
A001136 - Baby food processor BABYMOOV - Free user manual and instructions
Find the device manual for free A001136 BABYMOOV in PDF.
| Product type | Baby food steamer blender |
| Brand | BabyMoov |
| Model | A001136 (Nutribaby+ / XL) |
| Main functions | Steaming, defrosting, bottle warmer, baby food reheating, sterilization, blending (3 speeds) |
| Water tank capacity | 400 ml max |
| Baskets capacity | Up to 400 g per basket, 3 baskets max |
| Materials | BPA and phthalate-free, food-grade certification |
| Included accessories | Cooking unit, water tank, cooking juice collector, 3 steam baskets, 2 removable trays, lid, blending unit with removable bowl and blade, spatula |
| Safety | Automatic safety shut-off, thermal protection, blending lid lock, overheating protection |
| Maintenance and cleaning | Baskets, trays, collector, lids and blending bowl dishwasher safe; base and heating unit cleaned with damp sponge |
| Descaling | Every 50 cycles with white vinegar or descaling product; calc icon on display |
| Warranty | Lifetime warranty subject to registration within 2 months (see Babymoov website) |
Frequently Asked Questions - A001136 BABYMOOV
User questions about A001136 BABYMOOV
0 question about this device. Answer the ones you know or ask your own.
Ask a new question about this device
Download the instructions for your Baby food processor in PDF format for free! Find your manual A001136 - BABYMOOV and take your electronic device back in hand. On this page are published all the documents necessary for the use of your device. A001136 by BABYMOOV.
USER MANUAL A001136 BABYMOOV
Read all the instructions below carefully before using Nutribaby ^+ / XL.
- Clean the appliance after use. To prevent the risk of electric shock, do not immerse the appliance or its electrical cord in water or any other liquid.
- Use the appliance only to cook/heat/blend/sterilise or thaw. Use the appliance only for its intended purpose. Improper use or wrong operation may lead to potential injury.
- Take care when handling the blender blades, especially when removing the blades from the bowl, and emptying or during cleaning.
- The appliance contains no parts useful to the user for repairs. Do not repair the appliance by yourself. All repair must be carried out by the after-sales service department.
-
Monitor the appliance when in use with children nearby. Keep the appliance out of reach of children.
-
This appliance is for indoor use only. Do not use outdoors.
- Do not allow electrical cord to hang over the edge of the table or counter. Do not place near hot surfaces.
- Use the appliance on a flat, stable and dry surface.
- Do not place the appliance on a hot surface or near an oven or gas burner, or any other heat source.
- Do not touch the hot surfaces on the appliance (heating chamber).
- Do not move the appliance during use, once it has been plugged in, or if it contains hot water.
- Warning: stains may appear on the baskets or blending jug if you use strongly coloured foods, particular those which are orange and red.
WARNING
- WARNING: To avoid danger, if the electrical cable is damaged, it must be replaced by the manufacturer, its after-sales service department or a qualified electrician.
- Always disconnect the appliance from the supply if it is left unattended and before assembling, disassembling or cleaning.
- This appliance shall not be used by children. Cleaning and user maintenance shall not be made by children. Keep the appliance and its cord out of reach of children. This appliance is not to be used by persons (including children) with reduced physical, sensory or mental capabilities, or lack of experience and knowledge, unless they have been given supervision or instruction.
Children shall not play with the appliance. - Any type of misuse of the appliance may result in a potential injury.
- Be careful if hot liquid is poured into the blender as it can be ejected out of the appliance due to a sudden steaming.
- Respect heating times, and ensure the baby bottle and its contents are at a suitable temperature before feeding your baby.
- This appliance is intended to be used in household and similar applications such as:
- staff kitchen areas in shops, offices and other working environments;
- farm houses;
- by clients in hotels, motels and other residential type environments;
-
bed and breakfast type environments.
-
Use plastic or glass baby bottles suitable for boiling, or other heat-resistant recipients with this appliance.
- Always check your utensils prior to using them with Nutribaby+ / XL.
- The appliance is only to be used with the base provided.
- Do not use any accessories other than those supplied.
- Switch off the appliance and disconnect from supply before changing accessories or approaching parts that move in use.
- Do not operate the blending unit continuously for more than 30 seconds. Wait five seconds between each blending cycle.
- The heating element surface is subject to residual heat after use.
- Warning! Avoid spillage on the connector.
- Never leave the appliance unattended while it is operating.
- Electrical and electronic equipment can be recycled. Do not throw electrical or electronic appliances away with your household waste. Ensure they are recycled.

Throughout the European Union, this symbol indicates that the product must not be disposed of with household waste, but must be recycled.
COMPONENTS
1. Steaming unit
1.1.Water tank
1.2. Heating unit
1.3. Cooking juice collector
1.4. Steaming basket (x 2 or x 3)
1.5. Removable cooking tray (x 2 or x 3)
1.6. Steam outlet
1.7. Steamer lid
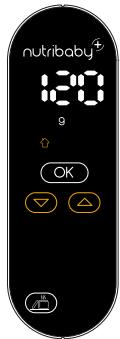
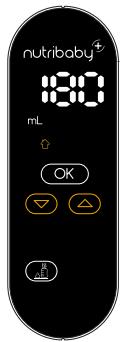
2.5. +/- Selection arrows
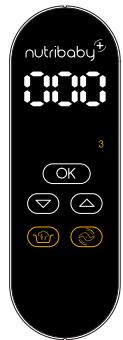
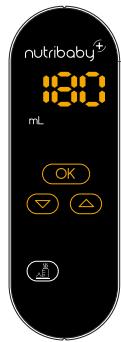
2.6. Blending function
2.7. Sterilizing function
2.8. Defrosting function
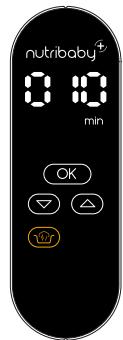
2.9. Baby food jar warming function
2.10. Baby bottle warming function
2.11. Steaming function
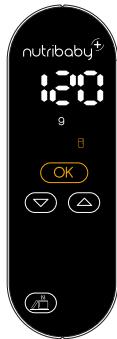
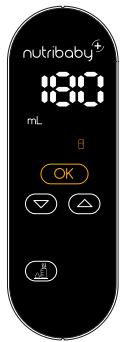
2.12. Validation "OK" function
2.13. Blending speed display
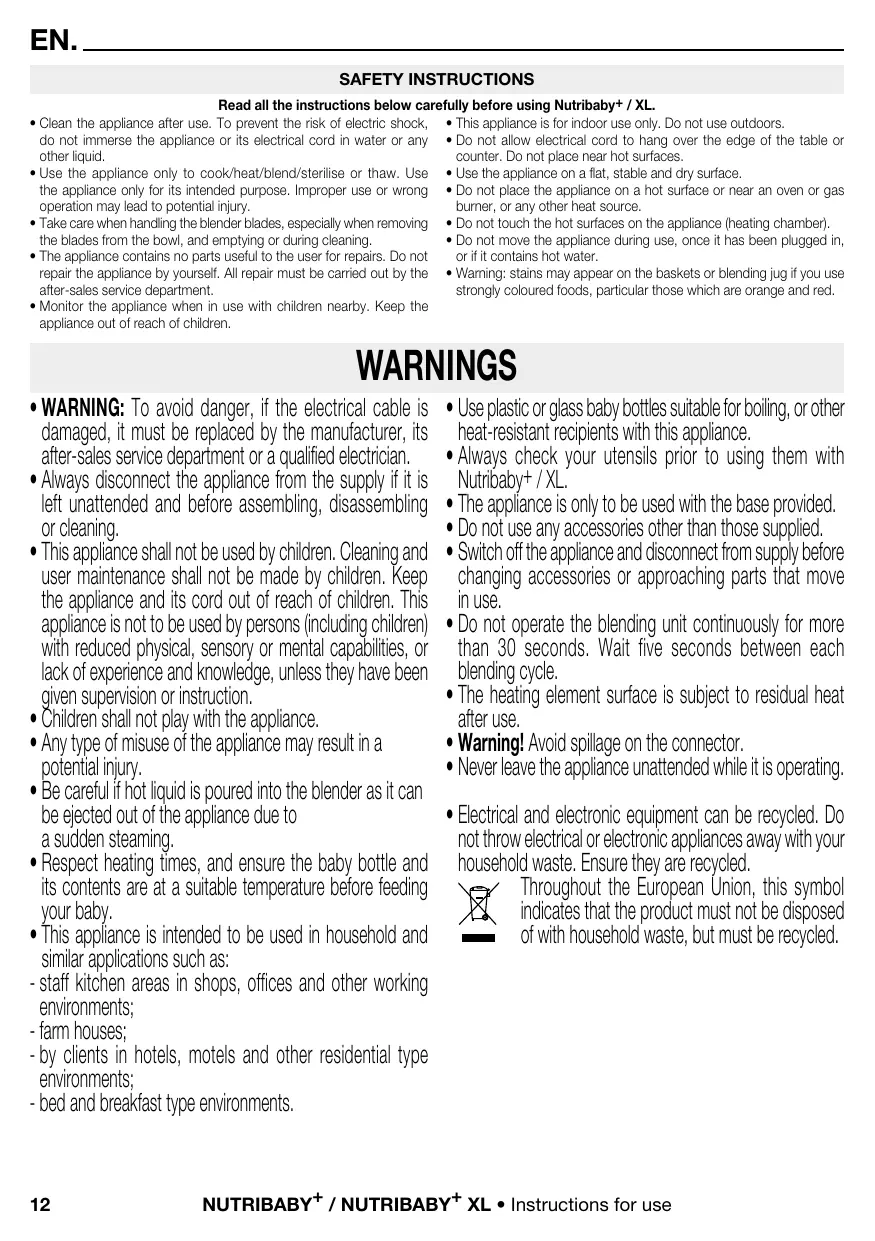
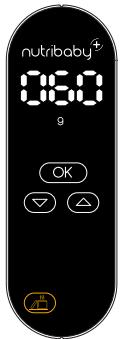
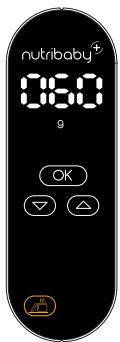
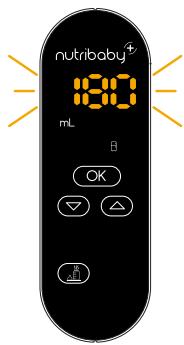
Control panel
2.1. Dscaling alert
2.2. Water level alert
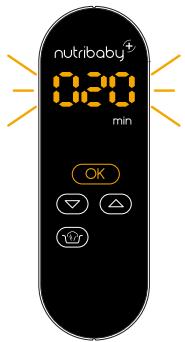
2.3. Time & quantity display
2.4. Temperature selection: room temperature / cold (for warming function only)
3. Blending unit
3.1. Removable blade
3.2. Blending jug
3.3. Blending lid
3.4. Blending switch
All the parts in this product are certified free of BPA and PTHHALATES.
Starting the STEAMING, DEFROSTING,
BABY BOTTLE HEATING, BABY FOOD JAR HEATING AND STERILIZING functions
Before starting any function.
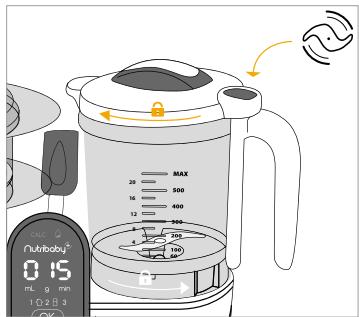
- Remove the cooking juice collector (1.3.) and fill the water tank (1.1.) up to the level of the heating unit (1.2.) (400 ml max.).
- Replace the cooking juice collector.
- Place the trays (1.5.) into the baskets (1.4.) depending on the required capacity.
- Position the lid (1.7.) so that the steam outlet (1.6.) is at the back.
- Turn on the appliance using the START / STOP button located on the top of the control interface.
STEAMING
- Place the trays (1.5.) in the basket (1.4.) as desired.
-
Cut the ingredients into small cubes measuring approx. 1,5 ~cm × 1,5 ~cm and place them in the steaming baskets. Place no more than 400 ~g of food in each basket.
-
Select the steam cooking function.
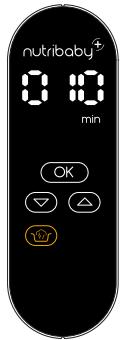
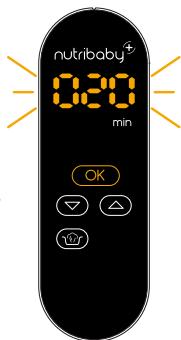
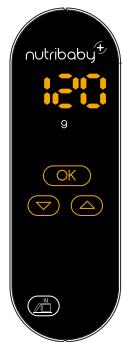
- Select the desired cooking time using the arrows.
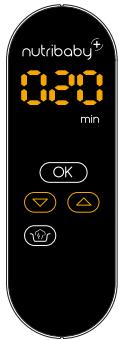
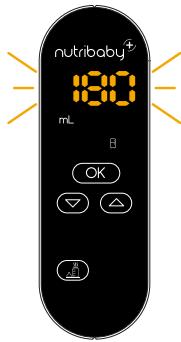
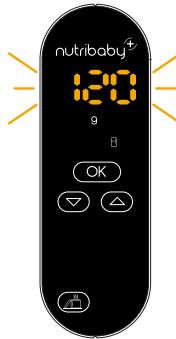
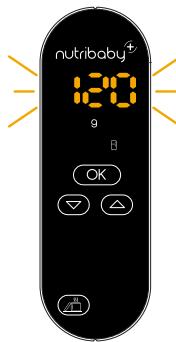
- Press OK. A beep sounds and the timer flashes. An alarm will sound to inform you that your meal is ready!
- The time will depend on the type and amount of food you wish to cook. Refer to the cooking-time table.
- If you wish to continue cooking, press the arrows to add minutes, then press OK to start.
Hints & tips
- Ingredients can be separated by type (vegetable/meat), or cooking time. For example: place potatoes which require a relatively long cooking time in the bottom basket, and courgettes in the upper basket as they cook more quickly. No more overcooked vegetables!
- Thanks to the removable trays, you can adjust the capacity: 1 small basket, 2 baskets, or 1 large basket by removing the middle tray.
- Thanks to its nutritional value and its taste, the cooking water from rice or vegetables can be used to thin purées or added to formula milk in babies' bottle.
- The cooking times are for guidance only. Always check that food is thoroughly cooked before eating. If your food is not cooked enough, reset the time. You may need to add more water. It is possible to decrease or increase the cooking time while cooking.
-
Leave gaps between pieces of food to allow a good steam cooking.
-
Try to use organic ingredients and washed them well before use.
- You can flavour your meals by adding herbs such as rosemary, thyme, etc. Place them in the cooking juice collector (1.3.) or straight into the baskets with the vegetables.
- Cereals (oats, rice, etc.) can be cooked in the Nutribaby+ / XL. Place a small amount into the cooking juice collector (1.3.).
Depending on the quantity and type of grain, you may need to add water to the cooking juice collector. - You can also cook eggs! Just place the eggs in the egg supports built into the trays.
- We recommend you to read the "Care and cleaning" part to know how to clean your Nutribaby ^+ / XL and optimize its lifetime.
Nutribaby+ XL. Using 3 baskets
- When using 3 baskets, we recommend adding all 3 baskets at the same time, following the colour coding (see STEAM COOKING GUIDE). It is important to follow the colour-coded order. This guarantees your food is cooked in the best way.
- The cooking time for all 3 baskets is the longest cooking time, i.e. the cooking time for the bottom basket (see STEAM COOKING GUIDE).
DEFROSTING
- Remove the cooking juice collector (1.3.).
- Stack the baskets and position them on the base (1). Place the recipients (without the lid) straight onto the removable cooking tray (1.5.).
- To defrost, proceed in the same way as for cooking, but select defrost mode 念
Advice and tips
- We recommend 15 mins for a 120ml baby food jar and 25 mins for a 180ml jar.
- Defrosting times may vary if the product has just been used, or the temperature of the water in the tank differs from 20^
BLENDING
- Check that the blending unit (3) is correctly connected to the main unit using the retractable connector.
- Place small pieces of cooked food into the blending jug.
- Depending on the required consistency, add some or all of the cooking water (200 ml max.) to the blending jug.
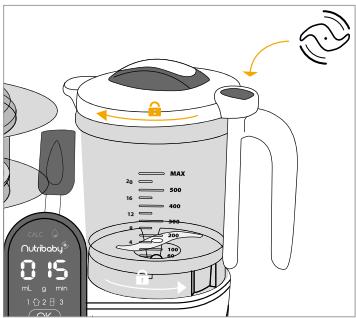
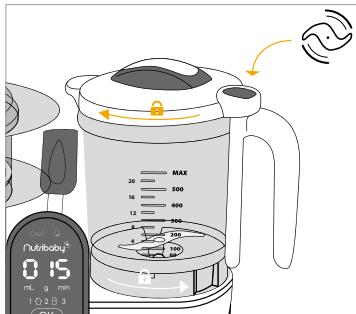
- Position and lock the lid (3.3.) onto the jug. Position and lock the jug onto the base.
- Press the blending switch (3.4.) on the lid for a maximum of 5 seconds. Wait another 5 seconds before repeating the process.
WARNING
- Do not hold down the button for more than five seconds at a time, to prevent the device from overheating.
-
Failure to follow the blending instructions above may cause the product to stop working as a safety measure. If the appliance stops, please:
-
let the product cool down for a few moments,
- add water (at least 1/3 of the cooking juice collector) to restart the steaming process.
Note: the safety cut-off system only applies to certain models. To find out whether it applies to your product, check whether there is a sticker on the blending jug.
NB.:
- If the contents in the blending jug are at a high temperature and exceed the maximum level, there is a risk of scalding.
- Never start a blending cycle without liquid (cooking juice, water, milk, cream, etc.) Starchy foods such as potatoes must contain at least 25% liquid, or add another vegetable to the mix.
- Fill the blending bowl to half way for smooth blending. Beyond this level, food will not be properly blended.
- If food sticks to the sides of the jug, move it into the centre of the blending jug using the spatula before blending again.


- To perfectly adjust the texture of your soups or purées, 3 blending speeds are available. Press the blending icon to activate the blending mode, and increase or decrease the blending speed from 1 (the slowest) to 3 (the fastest).
Hints & tips
- The blending function can always be selected no matter the chosen mode. For instance, it is possible to use the steaming function at the same time as the blending function.
- To cancel the blending function, press the blending icon for 3 seconds.
REHEATING
- Stack the baskets and place them on the base (1). Place the baby bottle without the teat directly onto the removable cooking tray (1.5.).
A. BABY BOTTLE HEATING
-
Select the bottle heating function.
-
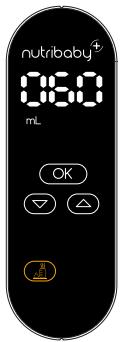
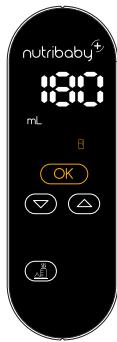
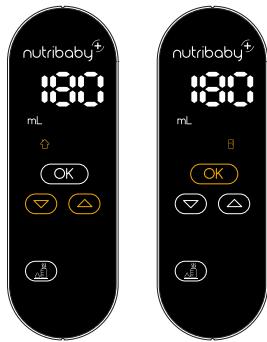
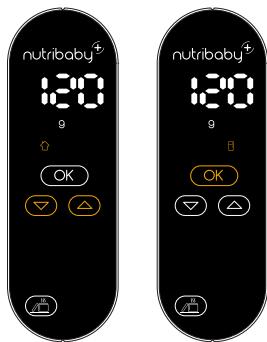
Select the quantity of liquid to heat using the arrows and press OK. A beep sounds.

- Select your current food temperature (room temperature or cold) using the arrows and press OK.

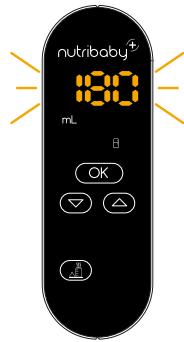
- Press OK. A beep sounds. The timer flashes. An alarm will sound to inform you that your bottle is ready!
B. BABY FOOD JAR HEATING
-
Select the food jar heating function.
-
Select the quantity of food to heat using the arrows and press OK. A beep sounds.
-
Select your current food temperature (room temperature or cold ) using the arrows and press OK.
-
Press OK. A beep sounds. The timer flashes. An alarm will sound to inform you that your jar is ready!

CAUTION:
- To prevent risk of burns, always check the temperature of the food before feeding your baby. Shake baby bottles well to mix, then pour a drop of milk on the inside of your wrist to check the temperature.
- The pre-programmed cycles are based on the average heating time of a baby bottle or baby food jar. The size and thickness of the baby food jar may affect the temperature of the food. If the food is too hot or too cold, reduce or increase the heating time using the 'steam' function.
- The size, material and thickness of the baby food jar or bottle and whether or not it has a removable bottom may affect the temperature of the food.
- Heating more than one bottle at once may also affect the reheating time. If the food is too hot or too cold, reduce or increase the heating time using the 'steam' function.
The suggested time for the Nutribaby+ / XL to heat baby bottles and baby food jars no longer applies in the following conditions:
- Temperature of water/milk or baby food jar:
- below 4^ - refrigerator temperature,
- above 20^ - room temperature.
- Temperature of water in the tank above 20^ .
- Nutribaby+ / XL already in use: if the product is already in use, stop it, remove the water from the tank and wait 15 minutes before turning it back on.
STERILIZING
- Remove the cooking juice collector (1.3.).
- Stack the baskets and place them on the base (1).
- Place the baby bottles upside down and any accessories you wish to sterilize directly onto the removable cooking tray (1.5.).
-
Place the lid (1.7.) on the upper basket.
-
Select the sterilizing function and press OK. A beep sounds.
- The timer is flashing. An alarm will sound to inform you that sterilization is over.
N.B.: we recommend you to read the "Care and precautions for use" part to know how to clean your Nutribaby ^+ / XL and optimize its lifetime.
CARE AND CLEANING
ALARMS
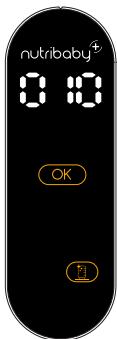
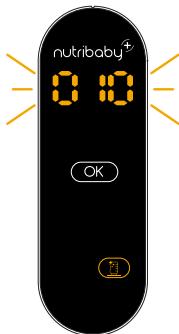
- An alarm will sound and the icon will light up on the control panel if the tank runs out of water during the cooking cycle. Remove the steamer baskets and add water in the water tank (1.1.).
Press OK to turn off the alarm, then press OK again to restart the timer. - An alarm will sound at the end of the cycle to notify you that cooking is complete.
CLEANING
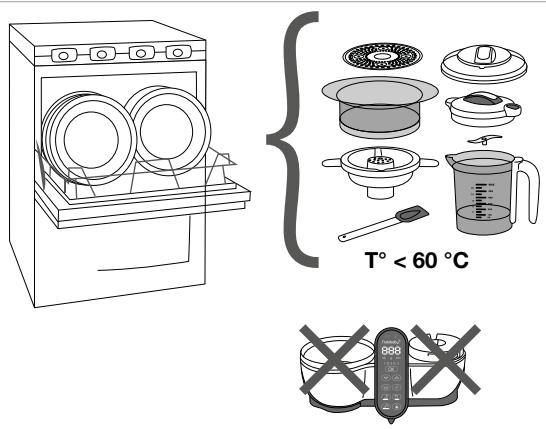
CAUTION: Unplug Nutribaby ^+ / XL and ensure it is cool before cleaning! The bases of the steamer and blender must not be washed in a dishwasher.
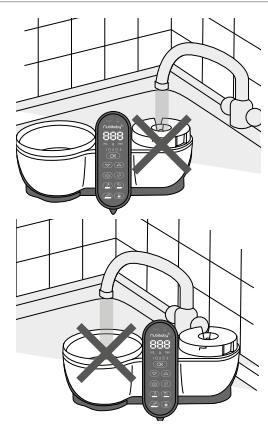
- Wipe off the heating unit inside the tank, and the base of the blending unit with a damp cloth or sponge. Do not use detergents or cleaners. Allow to dry. Do not wash Nutribaby ^ + / XL under running water. Do not allow water to enter parts containing electrical components.
- Do not use abrasive or scouring cleansers for cleaning as they may damage the apparatus and its surface. The cooking baskets (1.4.), removable trays (1.5.), cooking juice collector (1.3.), lids (1.7.) and (3.3.), spatula and blending jug (3.2.) may be washed using a sponge, hot water and washing liquid. Rinse well and allow to dry. These elements are also dishwasher safe.
- To clean the blade (3.1.), simply unscrew it clockwise from beneath the jug.
DESCALING
When the Nutribaby ^+ / XL has been used for a certain period of time, mineral deposits may form on the heating unit and damage it. Thus, the icon calc (2.1.) will be displayed on the control panel.
You should descale the water tank regularly (every 50 cycles), pouring 100 ml of hot water and 100 ml of white vinegar. Let it sit for one or two hours (or more if necessary), without plugging in the apparatus. Pour off the mixture and wipe of inside of the tank and the heating unit with a wet cloth.
Once the operation is completed, hold down OK for 5 seconds to make the icon calc (2.1.) disappear.
Limescale may also be removed using limescale removers designed for food products (citric acid based).
N.B.: 50 cycles is an average estimate. Descaling may need to be carried out more often if the water used has a high mineral content ("hard water").
| PROBLEMS | POSSIBLE CAUSES | SOLUTION |
| The blending jug is not working | The connector is not pulled out and connected to the blending unit. | Pull out the connector and connect it to the blending unit by placing it on top. |
| The blades are not turning. | Contact the after-sales service. We may need to exchange your blending unit. | |
| The blending jug lid is not positioned correctly. | Check whether the lid is positioned correctly on the blending jug. If the lid is positioned correctly but blending will still not start, please contact our customer service department. | |
| The calc symbol is lit up | The calc symbol lights up automatically after 50 heating cycles. | Press the OK button for 5 seconds. If the calc symbol stays on, you will need to RESET. To reset, press the 2 arrows and the ON/OFF button at the same time. |
| The △symbol is lit up | The steaming unit has run out of water. | Press the OK button for 5 seconds and add water. If the △symbol stays on, you will need to RESET. To reset, press the 2 arrows and the ON/OFF button at the same time. |
| The product stops before finishing the cooking, sterilising or heating cycle | Limescale build-up. | See the ‘CARE AND CLEANING’ section in the instruction manual for how to descale the product using water and vinegar. |
| The blending unit has suddenly stopped | The fuse or heat protection is activated (this applies to most models). | Let the product cool down for a few moments. Add liquid to the blending jug and blend again. If the product still does not work after that, please contact our after-sales service. |
SICHERHEITSHINWEISE
INTRETTEREA SICURATAREA
ALARMELE
3.HaTnCHiTB OK. PpO3ByuHb CnHAn, TaMep NoHc 6NIMATn. Ipo roTOBHeCTb CNoBiCTnTb 3ByKOBIN CnHAn.
- Yac nprirotybaHHa 6yde 3aIexkatn BiD TIny Ta KInbKocti iXi, Aky Bn 6aJkaTe nprirotybatn. 3BepHITbcra Do ta6liuzi 3 yacom nprirotybaHHa.
-Якwo B6ажаete npodobxintnpirotybaHHaHTncHtCTpIKN,io6doatn XBunHHa notim HATNCHtOK,io6 podobxint npirotybaHH.
Pikka3Kn Ta nopadn
- IHRpeiEHTM MoJyTB 6TyI pO3dJIeHI 3a TINOM (OBOU / M'AcO), a60 3a Yacom npnroTsyBaHnHa. HapnKnaIa: nomictb KapToIIIO, kA BIMarae BiDHOCHO DOBtRO Ucay npnrTOyBaHnBA HmXHi KOnIKy, a Ka6aKnY bepXHi KOnIK, ToDi BOHn rTOyBaTMyTBc pIBHomipHO.
- 3aBdKn 3HIMMn IOTAM MOKH a PeryIbOATn EMHCTb: MoKH BVKOPICTOBYBATn 1 HeBENIKN KOUIN, 2 KOUINK a60 1 BENIKY KOp3HUY, BIVMAIOUc cepedhNI JOTOK.
- Cik kyni notpannB cHmHcTbIy 3nupanhcoKy moKHa BnKOpNCTaTn DoabuHn Ioro do 6JeHepa dny npDipHeHHa. LIM camm Bu 36arayte duTtue piope BitamHAM Ta mIKpoenemHTAMn.
-
Vac nprirotybaHnka3aHnn opiEHTOBHn. 3aBxJn nepeBipRte, 106 iJa peteBnO nprirotybanac. JaKIO BaaHa He nprirotobNeA doCTaTHbO, cKNHte Ca. Bam Moke 3naoobntbc 6ilbSe BoN. Pid vac nprirotyBaHn moXHa 3MeHNtns a60 36IbUbnue pncpriotybaHH
-
3aIIuIte npomixkMix mMaToUckam iXi, 06 3a6e3neuHTn Kpaue nprirotybaHna napy.
- HamaraiTeCb BnKOpncTOBbATn CBXi ekONorIyHO uNCTi npOdyTn, Do6pe npOMBaIe ix neped BnKOpncTaHHaM.
- Moxha IdoabaTn TpaB, taik pO3mapuH, ye6peu b i T.d. Pmicti b x y EMcKiTb dny 360py coky (1.3.) a6o npraMo B KOUsKn 3 OBOaAM.
- Kpynn (BiccaHky, pnc ToTo) MOxHa roTyBaTn B Nutribaby ^+ / XL nomictnbun ix HebeNky kiIbKiCTb y pe3epByap dny 36opy coky doaBwn BoDn 3anExHo BiD nOpi6HO nponopuii (1.3.).
- MoXHa TaKoX rOryBaTn Rnca! IpocTo nOmictiB Rnca B KpyrIi OTbOpN, B6yDoBaHl B NotKn.
- Mn peKoMeHnyeMo O3HaHOMITnC 3 po3dInom «OOrIaT a OUYIeHHra», IIO6 diIHaTnC, JaN npabunbHo OuNCTnTn Nutribaby+ / XL ta ONTmIM3yBAtn INoTepMin Cnyk6n.
Nutribaby+ XL. BnKOpncTObyUOu3 Koouka.
-Пи ВИКОПИСТАНHI 3-X кошИКIB MЛ peKOMeHДУЕМО ДOTРIMyBaTиСь NOcIДOBHOCTi KOLьбОВIX MITOK (ДИВ. napamETрИ ВИКОПИСТАнHI). BaxJIINBO DOTPIMyBaTиСь KOLьБОВOrO NOpЯДу ДЯ КрашOrO pIriGOTyBaHnY.
-啪 npriroTybaHHn 3 KoWNKIB - ue haB6InbHm qac npriroTybaHH, to6To qac npriroTybaHH nI HNKnboI KOp3HN (DINB. Poci6HK i3 npriroTybaHH).
PO3MOPOXyBAHH
-3HimiTb EMcKiCTb dЯссбopy coky (1.3.).
- CknapbIb KooNki i po3auyte ix Ha napOBmy 6noCi (1).PomictiB cyoK c iKeIO (6e3 KpuKn) npAmo Ha 3'EMHI niDOnHn dnn nprirotybaHHA (1.5.).
-Дяpo3MopoOxyBaHnДиTe TAK cAmo,яiДЯпriNToYBaHHa Na napy,ale Bn6epiB pexIMpo3MopoOxyBaHHa.
Пикази та поади
-
- Mn pekomehyemo 15-tn XbuiHHnpexim roTyBaHHa dIa 120 mI EMKoCTi 3 duTayuXapuyBaHHa I 25-Tn XbuiHHn pexum dIra EMKoCTi ha 180 mI.
- Yac po3MopOxyBaHnMoKe 3mHOBaTncb, kIoo npOyKT TiIbKn IIO 6yB BnKOpNCtAHn, aOo TempePaTypa BODN B pe3epByapi Biip3HЯETbcra BiD 20^!
IODPi5HEHHA
- IpekekohaTecb, 60 60kO nIPOpi6HeHn (3.) npaBnIbHO nIKIOueHn 3a DOnOMoTO BcCyBHor o03'Emy Ha roLoBHOMy 6noCi.
-ПомICTITb HeBENIKI WMATOOKN Do yawi 6NeHepa 3a DonOMOROIO JoxKn-uaTeJra. - 3aIeJxHO BiD 6axaHoi KOHCnCTeHcii DOnaIte KInbKiCTb BOn (200 Ml. MaKcMym).
- 3akpiNe i 3aikcyi Te KpniKy (3.3) Na yaii 6JIeHepa. Po3auiTe auiy Ha oChoby i 3aikCyiTe ii.
- Ha KPNKBy BBIMKHeHHa (3.4.) Ha Kpnu6i 6neHepa MaKcMym Ha 5 cek. Poyekai Te 5cekynd nepeTd m, k npoobxntn.
YBATAI!
- He ytpmuyte KhoNky 6ilbse n'ayt cekyH, 0o6 3anobirn neperpribaHHIO npictpoio.
- HeDopTmuMaHnBa Bnue Bka3aHnX IHCTpykui Moe npu3BecTu DO npuHHHeHn Po60Tu npucTroU. KaUO npucTpi 3ynnHBcA, 6ydb-JIaca: - daJIte 3MOry npoDuKtAm OxOJIoHYTu;
- HatachitbOK. Ipo3BvHtB 3BykoBn cnHan npo 3aKiHueHHaRpiBy.


B.ПДIGРIBBAHOYOK3ДИТЯЧМХAPЧУBAHHМ
- Bùbèpiβtǔ yǒnhúqiu níirigpiβyà hòučok 3 DúTÍMùn xαpùyǔBàHmǔr.
2.3a donomoro 0rpnok Bnu6epBtob6emixkyn nparhete nijpirtni.
3.3a donomoroo ctpinok Bn6epitb notouhy TEmnpatyp npdyktB. KimhaTHa TEmnpatyp a6o 3 xonoindlbHnka H. Hatnichtb OK.
- Hatinchitb OK.
Празьчыть 3ыкови синhan.
Таимер 6лматиme.
YBARA:
- ξιδ 3παοδιτην ριπικύ Οικίβ, 3ανχινη περεβρίαι τέτεμηρατήγι κερεριστόντους έλυθημιντήμει Στργεις έπτητην Πληλικύ τα ἀλητητην Κραπλίου ΜΟλοκα ὅνγιτριχήσι Στορόγι Εαπ'яστή, ξιδ περεβρίαι τέτεμηρατήν.
PonepeHbO 3aOpRpaMoaHani 63ay0tBa Ca cepDhbOMy caci HarpBHaHN DnTHOI PnAShKn dN DnTnAorO xapYbaHN. Po3Mp i ToBunia 6aHoCkN Ira DNTHoO XAPyBaHN Moke BnMaBHTa Htemepatyp iKi. AkuO iKa 3aHaTo rapa a 6o 3aHaTTO XOJOnDA, 3mEniBb 6o3bSnBtBu cac HarpBHaHN 3a ODonMOIO OyHKuII FOTyBaHN Ha npay). - Po3mip, MaTepiA I ToBUnHa 6aHOnKn a6o PIIuShKn dIa DITraYOrO XapUyBaHN, MoKyTB BnINBaTn Ha TemnepaTy pIxi.
-Harpibahna 6bnbe ondie i npnki Ondohayo Moke taokx BnHnyHa Ha cac harpibahna. Jaio iKa 3aHaTo rapaa a60 3aHaTo xOJHa, 3mehiB ab6 3ibwiB Ta cHarpibahna 3doNOMOIO yHKuII «rOtybAHNa Ha napy".
3anpOnoHOBaHn uac dIy nIDirpiBaHHn DITaYnx pIaIeOK i 6aHouOK 3 dITaYmX hapyBaHHm B Nutribaby+/ XL he 3actocobYetbc npn Takix yMObax:
-TemnepaTpa BOIN/MONOKa 60 6aHouKIn 3 dntTayHM XapUyBaHHM:
- Hxue 4°C - Tempeata pyxoJIOHnBnKa,
Bnue 20^ -KimHaTHa TemnepaTypa.
-TemepaTpa BODn B pe3epByapi Bnue 20^ - Nutribaby ^+ / XL yuke BVKOPNCOTByc8a: kIIO npictpi Bxke BVKOPNCOTByc8a, 3yINHITb Ioro, BNIMTe BOy 3 pe3epByapa Ta nouekaaiTe 15 xBUNIH, nepHI iK 3HOY bYBMKNHTn Ioro.
CTEPNJI3AUJIA
jblll jlll g l lllllllllllllllllllllllllllllll
29.28:40
eoggl no cllal all! iis aolg bbll ciaa ge laoall iie jedlg abaaal stai
.
jlllloo oJolal aoIgAol CIgKoi JLo
yj y j g o lolwol k y aolll jn laa
29.29.29.29.29.29.29.29.29.29.29.29.29.29.29.29.29.29.29.29.29.29.29.29.29.29.29.29.29.29.29.29.29.29.
400 23 15
aagaaag aalb alj jn jn jn jn jn jn jn jn jn jn jn
dIab eIjI Js aJwla oJrJg
:LiLgLlOgA1jzllolj5UolulwJglllIa
.()gaiyjgysglg jajggsalgljjjjjj
y
d. 日 _ 日 4-1jLdL (5-1) jglalg
JbAaUd 400 Jn Jn JnBaa Ua a Pw 1.5* Pw 1.5 waa ooo
g0g10101g2《g]g>ba0.3
duaw.duilluldooggdo
jdyyIgao
.0jolde

gall 20.2
aabg j1.1
julily 80
. gblall lalll ll 1000
.aaalj bJg 3-3)
aJ5uS uS yjg 5 do bui jdo aJ5 doal al (4-3) bclg lge bfo
jglal jolal gai 5 jol jol jol jol jol jol jol
Jal Jolos Joll jce aaii a 10k 085aill bll claoe gil pse 6
yLwpaalj yj. jagai 1
iJ
yall yall aas oaw oday (j3y jy yall oag) all oal
.1aI 1 aI 1 aI 1 aI 1 aI 1 aI 1 aI 1 aI 1 aI 1 aI 1 aI 1 aI 1 aI 1 aI 1 aI 1 aI 1 aI 1 aI 1 aI 1 aI 1 aI 1 aI 1 aI 1 aI 1 aI 1 aI 1
4ab > 3a
Jlalll l 100000000000000000000000000000000000000000000000000000000000000
jolll
J 100
.8o 8o blll l a aalall laaiaa bllll gllgll
blj jajl bai jil. jll 1sJw wjjg Jgl lwlal dlaw jbjnl bla cje 3 jgsa - (e) aas) 3 u (b) aas) 1 ja baii aas jgl g jg, baii g
glaig ciaiaio
Jlal Jll jIjIgI gI jIJIaII I aIJIaJI bJIJIaJI pJIJI JIJIJI.1
alall aag 10000000000000000000000000000000000000000000000000000000000


#
.5-1) aall 200000000000000000000000000000000000000000000
gall. gol. gol. 4
ydy. ydy. ydy. ydy. ydy. ydy. ydy. ydy. ydy. ydy. ydy. ydy. ydy. ydy. ydy. ydy. ydy. ydy. ydy. ydy. ydy. ydy. ydy. ydy. ydy. ydy. ydy. ydy. ydy. ydy. ydy. ydy. ydy. ydy. y dy
0j0000000000000000000000000000000000000000000000000000
a 1500150015001500150015001500150015001500150015001500150015001500150015001500150015001500150015001500150
Jalll aJj JooA.JaJI JJJooaa aabg 1.1
jgolgo 10000000000000000000000000000000000000000000000000000
aall pala 1j0 j0 j0.3 (j0j0g j0j0j0j0j0j0j0j0j0j0j0j0j0j0j0j0j0j0j0j0j0j0j0j0j0j0j0j0j0j0j0j0j0j0j0j0j0j0j0j0j0
a0 20 00 00 00 00 00
. 15 j 15j 15j 15j 15j 15j 15j 15j 15j 15j 15j 15j 15j 15j 15j 15j 15j 15j 15j 15j 15j 15j 15j
a
.(3-1)
.(1)
.5-1) aljlll ao glll j 0o lga aee i j ciaa o jg sally jall lcljog -
. 品 山 山 山 山 山 山 山 山 山 山 山 山 山 山 (7-1)
Goo aoll Jaaol jao1g C3oall.2
aai jia aai jie ay
100
-
- 1010
Jusu Jusu Jusu Jusu Jusu Jusu Jusu Jusu Jusu Jusu Jusu Jusu Jusu Jusu Jusu Jusu Jusu Jusu Jusu Jusu Jusu Jusu Jusu Jusu
a.b.11g a11
J
.(1-1) oolj jol jol jol jol jol jol jol jol jol jol jol jol jol jol jol jol jol jol jol jol jol jol jol jol jol jol jol jol jol jol jol jol jol jol jol jol jol jol jol jol jol jol jol jol
.0361 bdo oolay y j do golgo jj dc bdo jd iy dzy golgo jj dc bdo
yabll aas Jlaa lyda yaa jayjaiy jdo jbi
aalll aal 1 bllg xlll ool lue jao yagaa jia jn sj g jgs jas
a 100000000000000000000000000000000000000000000000
a1ySgSbIgSbI dSgSbI gSbI I JgSbI UoUu
aagw jgwl all lgl soj 13 gil aalil golll clalbdo
J 2-3)g (3-1) a b g (5-1) a y
aal allu piu wul gall ool uus sgg aag lgs jlg aabai
.alegll o jao aleIwI wJae oJoi 1k (1-3) oJai IaJI -

山
CALc (2-1) jyj yj yj yj yj yj yj yj yj yj yj yj yj yj yj yj yj yj yj yj yj yj yj yj yj yj yj yj yj yj yj yj yj yj yj yj yj yj yj yj yj yj yj yj yj yj yj yj yj yj yj
aaloo aolae aebaae e ae oogg jolld oaoalg boll sow. jgl
.CALC (2-1) 5 5 5 5 5 5 5 5 5
(dujusolao 1de aetal) aiiidll cuaaiaa aaiuill wglgll ydoja pdooyw dssll wglgll a
.(jusol)jolal jol aullaui jglgiospooaiuilll jiljol oaoiuljlljlaeoljpljdy.ogwauuoyoo yoo o0g50:abgolo
- Lifetime warranty. Register within 2 months. See conditions at babymoov.co.uk.
NL.
a a a a a a a a a a a a a a a a a a a a a a a a a a a a a a a a a a a a a a a a a a a a


- Read all the instructions below carefully before using Nutribaby + / XL.
- WARNING
- COMPONENTS
- Steaming unit
- Control panel
- Blending unit
- Starting the STEAMING, DEFROSTING,
- BABY BOTTLE HEATING, BABY FOOD JAR HEATING AND STERILIZING functions
- Before starting any function.
- STEAMING
- Hints & tips
- Nutribaby+ XL. Using 3 baskets
- DEFROSTING
- Advice and tips
- BLENDING
- NB.:
- REHEATING
- BABY BOTTLE HEATING
- BABY FOOD JAR HEATING
- CAUTION:
- STERILIZING
- CARE AND CLEANING
- ALARMS
- CLEANING
- DESCALING
- SICHERHEITSHINWEISE
- INTRETTEREA SICURATAREA
- ALARMELE
- Pikka3Kn Ta nopadn
- Nutribaby+ XL. BnKOpncTObyUOu3 Koouka.
- PO3MOPOXyBAHH
- Пикази та поади
- IODPi5HEHHA
- YBATAI!
- B.ПДIGРIBBAHOYOK3ДИТЯЧМХAPЧУBAHHМ
- YBARA:
- CTEPNJI3AUJIA
- glaig ciaiaio
- #
- a
- a.b.11g a11
- NL.
Brand : BABYMOOV
Model : A001136
Category : Baby food processor