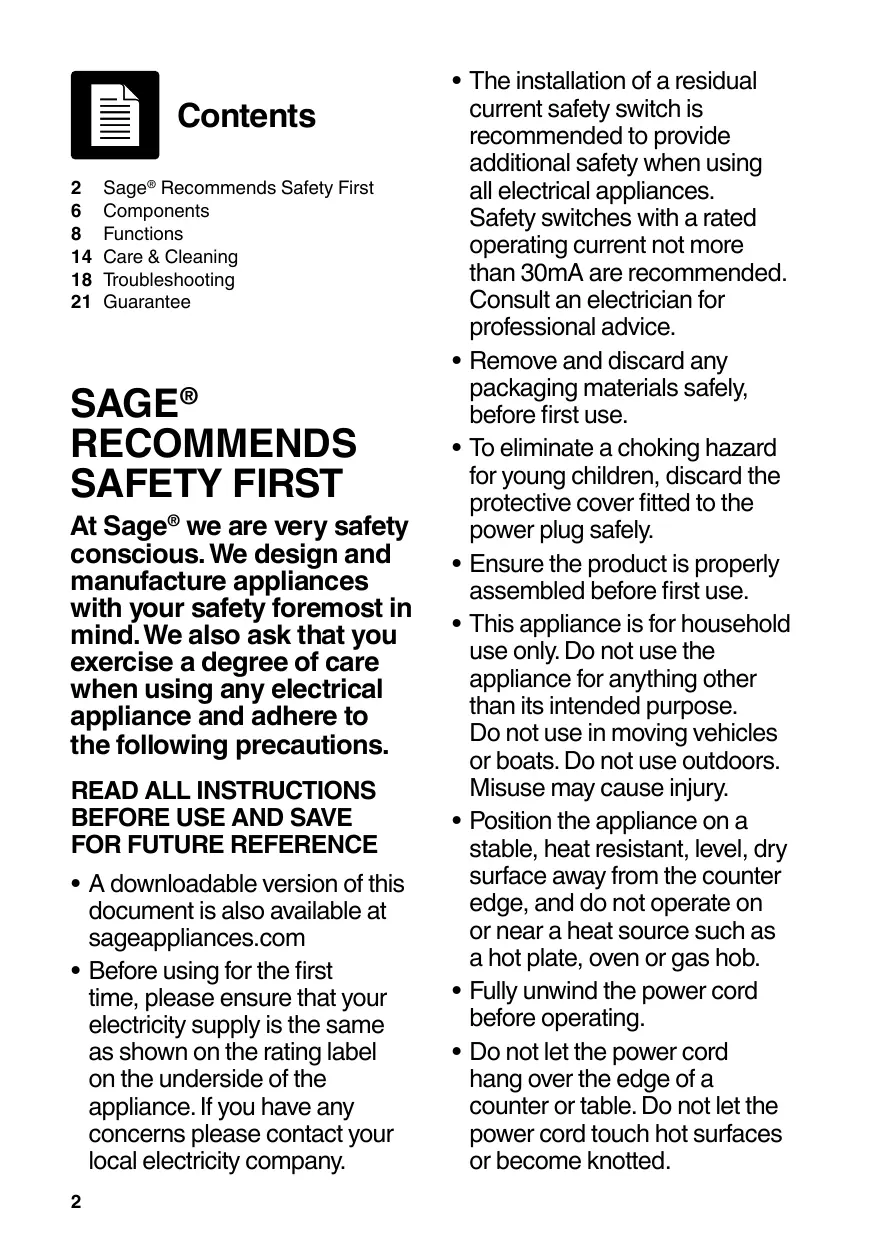
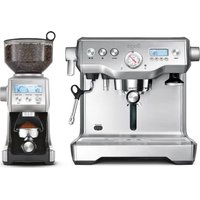
USER MANUAL SES875 SAGE
the Barista Express™
BES875/SES875

EN QUICK GUIDE
DE KURZANLEITUNG
FR GUIDE RAPIDE
NL SNELSTARTGIDS
ITGUIDARAPIDA
ES GUIA RAPIDA
PT MANUAL RAPIDO
Contents
2 Sage® Recommends Safety First
6 Components
8 Functions
14 Care & Cleaning
18 Troubleshooting
21 Guarantee
SAGE® RECOMMENDS SAFETY FIRST
At Sage® we are very safety conscious. We design and manufacture appliances with your safety foremost in mind. We also ask that you exercise a degree of care when using any electrical appliance and adhere to the following precautions.
READ ALL INSTRUCTIONS BEFORE USE AND SAVE FOR FUTURE REFERENCE
- A downloadable version of this document is also available at sageappliances.com
-
Before using for the first time, please ensure that your electricity supply is the same as shown on the rating label on the underside of the appliance. If you have any concerns please contact your local electricity company.
-
The installation of a residual current safety switch is recommended to provide additional safety when using all electrical appliances. Safety switches with a rated operating current not more than 30mA are recommended. Consult an electrician for professional advice.
- Remove and discard any packaging materials safely, before first use.
- To eliminate a choking hazard for young children, discard the protective cover fitted to the power plug safely.
- Ensure the product is properly assembled before first use.
- This appliance is for household use only. Do not use the appliance for anything other than its intended purpose. Do not use in moving vehicles or boats. Do not use outdoors. Misuse may cause injury.
- Position the appliance on a stable, heat resistant, level, dry surface away from the counter edge, and do not operate on or near a heat source such as a hot plate, oven or gas hob.
- Fully unwind the power cord before operating.
-
Do not let the power cord hang over the edge of a counter or table. Do not let the power cord touch hot surfaces or become knotted.
-
Do not leave the appliance unattended when in use.
-
If the appliance is to be:
-
left unattended
- cleaned
- moved
- assembled; or
- stored
Always switch off the espressomachine by pressing thePOWER button to OFF.
Switch off and unplug from the power outlet.
- Regularly inspect the power cord, plug and actual appliance for any damage. If found to be damaged in any way, immediately cease use of the appliance and return the entire appliance to the nearest authorised Sage Service Centre for examination, replacement or repair.
- Keep the appliance and accessories clean. Follow the cleaning instructions provided in this book. Any procedure not listed in this instruction booklet should be performed at an authorised Sage Service Centre.
- The appliance can be used by children aged 8 or older and persons with reduced physical, sensory or mental capabilities or a lack of experience and knowledge, only if they have been given supervision or instruction concerning use
of the appliance in a safe way and understand the hazards involved.
- Children should not play with the appliance.
- Cleaning of the appliance should not be carried out by children unless they are 8 years or older and under adult supervision.
- The appliance and its cord should be kept out of reach of children aged 8 years and younger.
- Do not use attachments other than those provided with the appliances.
- Do not attempt to operate the appliance by any method other than those described in this booklet.
- Do not move the appliance whilst in operation.
- Do not use any other liquid apart from cold mains/town water. We do not recommend the use of highly filtered, de-mineralised or distilled water as this may affect the taste of the coffee and how the espresso machine is designed to function.
- Never use the appliance without water in the water tank.
- Ensure the portafilter is firmly inserted and secured into the brewing head before using the machine.
-
Never remove the portafilter during the brewing operation as the machine is under pressure.
-
Do not place anything, other than cups for warming, on top of the appliance.
- Use caution when operating machine as metal surfaces are liable to get hot during use.
- Do not touch hot surfaces. Allow the product to cool down before moving or cleaning any parts.
- Heating element surface is subject to residual heat after use.
Always ensure the appliance is turned OFF, unplugged at the power outlet and has been allowed to cool before cleaning, attempting to move or storing.
- The appliance is not intended to be operated by means of an external timer or separate remote-control system.
- The use of attachments not sold or recommended by Sage may cause fire, electric shock or injury.
- Always turn the appliance to the off position, switch off at the power outlet and unplug at the power outlet when the appliance is not in use.
- Any maintenance other than cleaning should be performed by an authorised Sage® service centre.
-
Do not use the appliance on a sink drain board.
-
Do not operate the appliance if it is in an enclosed space, or within a cupboard.
- Use caution when descending as hot steam may be released. Before descending, ensure drip tray is empty and inserted. Refer to 'Care & Cleaning' for further instructions.
- Do not operate the grinder without the hopper lid in position. Keep fingers, hands, hair, clothing and utensils away from the hopper during operation.
SPECIFIC INSTRUCTIONS FOR WATER FILTER
- Filter cartridge should be kept out of reach of children.
- Store filter cartridges in a dry place in the original packaging.
- Protect cartridges from heat and direct sunlight.
- Do not use damaged filter cartridges.
- Do not open filter cartridges.
- If you are absent for a prolonged period of time, empty the water tank and replace the cartridge.

The symbol shown indicates that this appliance should not be disposed of in normal household waste.
It should be taken to a local authority waste collection centre designated for this purpose or to a dealer providing this service. For more information, please contact your local council office.

To protect against electric shock, do not immerse
the power cord, power plug or appliance in water or any other liquid.
FOR HOUSEHOLD USE ONLY SAVE THESE INSTRUCTIONS
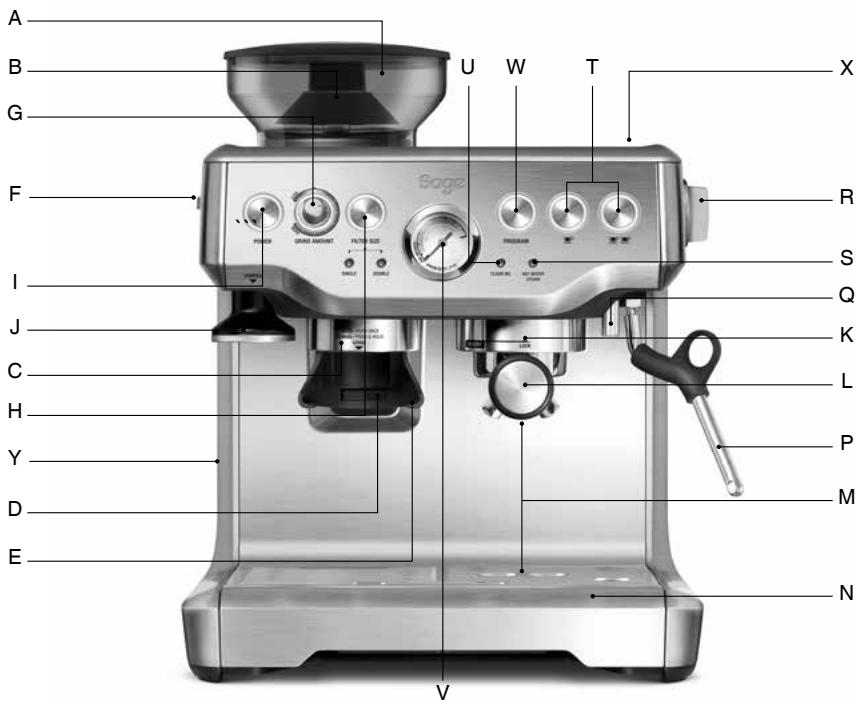
A. 250g bean hopper
B. Integrated conical burr grinder
C. Grind outlet
D. Grinding activation switch
E. Hands free grinding cradle
F. GRIND SIZE selector
G. GRIND AMOUNT dial
H. FILTER SIZE button
I. POWER button
J. Integrated removable 54mm tamper
K. Group head
L. 54mm stainless steel portafilter
M. Extra-tall cup clearance for tall mugs
N. Removable wet & dry coffee separator drip tray
O. Storage tray (located behind drip tray)
P. 360^ swivel-action steam wand
Q. Dedicated hot water outlet
R. Steam/Hot Water dial
S. Steam/Hot Water light
T. 1 CUP and 2 CUP buttons
U. CLEAN ME light
V. Espresso pressure gauge
W. Programme button Re-programs the preset 1 CUP and 2 CUP shot volumes.
X. Cup warming tray
Y. 2L removable water tank

ACCESSIONS
- Temp Control™ Milk Jug
- Cleaning disc
- Cleaning tablets
- Dual Wall filter baskets (1 cup & 2 cup) Use with pre-ground coffee.
-
Single Wall filter baskets (1 cup & 2 cup) Use when grinding fresh whole coffee beans
-
Water filter holder and filter
- Cleaning brush
- The Razor™ precision dose trimming tool
- Cleaning tool
- Allen key
INSTALLING THE WATER FILTER
- Remove the water filter and water filter holder from the plastic bag.
Soak the filter in cold water for 5 minutes.
- Wash the filter holder with cold water.

- Set the reminder for next month of replacement. We recommend to replace the filter after 3 months.

- Insert the filter into the two parts of the filter holder.
- To install the assembled filter holder into the water tank, align the base of the filter holder with the adapter inside the water tank. Push down to lock into place.

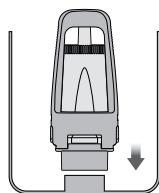
- Fill the water tank with cold water before sliding back into position at the back of the machine and locking into place.
FIRSTUSE
- Ensure the water filter is securely fitted inside the water tank.
- Fill the water tank with cold, preferably filtered water up to the MAX mark.
- Ensure the hopper is locked into position.
Plug the power cord into a 230V power outlet. Press the POWER button to switch the machine on. The POWER button light will flash while the machine is heating.

NOTE
If the hopper is not correctly locked into position, the FILTER SIZE LED's will flash.
- Press 2 CUP button to run hot water through the group head.
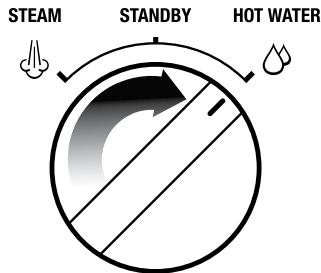
- Position the steam wand tip over the drip tray. Rotate the STEAM / HOT WATER dial to the STEAM position and run steam through the steam wand for 10 seconds.

- Rotate the STEAM/HOT WATER dial to the HOT WATER position and run water through the hot water outlet for 10 seconds.
- Repeat steps 1-3 until the water tank is empty.
GENERAL OPERATION
Setting the Grind Size
The grind size will affect the rate of water flow through the coffee in the filter basket and the flavour of the espresso.
We recommend you start at setting 8 and adjust as required.

Setting the Grind Amount
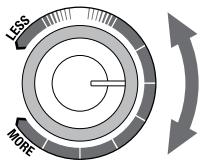
Set the GRIND AMOUNT dial to the 3 o'clock position as a starting point. Adjust towards LESS or MORE as required to adjust the dose amount.
Selecting a filter basket
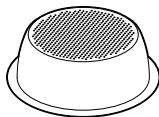
Use Single Wall filter baskets if grinding fresh whole coffee beans.

1 CUP
2 CUP
Use Dual Wall filter baskets if using pre-ground coffee.

1 CUP

2 CUP
Selecting the Filter Size
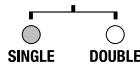
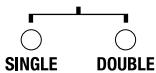
Insert either the 1 CUP or 2 CUP filter basket into the portafilter. Press the FILTER SIZE button to select SINGLE if using the 1 CUP filter basket, or DOUBLE if using the 2 CUP filter basket.

FILTER SIZE
Automatic Dosing
- Push and release the portafilter to engage the grinding activation switch.
- Grinding will automatically stop, however if you wish to stop grinding before the cycle has finished, push and release the portafilter.
Manual Dosing
- Push and hold the portafilter to engage the grinding activation switch. Continue holding until the desired amount of ground coffee has been dosed.
- To stop grinding, release the portafilter.
Tamping the Ground Coffee
- Once grinding is complete, tamp down firmly.
- As a guide to dose, the top edge of the metal cap on the tamper should be level with the top of the filter basket AFTER the coffee has been tamped.


Trimming the Dose
The Razor™ precision dose trimming tool allows you to trim the puck to the right level for a consistent extraction.

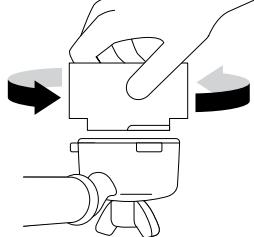
- Insert the Razor™ dose trimming tool into the filter basket until the shoulders of the tool rest on the rim of the basket.
- Rotate the Razor™ dose trimming tool back and forth while holding the portafilter on an angle over a knock box to trim off excess coffee grinds.
Purging the Group Head
Before placing the portafilter into the group head, run a short flow of water through the group head by pressing the 1 CUP button.
Inserting the Portafilter
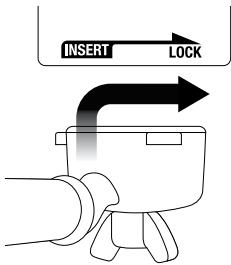
Insert the portafilter into the group head and rotate the handle towards the centre until resistance is felt.
Press the 1 CUP button once to extract a single shot of espresso at the preset volume (approx. 30ml ).

PROGRAM


NOTE
Pressing the 1 CUP or 2 CUP button during a preset shot volume will immediately stop the extraction.
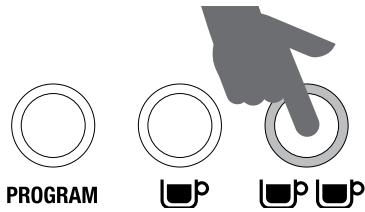
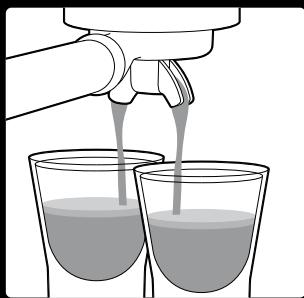
Press the 2 CUP button once to extract a double shot of espresso at the preset volume (approx. 60ml ).
Re-Programming
Shot Volume - 1 CUP or 2 Cup
- To begin programming, press the Programme button once.
- Press 1 CUP or 2 CUP button to start espresso extraction. Press 1 CUP or 2 CUP button again once desired volume of espresso has been extracted. The machine will beep twice to indicate the new 1 CUP or 2 CUP volume has been set.
Resetting Default Volumes
To reset the machine to the default 1 CUP and 2 CUP shot volumes, press and hold the PROGRAMME button until the machine beeps three times. Release the PROGRAMME button.

NOTE
Default settings: 1 CUP shot volume is approx. 30ml. 2 CUP shot volume is approx. 60ml.
Manual Shot Volume
Press and hold the 1 CUP or 2 CUP button. The extraction will enter low pressure pre-infusion until the button is released. When the 1 CUP or 2 CUP button is released, extraction will continue at full pressure. Press the 1 CUP or 2 CUP button again once the desired volume of espresso has been extracted.

PRESS & HOLD

CORRECT EXTRACTION

Within
Espresso Range

- Flow starts after 4-7 secs
- Flow slow like warm honey
- Crema is golden brown with a fine mousse texture
- Espresso is dark brown
- Extraction takes 25-35 secs
AFTER EXTRACTION
REMOVE USED GRINDS

Used grinds will form a coffee 'puck'. If the puck is wet, refer to the 'Under Extraction section.
RINSE FILTER BASKET

Keep the filter basket clean to prevent blockages. Without ground coffee in the filter basket, lock the portafilter into the machine and run hot water through.

UNDER EXTRACTION

Under
Espresso Range
- Flow starts after 1-3 secs
- Flow fast like water
- Crema is thin and pale
- Espresso is pale brown
- Tastes bitter/sharp, weak and watery
- Extraction takes up to 20 secs
SOLUTIONS
Grind Finer

Tamp using 15 kilos of pressure. The top edge of metal cap on the tamper should be level with the top of the filter basket AFTER tamping Trim the puck to the right level using the Razor" dose trimming tool.

Always use the Razor tool and trim off some coffee after tamping.

OVER EXTRACTION

Over
Espresso Range

- Flow starts after 8 secs
- Flow drips or not at all
- Crema is dark and spotty
- Espresso is very dark brown
Tastes bitter and burnt
- Extraction takes more than 40 secs
SOLUTIONS
Grind Coarser

Tamp using 15 kilos of pressure. The top edge of metal cap on the tamper should be level with the top of the filter basket AFTER tamping
Trim the puck to the right level using the Razor™ dose trimming tool.

Always use the Razor tool and trim off some coffee after tamping.
GRIND
DOSE
TAMP
SHOT TIME
| OVER EXTRACTED
BITTER • ASTRINGENT | TOO FINE | TOO MANY
USE RAZOR
TO TRIM | 15-20KG | OVER 40 SEC |
| BALANCED | OPTIMUM | 8-10G (1 CUP)
15-18G (2 CUP) | 15-20KG | 25-35 SEC |
| UNDER EXTRACTED
UNDERDEVELOPED • SOUR | TOO COARSE | TOO LITTLE
INCREASE DOSE
& USE RAZOR
TO TRIM | 15-20KG | UNDER 20 SEC |
USING THE STEAM / HOT WATER DIAL
Steam
- Position the steam wand tip over the drip tray.
- Turn the STEAM / HOT WATER dial to the STEAM position. The STEAM / HOT WATER light will flash to indicate the machine is heating to create steam.

- When the STEAM/HOT WATER light stops flashing, return the dial back to STANDBY position.
- Then within 8 seconds, insert the steam wand tip (1-2cm) below the surface of the milk, close to the right hand side of the jug at the 3 o'clock position and quickly turn the dial back to the STEAM position. Pausing the steam avoids the milk splashing out of the jug (this pause function lasts for 8 seconds only).
- The indicator strip on the milk jug will change colour to highlight the exact milk temperature. We recommend milk temperature to be between 60 - 65^ C .
- Once the milk is at the correct temperature (60 - 65^) , return the dial to the STANDBY position BEFORE removing the jug.
- Set the jug to one side. Immediately wipe the steam wand with a damp cloth. Then, with the steam wand tip directed over the drip tray, briefly turn steam on to clear any remaining milk from inside the steam wand.
- Pour milk directly into the espresso.

NOTE
After 5 minutes of continuous steaming, the machine will automatically disable the steam function. The STEAM/HOT WATER light will flash. When this occurs return the dial to the STANDBY position.
Hot Water
- Turn the STEAM/HOT WATER dial to the HOT WATER position.
- To stop the hot water, return the dial to the STANDBY position.

ADVANCED TEMPERATURE MODE
Adjusting Water Temperature
To enter Advanced Temperature Mode:
- Press the POWER button to switch the machine off.
- Press & hold the PROGRAMME button, then press the POWER button. The machine will beep once. The illuminated button will indicate the current temperature selected. To adjust the water temperature, press one of the following buttons within 5 seconds of entering Advanced Temperature Mode. The machine will beep twice to confirm the change. If no buttons are pressed within 5 seconds after entering Advanced Temperature Mode, no change will be made & the machine will return to STANDBY mode.

POWER

PROGRAM
Default Temperature setting:
In Advanced Temperature Mode, press the Programme button.

PROGRAM


Increase Water Temperature +1^
In Advanced Temperature Mode, press the 1 CUP button.

PROGRAM

Increase Water Temperature +2^
In Advanced Temperature Mode, press the 2 CUP button.

PROGRAM

U

Up U
Decrease Water Temperature -1°C:
In Advanced Temperature Mode, press the FILTER SIZE button.

POWER

FILTER SIZE

PROGRAM
Decrease Water Temperature -2°C:
In Advanced Temperature Mode, press the POWER button.

AUTO OFF MODE
The machine automatically switches to AUTO OFF mode after 30 minutes.
REPLACING THE WATER FILTER
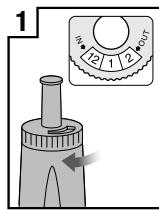
Set current month

Soak filter for 5 min
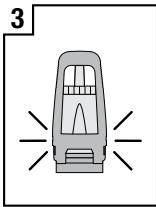
Ensure parts are connected
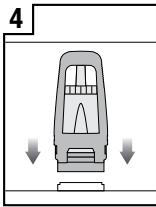
Install filter in tank

Install water tank
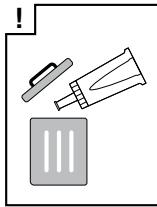
Replace filter after 90 days or after 40L
The provided water filter helps prevent scale build-up in and on many of the inner functioning components. Replacing the water filter after three months or 40L will reduce the need to descale the machine.
The limitation of 40L is based on water hardness level 4. If you are in level 2 area, you can increase this to 60L.
CLEANING CYCLE
The CLEAN ME light will illuminate when a cleaning cycle is required. This is a back-flushing cycle and is separate from descending.
- Insert the 1 CUP filter basket into the portafilter, followed by the supplied cleaning disc, followed by 1 cleaning tablet.
- Lock the portafilter into the group head and place a large container beneath the portafilter spouts.
- Ensure the water tank is filled with cold water and the drip tray is empty.
- Press the POWER button to switch the machine off.
- Press the 1 CUP and 2 CUP buttons simultaneously, then also press the POWER button. Hold all 3 buttons together for approximately 10 seconds.
- The cleaning cycle will commence and last for approximately 5 minutes. During this time, water will intermittently flow from the portafilter spouts. Once complete, 3 beeps will sound.
- Remove the portafilter and ensure the tablet has completely dissolved. If the tablet has not dissolved, repeat until the tablet has dissolved.
DESCALING
After regular use, hard water can cause mineral build up in and on many of the inner functioning components, reducing the brewing flow, brewing temperature, power of the machine, and taste of the espresso.
- Even if you are correctly using the water filter provided, we recommend you to descale when you see scale build-up in the water tank.

WARNING
Do not immerse power cord, power plug or appliance in water or any other liquid. The water tank should never be removed or completely emptied during descaling.
Priming machine for descending function
- Dissolve one Sage Descaling powder sachet into one litre of water then fill the water tank.
- Press and hold the 2 CUP button and then press and hold the POWER button simultaneously to enter the Descale mode. The unit will heat up as part of commencing the descending action, during the heating processes the POWER button should flash continuously. The machine will indicate it is ready for descending when the POWER button, 1 CUP button, CLEAN ME indicator and HOT WATER / STEAM indicator are all illuminated (solid on).
Dscaling the coffee component
- Press the 1 CUP button to start the descending for the coffee component of the machine. Descaling coffee component takes approximately 25 seconds. The 1 CUP button should flash continuously and remain constant once the descending process has finished. To terminate the descending within 25 seconds, press the 1 CUP button again.
Descale the steam and hot water components
Descaling steam and hot water takes approximately 13 seconds and 8 seconds respectively. Descaling can be terminated prematurely by turning the steam dial to STANDBY.
- Descale Steam component by turning the steam dial LEFT towards the STEAM icon.

- Descale Hot water component by turning the steam dial to the RIGHT towards the HOT WATER icon.

Repeat processes to complete descaling
After the above processes about half (0.5 litre) of the descale solution should be left in the water tank.
- Repeat steps 4-6 above to complete the descending process to empty the solution in the tank.
Dscaling Solution Rinse
- After descending, remove the water tank and rinse thoroughly then refill with fresh cold water to the maximum capacity (2 litres) and repeat steps 4-6 to further cleanse the machine of any residue of the cleaning solution thoroughly.
- Press 'POWER' to quit the descending process. This will be indicated by the LED lights switching off.

NOTE
The machine turns off automatically if there is no action for 5 minutes in descending mode. To resume descending, please start from step 3.
This step is only required if there is a blockage between the grinding burrs and the grinder outlet.
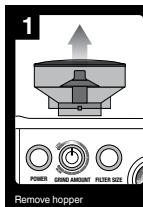

Set GRIND SIZE to '1' (linest)

Use 10mm socket. Rotate Clockwise to loosen the nut only

Set 'GRIND SIZE' to '16' (coarsest)

Unlock & remove top burr

Remove nut, spring & flat washer. Carefully remove lower burr

Remove grind fan & washers using long-nose pliers
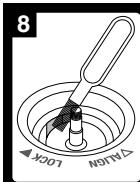
Unblock the grinds exit chute using the brush or a pipe cleaner
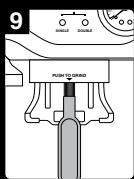
Clean chute with brush

Insert washers & grind fan using long-nose pliers

Insert lower burr (drive pin & cavity to align). Insert.
flat washer & spring washer

Rotate Counter-Clockwise to tighten nut

Insert & lock top burr

Set 'GRIND SIZE' to '5' Replace & lock happen

WARNING
Care should be taken as the grinder burrs are extremely sharp.
CLEANING THE STEAM WAND
The steam wand should always be cleaned after texturing milk. Wipe the steam wand with a damp cloth. Then with the steam wand tip directed over the drip tray, briefly set the STEAM / HOT WATER dial to the STEAM position. This will clear any remaining milk from inside the steam wand.
If any of the holes in the tip of the steam wand become blocked, ensure the STEAM / HOT WATER dial is in the STANDBY position. Press the POWER button to switch the machine off and allow to cool. Use the pin on the end of the provided cleaning tool to unblock the hole(s).
If the steam wand remains blocked, remove the tip using the integrated spanner in the cleaning tool and soak in hot water. Use the pin on the end of the provided cleaning tool to unblock the hole(s) before re-attaching to the steam wand.
CLEANING THE FILTER BASKETS AND PORTAFILTER
The filter baskets and portafilter should be rinsed under hot water immediately after use to remove all residual coffee oils.
If any of the holes in the filter basket become blocked, use the pin on the end of the provided cleaning tool to unblock the hole(s).
If the hole(s) remain blocked, dissolve a cleaning tablet in hot water and soak filter basket and portafilter in solution for approx. 20 minutes.
Rinse thoroughly.
The group head interior and shower screen should be wiped with a damp cloth to remove any ground coffee particles.
Periodically purge the machine. Place an empty filter basket and portfilter into the group head.
Press and hold the 1 CUP button and run a short flow of water to rinse out any residual coffee.
CLEANING THE DRIP & STORAGE TRAY
The drip tray should be removed, emptied and cleaned at regular intervals, particularly when the drip tray full indicator is showing EMPTY ME!
Remove the grid from the drip tray. Lift the coffee grind separator and dispose of any coffee grounds. The EMPTY ME! indicator can also be removed from the drip tray by pulling upwards to release the side latches. Wash all parts in warm soapy water with a soft cloth. Rinse and dry thoroughly.
The storage tray (located behind the drip tray) can be removed and cleaned with a soft, damp cloth. Do not use abrasive cleansers, pads or cloths which can scratch the surface.

NOTE
All parts should be cleaned by hand using warm water and a gentle dish washing liquid. Do not use abrasive cleansers, pads or cloths which can scratch the surface. Do not clean any of the parts or accessories in the dishwasher.
CLEANING THE OUTER HOUSING & CUP WARMING TRAY
The outer housing and cup warming tray can be cleaned with a soft, damp cloth. Polish with a soft, dry cloth. Do not use abrasive cleansers, pads or cloths which can scratch the surface.
STORING YOUR MACHINE
Before storing, ensure the STEAM / HOT WATER dial is in the STANDBY position, press the POWER button to switch the machine off and remove the plug from the power outlet. Remove unused beans from the hopper, clean the grinder (see page 16), empty the water tank and the drip tray.

WARNING
Do not immerse power cord, power plug or appliance in water or any other liquid.
USING THE ALLEN KEY
Over time, the silicone seal surrounding the shower screen will need to be replaced to ensure optimum brewing performance.
- Press the POWER button to switch the machine off and unplug the cord from the power outlet.
- Carefully remove the water tank and drip tray, taking particular care if they are full.
- Using a skewer or similar, clean the centre of the screw of any residual coffee.
- Insert the shorter end of the Allen Key into the centre of the screw. Turn counter-clockwise to loosen the screw.

- Once loosened, carefully remove and retain the screw, stainless steel shower screen and black dispersion plate. Make note of the side of the shower screen and dispersion plate that are facing downwards. This will make re-assembly easier. Wash the shower screen and dispersion plate in warm soapy water, then dry thoroughly.
- Remove the silicone seal with your fingers or a pair of long-nose pliers. Insert the new seal, flat side first, so the ribbed side is facing you.

- Re-insert the dispersion plate, then the shower screen, then the screw. With your fingers, turn the screw clockwise for 2-3 revolutions then insert the Allen Key to tighten until the screw is flush with the shower screen.
- Re-insert the drip tray and water tank.
Contact Sage Customer Service or visit www.sageappliances.com for replacement silicone seals or for advice.
| PROBLEM | POSSIBLE CAUSE | WHAT TO DO |
| Machine does not heat up. | • STEAM / HOT WATER dial is not in the STANDBY position. | • Turn the STEAM / HOT WATER dial to the STANDBY position. Machine will commence heating. |
| STEAM/HOT WATER light flashes when the machine is turned on. | | |
| Water does not flow from the group head. | • Machine has not reached operating temperature. | • Allow time for the machine to reach operating temperature. The POWER button light will stop flashing and all button lights on the control panel will illuminate when ready. |
| No hot water. | • Water tank is empty. | • Fill tank. |
| • Water tank is not fully inserted and locked into position. | • Push water tank down completely to lock into place. |
| • Machine needs to be descaled. | • Refer to 'Descaling', page 14. |
| • Coffee is ground too finely and/or too much coffee in filter basket and/ or over tamping and/or filter basket is blocked. | • See below, 'Espresso only drips from the portafilter spouts or not at all'. |
| Espresso only drips from the portafilter spouts or not at all. | • Coffee is ground too finely. | • Use slightly coarser grind. Refer to 'Setting the Grind Size', page 9 and 'Over Extraction', page 11. |
| • Too much coffee in the filter basket. | • Lower dose of coffee. Refer to 'Setting the Grind Amount', page 9 and 'Over Extraction', page 11. |
| • Coffee tamped too firmly. | • Tamp between 15–20kg of pressure. |
| • Water tank is empty. | • Fill tank. |
| • Water tank is not fully inserted and locked into position. | • Push water tank down completely to lock into place. |
| • The filter basket may be blocked. | • Use the pin on the end of the provided cleaning tool to unlock the hole(s). If the hole(s) remain blocked, dissolve a cleaning tablet in hot water and soak filter basket and portafilter in solution for approx. 20 minutes. Rinse thoroughly. |
| • Machine needs to be descaled. | • Refer to 'Descaling', page 14. |
| Espresso runs out too quickly. | • Coffee is ground too coarsely. | • Use slightly finer grind. Refer to 'Setting the Grind Size', page 9 and 'Under Extraction', page 11. |
| • Not enough coffee in the filter basket. | • Increase dose of coffee. Refer to 'Setting the Grind Amount', page 9 and 'Under Extraction', page 11. |
| • Coffee tamped too lightly. | • Tamp between 15–20kg of pressure. |
| Espresso runs out around the edge of the portafilter. | • Portafilter not inserted in the group head correctly. | • Ensure portafilter is completely inserted and rotated until resistance is felt. |
| • There are coffee grounds around the filter basket rim. | • Clean excess coffee from the rim of the filter basket to ensure a proper seal in group head. |
| • Coffee tamped too lightly. | • Tamp between 15–20kg of pressure. |
| • Too much coffee in the filter basket. | • Lower dose of coffee. Refer to 'Setting the Grind Amount', page 9. |
| • The silicone seal surrounding the shower screen needs to be replaced to ensure the portafiler is properly secured into the group head. | • Refer to 'Using the Allen Key', page 17. |
| No steam. | • Machine has not reached operating temperature. | • Allow time for the machine to reach operating temperature. The STEAM / HOT WATER light will flash to indicate the machine is heating to create steam. During this time, condensed water may purge from the steam wand. This is normal. When the STEAM / HOT WATER light stops flashing the steam wand is ready for use. |
| • Water tank is empty. | • Fill tank. |
| • Water tank is not fully inserted and locked into position. | • Push water tank down completely to lock into place. |
| • Machine needs to be descaled. | • Refer to 'Descaling', page 14. |
| • Steam wand is blocked. | • Refer to 'Cleaning the Steam Wand', page 16. |
| • STEAM/HOT WATER dial is not in the STEAM position. | • Ensure the STEAM / HOT WATER dial is completely rotated to the STEAM position. |
| Coffee not hot enough. | • Cups not pre-heated. | • Rinse cups under hot water outlet and place on cup warming tray. |
| • Portafilter not pre-heated. | • Rinse portafilter under hot water outlet. Dry thoroughly. |
| • Milk not hot enough (if making a cappuccino or latté etc). | • Heat milk until side of the jug becomes hot to touch. |
| • Machine needs to be descaled. | • Refer to 'Descaling', page 14. |
| No crema. | · Coffee tamped too lightly. | · Tamp between 15-20kg of pressure. |
| · Coffee is ground too coarsely. | · Use slightly finer grind. Refer to ‘Setting the Grind Size’, page 9 and ‘Under Extraction’, page 11. |
| · Coffee beans or pre-ground coffee are not fresh. | · If grinding fresh whole coffee beans, buy freshly roasted coffee with a “roasted on” date and use within 2 weeks of this date.
· If using pre-ground coffee, use within a week of grinding. |
| · The filter basket may be blocked. | · Use the pin on the end of the provided cleaning tool to unlock the hole(s). If the hole(s) remain blocked, dissolve a cleaning tablet in hot water and soak filter basket and portafilter in solution for approx. 20 minutes. Rinse thoroughly. |
| · Single Wall filter baskets are being used with pre-ground coffee. | · Ensure you use Dual Wall filter baskets with pre-ground coffee. |
| Drip tray fills too quickly. | · Auto purge feature. Water is automatically released into the drip tray after the steam and hot water functions to ensure the thermocoil is at the optimal temperature for extracting espresso. | · No action required as this is the normal operation of the machine. |
| Pulsing/pumping sound while extracting espresso or steaming milk. | · The machine is carrying out the normal operation of the 15 bar Italian pump. | · No action required as this is the normal operation of the machine. |
| · Water tank is empty. | · Fill tank. |
| · Water tank is not fully inserted and locked into position. | · Push water tank down completely to lock into place. |
| Water leaking. | · Auto purge feature. Water is automatically released into the drip tray after the steam and hot water functions to ensure the thermocoil is at the optimal temperature for extracting espresso. | · Ensure the drip tray is firmly pushed in place after using the steam and hot water functions.
· Empty the drip tray regularly. |
| · Water tank is not fully inserted and locked into position. | · Push water tank down completely to lock into place. |
| · The silicone seal surrounding the shower screen needs to be replaced to ensure the portafiler is properly secured into the group head. | · Refer to ‘Using the Allen Key’, page 17. |
| Machine is on but ceases to operate. | · The safety thermal-cut out may have activated due to the pump or grinder overheating. | · Press the POWER button to switch the machine off and unplug from the power outlet. Allow to cool for about 30-60 minutes.
· If problem persists, call Sage Customer Service on: 0808 178 1650. |
PROBLEM
POSSIBLE CAUSE
WHAT TO DO
| No ground coffee coming from grinder. | • No coffee beans in hopper. | • Filler hopper with fresh coffee beans. |
| • Blocked grinder chamber or chute. | • Clean and clear grinder chamber and chute.Refer to 'Advanced Cleaning for the Conical Burr Grinding', page 16. |
| • Water / moisture in grinder chamber and chute. | • Clean and clear grinder chamber and chute. Refer to 'Advanced Cleaning for the Conical Burr Grinding', page 16. Ensure burrs are thoroughly dry before re-assembling. It is possible to use a hair dryer to blow air into the grinder chamber. |
| FILTER SIZE LED's are flashing. | • Bean hopper is not attached correctly. | • Remove hopper, check for debris and then re-lock hopper into position. |
| Too much/ too little ground coffee is being delivered to the filter basket. | • Grind amount settings are incorrect for particular grind size. | • Use the GRIND AMOUNT dial to increase or decrease the grind amount. Refer to 'Setting the Grind Amount', page 9 and 'Extraction Guide', page 11. |
| Too much/too little espresso is being delivered to the cup. | • Grind amount and/or grind size settings and/or shot volumes require adjustment. | • Try the following, one at a time:• Reset the machine to its original default settings.Refer to 'Resetting Default Volumes', page 10.Re-programme the shot volumes. Refer to 'Re-Programming Shot Volume', page 10.• Adjust the grind amount and/or grind size settings.Refer to 'Setting the Grind Size', page 9, 'Setting the Grind Amount', page 9 and 'Extraction Guide', page 11. |
| Grinder is making a loud noise. | • Blockage or foreign object in grinder. | • Remove hopper, check for debris or blockage. If necessary, clean and clear grinder chamber and chute. Refer to 'Cleaning the Conical Burr Grinding', page 16. |

Guarantee
2 YEAR LIMITED GUARANTEE
Sage Appliances guarantees this product for domestic use in specified territories for 2 years from the date of purchase against defects caused by faulty workmanship and materials. During this guarantee period Sage Appliances will repair, replace, or refund any defective product (at the sole discretion of Sage Appliances).
All legal warranty rights under applicable national legislation will be respected and will not be impaired by our guarantee. For full terms and conditions on the guarantee, as well as instructions on how to make a claim, please visit www.sageappliances.com.

Inhalte

SOLUTIONS
Mouture plus fine

8
Schoepf's corollary of Uchida's Theorem, 1973. (See also Szabaszki's correspondence)


Important "GRIND SIZE" for the bissels of a portchoc.

ATTENZIONE
PROBLEM
CAUSA POSIBLE
QUE HACER

Rode no semido contrato
A man, who has been injured,
pays apater a porca.

Introduza a bloque o iturador e supremo

Defina o "GRIND SIZE" (Grau de moogem) para "5". Reinstalle e blocque o deposito de g Rodrigs

AVISO
PROBLEMA CAUSA POSSIVE
O QUE FAZER
A�ina nao aquece.
PROBLEMA CAUSA POSSIVEL
O QUE FAZER
www.sageappliances.com
Registered in Germany No. HRB 81309 (AG Düsseldorf).
Registered in England & Wales No. 8223512.
Due to continued product improvement, the products illustrated or photographed in this document may vary slightly from the actual product.