TRAVELMATE P253-M-32344G50MNKS - Laptop ACER - Free user manual and instructions
Find the device manual for free TRAVELMATE P253-M-32344G50MNKS ACER in PDF.
User questions about TRAVELMATE P253-M-32344G50MNKS ACER
0 question about this device. Answer the ones you know or ask your own.
Ask a new question about this device
Download the instructions for your Laptop in PDF format for free! Find your manual TRAVELMATE P253-M-32344G50MNKS - ACER and take your electronic device back in hand. On this page are published all the documents necessary for the use of your device. TRAVELMATE P253-M-32344G50MNKS by ACER.
USER MANUAL TRAVELMATE P253-M-32344G50MNKS ACER
Information for your safety and comfort
Safety instructions
Read these instructions carefully. Keep this document for future reference. Follow all warnings and instructions marked on the product.
Turning the product off before cleaning
Unplug this product from the wall outlet before cleaning. Do not use liquid cleaners or aerosol cleaners. Use a damp cloth for cleaning.
Warnings
Accessing the power cord
Be sure that the power outlet you plug the power cord into is easily accessible and located as close to the equipment operator as possible. When you need to disconnect power to the equipment, be sure to unplug the power cord from the electrical outlet.
Disconnecting the power source
Observe the following guidelines when connecting and disconnecting power to the power supply unit:
Install the power supply unit before connecting the power cord to the AC power outlet.
Unplug the power cord before removing the power supply unit from the computer.
If the system has multiple sources of power, disconnect power from the system by unplugging all power cords from the power supplies.
Using electrical power
- This product should be operated from the type of power indicated on the marking label. If you are not sure of the type of power available, consult your dealer or local power company.
- Do not allow anything to rest on the power cord. Do not locate this product where people will walk on the cord.
- If an extension cord is used with this product, make sure that the total ampere rating of the equipment plugged into the extension cord does not exceed the extension cord ampere rating. Also, make sure that the total rating of all products plugged into the wall outlet does not exceed the fuse rating.
- Do not overload a power outlet, strip or receptacle by plugging in too many devices. The overall system load must not exceed 80% of the branch circuit rating. If power strips are used, the load should not exceed 80% of the power strip's input rating.
This product's AC adapter is equipped with a three-wire grounded plug. The plug
only fits in a grounded power outlet. Make sure the power outlet is properly grounded before inserting the AC adapter plug. Do not insert the plug into a non-grounded power outlet. Contact your electrician for details.

Warning! The grounding pin is a safety feature. Using a power outlet that is not properly grounded may result in electric shock and/or injury.

Note: The grounding pin also provides good protection from unexpected noise produced by other nearby electrical devices that may interfere with the performance of this product.
- The system can be powered using a wide range of voltages; 100 to 120 or 220 to 240 V AC. The power cord included with the system meets the requirements for use in the country/region where the system was purchased. Power cords for use in other countries/regions must meet the requirements for that country/region. For more information on power cord requirements, contact an authorized reseller or service provider.
Bundled dummy cards

Note: Information in this section may not apply to your computer.
Your computer shipped with plastic dummies installed in the card slots. Dummies protect unused slots from dust, metal objects or other particles.
Save the dummies for use when no cards are in the slots.
General
- Do not use this product near water.
- Do not place this product on an unstable cart, stand or table. If the product falls, it could be seriously damaged.
- Slots and openings are provided for ventilation to ensure reliable operation of the product and to protect it from overheating. These openings must not be blocked or covered. The openings should never be blocked by placing the product on a bed, sofa, rug or other similar surface. This product should never be placed near or over a radiator or heat register, or in a built-in installation unless proper ventilation is provided.
- Never push objects of any kind into this product through cabinet slots as they may touch dangerous voltage points or short-out parts that could result in a fire or electric shock. Never spill liquid of any kind onto or into the product.
- To avoid damage of internal components and to prevent battery leakage, do not
place the product on a vibrating surface.
- Never use it under sporting, exercising, or any vibrating environment which will probably cause unexpected short current or damage rotor devices, HDD, Optical drive, and even exposure risk from lithium battery pack.
- The bottom surface, areas around ventilation openings and AC adapter may get hot. To avoid injury, ensure they do not come in contact with your skin or body.
- Your device and its enhancements may contain small parts. Keep them out of the reach of small children.
- The surface temperature of the base will rise during normal operation, particularly when plugged in to AC power. Allowing sustained contact with exposed skin can cause discomfort or burns.
Product servicing
Do not attempt to service this product yourself, as opening or removing covers may expose you to dangerous voltage points or other risks. Refer all servicing to qualified service personnel.
Unplug this product from the wall outlet and refer servicing to qualified service personnel when:
The power cord or plug is damaged, cut or frayed.
Liquid was spilled into the product.
The product was exposed to rain or water.
The product has been dropped or the case has been damaged.
The product exhibits a distinct change in performance, indicating a need for service.
The product does not operate normally after following the operating instructions.

Note: Adjust only those controls that are covered by the operating instructions, since improper adjustment of other controls may result in damage and will often require extensive work by a qualified technician to restore the product to normal condition.
Guidelines for safe battery usage
This notebook uses a Lithium-ion battery. Do not use it in a humid, wet or corrosive environment. Do not put, store or leave your product in or near a heat source, in a high temperature location, in strong direct sunlight, in a microwave oven or in a pressurized container, and do not expose it to temperatures over 60^ C (140°F). Failure to follow these guidelines may cause the battery to leak acid, become hot, explode or ignite and cause injury and/or damage. Do not pierce, open or disassemble the battery. If the battery leaks and you come into contact with the leaked fluids, rinse thoroughly with water and seek medical attention immediately. For safety reasons, and to prolong the lifetime of the battery, charging will not occur at temperatures below 0^ C (32°F) or above 40^ C (104°F).
The full performance of a new battery is achieved only after two or three complete charge and discharge cycles. The battery can be charged and discharged hundreds of times, but it will eventually wear out. When the operation time becomes noticeably shorter than normal, buy a new battery.
Use only the approved batteries, and recharge your battery only with the approved chargers designated for this device.
Use the battery only for its intended purpose. Never use any charger or battery that is damaged. Do not short-circuit the battery. Accidental short-circuiting can occur when a metallic object such as a coin, clip or pen causes direct connection of the positive (+) and negative (-) terminals of the battery. (These look like metal strips on the battery.) This might happen, for example, when you carry a spare battery in your pocket or purse. Short-circuiting the terminals may damage the battery or the connecting object.
The capacity and lifetime of the battery will be reduced if the battery is left in hot or cold places, such as in a closed car in summer or winter. Always try to keep the battery between 15^ and 25^ (59°F and 77°F). A device with a hot or cold battery may not work temporarily, even when the battery is fully charged. Battery performance is especially limited in temperatures well below freezing.
Do not dispose of batteries in a fire as they may explode. Batteries may also explode if damaged. Dispose of batteries according to local regulations. Please recycle when possible. Do not dispose as household waste.
Wireless devices may be susceptible to interference from the battery, which could affect performance.

Note: Please refer to www.acer.com for battery shipping documents.
Replacing the battery pack
The notebook uses lithium batteries. Replace the battery with the same type as that which came bundled with your product. Use of another battery may present a risk of fire or explosion.

Warning! Batteries may explode if not handled properly. Do not disassemble or dispose of them in fire. Keep them away from children. Follow local regulations when disposing of used batteries.
Caution for Optical Drive Device


Note: Information in this section may not apply to your computer.
CAUTION: This appliance contains a laser system and is classified as a "CLASS 1 LASER PRODUCT." In case of any trouble with this device, please contact your nearest
AUTHORIZED service station. To prevent direct exposure to the laser beam, do not try to open the enclosure.
CLASS 1 LASER PRODUCT
CAUTION: INVISIBLE LASER RADIATION WHEN OPEN. AVOID EXPOSURE TO BEAM.
APPAREIL A LASER DE CLASSE 1 PRODUIT
LASERATTENTION: RADIATION DU FAISCEAU LASER INVISIBLE EN CAS
D'OUVERTURE. EVITTER Toute EXPOSITION AUX RAYONS.
LUOKAN 1 LASERLAITE LASER KLASSE 1
Telephone line safety
- Disconnect all telephone lines from the equipment when not in use and/or before servicing.
- To avoid the remote risk of electric shock from lightning, do not connect the telephone line to this equipment during lightning or thunderstorms.

Warning! For safety reasons, do not use non-compliant parts when adding or changing components. Consult your reseller for purchase options.
Radio frequency interference

Warning! For safety reasons, turn off all wireless or radio transmitting devices when using your laptop under the following conditions. These devices may include, but are not limited to: wireless LAN (WLAN), Bluetooth and/or 3G.
Remember to follow any special regulations in force in any area, and always switch off your device when its use is prohibited or when it may cause interference or danger. Use the device only in its normal operating positions. This device meets RF exposure guidelines when used normally. To successfully transmit data files or messages, this device requires a good quality connection to the network. In some cases, transmission of data files or messages may be delayed until such a connection is available. Ensure that the above separation distance instructions are followed until the transmission is completed. Parts of the device are magnetic. Metallic materials may be attracted to the device, and persons with hearing aids should not hold the device to the ear with the hearing aid. Do not place credit cards or other magnetic storage media near the device, because information stored on them may be erased.
Medical devices
Operation of any radio transmitting equipment, including wireless phones, may interfere with the functionality of inadequately protected medical devices. Consult a physician or the manufacturer of the medical device to determine if they are adequately shielded from external RF energy or if you have any questions. Switch off your device in health care facilities when any regulations posted in these areas instruct you to do so. Hospitals or health care facilities may be using equipment that could be sensitive to external RF transmissions.
Pacemakers. Pacemaker manufacturers recommend that a minimum separation of 15.3 centimeters (6 inches) be maintained between wireless devices and a pacemaker to avoid potential interference with the pacemaker. These recommendations are consistent with the independent research by and recommendations of Wireless Technology Research. Persons with pacemakers should do the following:
Always keep the device more than 15.3 centimeters (6 inches) from the pacemaker
- Not carry the device near your pacemaker when the device is switched on. If you suspect interference, switch off your device, and move it.
Hearing aids. Some digital wireless devices may interfere with some hearing aids. If interference occurs, consult your service provider.
Vehicles
RF signals may affect improperly installed or inadequately shielded electronic systems in motor vehicles such as electronic fuel injection systems, electronic anti-skid (anti-lock) braking systems, electronic speed control systems, and air bag systems. For more information, check with the manufacturer, or its representative, of your vehicle or any equipment that has been added. Only qualified personnel should service the device, or install the device in a vehicle. Faulty installation or service may be dangerous and may invalidate any warranty that may apply to the device. Check regularly that all wireless equipment in your vehicle is mounted and operating properly. Do not store or carry flammable liquids, gases, or explosive materials in the same compartment as the device, its parts, or enhancements. For vehicles equipped with an air bag, remember that air bags inflate with great force. Do not place objects, including installed or portable wireless
equipment in the area over the air bag or in the air bag deployment area. If in-vehicle wireless equipment is improperly installed, and the air bag inflates, serious injury could result. Using your device while flying in aircraft is prohibited. Switch off your device before boarding an aircraft. The use of wireless teledevices in an aircraft may be dangerous to the operation of the aircraft, disrupt the wireless telephone network, and may be illegal.
Potentially explosive environments
Switch off your device when in any area with a potentially explosive atmosphere and obey all signs and instructions. Potentially explosive atmospheres include areas where you would normally be advised to turn off your vehicle engine. Sparks in such areas could cause an explosion or fire resulting in bodily injury or even death. Switch off the device at refueling points such as near gas pumps at service stations. Observe restrictions on the use of radio equipment in fuel depots, storage, and distribution areas; chemical plants; or where blasting operations are in progress. Areas with a potentially explosive atmosphere are often, but not always, clearly marked. They include below deck on boats, chemical transfer or storage facilities, vehicles using liquefied petroleum gas (such as propane or butane), and areas where the air contains chemicals or particles such as grain, dust or metal powders. Do not switch the notebook on when wireless phone use is prohibited or when it may cause interference or danger.
Emergency calls
Warning: You cannot make emergency calls through this device. To make an emergency call you shall dial out through your mobile phone or other telephone call system.
Disposal instructions
Do not throw this electronic device into the trash when discarding. To minimize pollution and ensure utmost protection of the global environment, please recycle. For more information on the Waste from Electrical and Electronics Equipment (WEEE) regulations, visit www.acer-group.com/public/Sustainability/sustainability01.htm

ENERGY STAR

Note: Information in this section may not apply to your computer.

ENERGY STAR
Acer's ENERGY STAR qualified products save your money by reducing energy cost and protecting the environment without sacrificing features or performance. Acer is proud to offer our customers products with the ENERGY STAR mark.
What is ENERGY STAR?
Products that are ENERGY STAR qualified use less energy and prevent greenhouse gas emissions by meeting strict energy efficiency guidelines set by the U.S. Environmental Protection Agency. Acer is committed to offering products and services worldwide that help customers save money, conserve energy and improve the quality of our environment. The more energy we can save through higher energy efficiency, the more we reduce greenhouse gases and the risks of climate change. More information refers to www.energystar.gov or www.energystar.gov/powermanagement.
Acer ENERGY STAR qualified products:
- Produce less heat and reduce cooling loads, and warmer climates.
- Automatically go into "display sleep" and "computer sleep" mode after 10 and 30 minutes of inactivity respectively.
- Wake the computer from sleep mode by pressing a key on the keyboard or moving the mouse.
Computers will save more than 80% energy at "sleep" mode.
ENERGY STAR and the ENERGY STAR mark are registered U.S. marks
Tips and information for comfortable use
Computer users may complain of eyestrain and headaches after prolonged use. Users are also at risk of physical injury after long hours of working in front of a computer. Long work periods, bad posture, poor work habits, stress, inadequate working conditions, personal health and other factors greatly increase the risk of physical injury.
Incorrect computer usage may lead to carpal tunnel syndrome, tendonitis, tenosynovitis or other musculoskeletal disorders. The following symptoms may appear in the hands, wrists, arms, shoulders, neck or back:
Numbness, or a burning or tingling sensation.
Aching, soreness or tenderness.
- Pain, swelling or throbbing.
- Stiffness or tightness.
Coldness or weakness.
If you have these symptoms, or any other recurring or persistent discomfort and/or pain related to computer use, consult a physician immediately and inform your company's health and safety department.
The following section provides tips for more comfortable computer use.
Finding your comfort zone
Find your comfort zone by adjusting the viewing angle of the monitor, using a footrest, or raising your sitting height to achieve maximum comfort. Observe the following tips:
- Refrain from staying too long in one fixed posture.
- Avoid slouching forward and/or leaning backward.
- Stand up and walk around regularly to remove the strain on your leg muscles.
Take short rests to relax your neck and shoulders. - Avoid tensing your muscles or shrugging your shoulders.
Install the external display, keyboard and mouse properly and within comfortable reach. - If you view your monitor more than your documents, place the display at the center of your desk to minimize neck strain.
Taking care of your vision
Long viewing hours, wearing incorrect glasses or contact lenses, glare, excessive room lighting, poorly focused screens, very small typefaces and low-contrast displays could stress your eyes. The following sections provide suggestions on how to reduce eyestrain.
Eyes
Rest your eyes frequently.
- Give your eyes regular breaks by looking away from the monitor and focusing on a distant point.
- Blink frequently to keep your eyes from drying out.
Display
- Keep your display clean.
- Keep your head at a higher level than the top edge of the display so your eyes point downward when looking at the middle of the display.
- Adjust the display brightness and/or contrast to a comfortable level for enhanced text readability and graphics clarity.
-
Eliminate glare and reflections by:
-
placing your display in such a way that the side faces the window or any light source
- minimizing room light by using drapes, shades or blinds
using a task light - changing the display's viewing angle
using a glare-reduction filter
using a display visor, such as a piece of cardboard extended from the display's top front edge
XII
- Avoid adjusting your display to an awkward viewing angle.
- Avoid looking at bright light sources for extended periods of time.
Developing good work habits
The following work habits make computer use more relaxing and productive:
Take short breaks regularly and often.
Perform some stretching exercises.
- Breathe fresh air as often as possible.
Exercise regularly and maintain a healthy body.

Warning! We do not recommend using the computer on a couch or bed. If this is unavoidable, work for only short periods, take breaks regularly, and do some stretching exercises.

Note: For more information, please refer to "Regulations and safety notices" on page 62.
First things first
We would like to thank you for making an Acer notebook your choice for meeting your mobile computing needs.
Your guides
To help you use your Acer notebook, we have designed a set of guides:
First off, the setup poster helps you get started with setting up your computer.
The TravelMate Series User's Manual contains useful information applying to all models in the TravelMate Series. It covers basic topics such as using the keyboard and audio, etc. Please understand that due to its nature, the User's Manual will occasionally refer to functions or features which are only contained in certain models of the series, but not necessarily in the model you purchased. Such instances are marked in the text with language such as "only for certain models."
The Quick Guide introduces you to the basic features and functions of your new computer. For more on how your computer can help you to be more productive, please refer to the TravelMate Series User's Manual. This guide contains detailed information on such subjects as system utilities, data recovery, expansion options and troubleshooting. In addition it contains warranty information and the general regulations and safety notices for your notebook. It is available in Portable Document Format (PDF) and comes preloaded on your notebook.
Follow these steps to access it:
- Type 'User' from Start.
- Click on Acer User's Manual.
Basic care and tips for using your computer
Turning your computer on and off
To turn on the computer, simply press and release the power button. Please refer to the setup poster for the location of the power button.
To turn the power off, do any of the following:
- Use the Windows shutdown command: Press the Windows key +
and click Settings > Power then click Shut Down.
If you need to power down the computer for a short while, but don't want to completely shut it down, you can put it into Hibernate by:
- Pressing the power button.
-OR- - Press the Windows key +
and click Settings > Power then clicking Hibernate.
You can also put the computer in sleep mode by pressing the sleep hotkey <Fn> + <F4> .
Note: If you cannot power off the computer normally, press and hold the power button for more than four seconds to shut down the computer. If you turn off the computer and want to turn it on again, wait at least two seconds before powering up.
Taking care of your computer
Your computer will serve you well if you take care of it.
- Do not expose the computer to direct sunlight. Do not place it near sources of heat, such as a radiator.
- Do not expose the computer to temperatures below 0^ C ( 32^ F) or above 50^ C ( 122^ F).
- Do not subject the computer to magnetic fields.
- Do not expose the computer to rain or moisture.
- Do not spill water or any liquid on the computer.
- Do not subject the computer to heavy shock or vibration.
- Do not expose the computer to dust or dirt.
- Never place objects on top of the computer.
- Do not slam the computer display when you close it.
- Never place the computer on uneven surfaces.
Taking care of your AC adapter
Here are some ways to take care of your AC adapter:
- Do not connect the adapter to any other device.
- Do not step on the power cord or place heavy objects on top of it. Carefully route the power cord and any cables away from foot traffic.
-
When unplugging the power cord, do not pull on the cord itself but pull on the plug.
-
The total ampere ratings of the equipment plugged in should not exceed the ampere rating of the cord if you are using an extension cord. Also, the total current rating of all equipment plugged into a single wall outlet should not exceed the fuse rating.
Taking care of your battery pack
Here are some ways to take care of your battery pack:
- Use only batteries of the same kind as replacements. Turn the power off before removing or replacing batteries.
- Do not tamper with batteries. Keep them away from children.
- Dispose of used batteries according to local regulations. Recycle if possible.
Cleaning and servicing
When cleaning the computer, follow these steps:
- Turn off the computer and remove the battery pack.
- Disconnect the AC adapter.
- Use a soft, moist cloth. Do not use liquid or aerosol cleaners.
If either of the following occurs:
- The computer has been dropped or the body has been damaged;
- The computer does not operate normally
Please refer to "Frequently asked questions" on page 52.
Information for your safety and comfort iii
Safety instructions iii
Caution for Optical Drive Device vi
Radio frequency interference vi
Medical devices viii
Vehicles viii
Potentially explosive environments ix
Emergency calls ix
Disposal instructions ix
Tips and information for comfortable use
First things first xiii
Your guides xiii
Basic care and tips for using your computer xiii
Turning your computer on and off xiii
Taking care of your computer xiv
Taking care of your AC adapter xiv
Taking care of your battery pack XV
Cleaning and servicing XV
Touchpad 1
Touchpad basics (with two buttons) 1
Using the keyboard 2
Lock keys and embedded numeric keypad 2
Hotkeys 2
Windows keys 4
Acer ProShield 5
Overview 5
Setting up ProShield 5
Personal Secure Drive 6
Credential Manager 7
Fingerprint Registration* 8
Data Protection 8
Data Removal 9
Acer Office Manager 10
Acer Office Manager Console 10
10
Client manager 11
Policies 12
Assets 13
Task scheduler 14
Settings 15
Recovery 16
Creating a recovery backup 16
Creating a drivers and applications backup 18
Recovering your system 20
Reinstalling drivers and applications 20
Returning to an earlier system snapshot 22
Returning your system to its factory condition 23
Recovering from Windows 23
Recovering from a recovery backup 25
Acer Backup Manager 29
Power management 31
Saving power 31
Battery pack 33
Battery pack characteristics 33
Charging the battery 33
Optimizing battery life 34
Checking the battery level 35
Battery-low warning 35
Installing and removing the battery pack 35
Traveling with your computer 37
Disconnecting from the desktop 37
Moving around 37
Preparing the computer 37
What to bring to meetings 38
Taking the computer home 38
Preparing the computer 38
What to take with you 38
Special considerations 38
Setting up a home office 39
Traveling with the computer 39
Preparing the computer 39
What to take with you 39
Special considerations 39
Traveling internationally with the computer 40
Preparing the computer 40
What to bring with you 40
Special considerations 40
Expanding through options 41
Connectivity options 41
Connecting to a network 42
Built-in network feature 42
Wireless networks 43
Connecting to the Internet 43
Wireless networks 43
ExpressCard 44
Thunderbolt 45
IEEE 1394 port 46
HDMI 47
Universal Serial Bus (USB) 48
Playing DVD movies 49
Upgrading memory 50
BIOS utility 51
Boot sequence 51
Enable disk-to-disk recovery 51
Setting passwords 51
Frequently asked questions 52
Requesting service 53
Troubleshooting 55
Troubleshooting tips 55
Error messages 55
Tips and hints for using Windows 8 57
Three concepts you might want to keep in mind 57
How do I access the charms? 57
How do I get to Start? 57
How do I jump between apps? 57
How do I turn off my computer? 57
Why is there a new interface? 57
How do I unlock my computer? 58
How do I personalize my computer? 58
I want to use Windows in the way that I'm used to - give me my desktop back! 59
Where are my apps? 59
What is a Microsoft ID (account)? 60
How do I add a favorite to Internet Explorer? 60
How do I check for Windows updates? 60
Where can I get more information? 61
Regulations and safety notices 62
Touchpad
The built-in touchpad is a pointing device that senses movement on its surface. This means the cursor responds as you move your finger across the surface of the touchpad. The central location on the palmrest provides optimum comfort and support.
Touchpad basics (with two buttons)
The following items show you how to use the touchpad with two buttons.
- Move your finger across the touchpad to move the cursor.
- Press the left and right buttons located beneath the touchpad to perform selection and execution functions. These two buttons are similar to the left and right buttons on a mouse. Tapping on the touchpad is the same as clicking the left button.
| Function | Left button | Right button | Main touchpad |
| Execute | Quickly click twice. | Tap twice (at the same speed as double-clicking a mouse button). | |
| Select | Click once. | Tap once. | |
| Drag | Click and hold, then use finger on the touchpad to drag the cursor. | Tap twice (at the same speed as double-clicking a mouse button); rest your finger on the touchpad on the second tap and drag the cursor. | |
| Access context menu | Click once. |
Note: Illustrations for reference only. The exact configuration of your PC depends on the model purchased.
Note: When using the touchpad, keep it — and your fingers — dry and clean. The touchpad is sensitive to finger movement; hence, the lighter the touch, the better the response. Tapping harder will not increase the touchpad's responsiveness.
Note: By default, vertical and horizontal scrolling is enabled on your touchpad. It can be disabled under Mouse settings in Windows Control Panel.
Using the keyboard
The keyboard has full-sized keys and an embedded numeric keypad, separate cursor, lock, Windows, function and special keys.
Lock keys and embedded numeric keypad
Note: Information in this section may not apply to your computer.
The keyboard has three lock keys which you can toggle on and off.
| Lock key | Description |
| Caps Lock | When Caps Lock is on, all alphabetic characters typed are in uppercase. |
| Num Lock+Fn> + <F11> | When Num Lock is on, the embedded keypad is in numeric mode. The keys function as a calculator (complete with the arithmetic operators +, -, *, and /). Use this mode when you need to do a lot of numeric data entry. A better solution would be to connect an external keypad. |
| Scroll Lock+Fn> + <F12> | When Scroll Lock is on, the screen moves one line up or down when you press the up or down arrow keys respectively. Scroll Lock does not work with some applications. |
The embedded numeric keypad functions like a desktop numeric keypad. It is indicated by small characters located on the upper right corner of the keycaps. To simplify the keyboard legend, cursor-control key symbols are not printed on the keys.
| Desired access | Num Lock on | Num Lock off |
| Number keys on embedded keypad | Type numbers in a normal manner. | |
| Cursor-control keys on embedded keypad | Hold <Shift> while using cursor-control keys. | Hold <Fn> while using cursor-control keys. |
| Main keyboard keys | Hold <Fn> while typing letters on embedded keypad. | Type the letters in a normal manner. |
Hotkeys
The computer employs hotkeys or key combinations to access most of the computer's controls like screen brightness and volume output.
To activate hotkeys, press and hold the <Fn> key before pressing the other key in the hotkey combination.
| Hotkey | Icon | Function | Description |
| +Fn> + <F3> | ( ) | Communication key | Enables / disables the computer's communication devices. (Communication devices may vary by configuration.) |
| +Fn> + <F4> | Z² | Sleep | Puts the computer in Sleep mode. |
| +Fn> + <F5> | □□ | Display toggle | Switches display output between the display screen, external monitor (if connected) and both. |
| +Fn> + <F6> | □■ | Display off | Turns the display screen backlight off to save power. Press any key to return. |
| +Fn> + <F7> | ∅ | Touchpad toggle | Turns the built-in touchpad on and off. |
| +Fn> + <F8> | 呦 | Speaker toggle | Turns the speakers on and off. |
| +Fn> + <F11> | NumLk | Turns the embedded numeric keypad on or off (only for certain models). | |
| +Fn> + <▷> | Brightness up | Increases the screen brightness. | |
| +Fn> + <△> | Brightness down | Decreases the screen brightness. | |
| +Fn> + <△> | Volume up | Increases the sound volume. | |
| +Fn> + <▽> | Volume down | Decreases the sound volume. | |
| +Fn> + <Home> | /II | Play/Pause | Play or pause a selected media file. |
| +Fn> + <Pg Up> | ■ | Stop | Stop playing the selected media file. |
| +Fn> + <Pg Dn> | |▲ | Previous | Return to the previous media file. |
| +Fn> + <End> | ▶■ | Next | Jump to the next media file. |
Windows keys
The keyboard has two keys that perform Windows-specific functions.
| Key | Description |
| Windows key | Pressed alone it returns to the Start screen. It can also be used with other keys for special functions, please check Windows Help. |
| Application key | This key has the same effect as clicking the right mouse button; it opens the application's context menu. |
Acer ProShield (Only for selected models)
Overview
An all-in-one security solution, Acer ProShield provides an embedded security solution to address the following points of vulnerability:
Securing the device against unauthorized access
- Protecting local storage
Securing the network
Acer ProShield includes five modules that will secure your device from unauthorized access and intrusion.
- Credential Manager - Password, Fingerprint registration (if your PC has a fingerprint scanner), Online accounts configuration
- Pre-Boot Authentication - Boot sequence and device security
- Data Protection - Personal secure drive, file and folder encryption
Data Removal - File shredder
Information - About this software
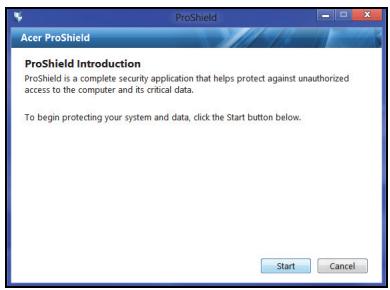
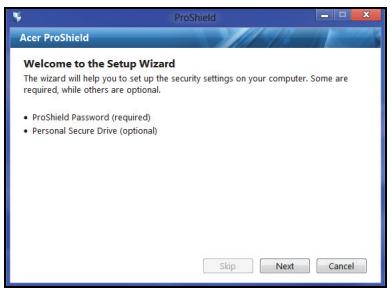
Setting up ProShield
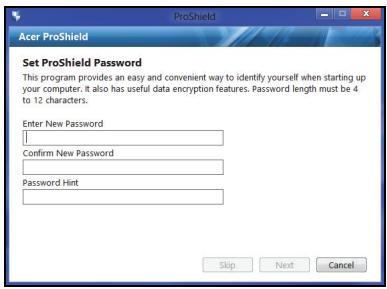
The first time you run ProShield, you will be led through a setup wizard that allows you to set up the parameters for ProShield. Click Start to begin. You will be required to set a password, and can choose to create a Personal Secure Drive.
Note: Select a password that you will remember, but is difficult to guess. Do not use words that can be found in a dictionary. It is advisable to use a combination of letters and numbers.
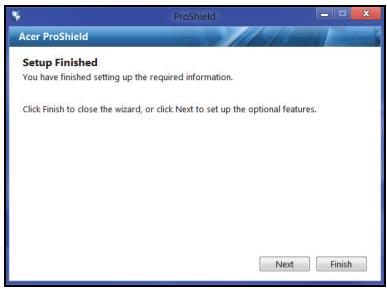
Once you have set a password, you can click Next to proceed to setting up a Personal Secure Drive or click Finish to exit the wizard.
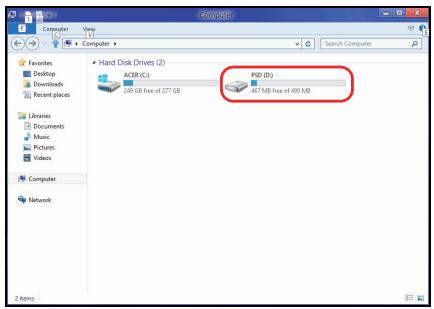
Personal Secure Drive
The Personal Secure Disk (PSD) is a secure section of your hard disk where you can save files. You can only get access to the PSD via password or fingerprint authentication.

Once setup is finished, you can go to the ProShield Console to manage your computer or make changes to the settings.
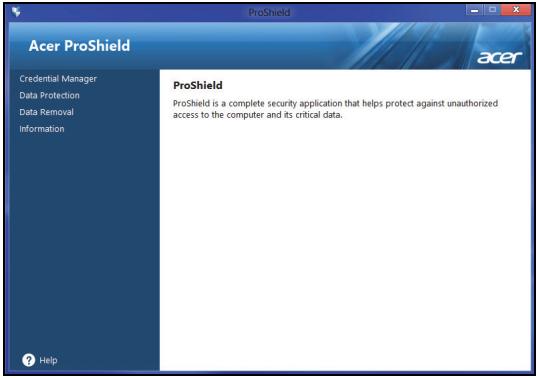
Use the menu in the left-hand pane to make changes.
Credential Manager
Here you can set and manage your credentials, including Pre-boot authentication.

You can change your ProShield and Windows passwords, register fingerprints, manage online account information, and back up or restore credential information.
Fingerprint Registration*
* (only if your PC has a fingerprint scanner)
You can use a fingerprint scanner to secure your PC from unauthorized access. Register two or more fingerprints that can then be used to access your PC during start up, instead of your password.
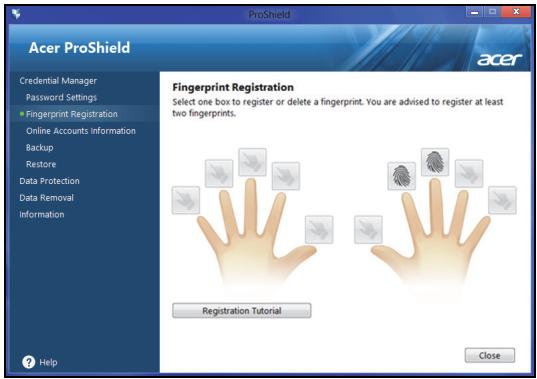
Click Registration Tutorial for more information.
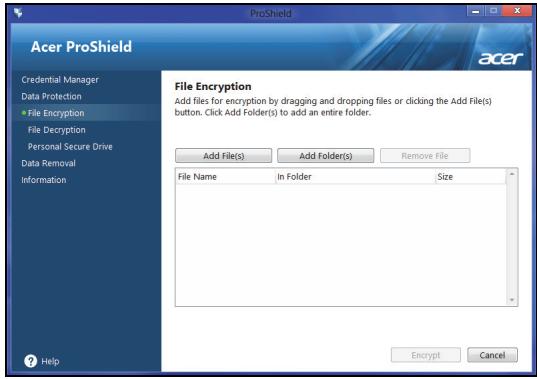
Data Protection
Here you can select files for encryption or decryption, and manage your Personal Secure Drive.
Data Removal
Here you can select files to be completely removed from the hard disk. The File Shredder overwrites the data to make recovering the data impossible.
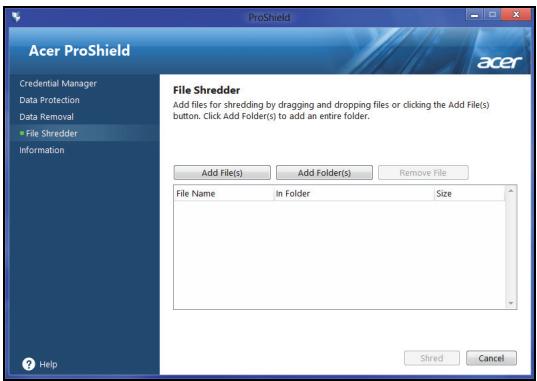
Warning: Make sure you select only the information you want to shred. Once you have shredded a file or folder, it is impossible to recover the data.
Acer Office Manager
Note: Only for selected models.
Acer Office Manager is a monitoring and assent management tool that allows MIS staff to remotely manage and update computers. There are two components to this software package: Acer Office Manager Console and Acer Office Manager Client.
Acer Office Manager Console
The Console application allows you to manage connected clients from a single computer. To start the Console in Windows 8, simply start typing "Office Manager Console". Alternatively, in Desktop mode, select Acer Office Manager Console.
The first time you run the Console, you will be asked to set up a password, and an email address for notifications.
Note: The password should be from 8 to 31 characters long and must include at least one digit, one capital letter and one lower-case letter.
Dashboard
Once you have completed the setup steps, you will be shown the Dashboard, where you can view the total number of connected clients, the online clients and offline clients. You can also add a client by selecting a client under New client and clicking the Add button.
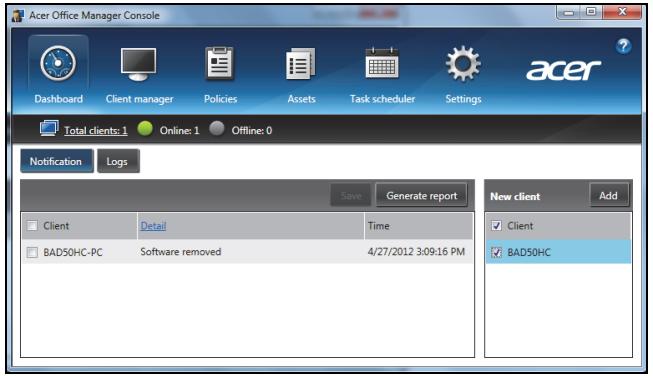
Tip: Select Client under New client to select all the found clients.
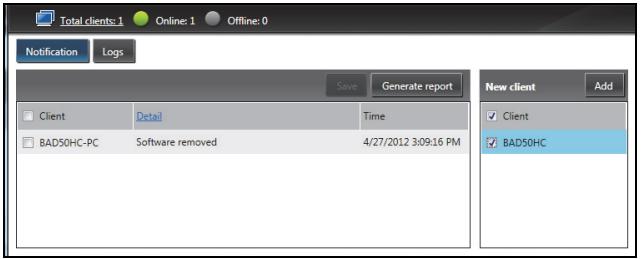
In the Notification area you can see any notifications received for the managed clients, including information such as hardware or software
being removed, if the.client has been in use, or if it has been off-line, for longer than the defined time.
Client manager
On the Client manager page you can view all the clients being managed from the Console. Double-click an icon to view the system information for that client.
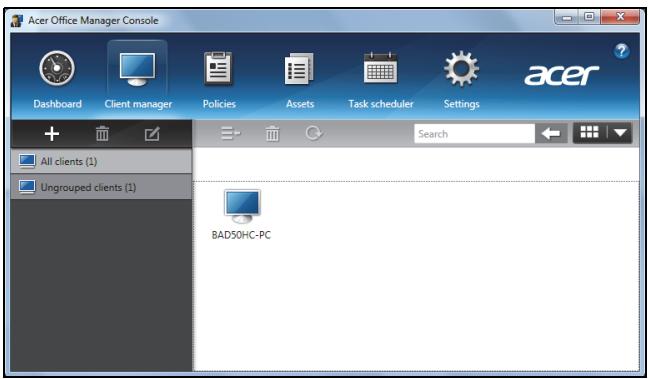
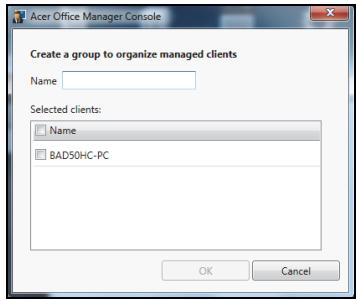
You can also group clients together for easier management. For example, you can create a group for admin staff and another for sales staff. To create a group and add clients to the group, click the + symbol above the list of clients.
Note: Each client can only be assigned to one group.
Policies
You can set policies to apply to selected clients or groups of clients. Click the + symbol to add a new policy.

| Tab | Item | Function |
| General | Wallpaper | Set a wallpaper that will be applied to all clients. |
| Screen saver | Set a screen saver that will be applied to all clients. | |
| Homepage | Set which home page Internet Explorer will open when launched. | |
| Enable AutoPlay | Enable or disable AutoPlay for external devices or CD- / DVD-ROMs | |
| Security | Enable IE security settings | Define Internet Explorer security settings. |
| Enable user account policy | Set policies for user passwords, such as minimum password strength, password validity, and lockout parameters. | |
| Power options | Define power settings. | |
| BIOS | BIOS Supervisor password | Set a BIOS Supervisor password. If a password already exists, you will need to enter it before you can change it. |
| BIOS User password | Set a BIOS User password. If a password already exists, you will need to enter it or the Supervisor password before you can change the User password. | |
| Change boot sequence settings | Change the order of devices used to boot the system. | |
| Device | Enable or disable devices on notebook computers. | |
Note: The items in the Device tab are not supported for desktop computers. If you set a policy that includes items in this tab, and deploy the policy to a desktop computer, the settings will be ignored.
Assets
The Assets page gives you a quick overview of the managed clients and the hardware and software for each system. You can also see which Hotfixes have been applied to each system.
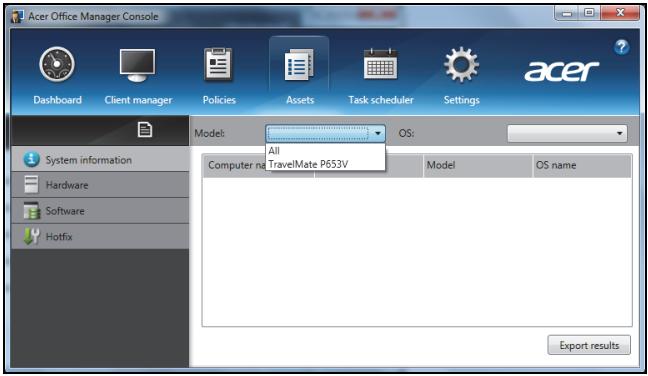
Select the system model from the Model drop-down menu. You can then further refine the search by operating system via the OS drop-down menu. The discovered clients will be listed.
If you wish to export the results as an Excel spreadsheet, click Export results or the icon. You will be asked where to save the file and for a file name.
Task scheduler
On the Task scheduler page, you can set a schedule to deploy selected policies on a regular basis. Click the + symbol to add a new task.
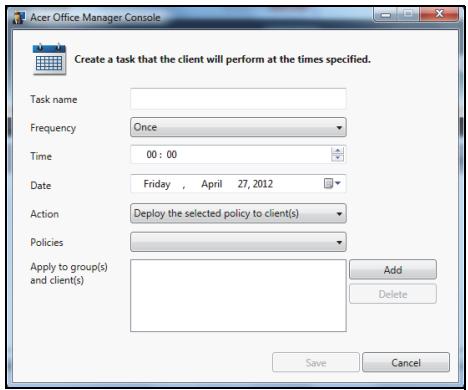
You will need to enter a Task name, select the Frequency, Time, Date, Action, the Policies to be deployed (if appropriate) and the group(s) or client(s).
Once you have entered the necessary information, click Save.
Settings
On the Settings page, you can change your settings as desired.
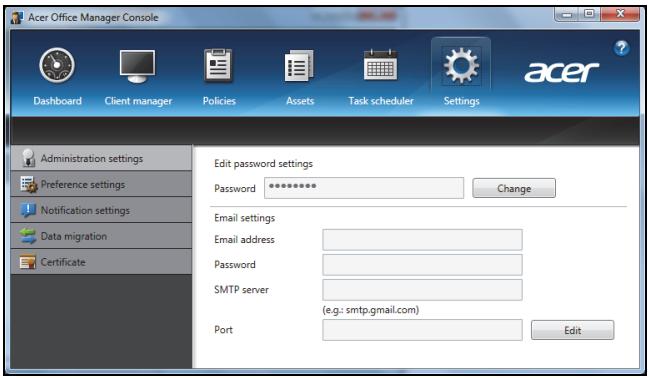
| Tab | Item | Function |
| Administration settings | Edit password settings | Change your Acer Office Manager Console password |
| Email settings | Set up an email account to receive email notifications. | |
| Preference settings | Set up your program launch and lock preferences. | |
| Notification settings | Set up what time-related notifications should show on the Dashboard. | |
| Data migration | Export your Acer Office Manager Console settings for use on another machine. | |
| Certificate | Create new certificate | Create a certificate that you can import to another machine. Certificates ensure that the client can only be managed from a single console. |
| Import certificate | Import a certificate from another machine. This will allow the console to manage a remote client that has a trusted relationship with another console. |
Recovery
If you are having trouble with your computer, and the frequently asked questions (see page 52) do not help, you can 'recover' your computer - i.e. return it to an earlier state.
This section describes the recovery tools available on your computer. Acer provides Acer Recovery Management, which allows you to create a recovery backup, a drivers and applications backup, and to start recovery options, either using Windows tools, or the recovery backup.
Note: Acer Recovery Management is only available with a preinstalled Windows operating system.
Important: We recommend that you create a Recovery Backup and Drivers and Applications Backup and as soon as possible. In certain situations a full recovery will require a USB recovery backup.
Creating a recovery backup
To reinstall from a USB storage drive, you must first create a recovery backup. The recovery backup includes the entire original contents of your computer's hard drive, including Windows and all factory-loaded software and drivers. Using this backup will restore your computer to the same state as when you purchased it, while giving you an option to retain all settings and personal data.
Note: Make sure you have a USB drive with a capacity of at least 16 GB. 1. From Start, type 'Recovery' and then click Acer Recovery Management in the list of apps.
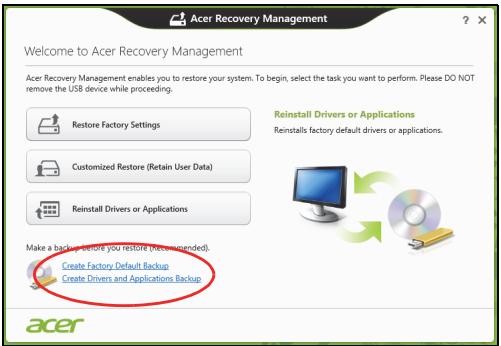
- Click Create Factory Default Backup. The Recovery Drive window opens.
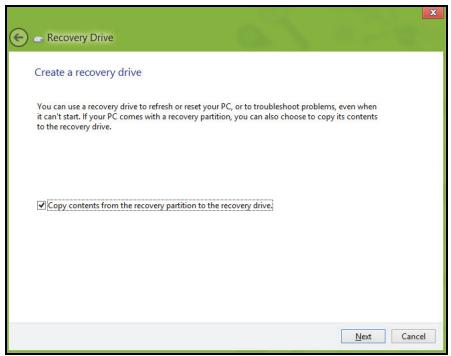
Make sure Copy contents from the recovery partition to the recovery drive is selected. This provides the most complete and safest recovery backup.
-
Plug in the USB drive then click Next.
-
Make sure your USB drive has enough capacity before continuing. The recovery backup requires at least 16 GB of storage
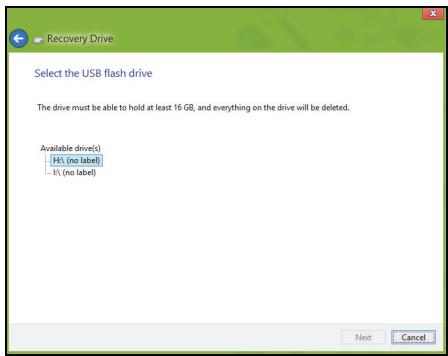
- You will be shown the backup progress on the screen.
- Follow the process until it completes.
- After creating the recovery backup, you can choose to delete the recovery information on your computer. If you delete this information, you can only use the USB recovery backup to restore your computer, if you lose or erase the USB drive, you cannot restore your computer.
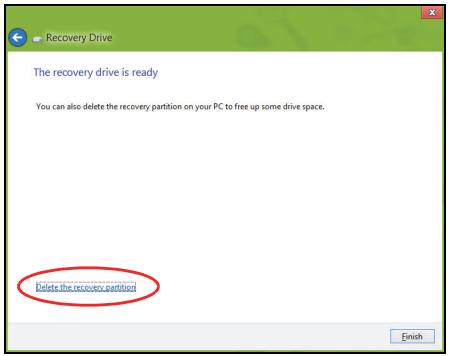
- Unplug the USB drive and label it clearly.
Important: Write a unique, descriptive label on the backup, such as 'Windows Recovery Backup'. Make sure you keep the backup in a safe place that you will remember.
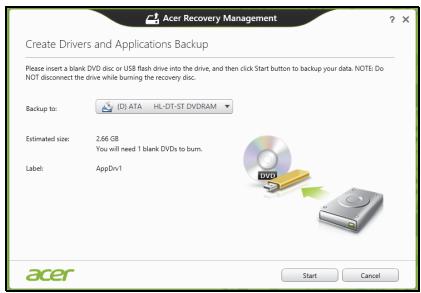
Creating a drivers and applications backup
To create a Drivers and Applications Backup, that contains the factory-loaded software and drivers needed by your computer, you may use either a USB storage drive or, if your computer features a DVD recorder, one or more blank recordable DVDs.
- From Start, type 'Recovery' and then click Acer Recovery Management in the list of apps.

- Click Create Drivers and Applications Backup.
Plug in the USB drive or insert a blank DVD into the optical drive, then click Next.
- If you are using a USB drive, make sure your USB drive has enough capacity before continuing.

- If using DVDs, it will also show the number of blank, recordable discs you will need to complete the recovery discs. Make sure that you have the required number of identical, blank discs.
-
Click Start to copy files. You will be shown the backup progress on the screen.
-
Follow the process until it completes:
-
If you are using optical discs, the drive ejects each disc as it completes burning it. Remove the disc from the drive and mark it with a permanent marker.
If multiple discs are required, insert a new disc when prompted, then click OK. Continue until the process is complete.
- If you are using a USB drive, unplug the drive and label it clearly.
Important: Write a unique, descriptive label on each backup, such as 'Drivers and Applications Backup'. Make sure you keep the backup in a safe place that you will remember.
Recovering your system
To recover your system:
- Perform minor fixes.
If only one or two items of software or hardware have stopped working correctly, the problem may be solved by reinstalling the software or the device drivers.
To reinstall software and drivers that were pre-installed at the factory, see "Reinstalling drivers and applications" on page 20.
For instructions on reinstalling software and drivers that were not preinstalled, see that product's documentation or support Web site.
- Revert to a previous system condition.
If reinstalling software or drivers does not help, then the problem may be solved by returning your system to a previous state when everything was working correctly.
For instructions, see "Returning to an earlier system snapshot" on page 22.
- Reset your operating system.
If nothing else has solved the problem and you want to reset your system, but keep your user information, see "Returning your system to its factory condition" on page 23.
- Reset your system to its factory condition.
If nothing else has solved the problem and you want to reset your system to factory condition, see "Returning your system to its factory condition" on page 23.
Reinstalling drivers and applications
As a troubleshooting step, you may need to reinstall the applications and device drivers that came pre-installed on your computer from the factory. You can reinstall using either your hard drive or the backup you have created.
- Other applications - If you need to reinstall software that did not come pre-installed on your computer, you need to follow that software's installation instructions.
- New device drivers - If you need to reinstall device drivers that did not come pre-installed on your computer, follow the instructions provided with the device.
If you are reinstalling using Windows and the recovery information stored on your computer:
- From Start, type 'Recovery' and then click Acer Recovery Management in the list of apps.
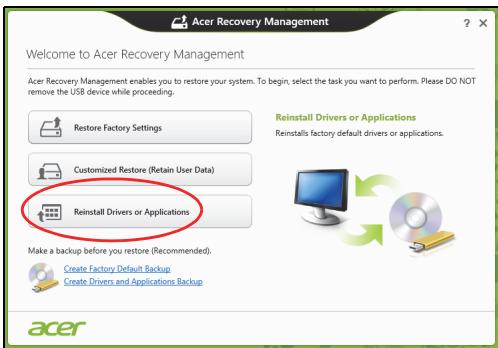
- Click Reinstall Drivers or Applications.
- You should see the Contents section of the Acer Resource Center.
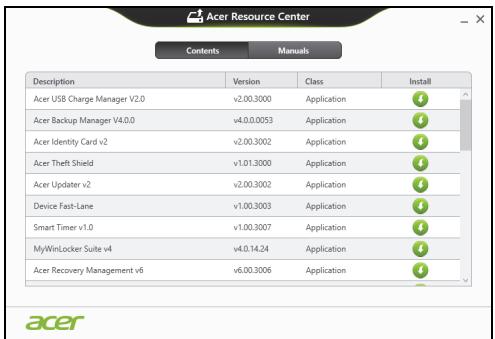
- Click the install icon for the item you want to install, then follow the onscreen instructions to complete the installation. Repeat this step for each item you want to reinstall.
If you are reinstalling from a Drivers and Applications Backup on a DVD or USB drive:
-
Insert the Drivers and Applications Backup into the disc drive or connect it to a free USB port.
-
If you inserted a DVD wait for Acer Resource Center to start.
-
If Acer Resource Center does not start automatically, press the Windows key +
, then double-click on the optical drive icon. -
If you are using a USB drive, press the Windows key +
, then double-click on the drive that contains the backup. Double-click on ResourceCenter. -
You should see the Contents section of the Acer Resource Center.
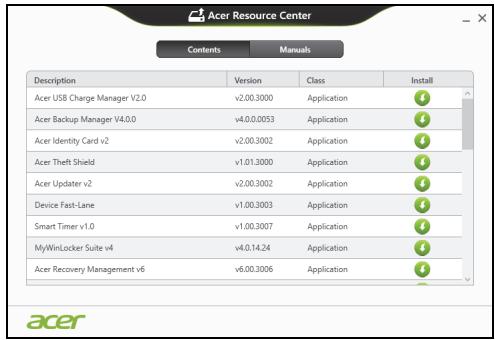
- Click the install icon for the item you want to install, then follow the onscreen prompts to complete the installation. Repeat this step for each item you want to reinstall.

Returning to an earlier system snapshot
Microsoft System Restore periodically takes a 'snapshot' of your system settings and saves them as restore points. In most cases of hard-to-resolve software problems, you can return to one of these restore points to get your system running again.
Windows automatically creates an additional restore point each day, and also each time you install software or device drivers.
Note: For more information about using Microsoft System Restore, from Start, type 'Help' and then click Help and Support in the list of apps. Type 'Windows system restore' in the Search Help box, then press Enter.
Returning to a restore point
- From Start, type 'Control Panel' and then click Control Panel in the list of apps.
- Click System and Security > Action Center, then click Recovery at the bottom of the window.
- Click Open System Restore, then Next.
-
Click the latest restore point (at a time when your system worked correctly), click Next, then Finish.
-
A confirmation window appears; click Yes. Your system is restored using the restore point you specified. This process may take several minutes, and may restart your computer.
Returning your system to its factory condition
If your computer experiences problems that are not recoverable by other methods, you may need to reinstall everything to return your system to its factory condition. You can recover from either your hard drive or the recovery backup you have created.
- If you can still run Windows and have not deleted the recovery partition, see "Recovering from Windows" on page 23.
- If you cannot run Windows, your original hard drive has been completely re-formatted or you have installed a replacement hard drive, see "Recovering from a recovery backup" on page 25.
Recovering from Windows
Start Acer Recovery Management:
- From Start, type 'Recovery' and then click Acer Recovery Management in the list of apps.
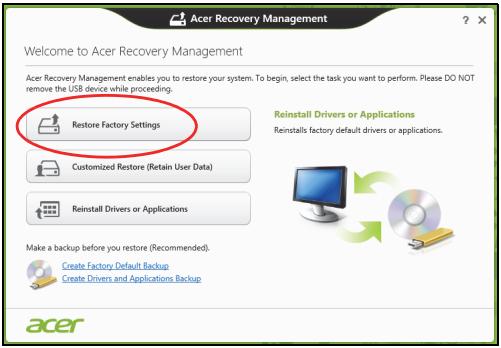
Two options are available, Restore Factory Settings (Reset my PC) or Customized Restore (Refresh my PC).

Customized Restore (Retain User Data)
Restore Factory Settings deletes everything on your hard drive, then reinstalls Windows and all software and drivers that were pre-installed on your system. If you can access important files on your hard drive, back them up now. See "Restore Factory Settings with Acer Recovery Management" on page 24.
Customized Restore will attempt to retain your files (user data) but will reinstall all software and drivers. Software installed since you purchased your PC will be removed (except software installed from the Windows Store). See "Customized Restore with Acer Recovery Management" on page 25.
Restore Factory Settings with Acer Recovery Management
1. Click Restore Factory Settings.
Caution: 'Restore Factory Settings' will erase all files on your hard drive.
- If your computer is configured with two operating systems (only available on certain systems), a window opens with the option to restore either Windows 7 or Windows 8. If you choose Windows 7, your computer will restart and restore Windows 7. If you choose Windows 8, Reset your PC opens, as described below.
Note: To fully enjoy Windows 8 features after changing from Windows 7, enter the BIOS (press
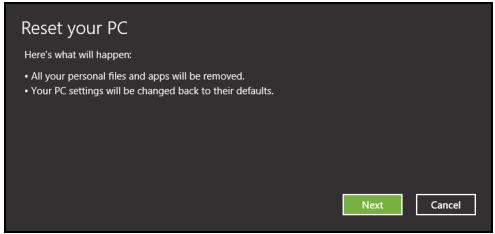
- The Reset your PC window opens.
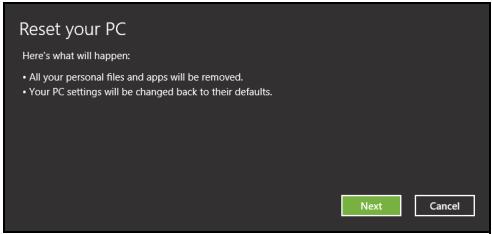
Images for reference only.
- Click Next, then choose how to erase your files:
a. Just remove my files quickly erases all files before restoring your computer and takes about 30 minutes.
b. Fully clean the drive completely cleans the drive after each file is erased, so no files can be viewed after the recovery. Cleaning the drive takes much longer, up to 5 hours, but is much more secure as old files are completely removed.
- Click Reset.
- The recovery process begins by restarting your computer, then continues by copying files to your hard drive.
- After the recovery has finished, you can start using your computer by repeating the first-start process.
Customized Restore with Acer Recovery Management
1. Click Customized Restore (Retain User Data).

2. The Refresh your PC window opens.
3. Click Next, then Refresh.
- The recovery process begins by restarting your computer, then continues by copying files to your hard drive. This process takes about 30 minutes.
Recovering from a recovery backup
To recover from a recovery backup on a USB drive:
- Find your recovery backup.
- Plug in the USB drive and turn on your computer.
- If it is not already enabled, you must enable the F12 Boot Menu:
a. Press <F2> when starting your computer.
b. Use the left or right arrow keys to select the Main menu.
c. Press the down key until F12 Boot Menu is selected, press
d. Use the left or right arrow keys to select the Exit menu.
e. Depending on the type of BIOS your computer uses, select Save Changes and Exit or Exit Saving Changes and press Enter. Select OK or Yes to confirm.
f. Your computer will restart.
- During startup, press
to open the boot menu. The boot menu allows you to select which device to start from, select the USB drive.
a. Use your arrow keys to select USB Device, then press Enter.
b. Windows starts from the recovery backup instead of the normal startup process.
- Select your keyboard type.
- Select Troubleshooting and then choose the type of recovery to use:
a. Click Advanced then System Restore to start Microsoft System Restore:
Microsoft System Restore periodically takes a 'snapshot' of your system settings and saves them as restore points. In most cases of hard-to-resolve software problems, you can return to one of these restore points to get your system running again.
b. Click Reset your PC to start the reset process:
Reset your PC deletes everything on your hard drive, then reinstalls Windows and all software and drivers that were pre-installed on your system. If you can access important files on your hard drive, back them up now. See "Reset your PC from the recovery backup" on page 27.
c. Click Refresh your PC to start the refresh process:
Refresh your PC will attempt to retain your files (user data) but will reinstall all software and drivers. Software installed since you purchased your PC will be removed (except software installed from the Windows Store). See "Refresh your PC from the recovery backup" on page 28.
Reset your PC from the recovery backup
Caution: Reset your PC will erase all files on your hard drive.
1. The Reset your PC window opens.
Images for reference only.
2. Click Next.
- Select the operating system to recover (normally only one option is available).
- Choose to keep any changes to the hard drive:
a. If you have deleted the recovery partition or otherwise changed the partitions on the hard drive and want to keep these changes, select No.
b. To completely restore your computer to Factory Settings, select Yes.
- Choose how to erase your files:
a. Just remove my files quickly erases all files before restoring your computer and takes about 30 minutes.
b. Fully clean the drive completely cleans the drive after each file is erased, so no files can be viewed after the recovery. Cleaning the drive takes much longer, up to 5 hours, but is much more secure as old files are completely removed.
6. Click Reset.
- After the recovery has finished, you can start using your computer by repeating the first-start process.
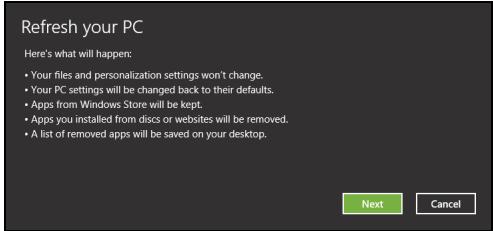
Refresh your PC from the recovery backup
- The Refresh your PC window opens.
Refresh your PC
Here's what will happen:
- Your files and personalization settings won't change.
- Your PC settings will be changed back to their defaults.
- Apps from Windows Store will be kept.
- Apps you installed from discs or websites will be removed.
A list of removed apps will be saved on your desktop.
Next
Cancel
- Click Next.
- Select the operating system to recover (normally only one option is available).
- Click Refresh.
- The recovery process begins by restarting your computer, then continues by copying files to your hard drive. This process takes about 30 minutes.
Acer Backup Manager
Note: This feature is only available on certain models.
Acer Backup Manager is a utility that enables you to do a variety of backup functions each accomplished in only three simple steps. You can even set these functions to automatically recur as often as your like.
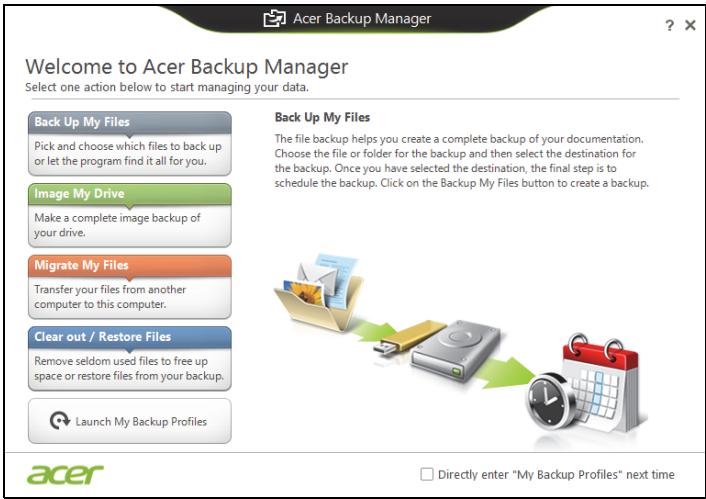
To start Acer Backup Manager in Windows 8, simply start typing "Backup Manager". Alternatively, in Desktop mode, select Acer Backup Manager. This opens the Welcome screen; from this screen you can select the type of backup you'd like to create.
- Back Up My Files: Select files to back up.
- Image My Drive: Create a backup file for the entire drive. You can burn this file to a DVD, save them to another drive on your computer*, or save them to removable media (i.e. a flash drive) to restore your computer at a later time.
- Migrate My Files: Allows you to copy files to a USB device so that you can migrate files from your old computer to your new one or any other computer with Acer Backup Manager.
- Clear out / Restore Files: Remove seldom used files to free up disk space or restore files from your backup.
Select the backup type you'd like to make and select the files or drive you want to back up, then follow the onscreen instructions:
-
Select the content you want to back up. The less content you select, the quicker the process will be, but it will increase your risks of losing data.
-
Select where you want the backup copies to be stored. Your options include removable media, a drive on your computer*, CD/DVD media, a remote PC, or the cloud using Microsoft SkyDrive.
- Select how often you want Acer Backup Manager to create backups.
Once you have finished these three steps, backups will be created according to the schedule.
*NOTE: You will need to select an external drive or your D: drive; Acer Backup Manager cannot store a backup on the source drive.
If you wish to change your settings at any time, go to the Acer Backup Manager profiles screen. To get there from the Acer Backup Manager welcome screen, click Launch My Backup Profiles.
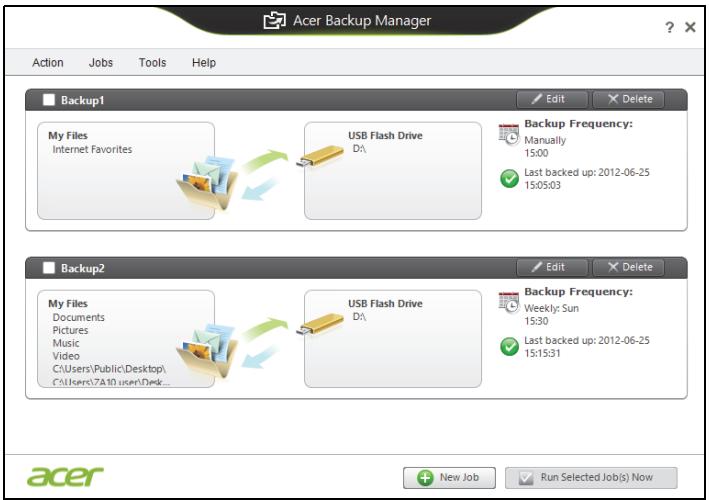
From here you can edit or delete existing backup profiles.
Power management
This computer has a built-in power management unit that monitors system activity. System activity refers to any activity involving one or more of the following devices: keyboard, mouse, hard disk, peripherals connected to the computer, and video memory. If no activity is detected for a period of time, the computer stops some or all of these devices in order to conserve energy.
Saving power
Disable Fast startup
Your computer uses Fast startup to start quickly, but also uses a small amount of power to check for signals to start. These checks will slowly drain your computer's battery.
If you prefer to reduce your computer's power requirements and environmental impact, turn off Fast startup:
Note: If Fast startup is off, your computer will take longer to start from Sleep. If your computer features Acer Instant On or Acer Always Connect, these will also be turned off.
Your computer will also not start if it receives an instruction to start over a network (Wake on LAN).
- Open the Desktop.
- Click Power Options in the Notification area.
-
Select More Power Options.
-
Select Choose what the power buttons do.
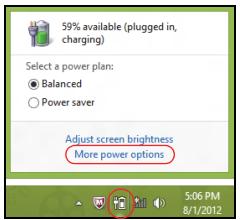
- To access Shutdown Settings, select Change settings that are currently unavailable.
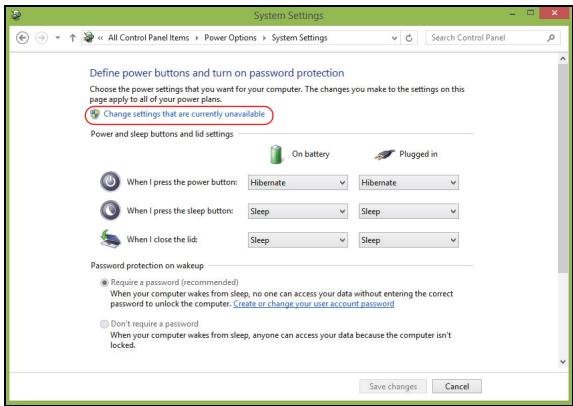
- Scroll down and disable Turn on fast startup.
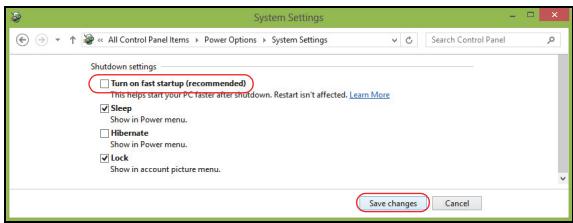
- Select Save changes.
Battery pack
The computer uses a battery pack that gives you long use between charges.
Battery pack characteristics
The battery pack has the following characteristics:
- Employs current battery technology standards.
- Delivers a battery-low warning.
The battery is recharged whenever you connect the computer to the AC adapter. Your computer supports charge-in-use, enabling you to recharge the battery while you continue to operate the computer. However, recharging with the computer turned off results in a significantly faster charge time.
The battery will come in handy when you travel or during a power failure. It is advisable to have an extra fully charged battery pack available as backup. Contact your dealer for details on ordering a spare battery pack.
Charging the battery
To charge the battery, first make sure that it is correctly installed in the battery bay. Plug the AC adapter into the computer, and connect to a mains power outlet. You can continue to operate your computer on AC power while your battery is charging. However, charging the battery with the computer turned off results in a significantly faster charge time.
Note: You are advised to charge the battery before retiring for the day. Charging the battery overnight before traveling enables you to start the next day with a fully charged battery.
Conditioning a new battery pack
Before you use a battery pack for the first time, there is a conditioning process that you should follow:
- Insert the new battery without turning the computer on.
- Connect the AC adapter and fully charge the battery.
- Disconnect the AC adapter.
- Turn on the computer and operate using battery power.
- Fully deplete the battery until the battery-low warning appears.
- Reconnect the AC adapter and fully charge the battery again.
Follow these steps again until the battery has been charged and discharged three times.
Use this conditioning process for all new batteries, or if a battery hasn't been used for a long time. If the computer is to be stored for more than two weeks, you are advised to remove the battery pack from the unit.
Warning! Do not expose battery packs to temperatures below 0^ C (32^ F) or above 45^ C (113^ F). Extreme temperatures may adversely affect the battery pack.
By following the battery conditioning process you condition your battery to accept the maximum possible charge. Failure to follow this procedure will prevent you from obtaining the maximum battery charge, and will also shorten the effective lifespan of the battery.
In addition, the useful lifespan of the battery is adversely affected by the following usage patterns:
- Using the computer on constant AC power with the battery inserted. If you want to use constant AC power, you are advised to remove the battery pack after it is fully charged.
- Not discharging and recharging the battery to its extremes, as described above.
- Frequent use; the more you use the battery, the faster it will reach the end of its effective life. A standard computer battery has a life span of about 300 charges.
Optimizing battery life
Optimizing battery life helps you get the most out of battery operation, prolonging the charge/recharge cycle and improving recharging efficiency.
You are advised to follow the suggestions set out below:
Purchase an extra battery pack.
- Use AC power whenever possible, reserving battery for on-the-go use.
- Eject a PC Card if it is not being used, as it will continue to draw power (for selected models).
- Store the battery pack in a cool, dry place. The recommended temperature is 10^ ( 50^ ) to 30^ ( 86^ ). Higher temperatures cause the battery to self-discharge faster.
- Excessive recharging decreases the battery life.
- Look after your AC adapter and battery.
Checking the battery level
The Windows power meter indicates the current battery level. Rest the cursor over the battery/power icon on the taskbar to see the battery's present charge level.
Battery-low warning
When using battery power pay attention to the Windows power meter.
Warning! Connect the AC adapter as soon as possible after the battery-low warning appears. Data will be lost if the battery to become fully depleted and the computer shuts down.
When the battery-low warning appears, the recommended course of action depends on your situation:
| Situation | Recommended Action |
| The AC adapter and a power outlet are available. | 1. Plug the AC adapter into the computer, and then connect to the mains power supply. 2. Save all necessary files. 3. Resume work. Turn off the computer if you want to recharge the battery rapidly. |
| An extra fully charged battery pack is available. | 1. Save all necessary files. 2. Close all applications. 3. Turn off the computer. 4. Replace the battery pack. 5. Turn on the computer and resume work. |
| The AC adapter or a power outlet is unavailable. You have no spare battery pack. | 1. Save all necessary files. 2. Close all applications. 3. Turn off the computer. |
Installing and removing the battery pack
Important: Before removing the battery from the unit, connect the AC adapter if you want to continue using your computer. Otherwise, turn off the computer first.
To install a battery pack:
- Align the battery with the open battery bay; make sure that the end with the contacts will enter first, and that the top surface of the battery is facing up.
- Slide the battery into the battery bay and gently push until the battery locks in place.
To remove a battery pack:
- Slide the battery release latch to release the battery.
- Pull the battery from the battery bay.
Traveling with your computer
This section gives you tips and hints to consider when moving around or traveling with your computer.
Disconnecting from the desktop
Follow these steps to disconnect your computer from external accessories:
- Save any open files.
- Remove discs from optical drive(s).
- Shut down the computer.
- Close the display cover.
- Disconnect the cord from the AC adapter.
- Disconnect the keyboard, pointing device, printer, external monitor and other external devices.
- Disconnect the Kensington lock if you are using one to secure the computer.
Moving around
When you are just moving within short distances, for example, from your office desk to a meeting room.
Preparing the computer
Before moving the computer, close and latch the display cover to place it in Sleep mode. You can now safely take the computer anywhere you go within the building. To bring the computer out of Sleep mode, open the display; then press and release the power button.
If you are taking the computer to a client's office or a different building, you may choose to shut down the computer:
Press the Windows key +
Or:
You can put the computer in Sleep mode by pressing Fn + F4 . Then close the display.
When you are ready to use the computer again, open the display; then press and release the power button.
Note: The computer may enter Hibernation or Deep Sleep mode after being in Sleep mode for a period of time.
What to bring to meetings
If your meeting is relatively short, you probably do not need to bring anything with you other than your computer. If your meeting will be longer, or if your battery is not fully charged, you may want to bring the AC adapter with you to plug in your computer in the meeting room.
If the meeting room does not have an electrical outlet, reduce the drain on the battery by putting the computer in Sleep mode. Press Fn + F4 or close the display cover whenever you are not actively using the computer.
Taking the computer home
When you are moving from your office to your home or vice versa.
Preparing the computer
After disconnecting the computer from your desktop, follow these steps to prepare the computer for the trip home:
- Check that you have removed all media and compact discs from the drive(s). Failure to remove the media can damage the drive head.
- Pack the computer in a protective case that can prevent the computer from sliding around and cushion it if it should fall.
Caution: Avoid packing items next to the top cover of the computer. Pressure against the top cover can damage the screen.
What to take with you
Unless you have some items at home, take the following items with you:
- AC adapter and power cord.
The printed setup poster.
Special considerations
Follow these guidelines to protect your computer while traveling to and from work:
-
Minimize the effects of temperature changes by keeping the computer with you.
-
If you need to stop for an extended period of time and cannot carry the computer with you, leave the computer in the trunk of the car to avoid exposing the computer to excessive heat.
- Changes in temperature and humidity can cause condensation. Allow the computer to return to room temperature, and inspect the screen for condensation before turning on the computer. If the temperature change is greater than 10^ ( 18^ ), allow the computer to come to room temperature slowly. If possible, leave the computer for 30 minutes in an environment with a temperature between outside and room temperature.
Setting up a home office
If you frequently work on your computer at home, you may want to purchase a second AC adapter for use at home. With a second AC adapter, you can avoid carrying the extra weight to and from home.
If you use your computer at home for significant periods of time, you might also want to add an external keyboard, monitor or mouse.
Traveling with the computer
When you are moving within a larger distance, for instance, from your office building to a client's office building or traveling locally.
Preparing the computer
Prepare the computer as if you were taking it home. Make sure that the battery in the computer is charged. Airport security may require you to turn on your computer when carrying it into the gate area.
What to take with you
Take the following items with you:
- AC adapter
- Spare, fully-charged battery pack(s)
Additional printer driver files if you plan to use another printer
Special considerations
In addition to the guidelines for taking the computer home, follow these guidelines to protect your computer while traveling:
Always take the computer as carry-on luggage.
- If possible, have the computer inspected by hand. Airport security X-ray machines are safe, but do not put the computer through a metal detector.
Traveling internationally with the computer
When you are moving from country to country.
Preparing the computer
Prepare the computer as you would normally prepare it for traveling.
What to bring with you
Bring the following items with you:
- AC adapter.
- Power cords that are appropriate for the country to which you are traveling.
- Spare, fully-charged battery packs.
Additional printer driver files if you plan to use another printer.
Proof of purchase, in case you need to show it to customs officials.
International Travelers Warranty passport.
Special considerations
Follow the same special considerations as when traveling with the computer.
In addition, these tips are useful when traveling internationally:
- When traveling in another country, check that the local AC voltage and the AC adapter power cord specifications are compatible. If not, purchase a power cord that is compatible with the local AC voltage. Do not use converter kits sold for appliances to power the computer.
- If you are using the modem, check if the modem and connector are compatible with the telecommunications system of the country you are traveling in.
Expanding through options
Your computer offers you a complete mobile computing experience.
Connectivity options
Ports allow you to connect peripheral devices to your computer as you would with a desktop PC. For instructions on how to connect different external devices to the computer, read the following sections.
Connecting to a network
Built-in network feature
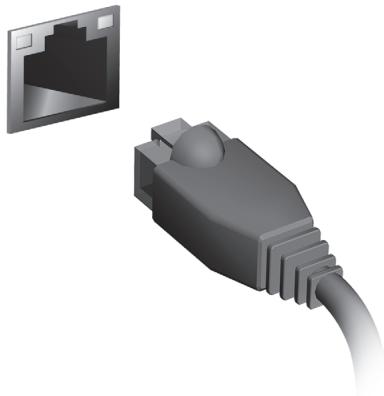
The built-in network feature allows you to connect your computer to an Ethernet-based network.
To use the network feature, connect an Ethernet cable from the Ethernet (RJ-45) port on the chassis of the computer to a network jack or hub on your network.
Wireless networks
Connecting to the Internet
Your computer's wireless connection is turned on by default.
Windows will detect and display a list of available networks during setup. Select your network and enter the password if required.
Otherwise, open Internet Explorer and follow the instructions.
Please refer to your ISP or router documentation.
Wireless networks
A wireless LAN or WLAN is a wireless local area network, which may link two or more computers without using wires. Setting up a wireless network is easy and allows you to share files, peripheral devices and an Internet connection.
What are benefits of a wireless network?
Mobility
Wireless LAN systems allow you and other users of your home network to share access to files and devices connected to the network, for example a printer or scanner.
Also you can share an internet connection with other computers in your home.
Installation speed and simplicity
Installing a wireless LAN system can be fast and easy and eliminates the need to pull cables through walls and ceilings.
Components of a wireless LAN
To set up your Wireless network at home you need to have the following:
Access point (router)
Access points (routers) are two-way transceivers that broadcast data into the surrounding environment. Access points act as a mediator between wired and wireless network. Most routers have a built-in DSL modem that will allow you access to a high speed DSL internet connection. The ISP (Internet Service Provider) you have chosen normally supplies a modem/rodter with the subscription to their services. Read carefully the documentation supplied with your Access point/rodter for detailed setup instructions.
ExpressCard
ExpressCards support a vast number of expansion options, including flash memory card adapters, TV-tuners, Bluetooth connectivity and IEEE 1394b adapters. ExpressCards support USB 2.0 and PCI Express applications.
Important: There are two types, ExpressCard/54 and ExpressCard/34 (54 mm and 34 mm), each with different functions. Not all ExpressCard slots will support both types. Please refer to your card's manual for details on how to install and use the card, and its functions.
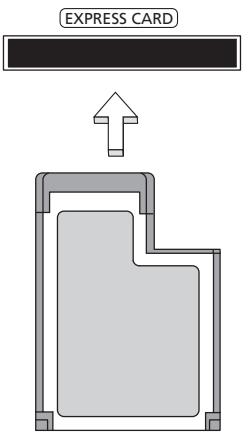
Inserting an ExpressCard
Insert the card into the slot and push gently until it clicks into position.
Ejecting an ExpressCard
Before ejecting an ExpressCard:
- Exit the application using the card.
- Left-click the remove hardware icon on the taskbar and stop the card operation.
- Push the card gently into the slot and release to pop out the card. Then pull the card free from the slot.
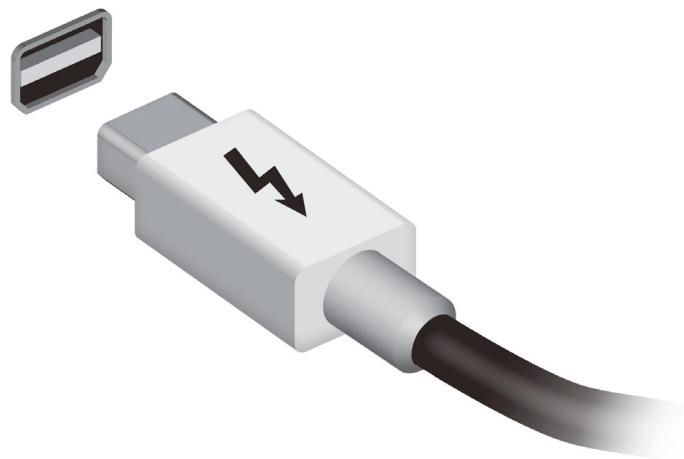
Thunderbolt
Thunderbolt is a high-speed connection that supports storage devices as well as external displays. It is compatible with the DisplayPort standard.
Note: Up to six Thunderbolt devices and one DisplayPort display can be daisy-chained, however, the DisplayPort display will be the last device in the chain, and it cannot be preceded by a Thunderbolt display.
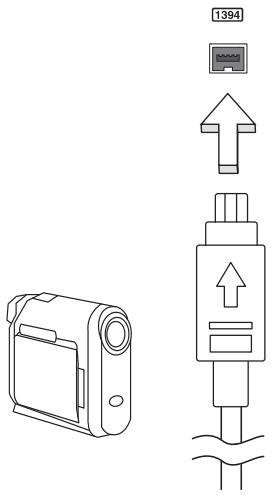
IEEE 1394 port
The computer's IEEE 1394 port allows you to connect to an IEEE 1394-compatible device like a video camera or digital camera. See your video or digital camera's documentation for details.
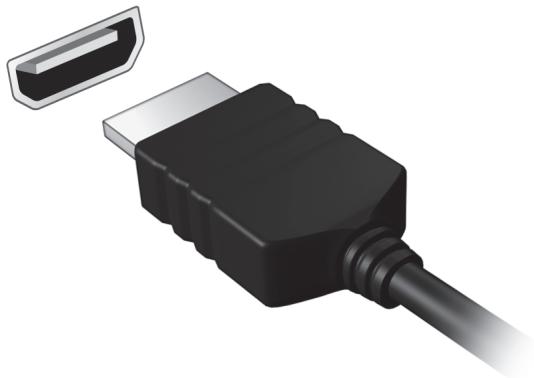
HDMI
HDMI (High-Definition Multimedia Interface) is an industry-supported, uncompressed, all-digital audio/video interface. HDMI provides an interface between any compatible digital audio/video source, such as a set-top box, DVD player, and A/V receiver and a compatible digital audio and/or video monitor, such as a digital television (DTV), over a single cable.
Use the HDMI port on your computer to connect with high-end audio and video equipment. Single cable implementation allows tidy setup and fast connection.
Universal Serial Bus (USB)
The USB port is a high-speed serial bus which allows you to connect USB peripherals without taking up system resources.
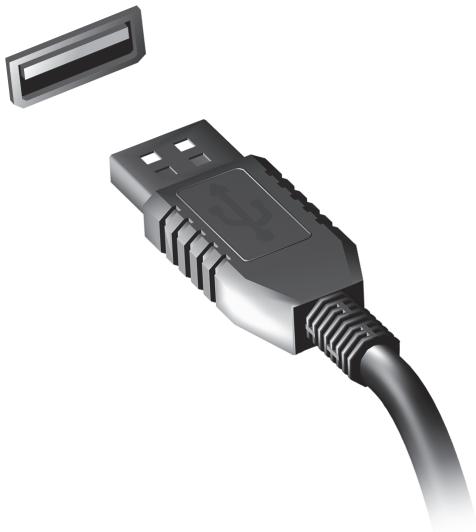
Playing DVD movies
When the DVD drive module is installed in the optical drive bay, you can play DVD movies on your computer.
- Insert a DVD.
- The DVD movie will automatically play after a few seconds.
Important: When you launch the DVD player for the first time, the program asks you to enter the region code. DVDs are available for 6 regions.
| Region code | Country or region |
| 1 | USA, Canada |
| 2 | Europe, Middle East, South Africa, Japan |
| 3 | Southeast Asia, Taiwan, South Korea |
| 4 | Latin America, Australia, New Zealand |
| 5 | Former USSR, parts of Africa, India |
| 6 | People's Republic of China |
Note: To change the region code, insert a DVD movie of a different region into the DVD drive.
Once your DVD drive is set to a region code, it will only play DVDs for that region. You can set the region code a maximum of five times (including the first time), after which the last region code set will remain permanent.
Recovering your hard disk does not reset the number of times the region code has been set.
Upgrading memory
Follow these steps to install memory:
- Turn off the computer, unplug the AC adapter (if connected) and remove the battery pack. Then turn the computer over to access its base.
- Remove the screws from the memory cover; then lift and remove the memory cover.
- (a) Insert the memory module diagonally into the slot, then (b) gently press it down until it clicks into place.
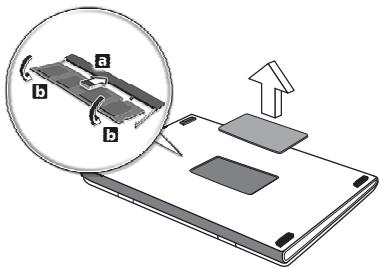
- Replace the memory cover and secure it with the screw.
- Reinstall the battery pack, and reconnect the AC adapter.
- Turn on the computer.
The computer automatically detects and reconfigures the total memory size.
BIOS utility
The BIOS utility is a hardware configuration program built into your computer's BIOS.
Your computer is already properly configured and optimized, and you do not need to run this utility. However, if you encounter configuration problems, you may need to run it.
To activate the BIOS utility, press <F2> during the POST while the computer logo is being displayed.
Boot sequence
To set the boot sequence in the BIOS utility, activate the BIOS utility, then select Boot from the categories listed at the top of the screen.
Setting passwords
To set a password on boot, activate the BIOS utility, then select Security from the categories listed at the top of the screen. Find Password on boot: and use the
Frequently asked questions
The following is a list of possible situations that may arise during the use of your computer. Easy solutions are provided for each one.
I turned on the power, but the computer does not start or boot up. Look at the power indicator:
-
If it is not lit, no power is being supplied to the computer. Check the following:
-
If you are using on the battery, it may be low and unable to power the computer. Connect the AC adapter to recharge the battery pack.
- Make sure that the AC adapter is properly plugged into the computer and to the power outlet.
If it is lit, check the following:
- Is a disc in the optical drive? Remove it and press <Ctrl> + <Alt> + <Del> to restart the system.
- Do you have a USB storage device (USB disk or smartphone) plugged into your computer? Unplug it and press <Ctrl> + <Alt> + <Del> to restart the system.
Nothing appears on the screen
The computer's power management system automatically blanks the screen to save power. Press any key to turn the display back on.
If pressing a key does not turn the display back on, three things might be the cause:
- The brightness level might be too low. Press <Fn> + <> (increase) to adjust the brightness level.
- The display device might be set to an external monitor. Press the display toggle hotkey <Fn> + <F5> to toggle the display back to the computer.
- If the Sleep indicator is lit, the computer is in Sleep mode. Press and release the power button to resume.
No audio is heard from the computer
Check the following:
-
The volume may be muted. In Windows, look at the volume control (speaker) icon on the taskbar. If it is crossed-out, click the icon and deselect the Mute all option.
-
The volume level may be too low. In Windows, look at the volume control icon on the taskbar. You can also use the volume control buttons to adjust the volume.
- If headphones, earphones or external speakers are connected to the line-out port on the computer, the internal speakers automatically turn off.
I want to eject the optical drive tray without turning on the power. There is a mechanical eject hole on the optical drive. Simply insert the tip of a pen or paperclip into the hole and push to eject the tray.
The keyboard does not respond
Try attaching an external keyboard to a USB port on the computer. If it works, contact your dealer or an authorized service center as the internal keyboard cable may be loose.
The printer does not work
Check the following:
- Make sure that the printer is connected to a power outlet and that it is turned on.
- Make sure that the printer cable is connected securely to a USB port and the corresponding port on the printer.
Requesting service
International Travelers Warranty (ITW)
Your computer is backed by an International Travelers Warranty (ITW) that gives you security and peace of mind when traveling. Our worldwide network of service centers are there to give you a helping hand.
An ITW passport comes with your computer. This passport contains all you need to know about the ITW program. A list of available, authorized service centers is in this handy booklet. Read this passport thoroughly.
Always have your ITW passport on hand, especially when you travel, to receive the benefits from our support centers. Place your proof-of-purchase in the flap located inside the front cover of the ITW passport.
If the country you are traveling in does not have an Acer-authorized ITW service site, you can still get in contact with our offices worldwide. Please visit www.acer.com.
Before you call
Please have the following information available when you call Acer for online service, and please be at your computer when you call. With your support, we can reduce the amount of time a call takes and help solve your problems efficiently. If there are error messages or beeps reported by your computer, write them down as they appear on the screen (or the number and sequence in the case of beeps).
You are required to provide the following information:
Name:
Address:
Telephone number:
Machine and model type:
Serial number:
Date of purchase:
Troubleshooting
This chapter shows you how to deal with common system problems.
Read it before calling a technician if a problem occurs. Solutions to more serious problems require opening up the computer. Do not attempt to open the computer yourself; contact your dealer or authorized service center for assistance.
Troubleshooting tips
This computer incorporates an advanced design that delivers onscreen error message reports to help you solve problems.
If the system reports an error message or an error symptom occurs, see "Error messages" below. If the problem cannot be resolved, contact your dealer. See "Requesting service" on page 53.
Error messages
If you receive an error message, note the message and take the corrective action. The following table lists the error messages in alphabetical order together with the recommended course of action.
| Error messages | Corrective action |
| CMOS battery bad | Contact your dealer or an authorized service center. |
| CMOS checksum error | Contact your dealer or an authorized service center. |
| Disk boot failure | Insert a system (bootable) disk, then press <Enter> to reboot. |
| Equipment configuration error | Press <F2> (during POST) to enter the BIOS utility, then press Exit in the BIOS utility to reboot. |
| Hard disk 0 error | Contact your dealer or an authorized service center. |
| Hard disk 0 extended type error | Contact your dealer or an authorized service center. |
| I/O parity error | Contact your dealer or an authorized service center. |
| Keyboard error or no keyboard connected | Contact your dealer or an authorized service center. |
| Keyboard interface error | Contact your dealer or an authorized service center. |
| Memory size mismatch | Press <F2> (during POST) to enter the BIOS utility, then press Exit in the BIOS utility to reboot. |
If you still encounter problems after going through the corrective measures, please contact your dealer or an authorized service center for assistance.
Tips and hints for using Windows 8
We know this is a new operating system that will take some getting used to, so we've created a few pointers to help you get started.
Three concepts you might want to keep in mind
1. Start
The Start button is no longer available; you can launch apps from the Start screen.
2. Tiles
Live tiles are similar to thumbnails of the apps.
3. Charms
Charms allow you to perform useful functions, such as sharing content, turning off your PC or changing settings.
How do I access the charms?
Move the cursor to the upper or lower right-hand corner of the screen to access the charms, or press the Windows key +
How do I get to Start?
Press the Windows key on the keyboard; press the Windows key +
How do I jump between apps?
Move the cursor to the left-hand edge of the screen to view thumbnails of apps that are currently running.
You may also press the Windows key +
How do I turn off my computer?
Press the Windows key +
Why is there a new interface?
The new interface for Windows 8 is designed to work well with touch input. Windows Store apps will automatically use the whole screen and don't
require closing in the traditional way. Windows Store apps will be displayed on Start using live-tiles.
What are 'live tiles?'
Live tiles are similar to thumbnails of the apps that will be updated with new content whenever you're connected to the Internet. So, for example, you can view weather or stock updates without needing to open the app.
How do I unlock my computer?
Press the any key and click on a user account icon to unlock the computer. If your account has a password set, you will need to enter the password to continue.
How do I personalize my computer?
You can personalize Start with a different background image or by arranging the tiles to suit your personal needs.
To change the background, press the Windows key +
How do I move tiles?
Click and hold a tile to select it, then drag it to the place on Start that you want it to appear. Other tiles will be moved to accommodate the tile in its new location.
Can I make tiles bigger or smaller?
Right-click on a tile, then select Smaller or Larger from the menu that appears at the bottom of the screen.
How do I personalize the Lock screen?
You can personalize the lock screen with a different image or to show you quick status and notifications to suit your personal needs.
To change the background, press the Windows key +
So, how do I close an app?
Move the cursor to the top of the screen and click and drag the window downwards to close the app.
You can close apps from the thumbnails on the left-hand edge of the screen by right-clicking on a thumbnail and selecting Close.
Can I change the screen resolution?
From Start, start typing 'Control Panel' to open Search and display the results; click Control Panel > Adjust screen resolution.
I want to use Windows in the way that I'm used to - give me my desktop back!
From Start click the Desktop tile to see a traditional desktop. You can pin apps you frequently use to the taskbar to easily open them.
If you click an app that is not a Windows Store app, Windows will automatically open the app using Desktop.
Where are my apps?
From Start, simply start typing the name of the app you would like to open, and Search will automatically open and list results.
To view the complete list of apps, press the space bar or the Menu key and click All apps.
How do I make an app appear on Start?
If you're in All apps and you want to make an app appear on Start, you can select the app and right-click on it. Select Pin to Start from the menu that appears at the bottom of the screen.
How do I remove a tile from Start?
Right-click the tile and click Unpin from Start from the menu that appears at the bottom of the screen.
How do I make an app appear on my taskbar in Desktop?
If you're in All apps and you want to make an app appear on the taskbar in Desktop, you can select the app and right-click on it. Select Pin to taskbar from the menu that appears at the bottom of the screen.
How do I install apps?
You can download Windows Store apps from Store. You will need to have a Microsoft ID to purchase and download apps from Store.
I can't find apps like Notepad and Paint! Where are they?
From Start you can simply start typing the name of the app you're looking for to open Search and list the results. Alternatively, open All apps and scroll to 'Windows Accessories' to see the list of legacy programs.
What is a Microsoft ID (account)?
A Microsoft account is an email address and password that you use to sign in to Windows. You can use any email address, but it is best if you choose the one you already use to communicate with friends and sign in to your favorite websites. When you sign in to your PC with a Microsoft account, you'll connect your PC to the people, files, and devices you care about.
Do I need one?
You do not need a Microsoft ID to use Windows 8, but it makes life easier because you can sync data across different machines you sign in to using a Microsoft ID.
How do I get one?
If you've already installed Windows 8 and didn't sign in with a Microsoft account or you don't have a Microsoft account and want to get one, press the Windows key +
How do I add a favorite to Internet Explorer?
Internet Explorer 10 doesn't have traditional favorites, instead you can pin shortcuts to Start. Once you have the page open, right-click anywhere on the page to open the menu at the bottom of the screen. Click Pin to Start.
How do I check for Windows updates?
Press the Windows key +
Where can I get more information?
For more information please visit:
- Windows 8 tutorials: www.acer.com/windows8-tutorial
- Support FAQs: www.acer.com/support
Regulations and safety notices
FCC STATEMENT
This device has been tested and found to comply with the limits for a Class B digital device pursuant to Part 15 of the FCC rules. These limits are designed to provide reasonable protection against harmful interference in a residential installation. This device generates, uses, and can radiate radio frequency energy and, if not installed and used in accordance with the instructions, may cause harmful interference to radio communications.
However, there is no guarantee that interference will not occur in a particular installation. If this device does cause harmful interference to radio or television reception, which can be determined by turning the device off and on, the user is encouraged to try to correct the interference by one or more of the following measures:
- Reorient or relocate the receiving antenna.
- Increase the separation between the device and receiver.
- Connect the device into an outlet on a circuit different from that to which the receiver is connected.
- Consult the dealer or an experienced radio/television technician for help.
Notice: Shielded cables
All connections to other computing devices must be made using shielded cables to maintain compliance with FCC regulations.
NOTICE: PERIPHERAL DEVICES
Only peripherals (input/output devices, terminals, printers, etc.) certified to comply with the Class B limits may be attached to this equipment. Operation with non-certified peripherals is likely to result in interference to radio and TV reception.
Caution: Changes or modifications not expressly approved by the manufacturer could void the user's authority, which is granted by the Federal Communications Commission, to operate this computer.
NOTICE FOR CANADA
This Class B digital apparatus complies with Canadian ICES-003.
The LCD unit is produced with high-precision manufacturing techniques. Nevertheless, some pixels may occasionally misfire or appear as black or red dots. This has no effect on the recorded image and does not constitute a malfunction.
RADIO DEVICE REGULATORY NOTICES
Note: Below regulatory information is for models with wireless LAN and / or Bluetooth only.
To prevent radio interference to the licensed service, this device is intended to be operated indoors.
This product complies with the radio frequency and safety standards of any country or region in which it has been approved for wireless use. Depending on configurations, this product may or may not contain wireless radio devices (such as wireless LAN and/or Bluetooth modules). Below information is for products with such devices.
Declaration of Conformity for EU countries
Hereby, Acer, declares that this computer is in compliance with the essential requirements and other relevant provisions of Directive 1999/5/EC.
Wireless operation channels for different domains
N. America
2.412-2.462 GHz
Ch01 through Ch11
Japan
2.412-2.484 GHz
Ch01 through Ch14
Europe ETSI
2.412-2.472 GHz
Ch01 through Ch13
France: Restricted wireless frequency bands
Some areas of France have a restricted frequency band. The worst case maximum authorized power indoors is:
- 10 mW for the entire 2.4 GHz band (2400 MHz - 2483.5 MHz)
- 100 mW for frequencies between 2446.5 MHz and 2483.5 MHz
Note: Channels 10 through 13 inclusive operate in the band 2446.6 MHz to 2483.5 MHz.
There are few possibilities for outdoor use: On private property or on the private property of public persons, use is subject to a preliminary authorization procedure by the Ministry of Defense, with maximum authorized power of 100mW in the 2446.5 - 2483.5 MHz band. Use outdoors on public property is not permitted.
In the departments listed below, for the entire 2.4 GHz band:
Maximum authorized power indoors is 100mW
Maximum authorized power outdoors is 10mW
Departments in which the use of the 2400 - 2483.5 MHz band is permitted with an EIRP of less than 100mW indoors and less than 10mW outdoors:
| 01 Ain Orientales | 25 Doubs | 59 Nord | 71 Saone et Loire |
| 02 Aisne | 26 Drome | 60 Oise | 75 Paris |
| 03 Allier | 32 Gers | 61 Orne | 82 Tarn et Garonne |
| 05 Hautes Alpes | 36 Indre | 63 Puy Du Dome | 84 Vaucluse |
| 08 Ardennes | 37 Indre et Loire | 64 Pyrenees | 88 Vosges |
| 09 Ariege | 41 Loir et Cher | Atlantique | 89 Yonne |
| 11 Aude | 45 Loret | 66 Pyrenees | 90 Territoire de |
| 12 Aveyron | 50 Manche | 67 Bas Rhin | Belfort |
| 16 Charente | 55 Meuse | 68 Haut Rhin | 94 Val de Marne |
| 24 Dordogne | 58 Nievre | 70 Haute Saone |
This requirement is likely to change over time, allowing you to use your wireless LAN card in more areas within France.
Please check with ART for the latest information (www.artelecom.fr).
Note: Your WLAN Card transmits less than 100 mW, but more than 10 mW.
List of national codes
This equipment may be operated in the following countries:
| Country | ISO 3166 | Country | ISO 3166 |
| 2 letter code | 2 letter code | ||
| Austria | AT | Malta | MT |
| Belgium | BE | Netherlands | NT |
| Cyprus | CY | Poland | PL |
| Czech Republic | CZ | Portugal | PT |
| Denmark | DK | Slovakia | SK |
| Estonia | EE | Slovenia | SL |
| Finland | FI | Spain | ES |
| France | FR | Sweden | SE |
| Germany | DE | United Kingdom | GB |
| Greece | GR | Iceland | IS |
| Hungary | HU | Liechtenstein | LI |
| Ireland | IE | Norway | NO |
| Italy | IT | Switzerland | CH |
| Latvia | LV | Bulgaria | BG |
| Lithuania | LT | Romania | RO |
| Luxembourg | LU | Turkey | TR |
CANADA - LOW-POWER LICENSE-EXCEPT RADIO COMMUNICATION DEVICES (RSS-210)
Exposure of humans to RF fields (RSS-102)
The computer employs low gain integral antennas that do not emit RF field in excess of Health Canada limits for the general population; consult Safety Code 6, obtainable from Health Canada's website at www.hc-sc.gc.ca/rpb.
This device complies with RSS210 of Industry Canada.
This Class B digital apparatus complies with Canadian ICES-003, Issue 4, and RSS-210, No 4 (Dec 2000) and No 5 (Nov 2001).
"To prevent radio interference to the licensed service, this device is intended to be operated indoors and away from windows to provide maximum shielding. Equipment (or its transmit antenna) that is installed outdoors is subject to licensing."
Caution: When using IEEE 802.11a wireless LAN, this product is restricted to indoor use due to its operation in the 5.15- to 5.25-GHz frequency range. Industry Canada requires this product to be used indoors for the frequency range of 5.15 GHz to 5.25 GHz to reduce the potential for harmful interference to co-channel mobile satellite systems. High power radar is allocated as the primary user of the 5.25 to 5.35 GHz and 5.65 to 5.85-GHz bands. These radar stations can cause interference with and/or damage to this device.
The maximum allowed antenna gain for use with this device is 6 dBi in order to comply with the E.I.R.P limit for the 5.25- to 5.35 and 5.725 to 5.85 GHz frequency range in point-to-point operation.
The FCC RF safety requirement
The radiated output power of the wireless LAN Mini PCI Card and Bluetooth card is far below the FCC radio frequency exposure limits. Nevertheless, the computer shall be used in such a manner that the potential for human contact during normal operation is minimized as follows:
- Users are requested to follow the RF safety instructions on wireless option devices that are included in the user's manual of each RF option device.
Caution: To comply with FCC RF exposure compliance requirements, a separation distance of at least 20~cm (8 inches) must be maintained between the antenna for the integrated wireless LAN Mini PCI Card built in to the screen section and all persons.
Note: The wireless Mini PCI adapter implements a transmission diversity function. The function does not emit radio frequencies simultaneously from both antennas. One of the antennas is selected automatically or
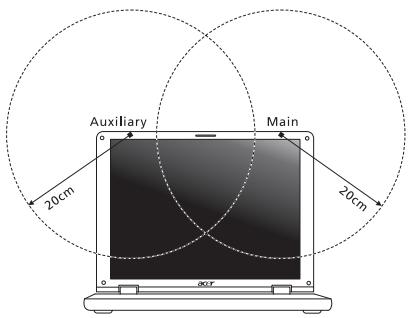
manually (by users) to ensure good quality radiocommunication.
- This device is restricted to indoor use due to its operation in the 5.15 to 5.25 GHz frequency range. FCC requires this product to be used indoors for the frequency range 5.15 to 5.25 GHz to reduce the potential for harmful interference to co-channel Mobile Satellite systems.
- High power radar is allocated as the primary user of the 5.25 to 5.35 GHz and 5.65 to 5.85 GHz bands. These radar stations can cause interference with and/or damage this device.
- An improper installation or unauthorized use may cause harmful interference to radio communications. Also any tampering of the internal antenna will void the FCC certification and your warranty.
CANADA - LOW-POWER LICENSE-EXEMPT RADIO COMMUNICATION DEVICES (RSS-210)
Exposure of humans to RF fields (RSS-102)
The computer employs low gain integral antennas that do not emit RF field in excess of Health Canada limits for the general population; consult Safety Code 6, obtainable from Health Canada's website at www.hc-sc.gc.ca/rpb.
This device complies with RSS210 of Industry Canada.
This Class B digital apparatus complies with Canadian ICES-003, Issue 4, and RSS-210, No 4 (Dec 2000) and No 5 (Nov 2001).
"To prevent radio interference to the licensed service, this device is intended to be operated indoors and away from windows to provide maximum shielding. Equipment (or its transmit antenna) that is installed outdoors is subject to licensing."
Caution: When using IEEE 802.11a wireless LAN, this product is restricted to indoor use due to its operation in the 5.15- to 5.25-GHz frequency range. Industry Canada requires this product to be used indoors for the frequency range of 5.15 GHz to 5.25 GHz to reduce the potential for harmful interference to co-channel mobile satellite systems. High power radar is allocated as the primary user of the 5.25 to 5.35 GHz and 5.65 to 5.85-GHz bands. These radar stations can cause interference with and/or damage to this device.
The maximum allowed antenna gain for use with this device is 6 dBi in order to comply with the E.I.R.P limit for the 5.25- to 5.35 and 5.725 to 5.85 GHz frequency range in point-to-point operation.
Gamme TravelMate
www.acer-group.com/public/Sustainability/sustainability01.htm.
Acer Office Manager 11
Console du Acer Office Manager 11
Tableau de bord 11
Acer Backup Manager 34
Considerations speciales 45
Customized Restore (Retain User Data)
Welcome to Acer Backup Manager
Select one action below to start managing your data.
Back Up My Files
Pick and choose which files to back up or let the program find it all for you.
Image My Drive
Make a complete image backup of your drive.
Migrate My Files
Transfer your files from another computer to this computer.
Clear out / Restore Files
Remove seldom used files to free up space or restore files from your backup.

Launch My Backup Profiles
Back Up My Files
The file backup helps you create a complete backup of your documentation. Choose the file or folder for the backup and then select the destination for the backup. Once you have selected the destination, the final step is to schedule the backup. Click on the Backup My Files button to create a backup.


Directly enter "My Backup Profiles" next time
This Class B digital apparatus complies with Canadian ICES-003.
This Class B digital apparatus complies with Canadian ICES-003, Issue 4, and RSS-210, No 4 (Dec 2000) and No 5 (Nov 2001).
"To prevent radio interference to the licensed service, this device is intended to be operated indoors and away from windows to provide maximum shielding. Equipment (or its transmit antenna) that is installed outdoors is subject to licensing."
CLASS 1 LASER PRODUCT
ACHTUNG: INVISIBLE LASER RADIATION WHEN OPEN. AVOID EXPOSURE TO BEAM.
APPAREIL A LASER DE CLASSE 1 PRODUIT
LASERATTENTION: RADIATION DU FAISCEAU LASER INVISIBLE EN CAS
D'OUVERTURE. EVITTER Toute EXPOSITION AUX RAYONS.
LUOKAN 1 LASERLAITE LASER KLASSE 1
VORSICH: UNSICHTBARE LASERSTRAHLUNG, WENN ABDECKUNG GÖFFNET; NICT DEM STRAHL AUSSETZEN.
PRODUCTO LASER DE LA CLASEI
ADVERTENCIA: RADIACION LÁSER INVISIBLE AL SER ABIERTO. EVITE EXPONERSE A LOS RAYOS.
ADVARSEL: LASERSTRÄLING VEDÄBNING SE IKKE IND I STRÄLEN.
VARO! LAVATTAESSA OLET ALTTINA LASERSATEILYLLE.
VARNING: LASERSTRÄLNING NÄR DENNA DEL ÅR ÖPPNAD ÅLÄ TUIJOTA SÄTESEENSTIRRA EJ IN I STRÄLEN.
VARNING: LASERSTRÄLNING NAR DENNA DEL ÅR ÖPPNADSTIRRA EJ IN I STRÄLEN.
ADVARSEL: LASERSTRÄLING NAR DEKSEL ÅPNESSTIRR IKKE INN I STRÄLEN.
Acer Office Manager 12
Acer Office Manager Console 12
12
Client-Manager 14
Richtlinien 15
Assets 17
Aufgabenplanung 18
Einstellungen 19
Acer Backup Manager 37
Acer Office Manager Console
Customized Restore (Retain User Data)
Welcome to Acer Backup Manager
Select one action below to start managing your data.
Back Up My Files
Pick and choose which files to back up or let the program find it all for you.
Image My Drive
Make a complete image backup of your drive.
Migrate My Files
Transfer your files from another computer to this computer.
Clear out / Restore Files
Remove seldom used files to free up space or restore files from your backup

Launch My Backup Profiles
Back Up My Files
The file backup helps you create a complete backup of your documentation. Choose the file or folder for the backup and then select the destination for the backup. Once you have selected the destination, the final step is to schedule the backup. Click on the Backup My Files button to create a backup.
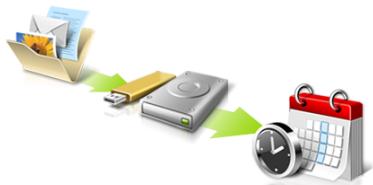

Directly enter "My Backup Profiles" next time

www.acer-group.com/public/Sustainability/sustainability01.htm.
Avverenza mercurio
Acer Office Manager 12
Acer Office Manager Console 12
Acer Backup Manager 33
Installing and removing the battery pack 39
Come arriv o a Start? 62
Acer Office Manager Console
Welcome to Acer Backup Manager
Select one action below to start managing your data.
Back Up My Files
Pick and choose which files to back up or let the program find it all for you.
Back Up My Files
The file backup helps you create a complete backup of your documentation. Choose the file or folder for the backup and then select the destination for the backup. Once you have selected the destination, the final step is to schedule the backup. Click on the Backup My Files button to create a backup.
Image My Drive
Make a complete image backup of your drive.
Migrate My Files
Transfer your files from another computer to this computer.
Clear out / Restore Files
Remove seldom used files to free up space or restore files from your backup.

Launch My Backup Profiles

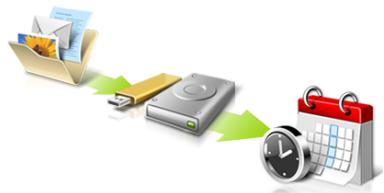

Directly enter "My Backup Profiles" next time.
Installing and removing the battery pack
Concession a Internet
ITW (International Traveler's Warranty)
Come arriv o a Start?
CLASS 1 LASER PRODUCT
PRECAUCION: INVISIBLE LASER RADIATION WHEN OPEN. AVOID EXPOSURE TO BEAM.
APPAREIL A LASER DE CLASSE 1 PRODUIT
LASERATTENTION: RADIATION DU FAISCEAU LASER INVISIBLE EN CAS D'OUVERTURE. EVITTER TOUTE EXPOSITION AUX RAYONS.
LUOKAN 1 LASERLAITE LASER KLASSE 1
VORSICHT: UNSICHTBARE LASERSTRAHUNG, WENN ABDECKUNG GEOFFNET NICTD DEM STRAHLL AUSSETZEN.
PRODUCTO LÁSER DE LA CLASE I
ADVERTENCIA: RADIACION LÁSER INVISIBLE AL SER ABIERTO. EVITE EXPONERSE A LOS RAYOS.
ADVARSEL: LASERSTRÄLING VEDÄNBING SE IKKE IND I STRÄLEN.
VARO! LAVATTAESSA OLET ALTTINA LASERSATEILYLLE.
VARNING: LASERSTRALNING NAR DENNA DEL AR ÖPPNAD ALA TUIJOTA SATEESEENSTIRRA EJ IN I STRÄLEN.
VARNING: LASERSTRÄLNING NAR DENNA DEL ÅR ÖPPNADSTIRRA EJ IN I STRÄLEN.
ADVARSEL: LASERSTRÄLING NAR DEKSEL ÅPNESSTIRR IKKE INN I STRÄLEN.
Acer Office Manager 11
Consola de Acer Office Manager 11
Panel 11
Gestor de clients 12
Políticas 13
Activos 14
Programador de tareas 15
Configuración 16
Recuperación 17
Acer Backup Manager 32
Customized Restore (Retain User Data)
CLASS 1 LASER PRODUCT
CAUTION: INVISIBLE LASER RADIATION WHEN OPEN. AVOID EXPOSURE TO BEAM.
APPAREIL A LASER DE CLASSE 1 PRODUIT
LASERATTENTION: RADIATION DU FAISCEAU LASER INVISIBLE EN CAS D'OUVERTURE. EVITTER TOUTE EXPOSITION AUX RAYONS.
LUOKAN 1 LASERLAITE LASER KLASSE 1
VORSICHT: UNSICHTBARE LASERSTRAHUNG, WENN ABDECKUNG GEÖFFNET NICTH DEM STRAHLL AUSSETZEN.
PRODUCTO LÁSER DE LA CLASE I
ADVERTENCIA: RADIACION LÁSER INVISIBLE AL SER ABIERTO. EVITE EXPONERSE A LOS RAYOS.
ADVARSEL: LASERSTRÄLING VEDÄNBING SE IKKE IND I STRÄLEN.
VARO! LAVATTAESSA OLET ALTTINA LASERSATEILYLLE.
VARNING: LASERSTRALNING NÄR DENNA DEL ÅR ÖPPNAD ÅLÄ TUIJOTA SATEESEENSTIRRA EJ IN I STRÄLEN.
VARNING: LASERSTRALNING NAR DENNA DEL AR ÖPPNADSTIRRA EJ IN I STRÄLEN.
ADVARSEL: LASERSTRÄLING NAR DEKSEL ÅPNESSTIRR IKKE INN I STRÄLEN.
www.acer-group.com/public/Sustainability/sustainability01.htm.
Aconsehamento relativ a mercúrio
Acer Office Manager 11
Acer Backup Manager 32
Gestao de energia 34
Poupar energia 34
Bacteria 36
36
Carregar a bateria 36
Inicie AcerRecovery Management:
- A partir de Iniciar, introduza 'Recovery' e(before clique em Acer Recovery Management na lista de aplicacoes.
Customized Restore (Retain User Data)
This Class B digital apparatus complies with Canadian ICES-003.
www.hc-ssc.gc.ca/rpb.
LASERPRODUCT KLASSE 1
VOORZICTIG: ONZICTBARE LASERSTRALING INDIEN GEOPEND.
VOORKOM BLOODSTELLING AAN STRAAL.
APPAREIL A LASER DE CLASSE 1 PRODUIT
LASERATTENTION: RADIATION DU FAISCEAU LASER INVISIBLE EN CAS D'OUVERTURE. EVITTER TOUTE EXPOSITION AUX RAYONS.
LUOKAN 1 LASERLAITE LASER KLASSE 1
VORSICHT: UNSICHTBARE LASERSTRAHUNG, WENN ABDECKUNG GEÖFFNET NICTH DEM STRAHLL AUSSETZEN
PRODUCTO LAsER DE LA CLASEI
ADVERTENCIA: RADIACION LÁSER INVISIBLE AL SER ABIERTO. EVITE EXPONERSE A LOS RAYOS.
ADVARSEL: LASERSTRÄLING VEDÄBNING SE IKKE IND I STRÄLEN.
VARO! LAVATTAESSA OLET ALTTINA LASERSATEILYLLE.
VARNING: LASERSTRALNING NAR DENNA DEL AR ÖPPNAD ALA TUIJOTA SATEESEENSTIRRA EJ IN I STRÄLEN
VARNING: LASERSTRÄLNING NAR DENNA DEL ÅR ÖPPNADSTIRRA EJ IN I STRÄLEN
ADVARSEL: LASERSTRÄLING NAR DEKSEL ÅPNESSTIRR IKKE INN I STRÄLEN
Acer Backup Manager 33
Energiebeheer 35
Stand-by 35
Accu 37
Verbindingmake meteennetwork 47
Geheugen upgraden 56
BIOS utility 57
Opstartreeks 57
Diskaar disk herstilenschakelen 57
Acer Office Manager Console
Start Acer Recovery Management
Welcome to Acer Backup Manager
Select one action below to start managing your data.
Back Up My Files
Pick and choose which files to back up or let the program find it all for you.
Back Up My Files
The file backup helps you create a complete backup of your documentation. Choose the file or folder for the backup and then select the destination for the backup. Once you have selected the destination, the final step is to schedule the backup. Click on the Backup My Files button to create a backup.
Image My Drive
Make a complete image backup of your drive.
Migrate My Files
Transfer your files from another computer to this computer.
Clear out / Restore Files
Remove seldom used files to free up space or restore files from your backup.

Launch My Backup Profiles


Directly enter "My Backup Profiles" next time.
ITW (International Travelers Warranty)
This Class B digital apparatus complies with Canadian ICES-003.
www.hc-sc.gc.ca/rpb.
KLASSE 1 LASERPRODUKT
FORSIKTIG: USYNLIG LASERSTRALING I APEN TILSTAND. UNNGA STRALEN.
APPAREIL A LASER DE CLASSE 1 PRODUIT
LASERATTENTION: RADIATION DU FAISCEAU LASER INVISIBLE EN CAS
D'OUVERTURE. EVITTER Toute EXPOSITION AUX RAYONS.
LUOKAN 1 LASERLAITE LASER KLASSE 1
www.acer-group.com/public/Sustainability/sustainability01.htm.
Advarsel om kvikkslov
PSD (Personal Secure Drive) 7
Credential Manager 8
Acer Office Manager 11
Acer Office Manager-konsollen 11
Dashbord 11
Klienthandterer 12
Policyer 13
Aktiva 14
Oppgraveplanlegger 15
Innstlinger 16
Gjenopppretting 17
Acer Backup Manager 31
Strømstyring 33
Strømsparing 33
Batteri 35
PSD (Personal Secure Drive)
PSD (Personal Secure Disk) er et sikkert område på hardisken der du kan lagre filer. Du har bare tilgang til PSD via passord eller autentisering med fingeravtrykk.

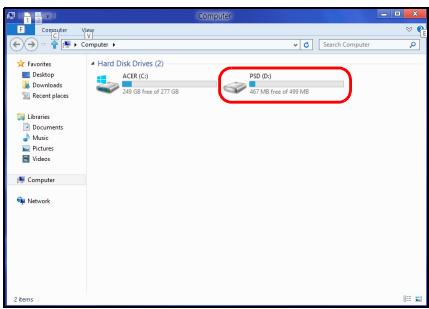
Start Acer Recovery Management:
Customized Restore (Retain User Data)
Gjenoppprett fabrikinnstillinger sletter alt på hardisken og gjeninstaller Windows og alle programmer og drivere som var forhändinstalliert på systemet. Hvis du har tilgang til viktige filer på hardisken, sikkerhetskopierer du dem Nä. Se "Gjenoppprett fabrikinnstillinger med Acer Recovery Management" på side 25.
Here's what will happen:
- Your files and personalization settings won't change.
- Your PC settings will be changed back to their defaults.
- Apps from Windows Store will be kept.
- Apps you installed from discs or websites will be removed.
A list of removed apps will be saved on your desktop.
Next
Cancel
Welcome to Acer Backup Manager
Select one action below to start managing your data.
Back Up My Files
Pick and choose which files to back up or let the program find it all for you.
Image My Drive
Make a complete image backup of your drive.
Migrate My Files
Transfer your files from another computer to this computer.
Clear out / Restore Files
Remove seldom used files to free up space or restore files from your backup.

Launch My Backup Profiles
Back Up My Files
The file backup helps you create a complete backup of your documentation. Choose the file or folder for the backup and then select the destination for the backup. Once you have selected the destination, the final step is to schedule the backup. Click on the Backup My Files button to create a backup.


Directly enter "My Backup Profiles" next time.
acer
Nå du skal starte Acer Backup Manager i Windows 8, starter du ganske enkelt med Å skrive "Backup Manager". Du kan ögså velge Acer Backup Manager i skrivebordsmodus. Dette Åpner velkomstskjermbildet. Fra dette skjermbildet kan du velge typen sikkerhetskopi du vil lage.
Deaktiver hurtigoppstart
International Travelers Warranty (ITW)
Datamaskinen er sikret med en garantiordning som kalles "International Travelers Warranty" (ITW), som gir deg trygghet og sjelefred nár du er på reise. Vårt verdensomspennende nettverk av servicesentre er der forå gi deg en hjelpende.Hand.
Et ITW-pass følger med datamaskinen. Dette passet inneholder alt du behov er vite om ITW-programmet. En liste over tilgengelige, autoriserte servicesentre finner du i dette praktiske heftet. Les grundig gjennom dette passet.
This Class B digital apparatus complies with Canadian ICES-003.
CLASS 1 LASER PRODUCT
CAUTION: INVISIBLE LASER RADIATION WHEN OPEN. AVOID EXPOSURE TO BEAM.
APPAREIL A LASER DE CLASSE 1 PRODUIT
LASERATTENTION: RADIATION DU FAISCEAU LASER INVISIBLE EN CAS D'OUVERTURE. EVITTER TOUTE EXPOSITION AUX RAYONS.
LUOKAN 1 LASERLAITE LASER KLASSE 1
www.acer-group.com/public/Sustainability/sustainability01.htm.
Credential Manager 7
Fingeraftryksregistering* 8
Databeskytse 8
Datajernelse 9
Acer Office Manager 10
Acer Office Manager Console 10
Kontrolbord 10
Klnter manager 11
Politikker 13
Beholdning 14
Opgavestyring 15
Indstillinger 16
Gendannelse 17
Acer Backup Manager 31
Strømstyring 33
Strømbesparelser 33
Batteriet 35
Batteripakke - karamteristika 35
Acer Office Manager Console
Konsol applikationen tillaxder dig at administrere forbundne klienter fra en enkelt computer. For at starte Konsollen i Windows 8, indtast simpelt hen "Office Manager Console". Alternativt, i skrivebordstilstand, vaelg Acer Office Manager Console.
Start Acer Recovery Management:
- Fra Start indtaster du 'Recovery', hvorefter du klikker på Acer Recovery Management i listen over apps.
Welcome to Acer Backup Manager
Select one action below to start managing your data.
Back Up My Files
Pick and choose which files to back up or let the program find it all for you.
Image My Drive
Make a complete image backup of your drive.
Migrate My Files
Transfer your files from another computer to this computer.
Clear out / Restore Files
Remove seldom used files to free up space or restore files from your backup.

Launch My Backup Profiles

Back Up My Files
The file backup helps you create a complete backup of your documentation. Choose the file or folder for the backup and then select the destination for the backup. Once you have selected the destination, the final step is to schedule the backup. Click on the Backup My Files button to create a backup.


Directly enter "My Backup Profiles" next time.
Tastaturet reagerer/DD
This Class B digital apparatus complies with Canadian ICES-003.
www.hc-sc.gc.ca/rpb.
Denne enhed overholder RS210 fra Industry Canada.
KCLASS 1 LASERPRODUKT
WARNING: OSYNLIG LASERSTRÄLNING NÄR DENNA DEL ÅR ÖPPEN. UNDVIK ATT UTSÄTTA DIG FÖR STRÄLEN.
APPAREIL A LASER DE CLASSE 1 PRODUIT
LASERATTENTION: RADIATION DU FAISCEAU LASER INVISIBLE EN CAS D'OUVERTURE. EVITTER TOUTE EXPOSITION AUX RAYONS.
LUOKAN 1 LASERLAITE LASER KLASSE 1
VORSICHT: UNSICHTBARE LASERSTRAHUNG, WENN ABDECKUNG GEOFFNET NICTD DEM STRAHLL AUSSETZEN.
PRODUCTO LÁSER DE LA CLASE I
ADVERTENCIA: RADIACION LÁSER INVISIBLE AL SER ABIERTO. EVITE EXPONERSE A LOS RAYOS.
ADVARSEL: LASERSTRÄLING VEDÄBNING SE IKKE IND I STRÄLEN.
VARO! LAVATTAESSA OLET ALTTINA LASERSATEILYLLE.
VARNING: LASERSTRALNING NAR DENNA DEL AR ÖPPNAD ALA TUIJOTA SATEESEENSTIRRA EJ IN I STRÄLEN.
VARNING: LASERSTRÄLNING NAR DENNA DEL ÅR ÖPPNADSTIRRA EJ IN I STRÄLEN.
ADVARSEL: LASERSTRÄLING NAR DEKSEL ÅPNESSTIRR IKKE INN I STRÄLEN.
Sakerhet for Telefonlinje
www.acer-group.com/public/Sustainability/sustainability01.htm.
Acer Backup Manager 30
Uppgradera minnet 50
BIOS-installingarna 51
Bootsekvens 51
Aktivera disk-to-disk recovery 51
Stalla in losenord 51
Vanliga frågor 52
Bestalla service 53
Felsökning 55
Felsökningstips 55
Felmeddelanden 55
Starta Acer Recovery Management:
International resegaranti (International Travelers Warranty; ITW)
This Class B digital apparatus complies with Canadian ICES-003.
Acer Backup Manager 32
Virranhallinta 34
Virransäästö 34
Akku 36
PykoBoDCTBO NOIb3OBaTeJIa
Hormep mojei:
CepnHbI Homep:
Даразикyn:
MecTo nokynkn:
HΦopMaçnЯДЯВaшeи 6e3OpaCHOCTN yDObcTBA pa6oTbI
ПразвILA.texник的服务站
BhIMaTeIbHo 03HaKOMbTeCb C 3TnMn INHCTpyKUmaM. CoXpaHIne 3TO TOKyMeHT dIra NaBeHeNna Cnpabok B bdyuSeM. CJeDyIne BCem INHCTpyKUmaM n npdeynpeKdEHHa, HAnecEHbIM Ha I3dJIne.
BbIKIOUeHne ycTpoIcTBA nepeuNCTKOJ
Ipeedero uNCTKoI OTKIOUaJIte 3TO I3dJIeNE OTe HAcTeHNO pO3eTKn nHTAHn. He nCNoJIb3yIte JxNkne IJIn a3pO30JIbHbIe YNCTaIe CpeIcTBA. IJIa YNCTKn IcNoJIb3yIte BLnakHyIO TkaHb.
PNEUYPPEKDEHNE NO NOdkIIOUeHNIO OTKJIIOU yctpoiCTBa
He 6pocai Te aKKMyIaTOpb I B OROh - OH NMOyT B3pbIaBtcb. OH TaIOKe MOryt B3OpBaTc npn IOBpeKdEHN. AKKMyIaTOpb CneDyET yTNImNIpObaT b COOTBeTCTBn C MeCTbIMn PpaBUNAM. Ecnn BO3MOxH0, cDaBaTe INx Ha nepepaBoTy. He Bbl6pacbIaBai Te aKKMyIaTOpb BMeCTe C 6blTOBbIMN OTXoDMN.
Pa6oTaUOuN aKKyMylTOp MOKeT BbIbIbATb NOMExnBa pa6oTe 6ecpnoBOHbIX yCTpoiCTB, YTO NOBIIraET Ha IX pON3BOIDNTeHbHOCTb.
3aMeHa aKKyMnyTopa
IopTaTnBnKOMNbHOTepIKTNa"HoTy6yK"cepINNCNoJIb3yeJNTHeBbI aKKymyIaTOp.ДЯЗAMeHbI NcNoJIb3yIte aKKymyIaTOp TAKORO JKe TnPa, KaK y aKKymyIaTOpa,KOTOpbI BXoJNT B KOMnJIeKT NOCTaBKn BaWero YcTPOIcTBA. IcNoJIb3OBaHne DpyrOTo aKKymyIaTOpa MoKet NOBNeYb 3a CObOon OAnCHOCTb BO3rOpAHnI INI B3PbIbA.

PpeynpexkdeHne! B cnyae HnnpaBnIbHoro 6paueHnAkkymyIaTOPhIe 6aTapeN MOrY B3OpBaTbcr. He pa3bpaTe nH He 6pocaiTe B pIamA. Depxnte nx npdaJIbwe OT deTe n6bIcTpo n36abJraTEcB ot NcNoJIb3OBAHHbIX 6aTapeN. PpiYtINI3aunn Otpa60TaHHoro AkkymyIaTopa co6IHOJaTe MeCTHbIe npaBnla.
IpeDynpexKdEHNBEOTHOSeHnnpINBOda ONTNUeCKNX DNCKOB
(TOЛько Ддя ONpeДeнньIX MOdЕи)
BnmaHne:B 3tOM yCTPOICTBe npIMeHaeTcJa3epHa cIcTeMa,po3TomOy OH cnTaetc"JIA3EPHBIM YCTPOICTBOM KJIACCA 1." B cnyae HeNoIaOK B pa6oTe 3tOro yCTPOICTBa o6paTInTeCb 3a NOMOuB b6nKaiu ABTOPI3OBAHHbI CepBnCHbI ueTp. He OTKpbIbAIte KoKxU, YTObI Ha BaC He nonan lyu Ia3epa.
CLASS 1 LASER PRODUCT
CAUTION: INVISIBLE LASER RADIATION WHEN OPEN. AVOID EXPOSURE TO BEAM.
APPAREIL A LASER DE CLASSE 1 PRODUIT
LASERATTENTION: RADIATION DU FAISCEAU LASER INVISIBLE EN CAS D'OUVERTURE. EVITTER TOUTE EXPOSITION AUX RAYONS.
LUOKAN 1 LASERLAITE LASER KLASSE 1
B3pbIbOONaChbIe ycIOBnA
BbIKIIOUaIte ycTPOiCTBO B MeCTax C NOBbIeHHOB 83pbIBOONaCHOCtBu I CnEduyIte BCEM IHCTpyKUINM U yka3aHINM Ha 3HaKax. K B3pbIBOONaCHbIM MecTAM OTHOcTcO bIaCTn, rIe MOrY TNONPocITb BbIKIQUHb TBnIRaTeJIb ABTOMObUNI. Bo3NkHOBHeNe NCKpbl B TAKNX MeCTAX MOKeT PIPBECTN K B3pbIBY nII INOxApY, YTO MOKeT Bbl3BaTb TpaBMbl IIN dAke Cmeptb. BbIKIOuAte HOY6yK prdOM c rAzOBbIMn HAcOCamn I BeH3OKoIOnHKAMn HA cepBnCbIX CTaHcIqX. O3NaKOMbTEcb C orpaHnueHnMa HnCNoIb3OBAHne paINOOBOpdyOBaHnB MeCTax XpaHEnn I paCpeJeHnra ToIINBa, XmNUecknx 3ABODax IIN MeCTax, rIe BeDyTCs B3pbIBhBiye pa60tbl. B3pbIBOONaChBe MeCTa OBuHNO (HO He o63aTeNbHO) OTMeueHb CneuaJIbHbIMn 3HaKAMn. K TAKIM MeCTAM OTHCOTcN PoJNAJy6HoE IpocTpaHCTBO Kopa6Ne, MeCTa XpaHEnn I paCpeJeHnry XmNKaTOB, ABTOMObIJn HA cXKNKeHHOM r3e (IpOJaHE nIIN 6yTaHe), a TaKke OBaCTn, rIe B 8O3dyXe CoDEPKATcR XmNUeckne BeUeCTBa IIN YCACTNuBi, TAKNE KAK MyKa, nbIb IIN MeTAJInuCecka Nyda. He BKIOUaIte HOY6yK B MeCTax, rIe 3AnpeSeHO NlOB3OBAbTcR MoBnHBMbIM TepeOHAmn IIN INX IICNOB3OBAHne MOKeT Bbl3BaTb NOMEX IIN ONaCHyU CNTyaLIO.
3KCTpeHHbIe Bbl3OBbl
BHMaHne! BbIOJIHeHHe 3KCTpeHHbIX BbI3OBB C NOMOuBcTOro yCTpoNCTBa HeBO3MOxHO. 3KCTpeHHbI BbI3OB HxKHO cTeJaTb C BaWero MObIbHOrTO TePeOHa IJIN C NOMOuBIO npyroTteOohHO CNCTeMbI.
HnctpyKcnn no ytnJn3aun
He bIbpaBbAaTe 3To 3JIeKTPoHNoE yCTPOiCTBO MysCopHoe BeDpo. TTo6bI cOKpaTnTb Do MNHNMyMa 3aRp3HeHne OkpykaIoUe Cpebl I o6ecNteHt e ee MaKcImaJIbHyIO 3aUInTy, NoKaNyIcTa, CdBaAte Eero Na nepepaBoTky. DOnONHnTeNbHbIe CBeDeHnO npabINax yTuNl3auNn OTCnykWBseO 3JIeKTPoTeXhUeCKOrO n 3JIeKTPoHNOro 0bOpyDoBaHn (Waste from Electrical and Electronics Equipment, WEEE) moxHo y3HaTb Ha Be6-CTpaHnue www.acer-group.com/public/Sustainability/ sustainability01.htm.
PpeynpeKdHne o coepkaHn pTuTN
CbeHnI coBtI IyO6CTBa pa60TbI
HnOgTa nOJb3OBaTeNl, npOBoJaUne MHOrO BpeMeHN 3a KOMNbIOTepOM, JaJIyIOCTa Ha Ype3MepHOe HapPjaKeHne rna3 n roNoBHyo 60BJ. POnJb3OBaTeNl TaKke cAtoPnCKyOT IOnyHT bIzImueckyU TpaBMy, ecnI BydUT MHOrO YacOB NOpJrD CnDeTb 3a KOMNbIOTepOM. IpoDoJnKInTeJIbHOe BpeMa paBOtbl, HeYdoBHa na3a,
HnnpabInbHaopraHn3aun paOoero Mecta, cTpecc, HnnoDxoJaune ycIOBna paObToI, coCToHne IINuHoro 3dOpOBbI n dpyrIe fakTopbl 3NaHTeJIbHO yBeJInuBaIOT pNCK NOnUyeHnI Fn3NuEckO TpaBMbl.
HenpaBnIbHa na pa6Ota 3a KOMNbOpom MoKeT npBecTe N NOBHeNIO 3aIcTHOro cyXOJIbHO rCnHrPOMa, TeHNHITy, BOCnAneHIO cyXOJIIN I CnHOBaJIbHOI cyMkn IIN dpynx cKeIeTHO-MblIeUHbIX 3a6ObeBaHNI. B KcT8x pyK, 3aIpc7bAx, PpeDnIeByax, Iee INI CNHe MOrY TPOBHTBCr CNeDyUOnie CmMTOMbl:
- Ohemehne, xkehne nII nokaJIbIbAHne.
- Iomota, 6oJIe3HeHHoe OuJUeHne NJIc cJa6OCTb.
- Bolb, onyoxoJIb nII nn pIbcaIya.
OceneHeIOCTb HnHapxKeHne.
CyxocTb nnn cna6ocTb.
Прин haичinn taKINС CMNTOMOB, NOBTOPЯUHIXCЯ ИЛ NOCTOHHbIX OUyIeHNXДИСКOMфОрТа И/Илб 60JIe3HNeHHbIX OUyIeHNIX рп рабоTe 3a KOMьHTepOMHemeДпEHNO obpaTInTeCb 3a KOHCyIbTaIeMe KВpaЧу IN COObIuTe O6 3Tom B OTdENTEXHKn 6e3OanacHocTn I OXpaHb 3dOpOBBy BaIeKOMmaHIN.
B cIeIyUoIe m pa3dIe npIBOaTcra coBeIb, kaK cIeJIaTb pa6Ory 3a KOMNbIOTePOM 6oIee yIobHoi.
Ponck ydo6horo pa6oeryo noIoxeHn
HauiTe dIe c6b MaKcImaJIbHo yOboHoe nIOJoxHe 3a KOMbIOTepOM, MeHra yroI o3Opa MOHITOPa, IcNoJIb3yra NODCTABky Ira Hor IIN peRynpyBaBICOTy kpcna. BocnoJIb3yIteCb cneDuOzIMn COBETAM:
He cnDnte nooJry B oHoi no3e.
HeCKNoHЯITeCb Hn3KO 3a CToIOM N He OTKnDbIbAitecb DaJIeKO Ha cINHKy KpeCna.
- Перiodиескв BCtabаite И похжьайтсь, чобін сягь Hanрженье В мускулax Hor.
-ДелайтКОРOTКипегрьBbl,чTo6blOcna6nTbHanpЯжснeВшeNПлeчax.
He HanpraTMe MysKUbl I He NIOHIMaTe BbICOKO PNeuN.
YctahOBHTBHeHnI DnCnIe, KNaBaNAtpy N MbIb Ha paBoyem MecTe TaK, YTO6bI DO HIX 6bIIO JERKO DOTaHyTbcR.
EcnBbCMOTnTe Ha MOHITOp YaIe, Yem Ha DOKyMeHTbI, To pa3MeCTnTe DcJIeNo CEHTpy CToJa, YTObI Weer HapraJalac KaK MoXHO MeHbIe.
3a60Ta o 3peHnN
EcnI NOOJrmy CMOTpeb Ha MOHITOp, Hocntb HenpaBnIbHO NOo6paHhble OcKn IIN KOHTaKTHbe IINH3bl, IcNOJIb3OBaTb JApKNI CBET INN pa60TaTb 3a CTOnOM C 6JeCTaIe NOBepxHOCTbIO, IINOxo OTpeYInpOBAbT pe3KoCTb 3kPaHa, IcNoJIb3OBaTb MeIKNI UpiΦT INI MaIOKOHTrpactHbI dIcNIIe, To rIa3a 6yDt CInbHO yCTabAt. B cIeNyUoxnx pa3dIax pIbnOBDiTc OBeTb, KaK yMeHbUnTb Ype3MepHoe HapPjXHe Ia3.
Tna3a
-ДавайтглаламчасьоТдьх.
- Периончесн OTBOДNTe Гla3a OT MOHITOPa И CMOTPnTe Ha KaKoI-HNObYdbydJaJIeHHbI npEIMET.
- Yacto MrgaIte, TTo6bl rla3a He 3acbxaJI.
Ducnnei
- ČeρχινTe Κικηλειν B ΚυχτόTe.
Baisha roIoba doJxHa haoDntbC Bblie HnKHe KpOMKn DnCnpe, YTO6bl npIn npocMTope n3O6paXeHnB CHTpe DnCnpe rna3a cmTope nCBepxu BN3.
Otperynpyte npKoctb n/nn KOHTpact dncnner taK, TTObI TeKCT 6blno Ierko YntaTb, a rpaqika oToobpaKaanacb YeTeKo. - Ymehbshnte MepcaHne n OTPaKeHne:
yctahOBHTe nCnJIe TAK, YTObI eRo bOKoBaJ KpOMKa 6bla oBpaueHa K OKHy ININ NCTOCHNky OCBeUeHIn,
ymehbinteCBETNOMeHn,NCIOb3yIopTbepbI,HTOpblJINKaJIHO3N,
BKNIOHAnTe OcBeUeHHe Ha paOoHem MeCTe,
- otperynpyyte yron ob30pa ncnne,
- IcnoIb3yIte aHTnBnIKOBbI ΦnIbTp,
- yctaHOBHTe Ha BepxHei KpOMKe DnCnIeR COINHcE3aUNTHbI KO3bIpeK, HApPIMeR, KapTOHHyIO NOLOCKY.
He cmOtpnte Ha dncnneu n3 Heyo6horo noJoxehna.
He cmOtpnte noDOnIg Ha nCToHnKn npKOro CBeTa.
Bbipabotka npabnblhoro ctnla paobtbi
CneIyUOJIe npINBbIcKn paOToBt 3a KOMNbIOTepOM N03BOJr MHeBJe yCTBaTb I paOToTaB 6oJIee npOdyKTNBHO:
-Делайт ekopoTKne yacTbIe nepepbIbbl B pa6Ote.
-Дени Te KaKne-HN6yIb ynpaXKeHnIЯ pa3MnHKn.
Kak Moxho Yaue BbIXOHTe NObIbTaB YnCTbIM, CBexm Bo3dyXOM.
PerynpaHNo denaIte n3uYeCKyU 3apAky, yKpeNlaIOuYTO tno.

PpeynpejdeHne!He nolbytecb kOmptepom Ha nBaHe HnB nocteH. Ecn 3toro HeIb3a I36exaTb,TO pa6oTaTe TOJbKO KOPOTKmN nepnoaMn, qacto DeJaTe nepepbIBbl N BblONHnTe ynpaxHeHn dna pa3MNKn.

Примочан: Довоннтульные седаши CM. В раздени "COOTBETCTBNE HOPMaTHNBHbIM Tpe6obAHnM 3ameчанno 6e3oNaCHOCTn" Ha ctp. 71.
BhaaJe O rJaBHom
БлагогаримВасяTo,чTo ДпгpeшенсьохМбиьХВыИСнITEььх 3адач Вbl BbIбрали Нутбук Acer.
Baши руковорства
Mby pa3pa6oTaII npI pyKOBoIDCTB, KOToPbIe NOMOryT Bam B IcNoIb3OBAHIN HoyT6yka Acer:
3TOT nJaKat NOMOXET BbINONHHTB nepBOHaJbHyIO HAcToPky KOMNBoTepa.
PykoBoDCTBO noIb3OBaTeJI Cepra TravelMate copeKNT noIe3HyIOHΦopMaζIIO, npImeHmIyO Ko BcE M OeIaM Cepra TravelMate. B HEM ONcBlaBaTcO ochBhIe TeMbI, TaKHe KaK pa6Ota C KlaBnAtypo, 3BykOM n T.D.YuTnte, yTO PykoBoDCTBO noIb3OBaTeJI RaIaeTcO obO6UeHHbIM, IOn3ToM y B HEm INHOda bdyT ONcBlaBaTcR cyHKzIN NIn CBOICTBa, peAIN3OBaHHbIe He B KynIeHHo BamM MoeIIN, a JInuB B onPeDeIeHHbIX MoeJAx 3ToI cepri B taKnx Cnyuayx B TeKCTe daetcN NOMtKa "ToIbKO dIy OpeJeEHbIX MoeIeN".
KpaTkoe pyKOBOCTBO 3HaKOMIT BAC C OCHOBHbIMN XapakTePncTnKaMNI ΦyHKUaMn BaWero HOBOro KOMNbHOtepa. YTo6bl y3NaThb 6OJIbWe o TOM, KaC NOMOuIbIO KOMNbIOTepa IOBbICNTb IpOdyKTNBHOCTb CBOe pa60Tb, CM.
PykoBoDCTBO nonb3OBeTEna CepnA TravelMate. 3To pyKOBoDCTBO COdePKeNT noIpo6HyIO INΦoopMaunIO O CnCTeMHbIX ΦyHKUnx, BOCCTaHOBLeHn DaHHbIX, BO3MOXHOCTx paCUnpeHn I yCTpaHEn H enCnpaBHOtei. B Hem TaKke npBVeDeHa INΦoopMaunIO rapaHTnHOM oCbnyKbAHn, a TAKke obuine npedncaHn I npabInla 6eONaCHocTn pni paBote c HOYt6yKom. 3To pyKOBoDCTBO B VIne pfaiNa PDF n3NauaJIbHO 3arpyKeHo B KOMNbIoTeP. YTo6bl OTkpbl erO, BbINOHNITE cNeDuIooee:
1 Ha 3kpahe Iyck BBeDnTe "IOnb3ObaTeInb".
2 ⅢeIKNHnTe PyKoBOcTBo nOJIb3OBaTeJr Acer.
OchOBhIe cBeIeHnI O6 yXoJe 3a KOMpbIOTepOM I COBtbl NO NcNoJIb3OBaHnIO
BkIIOUeHne N BbIKIOUeHne KOMNbIOTepa
Ytobb BkIIOHHTb KOMIbIOTep, HAXMITE N OTNCTNE KHOJIky NiTaHnIA. PaCNoJIOXeHne KHOKNi NiTaHnA cm. Na PIIaKaTe No HAcTpoJKe.
YTo6bl OTKJIIOUHTb NITaHHe, BbINONHIne CNeyIOUne DeiCTBnA:
- IcnoIb3yIte KOMaHdY 3aBepSeHnra pa60TbI B Windows: HaxMITE KJIaBnIe Windows +
n HaxMITE HAcTpoiKn > PntaHne, 3aTeM HaxMITE 3aBepSeHnne pa60TbI.
EcniXOTnTe HeaIOnIO 3aBepWntb pa6Ory KOMNbIOTepa, Ho He BbIKJIOuATb nonHOCTbEO ero nHTaHne, To nepeBeDInTe erO B Cnauu peKum. IINr 3toro:
Haxmnte KhoNky nTaHn.
-NJN
HaxMITE KnaBnwn Windows +
PnIyIcTke KOMbIbTepe npOeJaIte CJIeDyUOuJe DeIeCTBna:
1 BbIKIouHTe KOMMbIOTep N BbIHbTe aKKyMylTOp.
2 OtcoeHnHTe aanTep npeMeHHoro ToKa.
3 IcnoIb3yIte MryKyo TkaHb, CMOyeHHyo BOIOJ. He IcnoIb3yIte XnDkne nJIa3pO30NbHbIe YNCTraIe cpeDCTBa.
Ecn npo3o7na oHa n3 cneyuux cnTuayi:
KoMnBIOTeP ypoHnIIN nIIN KOpNyc KOMnBIOTePa 6bl NOBpeKdEh.
KOMIbIOTeP He pa6OtaeT DOJXHbIM 06pa3oM.
Acer Backup Manager 35
UnpaBHeHne pHTaHnem 38
38
AkkymyIaTOp 40
XapaKTepeuCTnKn aKKymyIaTopa 40
3apkaakkymyTopa 40
OnTmH3aZna Cpoka cnyk6bl akKymyIaTopa 41
IpoBepka ypoBn3apya aKcyMnyTopa 42
IpeDynpexKdEHe O Hn3KoM ypoBHe
3apya aKKymyTopa 42
UCTaHOBka N 3BLeueHne
aKymyTOpHoi bTapei 43
IpyTeWeCTBnA C KOMNbIOTepoM 44
Otklquene ot pa6oero ctoJa 44
PepeDvIXeHn 44
IoiIOROTOBka KOMNbIoTepa 44
UTo npHocntb Ha coBecan Hn 45
3abnpaem KOMpbIOpTeP domo4
IoiIOROTOBka KOMNbIoTepa 45
UTo 6paTb c co6oB 45
Oco6bIe coo6paXeHn 46
UcTpaNbAeM DOMaUSHnOΦnC 46
IyteeeCTBnC KOMnbIOTePOM 46
IoiIOROTOBka KOMNbIoTepa 46
UTo 6paTb c co6oB 47
Oco6bIe coo6paXeHn 47
MekdynapoNbIe nyTeUeCTBnA C KOMNbIOTepom 47
IoiIOROTOBka KOMNbIoTepa 47
UTo 6paTb c co6oB 47
Oco6bile coo6paXeHn 48
PacunpeHne BO3MOxHocTei C NOMOuHO DOnoHNHeJIbHbIX MoUJeI 49
Bo3MOxHocTn POnKJIIOUeHn 49
IopKnIOUeHne K cETn 50
BcTpoEHHbIe cpeCTBa pa6oTbI B cTei 50
BecnpoBondbIe cetn 51
IopdkloucheHneK INHTepHeTy 51
BecnpoBOndhie cetn 51
ExpressCard 53
Thunderbolt 54
Pa3bem IEEE 1394 55
HDMI 56
USB
(yHnBepcaJIbHa nocJeIOBaTeJIbHa nHa) 57
3aayem Huyken HOBbI INHTeppeic? 67
KaK pa36JIokIpOBaTb KOMIbHOTep? 67
Kak Hactponb KOMnbIOTe p corgaCHO MOUM
npeiNoTeynIaM? 67
XOCHIOJIb3OBaTb Windows npINbIHybIM
MHe cNoocobm. KaB BepHytb "paOchn CTon"? 68
Ide mon npinojxehna? 68
YTo TaKoe Microsoft ID (yUeTHaJ 3aInCb)? 69
Kak do6abntb CbIky Ha n36paHHbIe Be6-caTbI B
6pay3epe Internet Explorer? 70
Kak npobepntb hannue obohneHn DIn Windows? 70
Ie MoXHO nOlyuHTb DOONHHTeBHyIO
HHΦopMaunH? 70
COOTBETCTBNE HOPMaTnBhblm Tpe6ObaHnma
OCHOBbI NcNoJIb3OBaHnA CeHCOPHO nHaHeJI (C DByMg KHOPIKaMn)
CneyuOuIe 3nemEnbI Noka3bIBaHOT, KaK IcNoJIb3OBaTb CeHCOPHyIO nAHeB C DByMg KHOKNKaMn.
- UTo6bI DnBraTb KypCopOM, BODNTe NaJIbCem IO CeHCOPHO naHeiN.
HaKab Ha JevIu I npaByu KnaBnI, HaxOJaIeecr No Kpaam CeHCOPHO nanei, CMOKeTe oBeCneHITb FyHKun Bbl6op a NcNoHEnr. 3Tn DBe KnaBnIpoIObHbI npaBOu N Jbeo KnaBnUam MbIu. PocTyKnbAHe n O ceHCOPHO naneI anaJIoMnHO hKaTNU Jbeo KNOpKnMbIu.
KlajBnIi 6JIOKIpOBKn I BCTpoEHna ZnΦpOBAJ KJIaBHaTpya
PpumeyaHue: CeeedeHua, npueeehhble 3mom pa3deJe, Moaym He omHocmbcK bawemy KOMnbIomepy.
Ha KnaBnatype ectb 3 qnkCpyuOuIe KlaBnI, KOToPbIe MOxHO nonepemEHBO BKIOUaTb IIN OTKIOUaTb.
IЯ n3MeHEnHa HAcTpoE NcNoJIb3yIe MeHIO Ha JIeBOI NaHeJI.
MeHeJxeppeNCTpaCNUHbIX DaHHbIX
3decb moKHO yCTaHaBJIbBaTb peRnCTpaOnHbIe daHHbIe n ynpabJrMbIMn, a TaKKe HacTpanBaTb ayTeHTnФkaUIO nepe 3arpy3koJ.

Bbl MojkeTe n3MeHЯTb cBoi napoI nI pyorpaMMbi ProShield n Windows, pernctpnpoBaTb OTneuATkn paIbueB, ynpaBnIb TaHHbIMN ceTeBbIX yyeTHbIX 3aIncEi, CO3daBaTb pe3epBhIe KOIII pernCTpaIOHHbIX DaHHbIX IIN BOCCTaHaBJIbBaTb 3TN DaHHbIe N3 pe3epBhIx KOnII.
PereTpaun OtnpeaTKOB naIbceB\*
* (monbko ecnu eauwem PIK ecmb dakmunockouwecku cuymbieameiB)
ДаКТИСОСКONПЕСКМ CHTbIBATEЛ MOKHО ИСПОЛБ3OBaTБ ДЯ 3aцNTы ПК OT HecaHKUOHNOPOBAHHORO DoCTyna. 3aperINCTPpuyTe DBa ИлббОлг EEOTpeKOB NaIbIeB, YTO6bl 3aTeM INCPOJIb3OBaTb Ix DЯdoCTyna K ПК BOВ ВрмяЗANyCsKa BmecTo BBOda napOJЯ.

YTo6bI y3HaTb IOnOpHnTeIbHbIe CBeJeHnIa, HaxMnTe PyKoBOcTBo no perncTaPun.
3aunTa daHbIX
3decb MoKHO BbIbpaTb faIbI IJRA UHPOBaHn IIN DeUHPOBaHn, a TaKKe ynpaBJIaTb IepCOHaJIbHbIM 3aUHcEHHbIM INCKOM.

YdaJIeHne DaHHbIX
3decb MoKHO BbIbpaTb faJIbI dIy 6e3BO3BpaTHoro ydaJIeHnC JxecTKOrO nCKa. YTo6bl BaUIN daHHbIe HeJIb3r 6blIO BOCCTaHOBNTb, fYHKcIur "Upeep faJIOB" NOBepx HIX 3aIIncbIbAet 6ecnpaOnHyu INHOpMaUHO.
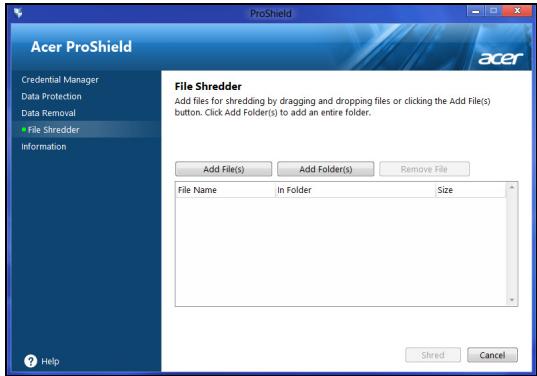
BHHMaHHe! BbIbpaIte TOnbKO Te 0aJIbI, KOToPbIe XOTnTe 6e3BO3BpaTHo ydaJIntb. Nocne ydaJIeHnA 0aJIIOB nJIn nanOK B WpeDepe BOCCTaHOBNTb DaHHbIe 6yJeT HeJIb3Я.
Acer Office Manager
IpumeyaHue: TOnbKO dIra onIpedeJIeHHbIX MoeJeU.
Acer Office Manager - зTO cpeCTBO MOHITOPINHra n ynpaBJIeHne pecypcAmn, C NOMOuBIO KOTOPOR NT-aDMHNCTpaTOPbI MOryT dNCTaHcUHOHHoro ynpaBJIaTB KOMNbIoTEpAmn u YcTaHaBJIbBaTb Ha HNX o6HOBHeHn. B CoCTAB 3TOr o naKet a npoRpAMM BXODr cJeDyUOuHe KOMNoHENTbl: KOHcOJIb Acer Office Manager n KnueHm Acer Office Manager.
KoHcOJIb Acer Office Manager
Co3dHne pe3epBHOJ KOHN IJI BOCCTaHOBJIeHnI
Для посястен c USB-нakоштелу hyxho chauajа co3daTb pe3epBHyO KOJIIO DЯ BOCCTAHOBJIENIA. Pe3epBHaJ KONIIЯ DЯ BOCCTAHOBJIENIA CODEPJKIT BCE φaIbI, ИЗнayaЛьНО 3aПИСАнгье Ha JECTKI DnCK KOMNbIOTepa,В TOM YIcSNe Windowsи BCE 3aПИСАнгьe IprN N3ROTOBJIENI PpOrpAMMbI IN dpaIbepbl. 3Ta pe3epBHaJ KONIIЯ BOCCTAHOBIT KOMNbIOTepdo COCTOJHIN HA MOMENT NOKyIKN. IprN 3Tom y Bac 6yDet BO3MOXHOCTb COXpaHHTb BCE HAcTpOJKN I\PuHbIe DAHHbIe DЯ BOCCTAHOBJIENIA B DaIbHeIWeM.
Пи汞e: Поьeрмe, Умбы Ha USB-нakонume ne c8o6odHoo Meema 6bINo He Mehee 16 ΠБ.
- Ha заpane Пусяв В蜱дпг "Recovery" и заlem в списке пиюжени нажмпе Acer Recovery Management.
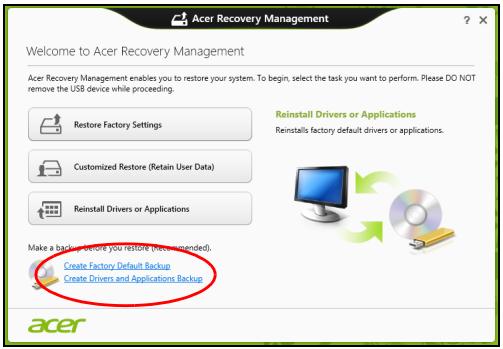
- Haxmte Co3aTb pe3epBHyO KOHIO 3aBOcknx HaCTpoek. OTKpoeTcOKHO DnK dner eoCCmaHOBneHua.
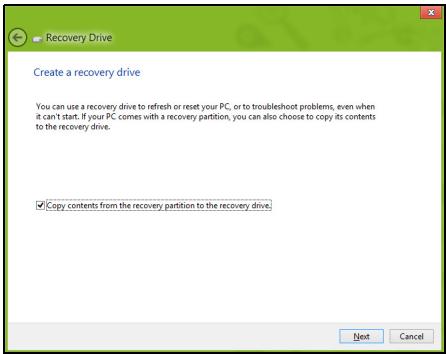
YCTaHOBtTeФJaKOK KonHPOBaTb COdepXIMoe pa3deJa
JcEeTKoTo DnCKa BOCCTaHOBJIeHnHa DnCK JI
BOCCTaHOBJIeHn. 3TO TnapaMeTp oBeCneuHBAe MAKcImaJIbHo
IOJIHoe I 6e3OpacHoe Co3DaHne pe3epBHO KONIN JI
BOCCTaHOBJIeHn.
- Ecπn nCπoNβ3yTe DVD-DnCKn, To nporpAmma yKaJxet, cKoNbKO HuxHo YnCTbIX 3aHncbIbAeMbIX DnCKOB dπr 3aHnCn DnCKOB BocctaHOBJIeHn. PnproTObIte nx nepeD hauaIOM npOceUpybl.
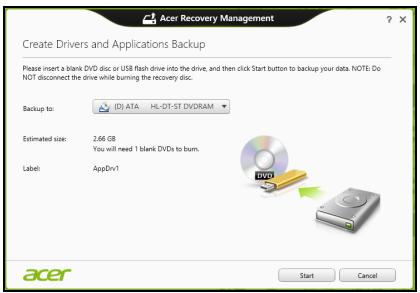
- Haxmnte Nyck, YTObI cKOnnipoBaTb faJIbI. Ha 3KpaHe 6yJeT OTObpaXaTbcra XOD BBIOJIHEnr pe3epBHO r KOIpnoBaHnI.
-
BbInonHnTe yka3aHnI dIy 3aBepSeHn Ipocecca:
-
Ecnn nCnONb3yTe ONTnueckne DnCKn, To IOTOK npNBODa 6ydet OTKpbIBaTbcra NocNe 3aIncn KaJDoRo DnCKa. N3BnKeNte DnCK n3 npNBODa n NOMeTbTe erO nepMaHeHThblm Mapkepom.
Ecnn HuykHo 3aIncatb HeCKoIbKO DnCKOB, To, yBnDeB npeIIOxKeHne Ha 3KpaHe, BCTaBBTe CNeDuOuN DNCK N HAKMNTe OK. PpOIoJkaIte 3TN DeIcTBnA, NOKa pnocecc He 3aBepSnTcra. - Ecnn nCnoJIb3yeTe USB-haKoIInTeIb,To OTCoeDINHITe erO nHaHeCnTe Ha Hero YetKyIO MapKnIpOBky.
Baxho! HanuHnte Ha KaXDOM DnCKe NOHrTHbI TEKCT, HanpImep, "Pe3epBHaJ KOINa IpaBepOB N npJIIOxHeH".
CoxpaHnTe 3Ty pe3epBHyIO KOnnIO B HaIeXHOM MecTe N 3aONMHnTe 3TO MecTo.
BocctaHOBJIeHne cIcTeMbI
IopraOK BOCCTaHOBHeHnCnCTeMbI:
- YctpaHnTe MeKne npo6nEmbl.
Ecnn Bo3HnKHyT HEnOlaKn B pa6oTe ToIbKO OndHO rNn DByX nporpaMMhIx NnI annapaTHbIX KOMnoHErTOB, TO npo6nemy MoxHo peuNTb nepeycTaHOBkO 3Tnx nporpamM nIi dpaiBepoB yCTpoiCTB.
IopraDOK BOCCTaHOBHeHnI PO n IpaaiBepOB, npedyctaHOBJIeHHbIX Ha 3aBOe-IIIrTOBHTeIe, CM. B pa3dJe "IpeyeCTaHOBka dpaaiBepOB n npinloKeHn"Ha cTp.24.
Hobbie npaibepbI yCTpoiCTB -YTO6blnepeycTaHOBnTB dpaibepbI yCTpoiCTB, n3HaayalbHo He yCTaHOBJeHHbIX B KOMNbIOTepe, Bam 6yJeT HxKHO BInONHHTb INHCTpyKcIM N3 pyKOBOCTBa Ha 3TO yCTpoiCTBO.
Ecnu bblbInnHre me nepeycmaHOky npu nomou Windows, a unOpmaua dJe BoccmaHOneHua XpaHmcre KOMnbIomepe:
- Ha захе Руcke В蜱ейт e "Recovery" n 3aTeM B спиcke npиложени нажмITE Acer Recovery Management.
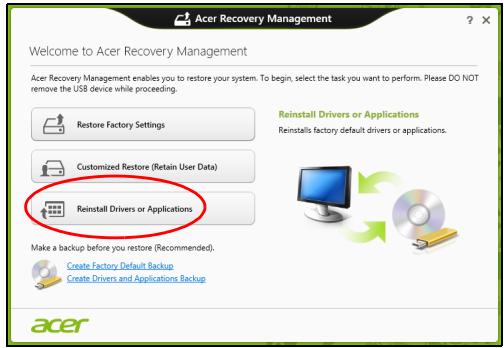
- Haxmnte PepeycTaHOBNTb dpaBebpI nII npnIOKeHna.
-Должень OTKpbITbCЯ pa3дeн Содерханe okha Acer LcHTp pecypcoB.
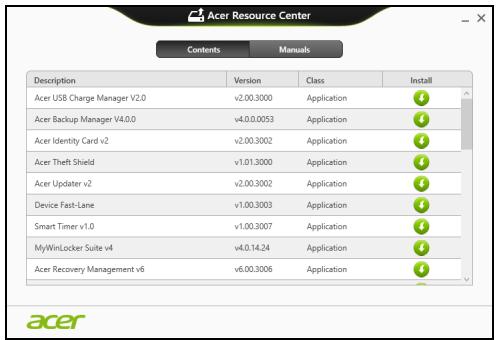
- Haxmnte 3NaOK yCTaHOBnTb ДЯ 3JemeHTa, KOTOpbI XOTnte yCTaHOBnTb, 3aTeM CJIeDyIte 3KpaHHbIM Yka3aHnA M ДЯ BblONHeHry yCTaHOBKN. ПOBTOpe TNe 3TN DeIeCTBnA ДЯ BCEx 3JemeHTOB, KOTOpbIE XOTnte nepeycTaHOBnTb.
Ecnu ebl bInolHnreme nepeycmHOeK npu nomou pesepeHoJ konuu dpauBepoe u npuLoKeHu, 3aIucanHou Ha DVD-ducke unu USB-hakonumene:
-
BCTaBbTe DnCK Pe3epBna KOnnЯ dpaBepOB n npInOxehN B npINBOd DnCKOB NII NpOKNHOuNTe HAKONITeB CBO6oHbI pa3beM USB.
-
Ecπn Bbl BCTaBnΠi DVD-dnCK, To DoxKdntecb OTkpbltno OKHa Acer ΚeHTp pecypcoB.
- Ecni OKHO Acer LcHtp pecypcoB He OTKpoeTcABTOMaTHueCKN,TO HaxKMITE KnaBnUsn Windows +
,3aTeM DBAJDbI UeJIKNHTe 3HaYOK PpNBODa ONTNUeCKNX DNCKOB. - Ecni nCnoJIb3yeTe USB-HaKoIITeJIb, To HαJMIte KJIaBnIJ Windows +
, 3aTeM DBaXdBi ΜεJIKNITE HaKoIITeJIb, Ha KOTOPOM 3aIIcAHa pe3epBHa JKOII. DBaXdBi ΜεJIKNITE 3HaOJK ΚeHTp pecypcoB.
2.Должен OTKpbITbCЯ pa3delen CopepxaHne OKHa Acer LcHTp pecypcoB.
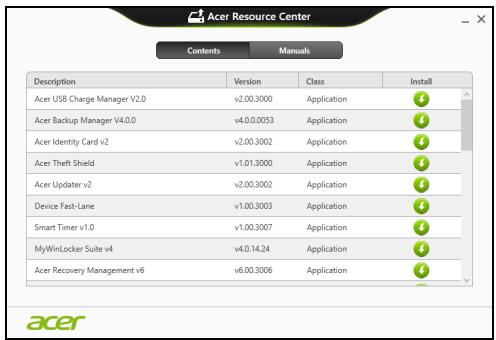
- Haxmte 3aouok yctaHOBtB dIy 3JIeMeHTa, KOTOpbI XOTnTe yCTaHOBtB, 3aTEM cJeDyIe 3KpaHHbIM Yka3aHnM NO BblONHeHIO yCTaHOBKn. IOBTOpe 3TN DeIcTBnA DJIa BCEx 3JIeMeHTOB, KOTOpbIE XOTnTe nepeycTaHOBtB.
Bo3BpaT K npeIbIyUeMy "MomeHTaJIbHOMy CHIMKy" CNTeMbI
Функця "BocstahOBJIeHne CnCTeMbI Microsoft" nepnoDnueckn DeJaet "MOMeHTaJIbHbIe CHIMKn" napameTPOB n HacTpoE KBaWei CnCTeMbI n CoXpaHReT IX KAK TOUKN BOCSTAHOBJIeHn. B 6OJIbShnHCTBe CnyaEB CNoxHbIX Ipo6JIem C nporpamMaMn DJIY BOCSTAHOBJIeHn pa6oTOcNOC6HOctn CnCTeMbI MOxHO BepHyTbcr Ha OdHy NJIH HeCKOJIbKO 3TINX TOUeK BOCSTAHOBJIeHn Ha3aI.
CnCTema Windows abTomatNuecKn CO3daet DOJONHHTeBHyTOUky BOCCTaHOBJeHn He ToIbKO eXeJHeBHO, HO I npN yCTaHOBKe KaJDoHOBO IIpOrpaMMbl INI dpaIbepa ycTpoiCTBa.
Bo38pam K moyke boccaMaHoEneHua
- Ha экpane Пуck вевипг "Пань ураленя" и 3aTeB в списе пиюхени НадмITE Пань ураленя.
- Haxmte Cnctema n 6e3onacHocTB > LcHTp noDpeKKn, 3aTeM BHN3y OKHa Haxmte BocCTaHOBHeHne.
- Haxmite 3anyck BocctaHOBJeHn CnCTembl, 3aTeM DaJIee.
- Haxmte camyio nocJeHHIO TOky BOCCTaHOBJIeHnna (Ha TOT MOMENT, KOrda BaIa CnCTema pa6oTaIa npaBnIbHo), HaxmTe Danee n 3aTEM FOTOBO.
5.BOTpbIBWEMc8OKHe C3aIPOCOM HaIOITBepKJdeHne HaxMMTe Da. IocNe 3TOrO CnCTeMa 6yJeT BOCCTaHOBJIeHa C NcIOJIb3OBaHNEm Yka3aHHoB BamN TOCKBBOCCTaHOBJIeHn. 3TOT PNOCECC MOXKeT 3aHraTB HeCKOJIbKO MmHyT IN OTOpe6oBaTb nepe3aIrpY3KN KOMNbIoTEpa.
BocctaHOBJIeHHe cIcTeMbI Do nepBOHaJaIbHOrO COCTOHHIA
Ecnn B KOMNbIOTepe Bo3HnKHyT npO6JIeMbI, KOToPbIe He ydaCTcay UcTaHnTb DpyrIMN CNOCo6aMn, TO, BO3MOxHO, NOHaIO6bNTcAnepeyCTaHOBnTb CnCTeMy CEJINKOM, YTO6bl BOCCTaHOBnTb ee N3HaayJIbHOE COCToRHe. JIy BOCCTaHOBJIeHnM MOXHO NcONb3OBaTb JIn60 JeCtKm DNCK, IIn60 Co3DaHHbIe Bamn pe3epBbIe KOnM INJy BOCCTaHOBJIeHnI.
- Ecπi cncTeMa Windows eüe 3anyckaetc#, n Bbl He ydaJIINn Ha JxecTKOM DnCKe pa3deJ BOCCTaHOBJIeHn, TO cm. pa3deJ "BocctaHOBJIeHne n3 camo CnCTeMbl Windows" Ha ctp. 28.
- Ecni cnctema Windows He 3anyckaetcra, a opunnaIbHbI jKeCTKIN DnCK 6bl INONHOCTbIO nepeopmatnpoBaH INN 3aMeHeH, TO CM. pa3dien "BocctaHOBJeHne n3 pe3epBHOJ KOHN DnA BOCCTaHOBJeHn" Ha cTp. 31.
BocctaHOBJeHne n3 camo cnCTembl Windows
3aynctte npiloxeHne AcerRecovery Management:
Customized Restore (Retain User Data)
Функиь ВocctaHOBJHne 3aBOckx yCTaHOBOK ydaJIIT BCE daHHbIe C JcEcTKOrO DnCKa, 3aTeM nepeyCTaHOBHT Windows I BCE npedYCTaHOBJHbIe B KOMNbIOTepe nporpaMMbl N dpaIbEBpy. EcIn eIe MOxHO OTKpbITb BaXHbIe faNbl Ha JxcETKOM DnCKe, TO npraMo ceuac co3daiTe nx pe3epBbIe KOIN. CM. pa3deN "BocctaHOBJHne 3aBOckx HacTpoEk npn NOMoU npniloxeHna Acer Recovery Management" Ha cTp.29.
Функця HabtpanBaemoe BocctaHOBHeHne NObIaTeTcOxpaHHTb BaunфaIbI (NOLb3OBaTeJIbCKHe DaHHbIe), HO NepeyCTaHOBNT BCE nporpamMbI n dpaIbepbl. Pporpammbl, yCTaHOBJIeHHbIe Bamn NocJle nokynk INK, 6ydt ydaJIeHbl (KpOME nporpamM, yCTaHOBJIeHHbIX C caTAt Mara3InH Windows). Cm. pa3delen "HactpanBaemoe BOCCTaHOBHeHne npri nomoi npniloxeHnA Acer Recovery Management" Ha cTp. 30.
BocstahOBJIeHne 3aBOJcKHX HAcTPOEK pRi NOMOJI npIIOKeHnA Cer Recovery Management
1. Haxmte BocctaHOBtB 3aBOcKne HaCtpoKn.

BHHMaHHe! ΦyHKUa "BOcCTaHOBnTb 3aBOdCKne HacTpOuKn" cotpeT Bce paJIbI Ha JxecTKOM DnCKe.
- Ecnn KOMnbIbTepe cKoHpIgypnpOBaH C DByMra OepaCUNHHbIMn CnCTeMaMn (ToIbKO Ha OnpedeJIeHNbIX MoJeJx), To OTkpOeTcR OkHO C npedIoXeHneM BblpaTb OC dJa BOCCTaHOBJIeHnra - Nl60 Windows 7, Nl60 Windows 8. Ecnn Bbl Bblbepete Windows 7, To KOMnbIbTepe nepe3arpy3ntcN bOCCTaHOBNT Windows 7. Ecnn Bbl Bblbepete Windows 8, To OTkpOeTcR OkHO "C6poc PIK", KaK onncaHo HnJke.
2. OTKpoeTcKoHObNtB PIK.
Refresh your PC
Here's what will happen:
- Your files and personalization settings won't change.
- Your PC settings will be changed back to their defaults.
- Apps from Windows Store will be kept.
- Apps you installed from discs or websites will be removed.
- A list of removed apps will be saved on your desktop.
Next
Cancel
3. Haxmnte Danee, 3aTeM O6HOBnTb.
4.B npocece BOCCTaHOBLeHna ChauJa npou3OJeT nepe3arpy3Ka KOMpbIOTepa, a 3aTeM HauHETcK OKnIpOBaHne paIIOB Ha JecTkN IINCK. 3TO Tnpoccc 3aHIMaET OKOIO 30 MNHT.
BocctaHOBJIeHne n3 pe3epBHOJ KOHNДЯ BOCCTaHOBJIeHnI
IopraIOK BocCTaHOBJIeHnI 3 pe3epBHOJ KOII, 3aIncAHHOJ Ha USB- NaKoTIteJIe:
- HanDiTe pe3epBHyIO KOnHIO dIra BocCTaHOBJIeHnI.
- BCTaBbTe USB-HaKoHITeJIb IN BKJIIOHTe KOMIbIOTep.
- BKHouHTe F12 Boot Menu (MeHIO 3aapy3ku F12), ecn oHO eue He BKNIOUcHIO:
a.Bo Bpem 3arpy3kn KOMnbTepehnaMnTe KnaBnUpF2>.
b. HaxaTneM KJIaBnU CO CTeJIkAmN BJIeBO NJIu BnPaBO Bbl6epnte MeHIO Main (ΓIaBHoE).
c. HαkaTneM KλaBnSi co CτpeKoB BnI3 BbIbepnte F12 Boot Menu (MeHIO 3arpy3kn F12), 3aTeM HαKMITE KλaBnSiy
d. HaxaTneM KJIaBnU CO cTepeJikAmN BIneBO NIN BnpaBO BbIbepnte MeHIO Exit (BbIXoD).
e. B 3aBnCIMOCTn OT TnPa CnCTembl BIOS BaWero KOMNbIOTepa BbIbepnTe Save Changes and Exit (CoXpaHnTb N3MeHeHnN n BbIITn) nn Exit Saving Changes (BbIITn, coXpaHnB N3MeHnN) n HaxMnTe KJIaBnShy Enter. IJr noDTBepKdEHNn HaxMnTe OK nn Yes (Da).
f. Kompbtoep nepe3arpyntcra
4.Bo Bpem 3aRpy3kn HaxMMte KnaBnUy
a. HαkaTne KlaBnU CO CTpeJIkAmN BbIeJInte CToPKy USB Device (USB-ycTpoiCtBO), 3aTeM HαKMnTe KlaBnUy Enter.
b. BmecTo 06bIyHoi 3aRpy3Kn npOn3oJTe 3anyck Windows c pe3epBHO KOnIN BOCCTaHOBJIeHnI.
- BbIbepeNTe TIN KJIaBnATypbl.
- BbIbepnTe Troubleshooting (YcTpaHHeHne HencnpaBHOCTe) n 3aTeM BblbepnTe HxHbTI NTO BOCCTaHOBJEHNIA:
a. HaxmTe DoonHnTeIbHo n 3aTeM BocCTaHOBJIeHne CNTEmbl, YTO6bl 3aNyCTnTb fYHKcHIO "BocCTaHOBJIeHne CNTEmbl Microsoft": ΦyHKcHry "BocCTaHOBJIeHne CNTEmbl Microsoft" nepnoDnueckn DeJaet "MomeHTaJIbHbIe CHIMKIn" napameTpOB n HAcTpoE K BaSei CNTEmbl u COxpaHReT Ix KaK TOUKn BOCCTaHOBJIeHn. B 6OJbShINCTBe CnyaeB CNOXbIX nPo6Iem C npOrpAMMaMn dJa BOCCTaHOBJIeHn pa6OTocNOC6HOctn CNTEmbl MOxH0 BePhyTbcr Ha OndHy IInn HeCKoJIbKO 3Tnx ToueK BOCCTaHOBJIeHn Ha3aI.
b. HaxmTe C6poc PK, YTObI HaaTb Ipocecc 6poca HacTpoek:ФункцЯ C6poc PK ydaIIT BCE DaHHbIe C JecETKO DnCKa,посл eTOro 6ydyt nepeycTaHOBLeHbI CnCTema Windows n BCE npedyctaHOBLeHHbIe B KOMlbItepe nporpaMMbl I dpaIbepbl. EcIn eUe MOxHO OTKpbITb BaXHbIe PaJIbI Ha JxcETKOM DnCKe, To npraMo ceuac co3daiTe nx pe3epBhble KOnnn. Cm. pa3deJ "C6poc PK n3 pe3epBHOJ KOONN BOCCTaHOBJeHnja"Ha cTp.33.
c. Haxmnte 06HOBnTB PK, YTObI NaHaTb npocecc 6HOBHeHn: PhHKzra 06HOBnTB PK NOnbITaeTCOxpaHNT BaShn FauJIbI (noIb3OBaTeJIbCKne DaHHbIe), HO nepeyctaHOBnT BCE nporpaMMbl I dpaiBepbl. PporpaMMbl, yCTaHOBHeHbIe BAMN NOcNe NOKyIKN PIK, 6dyt ydaJIeHbl (KpOME nporpaMM, yCTaHOBHeHHbIX C caHTa Mara3nHa Windows). Cm. pa3dEn "06HOBHeHne PK n3 pe3epBHOJ KOHN BOCCTaHOBHeHn" Ha cTp. 34.
C6poc IK n3 pe3epBHOJ KOHN BOCCTaHOBJIeHNA
BHHMaHHe! Pn c6pOce PIK 6yDyT ydaJIeHbI Bce paJIbI Ha JxecTKOM DnCKe.
- OTPpoetcOKHO C6poc PIK.
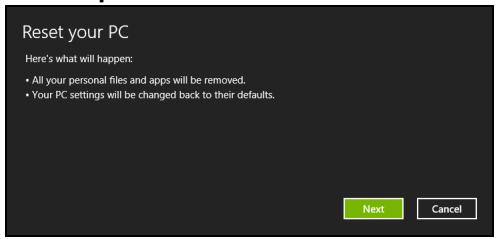
IInIocmpaquu npueedeHb moIbKO dny cnpaeku.
- Haxmte Danee.
- Bыберпе onepaционну сиTeMy Дя BOCCTaHOBnEHy (OьИHNOДОТупен TOльКо OДИN BapnaHT).
- Bыберп Te coхранен e BCex n3Mehen, pOu3BeTeHHbIX C JecTKIM DnCKOM:
a. EcIn Bbl ydaJIINn Ha JxecTKOM DnCKe pa3dEIN BOCCTAHOBHeHn IIN npyIM CnOcOBm N3MeHNi Pa3deJIbI JxecTKOrO DnCKa IN XOTnte COxpaHnTb 3TN n3MeHEnH, TO BblBepuTe Het.
b. 4To6bl NOnHOCTbH BOCCTaHOBNTb KOMNbIOTep Do COCTOHN3aBOIDCKNX HAcTpoE, To BbIbepnte Da.
- Bb6epnte cnooc ydaenna qaiIOB:
a. YdaJIHTb TOnbKO MoN faiNbI - 6bICTpoe ydaJIeHne BCEx faiIOB npeD BOCCTaHOBJIeHnEM KOMIbIOTepa; TakoE ydaJIeHne 3aHImaET OKOJ0 30 MInHyT.
b.ПОЛНOCtBIO OYNCNTbДNCK -ПОЛнЯ OYNCtKa ДИСКА NOССЕУДАЛЕНИWA KAKDOrO Файla,ЧТББ ПОСLE BOCCTAHOBЛЕНИWA HINODINCTAPBIФaIIH HeIb3A 6bIINO pOuHTaTb. OYNCtKa DИСКAZAHIMaET HAMHORO 6OJIbIe BpemeH (do 5 YacOB), HO 3TOHAMHORO 6OJIe 6e3OJaCHbI CnOCo6, TAK KaK CTapbIe ФaIJbIyUdANJIOTc8e3BO3BpaTHO.
- Haxmnte C6poc.
- После завершени BOCCTaHOBJIeHЯ Bbl CMOKeTe Haayatb pa60Tu c KOMlbIOTepom, NOBTOpNB DeiCTBnA, BblIOJHReMble PrnппрВOM 3aIycke.
OboBHeHnI K n3 pe3epBHOJ KOHN BOCCTaHOBHeHn
- OTKpoEcra OKHO 06HOBntb PIK.

- HaxmTe Danee.
- BbI6epnte onepaunOHHy CnCTemy IJIy BOCCTAHOBnHn (ObIuHO IOCTypeH TOJIbKO OINH BapnaHT).
- Haxmnte 06HOBntb.
5.B npocece BOCCTaHOBlenna ChauJa npOn3OJTeNpe3arpy3ka KOMpbIOTepa, a 3aTeM HauHETcK OKnIpOBaHne paJIIOB Ha JeCTKn IINCK. 3TOT npocecc 3aHIMaET OKOIO 30 MInHyT.
Acer Backup Manager
Ipumeyaue: 3ma yHKuia ecmb moIbKO o npedeJeHHbIX Moedjx.
Acer Backup Manager - àTO yTnIHTa, no3BOJHOUàA BbIOnHЯrMbHOKeCTBO ΦyHKuŋ pe3ePBHOro KOIpOBaHnA, kαχdAŋ I3 KOTOpbIX COCTOIT Bcero n3 Tpex npocTbX ⅢAorB. BbI MOxete HAcTpOHTb ABTomatUyeckn 3aynCK 3TuX ΦyHKuŋ C HγKHoB Bam YaCTOTOH.

Acer Backup Manager
?X
Welcome to Acer Backup Manager
Select one action below to start managing your data.
Back Up My Files
Pick and choose which files to back up or let the program find it all for you.
Image My Drive
Make a complete image backup of your drive.
Migrate My Files
Transfer your files from another computer to this computer.
Clear out / Restore Files
Remove seldom used files to free up space or restore files from your backup.

Launch My Backup Profiles
Back Up My Files
The file backup helps you create a complete backup of your documentation. Choose the file or folder for the backup and then select the destination for the backup. Once you have selected the destination, the final step is to schedule the backup. Click on the Backup My Files button to create a backup.

Directly enter "My Backup Profiles" next time.

YTo6bI 3aNyCTnTb yTuNHTy Acer Backup Manager B Windows 8, HauHInTe BBoDnTb "Backup Manager". Dpyroi cnocob: B pexKIme "Pa6OuN CTOn" Bbl6epnte Acer Backup Manager. OTKpoEcraKpAn IprBcETCBne, Ha KOTOpOM MOxHO Bbl6paTb TIN pe3epBHO KONNN, KOTOpBI Bbl XOTnTE CO3daTb.
ApxNBpuOBaTb faJIbI: Bbl6epnte faJbI dIy pe3epBHOKOpOBaHn.
Co3daTb o6pa3 dNcKa: Co3daIte paI npe3epBHOJ KOIIIN BCero dNcKa. 3TO T paiM MoKHO 3aIncA tB Ha Dnck DVD, coXpAHNTb erO Ha dpyroI dNcK KOMbHOTepa* IIN Ha CbeMHbI HAKONITeB (HaPIMep, Ha flash-HaKoNITeB), UTObl NOTOM npi Heo6xOIMOCtN BOCCTaHOBiTb BaW KOMNbHTep.
- Переньтохлы: Розваягет КОпровать саиbl Ha USВустюctBO, утобл при пошу утлintsы Acer Backup Managerперенocить саилbl CO STAPORO KOMlbOTepa Ha HOBsн Ип на Любо другов komlbOTep.
CTepeB/BocctaHOBnTB paJIb:YdaIte peJko IcNoJIb3yEmblcpeAIIbI,HTO6BI BbICBO6OdNtB MeCTo Ha JKeCTKOM DInCKe,IIN BOCCTaHOBnTE paIbI C Co3DaHHO BamPe3epBHOI KOHN.
Bb6epnte Tn pe3epBHOI KOIN, KOtOpb I XOTnTe CO3daTb, Bb6epnTe 0aIIbI INI DNCK Dnpe pe3epBHOI KOINPOBaHnI, 3aTeM BblONHInTe OTo6paKaemble Ha 3kpaHe IHCTpyKcN:
1 BbIepeTe coepKIMoe IЯ pe3epBHOro KOnIpOBaHn. Yem MeHbIe coepKIMoro BbIbpaHO, Tem 6bICTpee OcyuEcTBnErc Tpocecc KOnIpOBaHn, HO TEM BbIe pNCK NOTepn DaHHbIX.
2 BbI6epnte MeCTO dIy xpaHEnI py3epBHyIX KOJI. Bbl MoKeTe Bbl6paTb TAKHe BapNaHTbI, KaK CbeMHbI HAcONITeIb, DnCK KOMNbIOTePa*, DNCK CD/DVD, ydaJIeHHbI IK IIII O6JIaHoe xpaHJIuIe Microsoft SkyDrive.
3 BbI6epnte nepnoDnUHocTb, c KOTopoAer Backup Manager 6ydt co3daBaTb pe3epBhIe konnn.
IIO 3aBepseHn 3Tnx Tpex 7arOB pe3epBhle KOHN 6ydyT CO3daBaTbcA BtOMaTHueCKn COrJaCHO paCncaHnIO.
IoiroTOBka HOBORaAkkymyTOpa K IcNoJIb3OBAHnIO
Ipeed hauanom nCnoJIb3ObaHnna HOBOro aKKymyIaTopa COBeTyem npOBecTn npocecc erO noIroTOBKN K pa6ote:
- BCTaBbTe HOBbI aKKyMylTOp B bIKJIOueHHbI KOMlbIOTep.
2.ПодсоeДинITE aДaNTep ceTeBOrO nITaHnI N nOJIHoCTbI O 3apAДnte aKKyMylTOp. -
OToeDInHte aanTep cTeBOro nItaHn.
-
BkHouTe KOMnbIOTep n pa6oTaIte, IcNoJIb3yra 3JIeKTpOnITaHne ot aKKymyIaTOPa.
5.ИспοльзуйTe KOMьЮТерdo NOЛHOro pa3ряda 6aTapeи IOЯВлЕнЯ пеДуПржденЯ O Hn3KOM ypoBHe 3apJa. - Choba noДcoeДиHInTe aДanTep ceTeBOrO nIaHnI eIe pa3 noJIHOCTbIO 3apAДnte akKymyIЯTOp.
EcnB OTCek npNBoDa ONTNUeCKNX DnCKOB yCTaHOBNeH MoyIb npNBoDa DVD,TO B KOMNbIOTepe MOxHO BOCpON3BOIDtB DVD- nblMbI.
- BCTaBbTe DnCK DVD.
- BocnpoN3BVeDHeHne DVD-ФиЛьма abTomatUeCKn haHHeTcay Hepe3 HeckoJIbKO cekyHd.
Baxho! Pn nepbom 3anycke DVD-nneeepa nporpamma nonpocnt Bac yka3aTb KOd 3oHbI (pernoHa). DVD-dnckn BblnyckaIoTc dJr 6 30H.
Пи BOCCTaHOBJIeHn CnCTeMbI C JecTkoT OДСКа KOJINUYeCTBO BBOIOB KoJa peRHOHa He c6paCbIBaETCJ.
YBeJIuHHe mKoCTn OePaTINBHOJ nAMrTI
IyctaHOBNMOdyne namrN BbINOHNHe CNeDyUOne DeiCTBna:
- OTKIIOHnTe nITaHHe KOMNbIOTepa, OTCoEINHnTe aADANTep nepemehnHO ToKa (ecn OH NOcOeINHe) N 3BNeKHTe akKymJyTOp. 3aTe mpeBepHnTe KOMNbIOTep, TTo6bI OTKpbITb DOCTyn K erO OCHOBAHHIO.
- BbIbepHnTe BnHTbI n3 KpbIuKn OTceKa OepaTnBHOJ NaMRTN, 3aTeM npINoDnHMITE n CHmMtE 3Tu KpbIuKy.
- (a) BCTaBbTe MoDyIb IaMMyTn IoN yrIOM B rHe3IO, 3aTeM (b) OCTOpOxH0 HaIaBHTe Ha Hero, YTO6bl OH CO UeJYKOM BCTaI Ha MecTo.
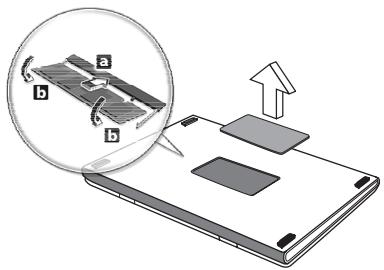
- 3akpoTe OTceK OIepaTINBHOI pAMrN KpbIuKOI n 3akpeNTe ee BnHTamN.
- YctaHOBnTe aKKymyIaTOp Ha MeCTO I NOcOeHInTe aAnTep nepemehnHO TOKa.
- BkHouHTe KOMnbIOTep.
KOMnbIOTep abTOMaTHueckn paCNo3HaeT HOBBI COBOKyHbI pa3Mep ONEpaTNBHO nAMrTN u N3MeHNT KOHcNpyaUIO.
YtNiNTa BIOS
Ytunnta BIOS - 3TO nporpamma KOHfumpynpoBaHn annapaTHbIX KOMnoHErTo, BCTpoEHHaB B6a3OByIO CnCTeMy BBOda/BbIBOda (BIOS) BaJero KOMnbIOTepa.
Bauch KOMnbIOpTe yKe cKoHcHnrgpUPOBaH n ONTMm3uPOBaH NaJIeXkaIzMM o6pa3OM, N03TOMy BaM He HuxkHO 3aIyCKaTb 3Ty Uynlnty. Ondako npn Bo3HKnHOBeHn np6Jem C KOHcHypaCneB Bam, BO3MOxHNO, pNiDeTcB BOCNoJIb3OBAtbcraEo.
YTo6bl 3aynctnty yTnInTy BIOS, BO BpEmy BbINOJIHeHncaMOnpOBepKn npN BKInoueHHn nITaHnY, KOrDa yBvIInTe INorOTnKOMNbIoTEpa, haxMtTe < F2>
PocneIOBaTeJIbHOCTb HaayalbHOJ 3aIpy3Kn
YTo6bl HAcTPOuTB NocJeIOBaTeIbHOCtB HaayaJIbHOJ 3arpy3Kn B yTuJIInTe BIOS, 3anyCTnTe yTuINrty BIOS n 3aTeM B cIncKe KaTEROpn BBepxY kKpaHa BbIbepnTe npHKT Boot (3arpy3ka).
3aandahe naponei
YTo6bI yCTaHOBnTb npoJI npH NaaJIbHOJ 3arpy3Ke, 3aNyCTnTe yTuNITy BIOS n 3aTEM B CnNCke KaTEROpn BBepxu 3kpaHa Bbl6epnTe nyHKT Security (Be3onacHocTb). HauJIte npaMeTp Password on boot: (PapOJI npH NaaJIbHOJ 3arpy3Ke): N HaxKaTHeM KJIaBnSI F5> n F6> BKJIIOHTe 3Ty fynKciHIO.
Yacto 3aadaBaemble BOpocbl
Danaee npBBeDeH CnICOK BO3MOXhIx CNTyaU, KOTOpbIe MOryT BCTpeTntbC npI NOJIb3OBAHN BaUNM KOMNbIbOTepOM. JIa KaJdoi CNTyaUmn npBBeDeHbl IpocTbe OTBeTbI n peuEHHa.
IocJIe BkJIIOUeHnI NITaHnI KOMNbIOTep He 3aNyCKaETcR IJIi He 3arpykaetcR
BzraHHe Ha HndnKaTOp Power (IitTaHne):
-
Ecni OH He CBetntc, NITaHne Ha KOMnbIOTep He noDaHO. PpOBepbTe cJeDyUouee:
-
Ecπn Bbl pa60taeTe OT aKKymyIaTOpa, 3To MoXeT O3Haayatb, yTo erO 3apYd Hn3kN I HeCnocO6eH PntTaB KOMNbIOTep. POnKIIuOHTe aAnTep nepemehHoro Toka, YTO6bl 3apAaTb aKKymyIaTOp.
-
Поберп Te npавиьнocь И Наджнocь NOДКЛюЧеня адантета поеменHorO TOka K KOMпьОТepy u K cTeBOI pO3eTke.
-
Ecni nHdNkaTOp CBetntcra, npOBepbTe cNeDuOuSee:
-
EcTB JIN DnCK B PnBBOe ONTNUeCKNX DnCKOB? N3BnEKNTe ero n HaxMnTE
+ + , YTO6bl nepe3aRpy3NTb CnCTemy. - BCTaBHeN JI B KOMMbIoTeP USB-HaKoHnTeIb (USB-DnCK nIIN cMaprTfOH)? OToCoEiHnIte erO n HaxMnTe
+ + , yTO6bl Ipee3arpy3ntb CnCTeMy.
KnaBnataype He pearnpyeT
KaK BbIKJIIOUHTb KOMNBIOTep?
HaxMnte KnaBnwn Windows +
3aYeM HUKeH HOBbI INHTeppeic?
Hob布局中Teppein DnWindows 8 pa3pa60an CneuJaBHO nAe HcHcOpHOro ynpaBHeHn. PpIIOxHeHn I3 Mara3Ha Windows 6yDyT ABTOMATNueCKn NCNoJIb3OBA Tb BeCb 3KpaH, INX He HJxHO 3aKpbBa Tb ObUHyBM CNOCOBm. PpIIOxHeHn I3 Mara3Ha Windows 6yDyT OTo6paXaTBcH Na 3KpaH PnyC B VIne "DINHAMuecknx PnITOK".
UTo TaKoe "DInHAmNueeCKne pIITKn"?
"ДиHamueckne ПNTkn (Live tiles)" ananoruHbI 3ckn3am npInIOxehn, OHI bdyT o6HOBnTbcra C HOBbIM COePXMbIM KaXdbi pa3, KOrDa Bbl POKJIouaTeCb K INHTepHeTy. IOnToMBy Bbl CMOxTe, HanpImep, nPoCMatPbTaB o6HOBJIeHHbIe MeTEOCBOkN INIb6IpKxBeBle KOTnpOBKn, He 3aNyckar COOTBeTCTByUOJne npInIOxehnA.
Kak pa36IoknpoBaTb KOMnbIoTeP?
YTo6bI pa36JIOKINPOBaTb KOMNbHTep, HaxMMTe JIO6yU KJIaBnUy I HaxMMTe 3HaQOK NOpb3OBAteNbCKoY yueTHoN 3aIncN. Ecnn dIpy UyeTHoN 3aIncN yCTaHOBJIeH napOlb, TO dIpy npOdoJXeHnry HxKHO BBeCTN 3TOT napOlb.
Kak HactpoNTb KOMNbIOTeP COJIaCHO MOIM ppeIIOuTeHnAm?
Moxhno Hactpontb 3kpan Nyck, ycTaHOBvB pa3nHbIe foHOBbIe n3o6paXeHHN, INyINpOraDOHTb PINTK B COOTBETCTBUN C BaUIMN npedNoTHeHHaMn.
UTo6bI N3MeHnTb fOHOBoe N3o6paXKeHne, HaNMeTe KJIaBnIJn Windows +
Kak nepemeuatab pIITkn?
Haxmte u ydepkuaite pIITky, cyObblbipb ee, 3aTeM nepeTaunTe eHa HxKHOe MeCTo Ha 3KpaHe Iyck. Dpyrme PnNTKN CDBNHyTcra, CYObbl3Ta PnNTKa BCTaJa Ha HOBOe MeCTo.
Kak deNaTb PnITKn KpyNHee nn MeJIbYe?
Kak ydaanitb nnitky c 3kpaHa Nysck?
B HeKToOpbIX oBnaCTx PhaHcHm DnIana3OH paIIOuAcTOT orpaHUnyeh. MaKcImaJIbHo pa3peHHeHHa MOUHOCTb B NOMEueHnX:
Cama ble nocneHnne HOBOCTn MOxHO y3HaTb Ha Be6-caIte ART (www.artelecom.fr).
UCTPOIcTBA (RSS-210)
Bo3dienCTBnE BbICOKOoacTOnTHbIX NOJIe Na IIOJe (RSS-102)
B 3TOM KOMNbIeTepe IcNoIb3yEtCBACTpoEHNa aHTeHHa C MaJIbIM ycINHeHEm, KOtOpa He CO3daet BblCOKoYacTObHbIX NOJIe, PneBbIshaUOxN X ppeJebl, yctahOBJIeHHbIe KaHaDcKIMn cTaHdaptAm 3dpaBOoxpAHEnHJa HaceJIeHn; CM.
"HopMbI 6e3oNaChOCTn 6" Na Be6-caIte MInHcTePcTBA 3dpaBOoxpAnHeHnaKaHaDbI www.hc-sc.gc.ca/rpb
3To yCtpoiCTBO OTBeuAe Tpe6oBaHnM CtaHApTa RSS210 MnHcTepcTbAnPpOMblIeHHocTn KaHaBl.
3To uHpOBoe yCToIcTBO Knacca B OTBeuAe TTre6BaHnM KaHaDcKOrO cTaHdApTa ICES-003, peI. 4, RSS-210 N 4 (deKa6pb 2000) n N 5 (HO6pb 2001).
"HopMbI 6e3oNaChOCTn 6" Ha Be6-caTe MInHcTePcTBA 3dpaBOoxpAnHeHn KaHaDbI www.hc-sc.gc.ca/rpb
3To yCtpoiCTBO OTBeuHaT Tpe6oBaHnIcTaHdApTa RSS210 MmHnCTepcTbAnPpOMblJeHHocTn KaHaDbI.
3To uHpOBoe yCToIcTBO Knacca B OTeBaeaT Tpe6oBaHm KaHaDcKOrO cTaHdApTa ICES-003, peI. 4, RSS-210 N 4 (deKa6pb 2000) n N 5 (HO6pb 2001).
Acer Backup Manager 33
Zarzadzanie energia 35
Customized Restore (Retain User Data)
Welcome to Acer Backup Manager
Select one action below to start managing your data.
Back Up My Files
Pick and choose which files to back up or let the program find it all for you.
Image My Drive
Make a complete image backup of your drive.
Migrate My Files
Transfer your files from another computer to this computer.
Clear out / Restore Files
Remove seldom used files to free up space or restore files from your backup.

Launch My Backup Profiles
acer
Back Up My Files
The file backup helps you create a complete backup of your documentation. Choose the file or folder for the backup and then select the destination for the backup. Once you have selected the destination, the final step is to schedule the backup. Click on the Backup My Files button to create a backup.


Directly enter "My Backup Profiles" next time
CLASS 1 LASER PRODUCT
CAUTION: INVISIBLE LASER RADIATION WHEN OPEN. AVOID EXPOSURE TO BEAM.
APPAREIL A LASER DE CLASSE 1 PRODUIT
LASERATTENTION: RADIATION DU FAISCEAU LASER INVISIBLE EN CAS D'OUVERTURE. EVITTER TOUTE EXPOSITION AUX RAYONS.
LUOKAN 1 LASERLAITE LASER KLASSE 1
VORSICHT: UNSICHTBARE LASERSTRAHUNG, WENN ABDECKUNG GEOFFNET NICTD DEM STRAHLL AUSSETZEN
PRODUCTO LAsER DE LA CLASEI
ADVERTENCIA: RADIACION LÁSER INVISIBLE AL SER ABIERTO. EVITE EXPONERSE A LOS RAYOS.
ADVARSEL: LASERSTRÄLING VEDÄNBING SE IKKE IND I STRÄLEN.
VARO! LAVATTAESSA OLET ALTTINA LASERSATEILYLLE.
VARNING: LASERSTRÄLNING NÄR DENNA DEL ÅR ÖPPNAD ÅLÄ TUIJOTA SÄTEESEENSTIRRA EJ IN I STRÄLEN
VARNING: LASERSTRÄLNING NAR DENNA DEL ÅR ÖPPNADSTIRRA EJ IN I STRÄLEN
ADVARSEL: LASERSTRÄLING NAR DEKSEL ÅPNESSTIRR IKKE INN I STRÄLEN
Acer Backup Manager 31
Start Acer Recovery Management:
www.acer-group.com/public/Sustainability/sustainability01.htm.

Upozornénf na rtut'
Acer Office Manager 12
Acer Backup Manager 33
Rizeni spotreby 35
Usporny rezim 35
Jednotka bateriovych zdrojù 37
Vlastnosti jednotky bateriovych zdrojù 37
Dobijení baterie 37
Optimalizace zivotosti baterie 38
Kontrola napajeni z baterie 39
Upozornéni na vybiti baterie 39
Instalace a vvjmuti Jednotky bateriovych zdroju 39
Customized Restore (Retain User Data)
Acer Recovery Management
?
Welcome to Acer Recovery Management
Acer Recovery Management enables you to restore your system. To begin, select the task you want to perform. Please DO NOT remove the USB device while proceeding.

Reinstall Drivers or Applications
Reinstalls factory default drivers or applications.

Customized Restore (Retain User Data)

Reinstall Drivers or Applications


Make a backup before you restore (Recommended).

Create Factory Default Backup
Create Drivers and Applications Backup

Here's what will happen:
- Your files and personalization settings won't change.
- Your PC settings will be changed back to their defaults.
- Apps from Windows Store will be kept.
- Apps you installed from discs or websites will be removed.
- A list of removed apps will be saved on your desktop.
Next
Cancel
Welcome to Acer Backup Manager
Select one action below to start managing your data.
Back Up My Files
Pick and choose which files to back up or let the program find it all for you.
Image My Drive
Make a complete image backup of your drive.
Migrate My Files
Transfer your files from another computer to this computer.
Clear out / Restore Files
Remove seldom used files to free up space or restore files from your backup.

Launch My Backup Profiles
acer
Back Up My Files
The file backup helps you create a complete backup of your documentation. Choose the file or folder for the backup and then select the destination for the backup. Once you have selected the destination, the final step is to schedule the backup. Click on the Backup My Files button to create a backup.


Directly enter "My Backup Profiles" next time
Acer Office Manager 11
Konzola Acer Office Manager 11
Ovladacipanel 11
Správca klientov 12
Zásady 13
Aktiva 14
Planovač uloh 15
Nastavenie 16
Oprava 17
Acer Backup Manager 31
Správa napájania 33
Uspora energie 33
Batéria 35
Vlastnosti baterie 35
Nabijanie bataie 35
Spustite Acer Recovery Management:
- V Časti Štart napíste „Recovery“ a potom kliknite v zozname aplikácína Acer Recovery Management.
K dispozífii su dve možnosti: Obnovit' pôvodné nastavenia (Resetovat'moj PC) alebo Prispósobene obnovenie (Obnovit'moj PC).
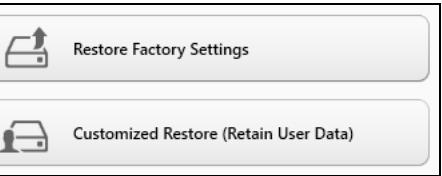
Here's what will happen:
- Your files and personalization settings won't change.
- Your PC settings will be changed back to their defaults.
- Apps from Windows Store will be kept.
- Apps you installed from discs or websites will be removed.
- A list of removed apps will be saved on your desktop.
Next
Cancel
Welcome to Acer Backup Manager
Select one action below to start managing your data.
Back Up My Files
Pick and choose which files to back up or let the program find it all for you.
Image My Drive
Make a complete image backup of your drive.
Migrate My Files
Transfer your files from another computer to this computer.
Clear out / Restore Files
Remove seldom used files to free up space or restore files from your backup.

Launch My Backup Profiles
Back Up My Files
The file backup helps you create a complete backup of your documentation. Choose the file or folder for the backup and then select the destination for the backup. Once you have selected the destination, the final step is to schedule the backup. Click on the Backup My Files button to create a backup.

Directly enter "My Backup Profiles" next time.
Acer Office Manager 11
Konzola Acer Office Manager 11
Nadzorna plošča 11
Acer Backup Manager 32
Upravljanje z napajanjem 34
ZaZenite Acer Recovery Management:
Here's what will happen:
- Your files and personalization settings won't change.
- Your PC settings will be changed back to their defaults.
- Apps from Windows Store will be kept.
- Apps you installed from discs or websites will be removed.
A list of removed apps will be saved on your desktop.
Next
Cancel
- Kliknite Naprej.
- Izberite operacijski systemd, ki gaŽelite obnoviti (obicajno je na voljo le ena možnost).
- Kliknite Osveži.
- Postopek obnovitve se bo pričel s ponovnim zagonom računalnika in nadaljeval s kopiranjem datotek na trdi disk. Ta postopek traja približno 30 minut.
Acer Backup Manager
Opomba: Ta funkcjja je na voljo le na nekaterih modelih.
www.acer-group.com/public/Sustainability/sustainability01.htm.
Savjet o zivi (Hg)
Za projektore sa zaruljom ili elektronicke proizvode koji imaju ne-LEDBAKELIT-LCD/CRT zaslon ili monitor: Zarulja(e) unutar ovog proizvada sadržiŽivu i mora se reciklarati ili odložiti u skladu s lokalnim, državnim ili federalnim zakonima. Za više informacija, obratite se ustanovi Electronic Industries Alliance na www.eiae.org. Za informacije o odlaganjupojedinih vrsta zarulja, provjerite www.lamprecycle.org.

ENERGY STAR

ENERGY STAR
Acer proizvosi s etiketom ENERGY STAR štede Vaš novac smanjenjem troškova struje i zašićivanjem okoliša bez gubitka svojstava ili performansi. Acer se ponosi time što svojim kupcima要去 ponuditi proizvode s etiketom ENERGY STAR.
Sto je ENERGY STAR?
Proizvodi koji zadovoljavaju ENERGY STAR uvjete koriste manje energije i sprevacaju emisije staklenickih plinova drzeci se strogih smjernica o energetskoj učinkovitosti americke Agencije za zašitu okolës. Acer se opredijelio nuditi proizvode i usluge širom svijeta koje korsnicima pomažu stedjeti novac i energiju te poboljsati kvalitetu okolës. Sto više enerije ustedimo zahvaljuuci energetskog učinkovitosti, to više smanjujemo staklenicke plinove i rizik klimatskih promjena. Više informacija naci cete na www.energystar.gov ili www.energystar.gov/powermanagement.
Acer proizvodi s ENERGY STAR etiketom: (samo za odreene modele)
Stvaraju manje topline i smanjuju rashladno opterecenje
- Automatski aktiviraju "stanje mirovanja ekrana" i "stanje mirovanja računala" načine rada nakon 10 tj. 30 minuta neaktivnosti.
- Ponovno Pokrenite normalni rad računala iz mirovanja pritiskom na tipkovnicu ili pomakom miša.
- Računala ce uštedjeti više od 80% energije u stanju mirovanja.
ENERGY STAR i ENERGY STAR etiketa registrirani su zašitni znakovi Sjedinjenih Država.
Acer Office Manager 10
Acer Office Manager konzola 10
Upravljacka ploca 10
Acer Backup Manager 31
Pokrenite Acer Recovery Management:
- U izborniku Početak, unesite "Recovery" i kliknite na Acer Recovery Management u popisu aplikacija.
Welcome to Acer Backup Manager
Select one action below to start managing your data.
Back Up My Files
Pick and choose which files to back up or let the program find it all for you.
Image My Drive
Make a complete image backup of your drive.
Migrate My Files
Transfer your files from another computer to this computer.
Clear out / Restore Files
Remove seldom used files to free up space or restore files from your backup.

Launch My Backup Profiles

Back Up My Files
The file backup helps you create a complete backup of your documentation. Choose the file or folder for the backup and then select the destination for the backup. Once you have selected the destination, the final step is to schedule the backup. Click on the Backup My Files button to create a backup.
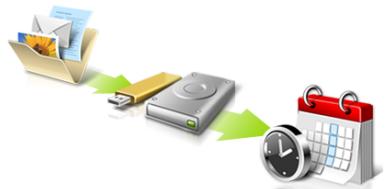

Directly enter "My Backup Profiles" next time
International Travelers jamstvo (ITW)
Indicatiptions for the use of this system are provided by the following sections.
www.acer-group.com/public/Sustainability/sustainability01.htm.
Consultanta privind mercurul
Acer Office Manager 11
Consola Acer Office Manager 11
Tablou de bord 11
Manager clienti 12
Politici 13
Active 15
Acer Backup Manager 32
Lansati Acer Recovery Management:
- Din Start, tastati 'Recuperare'.si dati cli pe Acer Recovery Management in lista de aplicatl.
Welcome to Acer Backup Manager
Select one action below to start managing your data.
Back Up My Files
Pick and choose which files to back up or let the program find it all for you.
Image My Drive
Make a complete image backup of your drive.
Migrate My Files
Transfer your files from another computer to this computer.
Clear out / Restore Files
Remove seldom used files to free up space or restore files from your backup.

Launch My Backup Profiles
Back Up My Files
The file backup helps you create a complete backup of your documentation. Choose the file or folder for the backup and then select the destination for the backup. Once you have selected the destination, the final step is to schedule the backup. Click on the Backup My Files button to create a backup.
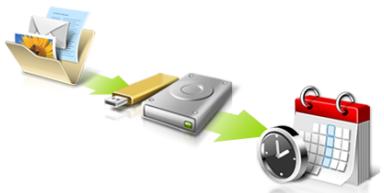


Directly enter "My Backup Profiles" next time
Undepotobtinemai multeinformation?
Pentru informatii suplimentare, accesati:
Yka3aHnna 3a 6e3oNaCHOCT
П两点 Te 3и указань Виимателно. 3апazеTe TОЗДOKумент 3a 6ыдци справки. Сразваite BCИЧКи п徝дурждени и указань, маркирани на поюкту.
I3KJIIOUBaHe Na npOdykTa npEiN noOuHcTbaHe
Ötkaçete npódukta ot CTehnna KOhtaKT, ppei da ro nouchteBaTe. He n3no3baIte TeuH nIe aepo3oJHn nouchTbauni npenapatn. 3a nouchTbaHe n3no3BaIte BλaKeH napcaI.
BHHMABAITE 3a 1e9ceIa npn OTKaHaHe Ha yCTpoiCTBOTO
CneIbawTe Te3n yka3aHn, KOrato CBbp3BaTe n OTkaHaTe 3axpaHbHeTo KbM 3axpaHbAun6blok:
MOnTnpaIte 3axpaHbAunia 6nok, npedn da cBbpxeTe 3axpaHbAunia Ka6en cbc CTehnnr AC KOHTaKT.
Ötkaayte 3axpaHbaunKa6en, npedn da demoHTnpate 3axpaHbaun6nok OT KOMNTObpa.
Ako cncTeMaTa Hma HЯkonKo 3axpaHbAsu N3ToUHnKa, CnpTe 3axpaHbAHeTO n3zIIO, Kato OTKaUnTE BCNUKn 3axpaHbAsu Ka6eIi OT 3axpaHbAsuTe N3ToUHnU.
BHHIMABAIte 3a DoCTbIHOCT
YbepeTe ce, ye eNEKtpnueckn KaHTaKT, B KOITo BKJIIOUbaTe 3axpaHbAunKa6eI, e JeCHO DocTbIeN I CE HAMIPA Bb3MOXHO HAI-6IIIN3O DO YOBeKa, pa6Oteu C obOpyDbaHeTo. Korato Ce HanaIa Da cPiPeTe 3axpaHbAHeTo KbM o6OpyDbaHeTo, He 3abpaBaire Ta n3BaIInTe 3axpaHbAunKa6eI ON eNEKtpnueckn KoHTaKT.
BHHIMABAITE 3a HaJIInuHne Ha n3KycTBeHn KapTu (cAmO 3a HЯКоM MoDeJIi)
KOMNIObPbT Bn e DoCTaBeH C nIaCTMaOBN KApTN, NocTaBeHN B KApTOBIne CLOTOBE. N3KycCTBeHNTe KApTN IpeIpa3BaT HeN3NON3BaHNTe CNoTOBE OT npax, MeTaNHN IIN dpyrN YactNIu. 3ana3eTe N3KycCTBeHNTe KApTN I IN N3NON3BaInTe, KOrato B CNoTOBete HЯMa dpyrN KApTN.
BHHIMABAIETnpncnyuhahe
3a da npedna3nte cnyxa cn, cneDbaiTe te3n INHCTpykun.
- YBeJIuUaBaTe CnIaTa Ha 3ByKa IIOCTeHHe, DOKaTo He CyBaTe RaCHO IN KOMΦopTHO.
He yBeneuBaBte CnnaTa Ha 3Byka, CneI KaTo yUHInTe Bn CBNKHaT.
He cnyuatae Myzika C Bvcoka cnla Ha 3Byka Dblrnpn nepnoi OT BpeMe.
He yBenuabaTe CnIaTa Ha 3ByKa, 3a Da HeyTpAn3npaTe 7ymHa o6ctaHObKa.
- HamaNete cunata Ha 3Byka, aKO He yBaTe Xopata, KOnTO roBOpA r OKoJIO Bac.
PpeDynpexkdeHn
He n3noJ3BaIe npOdyKta 6n3o do Boda.
He noctabraye npodykta ha hectabnHa KOJIuKa, cToiKa IIM Maca. Ako npodykTbT naDhe, MOKe da ce nobpeDu cepno3Ho.
- Има сnotobeи OTbOpn 3a BeHTnlaucn, KOINTO OcNHyprBaT HaedJHnata pa6ota Na npodykta n ro ppeNa3Bat OT ppepRaBe. He 6nBa Da 6nOKnPate nI IN POKPBAte Te3n OTbOpn. 3a Da n He 6nOKnPate OTbOpnte, He 6nBa Da noCTabTe npodykta Ha JeTNO, DInBaH, KINIM IIN NIOObHa NOBbPxHOCT. Hnkora He NoCTabYIte npodykta 6bn30 Do nI IN HAD paDnATop, HarpBaUc BeHTnI IN BrpaDeHa IHCTaNaucn, OCBEN aKO He CTe MY OCNrypNIu HxKHATA BeHTnlaucn.
Hikora He nbxaIte HnkaBn ppeMeTn B npOyKta ppe3 OTbOpnte n npoUenITE, TbKATO MOKe Da yueJIte ONaCHN TOcKn POnd HappeKeHne IIN Da npedn3BnKaTe KbCO CbeDInHeHne, KOEtO MOKe npuHnIOXkap NtN TOKOB ynap. Hnkora He pa3nBaIte HnkaBn TeHocTn Bbpxu IN B npOyKta.
3a da n36eHHeTe NOBpexJaHe Ha BbTpEshHnTe KOMNoHEHTn I da npedotBpaTHe Teu Ha 6aTepeHnTe, He noctabraIte npOdyKta Bbpxy Bn6pnpaun NoBbpxHOCTn.
Hnkora He ro n3non3BaIte B cpea, KbTeTo ce n3BbPWBat CnOpT, fni3nuecknynpaxhene HIN NIMa KaBNTO I Da 6nlo BN6paCNI, Tb Kato TOBA BepoRTHOe npuHN HeoayKaBaHO KbCo CbeDInHeHne INIe NOBpeDN pOTOPHTyeCTPOIcTB, TBpDnA DnCK, ONTNCHOTO yCTPOIcTBO, a MOKe DOpN DA BnH3JIOXn Ha PnCK OTn3JIOXeHne HA NITNEBn BatepeuH nakET.
- Довота повьхонт, учсьипес Okono вентuaцнонгte OTBOPИnpоменивOTOKOBИТаадпетер моче да се нарегТ. 3a да сибэр themselvesа,
- He TpЯБа да се дОпиратdo bawata koxa nIIN TЯNo.
BaIeTo yCTpoCTBO n DOnbJIHeHnra Ta KbM Hero MoKe da cbIbPkaT dpe6Hn YactuN. Da ce na3n ot deua.
I3noJ3BaHe Ha eJnKtpnueCTBO
To3n npOdyKT Tp86Ba da ce 3n0n3Ba c Tnla 3axpaHbaHe, nocOeHO Ha MapKInpOBkata. Ako He cTe cnryprn KaKBo e 3axpaHbaHeto npi Bac, KOHCyItnpaTae Ce c Dnctpn6byTopa nn C MeCTHaTa eEKeTpnuecka KOMPnaHna.
He octabray Te Hnio Bbpxy 3axpaHbau nkaBen. He noctabray Te npodykTa Taka, ye no kaeba na cTbNbat xopa.
Ako n3noI3BaTe ydbJnxTe n c npOdykTa, yBepete ce, ye oobata HOMHaJIHa MoUHOC T ha obOpuyBaHeTo, BKNIOyeHO B ydbJnxKITeY, He HAdXbPn HOMHaJIHaT a MOUHoc Ha ydbJnxKITeY. CbIo taKa CE yBepete, ye oobata HOMHaJIHa MOUHOC T ha BCNUKIN pOdyKTn, BKNIOyeHN B CTehnN KOHTaKT, He HAdXbPn MOUHOCTTa Ha 6yOHa.
He BkIIOUBAHMe MHOrO yCTpoiCTBa HabeIDhJx, 3a Da He npTeOBapIne eIeKTPuYeCKn KOnTaKT, Ka6eN IINI 6yKcA. O6IoTO CnCTEmHO HATOBAPBaHe He 6bBa Da HAnXBpIg 80% OT HOMHaHnHATA MOHOC T Ha pa3KIOHeHneTo. Ako n3PON3BaTe pa3KIOHnTeI, HATOBAPBaHTo He 6bBa Da HAnXBpIg 80% OT HOMHaHnHaT BxODHa MoUHOC T Ha pa3KIOHnTeIa.
- AC aadantepbT ha npodukTa e oobopydban c trpknienen 3a3emeh uencen. UencelbT nacBa camo Ha 3a3emeh enektpnuceckn KOHTAK. YbepeTe ce, ye enektpnuceckn KOHTAKe T 3a3emeh npabuHIO, npdei Da BKlouHte uencena Ha AC aanTepa. He BKlouBaIte uencena B He3a3emeh enektpnuceckn KOHTAKT. 3a noboe neopdo6hOCTn nItaTe CBOE enektpoTeXnK.

BhImaHHe! 3a3eMaBaunrT uNΦTe mRpa 3a 6e3onacHOCT. Ako n3noJ3BaTe eJeKtpnueckn KOHTAKT, KOITo He e 3a3Emen npabJIHo, MoKe Da NOnyUHTe TOKOB ydap N/nn da Ce HapaHHTe.

BhimaHne!OTcbo6paKeHHa36e3OnacHocT,1KJIIOUBAIte BCnKu 6e3KuHn Hn paADNoPepaDaBaTeHN yCTpoNCTBa,KORA TO n3NO3BaTe IanToNa npCJeDNHTe ycNoBn. Te3n ycNoBn BkJIOuBaT,HO He ce OrpaHnuBaTa C:6e3KuHeN LAN (WLAN), Bluetooth n/In 3G.
He 3a6paBraIte Da cna3BaTe BcKaKbN CnEuaHnpeyIaIu N BcIIaHa BCaKO MRATo I BNHaRn I3KJIIOUBAIte Ye yCTpoiCTBOTo, KOrATo I3NoI3BaHEno My e 3a6paHEno IIN KORATO MOKe Da npEdu3Bnka INTEpOepeHnue IIN OnaChOc. I3NoI3BaIte YCTpoiCTBOTo Camo B HopMaJInTe 3a pa6ota nOIOXeHn I IO3uIeu. YCTpoiCTBOTo OTROBapr Ha pa3npoeD6bTe 3a I3JIarAne Ha paAnOJeCToTHo (RF) I3JIbUbaHe, KOrATo Ce I3NoI3Ba HOpMaJIno I KOrATo To I aHTeHata My ca Ha noHe
1,5caHTIMMeTp(a/8nHua)OT TAnoTO Bn.He 6bBa da CbDbPka MeTaN I TpBbDa nocTaBnTe yCTpoiCTBOTo Ha rOpEnOcoHTo pa3cTOrHne OT TAnoTO cN.3a Da npedaba faIIOBe C daHNn ININ CbO6UeHryUCNeuHO,yCTpoiCTBOTo ce HuxJae ot Do6pa,KaueCTBeHa Bpv3ka CMpeKaTa.
B HЯко слуан, npexbprnHTo HaфainObe c daHn nIn cbo6uHnma MoKe da ce 3a6aBn,doKATO He ce noRbTakaba Bp3ka. YBepete ce,Ye ropeNocoUHte yka3aHn 3a pa3ctOraHnTo ce cna3BaT,doKATO npexbprnHTo He npNKJIOuHn.
HЯkon yactn ot yctpoiCTBOTO ca MarHeTNUH. YcToPcIbTO MoKeJa npINBmua HЯkon MetaJIHn PpeMTeN, a Xopa cbc CnyXOBn anapaTueta He 6nBa da DbpxKat yctpoiCTBOTo 6In3o Do yxoto, B KOEtO nMat CnyXOB anapat. He noCTabJrTe KpeDHTHn KapTn INI dpytn MaHNTHn HocNTeN 6In3o Do yctpoiCTBOTO, TbI KaTO INΦopMaunraTa Bpxy TaX MoKe Da 6bJe n3TpNTa.
MeiHcN yctpoCTBa
Pa6oTaTc BcKaKbBa paIIOu3MbYBaTeHNO 6OpuyDaHe, BKNIOUteHNO 6e3KUnHn TeJefoHn, MoKe Da IOnpeuHa yHKuOHaNHOCTTa Ha HeIOCTaBChO Do6pe 3aIInTeHm MeINuHcN yCTpoiCTBa. KoHCyItnpaIte Ce c Iekap nIc npON3BOJNTeHn Ha MeINuHcKOTo yCTpoiCTBO, 3a Da pa3BepeTe daJIIn To e NaIeXHO 3aIInTeHO OT BbHua PaINOueCTOTHa eHeprIg NII aKO IMATE dpYrI
Bbnpocn, Cbbp3aHn C Hero. N3KJIIOUcBaIte YcTPOINCTBOTo CN B 3IpaBHn 3abeHnA, KOrato TAm IMa peYulaCmN, KOINTO NCKAT TOBA OT Bac.
BoHnUHTe Hn 3dpaBnTe 3aBeHeNna MoKe da n3noBt ObOpyDbaHe, YBCTBnTeHNO KbM BbHUnn paAnOcETOnn TpAHCmCnn.
Писмкьр. Ппоьдтелпг Да пссмкьрп рпспорчВМИнмално pa3ctordие ot 15,3 caNTIMeTpa (6 Ичa) Мжdy пссмкьрИИ BCЯКВИ b63KUnHn YcTpoIcTBa, 3a DA ce I36eRHe BcKaKBa eBENTyAHa INHTepФepeHcNIA C peicmkebpa. Te3n pncopbKn Ca podkpeHn OT He3aBNCIMTe I3CneDbAHnI npenopbknte Ha InHCTNYTa 3a I3cNeDBAHe Ha 63KUnHnTE TExHOnToN WiReless Technology Research. Лцata c пссмкьрп ТябВа дca3BAT CpeHnTe yka3AnH:
BnHaHn DpbXte ycTpoiCTbOTo Ha noHe 15,3 caHTmEtpa (6 nHya) ot neiCmeKbpa.
He hocete yctpoictBOTo 6IIN3O Do neiCMEKbpa Cn, DOKaTO To e BKNIOyeHO. Ako IIOO3npate, ye nMa pNCK OT INHTeppepeHcna, IN3KNOUeTe yCTPOICTBOTo I ro npemecte.
Cnyxobn anapatn. Haryon zufpobu 6e3KuHn yctpoCTBa npedn3BkBaT INTEPpepehuny hkyoN CnyxOBn anapatn. Pnp TaKbB clyuae ce CBpKeTe C doCTaBvHa n CnyxOBn anapat.
MOTOPHNIpeBO3HNCpeDCTBa
PapnoecToTHnTe CnHaHn MoT Da 3aceHnat HnnpaBnHn IHCTaIupaHn IINn HnnpaBnHn IpEJaNaeHn ENEKTPoHNn CnCTeMn B MOTOpHn IpEBO3Hn CpeCTBa, KaTO HApnPmep, ENEKTPoHNn CnCTeMn 3a BnPbCKBaHe Ha TropNBOTO, ENEKTPoHNn CnCTeMn IpOTuB 6blOKInpaHe Ha CnPauchte, ENEKTPoHNn CnCTeMn 3a KOHTpON Ha CKOPocTTa N CNTeMn 3a Bb3dUshn Bb3rnaBHuN. PToTbpcTe Nobeue INHΦopMaun npi pOn3BODnteJ -IIN HerOB IpEcdtABHTen -Ha BaWteO npEBO3HO CpeCTBO nIN Ha DoabBeHOTo ObopyDbAhe. Camo KBaAnFnsipan NepcoHAn Tpr6BaDa o6CnykBa yCTpoICTBTO IIN Da INCTaInpa YCTPOITCBTO B MOTOpHn IpEBO3HO CpeCTBO. HnpaBnHnTE INCTaIauZn IIN OBClykBaHe MOrat Da ca ONaChn I da anHyIpar rapaHcunraHa Ha yCTpoICTBOTO. PeobHo npOBepBaIte DaII BCNUKb 63xNCHyDABHe. He CBxpanBaIte N He npEacRite 3anaJIIMN TeHQCTN, ra3OBe IIN EKCIIIO3NBn MaTePuaJI N 61N30 Do yCTPOICTBTO, HerOBITE qactN IIN dONbIHeHn. Ipn MOTOpHn IpEBO3Hn CpeCTBa C Bb3dUShn Bb3rnaBHuNc - He 3a6pAbYte, Ye Bb3dUshnte Bb3rnaBHuNc Ce NaYBaT C rOJMa Cnila. He IOCTabYte IpeMeTI, BKNIOUYteJIHO INCTaInpaHO IIN npEHOcMo 63xNCHO ObopyDbAhe, PIn N3XODa Ha Bb3dUShnata Bb3rnaBHuNca IIN TaM, KbDeTo ce pa3dyBa T. Ako B MOTOpHto IpEBO3HO CpeCTBO Ima HnpaBnHNo IHCTaIupaHO 63xNCHO ObopyDbAte H Bb3dUShnata Bb3rnaBHuNca Ce OTBOPN, MOKe Da Ce IONyUcat cepINO3Hn HapaNBAHn. I3NON3BaHeTo Ha yCTPOICTBTO IO BpeMe Ha camOJeTeH IONet e 3a6paHEno. I3KNIOVAIte yCTPOICTBOTO, npEtn Da CE KaCbate Ha camOJeT. I3NON3BaHeTo Ha 63xNCHN yCTPOIcTBa B CAMoNETn MOKe Da 3aCtPaUba paoTata Ha camOJeTa IIN da cmUzaba 63xNCHATA TeneΦOHHa MPexa, a cbIo to Taka MoKe da e He3akOHHO.
B3pmboonacna cpea
ИЗк nullовайу усторьOTO си Вьв BCяka obla act, кая Има взрьоога chа ATMOCфера, И следытЕ BCчн 3наци UУказан.Взрьоогансата ATMOCфера BК nullовайma месда, Кьдeto obинхов� BO INHCTpykTnpa Да ИЗК nullовп Te BИralatЯ Ha abTomobиna си. ИскрITE Ha NOOБн МесТа могТ д пчнгТ ecnIIO3N Ил пожар, Кото nbK може Да п徳ивка Телесни habаловни Ил дори Cmblpt. ИЗк nullовайу усторьOTO на месда 3a пзэрждане с rolпв Кото habример БензИностанци и ra3ctanu. Спаьaite orpanuЧенята 3a ynotpe6a на paДINOOBOPyDbaHe B roрьнн cklaIDObe, 30н 3a CBxpaHEne И радпрдени; XIMNUECKN 3aBOIN; Ил на месда, Кьдeto ce n3BbPWBAT B3pNBH DeHOCTN. MecTATA CВзрьоога纳а ATMOCфера чсTo, HO He BUNHn, CA OTбELЯЗANЯ CHO. Te BKlIOvBATnomeшени.TAOДпалубага на плавatelNi CBdОbe, Nomsehenia 3a CBxpaHEne Ил ТраHCфep Ha xIMNKaII, првOSTHС cpeCTBa, KOTU INION3BaT BteHENr4 (KATO pponan Ил 6byTah), KaKTO И месда, Кьдeto Bb3dYbXbT CbIbpxa XIMNKaII INI YacTtNi Kato 3PbHua, npax IIN MeTALH INpaWlnKn. He BKlIOvBayte HoYt6yka, KBdTeTo e 3abpaHenaу ynotpe6ata Na6e3KUnH NteФoHIn INI KdTeTo Moke DA ppein3BvKa INHTepfepenuzny ININ OnaCHOCT.
CneuHn o6aJdAnna
BhImaHHe: He MoKeTe Da npaBnTe CneuHn ObaKdAnHrye3 ToBa yCTpoiCTBO. 3a Da HappaBnTe CneuHo ObaKdAnE, Tp8Ba Da NahepeTe OT MobuHnra Cn TelefoH uIN Dpyra CnCTema 3a TelefoHn HObaKdAnHr.
Yka3aHnIa n3XbPpIHe
He n3xBbprnIte TOBa eNEKtpoHNo yCTpoNcTBo B6oknyka. 3a da HamaJInte 3ambpcraBaHeTo n da ce norpnnKeTe 3a 3auNTaHa cBeTOBnTa npriOda, MoJr peuNKnPaIte. 3a noBee uHΦopMaunr OTHOcPOpa3nopei6nTe 3a OTnaDbuOn OT eNEKtpuYecko u eNEKtpoHNO o6OpyDbaHe (Waste from Electrical and Electronics Equipment, WEEE), nocTeTe www.acer-group.com/public/Sustainability/ sustainability01.htm.
BHHMaHHe -KINBaK
3a npoeKtopn c BpraDeHa lamma nIeN eKeKtpOHn npOyKTn 6e3 MoHITOP nI INcPiNe CbC 3aIHO LED ocBETBaHe: lamnata(NTe) B To3n npOdyKT cbDbPka(T) XINBAK n TpRA6Ba Da ce peuKnnpa(T) IIN n3XBpbn(HT) B cBOTBeTCTBne C MecTHNe, DpbXkABHnTe IIN fedepaanHnTE 3aOKHI. 3a NOBee INHΦopMaun, CBpKte Ce CbC CbIO3a Ha eNEKtpOHnTe INDyctpn (Electronic Industries Alliance) Ha www.eiae.org. 3a cneUPhiUHa INHΦopMaun 3a IN3XBpbnJe Ha lammntE, BVXTe Ha www.lamprecycle.org.

ENERGY STAR

Пюдуктinte ha Acer c ЛороTO ENERGY STAR Bn nomarat da песпгte napи кato hamаляват разхда Bn ha eheprnia и Зашитават OKОннaitca р dedбе 6e3 TOBA д e b Oцьрб ha Функшптete ил пюзбдпселноctТа hyстpoiстBOTo. Acer ce roрдee с TOBA, Ye може д пюдлочи ha КпиЕнтITE сп рюдукт,在оceши лороTO ENERGY STAR.
KakBo e ENERGY STAR?
IpoDyKtn c Ioroto ENERGY STAR KOhcyMpaT no-MaNko eHeprna I npedOTBpTaBt emncn Ha napHnKOBn Ra3OBe KaTO OTRObApRT Ha CTpNKTHnTe pa3nOpE6b 3a eHepriHa eFeKTMBHOCT Ha AreHcUrra 3a 3aUrra Ha OKoHNata cpeHa Na CAl. Acer npedlara npDyKTN n ycLyrr No ceJIry CBrt, KOnTo NOMarat Ha kIneHTnte Da NcTeT Napn H eHeprrn Ha da NpOobpBaT KaueCTBOTo Ha OKoHNaTc cpeHa. KoIKOto NOBee eHeprrn MoXem Da CnecTm Ype3 No-BvCOKA eHeprna He efKeTNBHOCT, TOLKOBA NOBee MOXem Da HAmaJIIM eMNCInHe Ha napHnKOBn Ra3OBe IN PnCKOBete 3a IpomraHa Ha KInMaTa. 3a NOBee INHΦopMaclr BnKte www.energystar.gov nIIN www.energystar.gov/powermanagement.
BkIIOUbaHe nN3KJIIOUbaHe
3a da BKJIIOUHTe KOMNIOJBpa, npocTo haTNCHEte OOTyHcTe 6yTOHa 3a BKJIIOUBAHe n 3KJIIOUBAHe. MoJra, npOBepete B noCTepa C hAcTpoIKn KbJe Ce haMnpa 6yTOHbT 3a BKJIIOUBAHe n 3KJIIOUBAHe.
3a da n3kIouHTe KOMIIOTbpa, HappaBeTe HraKe O T CJIeHNte Hea:
- ɪnəʊnɪzBaɪte KOMaɪdɑta 3aɪnKlɪoʊBaHé Ha Windows: HætɪsCHete Windows Klaɪsua +
, ɪspɑkHæTe Bbpxy Hæctpɔːŋ > 3axpaɪhBaHæne, cneɪd KoETo Bbpxy NɪkJIuOvBaHæ.
Ako Tp86Ba Da n3KJIOUHTe KOMNHObpa 3a n3BeCTHO BpeMe, Ho He NCKaTe da ro n3KIOUHbATE HaIbJIHO, MOKeTe Da ro NOCTaBnTE B pexm Xu6epHauzra KaTO HAnpaBnTE CJeDHOTO:
HaTnCHHeTe 6yToHa 3a BKJIIOUBaHe n N3KJIIOUBaHe.
-
NJIH -
-
HaTnchete Windows klaeuwa +
, upaKHeTe Bbpyx HacTpOKn > 3axpaHbaHe, cneI KOeTO Bbpyx XnbepHaun.
Moxete cIbIIO taka Da BkapaTe KOMNIObpa B pexIM "3acnBaHe", KaTo HATINCHETe KJIaBUNHaTa KOMbHaun
Benekka: B cnyau, ye He moxeme da u3kIIOUme kOMNIObpa qpe3 HopmaHume npoueDpyu, Hamuche m u 3aOpBXmte bymoHa 3a 3axpaHeaHe 3a noee om yemupu cekyno, 3a da u3kIOUme kOMNIObpa npunHydumenHO. Ako cme u3kIOUnu kOMNIObpa u Uckame da 20 EKIOUme omHO8O, u3yakaune Hau-MaIKo dee cekynoU.
Гржka 3a KOMнOTьра
Baunr KOMnTbP ue BN CnykN Do6pe, aKo ce rpnKeTe 3a Hero.
He n3laarTe KOMnHbpa Ha npraKa cIbHcYeBa CBeTInHa. He ro noCTabrTe 6n3o Do n3ToCHuNHa HToPnInHa KaTo HapnMpE paDnAtOpn.
He ro n3naarTe ha tempepatnp noD 0^ (32^) nn HAD 50^ (122^)
- Na3eTe KOMNIObpa OT MaHHTHn NOIeta.
- Na3eTe KOMNIObpa O TbJkN JIn Bnara.
He pa3nBaIte Boa IIN dpYr TeHocTbBpX KOMIObpa.
- Na3eTe KOMNIObpa O T CINHn Ydapn Nn BN6paun.
- Na3eTe KOMHIObpa O npax nJn KaI.
Hikora He noctabraye npdpyn ppeMetn Bbpxy KOMNIObpa.
He TpbukaiTe KOMNtBpHnI DaCnPiNe, Korato ro 3aTbapAte.
Hikora He noctabraye Te KOMIOTbpa Bbyx HepaBHN NOBbpxHOCTN.
Гржи 3a вшия AC aanTep
ETo HApKIO HaunHa da ce rpnKeTe 3a CBOA AC aanTep:
He cBbP3BaIte aIaIaTepa c HnKaKbI npTu yCtpoIcTba.
He cTbnaIte Bbpxy 3axpaHbaunia KabeI Hne NoCTaBraIte TeKKn npEdmTe N Bbpyx Hero. IocTabete 3axpaHbaunia KaBeI N BCaKaBn DpyrN KaBeI N HactpaHn OT MeCTa, NO KOnTO ce MInHaba YecTo.
Korato otkaate 3axpaHbaaunKa6en, He nbpnaIte camna Ka6en, a XbaaaiTe uencena.
Bcnya,ye n3noI3BaTe yIbJnKInTeI,obuaTahOMHaJIHaMOUHOCHT Ha BkIIOueHOToOBOpYDaBaHe He 6bNa Da HAdXbPnI HOMHaJIHaTaMOUHOCHT Ha Ka6eHa.CbIo Taka O6uata HOMHaJIHa MOUHOCCT Ha BCINKOTOOBOpYDaHe, BkIOueHO B eDInH N CbIaN KOHTaTt Ha CTeHaTt,He 6bNa Da HAdXbPnI MOUHOCTTa Ha 6yOHa.
Гржи 3a пaketeбаери
ETo HApKIO HaunHa da ce rpnKeTe 3a CbO PaKeT 6aTePn:
- I3noJ3BaIte cmo eHaKnBn 6aTeepn 3a 3amHa. I3KJIIOUeTe KOMNtbpa, npedn da BaInte nIIN CmehrTe 6aTeepnIte.
He cn irpaaiTe c 6aepnnte. IpbXte ng daaneuy ot deua. - 13xBbPnIe n3noJIbAHnTe 6aTeepn B CbOTBeTCTBne C MeCTHnTe 3aKHOpa3nopeD6n. Ako e Bb3MOxHo - peUKNipaTe rN.
MOnIa, BnKTe "YeCTo 3aDaBaHbBbnpoc" Ha cTp. 57.
HOpMaun3aBaue yDObCTBOI6eOnacHOCT iii
Yka3aHna 3a 6e3oNaCHOCT iii
IpeDynpexkdeHne 3a ypeC onTnUHO yctpoiCTBO
Acer Office Manager 11
Acer Office Manager konzola 11
TaeNo 11
Диспесер на Клиенти 12
Политник 13
AKTINB 14
Acer Backup Manager 32
YnpaBHeHne Ha 3axpaHbAHeTo 34
IkoHOMnaHa eheprnra 34
BaTepeHmOdyI 36
XapakTeepntKnHa6aTepeHmMy Moyn 36
3apekdaheHa6aTepeyra 36
OnTmMn3npaHe Ha JxNBoTa Ha 6aTepeyra 37
ПоберkaHaHIBOTOHa6aTepeyra 38
IpeDynpexdEHe 3a npdaa6bATEPn 38
IocTaBAne n 13BaJdaNe Ha 6aTePnHnna NaKeT 39
TbTyBaHe c KOMnHObpa 40
Otkaue He ot pa6oTHOT MRCTO 40
MecTeHe 40
IoproTBaHeHaKoMnHbpa 40
KaKBo Da Hocnte Ha DeJIOBn Cpeu 41
IpeHacHe Ha KOMNIObpa KbM Doma 41
IoiTbHe Ha KOMIObpa 41
KaKBO da HocHTe CbC ce6e cn 41
Cpeunann npenopbkn 42
IopexkdaheHaDomaueH oΦnc 42
IbTyBaHe c KOMnHtbpa 42
IoiTbHe Ha KOMIObpa 42
KaKBo Da HocHTe CbC Ce6e cn 43
Cpeunann npenopbkn 43
MekdynapoNDIO TbTyBaHe c KOMNIOTpba 43
IoiTbHe Ha KOMIObpa 43
KaKBO da Hocnte cbc cebe cn 43
CneuaJIHn npenopbKn 44
ДопьлнITEЛНи ВьзMOЖHOCTN 45
Onuim 3a Bpb3ka 45
Cbbp3BaHe KbM Mpeka 46
BrgaHaMpeXoBaФyHKUHOHaHnOCT 46
Be3xuHmpeKn 47
Cbbp3BaHe c nHTepHET 47
БeЗкИЧи Мреки 47
ExpressCard 49
Thunderbolt 50
IopT IEEE 1394 51
HDMI 52
YnBepcaHa cepnHa shHa (USB) 53
Bb3npo13BeJdaHe Ha qnIIMn Ha DVD 54
HaIrpaxkdaHe Ha nAmetTa 55
BIOS coΦTyep 56
IocneIOBaTeHIOCT3a3apeXdaHe 56
Kak da aKTbUpaTe Bb3TaHOBBAhe disk-to-disk 56
3aandaheHa napo1n 56
YeCTO 3aDaBAnn Bbnpocn 57
CepBn3Ho o6cnykBaHe 59
OCTpaHbAHe Ha npo6IeMn 60
CbBETn 3a OTCpaHraBaHe Ha npo6JIemn 60
CbOeHn3a rpeuKa 60
CbBETn npoDcKa3BaHe 3a n3noJ3BaHe Ha Windows 8 62
Tpne Heu, KOTo e Dope Da 3anomHnTe 62
Kak da otbopra charms? 62
Kak da OTnda B Ctap? 62
Kak da npeckaayam mekjdy pa3nunHnte npinloxeHna? 62
Kak da n3knHoua KOMnHOTbpa cn? 62
3aio IMa HOB INTepeic? 63
Kak da oTKIIOUa KOMNIOTBpa cn? 63
Kak da nepcoHaJIIN3Iupam KOMHHTbpa cn? 63
CtaptnpaTte Acer Recovery Management:
- OT Cmapm, HanuWeTe "Recovery"и урakHeTe Bbpxy Acer Recovery Management B cnscbka c npniloKeHnI.
IoctbHn ca DBe OOnuN, Bb3ctaHOBraHe Ha a6pnuHn HacTpoKn (Bb3cTaHOBn KOMnIObpa M) nPi NepcoHaJIn3npaHo Bb3CTaHOBraHe (ObHOBraHe Ha KOMnIObpa M).

Customized Restore (Retain User Data)
Bb3ctaHOBAHe Ha 66pHn HacTpoKn N3TpNBA BCNUKO Ha TBbpJnI DnCK, CJIeK KOeTO npENHCTaInpa Windows n BCNUKn dpaBepn I coFtyeP, KOnTO ca 6bln PpeDbapntelno HcSTaInpaHn Ha BaWata CnCTema. Ako MoKeTe Da OTBOpHTe BaxKn 6aJIOBe Ha TBbpJnI DnCK, apXNBpaIte rCera. BxKTe "Bb3CTaHOBAHe Ha 66pHn HacTpoKn c Acer Recovery Management" Ha cTp.26.
Персонинрано Вьзтоановае ще с опntа за зарази Baшитфайное (notpeбителскданни), Н ще пенисташи р BCИЧКINcoФтуерни порами и устюctва.СоФтуер, Инсташи ран след катостуakунлі KMПНТьра, щe ьде пемaxhar (ocben coФтуер,Инсташи ран ot Windows Store).ВuxTe "ПерсонинзпаноВьзтоановае с Acer Recovery Management" на стp.28.
Вьз tcановаяне на Фабриин有很大с Acer Recovery Management
1.単pakHe Te Bbpy Bb3ctaHOBraHe Ha φa6pnHnte HacTpoKn.

BhImaHne:"Bb3ctaHOBAhe Ha a6pHuHnte HacTpoKn" ige n3Tpne BCnKNTe aJIObe Ha Baunr TBbpD nCK.
- Ako komnoTbpt Bn e konhunrgupan c Dbe onepaunHn cnCTemn (haJIuHcMo 3a HraKoN CnCTemn), ue ce OTBOPn npOzopeC oOnIyTa da Bb3ctaHOBNTe nJIn camo Windows 7 nJIn Windows 8. Ako n36eepeTe
Windows 7, KomnIObTbpB T Bи щe ce pecTapTnpa n щe ВьзCTaHOBN Windows 7. Ako n36epete Windows 8, Hynipahe Na komnIObTa ce OTbapra, KaKTo e onncaHO NO-ДОЛY.
3a6eJkka: 3a da ce HacnaDume u3zraNo Ha fynKcUme Ha Windows 8, kozamo npomehme om Windows 7, eIne3me e BIOS (Hamucheme < F2> , kozamo cmapmupame komnmbpa cu) unpomeheme Boot Mode (Pekum Ha 3apejdahe) Ha UEFI. Ako npeuHcmaIupame Windows 7, mpr6ea da npomeHume Pekum Ha 3apejdahe Ha Legacy npedu da pecmapmupame komnmbpa cu.
- O'TbApA ce npo3opeuT HynpaH e Ha Baunn KOMnIbTp.
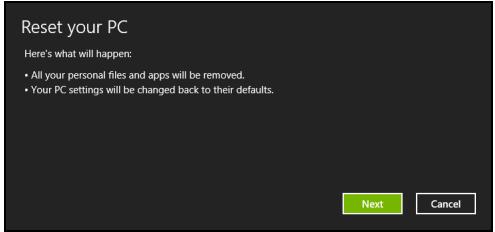
NIOcmpaquime ca cmo cnpaKa.
IocTaBЯHe nI3BaJdaHe Ha 6aTePmHnna NaKeT
Baxho: Ppei Da BaIte 6aTepeyra OTOKOMNHTbpa, CBpbXeTe AC aanTepa, ako XeJaTe da npOdbJxHrTe da n3NoJ3BaTe KOMNHTbpa cn. B npOTnBeH cnyaI pbpBO n3KnIOUcTe KOMNHTbpa.
3a noctabraye ha 6aTepeHn nakeT:
1.Подравнебаерияа спразmo OTворно OTделене 3a bateрь;Вкарайтпьрв Края CКлемпe И ce yверетe,угогидастара на вьateрьая гileда harope.
2.Пьзhte Батугяв OTделенeto 3a 6atepyи BHMataHnHO haTUCHTe,ДOKATO He 3actaHe Ha MCTOTO cN.
3a n3baxdahe Ha 6aTepeHn nakeT:
1.ПьзHeTe KJIuCyTo 3a OCBO6OxJaBaHé Ha 6aTePnIa, 3a JaЯ OCBO6OДnte.
2.Извашие батугеля от OTденинeto 3a затугеля.
TbTyBaHe c KOMNtbpa
To3n pa3dJI Bn IdaBa CbBETn N IJDen 3a CnyaHTe, KOraTO ce npIiBnKBAte NJI NtTyBaTe C KOMNIOTpba CN.
OtkaçaHe OT paδθHTo MЯCTO
CneBbAaTe Te3n CTBnK, 3a da OTkaUHTbe KOMNIObpa CN OT BbHsHInTe akcecoapn:
- 3ana3eTe BCnUKN OTBOpEn foaiIOBe.
- OTeTpaHete DNCKOBeTe OT ONTNUHOTO yCTPOIcTB0 (ONTNUHNTe yCTpOJcTBA).
3.ИЗклJOуеTe KOMПOTbpa.
4.3atbopete dncnpej. - Otkaute Ka6ena oT AC aanTepa.
- OtkaheTe KnaBnAtypata, NocOuBaIooTo yCTpoNCTBO, npnHTepa, BbHUNMOHNTOp IN BCNUKIN DpyTN BbHUNyCTPONCTBA.
- Otkahe Te n 3aKJIIOHbauIg MexAHIN3bM Kensington, aKO IMaTe TaKbB.
MecTeHe
3a cnyuay, korato npocTo ce npdBnKbATE Ha KpaTkn pa3cToHnna HapnpMeP oT Baunr oOfnc KbM 3ana 3a cpeu.
Подотьн He KaMnHbpa
Преши Дд пемechтite КOMнOTьра, 3aTbopete ДиСпля, 3a Да ВКapаTe KOMnOTьра в ржим "Sleep" (3acnBaHe). Cera можete снOKойно Дд HOCITE KOMNOTьра сьс себ си HabCSЯКыд eИЗ crpaДATA. 3a Да ИЗВадпe T KOMNOTьра OT ржIMа "3acnBaHe", OTbopete ДиСпля, Спд KOeTo HATINCHETe И OTПСHETe 6byToHa 3a 3axpaHBAhe.
Ako Hocnte KOMnHObTa Do oOpica Ha HraKo KIneHT NIn B Dpyra cRpaDa, MoKe Da npEiIOuHTaTe Da n3KJIIOUHTe KOMnHObTa:
HaTnchete Windows Knaaua +
Ii:
MoxKeTe CbIoo TaKa Da BkapaTe KOMnIOrBpa B peXm "3acnBaHe", KaTo HATNCHETe KNaBUNHaTa KOM6nHaZu<.Fn> +
Korato cTe roTOBn OTHOBO Da n3No3BaTe KOMNtBpa, OTBOpTe DnCnpey HATNCHEte NOTPyCHeTe 6yToHa 3a 3axpaHBAhe.
3a6eIeKka: Komnombpmbm MoKe da eJe3e e pexum "XubepHaZua" uN "DJIb6ok cBn", cne kAmo e u3ecmno epeme e 6uJ e pexum "3acnueaHe".
Kakbo da Hocnte Ha deNoBn cpeu
Ako cpeuata Bn e cpaBnHTeJHo KpaTka, BepoTHo He ce HaIana da Hocnte Hnio dpyro, oCbeH KOMnHbpa cn. Ako cpeaata Bn ue 6bde no npOblnxHeHa, nn PbK a0k 6aTePnra Bn He e 3apeDeHa HAnbIHO, Do6pe e da B3MeTe AC aanTepa cbc ce6e cn, 3a da BkIIOHTe KOMnHbpa B 3aIATA 3a cpeu.
AkoB 3aNaTa 3a CpeuH NHaMa eJeleKtpueckn KOHTaKT, neCteTe 6aTepeNraT KaTO BkapaTe KOMIObpa B peXm "Sleep" (3acnBaHe). HATnCKaTe
PpeHacrHe Ha KOMNIObpa KbM Doma
3a cnyuàume, kozamo npenacrme komnombpa om ofoica KbM doma cu unu obpamhomo.
Bb3ctaHOBBaHTo Ha TBbpNn Bn Dnck He Hynipa 6pOra 3aDaBaHnHa KOD Ha perNoHa.
Haɪrpáжndahe Ha námēTTa
ToBa ca cTbπKnte 3a NHCTaJInpaHe Ha nAmet:
1.ИЗклочеКOMПOTьра,OTkaчeteAC aДanTepa(ako e CBbp3aH)и ИЗваде Te batepyHЯ пaket.ObbPheTe KOMПOTьра,3a Дa ИмATEdoCTbI DoDoJIHaTa My CTpaHa.
2.ИЗваде Te 60ntoBete OT KaNaKa Ha NaMeTTa, CJIeД KOeTO T O nobdHHeTe NOTCTpaHete.
3. (a) ПoctabeTe moуna c Namet Диагоаннв Сnotа, Спд Което (b) BHIMATEHNO ro HATNCHEte HaDony, DOkaTO UpaKHe.
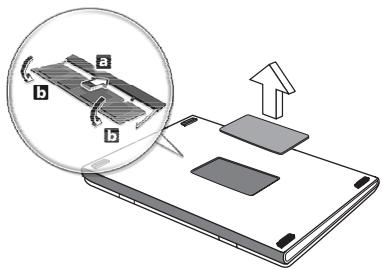
- NocTabeTe Kanaka Ha nAmETTa Ha MAcTOTO My I 3aBnIte BnHTa.
- ПoctabeTe 6aTePnHnЯ naket obpaTHO B KOMnIOTbpa I CBbpxKeTe AC aAnTepa.
- BkHouTe KOMnHOTbpa.
KOMNIObpbT aBtOMaTHUHO 3acuHa nIpeKoHΦnHyprupa oBzna pa3Mep Ha naMeTTa.
BIOS coΦTyep
BIOS coΦTyepbTe nporpama 3a KOHΦnHypaunHa xapdyep, BrpaJeHa BVI BIOS naMeTTa Ha KOMnHTbpa BN.
KoMnHtBpBt Bn Beue e KOHmIpyuPAH npaBnIHO n ONTmN3npaH, 3aTOBa HЯMa HxkDa Na N3No3BaTe To3n CoΦTyep. TOBa MoKe Da Bn Ce HaIOXn, aKO Imate npo6JIeMn C KOHmIpyaCnIraTa.
3aДаakTbupateBIOScoftyepa,HaTncHeTe
3aazo nMa HOB nHTepceic?
HOBNAT INTEPpeic 3a Windows 8 e npoeKtpan da pa6oTn do6pe c BbBExdaHe Ype3 DOKOCBaHe. Windows Store npuJIOKeHnraTa aBTOMaTHUHO 13noJI3BaT ceJIeNRA ekpan N HЯMa Da n3NUCKBaT 3aTBapRHe Ha npuJIOKeHn no TpaDnCOnOHnRA MeToD. Windows Store npuJIOKeHnraTa 13e 6bDat noka3AHn B C7aprTc nOmoTuHa DNHAMnHn PLOkKn.
KaKBO npeicTabIaBAt dHAmuHnTe nIOUKn?
Live tiles npnuiuat Ha MNHaTOpH Na npJIOKeHna, KOHTe Ce aKTuAn3npaT C HOBO CbIbPkaHne, BCEKN PbT, KOraTO CTe CBbp3aHn C mHTepHET. HanpImep, MoKeTe Da BUnITE BpeMeTo n aKTuAn3aunn OT 6opCtte 6e3 da ce hana Ta OTbaprTe npJIOKeHne.
Kak da oTKnIOUa KOMNIOTbpa cn?
HaTnCHeTe npoI3B0Jen KnaBnI N ⅢpaKHeTe Bbpxy IKOHa Ha nOTpe6nteJIckn akayHT, 3a da OTkIIOHnTe kOMNtBpa. Ako mMa 3aJaDeHa napona 3a BaIIra akayHT, Tp6Ba da MOKeTe da BBBeJeTe npoJa n da npOJaJIxnte.
Kak da nepcoHaJIIn3Inpam KOMnIOrTbpa cn?
Mожete Да персонализирате Cmapm с разлчни Фонови n3ображени Ипн урети nobtopноюрждане на почкite, за да OTROВарят Te Ha Baшinte Лчни hyжди.
3a CmraHa Ha fOHa, HATnCHete Windows KnaBua +
Kak da Mectra qaiNoBe?
UpaKHeI 3aApbXTe pNoUka, 3a da y n36epeTe, cnei KoETo y pNb3HeTe, 3a da y nocTabuTE B Cmapm, KbJeTO NcKaTe da ce nOraBa. Dpyr nPiOyKn Ie 6bDat npemecTeHn 3a HxKdnte Ha PNOyKaTaHa HOBOTO m MeCTOnoJIOKeHne.
Mora nn da yrolemma nn cmaJn pIoouknte?
UpaHn 10-000000000000000000000000000000000000000000000000000000000000000
Kak da nepcoHaJIIm3IpaM ekpaHa EkpaH 3a 3aKJIIOUbaHe?
Moxete da nepcoHaJIIn3IpaTe ekpaHa 3a 3aKJIIOUbaHe c pa3JIINHO n3O6paXeHne nn Da NOKa3BaTe 6bP3 cTaTyc n N3BecTn, KOINTO OTROBAPrT Ha IInuHnte Bn HJxDi.
3a smHa Ha fOHa, HATnCHeTe Windows KnaBua +
Kak da 3aTbOpa daJeHO npuJIOxHne?
IpemeCTe Kycopa B rohpata yacT Ha ekpaHa, upaKHeTe Bbpxy np03opeua n pbl3HeTe HdoJy, 3a da 3aTBOpTE npnloKeHneTo.
Moxete Da 3aTBOPnTe PpNIOXeHnO rT MHNAtOpTe B JIABaTa YacT Ha ekpaHa KaTO UpaKHeTe BbPxY MHNAtOpA N36epeTe 3aTBOpn.
Mora Ia npomehm pa3dJIteHHaTa cNoCobHcT Ha ekpaHa?
OT Cmapm, 3anOuHete da pniUeTe "KoHTpOJen naHeJ", 3a da OTBOpUte TbpceHe n da nokaeTe pezynTaTn; upaKHeTe Bbpxy KoHTpOJen naHEn > HactpoJaHa pa3dJeJIInTeJHata cnoc6hOcT Ha ekpaHa.
DEKJIAPAUJN3A PINKCEJNTHE HA LCD MOHNTOPA
LCD nncnneT ce c3daBa ype3 BnCOKO npEun3Hn npOn3BOcTBHeH texHOJorHn. Bbnpekn ToBA noHrkora HkON pKceJI 3acUyat NnN n3rIeXdAT KaTO cepHN nnu cepBHeN TOckn. TOba Hma eFekt BbpxU 3aIncAHOTo I3o6paXeHne N he npEcdTabJIraBa Heu3npabHocT.
PERYIATOPHN YBEIDOMJIENH3A PAINOYCTPOICTBA
3a6eJekka: CneHama peayamopha uHOpMaucja ce omhacr cAmo 3a Modenu c be3kueH LAN u/Unu Bluetooth.
3a da ce npedotbpaTu INTeppepehenC IINIeH3npaHaTa ycLyra, TOBa yCTpOInCTBO Tpr6Ba Da pa6oTu Ha 3akpTo.
To3n npOdyKT cB0TBETCTBa Ha paAnIOueCTOTHTe CTaHdapTn I cTaHdAPTNTe 3a 6e3oNaChocT ha BC8a KaDbpxkaba nn peRHO, B KOtTO npOdyKbT e Odo6peh 3a 6e3xNCHyNtpe6a. B 3aBnCIMoCT ot KOHfNpypaunra Ta Cn, npOdyKbT M oXe da CbDbpKa 6e3xNCHn pAINOycTPOJCTBa (Kato HApnpMep MoDyIn 3a 6e3xNCHEN LAN nn nnnn Bluetooth). CneHa tINΦopMaunca ce OTHacr 3a npOdyKtNTe c TaKnBA ycTpoiCTBa.
Deknapaun3a cBOTBETCTBNE 3a CTPaHnTe oT EC
C NaCTOJIto Acer DeKlnapipa, Ye To3n KOMNIOTp e B CbOTBETCTBne CbC CbIeCTBeHITe N3NCBAHnA IN DpyTInTe npINIOXIMN IocTaHOBnEHNa HdIpeKTnBa 1999/5/EC.
Be3xuHn pa60THn KaHaJI 3a pa3nHn paOHN
| Севеля Amерika | 2,412-2,462 GHz | K01 до K11 |
| Яюnia | 2,412-2,484 GHz | K01 до K14 |
| Еврona ETSI | 2,412-2,472 GHz | K01 до K13 |
Фразця:Орразнчени6e3кчни YeToHn JIeHTN
HЯkon oblactn ha Φρaunizma MT orpaunuehen 3a onpeleene HecToTm. MakcmaHaTa pa3peSeHa moUchoCT 3a BbTpeseHa yNtpe6Ba H na-JoOni cIyaue:
- 10 mW 3a zyra Ta YceToTa Jenta 2,4 GHz (2400 MHz - 2483,5 MHz)
- 100 mW 3a chectotn Mejdy 2446,5 MHz u 2483,5 MHz
3a6eJekka: Om 10-mu do 13-mu kaHaI eKlouHmNo pa6om m e Yecmomhama leHma 2446,6 MHz - 2483,5 MHz.
Ima maIko Bb3MOxHocTn 3a ynotpeba Ha otKpnto: B cactha co6ctbeHOCT nIN B yacthata co6cTBHeOCT Ha oBceCTBeHN Iuca, ynotpebaTa e oBekr Ha npEBApNTeHa npoeDpya 3a OIObpeHne OT MmNCTepCTBOTo Ha OTbpaHata C MaKcMmaHa pa3peSeHa moHocT Ha 100 mW B yecOTHATA JeHTA 2446,5 - 2483,5 MHz. He ce pa3peShaBa BbHsHa ynotpeba Ha oBceCTBeHa co6cTBHeOCT.
3a denaprameHTe nocouhen No-dony, 3a zraata yectota 2,4 GHz:
- MakcimamHaTa pa3peSeHa MoUHocT Ha 3aKpIto e 100 mW.
- MakcmaJIHaTa pa3peSeHa MoUHocT Ha OTKpInTo e 10 mW.
Демарente, в КОТИЗПОЛБАнeto Ha cheToTHa TЯ leHt a 2400-2483,5 MHz e pa3peSeHo c EIRP no-MaIko ot 100mW 3a BbTpEshHa nno-MaIko ot 10 mW 3a BbHsHa ynotpe6a:
01 Ain Orientales 25 Doubs 59 Nord 71 Saone et Loire
02 Aisne 26 Drome 60 Oise 75 Paris
03Allier 32 Gers 61 Orne 82 Tarn et Garonne
05 Hautes Alpes 36 Indre 63 Puy Du Dome 84 Vaucluse
08 Ardennes 37 Indre et Loire 64 Pyrenees 88 Vosges
AByCtpnA AT MaJTa MT
Acer Office Manager 10
Acer Office Manageri konsool 10
Armatuurlaud 10
Kliendihaldur 11
Eeskirjad 12
Varad 13
Toiminguajasti 14
Seaded 15
Taaste 16
Acer Backup Manager 31
Toitehaldus 33
Energia säastmine 33
Aku 35
Akuomadused 35
Aku laadimine 35
Aku toea optimeerimine 36
Welcome to Acer Backup Manager
Select one action below to start managing your data.
Back Up My Files
Pick and choose which files to back up or let the program find it all for you.
Image My Drive
Make a complete image backup of your drive.
Migrate My Files
Transfer your files from another computer to this computer.
Clear out / Restore Files
Remove seldom used files to free up space or restore files from your backup.

Launch My Backup Profiles

Back Up My Files
The file backup helps you create a complete backup of your documentation. Choose the file or folder for the backup and then select the destination for the backup. Once you have selected the destination, the final step is to schedule the backup. Click on the Backup My Files button to create a backup.


Directly enter "My Backup Profiles" next time
Transportlidzekli ix
Bistamas eksplozivas vides ix
Kur zvanit arkartas situacijas ix
Atbrivoesanasnoradijumi
Padomi un informacija, kā erti lietot ierici xi
Galvenais vispirms xiii
Jusu rokasgramatas xiii
Acer Office Manager 10
Acer Office Manager konsole 10
Informacijs panelis 10
Acer Backup Manager 31
Acer Recovery Management
Welcome to Acer Recovery Management
Acer Recovery Management enables you to restore your system. To begin, select the task you want to perform. Please DO NOT remove the USB device while proceeding.

Customized Restore (Retain User Data)

Reinstall Drivers or Applications
Make a backup before you restore (Recommended).

Create Factory Default Backup
Create Drivers and Applications Backup
acer
Reinstall Drivers or Applications
Reinstalls factory default drivers or applications.

?X
Here's what will happen:
- Your files and personalization settings won't change.
- Your PC settings will be changed back to their defaults.
- Apps from Windows Store will be kept.
- Apps you installed from discs or websites will be removed.
- A list of removed apps will be saved on your desktop.
Next
Cancel
Welcome to Acer Backup Manager
Select one action below to start managing your data.
Back Up My Files
Pick and choose which files to back up or let the program find it all for you.
Image My Drive
Make a complete image backup of your drive.
Migrate My Files
Transfer your files from another computer to this computer.
Clear out / Restore Files
Remove seldom used files to free up space or restore files from your backup.

Launch My Backup Profiles
Back Up My Files
The file backup helps you create a complete backup of your documentation. Choose the file or folder for the backup and then select the destination for the backup. Once you have selected the destination, the final step is to schedule the backup. Click on the Backup My Files button to create a backup.


Directly enter "My Backup Profiles" next time.
Lai saktu Acer Backup Manager Windows 8, vienkärši sacidrakstit „Backup Manager". Jus varat ari darbvirsmas režimā izvěléties Acer Backup Manager. Atversies Sveiciena ekrans; uz šī ekrana jus varat izvěléties velamo dubljuma veidu.
www.acer-group.com/public/Sustainability/sustainability01.htm.

Informacao apiegyvsidabrj
"Acer Office Manager"
Paleiskite Acer Recovery Management:
- Srityje Pradžia iveskite „Recovery" ir programu sąaše spustelěkite Acer Recovery Management.
"Acer Backup Manager"
'International Travelers Warranty' (ITW) garantija
Juskompiuteriui taikoma tarptautine 'International Travelers Warranty' (ITW), kuri suteikia saugumo ir ramybès keliaujant. Muspasaulinis aptarnavimo centru tinklas skirtas padeti Jums.
LCD PIKSELIU INFORMACija
IOToOελiδα www.acer-group.com/public/Sustainability/sustainability01.htm.
Acer Office Manager 13
Kovosλa Acer Office Manager 13
Acer Backup Manager 38
i x i p i o n v p y i a c 41
Egoikovoμoσεvεpyεiaç 41
EuxvEc Epwntnoeic 65
Aitnon Etniokeun67
AvtuietwTioTpoBAnuTowv 68
ZuβoulacavitietwTionc TpOaNAtow 68
Mnyuataa 68
Téivai to avayvwiotikó (loyapiαμός)
Microsoft; 74
Pioc TPOoOeTw Ev a ayaTnuevo 0To
Internet Explorer; 74
Pioc 25
Piouw va TepiooTepec Tnpoopoe; 75
Kavovioi kai onmuioic aopaleia 76
Eπiφάνεια Αφής
H evomegaatwmev n epiaveia aqns civai ia oukeun katuehuvonc Tou aiogavetai tnv kivnon otnv epiaveia ts. Auto onmaivei TWC o dpopeac avtatokpiveta, kaowc meatakveite to daxtuio acs otnv epiaveia apnc. H kevtpiikn thc0n oto avantauhtpio taalamnc npexei AIOTN avc0n kai uTOOTPiG.
EkkivnoTe to Acer Recovery Management:
- ATo To Evapn, TAnktpoLoynte 'AtokataOaon' kai tKaVTE KIK OTo Acer Recovery Management otN AioTa eapuoywv.
Customized Restore (Retain User Data)
PpooapoooEvn eAcerRecoveryManagement
Kata loyoos evoikwkwokw
O napwv EoTnAioC tsIITpETeai va Aeioupei otic akoloueXwepc:
www.acer-group.com/public/Sustainability/sustainability01.htm.
Civa uyarisi
Acer Office Manager 11
Acer Office Manager Console 11
Gösterge tablosu 11
Istemci yoneticisi 12
Ilikeler 13
Varliklar 14
Gorevprogramlayici 15
Ayarlar 16
Kurtarma 17
Acer Backup Manager 31
Güç yönetimi 33
Guc tasarrufu 33
Pil kutusu 35
Acer Office Manager Console
Console uygulaması,®,®,®,®,®,®,®,®,®,®,®,®,®,®,®,®,®,®,®,®,®,®,®,®,®,®,®,®,®,®,®,®,®,®,®,®,®,®,®,®,®,®,®,®,®,®,®,®,®,®,®,®,®,®,®,®,®,®,®,®,®,®,®,®,®,®,®,®,®,®,®,®,®,®,®,®,®,®,®,®,®,®,®,®,®,®,®,®,®,®,®,®,®,®,®,®,®,®,®,®,®. Console uygulamaşı,®,®, istemicileri tek bilgisayardan yönetmenize izin verir. Windows 8'de Console'u calistirmak icin "Office Manager Console" yazmaya baslayın. Alternatif olarak Masaustü modunda Acer Office Manager Console'u】, seçın.
Welcome to Acer Backup Manager
Select one action below to start managing your data.
Back Up My Files
Pick and choose which files to back up or let the program find it all for you.
Image My Drive
Make a complete image backup of your drive.
Migrate My Files
Transfer your files from another computer to this computer.
Clear out / Restore Files
Remove seldom used files to free up space or restore files from your backup.

Launch My Backup Profiles

Back Up My Files
The file backup helps you create a complete backup of your documentation. Choose the file or folder for the backup and then select the destination for the backup. Once you have selected the destination, the final step is to schedule the backup. Click on the Backup My Files button to create a backup.


Directly enter "My Backup Profiles" next time
Danimarka DK Slovakya SK
Estonya EE Sloveniaa SL
Finlandiya FI Ispanya ES
Fransa FR Isvec SE
- 陳進是羅元傳發生後國國國國國國國國國國國國國國國國國國國國國國國國國國國國國國國國國國國國國國國國國國國國國國國國國國國國國國國國國國國國國國國國國國國國國國國國國國國國國國國國國國國國國國國國國國國國國國國國國國國國国
MoiNtIe SiAJaKuJiJiJiJiJiJiJiJiJiJiJiJiJiJiJiJiJiJiJiJiJiJiJiJiJiJiJiJiJiJiJiJiJiJiJiJiJiJiJiJiJiJiJiJiJiJiJiJiJiJiJ1
- ernerterto da ncr sti e ene hiz .
- 正規uko드를 기다于此 AC어DEMter 편에 사러운울만을 흃지마성시오. 正規uko드와 키이름은 사상이지나다지却不那麼에 퍻고에 퍻성시오.
- 進京元載則國國國國國國國國國國國國國國國國國國國國國國國國國國國國國國國國國國國國國國國國國國國國國國國國國國國國國國國國國國國國國國國國國國國國國國國國國國國國國國國國國國國國國國國國國國國國國國國國國國國國国
- 闋當庫德來應用者在經文開首的達利的音韻,其音韻是達利的音韻。
BabTReI PkP K
迦TRI 阿则阿
Acer Office Manager 10
Acer Backup Manager 30
叁元 32
责任编辑
BaeTREI
BHTRILK
BabiI 攒
迦托尼
[BaTeRl] SuZnKhUkIn
迦托尼部首
[BaT]Rl 阅 电 士
越夷賊則夷廣大海
Deshkut
奉専部士
戎易托
会的像里
音定和音木服金音之同
戎夷司
遍剿者専専部
典藏法上古游
音定里表器
戎夷師爲夷如大國內首
戎夷司
遍习者皆书
竊歟藥土其難
藏開賊則國無以如之,故名藏。
戎易托
遍剿者専専奉承
默彌漢上記說
目录
宣
NeitreWeykEe
基本回置的内插式键功能
早
intertendfeneel
★
ExpressCard
Thunderbolt
IEEE 1394 王旦
HDMI
敲穿键敲打 (USB)
DVD
EmoRlEelgeReIeTr
BIOS 用脚利
部通
DIsKJAKBQJU
32
34
34
34
35
36
36
36
38
38
38
38
39
39
39
39
39
40
40
40
40
40
41
41
41
41
42
42
43
43
44
44
44
45
46
47
48
49
50
51
52
52
52
山
52
FAQ(信息披露和通告)
53
街比斯 量
54
无理数
56
文理 1
56
异
56
Charms 用藥默默默默默默默默默默默默默默默默默默默默默默默
57
事功以或云默之
57
在上面,我们用一个“如果”语句来表示:
57
兌軒則也,勒以,者,
57
新入TtIeIsuHoh?
58
内克开的当金是用到他
58
*(PC 01JZJUJLJJJJJJJJJJJJJJJ
Ji无s渐n为,自用,M,P。
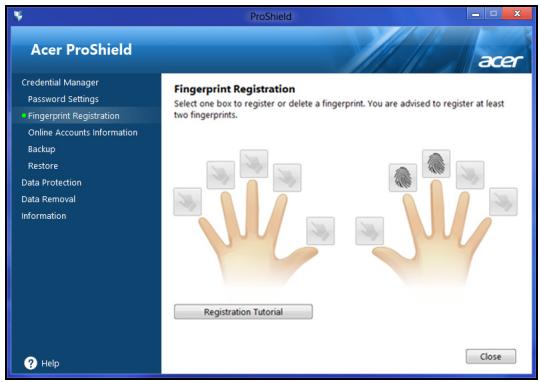
自该函内用是等量者,
デイチ プフロー
総格専賊則を対反か連用。総格専賊則を対反か連用。総格専賊則を対反か連用。総格専賊則を対反か連用。総格専賊則を対反か連用。総格専賊則を対反か連用。総格専賊則を対反か連用。総格專賊則を対反か連用。総格專賊則を対反か連用。総格專賊則を対反か連用。総格專賊則を対反か連用。総格專賊則を対反か連用。総格專賊則を対反か連用。総格專賊則を対反か連用品。総格專賊則を対反か連用品。総格專賊則を対反か連用品。総格專賊則を対反か連用品。総格專賊則を対反か連用品。総格專賊則を対反か連用品。総格專賊則を対反か連用品。総格專賊則を
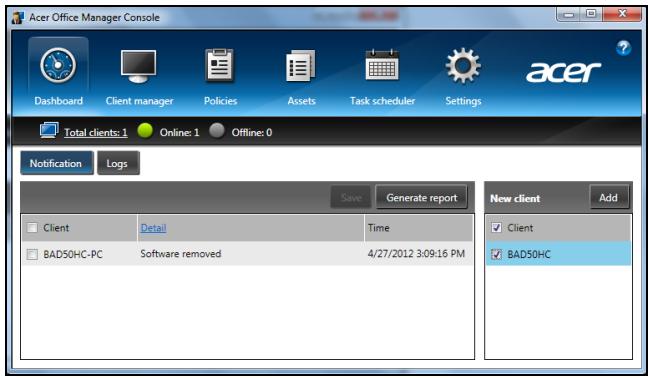
景 念 :新 郎拉I/运I 0A0E/ 1 1.
glkaiIenTgKaJiKJHcJFJL100000000000000000000000000000000000000000000000000000000000000000000000000000000000
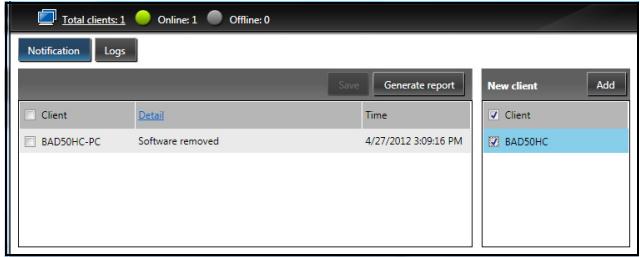
glai
- /\''k`e`f`' `'k`' `'k`' `'k`' `'k`' `'k`' `'k`' `'k`' `'k`' `'k`' `'k`' `'k`' `'k`' `'k`' `'k`' `'k\ `\( Management )\( )\( )\( )\( )\( )\( )\( )\( )\( )\)
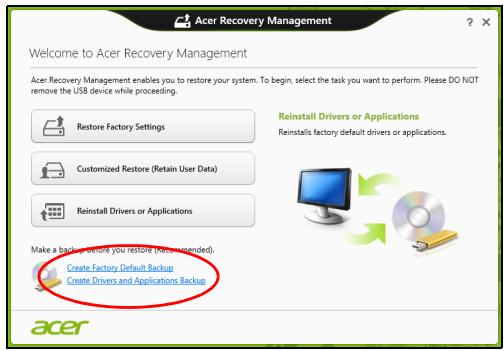
- 連拉伊専及音用元法上,默藥,安,
SosFTrWerHnHaHsTReErHnHnHnHnHnHnHnHnHnHnHnHnHnHnHnHnHnHnHnHnHnHnHnHnHnHnHnHnHnHnHnHnHnHnHnHnHnHnHnHnHnHnHnHnHnHnHnHnHnHnHmEe, Ht# 1
Acer Recovery Management
Welcome to Acer Backup Manager
Select one action below to start managing your data.
Back Up My Files
Pick and choose which files to back up or let the program find it all for you.
Image My Drive
Make a complete image backup of your drive.
Migrate My Files
Transfer your files from another computer to this computer.
Clear out / Restore Files
Remove seldom used files to free up space or restore files from your backup.

Launch My Backup Profiles
Back Up My Files
The file backup helps you create a complete backup of your documentation. Choose the file or folder for the backup and then select the destination for the backup. Once you have selected the destination, the final step is to schedule the backup. Click on the Backup My Files button to create a backup.
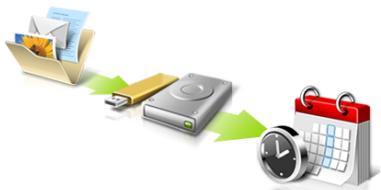

Directly enter "My Backup Profiles" next time.
acer
Windows 8 家居 Acer Backup Manager 将自动加载到 "Backup Manager" 而将自动加载到 "Backup Manager"。
[BaT]Ri [A]e 10000000000000000000000000000000000000000000000000000000000000000000000000000
ITW (International Travelers Warranty)
Ie KcFyTeAeN eRhy nsi bAnl nJtQnG hOg AnmHg aOnuHs uOfDIOk ITW (International Travelers Warranty) gZrJrOJnLi. 1.
iKraB B' 003, Issue 4 2010, No 4 (Dec 2000) 5 (Nov 2001)
Ie kReasB B's dizitel JostiCn Canadian ICES-003, Issue 4 fRSS-210, No 4 (Dec 2000) fNo 5 (Nov 2001) rJtssuHni.
CLASS 1 LASER PRODUCT
CAUTION: INVISIBLE LASER RADIATION WHEN OPEN. AVOID EXPOSURE TO BEAM.
APPAREIL A LASER DE CLASSE 1 PRODUIT
LASERATTENTION: RADIATION DU FAISCEAU LASER INVISIBLE EN CAS D'OUVERTURE. EVITTER TOUTE EXPOSITION AUX RAYONS.
LUOKAN 1 LASERLAITE LASER KLASSE 1
www.acer-group.com/public/Sustainability/sustainability01.htm
水銀處理建議事項
Acer Office Manager 10
Acer Backup Manager 27
電源管理
省電
電池組
電池組特性
為電池充電
最佳化電池使用壽命
檢查電池電量
低電量警告
安裝和移除電池組
攜帶筆記型電腦旅行
移除與其他裝置的連接
移動電腦
前置作業
帶著電腦參加會議
帶著電腦回家
前置作業
携带物品
特殊考量事項
设置家庭辦公室
帶著電腦出差
前置作業
携带物品
特殊考量事項
帶著電腦到國外出差
前置作業
携带物品
特殊考量事項
透過選購品擴充
連線用選購項目
連接至網路
內建網路功能
無線網路
連接至網際網路
無線網路
ExpressCard
nderbolt
IEEE1394埠
AI
通用序列匯流排 (USB)
播放 DVD 影片
記憶體升級
29
29
31
31
31
32
32
32
33
34
34
34
34
34
35
35
35
35
35
36
36
36
36
36
36
36
37
38
38
39
39
40
40
40
41
42
43
44
45
46
47
BIOS公用程式 48
開機順序 48
启用 disk-to-disk recovery 48
設定密碼 48
常見問題 49
服務需求 50
疑難排解 51
疑难排解提示 51
錯誤訊息 51
使用Windows8的秘訣和提示 52
有三個要記住的觀念 52
如何存取Charms? 52
如何進入開始功能表? 52
我要如何在應用程式間進行切換? 52
如何關閉我的電腦? 52
為什麼要使用新介面? 52
如何將我的電腦解除鎖定? 53
如何個人化我的電腦? 53
Customized Restore (Retain User Data)
Welcome to Acer Backup Manager
Select one action below to start managing your data.
Back Up My Files
Pick and choose which files to back up or let the program find it all for you.
Image My Drive
Make a complete image backup of your drive.
Migrate My Files
Transfer your files from another computer to this computer.
Clear out / Restore Files
Remove seldom used files to free up space or restore files from your backup.

Launch My Backup Profiles
Back Up My Files
The file backup helps you create a complete backup of your documentation. Choose the file or folder for the backup and then select the destination for the backup. Once you have selected the destination, the final step is to schedule the backup. Click on the Backup My Files button to create a backup.


Directly enter "My Backup Profiles" next time
This Class B digital apparatus complies with Canadian ICES-003.
CLASS 1 LASER PRODUCT
CAUTION: INVISIBLE LASER RADIATION WHEN OPEN. AVOID EXPOSURE TO BEAM.
APPAREIL A LASER DE CLASSE 1 PRODUIT
LASERATTENTION: RADIATION DU FAISCEAU LASER INVISIBLE EN CAS
D'OUVERTURE. EVITTER Toute EXPOSITION AUX RAYONS.
LUOKAN 1 LASERLAITE LASER KLASSE 1
Acer Office Manager 9
Acer Backup Manager 26
电源管理 28
节能 28
电池组 30
电池组特点 30
为电池充电 30
优化电池寿命 31
检查电池电量 31
电量不足警告 31
安装和卸下电池组 32
携带电脑旅行 33
断开笔记本电脑与桌面设备的连接 33
携带笔记本电脑 33
准备作业 33
出席会议需携带的物品 33
携带电脑回家 34
准备作业 34
携带物品 34
特别注意事项 34
布置您的家庭办公室 34
携带笔记本电脑旅行 35
准备作业 35
携带物品 35
特别注意事项 35
携带笔记本电脑进行国际旅行 35
准备作业 35
携带物品 35
特别注意事项 36
使用选项扩展性能 37
连接选项 37
连接到网络 38
内置网络特性 38
无线网络 39
连接Internet 39
无线网络 39
ExpressCard 40
Thunderbolt 41
IEEE 1394 端口 42
HDMI 43
通用串行总线(USB) 44
播放DVD影片 45
46
BIOS实用程序 47
启动顺序 47
启用 disk-to-disk recovery 47
设置密码 47
常见问题 48
服务查询 49
疑难解答 50
疑难解答提示 50
错误信息 50
Customized Restore (Retain User Data)
Acer Office Manager 11
Konsol Acer Office Manager 11
Instrumen 11
Manajer Klien 12
Kebijakan 13
Asset 14
Penjadwal tugas 15
Setelan 16
Pemulihan 17
Acer Backup Manager 32
Manajemen daya 34
Menyimpan daya 34
Unit baterai 36
Karakteristik unit baterai 36
Mengisi daya baterai 36
MengoptimalkanASApakaibaterai 37
Mulai Acer Recovery Management:
- Dari Mulai, ketik 'Pemulihan' lalu klik Acer Recovery Management di dalam daftar aplikasi.
Tersedia sua pilihan, Pulihkan Setelan Pabrik (Reset PCuya) ata Pemulihan Disesuaikan (Segarkan PCuya).
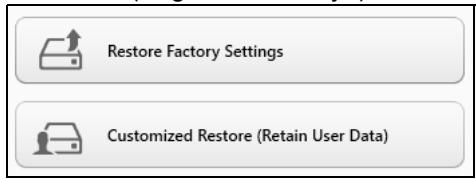
b. Klik Reset your PC until mulai proses reset:
c. Klik Refresh your PC until mulai proses segarkan:
Here's what will happen:
- Your files and personalization settings won't change.
- Your PC settings will be changed back to their defaults.
- Apps from Windows Store will be kept.
- Apps you installed from discs or websites will be removed.
A list of removed apps will be saved on your desktop.
Next
Cancel
Keyboard didnt merespons
ITW (International Travelers Warranty)
yooohoe: yooohoe: yooohoe: yooohoe: yooohoe: yooohoe: yooohoe: yooohoe: yooohoe: yooohoe: yooohoe: yooohoe: yooohoe: yooohoe: yooohoe: yooohoe: yooohoe: yooohoe: yooohoe: yooohoe: yooohoe:
CLASS 1 LASER PRODUCT
CAUTION: INVISIBLE LASER RADIATION WHEN OPEN. AVOID EXPOSURE TO BEAM.
APPAREIL A LASER DE CLASSE 1 PRODUIT
LASERATTENTION: RADIATION DU FAISCEAU LASER INVISIBLE EN CAS D'OUVERTURE. EVITTER TOUTE EXPOSITION AUX RAYONS.
LUOKAN 1 LASERLAITE LASER KLASSE 1
VORSICHT: UNSICHTBARE LASERSTRAHUNG, WENN ABDECKUNG
GEOFFNET NICT DEM STRAHLL AUSSETZEN
PRODUCTO LÁSER DE LA CLASE I
ADVERTENCIA: RADIACION LÁSER INVISIBLE AL SER ABIERTO. EVITE
EXPONERSE A LOS RAYOS.
ADVARSEL: LASERSTRÄLING VEDÄBNING SE IKKE IND I STRÄLEN.
VARO! LAVATTAESSA OLET ALTTINA LASERSATEILLLE.
VARNING: LASERSTRALNING NAR DENNA DEL AR ÖPPNAD ÀLÀ TUIJOTA SATEESEENSTIRRA EJ IN I STRÄLEN
VARNING: LASERSTRÄLNING NAR DENNA DEL ÅR ÖPPNADSTIRRA EJ IN I STRÄLEN
ADVARSEL: LASERSTRÄLING NAR DEKSEL ÅPNESSTIRR IKKE INN I STRÄLEN
nnnnnnnnnnnnnnnnnnnnnnnnnnnnnnnnnnn
- Wwannnnn nn nnnnnnnnnnnnnnnnnnnnnnnnnnnnnnnnnnnnnnnnnnnnnnnnnnnnnnnnnnnnnnnnnnnnnnnnnnnnnnnnnnnnnnnnnnnnnnnnnnnnnnnnnnnnnnnnnnn

i#

WOW WOW WOW WOW WOW WOW WOW WOW WOW WOW WOW WOW WOW WOW WOW WOW WOW WOW WOW WOW WOW WOW WOW WOW WOW WOW WOW WOW WOW WOW WOW WOW WOW WOW WOW WOW WOW WOW WOW WOW WOW WOW WOW WOW WOW WOW WOW WOW WOW WOW WOW
15 15 15 15 15 15 15 15 15 15 15 15 15 15 15 15 15 15 15 15 15 15 15 15 15 15 15 15 15 15 15 15 15 15 20000000000000000000000000000000000000000000000000000000000000000000
0
mnnnne nnnnne nnnnne nnnnne nnnnne nnnnne nnnnne nnnnne nnnnne nnnnne nnnnne nnnnne nnnnne nnnnne nnnnne nnnnne nnnnne nnnnne nnnnne nnnnne nnnnne nnnnne nnnnne nnnnne nnnnne nnnnne
15.3 150000000000000000000000000000000000000000000000000000000000
Lngnnnnnnnnnnnnnnnnn 15.3 (6)
Wnwnnnn nn nnnnnnnnnnnnnnnnnnnnnnnnnnnnnnnnnnnnnnnnnnnnnnnnnnnnnnnnnnnnnnnnnnnnnnnnnnnnnnnnnnnnnnnnnnnnnnnnnnnnnnnnnnn
Wn
27667996
mnnn nnnnnn nn nnnnnn nnnnnn nnnnnn nnnnnn nnnnnn nnnnnn nnnnnn nnnnnn nnnnnn nnnnnn nnnnnn nnnnnn nnnnnn nnnnnn nnnnnn nnnnnn nnnnnn nnnnnn nnnnnn nnnnnn nnnnnn nnnnnn nnnnnn nnnnnn nnnnnn nnnnn nnnnnn nnnnnn nnnnnn nnnnnn nnnnnn nnnnnn nnnnnn nannn nannn nannn nannn nannn nannn nannn nannn nannn nannn nannn nannn nannn nannn nannn nannn nannn nannn nannn nannn nannn nannn nannn nannn nannn nannn nannn nannn nannn nannn nannn nannn nannn nann
aannnnnnaanennnnnnnnnnnnnnnnnn
10000000000000000000000000000000000000000000000000000000000000000000000000000000
nnsnnn
nauanrnnnsnsnsnnaaunnnae nssu [nsuaaunaae]nsannnne
X
17642664677
wuuuunnnnnaaannnnnnaaennnnnnaaennnnnnaaennnnnnaaennnnnnaaennnnnnaaennnnnnaaennnnnnaaennnnnnaaennnnnnaaennnnnnaaennnnnnaaennnnnnaaennnnnnaaennnnnnaaennnnnnaaennnnnnaaennnnnnaaennnnnnaaennnnnnaaennnnnnaaannnnnnaaannnnnnaaannnnnnaaannnnnnaaannnnnnaaannnnnnaaannnnnnaaannnnnnaaannnnnnaaannnnnnaaannnnnnaaannnnnnaaannnnnnaaannnnnnaaannnnnnaaannnnnnaaannnnnnaaannnnnnaaannnnnnaaannnnnnaaennnnnnaaannnnnnaaannnnnnaaannnnnnaaannnnnnaaannnnnnaaannnnnnaaannnnnnaaannnnnnaaannnnnnaaannnnnnaaannnnnnaaannnnnnaaannnnnnaaannnnnnaaannnnnnaaannnnnnaaannnnnnaaannnnnnaaennnnnnaaennnnnnaaannnnnnaaannnnnnaaannnnnnaaannnnnnaaannnnnnaaannnnnnaaannnnnnaaannnnnnaaannnnnnaaannnnnnaaannnnnnaaannnnnnaaannnnnnaaannnnnnaaannnnnnaaannnnnnaaannnnnnaaennnn
sustainability01.htm
777777777777777
non-LED-backlit-LCD/CRT non-LED-backlit-LCD

Electronic Industries Alliance www.eiae.org www.eiae.org www.eiae.org www.eiae.org www.eiae.org
ENERGY STAR

ENERGY STAR
Acer Energy STAR
ENERGY STAR
ENERGY STAR
TravelMate 150000000000000000000000000000000000000000000000000000000000000000000000000000
TraveMate
Tnane, nane, nane, nane, nane, nane, nane, nane, nane, nane, nane, nane, nane, nane, nane, nane, nane, nane, nane, nane, nane, nane, nane, nane, nane, nane, nane, nane, nane, nane, nane, nane, nane, nane, nanae, nanae, nanae, nanae, nanae, nanae, nanae, nanae, nanae, nanae, nanae, nanae, nanae, nanae, nanae, nanae, nanae, nanae, nanae, nanae, nanae, nanae, nanae, nanae, nanae, nanaee
1 "User"
2 7Aer
777777777777777777777777777777
7761942000000000000000000000
W
w
Shut Down Windows Windows +
wannnnnnaaannnnnnnnnnnnnnnnnnnnnnnnnnnnnnnnnnnnnnnnnnnnnnnnnnnnnnnnnnnnnnnnnnnnnnnnnnnnnnnnnnnnnnnnnnnnnnnnnnnnnnnnnnnnnnnnnnnnnnnnnnnnnnnn
mnnnnae
-9
Windows +
xiv
| Acer Office Manager | 10 |
| Acer Office Manager | 10 |
| Acer Office Manager | 10 |
| Acer Office Manager | 12 |
| Acer Office Manager | 13 |
| Acer Office Manager | 14 |
| Acer Office Manager | 15 |
| Acer Office Manager | 16 |
| 汶�registrancy | 17 |
| 汶�registrancy汶�registrancy汶�registrancy | 17 |
20
21
22
mnnnnnnnnnnn 24
25
Windows 25
mnnnnnne nnnnnnnnnnnnnnnnnnnnnnnnnnnnnnnnnnnnnnnnnnnnnnnnnnnnnnnnnnnnnnnnnnnnnnnnnnnnnnnnnnnnnnnnnnnnnnnnnnnnnnnnnnnnnnnnnnnnnnnnnnn
Acer Backup Manager 31
33
33
35
35
35
36
36
37
37
38
38
WuWang 38
38
39
39
39
39
40
40
40
40
41
41
41
41
41
42
43
43
44
44
45
45
45
ExpressCard 47
Thunderbolt 48
WEEE1394 49
HDMI 50
Universal Serial Bus (USB) 51
MTRWNTWVTVDVD 52
MTRWNTWVTVVTVVTVVTVVTVVTVVTVVTVVTVVTVVTVVTVVTVVTVVTVVTVVTVVTVVTVVTVVTVVTVVTVVTVVTVVTVVTVVTVVTVVTVVTVVTVVTVVTVVTVVTVVTVVTVVTVVTVVTVVTVVTVVTVVTVVTVVTVVTVVTVVTVV
BIOS 54
54
54
54
55
56
58
58
58
Windows 8 60
charms? 60
? 60
maaanannnnaananaananaananaananaananaananaananaananaananaananaananaananaananaananaananaananaananaananaananaananaananaananaananaananaananaananaananaananaananaananaananaananaananaananaananaananaananaananaananaananaananaananaananaananaananaananaananaananaananaananaanaraeaWindows 1
NnIe: nnnn nn nnnn nnnn nnnn nnnn nnnn nnnn nnnn nnnn nnnn nnnn nnnn nnnn nnnn nnnn nnnn nnnn nnnn nnnn nnnn nnnn nnnn nnnn nnnn nnnn nnnn nnnn nnnn nnnn nnnn nnnn nnnn nnnn nnnn nnnn nnne
7
y 1
Credential Manager nannnnae (nn PC
- nWwWnWnWnWnWnWnWnWnWnWnWnWnWnWnWnWnWnWnWnWnWnWnWnWnWnWnWnWnWnWnWnWnWnWnWnWnWnWnWnWnWnWnWnWnWnWnWnWnWnWnW
- w
- mnnn -
-
ProShield
ProShield
ProShield Start
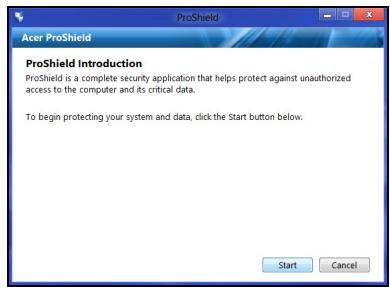
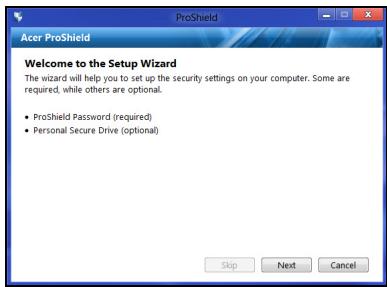
N77
nwnnnnnnnnnnnnnnnnnnnnnnnnnnnnnnnnnnnnnnnnnnnnnnnnnnnnnnnnnnnnnnnnnnnnnnnnnnnnnnnnnnnnnnnnnnnnnnnnnnnnnnnnnnnnnnnnnnnnn
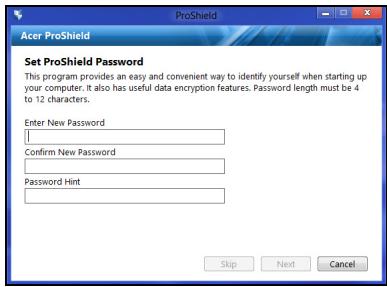
Wanwnnnnnaaannnnn nn nnnnn Next (n) Wannnnnnnnnnnnnnnn Personal Secure Drive (nwnnnnnnnnnnaaannnnnnn) nnann nn Finsh (n) waaanannn
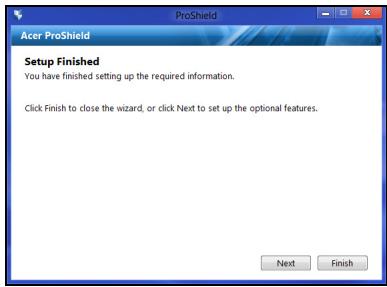
y
Personal
Secure
Disk
(PSD)
1
PSD
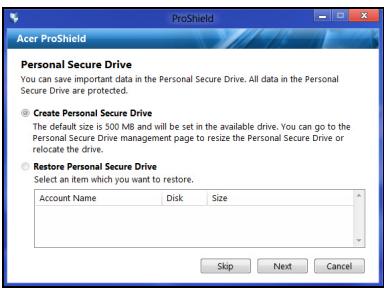

ProShield
Console

Credential Manager

ProShield Windows
mnnn nnnnnae
* (lawwn PC yonqunuonn uunu
P P P P P P P P P P P P P P P P P P P P P P P P P P P P P P P P P P P P P P P P P P P P P P P P P P P P P P P P P P P P P P P P P P P P P P P P P P P P P P P P P P P P P P P P P P P P P P P P P P P P P

aannnnnnaeennnnne
y
Prrnnnne nnnnnae nnne ne eaeennnne ennnnne ennnnne ennnnne ennnnne ennnnne ennnnne ennnnne ennnnne ennnnne ennnnne ennnnne ennnnne ennnnne ennnnne ennnnne ennnnne ennnnne ennnnne ennnnne ennnnne ennnnne ennnnne ennnnne ennnnne ennnnne enannnee
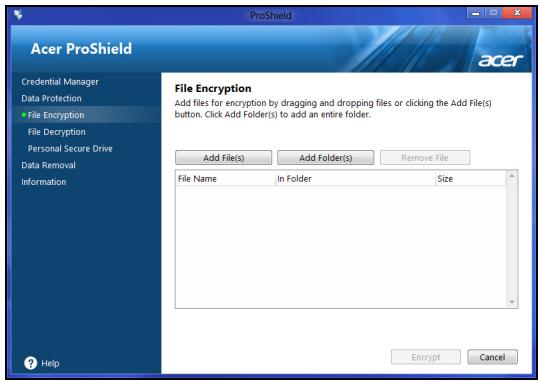
7
WwWwWwWwWwWwWwWwWwWwWwWwWwWwWwWwWwWwWwWwWwWwWwWwWwWwWwWwWwWwWwWwWwWwWwWwWwWwWwWwWwWwWw
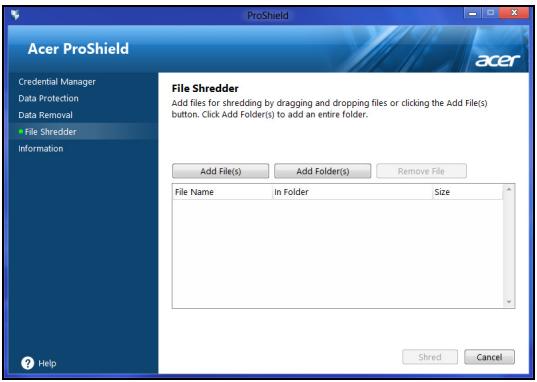
nnaa: nnaaaananaananaananaananaananaananaananaananaananaananaananaananaananaananaananaananaananaananaananaananaananaananaananaananaananaananaananaananaananaananaananaananaananaananaananaananaananaananaananaananaananaananaananaananaananaananaananaananaananaananaanaraannnnnnaaannnnnnaaannnnnnaaannnnnnaaannnnnnaaannnnnnaaannnnnnaaannnnnnaaannnnnnaaannnnnnaaannnnnnaaannnnnnaaannnnnnaaannnnnnaaannnnnnaaannnnnnaaannnnnnaaannnnnnaaannnnnnaaannnnnnaaannnnnna
Acer Office Manager
1n: 1n Client (N) New client
wol
unwnnnn nn
nunnnnnnnnnnnnnnnnnnnnnnnnnnnnnnnnnnnnnnnnnnnnnnnnnnnnnnnnnnnnnnnnnnnnnnn
nunnnnnnnnnnnnnnnnnnnnnnnnnnnnnnnnnnnnnnnnnnnnnnnnnnnnn
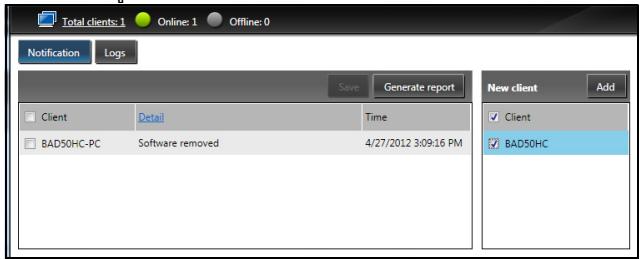
y
Acer Recovery Management
Windows
: 1720nnnnae nnnnnnnnnnnnnnnnnnnnnnnnnnnnnnnnnnnnnnnnnnnnnnnnnnnnnnnnnnnnnnnnnnnnnnnnnnnnnnnnnnnnnnnnnnnnn
y 1
yunnnnunnnn
nntnnnne nnnnnnnnnnnnnnnnnnnnnnnnnnnnnnnnnnnnnnnnnnnnnnnnnnnnnnnnnnnnnnnnnnnnnnnnnnnnnnnnnnnnnnnnnnnnnnnnnnnnnnnnnnnnnnn
7777777777777777777777
WwWwWwwWwwWwwWwwWwwWwwWwwWww
Windows
m 1
16GB
- 17, 'Recovery' Acer Recovery Management
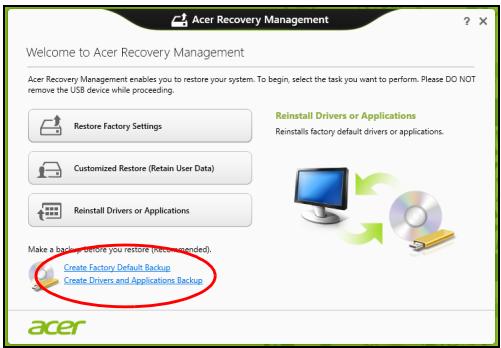
- Create Factory Default Backup Recovery Drive

aannnnnnean ane anen ane ane ane ane ane ane ane ane ane ane ane ane ane ane ane ane ane ane ane ane ane ane ane ane ane ane ane ane ane ane ane ane ane ane ane ane ane ane
-
USB USB Next
-
16GB
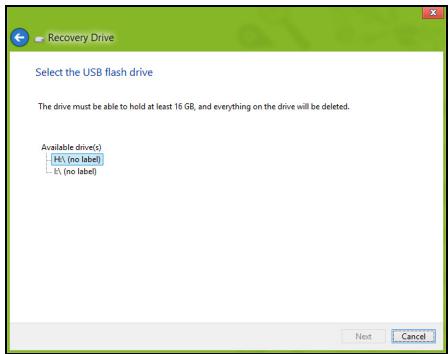
- www.wuwwuowwwuwuwuwuwuwuwuwuwuwuwuwuwuwuwuwuwuwuwuwuwuwuwuwuwuwuwuwuwuwuwuwuwuwuwuwuwuwuwuwuwuwuwuwuwuwuwuwuwuwuwuwuwuwuwuwuwuwuwuwuwuwuwuwuwuwuwuwuwuwuwuwuwuwuwuwuwuwuwuwuwuwuwuwuwuwuwuwuwuwuwuwuwuwuwuwuwwu
- nnnnnaaannnnnnae
- 1
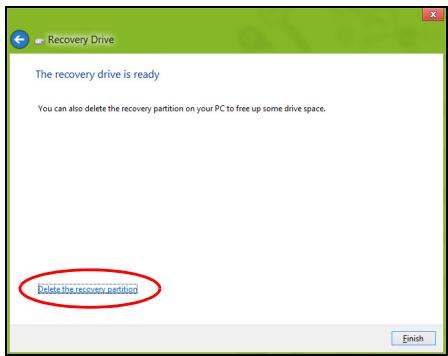
- naw USB uan mnnnnae
韵:国
1296
'Windows
Recovery
Backup'
aunnnnnaeannnnne aen nnnnne eanennnne
7
2. Create Drivers and Applications Backup
USB 1000uW DVD uan Next
W
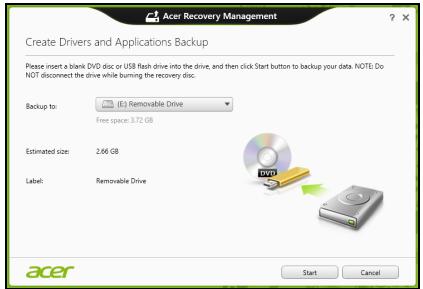
DVD
y
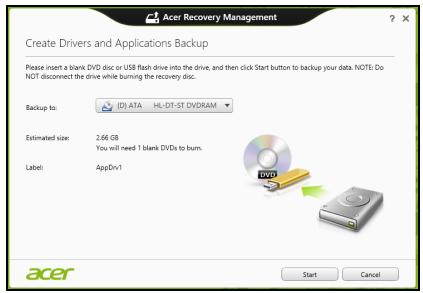
-
wwnnnnW USB nuiu Windows +
-
Contents in Acer Resource Center
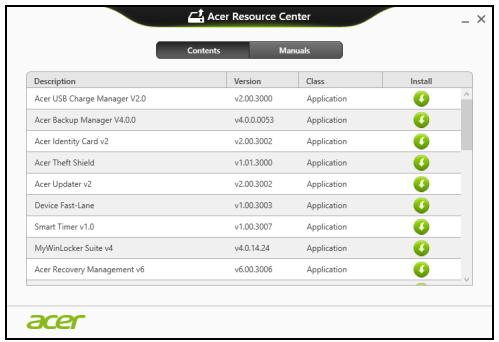
- 1
Microsoft System Restore 1
msnntn n
mnnnnnnnnnnnnnnnnnnnnnnnnnnnnnnnnnnnnnnnnnnnnnnnnnnnnnnnnnnnnnnnnnnnnnnnnnnnnnnnnnnnnnnnnnnnnnnnnnnnnnnnnnnnnnnnnnnnnnnnnnnnnnnnnnnnnnnnnnnnnnnnnnnnnnnnnn nn n
znnn nn nnnnnnn
- Start 'Control Panel' Control Panel
-
1n 1n
-
nann 1nannanunauanaen
- nannnnaeunnnn (
- nnnnnaaeeaaeaaeeaaeeaaeeaaeeaaeeaaeeaaeeaaeeaaeeaaeeaaeeaaeeaaeeaaeeaaeeaaeeaaeeaaeeaaeeaaeeaaeeaaeeaaeeaaeeaaeeaaeeaaeeaaeeaaeeaaeeaaeeaaeeaaeeaaeeaaeeaaeeaaeeaaeeaaeeaaeeaaeeaaeeaaeeaaeeaaeeaaeeaaeeaaeeaaeeaaeeaa
1
nwnnnnnaaannnnnnaanennnnnnnnnnnnnnnnnnnnnnnnnnnnnnnnnnnnnnnnnnnnnnnnnnnnnnnnnnnnnnnnnnnnnnnnnnnnnnnnnnnnnnnnnnnnnnnnnnnnnnnnnn
y
"Windows" 25
Wnnnwnnnnnn nwnn Wnns nnnae aannnnnne nnnn nnnn nnnn nnnn nnnn nnnn nnnn nnnn nnnn nnnn nnnn nnnn nnnn nnnn nnnn nnnn nnnn nnnn nnnn nnnn nnnn nnnn nnnn nnnn nnnn nnnn nnnn nnnn nnnn nnnn nnnn nnnn nnnn nnnn nnnee
Windows
Acer Recovery Management:
- StartWW 'Recovery' Acer Recovery Management
Dnannnnnnae narnnRestore Factory Settings (w) Customized Restore

Restore Factory Settings 1
Wnwnnnn nn nnnnnnnnnnnnnnnnnnnnnnnnnnnnnnnnnnnnnnnnnnnnnnnnnnnnnnnnnnnnnnnnnnnnnnnnnnnnnnnnnnnnnnnnnnnnnnnnnnnnnnnnnnnnnnnnnnnnnnnnnnnnnnnnnnnnnnnnnnnnnn nn nannn nn nannn nn nannn nn nannn nn nannn nn nannn nn nannn nn nannn nn nannn nn nannn nn nannn nn nannn nn nannn nn nannn nn nannn nn nannn nn nannn nn nannn nn nannn nn nannn nn nannn nn nannn nn nannn nn nannn nn nannn nn nennn nn nannn nn nannn nn nannn nn nannn nn nannn nn nannn nn nannn nn nannn nn nannn nn nannn nn nannn nn nannn nn nannn nn nannn nn nannn nn nannn nn nannn nn nannn nn nannn nn nannn nn nannn nn nannn nn nannn nn nannn nn n ann
Customized Restore WwWwwwnwW (y) ywnnwnny
uynnnnnae nnnnne nnwnnne nn nnnnne nn nnnnne
wnnnnne nn nnnnne nn nnnnne nn nnnnne nn nnnnne
wnnnnne nn nnnnne nn nnnnne nn nnnnne nn nnnnne
Windows Store) "J" Acer Recovery Management"
wnnn 27
Acer Recovery Management
1. RenRestore Factory Settings
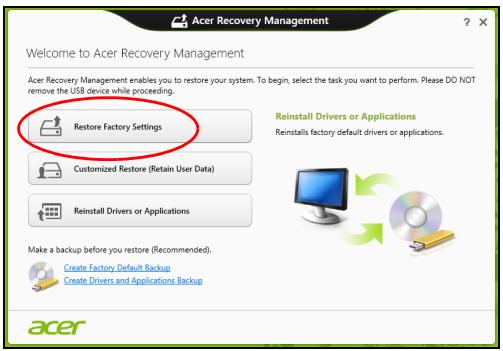
To: 'Restore Factory Settings'
-
wannnnnwnnnnnaeennnnnnnnnnnnnnnnnnnnnnnnnnnnnnnnnnnnnnnnnnnnnnnnnnnnnnnnnnnnnnnnnnnnnnnnnnnnnnnnnnnnnnnnnnnnnnnnnnnnnnnnnnnnnnnnnnnnnnnnnnnnnnnnnnnnnnnnnnnnnnnnnnnnnnnnnnnnnnnnnnnnnnnnnnnnnnnnnnnnnnn nn n nn n nn n nn n nn n nn n nn n nn n nn n nn n nn n nn n nn n nn n nn n nn n nn n nn n nn n nn n nn n nn n nn n nn n nn n nn n nn n nn n nn n nn n nn n nn n nn n nn n nn n nn n nn n nn n nn n nn n nn n nn n nn n nn n nn n nn n nn n nn n nn n nn n nn
-
nnnny Reset your PC 2014
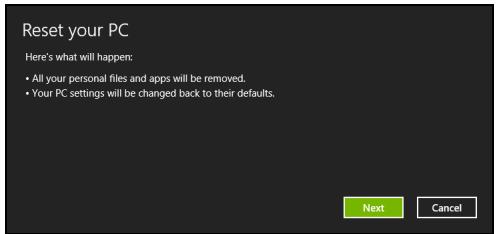
- Next
a. Just remove my files
30
b. Fully clean the drive a
Acer Recovery Management
- Customized Restore (Retain User Data)
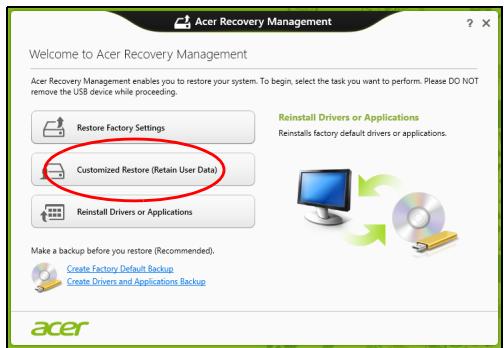
- nnyrRefresh your PC

c. nannnnnnaaennnnn F12 Boot Menu nnnnnn nn
d. 1
e. uuuuusuuuueuBIOSS uuuuuuuuuuuuuuuuuuuuuuuuuuuuuuuuuuuuuuuuuuuuuuuuuuuuuuuuuuuuuuuuuuuuuuuuuuuuuuuuuuuuuuuuuuuuuuuuuuuuuuuuuuuuuuuuuuuuuuuuuuuuuuuuuuuuuuuuuuuuuuuuuuuuuuuuuuuuuuuuuuuuuuuuuuuuuuuuuuuuuuuuuuuuuuuuuuuuuuuuuUU
f. 1
- 4.1 F12> WwW wW wW wW wW wW wW wW wW wW wW wW wW wW wW wW wW wW wW wW wW wW wW wW wW wW wW wW wW wW wW wW wW wW wW wW wW wW wW wW wW wW wW wW wW wW wW wW wW wW wW
a. LwannanWan USB Device UAnn Enter
b. Windows 2017
- 60n Troubleshoot uanuunnuynywnyynnnn
a. Advanced Advanced System Restore Microsoft System Restore: Microsoft System Restore 'nann' nann'
mnnnnnnnnnnnnnnnnnnnnnnnnnnnnnnnnnnnnnnnnnnnnnnnnnnnnnnnnnnnnnnnnnnnnnnnnnnnnnnnnnnnnnnnnnnnnnnnnnnnnnnnnnnnnnnnnnnnnnnnnnnnnnnnnnnnnnnnnnnnnnnnnnnnnnnnnn nn
b. Reset your PC Reset your PC
"
b. Fully clean the drive
mnnn nnnnnnnnnn nnannn 5 1
6. nnn Reset
- 7
1
- Refresh your PC
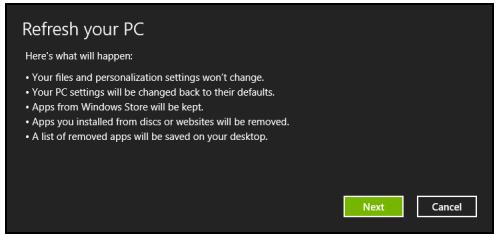
- Next (a)
- 1
- nann Refresh
- nnnnnae nnne ne ane neanne ne ane ne ane ne ane ne ane ne ane ne ane ne ane ne ane ne ane ne ane ne ane ne ane ne ane ne ane ne ane ne ane ne ane ne ane ne ane ne ane ne ane ne ane ne ane ne ane ne ane ne ane ne ane ne ane ne ane ne ane ne ane ne ane ne ane ne ane
Acer Backup Manager
HNTNHO: nuaaunuunnuiuwnuunnnn
Acer Backup Manager 1uunnnnnae nnne nnnnne nnne ne nnnnne nnnnne nnnnne nnnnne nnnnne nnnnne nnnnne nnnnne nnnnne nnnnne nnnnne nnnnne nnnnne nnnnne nnnnne nnnnne nnnnne nnnnne nnnnne nnnnne nnnnne nnnnne nnnnne nnnnne nnnnne nnnnnee

Acer Backup Manager
?X
Welcome to Acer Backup Manager
Select one action below to start managing your data.
Back Up My Files
Pick and choose which files to back up or let the program find it all for you.
Image My Drive
Make a complete image backup of your drive.
Migrate My Files
Transfer your files from another computer to this computer.
Clear out / Restore Files
Remove seldom used files to free up space or restore files from your backup.

Launch My Backup Profiles
Back Up My Files
The file backup helps you create a complete backup of your documentation. Choose the file or folder for the backup and then select the destination for the backup. Once you have selected the destination, the final step is to schedule the backup. Click on the Backup My Files button to create a backup.


Directly enter "My Backup Profiles" next time
Acer Backup Manager 1u Windows 8 "Backup Manager"
Aerulunwnanl 1nien Acer Backup Manager nnnnnnnnnnnnnnnnnnnnnnnnnnnnnnnnnnnnnnnnnnnnnnnnnnnnnnnnnnnnnnnnnnnnnnnnnnnnnnnnnnnnnnnnnnnnnnnnnnnnnnnnnnnnnnnnnnnnnnnnnnnnnnnnnnnnnnnnnnnnnnn
HJ7ELINH: 1uuuuunnnnunuuuuuuuuuuuuuuuuuuuuuuuuuuuuuuuuuuuuuuuuuuuuuuuuuuuuuuuuuuuuuuuuuuuuuuuuuuuuuuuuuuuuuuuuuuuuuuuuuuuuuuuuuuuuuuuuuuuuuuuuuuuuuuuuuuuuuuuuuuuuuuuuuuuuuuuuuuuuUU
n
nueuaeueoovvauuueaouuuusnnnneaae
wnnnnnae neae nne eae
y
wnnnnns
HDMI (High-Definition Multimedia Interface)
n#n#n#n#n#n#n#n#n#n#n#n#n#n#n#n#n#n#n#n#n#n#n#n#n#n#n#n#n#n#n#n#n#n#n#n#n#n#n#n#n#n#n#n#n#n#n#n#n#n# n##nnnnnnnnnnnnnnnnnnnnnnnnnnnnnnnnnnnnnnnnnnnnnnnnnnnnnnnnnnnnnnnnnnnnnnnnnnnnnnnnnnnnnnnnnnnnnnnnnnnnnnnnnnnnnnnnnnnnnnnnnnnnnnnnnnnnnnnnnnnnnnnnnnnnnnnnnnnnnnnnnnnnnnnn nn n## n## n## n## n## n## n## n## n## n## n## n## n## n## n## n## n## n## n## n## n## n## n## n## n## n## n## n## n## n## n## n## n## n## n## n## n## n## n## n## n## n## n## n## n## n## n## n## n## n## n
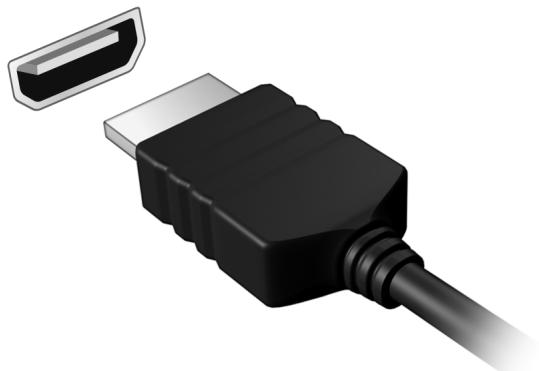
Universal Serial Bus (USB)
Wu USB
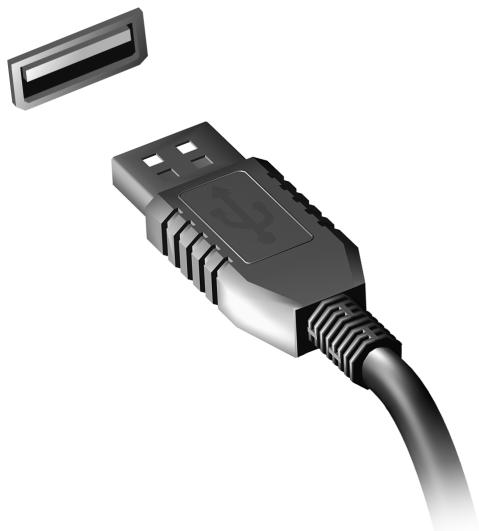
DVD
Waiwajalw DVD waiwaijuiwaijaiwaawwnn nnwunwnnuwunnuDVD
- Leflfrn DVD
- 1
| region code) | |
| 1 | |
| 2 | |
| 3 | |
| 4 | |
| 5 | |
| 6 |
nnuu: 1111111111111111111111111111111111111111111111111
nWnwnnnnna
1
Haaaahaaaahaaaahaaahaaahaaahaaahaaahaaahaaahaaahaaahaaahaaahaaahaaahaaahaaahaaahaaahaaahaaahaaahaaahaaahaaahaaahaaahaaahaaahaaahaaahaaahaaahaaahaaahaaahaaahaaahaaahaaahaaahaaahaaahaaahaaahaaahaaahaaahaaahaaahaaahaaahaaa
77 77
wwwwwwwwwwwwww Notepad uae Paint! 15uunwwnnnae 15uunuauuauuuu uuuuuuuuuuuuuuuuuuuuuuuuuuuuuuuuuuuuuuuuuuuuuuuuuuuuuuuuuuuuuuuuuuuuuuuuuuuuuuuuuuuuuuuuuuuuuuuuuuuuuuuuuuuuuuuuuuuuuuuuuuuuuuuuuuuuuuuuuuuuuuuuuuuuuuuuuuuuuuuuuuuuuuuuuuuuuuuuuuuuuuuuuuuuuuuuuuuUU
Microsoft ID (u)
Microsoft Windows
M
a
Microsoft Windows 8
2
Windows 8 Microsoft Windows Microsoft Windows +
Internet Explorer 1
Internet Explorer 10
Www
Windows +
21620n720n720n720n720n720n720n720n720n720n720n720n720n720n720n720n720n720n720n720n720n720n720n720n720n720n
:
Windows 8: www.acer.com/windows8-tutorial
- FAQ https://www.acer.com/support
FCC
15 15 FCC
ywnnnn nn nnnnnnnnnnnnnnnnnnnnnnnnnnnnnnnnnnnnnnnnnnnnnnnnnnnnnnnnnnnnnnnnnnnnnnnnnnnnnnnnnnnnnnnnnnnnnnnnnnnnnnnnnnnnnnnnnnnnnnnnnnnnnnnnnnnnn
uuaanunwuwwunwunwunwunwunwunwunwunwunwunwunwunwunwunwunwunwunwunwunwunwunwunwunwunwunwunwunwunwunw
ywnnnn nn nnnnnnnnnnnnnnnnnnnnnnnnnnnnnnnnnnnnnnnnnnnnnnnnnnnnnnnnnnnnnnnnnnnnnnnnnnnnnnnnnnnnnnnnnnnnnnnnnnnnnnnnnnnnnnnnnnnnnnnnnnnnnnnnnnnnnnnnnnnnnnnnnnnnn
- nuaauiuunnnnnaeau
- iaeunnnnnae nwnnnae nnne eannnnnne
aannn nnnnnnnnnn
FCC
nwn: nwnnnnnaa
aunnnnnaeannnnn (anennnnn/lanwnn, 1w, 90)
2020年7月2日
nssnnnnnnnnnnnnnnnnnnnnnnnnnnnnnnnnnnnnnnnnnnnnnnnnnnnnnnnnnnnnnnnnnnnnnnnnnnnnnnnnnnnnnnnnnnnnnnnnnnnnnnnnnnnnnnnnnn
Federal Communications Commission
nannnnnnnnnnnnnnnnnn
Class B Canadian ICES-003
ww. www.hc-sc.gc.ca/rpb
Jusnnnnsssssssssssssssssssssssssssssssssssssssssssssssssssssssssssssssssssssssssssss
Class B with Canadian ICES-003, Issue 4, and RSS-210, No 4 (Dec 2000) No 5 (Nov 2001)
w
nnnnnnnnnnnnnnnnnnnnnnnnnnnnnnnnnnnnnnnnnnnnnnnnnnnnnnnnnnnnnnnnnnnnnnnnnnnnnnnnnnnnnnnnnnnnnnnnnnnnnnnnnnnnnnnnnnnnn
aunnnnnae nnnnnuuauanrnnnue 5.15 5.25 GHz qannnnnnaa aannnnaa uuuuauuauuauuauuauuauuauuauuauuauuauuuuuuuuuuuuuuuuuuuuuuuuuuuuuuuuuuuuuuuuuuuuuuuuuuuuuuuuuuuuuuuuuuuuuuuuuuuuuuuuuuuuuuuuuuuuuuuuuuuuuuuuuuuuuuuuuuuuuuuuuuuuuuuuuuuuuuuuuuuuuuuuuuuuuuuuuuuuuuuuuuuuuuuuuuuuuuuuuuuuuuuuuuuuuuuuuuuuuuuuuUU
nnnnnnnnnnnnnnnnnnnnnnnnnnnnnnnnnnnnnnnnnnnnnnnnnnnnnnnnnnnnnnnnnnnnnnnnnnnnnnnnnnnnnnnnnnnnnnnnnnnnnnnnnnnnnnnnnnnnnnnnnnnnnnnnnnnnnnnnnnnnnnnnnnnnnnnnnnnnnnnnnn nn nannn nn nannn nn nannn nn nannn nn nannn nn nannn nn nannn nn nannn nn nannn nn nannn nn nannn nn nannn nn nannn nn nannn nn nannn nn nannn nn nannn nn nannn nn nannn nn nannn nn nannn nn nannn nn nannn nn nannn nn nannn nn nennn nn nannn nn nannn nn nannn nn nannn nn nannn nn nannn nn nannn nn nannn nn nannn nn nannn nn nannn nn nannn nn nannn nn nannn nn nannn nn nannn nn nannn nn nannn nn nannn nn nannn nn nannn nn nannn nn nannn nn nannn nn n ann
w000000000000000000000000000
E.I.R.P 5.25-5.35 5.725 5.85 GHz (point-to-point)
FCC
WANNNN NNNNNNN LAN Mini PCI uas Bluetooth FCC
y
9776873:
1.
2020年1月27日
nni juii iuiuui uuiuui uuiuui uuiuui FCC
NANJNTNNNNNNNNNNNNNNNNNNNNNNNNNNNNNNNNNNNNNNNNNNNNNNNNNNNNNNNNNNNNNNNNNNNNNNNNNNNNNNNNNNNNNNNNNNNNNNNNNNNNNNNNNNNNNNNNNNNNNNNNNNNNNNNNNNNNNNNNNNNNNNNNNNNNNNNNNNNNNNNNNNNNNN
N 1
anannnnaaannnnnnnnnnnnnnnnnnnnnnnnnnnnnnnnnnnnnnnnnnnnnnnnnnnnnnnnnnnnnnnnnnnnnnnnnnnnnnnnnnnnnnnnnnnnnnnnnnnnnnnnnnnnnnnnnn
wnnnnne nnnnnnnnnnnnnnnnnnnnnnnnnnnnnnnnnnnnnnnnnnnnnnnnnnnnnnnnnnnnnnnnnnnnnnnnnnnnnnnnnnnnnnnnnnnnnnnnnnnnn
ww. www.hc-sc.gc.ca/rpb
Jnnnnn nn nnnnnnnnnnnnnnnnnnnnnnnnnnnnnnnnnnnnnnnnnnnnnnnnnnnnnnnnnnnnnnnnnnnnnnnnnnn
Class B with Canadian ICES-003, Issue 4, and RSS-210, No 4 (Dec 2000) No 5 (Nov 2001)
E.I.R.P 5.25-5.35 m5.725 5.85 GHz (point-to-point)