USER MANUAL RBC40SB RYOBI
It is essential that you read the instructions in this manual before mounting and operating this machine.
| Attention ! | Il est indispensable que vous lisiez les instructions contenues dans ce manuel avant le montage et la mise en service de l'appareil. |
| Important! | It is essential that you read the instructions in this manual before mounting and operating this machine. |
| Achtung! | Bitte lessen Sie unbedingt vor Montage und Inbetriebnahme die Hinweise dieser Bedienungsanleitung. |
| Àtenación! | Es imprescindible que lea las instrucciones de este manual antes del montaje y de la puesta en servicios. |
| Attenzione! | Prima di procedere al montaggio e alla messa in funzione, è indispensable leggere attendamente le istruzioni del presente manuale. |
| Atença! | É indispensable verler as instruçõesdesto manual antes de montar e pôr em serviços. |
| Let op! | Het is absolut neutzakelijkvoörmontage en inbedrijfstellingdeaanwijzingenindeazehandleiding te lezen. |
| Observera! | Det arnodvändigt attläsa instruktionerna ienna braunsanvisning fore montering och driftsättning. |
| OBS! | Denne brugsanvisning skal lagesigennem inden montering og ibrugtagning. |
| Advarse! | Vennligst les instruktioneneienna braunsanvisningen for du monterer og tar i bruk maskinen. |
| Huomio! | On ehottoman välttamānta lukea tassä käytöhjeessa annetut ohejtennenenne asennusta ja käytöönottoa. |
| Προσχή! | Eivαιαπαραίτητονδιαβασετετιςομτάσειςτων σθηγμών αυτών πριν τη συναρολόγησηκαι ηεόσησελειουργία |
| Figyelem! | Feltétlenül fontos, hógy a jelen használatú utmutatóban foggalt elóirásokat az összeszerelés esz užembé helyezés ellot elolvassa! |
| Duležité upozorněnil | Před montáží náradí a uvedenim do provozu je nutné si prěcîst následujíci pouyny. |
| Bnuumanue! | Περει σ bópkοιи zámpусOM INHCTpymÊNTa HeōxbɔdμmIo IIPOUCHTbKUIMI INHCTpUkμmɪN3 HACTOJIeTO pukOBODCTBA. |
| Atentiel | Este indispensable sā citiì instructiunile continute òn ost mod de utilizare ònunte de montcj.si de punerea òn functiune. |
| Uwaga! | Przed montowaniem i uruchomieniem, koniecznie musie sie Państwo zapoznać z zaleceniami zawartymi w niniejszym sposobie užycia. |
| Pomembno! | Zelo pomembno je, da pred namestitvjo in prvo uporabo te naprave preberete navodila v tem priročniku. |
| Upozorenje! | Vázno je da upute u ovom Korisničkom priručniku procitate prije postavljanja i uporabe ovog alata. |
| Dikkat! | Montajdan ve aletin kullanimina böslamadan bu kilavuzda bulunan talimatlari okumaniz gerekmektedir. |
| Tähtis! | Lugege enne seadme kokkupanekut ja kasutamist kindlasti lâbi selles juhendis sisalduvad eeskirjad ja juhised! |
| Démesio! | Priěš surinkdami ir paleisdami aparataj darba, reikia, kad jūs perskaitytuméte šiame vadove esančias instrukcjías. |
| Uzmanibul! | Ir lotti būtiski, lui jūs izlasùtù norādījumus, kas snegti šajā rokasgrāmatā, pirms keraties pie ierīces montēsanas un iedarbināsanas! |
| Pozor! | Je nutné, aby ste si prečitali poukny, ktoré sa nachádzajú v tejto priručke pred montážou a spustenim pristroja. |
| Bnuumanue! | Πρèdi crlogobvaneи и рuskane на машинатае ваяхно ѳ почетete Иструкците в рьковоството за уnotpréba. |
Sous réserve de modifications techniques / Subject to technical modifications / Technische Änderungen vorbehalten / Bajo reserva de modificaciones tecnicas / Con riserva di eventuali modifiche tecniche / Com reserva de Modifications tecnicas / Technische wijzigingen voorbehonden / Med forbehäll for tekniska änderingar / Med forbehold for tekniskeændringer / Med forbehold om tekniske endringer / Tekniset mutokset varataan / Ytó TnV επιφύλξη τεχνικύντροποιŋσευν / A múszaki MODOSITAS jegát fenntartjuk / Zmény technickych udajú vyhrazeny / MγTyt 6bIbB BHECEHb TECHNIQUEKHE H3MENHIA/ Sub rezerva modificatijor tehnica / Z zastrzeżeniam modyfikaci technicznych / Tehnicne spreemembe dopušcene / Podložné TECHNICK promjenama / Teknik dūzeltmeler hakki sakildir / Tehnilised muudatused voimalikud / Pasiliekant teise daryti techninius pakeitimus / Paturam tiesibas mainit techniskos raksturlielumus / Technické zmeny vyhradené /
IopJIeXHa TeXHueCKN MoINHkaaHH
Français
SYMBOLES
CHARACTERISTIQUES PRODUIT
Poids
REEMPLACEMENT DU FIL (Fig. 18-21)
Important: Some of the following symbols may be used on your tool. Please study them and learn their meaning. Proper interpretation of these symbols will allow you to operate the tool better and more safely.
| SYMBOLS | NAME | EXPLANATION |
| A | Safety Alert Symbol | Indicates danger, warning or caution. it means attention!!! Your safety is involved. |
| B | Read Your Operator's Manual | Your manual contains special messages to bring attention to potential safety concerns as well as operating and servicing information. Please read all the information carefully to ensure satification and safe use. |
| C | Wear eye and hearing protection | Wear eye, and hearing protection when operating this equipment. |
| D | Wear head protection | Wear head protection where there is a risk of falling objects. |
| E | Keep bystanders away | Keep all bystanders at least 15m (50 ft) away. |
| F | Ricochet | Danger of Ricochet. |
| G | Tri-Arc blade | Tri-Arc blade is appropriate for this unit and is suited for cutting pulpy weeds and vines. |
| H | Do not use toothed blade | This unit is not intended for use with a toothed saw type blade. |
| I | RPM Decal | Rotational direction and maximum speed of the shaft for the cutting attachment. |
| J | Boots | Wear non-slip safety footwear when using this equipment. |
| K | Gloves | Wear non-slip, heavy-duty gloves. |
| L | No Smoking | Do not smoke when mixing fuel or filling fuel tank. |
| M | Petrol | Use unleaded petrol intended for motor vehicle use with an octane ranting of 87([R+M]/2) or higher. |
| N | Oil | Use 2-stroke oil for air cooled engines. |
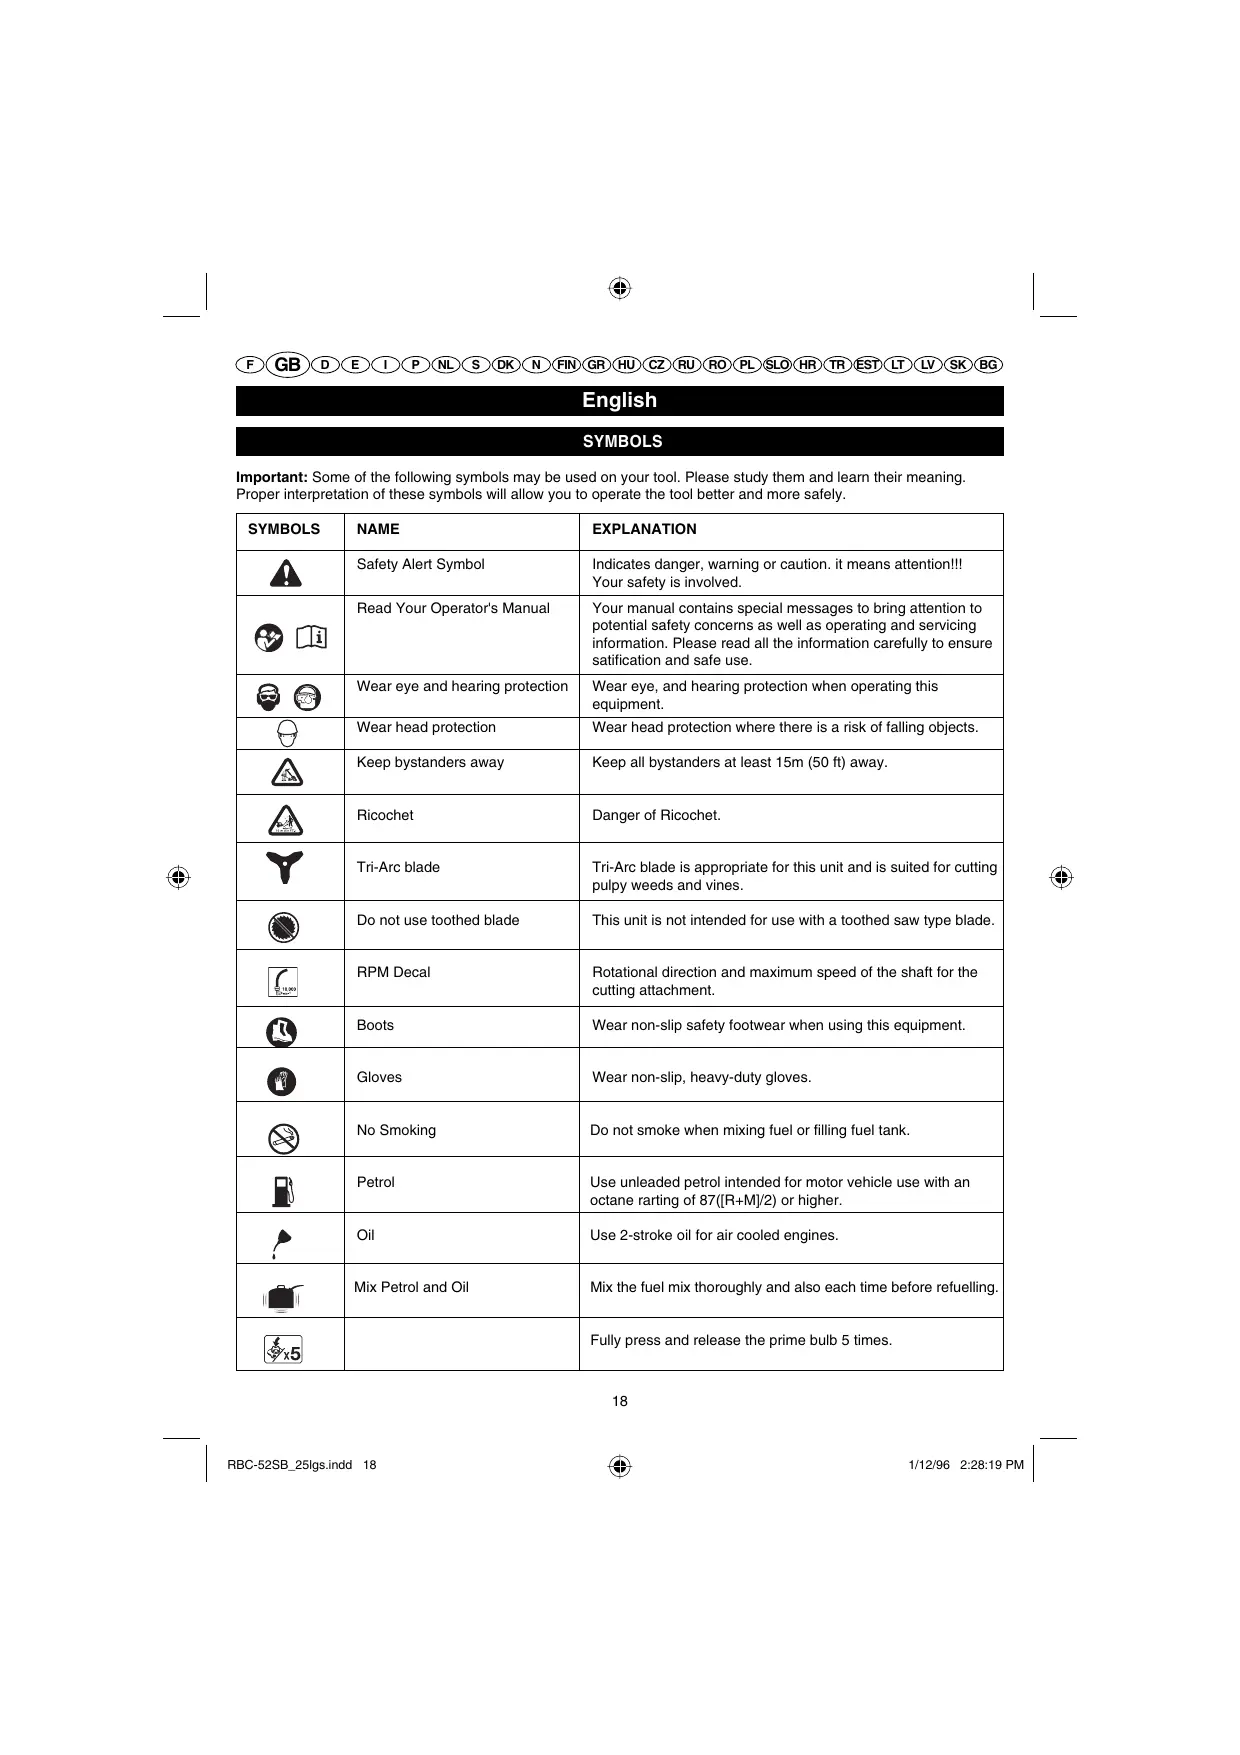
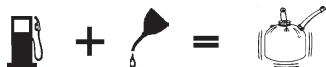
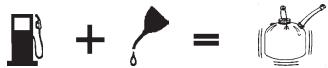
| O | Mix Petrol and Oil | Mix the fuel mix thoroughly and also each time before refuelling. |
| P | Fully press and release the prime bulb 5 times. |
English
SYMBOLS
Important: Some of the following symbols may be used on your tool. Please study them and learn their meaning. Proper interpretation of these symbols will allow you to operate the tool better and more safely.
| SYMBOLS | NAME | EXPLANATION |
| CE | | Conforms to all regulatory standards in the country in the EU where the product is purchased. |
Thank you for buying a Ryobi trimmer/brushcutter.
Your new trimmer/brushcutter has been engineered and manufactured to Ryobi's high standard for dependability, ease of operation, and operator safety. Properly cared for, it will give you years of rugged, trouble-free performance.

WARNING
To reduce the risk of injury, the user must read and understand the operator's manual.

WARNING
Do not attempt to operate this trimmer/brushcutter until you have read thoroughly and understood completely all instructions, safety rules etc contained in this manual. Failure to comply may result in accidents involving fire, electric shock or serious personal injury. Save operator's manual and review frequently for continuing safe operation, and instructing others who may use this tool.
READ ALL INSTRUCTIONS.
GENERAL SAFETY RULES
- For safe operation, read and understand all instructions before using the trimmer/brushcutter. Follow all safety instructions. Failure to follow all safety instructions listed below, can result in serious personal injury.
- Do not allow children or untrained individuals to use this unit.
- Never start or run the engine in a closed or poorly ventilated area; breathing exhaust fumes can kill.
- Clear the work area before each use. Remove all objects such as rocks, broken glass, nails, wire, or string which can be thrown or become entangled in the string head or blade.
- Wear full eye and hearing protection while operating this unit.
Wear heavy long pants, boots, and gloves. Do not
wear loose fitting clothing, short pants, jewellery of any kind, or use with bare feet.
- Secure long hair so it is above shoulder level to prevent entanglement in any moving parts.
- Keep all bystanders, children, and pets at least 15 m away.
- Do not operate this unit when you are tired, ill, or under the influence of alcohol, drugs, or medication.
Do not operate in poor lighting.
- Keep firm footing and balance. Do not overreach. Overreaching can result in loss of balance or exposure to hot surfaces.
- Keep all parts of your body away from any moving part.
- Do not touch area around the muffler or cylinder of the trimmer/brushcutter, these parts get hot from operation.
Always stop the engine and remove the spark plug wire before making any adjustments or repairs except for carburetor adjustments.
Inspect the unit before each use for loose fasteners, fuel leaks, etc. Replace any damaged parts before use.
The string head or blade will rotate during carburetor adjustments.
It has been reported that vibrations from hand-held tools may contribute to a condition called Raynaud's Syndrome in certain individuals. Symptoms may include tingling, numbness and blanching of the fingers, usually apparent upon exposure to cold. Hereditary factors, exposure to cold and dampness, diet, smoking and work practices are all thought to contribute to the development of these symptoms. It is presently unknown what, if any, vibrations or extent of exposure may contribute to the condition. There are measures that can be taken by the operator to possibly reduce the effects of vibration:
a) Keep your body warm in cold weather. When opera-ting the unit wear gloves to keep the hands and wrists warm. It is reported that cold weather is a major factor contributing to Raynaud's Syndrome.
English
GENERAL SAFETY RULES
b) After each period of operation, exercise to increase blood circulation.
c) Take frequent work breaks. Limit the amount of exposure per day.
If you experience any of the symptoms of this condition, immediately discontinue use and see your physician about these symptoms.
- Keep the tool well maintained, fasteners tightened and worn parts replaced.
- Mix and store fuel in a container approved for fuel.
- Mix fuel outdoors where there are no sparks or flames. Wipe up any fuel spillage. Move 9 m away from refueling site before starting engine.
- Stop the engine and allow to cool before refueling or storing the unit.
- Allow the engine to cool; empty the fuel tank and secure the unit from moving before transporting in a vehicle.
SPECIFIC SAFETY RULES FOR TRIMMER USE
- Replace string head if cracked, chipped, or damaged in any way. Be sure the string head or blade is properly installed and securely fastened. Failure to do so can cause serious injury.
Make sure all guards, straps, deflectors and handles are properly and securely attached.
Use only the manufacturer's replacement line in the cutting head. Do not use any other cutting attachment.
- Never operate unit without the grass deflector in place and in good condition.
- Maintain a firm grip on both handles while trimming. Keep string head below waist level. Never cut with the string head located over 76 cm or more above the ground.
SPECIFIC SAFETY RULES FOR BRUSHCUTTER AND BLADE USE
After engine stops, keep rotating blade in heavy grass or pulpy weeks until it stops.
- Do not operate the brushcutter unless the blade guard is firmly secured in place and in good condition.
Use heavy gloves while installing or removing blades.
Always stop the engine and remove the spark plug wire before attempting to remove any obstruction caught or jammed in the blade or before removing and installing the blade.
- Do not attempt to touch or stop the blade when it is rotating.
A coasting blade can cause injury while it continues to spin after the engine is stopped or throttle trigger released. Maintain proper control until the blade has completely stopped rotating.
- Replace any blade that has been damaged. Always make sure blade is installed correctly and securely fastened before each use. Failure to do so can cause serious injury.
Use only the manufacturer's replacement blade intended for use on this brushcutter. Do not use any other blade.
The blade is suited for cutting pulpy weeds and vines only. Do not use for any other purpose. Never use the blade to cut woody brush.
Exercise extreme caution when using the blade with this unit. Blade thrust is the reaction that may occur when the spinning blade contacts anything it cannot cut. This contact may cause the blade to stop for an instant, and suddenly "thrust" the unit away from the object that was hit. This reaction can be violent enough to cause the operator to lose control of the unit. Blade thrust can occur without warning if the blade snags, stalls, or binds. This is more likely to occur in areas where it is difficult to see the material being cut. For cutting ease and safety, approach the weeds being cut from the right to the left. In the event an unexpected object or woody stock is encountered, this could minimize the blade thrust reaction.
- Never cut any material over 13mm diameter.
Always wear the shoulder strap when using the brushcutter and adjust to a comfortable operating position. Maintain a firm grip on both handles while cutting with a blade. Keep the blade away from body and below waist. Never use the brushcutter with the blade located 76~cm or more above the ground level.
- Cover the blade with the blade protector before storing the unit, or during transportation. Always remove the blade protector before using the unit. If not removed, the blade protector could become a thrown object as the blade begins to turn.
SPECIFICATIONS
Weight
- Without fuel, cutting attachment 7.52 kg
-Withblade 7.87kg
- With string head 7.72 kg
Fuel tank volume 1230 cm³
Cutting swath 415 mm
English
SPECIFICATIONS
| Engine displacement |
| RBC-52SB | 51.7 cm3 |
| RBC-40SB | 40 cm3 |
| Maximum engine performance (in accordance with ISO 8893) |
| RBC-52SB | 1.4 kW / 1.9 HP |
| RBC-40SB | 1.27 kW / 1.7 HP |
| Maximum rotational frequency of the spindle | 10000 min-1 |
| Engine speed (rotational frequency) at recommended max. spindle rotational frequency | 12500 min-1 |
| Engine speed (rotational frequency) at idle | 2250-2750 min-1 |
| Fuel consumption (in accordance with ISO 8893) at max. |
| engine performance | 0.85 kg/h |
| Specific fuel consumption (in accordance with ISO 8893) at max. engine performance | 0.45 kg/h |
| Vibration level idling |
| - Left handle | 7.3 m/s2 |
| - Right handle | 7.5 m/s2 |
| Vibration level racing |
| - Left handle | 7.2 m/s2 |
| - Right handle | 7.5 m/s2 |
| Sound pressure level (in accordance with EN ISO 11806: |
| 1997, ISO 7917:1987) | 102 LpA (dBA) |
| Sound power level (in accordance with ISO 10884) | 115 LwA (dBpA) |
DESCRIPTION
- M6 wrench
- Hole of the gear case
- Hole in the upper flange washer
- Upper flange washer
- Blade cover
- Blade
- Cupped washer
- Washer
- Blade nut
- Gear case
- Spark plug wrench
- String head
- Connector
- Grass deflector
- Screw for grass deflector
- Locking tab
-
Notch
-
Handle bar
- Bottom clamp
- Shaft
- Throttle trigger
- Top clamp
- Latch
- Strap hanger
- Quick release tap
- Mounting bracket
- Best cutting area
- Dangerous cutting area
- Ignition switch
- Primer bulb
- Lever
- Blade protector
- Filter
ASSEMBLY
HANDLE (Fig. 2)
- Place the handle bar (18) in the bottom clamp (19) located on the shaft (20) housing.
Note: The throttle trigger (21) must be mounted to the operator's right side.
- Place the top clamp (22) on top and tighten the four M5 x 25 screws.
- Adjust the handle bar for best operator control in a comfortable upright position.
ATTACHING THE SHOULDER STRAP (Fig. 3)
- Connect the latch (23) on the shoulder strap to the strap hanger (24).
- Adjust the shoulder strap hanger to a balanced position where the blade or cutter attachment will suspend between 100mm to 300mm above the ground surface.
Adjust the strap hanger to a comfortable position.
Note: To quickly release the product from the shoulder strap, sharply pull the quick release tab (25).
GRASS DEFLECTOR AND BLADE GUARD USE (Fig. 4)
Note: When converting from brushcutter to string trimmer or string trimmer to brushcutter, make sure the correct guard/deflector is being used.
BLADE GUARD (Fig. 5)
- Attach the blade guard to the mounting bracket (26); install the four screws (M5× 16) from the bottom of the blade guard through the mounting plate and into the mounting bracket.
English
ASSEMBLY
Using the screwdriver supplied, tighten all four screws securely.
Note: When using the string head (12), the string shield must be attached to blade guard.
GRASS DEFLECTOR (Fig. 15)
- Attach the grass deflector (14) to the blade guard by placing the two locking tabs (16) into the two notches (17).
Using the screwdriver supplied, tighten the screw securely.

WARNING
Always stop the engine and remove the spark plug wire before making any adjustments such as changing cutting heads; this is to reduce the risk of serious personal injury.
CONVERTING FROM BRUSHCUTTER TO LINE TRIMMER
REMOVING THE BLADE (Fig. 7)
- Place the M6 wrench (1) through the hole of the gear case (2) and the hole in the upper flange washer (3). Turn the blade nut (9) clockwise by using the larger end of the spark plug wrench (11) to remove.
- Remove the washer (8), blade cover (5), cupped washer (7), blade (6) and upper flange washer (4). Retain the upper flange washer and cupped washer for string head installation.
- Attach the grass deflector (14) to the blade guard by placing the 2 locking tabs into the two notches and tighten the grass deflector screw by the screw driver on the spark plug wrench.
NOTE: Store the brushcutter parts together for later use.
INSTALLING THE STRING HEAD (Fig. 6)
- Place the upper flange washer over the gear shaft with the hollow side toward the gear head.
Install the cupped washer with the raised center away from the upper flange washer.
- Place the M6 wrench through the hole of the gear case and the hole in the upper flange washer. Install the smaller end of the connector (13) to the gear head by turning counterclockwise. Tighten securely.
- With the M6 wrench in place, turn the string head (12) counterclockwise onto the larger end of the connector to install. Tighten securely.
CONVERTING FROM LINE TRIMMER TO BRUSHCUTTER
REMOVING THE STRING HEAD (Fig. 6)
- Place the M6 wrench through the hole of the gear case and the hole in the upper flange washer. Remove the string head by turning clockwise.
- With the M6 wrench in place, turn the connector clockwise to remove.
- Remove the cupped washer and upper flange washer. Retain them for blade installation.
- Loosen the screw on the grass deflector. Remove the grass deflector by pushing in on the two locking tabs while pulling on the grass deflector to separate from the blade guard.
NOTE: Store the string head and grass deflector parts together for later use.
INSTALLING THE BLADE (Fig. 7)
- Place the upper flange washer over the gear shaft with the hollow side toward the gear head.
Center the blade on the upper flange, making sure the blade sits flat. Install the cupped washer with the raised center away from the blade.
Place the blade cover and washer on top.
Install the blade nut by turning counterclockwise. Place the M6 wrench through the hole of the gear case and the hole in the upper flange washer. Tighten the blade nut securely with the larger end of the spark plug wrench.
OPERATION

Read the operation manual and follow all warnings and safety instructions.

Wear eye protection and ear protection.

Keep all bystanders, especially children and pets, at least 15m from the operating area.
FUEL AND REFUELING
HANDLING THE FUEL SAFELY
Always handle fuel with care, it is highly flammable.
Always refuel outdoors where there are no sparks and flames. Do not inhale fuel vapors.
- Do not let petrol or oil come in contact with your skin.
- Keep petrol and oil away from the eyes. If petrol or oil comes in contact with the eyes, wash them immediately with clean water. If irritation is still present, see a doctor immediately.
English
OPERATION
Clean up spilled petrol immediately.
MIXING THE FUEL
This product is powered by a 2-stroke engine and requires pre-mixing petrol and 2-stroke oil. Pre-mix unleaded petrol and 2-stroke engine oil in a clean container approved for petrol.
This engine is certified to operate on unleaded petrol intended for automotive use with an octane rating of 87 ([ + ] / 2) or higher.
- Do not use any type of pre-mixed petrol / oil from fuel service stations, this includes the pre-mixed petrol / oil intended for use in mopeds, motorcycles, etc.
Use synthetic 2-stroke oil only. Do not use automotive oil or 2-stroke outboard oil.
Mix the 2-stroke oil into the petrol. This is a 30:1 ratio.
- Mix the fuel thoroughly and also each time before fueling.
- Mix in small quantities. Do not mix quantities larger than usable in a 30 day period. Synthetic 2-stroke oil containing a fuel stabilizer is recommended.

FILLING THE TANK
Clean surface around fuel cap to prevent contamination.
- Loosen fuel cap slowly to release pressure and to keep fuel from escaping around the cap.
Carefully pour fuel mixture into the tank. Avoid spillage.
Prior to replacing the fuel cap, clean and inspect the gasket.
- Immediately replace fuel cap and hand tighten. Wipe up any fuel spillage. Move 9 m away from refueling site before starting engine.
Note: It is normal for smoke to be emitted from a new engine during and after first use.

WARNING
Always shut off engine before fueling. Never add fuel to a machine with a running or hot engine. Move at least 9 m from refueling site before starting engine. Do not smoke!

OPERATING THE TRIMMER (Fig. 8)
Hold the trimmer with the right hand on the trigger handle and the left hand on the left handle. Keep a firm grip with both hands while in operation. Trimmer should be held at a comfortable position with the trigger handle about hip height.
Always operate trimmer at full throttle. Cut tall grass from the top down. This will prevent grass from wrapping around the shaft housing and string head which may cause damage from overheating. If grass becomes wrapped around the string head, stop the engine, disconnect the spark plug wire, and remove the grass. Prolonged cutting at partial throttle will result in oil dripping from the muffler.
CUTTING TIPS (Fig. 9)
- Keep the trimmer tilted towards the area being cut; this is the best cutting area (27).
- Do not cut in dangerous cutting area (28).
Use the tip of string to do the cutting; do not force string head into uncut grass.
- Wire and picket fences cause extra string wear, even breakage. Stone and brick walls, kerbs and wood may wear string rapidly.
- Avoid trees and shrubs. Tree bark, wood mouldings, cladding and fence posts can easily be damaged by the string.
Hold the brushcutter with the right hand on the trigger handle and the left hand on the left handle. Keep a firm grip with both hands while in operation. Brushcutter should be held at a comfortable position with the trigger handle about hip height. Maintain your grip and balance on both feet. Position yourself so that you will not be drawn off balance by the kick-back reaction of the cutting blade.
Adjust the shoulder strap to position the brushcutter at a comfortable operating position and to assure that the shoulder strap will reduce the risk of operator contact with the blade.
Exercise extreme caution when using the blade with this unit.
English
OPERATION
Blade thrust is the reaction which may occur when the spinning blade contacts anything it cannot cut. This contact may cause the blade to stop for an instant, and suddenly "thrust" the unit away from the object that was hit. This reaction can be violent enough to cause the operator to lose control of the unit. Blade thrust may occur without warning if the blade snags, stalls or binds. This is more likely to occur in areas where it is difficult to see the material being cut. For cutting ease and safety, approach the weeds being cut from the right to the left. In the event that an unexpected object or woody stock is encountered, this could minimise the blade thrust reaction.
BLADE
The blade is suited only for pulpy weeds and vines. When the blade becomes dull, it can be turned over to extend the life of the blade. Do not sharpen the blade.
CUTTING TECHNIQUE - BLADE

WARNING
Extreme care must be taken when using blades to ensure safe operation. Read the safety information for safe operation using the blade, refer to "Specific Safety Rules for Brushcutter and Blade Use" earlier in this manual.
Always hold brushcutter with both hands when operating. Use a firm grip on both handles.
- Maintain your grip and balance on both feet. Position yourself so that you will not be drawn off balance by the kick-back reaction of the cutting blade.
Inspect and clear the area of any hidden objects such as glass, stones, concrete, fencing, wire, wood, metal, etc.
- Never use blades near footpaths, fencing, posts, buildings or other immovable objects.
- Never use a blade after hitting a hard object without first inspecting it for damage. Do not use if any damage is detected.
The unit is used as a scythe, cutting from the right to the left in a broad sweeping action from side to side.
STARTING AND STOPPING (Fig. 12 and Fig. 16)

WARNING
Never start or run the engine inside a closed or poorly ventilated area; breathing exhaust fumes can kill.
TO START A COLD ENGINE:
- Lay trimmer on a flat, bare surface. Move ignition switch to the "I" position.
Push primer bulb (30) 5 times.
Note: Do not squeeze the throttle trigger (21) before engine starts. Squeezing the throttle trigger at this time will prevent the unit from starting.
Move the lever (31) up to close choke (NJ).
Pull the starter grip until engine starts.
Move the lever down to open choke (III).
- Allow the engine to warm up for a few minutes before using.
TO START A WARM ENGINE:
- Lay trimmer on a flat, bare surface. Move ignition switch to the "I" position.
- Choke lever should already be in the open choke (III) position. Pull the starter rope until unit runs.
TO STOP THE ENGINE:
To stop the engine, depress the ignition switch to the "O" position.
MAINTENANCE

WARNING
Use only original manufacturer's replacement parts, accessories and attachments. Failure to do so can cause possible injury, poor performance and may void your warranty.
- The cutting attachment must not work in idle mode. If this requirement is not satisfied, the clutch has to be adjusted or the machine needs an urgent maintenance by a qualified technician.
- You may make adjustments and repairs described here. For other repairs, have the trimmer serviced by an authorized service agent.
Consequences of improper maintenance may include excess carbon deposits resulting in loss of performance and discharge of black oily residue dripping from the muffler.
Make sure all guards, straps, deflectors and handles are properly and securely attached to avoid the risk of personal injury.
STRING REPLACEMENT
Use only 2.7mm diameter string.
- Stop the engine, disconnect the spark plug wire.
English
MAINTENANCE
Hold the string head and unscrew from the unit. Turn clockwise.
Push the button on the string head and pull the string out.
Push the button and push the new line through the eyelet of the string head.
BLADE PROTECTOR (Fig. 13)
Always place the blade protector (32) on the blade when the unit is not in use. Wear gloves and be cautious when handling the blade.
Note: Always remove the blade protector before using the unit. If not removed, the blade protector could become a thrown object as the blade begins to turn.
CLEANING THE EXHAUST PORT AND MUFFLER
Depending on the type of fuel used, the type and amount of oil used, and/or your operating conditions, the exhaust port and muffler may become blocked with carbon deposits. If you notice a power loss with your petrol-powered tool, a qualified service technician will need to remove these deposits to restore performance.
REPLACING AND CLEANING AIR FILTER (Fig. 14)
For proper performance and long life, keep air filter clean.
- Remove the air filter cover by unscrewing the screw on the air filter cover.
Remove the holding plate in the air filter box.
- Remove the filter (33), clean it in warm soapy water. Rinse and let dry completely. For best performance, replace annually.
Reinstall the filter.
Replace the holding plate.
- Replace the air filter cover and tighten the screw.
FUEL CAP

WARNING
A leaking fuel cap is a fire hazard and must be replaced immediately.
The fuel cap contains a non-serviceable filter and a check valve. A clogged fuel filter will cause poor engine performance. If performance improves when the fuel cap is loosened, the check valve may be faulty or the filter clogged. Replace fuel cap if required.
SPARKING PLUG
This engine uses a TORCH L7RTC with 0.6 - 0.7mm electrode gap. Use an exact replacement and replace annually.
STORAGE (1 MONTH OR LONGER)
Drain all fuel from tank into a container approved for petrol. Run engine until it stops.
Clean all foreign material from the trimmer. Store it in a well-ventilated place that is inaccessible to children. Keep away from corrosive agents such as garden chemicals and de-icing salts.
- Cover the blade with the blade protector before storing the unit, or during transportation.
- Abide by all ISO and local regulations for the safe storage and handling of petrol. Excess fuel should be used up in other 2-cycle engine-powered equipment.
English
TROUBLESHOOTING
IF THESE SOLUTIONS DO NOT SOLVE THE PROBLEM, CONTACT YOUR AUTHORISED SERVICE DEALER.
| PROBLEM | POSSIBLE CAUSE | SOLUTION |
| Engine will not start. | 1. No spark. | 1. Check spark. Remove sparking plug. Reattach the sparking plug cap and lay sparking plug on metal cylinder. Pull the starter rope and watch for spark at sparking plug tip. If there is no spark, repeat test with new sparking plug. |
| 2. No fuel. | 2. Push primer bulb until bulb is full of fuel. If bulb does not fill, primary fuel delivery system is blocked. Contact a service dealer. If primer bulb fills, engine may be flooded (see next item). |
| 3. Flooded engine. | 3. Remove spark plug, turn trimmer so spark plug hole is aimed at the ground. Make sure lever is in the open choke (||) position and pull starter cord 10 to 14 times. This will clear excess fuel from engine. Clean and reinstall spark plug. With the throttle trigger fully depressed, pull starter cord three times with lever at open choke (||) position. If engine does not start, move choke lever to close choke (NJ) position and follow normal starting instructions in “STARTING AND STOPPING” section. If engine still fails to start, repeat procedure with a new spark plug. |
| 4. Starter rope pulls harder now than when new. | 4. Contact a service dealer. |
| Engine starts but will not accelerate. | Carburetor requires adjustment. | Contact a service dealer. |
| Engine does not reach full speed and emits excessive smoke. | 1. Check oil fuel mixture. | 1. Use fresh fuel and the correct synthetic 2-stroke oil mix. |
| 2. Air filter dirty. | 2. Clean air filter. Refer to “Replacing and Cleaning Air Filter” earlier in this manual. |
| 3. Carburetor requires adjustment. | 3. Contact a servicing dealer. |
| Engine starts, runs, and accelerates but will not idle. | Carburetor requires adjustment | Contact a servicing dealer. |
| Blade continues to rotate at idle speed. | Carburetor requires adjustment. | Contact a servicing dealer. |
English
TROUBLESHOOTING
| PROBLEM | POSSIBLE CAUSE | SOLUTION |
| Grass wraps round shaft housing and string head. | 1. Cutting tall grass at ground level.
2. Operating trimmer at part throttle. | 1. Cut tall grass from the top down.
2. Operate trimmer at full throttle. |
| Oil drips from muffler. | 1. Operating trimmer at part throttle.
2. Check oil/fuel mixture.
3. Air filter dirty.
4. Carburetor requires adjustment. | 1. Operate trimmer at full throttle.
2. Use fresh fuel and the correct synthetic 2-stroke oil mix.
3. Clean per instruction in Maintenance Section.
4. Contact a servicing dealer. |
Deutsch
SYMBOLE
Nota: Whenever you use this device, you will be able to detect the presence of a fire in the area.
MONTAGEM DO DEFLECTOR DE RELVA (Fig. 15)
AFSCHERMKAP OF MESBESCHERMKAP MONTEREN (afb. 4)
MESBESCHERMKAP MONTEREN (afb. 5)
AFSCHERMKAP MONTEREN (afb. 15)
1 liter + 33 ml =
2 liter + 67 ml =
3 liter + 100 ml =
4 liter + 133 ml =
5 liter + 167 ml =
WERKEN MET DE GRASTRIMMER (afb. 8)
PAFYLDNING AF BEHOLDER
1 liter + 33 ml =
2 liter + 67 ml =
3 liter + 100 ml =
4 liter + 133 ml =
5 liter + 167 ml =
PRECTETESINASLEDUJICIPOKNY.
OBECNÉ BEZPEÇNOSTNI POKYNY
SPOUSTENI NARADI ZA TEPLA
PROBLEM A JEJICH RESENI
POKUD NABIZENÁ REŠENİ NEUMOZNÍ PROBLEM ODSTRANIT, OBRATTE SE NA NÉKTERÉ Z AUTORIZOVÁNYCH SERVISNICH STREDEISK RYOBI.
TEXHUNECKNE XAPAKTEPHCTUKN
Bec
-6e3 TOJIINBA H 6e3
peKyIINX CnCTEm 7,52 K
-6e3TOJIINHBAHC
HOXOM 7.87K
-6e3TOJIINBAHC
TpHMMepHOI ROJIOBKOI 7,72K
EMKoCTb 6aKa 1230 cm³
IIInpHa nokoca
Pa6oHn o6bEm MoToPA
RBC-52SB 51.7~cm^3
RBC-40SB 40~cm^3
MaKcHMaJIbHbI KII MoTOpa (ISO 8893)
RBC-52SB 1.4kBT / 1.9HP
RBC-40SB 1,27kBT / 1,7HP
MaKcHMaJIbHaNcKOpocTbBpaIIeHHa
PezHM MOTopa Ha MaKcHMaJIbHOI
ckopocTHBpaIeHH 125006/MHH
PekHM MOTOPa H aMaIoN cKOpocTH 2250-2750 o6/MH
PacxoTToJIbBa (ISO 8893)
Ha MaKCHMaJIbHOM peXHMe MOTopa 0,85 Kr/
HomHaJIbHbIpaCXOДToJIInBa
(ISO 8893) Ha MaKChMaJIbHOM
peKHMe MOtopa 0,45 Kr/
YpOBeHb Bn6paunHa MaJIoH cKOpocTH
- JIeBa pyKoTka 7,3 m/ceK²
- IIpaBa pyKoTka 7,5 m/ceK2
YpOBeHb Bn6paunHa pIoJIHOckOpocTH
-JIeBa pyKoTka 7.2 m/cek²
- npabay pykOa 7,5 m/ceK²
Akyctnueckoe naBJIeHne
(EN ISO 11806:1997, ISO 7917:1987) 102 JB A
AkyctHuecka MOHOCtB (ISO 10884) 115 dB p A
ONHCAHNE
- IIIecTHrpaHHbI KJIHOuM6
- OTrBepCTHe KapTepa IIOIIHHHKNOB
- Ipope3b B BepxHneIeYke
- BepxHja IeUka
- HxKxIeUka
- Hox
7.Полаяшайба
- IIIaIb6a
- Taika 6JIOKINPOBKN HOKA
- KapTeP IOJIINIIHHKOB
- CbeHOn KJIIOU
- TpHMMepHa rOJIOBka
- BényüaàIITaHra
- OtpaKaTeJIb TpaBbl
- BnHT OtpaKaTeJIraTpaBbI
- 3actekkn
- BbIeMka
- RykOraTka
- Hxhn cynnopt
- Bēpxhny trpy6ka
- Rykota akcelepaTopa
- BepxHHXOMyT
- Kapa6HH
- PeMeHb
- 3bIOK 6bICTpO OTCeKKN
- KpeIeKbIy cyIIIOrT
- 3oHa MaKcHMaJIbHOJ pa6OeH IIPOH3BOJInTeJIbHOCTH
- Onacna pa6oay 30Ha
- BbIKJIOyAteJIb
- Tpyuia ctraprepa
- Pbyar npoccejra
- 3aHTbIy HexOJI HOKa
- _HJBTP
Pycckn
CBOPKA
Pryka (Pnc.2)
YcTaHOBHTe OCHOBHyO pyKy (18) Ha HnKHHn cyHIOpt (19), pNkpeJIeHHbI K Tpy6e (20).
IIpHmueaHHe: Kypok akceJIepaTopa (21) IOJIKeH 6bITb yCTaHOBJeH cIpaBA OTIOJIb3OBeTJIa.
YcTaHOBHTe BepxHnCyIIOpT Ha Bepx pyKoATrKn H 3aTbHrTe YcTbIpe BnHTa M5x25.
YcTaHOBHTe pyKBy yIO6Hoe IJa paObToI IOJOKeHHe.
YCTAHOBKA PEMHRA (Pnc.3)
3acteRHTe Kapa6HH (23) pemHa yIke (24) Tpy6KN 6JIOKA MOTopa.
YctaHOBHTe yuHko H a Tpyo6ke B yIIO6Hoe paOoHee IIOJIOKeHene, yTO6bI paOo7a rOIOBka hXoONJIacb B 10-30 cm HAIZemJIe.
IIpHMeaHHe: YTo6bI JERKo cHrTb peMeHb c HnCTpyMeHTa, pe3KO IOTaHHTe 3a J3bUOK 6bICTpo nOTcTeKKn (25).
YCTAHOBKA OTPAXATEJII TPABBI IJIN 3AIIHTHOFO KOKYXA HOKA (Pnc.4)
IpMHueaHHe: IPh CMeHe TpHMmepa Ha Kocy HJIN KocbHa TpHMmep He 3a6bIbaHTe MeHrT bcoOTBeTcTBHyIOyTO3aIHTHyO DeTaJIb: KoxyHX HOx HA JIN OTpaKaTeJIb TpaBJI.
YCTAHOBKA 3AIIHTHOKO KOKYXA HOKA (Pnc.5)
YctaHOBHTe 3aunTHbIKoKyx Ha KpeIeJHbI cyINnOPT (26), BCTaBBuYeTbPe BHNTa (M5x16) B MOHTaXHyO IIaCTHHy, IIOI 3aunTHbIKoKyx, 3aTeM B KpeIeJHbI cyINnOPT.
Tyro 3aT8HHte YeTbIpe BnHTa OTBepTKoH N3 KOMIIJIeKTA.
IpeJ3aipabKoB CcERJa OcTaHaBJIbAaTe MoTOp. HKnOgJa He 3aipabJIte INCTyMeH cPa60TaOHm HIn IopraHM ToMOpOM. PocJe 3aipabKn 6aka yJaJIteCb He MeHee Yem Ha 9 MetPOB OT MecTa 3aipabKn, IpexJe Me 3aYcKaTb MoTOp. He KypHTe!
1JI + 33MJI =2JI + 67MJI =3JI + 100MJI =4JI + 133MJI =5JI + 167MJI =
Pycckn
PABOTA
HcIOJIb3OBAHNE TPUMMEPA IJIa BOPIOPOB (Pnc.8)
JepKHTe JIeByO pyKoTky IeBoi pyKo, a npabyo - npaBoi. Bo Bpemra paoBtBu KpeIKo JePckHTo IHCTpyMeHT o6EHmU pyKaAMn. JepKHTe TPhMMep B yIObHom paOoem IOLOKeHH, YTObI npabayr pyKoTka 6blIa npH6JI3HTeJIbHo Ha ypoBHe 6eJa.
Pa6oTaIte TprHMMepOM B IIOJIHOM peJXIME MOTOPa. KocHTe BbICOKYU TpABy ChaJaYI NOBEPxY, IOTOM HnKHe, YTO6bI OHa He HAMATbIbIaIacBa HnHHKHO TpyOky HIN Ha TprHMMPEHYO rOIOBky. B IpOTHBOM cIJyae 3O MoKet BbI3BaTb IIpeIperpeB MOTOPa. EcII IN TpaBa HAMOTaIaIcb Ha TprHMMPEHYO rOIOBky, OCTAHOBITNE MOTOP, CHIMITE pPOBOI co CBeHu NOCBOJOIte TprHMMPEHYO rOIOBky OT TpaBa.I PII pNIOJIXKTJIbHO pa6ote B cpeHM peKHE MOTOPa I3 BbIXIOIHORO TOBepCTNMOKETB BbTEKATb MaCIO.
HIOJE3HbIE COBETbI (Pnc.9)
Держпг Триммер NOД НakJOHOM K yuctky KOIIeHnA (cm. МаКснмAJьно пюнЗБОДНТьнан 30HA кОIIeHnA (27)).
EcJIH TpHMMeP He JepKATb IOI IIpaBbIbHIM HAKIOHOM, 3TO MoKeT IpeCTaBMyb OIIaHcOCTb (cm. OIIaChHa 30Ha KOIeHnE (28)).
KocTcMbIE KOHUnKnJeCKn,IO3ToMBy He ToIkaTe TPhMMep B BBICOKOITpaBe.
I PpOBoJIoUHHe 3aPpaXJIeHHa, 3a6OpbI, cTeHbI, TpoTyapbI H JepeBb 6bIcTpee H3HaIIHHBaHT IeCKy H MOrYT JaKe CJOMATb ee.
I36eRaTe KOHTaTJIeCKn CJepeBbMaH N KcyCTapHHKOM. JIeCKa MOKeTIONbPeBHTb Kopy DepeBbE, JepeBbHbIe ykpaueHHeN H3rTOPOJn IaHcAHHKOB.
HClIOJIb3OBAHHe BEH3OKOCbI (Pnc.10-11)
JepKHTe JeyUO pyKOaTky KocJI JbeOu pyKoA, a npabyIO - npaOB. Bo Bpempa60tBu KpeIko JepKHTe HnCTpyMent 06eHMn pykAMn. JepKHTe KOCy B yIO6HOM pa6ooyem POLOKeHHN, YTO6bI ppaBa pyKOaTKa 6bIIa IIp6Io3HNTJIbHO Ha yOpBHe 6EJa. KpeIooJepKHTe HnCTpyMent H 3aHmaite yctOHUnBOe POLOKeHHe. 3To IpeDOrbPaTHn IOTePio paBHObecnB CclYae OTCKOka.
OtpereyIHytepeMeHbHa yIO6Hyo pa6Ouyo IINHy. PeMeHb IO3BOIAeTepKATb HOx Ha 6e3OIIaChom pacCToHHN OT TeJa. ByIbTe KpaIHe octTopoJXhI pIi npAobTe IHCTpyMeTOM C HOKOM.KorJa HOx HaxOHT Ha IpEeMTe, KOtOpB OH He MooKet cKoCHTb, IHCTpyMeTOTcKaHBAe.TPi n ToTM HOx MOKeTHa MRHOBeHHe OCTaHOBHtCBsI N OTToJIKHytB Kocy DaJIeKO TO BCTpeEHHO IpEeTCTBn. 3OTOTcCKO
MOKET 6bIb IOBOJIbHO ChIbHbIM.He TepeIte KOHTPOJIb HAI HnCTpymeHTOM.OTCKOK MOKET BO3HIKNHyTB IIpi BCTpeye HOka c IpeIITCTBHeM.IPi 3aEaAHIN HOka IIIn IIpi eO deFopMaIIH.TakHe OTCKOKN YaIE BcEO BO3HNKAIoT IIpi pa6oBe T MeCtAX C orpaHnHuEHNO BHIMOCbIy.ⅡIe 60JIbIIeH NaHEXHOCHN 6beO3IONaOCHTO KcOHTeCopHKn DBHKeHHMn Cnpaba HAIeBO.Ecln Ha TpaekToPHN HOka OKaJcTeCn IOCTOPOHNI IpeIMet IIN KYcOK JepBa, To rOpH3OHTaJIbHoE DIBHKeHHe KcObl COKpATHT CNIY TOJIYka.
TPEXJIYUBEBOHOK
TpexIyueBoH HOX IIpeUycMOTpeH ToJIbKO IJIa ckOca copHЯKOB I paCTeHH C mRAKHMn CTe6JIIMN. KOrJa HOx 3atUynIIcA, eO mo HnopeBepHyt b npOIOJXaTb pa6Oty. He 3aatauHbaTe TpexIyueBoH HOX.
COBETBIIO PABOTE CHOXOM

IPEDUYIPEXJEHNE
BByIte KpaJIHe oCtOPOXHb Ipn paOBe c HoxOM. BHNMaTeJIbHO npOHTITE pa3JIe "IIpaBJIa TeXHKnE 6e30IaNacOcTH Ipn paOBe KOcoi" N3 HAcToTlIeFo pyKOBOCTBA.
- Pnpa6oTe BceIa IepKHTe HNCTpyMeHT O6EHMH pyKaAMH. OBlaJeITe HNCTpyMeHTOM.
KpeIKo JepKHTe HNCTPymeHt 3aHHMaTe yCTOHNBOE IOJIOKeHHe. 3To IpeIOTBpATHT NOpTePO paBHObecn B CJIyue otCkOKa.
OcMOTPHTyeaCTOK KOJIeHn H y6epHTe C Hero OCKoJKN cTeKJa, KAMHN, MetJIJIueCKeN He IpeBvHHbIe IIpeIMetbl, H3rOpOru, Kyckn 6tOHa H T.J.
HnKorJa He KocHe BIOJIb BByIOJKeHHbIX TPOINHOK, IaIHcaIHKNOB, 3arpaKJEnHH, 3daHH IN IIpoHx COOpyKeHH.
B C Lyuae CTOJIKHOBENH HOXA c PnEINrCTBHEM, IPOBepTe ero IeIOCTHOCTb, IPOJKe IeIPOJOJIKaTb paOToY. HNKOrJa He NOL3yIReTc BNOpeXJEHbIM HOXM.
KoCHTe IIHPOKHM6OKOBBIMN JBHXeHHMn CnpabaHaJIeBO.
3AIIYCK H OCTAHOBKA HHCTPYMEHTA (Pnc.12;Pnc.16)

IPEUYIPEXJEHNE
He 3aynyckaTe MOTOP B 3akpbyTOM HINI IIOXO IIPOBETPbHbAeMOM IOMeIeHHN: BBIXIOIIHbE Ra3bI ONAChbI JIJI KJH3NI.
3AIIYCKXOJOIOHOGOMOTOPA
IIOJOKHTNEHCTPUMEHT HcBO6OHyIO NOBEPXHOCTb. HTO6b3aIyCtHTbMOTOP,IOCTABTe BIKJOUATEJI BKJI/ BbIKJI (29) BIOJOKHEN "T".
HaKMMTe 5 pa3 Ha rpyu cyaprepa (30).
Pycckn
PABOTA
IIpMueaHHe: He HaKHMaiTe Ha Kypok AkceJepaTopo (21),IOka MoTOp He 3aBeJIcIe. 3To HApUHT IIpaBHLbHbI 3aNyCK HnCTpyMeHTa.
IocTaBbTe pHyaT IpoCceJIA (31) B BePxHee 3AkpyToe HIOLOKeHHe ()
IepraTe cTApTep, Ioka MOTOp He 3aBeJeTc.
IocTaBbTe pbyar npocceJBA HnKHee OTKpbIToe IIOLOKeHne (11).
IpeJcHemHaHHaTb paOToY daHTe MoTOpy IopapoTaTb HeCKoJIbKO MmHyT.
3AIIYCK TOPJYETO MOTOPA
IIOJOKHTNE IHCTpyMeHT Ha CBO6OHyHO NOBEPXHOCtB. HTO6b3aIyCTHTb MOTOP, HOCTaBBTe BbIKHOHTeBJ BKJI/ BbIKJI B IIOJOKHeNE "T".
PbuaqIpoocceJIOJIkeH yKe cToaTb BOTKbIOMIOIOJKeHH (III).IepraTe cTapTe, Ioka MotOp He3abeJeTc.
OCTAHOBKA MOTOPA
YtO6bI octaHOBHTb MOTop,IOCTaBBTe BbIKJIOVAteJIb BKJI/ BbIKJI B IOJOKeHHe "O".
O6CJYXHBAHHE

IPEUYIPEXDEHNE
Ipih 6ocLyKHBaHH HnctpyMeHa TIOJIb3yHTecb ToJIbKO mApOuHbIMn 3aIIuaCTaMHn A KAcceccyapAMn. HecoJIIOHeHne 3ToH nHctpyKHH MoKeT NOBLeB 3a Cooi NIOmKHy HnctpyMeHa T TaJKeJIbIe TpaBMbl. Kpore TOrO, 3To aHHyInpyet rapaHTHO Ha HnctpyMeHT.
He pa6oTaIe Ha Hn3KOM pexKHMe MoToPA. B Clyuae Heco6IoJeHnE 3ToN HTcPryKUnn, HAnO bSyTe OtperyInpObAT CuIeJIeHne HIn cPOnHO OtpcMOTHnpObaTb HtCtprMeHT c IOMOnIOB KBaJINΦHInpOBAHHorO TexHnKa.
Ipn3BOINTe ToJIbKO Te peryIINPOBKN H onepaHn no 06cIyXKBaHnHO, KOtOpBe IOnHcHbI B HacToHlEe pyKOBIOCTBE. JIA IJIO6bIX npYrHp E moHTHbIX pa6OT o6paauTIEcB b CEHTP TEXHnueCKORO 06cIyXBaHnH.
IINHEnpaBbHOMOcJyKbAHHHHCTpymEHTaMOkET 06pa3OBaTbcN3JIHIIHRA OKaJIHaC, cOKpaIaIOuJaP aONHBOITbeLbocTh paObTo h Bb3BaIOuaaTeY cheHoM MaJIHHCtOn KJIKOCTHn H3BbIXIOHORo OTBepCTn.
IpoBepaIE TpAIBHbOCTb yctAHOBKn KpeJIeHNHa cpeCTb 6e3oNaHcOHT, pEmHe, oTpaKaTeJIe H pyKoTOK. 3To IOMoXetI36eKatb TzKeJIbIX TpAM.
CMEHA JIECKH
IIOJIb3yI TeCb ToJIbKO JIECKOJ HnAmEtPOM 2,7 MM.
OctaHOBHTe MOTOP H CHIMHTE IPOBOJ CO CBEUH. BO3bMHTecb 3a TPHMMepHYIO TOIOLKBy N OTBHHTHe ee c KATYUIKNI BIPABO.
HaKMHTe Ha KHOIIky Ha TpHMMePHoI ROIOBKe H BbIyCTHte JieCKy.
HaKMHTe Ha KHOIky H IIPOIyCTHTe HOByIO JeCKy B yIIKO TPhMMepHOI rOIOBKN.
3AIIHTbI YEXOJI HOXA (Pnc.13)
B Heapooee BpemBa CBeJa HnAeBaiTe Ha HOX 3aHHTbH uexoJI (32).PiPh MaHHuIHHIOKOM bIte KpaHHe BHMaTeJIbHbI H noJIb 3yIETec IIepUATkAMi.
IpMmeyHHe: IpeJI HauJIOM paBOTb CHHMaTe 3aJIHTnTH b YeXoJ HOHa. B IpOTHBOM cIyuae erO MoKET BbIKHHytb C HOKa npI bpaUeHHn.
YHCTKA BbIXJIOIIHO TO OTBEPCTN I JIyIHTEJI
B 3aBHCmocTh O HcIOJIb3yeMOrO ToIJIHBA, TIIHa, KOJIuECTBa MaCJa N yCIOJBn paObTb, B BVXIOIHOM OTBepCTHH N B IyIHIte MeKOT cKoiITbcs OKaJIHnA. IIpn MAnEOHctN HnCTpyMeHTo OToIaBHe ero B YnCTKy KbaJIHfHIIpOBAHHom TeXhNKy.
3AMEHA I NICTKA BO3IyIHHOTO ФИЛБТРА (Pис.14)
ДябольшпpoHOBIOJIteJIbHOCTNИpoIJIeHЯсркaслжбbl HnCtpyMeHTa cJIeIITRE3a NCHCTOTOI BO3dIIHOROФЛBJtpa.
CHMHITE KpbIHKy BO3dyHoro HbTpa,OTBHTHB BHT Ha KpbIIKE.
CHMHTe yIepXHBaOHyIO IlaCTHHy BHyTpH OTJeJIeHnBO3dyHOroΦHJbTpa.
CnHMMrE pHbTp (33) H npOMoIe erO TeIIOB MblbHO B0Io. IpnOLOJIeTe rno H daIre IIOJIOCTbO bIcOCHyTb. DooJIeep IpoDyKTHNBocHT pa6OTbMeHJeTOB3duHbI h PJIbTp praB rOrd.
YcTaHOBHTe BO3yHbIyΦHJIbTp HA MeCTO.
YcTaHOBHTe yIepKHBaIOHyIO IJIaCTHHy Ha MeCTo.
YcTaHOBHTe KpbIHKy BO3dyHoro HJIbTpHa MeCTO H TyTO 3aTAHHTe BHT.
KpbIIKA TOJIJIHBHORO BAKA

IPEDUYIPEXJEHNE
HepeMpTeuHna KpbIbKa TOnJIbHBOrO 6aka MoKet BeB3BaTb IOKap. Ee CJIeYET HeMeJIeHHo 3aMeHHTb.
Pycckn
OBCJYXHBAHNE
KpbHka TOnIIHBHO 6aKa OcHaIeHa NbIbTpom H OJHOCTOPOHHM KJIaHApOM, He IIOJIeXaIHMH peMOHTy. 3Arp3HeHbI NbIbTp MeIaET IpaBnJIbHO paboTe MOpTa. Ecln MOTOP paObaTeA JUHIE, KOJa KpbHbKa 6aKa HEMHOrO OTBHHUeHa, 3TO CBNDETeIbCTByET O TOM, YTO OJHOCTOPOHHI KJIaHn HcNOPrTILcE HIN NbIbTp 3arp3HNlCJ. PInHneOxOJIMoCT 3AmEHNTe KpbHkY6aKa.
CBEHA
Ha HnCtpymEnTe HcNoIb3yeTcBcYe a3aKHHaTRCH L7RTCc3a3OpomMeJy3JeKToPdAmn0,6-0.7MM. IIOJIb3yIteCbTOJIbKOeTHMMOEJIaMnCBeYH MeHnTe CBEuyKaKJbIroJ.
XPAHEHNE (MECRAIIOJIbIIIE)
CJeIe Bce ToJIINBO H3 6aKa B KaHnCTpy IJIA 6eH3Ha. DaIte MOTOpY IopapoTATb, Ioka OH cAm He ocTaHOBHTcJ.
TuaTeJIbHO OHCTHe TpHMmep. XpaHInr ero B xopoIIO npOBETPbEAOM MOnHEeHHN, IIOaJIbIe OIT eTei He JeprKHe rE pAIOJc EKnHM BeIIeCTBaAMn, TaKHMn KAK caIIOBbe XHMkATbI HIN pa3MOpaXHBHOaIa CoJIb.
IpeπItpaHcHIpOHTpOBKINyKlaJKOHaXpaHeHHe HaDeBaHTeHaHOK3aHHTbIy YEXOI.
CJeDyIe cTaNJIaPTAM ISO IMcTeTHbIM npaBnJIAM xpaHeHINrROHIOE.CJIHTOE TOIJIHBO MOKHO HcIOJIb3OBaBt B JpyTHX INHCTpyMeHTx C bJYBXaTKbIb MOTOPOM.
Pycckn
CITITI TOATE INSTRUCTIUNILE.
MÁSURI DE SIGURANTA GENERALE
MONTAZ GLOWICY ZYLKOWEJ (Rys. 6)
YAKIT DEPOSUNUN KAPAGI

UYARI
SAKLAMA (BIR AY YA DA DAHA FAZLASI iCIN)
HOIDKE NEED JUHISED ALLES!
ÜLDISED OHUTUSNÖUDED
1 litras + 33 ml =
2 litrai + 67 ml =
3 litrai + 100 ml =
4 litrai + 133 ml =
5 litrai + 167 ml =
ZOLIAPJOVES NAUDIOJIMAS (8 pav.)
Laiky kite desine zoliapjovs ranken a save desine ranka, o kaire rankena - savo kaire ranka. Laiky kite savo iranki tvirtai dvejomis rankomis visa naudojimo laika. Reikia laikyti zoliapjove taip, kad darbo padetis butepatogi, desinei rankenai esant mazdau jusku klubu lygye.
PRECIAJTE SVSETKY POKNY
PRECIATAJTE SVSETKY POKNY
IIPOYETETE BCHUKN HHCTPYKUN.
OBIII IIPABUNA 3A BE3OIIACHOCT
COrJIeHa63oNaChAtaBn pa6Ota,IIpeIa IIpHCTbHIte KbM EKIIIOAATAHn HA TPmepa/TPmepa 3a pa3uHCTBaHe, IpoUeTe Hpa3yUe IO6pe BcHKn yka3aHn. Cna3BaHTe BcHKn HhCTpyKuHn 3a 63oNaCHoCT. IIPh HecIa3BaHe Ha IaJehnte IIO-JIoY IHCTpyKuHn 3a 63oNaCHoCT MoKeJa de Ce IIpHUNHTe TExKn TeJIeCNIOBpeI.
He onyckaiTe Ieua H Heo6yuHn IInca Da H3noI3BaT MaHHaTa.
Hikora He cTAPTHaPeIe IbHrAteJIe B 3aTbOpeHO HINJIe IIPOBETeHO NOMEJIeHNHe, TbI KaTO OTPa6oTeHHTe Ra3OBe MoKeJa ca CMbPTOHOCHH.
I IpeHpa6oTa pa3HcTe 3OHa Ta HnOp3BaHe. MHexHeT BCHKN IpeMEnTH KATO KAMbHn, CUYIEHN CTbKJa, INHOHN, KJHN, TeJn HJp, KOHTO MoTAta Ja bJat OTRbPJIeHN HJIn Da ce 3akavat B rJanaba T a TPhMeR a H BOHka.
■ IIO BpeMe Ha pa6oTa Tp86Ba Ja HocHTe IIpeIiHa3HH OUYHAn IIpeIiHa3HH cpeCTBa 3a yIHHte.
CbIto Tapa Tp86BaJa HocHTe IbIbTn IIbTeH NaHTaIOH, 6OTyINnPiKABuINn.He Tp86BaJa O6JIuATe IIHPOKn IpxHN,KbCNpaTALIOHN6HXyTaH NHKOrHa pa6oTeTe C 6OCh kpaKa.
Ako cTe cIbJIra KocA, BINHHeTe RaHaMaHeTa, 3aJa He ce 3aKaaHnB INHKeIHTe Ce YactH.
Дeцета,станчИнHTе Лиua И ДOMaIIHHTe XJBOHTHТЯбOAba cToTHa pa3cToHHe hA-NMaIko 15 M O T MЯСТOTo, KBJTepo pa6OHTHe.
He pa6oTeTe c MaHHaTata, aKO CTe H3MOpeHn, 6OJIHN, IOI Bb3JeCTBHe hA aJIKOXOI HJIN OIIHaTH, HJIN aKO B3HMATE JekapCTBa.
He H3IIOJ3BaIte TpHMepa, aKo CBeTJIHHaTa e HeIOCTaTBHa 3a pa60Ta.
BHHaH Tpa6BaJa na3nTe paBHOBeCne. CtbneTe cta6nIHO Ha 3eMaTa H He npToRaIte pBHe NaIaeJ. B InpToBHe cIyau MoKe Ja nAdHete H/IIa Ce IOnpeter Io ropeHINoBbpxOCTn.
I Na3eTe TJIOTO cN OT IINHKeIHTe ce YAcTH.
HeIO6JIHkaBaiTe pIe KbM H3NpyCkateIHaTAtp6aIIIN KbM IINIHbPa Ha TpMHepa/tpMHepa 3a pa3YCHTBaHE, TBKaTO IO BpeMe Ha eKcIIHOATAIg N Te3N YactH ce HAropeIiBaT.
BnHaH CnPiAaTe IIBraTeJI H N3KJIIOuBaIte JIKIoTO 3a 3aIIaJIbAHeTo IpeIN hAcTpoKa H NiPiPABKn C H3KJIOueHHe Ha perJaX ha KApSybopatota.
BceKnPiT npEnyIynOpTe6aOrJdAteMaHnHaTa, 3aJa cyeBepHe, YHeMa oTKaueHcyAuct, He Ye H3Tuva rohpBO n.T.H. PIOMeHeT BcNHy HeN3npaBBnYactH.
BbIeTe H3KJIIOHHTeJIHO BHIMaTeJIHH-JIaBaTa Ha TPhMepa HHOKbT Ce BbPtT npH perJax Ha Kap6ypaTopa.
- PnH HkON Xopa Noi B3dEeCTBHe Ha Bb6paunHTe MoKeJa ce IpeJ3BnKa "CINJPOBt HA PeHOr" cSb CNTOMrKaTO HJIYKN, H3TpBbIaBe H NO6eJIbAbe Ha IpbcTHTe, KOINTO 06IKHOBOEc E pcnoBBaRt pN H3JIaRaHe ha CTyI.
Бытарский
OBIIINIPABNJ3ABE3OINACHOCT
H3rlexJa, Ye 3a pa3BnBaHeTo Ha Te3n cHmITOMn OIINHHacAT HAcJECTBeHOCTTA, H3NaIarHeTo HA CTyn I BJIaxHOCT, HJIKOH XpAHTeHIn HABuIN, THOTHOHyIeHTo H onpeJELH NaUH naPbOTA. Ha TactOIIHn etan He e H3BeCTHO KaKBO KOJIYeCTBO Bn6paunH INI KKaBA IIpoJIbIXNtJHoCT Ha N3laIarHe MoKe JI npEIN3BHKat 3a60JIbAAHeTO. BB BceKN cLyauT Tp86Ba Da ce IpeIepHemAT HKnOH MepKN, 3a da ce OrpaHnH N3laRaHeTo HA BnBpaHN, Kato:
a) O6JIHuaIte ce IIObpe B cTyJeHO BpeMe. KOraTo pa6OTHTe C TpHmepa, Hocete PbKaBnH, 3a Da IpeJIIa3He IIaHHTe N KHTKHTe Cn OTONJIHaTa. H3rJIeXJa, ye HNCkata Tempepatya e EHH ot IraBbHTe qAchOpTH, cnOCo6CTBaUH 3a IOBBABaHoTa Ha CHNIpOMa HA PeiHo.
6) CJIeI pa6Ota HnPaBaTe HЯKoJko YnpaXHeHna 3a CTMyJIInpaHne Ha KpbBoo6paIeHNeto.
B) PeIOBHO cH IOUHBAHTe H OgrpaHHyTe H3JIaHaHeTo Ha Bn6paIIHH.
Ako ce IOJIbH NIKOJ OT cHIMITOMHTe, He3a6abHO npyeCTaHOBepeTa c TpHmepa H ce 6bPheTe KbM JIeKap.
IIOJIbPkaTe MaIIHnHaTa BIO6Po cIcTOrHHe, IIOBepBaHTe DaJIh YacHTe caIObe PHKcHpaHH IOIMeHNrIe NOBpeHnTe.
CmecBaHTe H cbXpaHbBAHTe rOpHBOTOBcI,PipeBnHe3a6eH3HN.
CmecBaHte H cHnBaHte rOpHBOTo Ha OTKpHTo,JaJIeYOT hckPH n IIaMbK. IOncHctete HahtbJIHO, aKO hma pa3cnIIaHO rOpHB. OITpbHHeTe ce IIOHe Ha 9 M OT MCTOTO, KbJeTO cte PbJHHIpe3epBoapa C rOpHBO, IppeJ Da IyncHeTe JBHrataJIa.
Cnpete IbHraTeIa Hn3yakaiTe da ce oxlaIaI, IIpeIaI da ro 3apeXdaTe c ropHBO H IIpeIaI da npH6epeTe MaHHHaTata.
I Ipei TpaHcnpOpTnpeHa TpHmepa c ABTomO6H, H3YaKaaiTe DnHrTaTeJIa Na H3cTHHe, H3npa3HeTe pe3epBoapa H 3actOnOpTe MaHHHaTa, 3a Ja He MbpJa IO BpeMe Ha DBHeKeHe.
CIEUHNFHN IIPABNJA 3A BE30IACHOCT IPN PABOTACTPMMEPH
IIOJMeHeTe rJaBaTa, aKO e HanyKaHa, OTHyNeHa HIN IOHnKakBb HaNHN NOBpeHa. YBepeTe ce, Ye IraBATA HIOKbt CaIpaBnHIO NcTabeHH HIO6pe HKcHpaHH. IIPh HeCnA3BaHe Ha Ta3n HnCTpyKuN MoKe Ja ce IIpnuHHr TeKKH TeLeChn NOBpeHn
YBepete ce,ye BcNkPipeJIIa3Hn eJIeMeHTn,peMbIiPipeJIIa3HtEJIH nIpbJxKKn ca IpaBnJIIO NOCTaBeHH nIO6peΦHKcpanHa.
- PnH NOIMMaHa hapeXeIIOTo BbXe H3NIO3BaHTe eHNcTBeHopeXeIIOBbXe,PiepOpbuaHOOTPnOH3BOiTeJIe.H3NIO3BaHTe HNKaKBO npyTO cpeCTBO 3a NpO3BaHe.
HnKora He H3IOJI3BaIte MaIIHHaTa, Ako IpeIpa3HTeJIaT cpeIy TpeBa He e IocTaBeH B H3IpaBHOCT.
IpbKTe 3npaBO TpHMePA 3a IbTe IpbKKn IO BpeMe HA EcknIOaTuaII. IpbKTe IraBaTa HA TpHMePA IOI HNBOTo HA KpbCTA. HNKora He IIpHcTBnBaiTe KbM p3aHe, aKO IpaBaTa HA TpHMePa ce HAMHa BA HBCOuHHa HaJ 76cmOTcMrtA.
CIIIINΦUHN IIPABUNJA 3A BE3OIIACHOCT IPII PABOTA C TPHMEP 3A PA3HNCCTBAHE N C HOK
CneI KATO H3racHTe IbnrataE, He BAiteTe BbPTaIIce HOK OT TbctaTapeBnH 3pactbHTe,IOkato He cPipe HAITbHO.
He H3NOJ3BaIte TpImepa 3a pa3HCTBaHe, ako Ipnctabkata c Hoka He e InpaBnIHO nOCTabeHa H 3akpeHena II AN oEHN3pBaHa.
HocTe IIbTHn pKabHn, KOraToIOCTaBTe H cBaJIaTe HOxJa.
BnHaH cnpaIae IINrAte H n3KIOuBaIte cTApTePHOTOBbKe, IpneI da BaIHTe 3aceHaJIH IpEaMeTH B HOka H npEiNoCTaBHe IIN cBAJIHaHE HaHOXA.
He ce onnTbAte n da oKocBaTe H da cInHpate HoKa, JOKaTO Ce BbPTH.
Morat Ja 6bJaT npHUnHeHH TeKk TteJecn HOBpeH, KOrato HOxBT Ce BpTn IIO HnePcIe CJIe CNHpAe Ha DBHrAteJIA JIN pN OHNyCaKe HA TPhRepa.3aTOBa Tp8Ba BHNarJA KOHTPOInPaTe HhCTpyMeHTA, JOKATO HOXBJ HAIIbJHOcnpe.
I OJMeHeTe HeH3nPaBnHn HOK. BcKeN IbT IpeH npBaOta InpOBepaBaiTe JaIN HoXbT e NocTaBeH npBaHNo H 3akpeHn MHOro Bope. PInH HeCna3BaHe Ha Ta3n HnCTpykuiMoKeJa ce IpnuHHrT TeKKn TeJeChn IOBpeHn
IpnnoMHa Ha HoKa H3nOJ3BaJIte eHINCTBEHO trpHexKTopeH HOK,pa3pa6oTeH 3aTOH TpHMep 3a pa3nuHtBeHa. He H3nOJ3BaJIte HNKAKbJ bpyr MOnEJHO.
TPhceKtopHnHT HOK e pa3pa6oTeH cAmO 3a H3p3BaHe Ha 6peHH nH3pactbIu. He H3IOJI3BaIte IpoJyKa 3a JpyHn. HHKORA He H3IOJI3BaIte TPhceKtopHnHa HOK 3a P83AHe Ha xpaCTn.
Блгарский
CIIENΦUHNI IPIPABNJIA 3A BE3OJIACHOCTIPII PABOTACTPIMEP 3A PA3NUCTBAHEICHOX
BbIeTe H3KJIHOHTeHIO BHHMATEJHH, KORATO H3NIO13BaTepeJeu HnCTPmuNT. MoJE Da ce IooJyU NTOKaT Ha HOka JPN KOHTAKT C HeIO, KOeTO He MOKe Ja 6bJe Cp3aHO. PInp To3H KOHTAK HOKSTa 3a MHT MOKe BHE3aIHo Da cIpe N da H3XbIpyu HnCTPmuNTa B IOcOKA, O6paTHa Ha 3aKaueHnHa IpeMTe. Toba DBHKeHHe MOKe Ja e ToIKoBA cHJHo, Ye OpeAToPbT Da H3rGbYNpaJIeHHeTo Ha HnCTPmuNTa. OTKat MoKE Ja ce IooJyU, Ako HOKbT Ce ydApn B IIpeYnCTBHe, 3ary6nCKOPoCT NIN 6bJe bLOkHpaH. HMa IIO-TOLIMa BEPOTHCT Da ce IooJyU OTAKB YuactbK c HeIO6pa BnHMOCT 3a P3aHe. 3a Da paBoITte JieCHO bIbIIha 6e3ONaCHOT, peKeTe bypeHnTE OTJnCHO HAIBBO. AKO Ha IIbTa Ha HOka NIOJaHe pPeIMet NIN NapYe IbPBO, PInp TaKOBa CTpaHNUO DHBKeHHe CE HAJIABAT IocJEnIuNTe OT OKtata.
HnKora He pexeTe MaTepHaJI c dHaMeTbP HaI 13 MM.
Korato pa60HTe c TpHmepa 3a IIOuHCTBaHe, BnHaHn H3IOJI3BaIte PembKa H peryIINpaIte NblJxHATA My TaKa, Ye da pa60HTe yIO6Ho. IpBxTe 3npabo HnCTpyMeHTA 3a IIBeTe IpBxKn IO BpEme Ha EKcIIIOaTaiu. DpBxTe HoKa daleu OT TaILOTO cn H IOI KpbCtra. He pa60Te c HOka Ha TpHmepa 3a pa3uHCTBaHe Hn76 cm Hn7 ZEMTRA.
IIOCTaBnIte IpeJna3HTeJI Ha TpHcKTopHHoK, IpeJn Ja IIpaHepeTe HIN IIpeHacTe HHCTpyMeHTa. CBAJIte IpeJNa3HTeJI Ha HOKa IIpeJn paOta C HnCTpyMeHTa. AKO IIpeJNa3HTeJIrHe e CBAJIeH, MOKeJa 6bJe HxHBpJIeH IIpn BbPTeHETo HA HOKa.
TEXHNUECKA INHΦOPMAIIJIA
Terno
-6e3 roPbBO H peKeI MEXaHn3bM 7,52 K
- c Hoxka 7,87 K
- c TpHMepeHaTa rJaBa 7,72 K
BmecTHMOCT Ha pe3epBoapa 1230cm³
IIInpoUHa Ha p3aHe 415 MM
Pa6oTeH 06em
RBC-52SB 51,7 Ky6. cm
RBC-40SB 40ky6.cm
MaKc. MoIIOHOC T Ha IINrIaTeJIa
(cnopeISO 8893)
RBC-52SB 1,4kW / 1,9HP
RBC-40SB 1,27 kW / 1,7 HP
MaKcHmAJHa ckOpocT Ha BbPteHe 10000 6OpOta/MHH.
Ckopoct Na dBnraTeJr npu MaKc.
ckopocT ha BbptHe 12500 o6oPoTa/MH.
CkopoCT Ha IbHrTaTeJHa Ipa3eH xoJ 2250-2750o6oPora/MnH.
Pa3xO_日Na rohpBO (cnopeISO8893)
IIpH MaKc. MoIIOHOCT Ha JBINrATeJIa 0,85 Kf/
CneuHnueH pa3XoHa rOpHbO
(cnopeISO8893) npn MaKc.
MOIIHOCT Ha JBHrTaTeJIa
0.45 Kr/
HnBOHaBn6paunHTeHaIpa3enXoJ
-JIyBaIpBxKKa 7,3M/c2
-ⅡaHaIpIbKka 7,5 m/c2
HnBOHaBn6paunIte pni
ПьЛн MOHOCT
-JIyBaIpBxKKa 7,2M/c²
-ⅡaHa pBxKa 7,5M/c2
AkyctHNo HaJIraHe (CIOpeJ EN
ISO 11806:1997, ISO 7917:1987)
CnlaHa3Byka(cnopeI ISO10884)
102 dBA
115 dBA
OIIINCAHNE
- KJIIOU IIIEcTOrpAM M6
- OTBOP B KUTTATA Ha 3b6Hm MExaHH3bM
- OTbOp Ha roPnHaJIaHeu
- TOpEn IaHeI
5.ДолгенФларец
- Hox
7.ИЗВИТАШАБА
8.IIIaIb6a
9.ГаиказблOKираненHOжа
- KyTHa Ha 3b6Hm MExaHH3bM
- Kom6HHnpan KJIHOY
- TpIMepHa rJaBa
13.3aADBKBaIIIINΦT
14.Ппдзгелсршутрава
- BnHT ha IIpeIIa3HtIe IcpeIy TpeBa
16.ПлacrHn3a3acToIopRaHe
- XJle6
18.Дрьжka
19.Доленпьркау
- FopHa Tpb6Ha npBxxKa
21.Дрьжka 3a ckopoocTа
- Topha cko6a
- KapabHnep
- Pemblk
- E3nue 3a 6b30 OTKaUaHe
26.Дьржач
- OITHMajHa 30Ha 3a p3aHe
- Onacha 30ha 3a pr3aHe
29.П配电ьсвay
30.ПусковбаJOH
- JIoCT Ha npoceJIHaTa KJIaIa
32.ПрелпаЗнTeЛ Na HOxa
33.ΦHITbP
Бытарский
MOHTHPAHE
IP^ (fHr.2)
IIOCTABeTe OCHOBHATA IpbJka (18) BbpyOJIHaTa Cko6a (19),HAMHPaIIa Ce bBypTxPb6HaTa IpbJka (20).
BeJekka: TprhepbT 3a ckopocTta (21) trpaBa ja ce nocTabn OIЯchata CTpHa ha OIepaTopa.
IocTabeTe roPnHn IbPkau BbPxy npBkKaTa H 3aBnTe yETnpHTe BnHTa M5 x 25.
PeyIpaIte IpbKkaTa Taka, YeJa MoKeTe Ja pa6oTHe yIO6Ho HJa KOHTpoIpaTe HHCTpyMeHtA.
IIOCTABRHE HA PEMbKA (fni.3)
3aKaYeTe Kapa6HHepa (23) Ha peMbKa B KaTapaMaTa (24), HAMHpAaIc Ce Bbpyr HopHaTa TpBbHa npbKa.
PeryiHpaIte HIOIOXeHHTo Ha KaTapaMaTa Bbpyx TpB6HaTa IpbKka Taka, Ye Na MoKete Ja pa6OTHe YUdOHO cTa6HIO H NObKt Hn I rBaTaBa HA TPhMepaJa ce Hampat Ha pa3cTOHHe MeJy 100 n 300 MM ot 3eMHTA.
BeIeKka: 3aJaOTKaUHTe IeCHO peMbKa OT HNcTpymHeTa, ⅡpbHHeTe p3KO e3HVETo 3a 6bP3O OTKaUHe (25).
H3IIOJI3BAHE HA IIPEIIIA3NTEJIA CPEIy TPEBA HNA KYTHIATA HAOXA (Φur.4)
BeIeJka: KORAto CMeHrTe TPhMepa 3a pa3UHcTBAHe CbC tChIaPdTHNa TPhMepu H o6paTHOTo, BHNMaBaIte JaIIH N3IOJI3BaTE CbOTBeTHN IpeIIa3eH MEXaHIN3bM (KytHa Ha HOka/NpeIIa3HrTeI cpeIy TpeBa).
KUTHRAHAHOKA (pHr.5)
3aKpeneTe IpeJnAeIeJI KbM IbPkaJa (26), Kato Ipokapate YeTHnPtHe BVHtA (M5x16) IpE3 MoHTaJhata IaCTHaN IOI IpEJIaHtJIeTJA, CIEJI KoETO HIpE3 IbPkaJa.
3aBHHTe 3IpaBO YeTHPHTe BHHTa C IIMOuTa Ha IIpeIOCTaBeHaTb KOMJIIEkTA OTBepTKa.
BeJexka:Korato H3IOJI3BaTe TPhMePHaTa rIaBa (12), IIpeIIa3HTeJIaT Ha rIaBaTa Tp86BaJa 6bJe IocTabeH.
IIPEIIIA3HTEJI CPEIUY TPEBA (pHr. 15)
MOnTHnAPte IpeJNa3HeJIe CpeIy Tepea (14) KbM IpeJNa3HeJIe Ha HOka Kato NocTabeTe DBeTe IIaactHH 3a 3actonopRBAhe (16) B bIbaTa JKeIb6 (17).
3aBHHTeTe 3npaBO BnHTa C NIOMOHTa Ha IpeIOCTaBeHaTa B KOMIIJIeKTA OTBePTKa.

IPIEduIPEXDEHNE
BnHaH cnnpaIte IbHrataJI n H3KIOUvaJIte CTapTePHOTO BbIke, IpEJI du N3bIpyBaTE NaCTPOIK Kato CmHaN a peJeIeII MexaHH3bM. Taka IIe N36eHTe I ne OAnocCTaOT TeKkTteJeCHN IOBpeJI.
ПЕВРБИАЕHAТРИМЕР3APA3YИСТBAHEBCTAHДAPTEHTPIMEP
3APEXDAHE HAPE3EPBOAPA
I OuHcTepe3epBoapa OKIo KaIauKaTa, 3a Ja He ce 3aMbpcn rOpHBOTO.
BabHOb pa3BnIte KanauKaTa, 3a Ja ce H3Nyche HaJIraHeTo HJa He ce pa3CIne rOpHBO OKOJO HeJ.
BHHMaTeJIHO H3CHHHe TropHBHaTc CmEc Bpe3epBoapa, KaTO BHIMaBaTe Ja He Ja pa3CHHe.
I IpeHn OTHOBn Da 3aBHeTe KaHaKaTa, IIOHCTeTe yIbTHeHHeTo H npOBePeTe JaH e B DIObOp CbCToHHe.
IocTaBeTe BeHaRa KaNaAChKaTa H xy6aBO Ra 3aTeRHeTe. IOnHCTeTe HnBnHO, Ako NMa pa3cnHAno rOpHBO. OtPbHHeTe ce NoHe Ha 9 MOT MxCTOTo, KbDeTo cTe IIbHNIIpe3epBoapacrOpHBO, PpeIN da NycHeTe DBHrataJIe.
BeIeKka: IIbHraTeJIaT MoKe Ia 3aIpyIIH, KOrATo IyChHeTe MaIIHHaTa 3a IIbPbN IIbT, a IIIOHkoRa H CJIeT TOBa.

IPEUYIPEXJEHNE
IpeJH 3apeXdaHe Ha pe3epBoapa BHHaHcnnpaTHe DBHraTeJI. HNKORA He 3apeXdaTe MaIIHHaTa, Ako DBHraTeJIeT e OIIe B DNHKeHHe HJIH aKO He e H3CTHnAI. OtDJIbHIte Ce IIOHe Ha 9 M OTMxCTOTO, KBJTO cTe IIJHIIJIpe3epBoapa C rOpHBO, IpeJHa JaNCHete DBHraTeJIe. He NpUiete!
Бытарский
HAUHH HA PABOTA
| 1 JIITbP | + | 33 MЛ | = |
| 2 JIITpa | + | 67 MЛ | = |
| 3 JIITpa | + | 100 MЛ | = |
| 4 JIITpa | + | 133 MЛ | 30:1 |
| 5 JIITpa | + | 167 MЛ | = |
HAUHH HA PAEBOTA C TPHMEPA (Phr.8)
XbaHeTe JIcHaTa IpbXka Ha TpHMePa C IcHcHaTa cH pKa, aJIbBATA IpbXka-C IJIbAta pKa. IIO BpeMe Ha pa6ota IpbXte 3IpaBO TpHMePa H c IIbeTe pIe. IpbXte TpHMePa B yIO6HO 3a pa6To NIOJKeHNe, KATO IpcHata IpbXka Ja e OKOJI HNBOTO HA xHaIIHa.
BHHar npoTeHa IIbIHa MoHIOCT. PekTe BnCokaTa TpeBa OTrope HaOly, 3a Ha He ce 3aIIeTe TpeBa OKIo TpB6HaTa IpbKka H IraBata, KOeTo MOKe Ja IpNcHIn NperpPBAHe Ha IBHrAteJI.AkO OKIo IgIABaTA Ha TpHMepe Ce 3aIIeTe TpeBa, CnPte JBHrAteJI, H3KlHOUe Te JHIO To 3a IaJaIBaHe n H3BaDeTe TpeBaT. PpH IpOJIbIXHtEJIHa paOba Ta cpeHa MoIHIOCT MoKe Ja IpOKane MaCIO OT IppeINa3HTeJI Ha H3NyCKaTEJHATA TpB6a.
CbBETI IPIH P3AHE (Pn.9)
I pybKTe TpHMepe IIOI HAKJIOH KbM 3OHaTa 3a p3aHe - BHXTe OITHMajHaTa 3OHa 3a p3aHe (27).
Ako He NoctabITE TpHMepa NIOI IpaBUNHnBbJI, p3aHeTo Moke Ja IopoDIN PHCK-BNKTe OIacHaTa 3OHa 3a p3aHeane (28).
Pexe ce camo KpauHuaTa Ha BbXeTo; He BkapBaITe rJaBaTa BBB BHCOKaTa TpeBa.
IpnKoHTaKT C 60JIINBa TEJ,OrpaJH,CTeHH,TpToaApN HbPBO BbKeTO ce H3HOcBa IIO-6bP3O,a MoKe IOpH Ja ce cKbCa.
I368raBaiTe IbPBeTata H xpaCTHre. BbKeTo MOKeJa IOBpeHN KOpata Ha IbPBeTata, IbPBeHnTe eJeMeHTH, O6JIIOBKNi nCTbJIOBE.
HAUYH HA PABOTA C TPHMEPA 3A PA3YNUCTBAHE (qur.10-11)
XbaHeTe JIcHaTa IpbKKa Ha TpHMepa 3a pa3UHCTBaHe c JIcHATA Ch PbKa, a JIbBA Ta IIpbK Ka - C JIbA Ta PbKa. IIO Bpe Me Ha paOToA DpJbXe 3IpaBO INCTpyMeHTa H C IBete Pbue. IIpbXe TpHMepa 3a pa3UnCTBaHe B yIO6ho 3a paOTo HIOLOKeHHe, Kato JIcHata IIpbKJa e OKOIO HHBOTO Ha XaHIIa. CTbNeTe CTa6NIIHO, 3a Ja 3ana3nTE paBHObecne H KOtPoJa B'bPyx IHCTpyMeHTa. Taka Hma Da 3aY6Hte paBHObeche Ipn OTCaVaHe HA HOka.
PeryJInpaIte XOpH3OHTaJIHaTb Bp3Ka taKa, Ye Ja MoKete Ta pa6oHTHe yIooHo. XOpH3OHTaJIHaTb Bp3Ka cBtIo Taka IIbPkn HOKa Ha pa3CTo8HHe OT TaIO To BI.
БьдeTe H3KIIIOUHTeJIHO BHNMaTeJIHH,KOraTO H3NoI3BaTePeeJH NcHTpMEnT. MoKeJa Ce IIOJIyUH OTKaT Ha HOka IIpr KOHTaKT C HeIO, KoTo He MoKe Ja 6bIe cpr3AHO. IIPr TOn3I KOHTaKT HObT 3a MIn MOKe BHe3aIIHO Ja Cnpe JHa JIAxHBpIIN HHCTpymEtA B NcOka, O6paTHa Ha 3aKaueHnN IIpeIMet. ToBa IBNXeHne MoKe Ja e TOIKoBA CNlHO, Ye OpeIATOpBT Ja n3rYbH ynpabJIeHHeTo HA NcHTpymEtA. OTKaT MoKe Ja ce IIOJyH, Ako HOkT b CE yApH B IIpeIaTcTBHe, 3aYb6n ckOpcT HIN 6bIe 6IokHpAn. Hma IO-ToIHMa BePoTHocT Ja ce IIOJyH OTKaT B YuaCTbK C HeIObpa BHNMOCT 3a P3aHE. 3a Da pa60tHe JecHo N B IIbJIHa 6e3oiacHocT, peKeTe 6byeHne OTJNCHO HAIJIBO. Ako H IIbTa H HoKa IIOIaHne IIpeIeMeT HIN NapeJbPBO, IIpr TaKOba IBNXeHne ce HAMJIABat NocJIeHNITe OT OKaTa.
TPUCTPAHEH HOK
TpHcTaPahHHnT HoK e pa3pa6oTeH cAmO 3a H3p3BaHe Ha 6bpeHN H3paCTbIu. Korato HOKbT ce H3HocN, MoKeTe Ja ro BbPhre, 3a Ja ce YIbJXn JXHBOTbT My. He 3aToUbaIte TpHcEKTOPHHoK.
CbBETI IPII P3AHE C HOKA

IPEDUYIPEXJEHNE
BbIeTe N3KJIIOUHTeJIHO BHNMaTeJIHH, KORAto H3IOJI3BaTepeJeiHn HcHrTpMeHTn. IpoVetete JaJeHNTeNoIropeCneuIΦuHIn npaBHLa 3a 6eOanachocT npaPobota c TpHMeR 3pa3aPCHCTBAHe).
BHHaHnIpbXTe 3IpaBO TpHMePA 3a pa3YHCTBaHe c IBe pIe 3a IBeTe IpbKKn.
CTbneTe cta6nHIO,3aJa 3aapan3te paBHOBeCe H KOHTpOla Bbpyx HcTpeMHTa. Taka HmaJa 3aY6He TaPBHOBeCe IINOTCKaUHaHE HoKja.
OrJTeJaTae pa6oTHn yuaCTbK n ro pa3HCTeTe OT npEdMeTH KATO CTbKa, KaMbH, 6eTOH, OrpaH, TeJeHa MpeXa, IpbHO, MeTaj Hnp.
HnKora He nIIOJI3BaIe TpMHepa 3a pa3uHcTBaHe no IpoJbJIkeHHe Ha IIbTeKN, oRaIIH, KOJIObE, cGrApH H JpyTHn HEnOJIbIKHN O6KeTHn.
He H3IOJI3BaIe OTOHO JOK, KOITc ce e c6JIbCKAJ C npEIMTe, IpEIN Da IPOBepHTe JaIIH He e NOBpeJH. He paOBeTc e hero, aKO e NOBpeJH.
Pa60TeTe c ⅢnPOK cTpaHnueh pa3max OTJЯCHO HaJIyBO.
IIYCKAHE I CIIHPAHE HA TPHMEPA (fur.12; fur.16)

IPEDUYIPEXJEHNE
HnKORA h CTAPTIPaJIte IbIRaTeJIe B 3aTbOpeHO HnI 3JI NOpBeTpeHO NmOEHeJIe, TbI KaTO OtpaBHeHrTe rAsoBE Moze Ja ca CmTpOHoCHn.
Бытарский
HAUH HA PABOTA
CTAPTHPAHE IPN CTUEN IIBNFATEJI
CNoKTeTreMepaBbpyVaRaHaNIOBaNObIpyXHOCT.3aJa BKNIOHTe JBHrAteJI,IOCTaBeTe IpeBKNIOHVAteJIa 3a NyCKaHe/cnHpae (29)B NOIoKeHe "T"(NyckaHe).
HaTHcHete HOTyCHeTe 5IbTHIyCKOBn6aIOH (30).
BeJekKa:He HnTckKaIte TpHrepa (21),npEni BnHraTeJIa n e 3apa6oTHJI. Taka IIe IIOIpeYHTe Ha H3nPABHOTo NpCKaHa Na HNCTpyMeHTA.
IocTaBeTe IocTa Ha IpOceJIHaTa KJIaIIa (31) HArope B 3aTbOpEHOIOJIOKeHHe (N).
IpbHHeTe cTape,IOkATo IBnTaTeJIr TpIbIHe.
IocTaBeTe IocTa Ha IpoceHaTa KJIaHa HaIoJy B OTBOpEHO IIIOJKeHHe (111).
IIpeHJa IIpHCTbIHTe KbMa6Ota C MaIIHHaTa,OCaBeTe JBHrAteJIJa IIopAp60TH HkOKIO MmHyTH.
CTAPTHPAHEPINTOITBJDBNFGATEJI
CNoKeTe TPhmepa BpPyx BA HraIIOBbpxHOCT. 3aJa BkIOHHTe DBHrataI, NocTaBe IpeBkIOHvBaTeJIa 3a NycKaHe/cnPiHaRe B NOJIOKeHe "T" (NyCkaHe).
JIOCTbT Ha IpocceIHaTa KJIana Tpr6BaJa Ce HAmHpa B OTBopeHO NIOJOKeHHe ([II]).Ako He e, HATHCHe TprHepa Hro OTNychete. JpBIIHeTe cTApTepa, JOKATO JBHrataJIETPbIHe.
CINPAHE HA DBHATEJIJA
3aJa cIpeTe IbHrataJIe,IOCTaBeTe IIpeKbCBAuA 3a IIyckaHe/ cIInpaHe B IOLOJKeHNe "O" (cIInpaHe).
IIOIDIPbJKA

IPEUYIPEJKDEHNE
H3no13BaIte eHHCTBeHO opHnHaJIHH YacTH, AkceCoaarp HnHcTpyMeHTN. AKo He cna3Bate ToBA yka3aHHe, Moke Ja ce npOoi PHCK ot Hen3IIpaBHO fyHKUHOHNpaHe seCpOHIe TNeCEchN IOBpeH. OCBenToBA rapaHHTa Bn Ie Ce o6e3cnH.
He H3no13BaItepeXeIIHmexAHn3bM,KOrato JBHrataEITa paOToHa npae3en XoJ.PnHecna3BaHc Ha ToBA ykA3aHHe, IIe Tpr6BaJa cpeYpHncaBcJeHHInTe IIN Ja H3Bbpiu CneuHem pEmOT ON KbaJIHnIHNpaTExNHK.
I3BbpiBaIte eHNCTBeHO TaKHBa HacTPOIKH IN nonpABKN, KOTO ca ONHCANH B HACTOHH POKOBIOCTBO. 3a BCJKAkBA Ipyra IIOIpBkKa/INPpABKa IIO TPhmepa ce o6bpeTe KbM OTOpNImapar cepBn3.
Ппг loша NOДьжka Ha MaIIHnHa roMa Ze ca SEIOJyH OIJIaHa He Na cajHn B NO-JOJIIMo KOJIIneTe BoK, KoETO MoKe Jda HAMAIH eEKFtTHBHOCTTa H n Da IOBeJDo H3THuHa He
UepHa MacJIeHa yTaIKA oT I3IIyScKaTeJIHaTa TpIb6a.
YBepTe Ce, Ye BcHcKIppeIa3HN eJIeMeHTn, peMbH, IppeIa3HTeJIH IN IbJxKc Ca npabHIO nocTabEH N fHKcHpaHH. Taka Ie H36erHete H onacHocTtA or TeKKn TeIEChN IOBpeJIH.
ПОДМЯHA HВБЖETO
I3IOJI3BaIte eINHCTBeHO B'BeKe c IHaMeTbP 2,7 MM.
Cnpete DnHrataI H3K1HouTe CTapTepHO BJKe. XBaHete rIaBATA I pa3BbPteTe OT pOJKaIIO NOCOKA ha YacOBHHKOBA tCPeJIKA.
HaTHcHete6yToHHaTJIaBaTaIpa3BnHTeBbKeTe.
HaTHCHete 6yToH H IIpeKaapAte HOBOTOBxke Ipe3 yXOTO HaIJIaBata.
IIPEIIN3HTEJI HAHOXA (fur.13)
Korato He H3noJI3BaTe TpMHepa 3a pa3uHCTBaHe, BHnArn NoctabHrIe PpeJN3a3HTeJHa HoJa (32). BnHarn Hocete pBkABHn I 6bJeTe H3KJIIOHTeJHO BHHMaTeJIHN, KORATO JOKOCBAte HOJa.
BeJekka: CbaJIaIe IpeIa3HTeJIHa HOka IIpeIa pa6Ota c TpHMepa 3a pa3YHcTbHe. AKO IIpeIa3HTeJIrT He e CBAJIeH, MOKeJa 6bIe H3XBpJIe HIIH BpTeHeTo Ha HOka.
IIOCHCTBAHE HA H3IYCKATEJIHATA TPb6A HHA OTBOPA
B 3aBHCHMOCT OT H3IOJI3BaHHN TIII IROPnBO H KOJIHyecTBO HA MaCJIoTO H/HH N YCJOIBHnA Ha EKCIIOATAaIIHA OTBOPbT H camaTAt H3NyckatJIHa Tpb6 MoKeJa Ce 3aIIyHATc Bc CaJHn. Ako YcETHe, Ye ceYb6 MoUHocT, TpMHepbT TpOBA Ja bE JIOuHCTeOT KBAJIHfHIIpaH TeXhNI.
IIODMAH IIOUHCTBAHE HA Bb3dYHHN HJITbP (Phi.14)
3a efeKTHBHa H IbIgra pa6Ota Ha TpHMepa IooHCTBaHTe peIOBHO Bb3dYIIHHa fHJIbP.
CbaJIeTe KaIIaKaHa Bb3JyIHHHgΦHJTbp, KaTO pa3BHeTe BHHTa,pa3HIOJOKeH bPxy KaIIaKa.
CbaJIeTe IIaCTHHaTa, HAMHpAIIaCe B rHe3IOTo Ha Bb3dYHHNΦHJTbp.
I3BaJTePeHJIITbPa(33)IroH3MaJIteCtoTIIaCanHeHa BOJa. H3IIaKHeTe Ro HIOctabete Xy6aBO Ja H3cIbXHe. 3a IIO-TOJIMa ePekTHBHOCT CmEHIe To BEJIBKTo JOIDIIIHO.
IocTabeTo o6paTHo IJIaCTHHata.
IocTabeteKaIIaKaHaBb3dYuHHnHΦHJTbpH 3paBO 3aBHTe BnHTa.
Блгарский
IIODPbXKA
KANAUCHA 3A TOPHBOTO

IPEDUYIPEJKDEHNE
Ako Kana'ukata ha TognBtO He ce 3atBaPpIITbHO, c3IaBaCe ONaHcOCT OIOJkap In Tp6bA He3a6abHoJa Ce IOJMeHN.
Kaanayaka 3a ropnboto Hma IITbP H cPiNaTeJIeH BeHTJI, KOHTo He Moke Ja ce nonpaBra. 3aynuHeHHT IITbp Hanyuaba N3npabHTo YHKUHOHnPahe Ha DnBraTeJIA KAO DnBraTeJIa TAnOuHe Ja paOtoNIO-no6pe, Korato Pa3BHeTe JekO KaanaykaTata 3a ropnbTO, B3MOnKHO e CnPaTeHNrT IITbP Ja e JeFKeTeh HIN IITbPbT- 3aNyIeH. POnMeHete Kaanaykata 3a ropnbTO, aKe e Heo6XoJIMO.
3AIIAJHA CBEIII
BaIIHrT TpHMep/tpHMep 3a pa3YHcTBaHe pa60TH c3c 3aJIHa CbeUc TORCH L7RTC c pa3OCTHOJIe MekJy eJEKtPOJHTe OR 0,6-0,7 MM. H3IOJI3BaIte eINHCTBeHO pEInOpbYaHnMoJe I nCMehTe CBEIJTa BEJITK GoIMHIoo.
CbXPAHEHNE (3A IOBUEOT 1 MECEU)
I HcHneTe octaHIoTO Bpe3ePBoa pROpBO B cbl, OIO6peH 3a cbxpaHeHHe Na 6e3HN. IIyChete DBHrataJIa pa60TH, JOKATO CnPE.
IOnHcTeTe I6pe TpHmepa.IPi6peTe Ro Ha IpiOBeTpBO H HeOCTbHIO 3a Deia MCTo.He roocTaeBte B 61H30cT KO KOpO3HBNN MaTePnAJIa KATO rpaIHnCKHN XHMKnI HIN COIIN 3a pa3Mpa3BAHe.
IocTabaIte IpeIa3HTeJIa, IIpeIa IapHepeTe HIN IIpeHaIte HHCTpyMeHTa.
BnKTe KaKBn ca 3NcKBaHnraHa ISO n MeCtTHHe pa3nOpE6H, cBbP3aHH cS cbxpaHHeHTo n TpeTnpAHeTO ha rOpBBn BeIeCTBa. MoKeTe da H3IOI3BaTe octaHIoTO roPBO 3a Ipyra MaIIHnca C IByTAkTO JBHrATE.
Блтарский
PA3PEIIABAHE HA IIPOBJIEMN
AKO TE3H CbBETH HE Bn IIOMOIHAT IA PA3PEHNTE Bb3HHKHAJINI IIPOBJEM,OBbPHETCE KbM OTOPN3HPAH CEPBNI3 HA RYOBI.
| ПОНБЛЕМ | BEPOЯTHA ПИЧУНА | РАЗPEШЕНЕ | |
| Диогател跌 He Trьгва. | 1. Ная Искра. | 1. Пюоверете зацалената с蜱и. Извашисту.
Върете кадай на мосто и поставете с蜱и;
върхуMeta�ншимьр. Д��лөнете ж利益ота 3а.
Задларыане и сддөдүдүлүлүлүлүлүлүлүлүлүлүлүлүлүлүлүлүлүлүлүлүлүлүлүлүлүлүлүлүлүлүлүлүлүлүлүлүлүлүлүлүлүлүлүлүлүлүлүлүлүлүм.
Ако не сдд Вьннскра, посторете тectа сюва с蜱и. | |
| 2. Ная Горив. | 2. Задлөствашит e рuckовинь балон, дokато се нарлүлүпс.
Горив. Ако saлөнт не се нарлүлүн, зашистемата 3a пада ване на горив о зашида.Обрете с Кьм сөрвз. Ако saлөнт се нарлүлүн, вьзmosкөдүлүлүлүлүлүлүлүлүлүлүлүлүлүлүлүлүлүлүлүлүлүлүлүлүлүлүлүлүлүлүлүлүлүлүлүлүлүлүлүлүлүлүлүлүлүлүлүлүлэ.
Төногател跌 La сдд Вьнгдүлүлүлүлүлүлүлүлүлүлүлүлүлүлүлүлүлүлүлүлүлүлүлүлүлүлүлүлүлүлүлүлүлүлүлүлүлүлүлүлүлүлүлүлүлүлүлүлүл靖.
3. Диогател跌 се задаи. | 3. Издалета задалата с蜱и и обрете төрмета с отвора за сөр岫а тьм земая.Обрете даду.
Диогателata калла в OTборно пioложени (III) и Д��лөнете старета 10-14 пьл. Тaka Д��огател.
піс освобдд о NTлішно оррив. Почстете сөр岫а иърете на мосто. Натистете төрна.
Докрай и дрьнөтө trп пьлүх старета, като лоctьт.
Надроселната калла в OTборно пioложени (III).
Ако д��огател跌 Trьнгд, поставете Лоста на д��релота калла в Заоворно пioложени (IV) и Иизлөнете уksынгдэв в раздд "Пусякане и сизралe" на машината. Ако д��огателт OTново не төрн,
Повсторете радлүчнITE etаин сюва сөрь. |
| 4. ХilOTOЗа задалване сдьрna lo-тудino, отколково когато Трмерът e Бли Нов. | | |
| Диогател跌 Trьгва, по He uсpopява. | Карбуразовь Трябва на се рergлпра. | Оььрете се Кьм сөрвз. | |
| Диогател跌 He Достига макимална мошости и Изпugska Тьрд'm MHOgo Дим. | 1. Пюоверете горивна смес.
2. Въздуннгд Флтьр e замьрс.
3. Kapбуразовь Трябва на се рergлпра. | 1. Изпогалове пяасно смесно горив с правлно сьотоншени на масло за بутakтбови Д��огател.
2. Почстете вьздуннoga Флтьр. Вьжт раздд "Пдмяна и рочстване на вьздуннoga Флтьр".
3. Oььрете се Кьм сөрвз. | |
Блгарский
PA3PEIIABAHE HA IIPOBJIEMN
| ПЮБЛЕМ | BEРОТHA ПИЧИHA | PA3PEШЕНЕ |
| Диогастяг Трьгва, работи
н усокая, по не падь ржа
празенхол. | Карбуразорь Травба
да сpeгунilla. | Оььрпесе С Кьм сервиЗ. |
| Hожьт се Вьрtn, когато
Диогастяг Работи на падьхихол. | Карбуразорь Травба
да сpeгунilla. | Оььрпесе С Кьм сервиЗ. |
| Травata се залита okоло
Трьбнatable Дрьжka и Главata. | 1. Побразытевиска трава
на НИВОТУ на Земета.
2. РабOTITE на сpeдно мошноct. | 1. Рожete виска трава OTROPE наюл.
2. РабOTITE на пьл�ma мошноct. |
| От Изпунскателна трава
Изтуа масло. | 1. РабOTITE на сpeдно мошноct.
2. Побразе Трава смес.
3. ВьзduишилтФильър e
Замьрсан.
4. Рабуразорь Трава ла
сpeгунilla. | 1. РабOTITE на пьл�ma мошноct.
2. Изплзайтпсяно Смесно СорнBOСправллно
сьотношени на масло 3a дутукови Дьигател.
3. Пожимпесе Тьзduишилфильър. Вьжte раддeл
"Пдмяна и почиствано на Вьзduишилфильър".
4. Оььрпесе се Кьм сервиЗ. |

GARANTIE - CONDITIONS
All Ryobi products are guaranteed against manufacturing defects and defective parts for a period of twenty-four (24) months from the date stated on the original invoice drawn up by the retailer and given to the end user.
Deterioration caused by normal wear and tear, unauthorised or improper use or maintenance, or overload are excluded from this guarantee as are accessories such as battery packs, light bulbs, blades, fittings, bags, etc. In the event of malfunction during the warranty period, please take the NON-DISMANTLED product, along with the proof of purchase, to your retailer or nearest Authorised Ryobi Service Centre.
This warranty in no way affects your legal rights concerning defective products.

GARANTIE - CONDITION
Acest produs Ryobi est garantat in cazul vicilor de fabricatie si pieseler col defecte pentru o durata de douazecisipatu (24) de luni,incepandu data factuuri originale emisi d'cate commerciant utilitorului final.
We declare in sole responsibility that the product, to which this certificate applies, conforms to the basic health and safety requirements of the Machinery Directive 98/37/EC and other relevant regulations. Like EMC Directive 89/336/EEC and Outdoor Directive 2000/14/EC.
We declare this product complies to the requirements of the Outdoor Directive 2000/14/EC.
Measured sound power level: 110 dB (A)
Guaranteed sound power level: 115 dB (A)
Date of issuance: 12/2006
Technical documents are kept by Homelite Far East Co., Ltd. 24/F, 388 Castle Peak Road, Tsuen Wan, N.T., Hong Kong.
Declared in 12/2006 by Homelite Far East Co., Ltd.

TapaHTnpoBAHHbIyPOBeHbAkyCTHueckO MoHOCTH: 115B(A)
Дага: 12/2006
Teryncheukka Jokmyemtaunya xpaHHTcB KOMANHIN Homelte Far East Co., Ltd. 24/F, 388 Castle Peak Road, Tsuen Wan, N.T., TohKohr
3aJIbIeHne o COoBETCBTINu cTAnIaPrrm CoCTaJIbE N apele 2006 r. KOMIIAHN Homelite Far East Co., Ltd.

Terynchiuekata JOKMENHTAUNI CE HAMPA i Homelite Far East Co., Ltd. 24/F,3887 Castle Peak Road, Tsuen Wan, N.T., Hong Kong.
Декаларагиа за chobetcbrtbc e ytbpdeha npe3 anpH 2006 r. or Homelite Far East Co., Ltd.
Machine:TRIMMER/BRUSH CUTTER
Name of company:
Address:
Ryobi Technologies S.A.S
LE GRAND ROISSY
Tel: +33-01-60.94.69.70 Fax: +33-01-60.94.69.79
Name of company:
Address:
Ryobi Technologies (UK) Limited.
MEDINA HOUSE, FIELD HOUSE LANE
MARLOW
BUCKS, SL7 1TB
UNITED KINGDOM
Tel: +44-1628 894 400 Fax: +44-1628 894 401
Name of company:
Address: