
PINPOINT - Remote control DICOTA - Free user manual and instructions
Find the device manual for free PINPOINT DICOTA in PDF.
| Product type | Wireless remote control with integrated laser pointer |
| Model | PINPOINT |
| Brand | DICOTA |
| Frequency | 433 MHz |
| Range | Approximately 30 meters (estimated) |
| Power supply | 2 AAA batteries (not included) |
| Laser pointer | Red, class 2, <1 mW |
| Receiver | USB, Plug & Play |
| Compatibility | Windows, Mac OS, Linux (estimated) |
| Buttons | Black screen, Next, Previous, F5/ESC, Laser |
| F5 function | Starts full-screen slideshow |
| ESC function | Exits slideshow |
| Black screen | Allows displaying a black screen during the presentation |
| Code change | Possible to avoid interference |
| Dimensions | Approximately 10 x 3 x 1 cm (estimated) |
| Weight | Approximately 50 g with batteries (estimated) |
| Warranty | 2 years |
| Customer service | info@dicota.com |
| Safety instructions | Do not point the laser at eyes or mirrors |
| Maintenance | Clean with a dry cloth, remove batteries if not in use for extended periods |
Frequently Asked Questions - PINPOINT DICOTA
Next: next slide.
Previous: previous slide.
F5/ESC: starts or exits slideshow.
●—: activates/deactivates laser.
User questions about PINPOINT DICOTA
0 question about this device. Answer the ones you know or ask your own.
Ask a new question about this device
Download the instructions for your Remote control in PDF format for free! Find your manual PINPOINT - DICOTA and take your electronic device back in hand. On this page are published all the documents necessary for the use of your device. PINPOINT by DICOTA.
USER MANUAL PINPOINT DICOTA
Wireless Presenter With Integrated Laser Pointer
deutsch
Bedienungsanleitung
CAUTION - Safety notes
The 433 MHz wireless presenter includes a built-in laser pointer. Therefore, as with any laser pointer, it is important to adhere to the following warnings and safety instructions to prevent injury:
- Never shine the laser pointer into a person's eyes, or stare into the laser beam. This is very dangerous and can cause instant temporary vision dysfunction!
- Do not point the laser pointer at mirror-like surfaces!
- Never aim the laser pointer anywhere on any person or animal!
- The laser pointer is not a toy. Keep the device out of reach of small children!
How to use PinPoint:
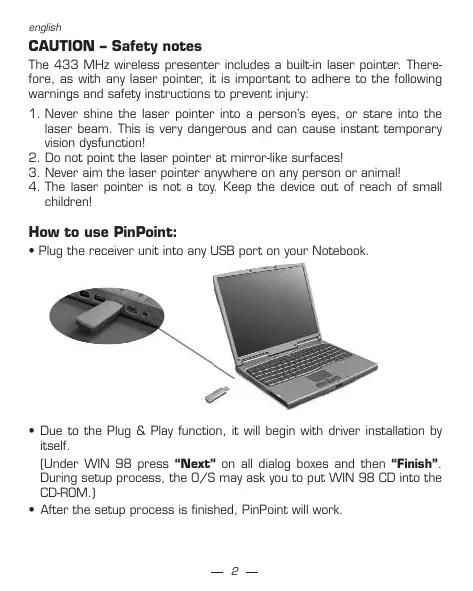
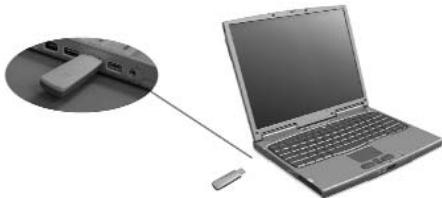
- Plug the receiver unit into any USB port on your Notebook.
- Due to the Plug & Play function, it will begin with driver installation by itself.
[Under WIN 98 press "Next" on all dialog boxes and then "Finish". During setup process, the O/S may ask you to put WIN 98 CD into the CD-ROM.]
After the setup process is finished, PinPoint will work.
PinPoint power ON:
Press and hold the "F5/ESC" key,
- then press " " within 2 seconds and
hold both keys for approx. 4 seconds.
PinPoint will be ON. The Green LED indicates from OFF to ON.
PinPoint power OFF:
- Press and hold the "F5/ESC" key,
- then press “ ” within 2 seconds and
hold both keys for approx. 4 seconds.
PinPoint will be OFF. The Green LED is OFF.
Connecting PinPoint with its receiver:
Pic. 1

Pic. 2
- Please press red button on the receiver with a pointed object (Stand by to learn the new ID) - Pic.2
- Press any button except “ ” to operate.
[Be patient and let receiver learn the new ID].
If you remove the battery, change the transmission frequency or the remote does not work, repeat the last two steps again.
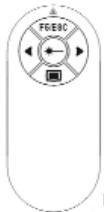
The buttons:
| Symbol | Key definition | |
| Black | Display a black screen or return to the slide show from a black screen. | |
| ▲ | Slide Forward | Perform the next animation or advance to the next slide. |
| Slide Back | Perform the previous animation or return to the previous slide. | |
| F5/ESC | F5: Running your slide show in full screen mode. ESC: End a slide show. | |
| Laser pointer ON/OFF. |
ID change:
If PinPoint doesn't work you might have to change the transmission frequency.
- Press and hold the button "F5/ESC"
- Then press the key ' " within 2 seconds and hold both keys for approx 4 seconds
- Then the transmission frequency will be changed to a new ID. The Green LED will blink.
Customer service:
If you encounter any problem with your PinPoint, please contact our local subsidiary, partner or dealer, or send us your inquiry to info@dicota.com.
2 years warranty. Please find the complete text in our guarantee on the internet: www.dicota.com.
All the products and software mentioned above are registered trademarks of their respective owners. Errors excepted.