PHASOR - Computer Accessories DICOTA - Free user manual and instructions
Find the device manual for free PHASOR DICOTA in PDF.
User questions about PHASOR DICOTA
0 question about this device. Answer the ones you know or ask your own.
Ask a new question about this device
Download the instructions for your Computer Accessories in PDF format for free! Find your manual PHASOR - DICOTA and take your electronic device back in hand. On this page are published all the documents necessary for the use of your device. PHASOR by DICOTA.
USER MANUAL PHASOR DICOTA
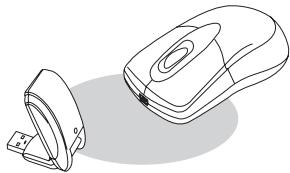
Wireless Rechargeable Laser Mouse
deutsch
Bedienungsanleitung
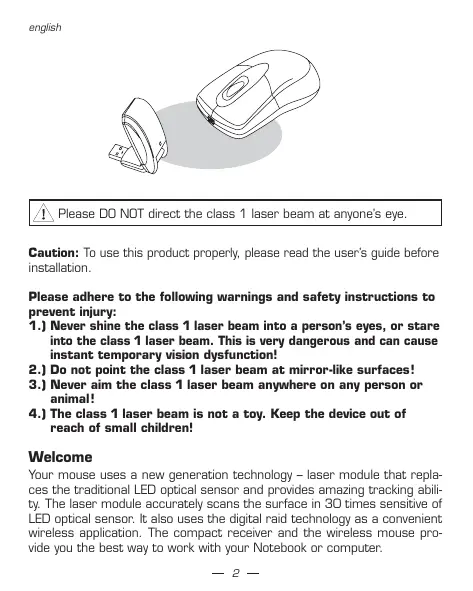
Please DO NOT direct the class 1 laser beam at anyone's eye.
Caution: To use this product properly, please read the user's guide before installation.
Please adhere to the following warnings and safety instructions to prevent injury:
1.) Never shine the class 1 laser beam into a person's eyes, or stare into the class 1 laser beam. This is very dangerous and can cause instant temporary vision dysfunction!
2.) Do not point the class 1 laser beam at mirror-like surfaces!
3.) Never aim the class 1 laser beam anywhere on any person or animal!
4.) The class 1 laser beam is not a toy. Keep the device out of reach of small children!
Welcome
Your mouse uses a new generation technology - laser module that replaces the traditional LED optical sensor and provides amazing tracking ability. The laser module accurately scans the surface in 3D times sensitive of LED optical sensor. It also uses the digital raid technology as a convenient wireless application. The compact receiver and the wireless mouse provide you the best way to work with your Notebook or computer.
Safety notice:
- This product complies with IEC 60825-1, class 1 laser product and EN 60950-1.
- This product complies with FCC and CE rules.
- This product has no serviceable parts. Use of controls or adjustments of procedures other than the user guide may result in dangerous.
Operation system:
- Windows® 98 SE, ME, 2000 & XP.
Functional introduction
Caution:
Change or modifications not expressly approved by the manufacturer responsible for compliance, could void the user's authority to operate the equipment.
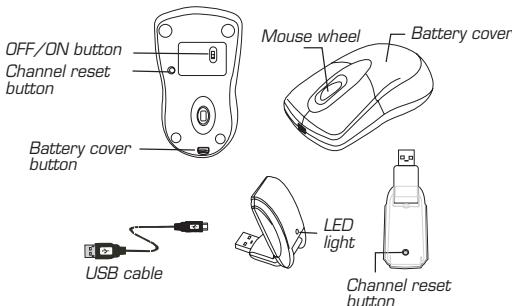
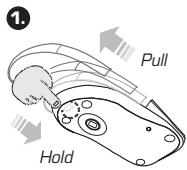
Installing the batteries
Step1: Press the button on the Phasor and pull the battery cover backward.
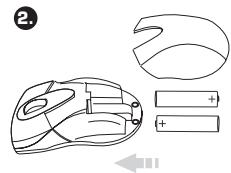
Step 2: Insert the batteries as shown inside the battery compartment.
Step 3: Replace the cover.
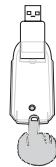
Install the receiver
It needs to be plugged into your computer or Notebook via the USB port.
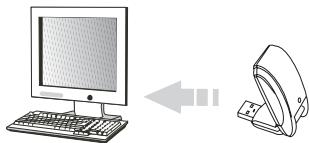
Connect to the USB of your Notebook or computer
Phasor is a Plug and Play device. Normally, it's not necessary to setup the RF Channel. But if some interference happens, then you should please setup the connection RF Channel.
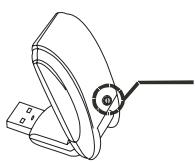
Setup the connection RF channel between the mouse and the receiver
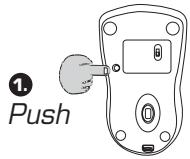
2.
Push
Push the channel reset button on the mouse. Push the channel reset button on the receiver. If the cursor does NOT move after 30 seconds, please do the step above.
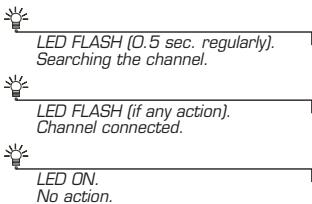
Caution: If you have completed the connection successfully, the LED on the receiver will flash several times. If the RF Channel is not connected properly, please reset RF Channel again by following the above steps. Please re-setup the RF Channel after you replace the batteries.
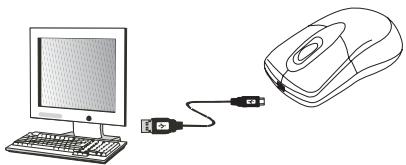
Recharging:
Please plug the USB cable into the front of the mouse and in your computer or Notebook by USB port. Mouse function can work uninterrupted during charging.
It is recommended that the batteries are charged for at least 12 hours before first use, to ensure a better performance of the rechargeables. After 12 hours Phasor is ready for normal use and you can enjoy the full performance capacity.
Using your Phasor
How to use the wheel
Your mouse has a wheel that functions both as a wheel for Windows scrolling and also as a middle button.
To use the middle button, directly press down the wheel.
For scrolling the screen, simply move the wheel.
Troubleshooting
A. Mouse does not work upon installation
Try one or more of the following:
- For optimal performance, place adjust the angle of the receiver to find the best performance.
- Make sure you have installed the batteries correctly.
-
Press the "Channel Reset" button on the receiver, and then press the "Channel Reset" button on the mouse.
-
Make sure the receiver is plugged in the USB port.
- Unplug the receiver and then plug in the receiver again. Make sure that it had been detected by the Operating Systems properly.
B. Mouse not detected
When using the mouse, it may not be detected by the Notebook/computer or receiver. To remedy this problem, try the following:
- Make sure the receiver is plugged in the USB port.
- You may re-setup the connection RF Channel between the mouse and the receiver, especially, when you have been changed or recharged your batteries.
C. The Screen Cursor does not move properly
- Change the angle of your radio receiver. Try adjusting the receiver and/or mouse to improve reception.
- Make sure that the battery low indicator is NOT lit on. Replace batteries if the low battery indicator is lit on.
- You may also need to change the RF Channel for the mouse. Press the "Channel Reset" button on the receiver, then press the "Channel Reset" button on the mouse.
Disclaimer
Information in this document is subject to change without notice. The manufacturer does not make any representations or warranties (implied or otherwise) regarding the accuracy and completeness of this document and shall in no event be liable for any loss of profit or any commercial damage, including but not limited to special, incidental, consequential, or other damage. No part of this document may be reproduced or transmitted in any form by any means, electronic or mechanical, including photocopying, recording or information recording and retrieval systems without the express written permission of the manufacturer.
Customer Service:
If you encounter any problem with your Phasor, please contact our local subsidiary, partner or dealer, or send us your inquiry to info@dicota.com.
2 years warranty. Please find the complete text in our guarantee on the internet: www.dicota.com.
All the products and software mentioned above are registered trademarks of their respective owners. Errors excepted.