
RT-1082 - AV receiver ROTEL - Free user manual and instructions
Find the device manual for free RT-1082 ROTEL in PDF.

| Product type | AM/FM/DAB Audio Tuner |
| Brand | Rotel |
| Model | RT-1082 |
| Dimensions (W x H x D) | 432 x 92 x 343 mm |
| Front panel height | 80 mm |
| Weight | 5.4 kg |
| Power consumption | 15 W operating, 5 W standby |
| Power supply | 120 V / 60 Hz (USA) or 230 V / 50 Hz (Europe) |
| Reception bands | AM, FM, DAB (Band III) |
| Presets | 30 AM/FM, 99 DAB |
| RDS/RBDS functions | Station name display, program type, time, text, PTY/TP/TA/AF search |
| Audio outputs | Stereo RCA (fixed level), coaxial and optical S/PDIF digital outputs |
| FM antenna input | 75 ohms unbalanced (F-type) |
| AM antenna input | 300 ohm loop antenna |
| DAB antenna input | 50 ohms, F-type connector |
| Supplied antennas | Indoor T-type FM, loop AM, indoor DAB |
| Remote control | Infrared wireless (RR-T95), batteries included |
| Audio output level | 1 V (FM), 500 mV (AM), 2 V at 0 dBFS (DAB) |
| FM signal-to-noise ratio | 73 dB (mono), 70 dB (stereo) at 65 dBf |
| FM harmonic distortion | 0.2% (mono), 0.3% (stereo) at 65 dBf |
| FM frequency response | 10 Hz - 15 kHz ± 3 dB |
| DAB frequency response | 20 Hz - 20 kHz |
| Max DAB audio bitrate | 224 kbps |
| Additional connectivity | 12V trigger, 3.5 mm external remote input, RS-232 (RJ-45) |
| Safety | Double insulation, do not expose to humidity, unplug if liquid enters |
| Maintenance and cleaning | Dry cloth or vacuum cleaner |
| Spare parts and repairability | Contact a Rotel authorized technician |
Frequently Asked Questions - RT-1082 ROTEL
User questions about RT-1082 ROTEL
0 question about this device. Answer the ones you know or ask your own.
Ask a new question about this device
Download the instructions for your AV receiver in PDF format for free! Find your manual RT-1082 - ROTEL and take your electronic device back in hand. On this page are published all the documents necessary for the use of your device. RT-1082 by ROTEL.
USER MANUAL RT-1082 ROTEL
This symbol is to alert the user to the presence of uninsulated dangerous voltages inside the product's enclosure that may constitute a risk of electric shock.

This symbol is to alert the user to important operating and maintenance (service) instructions in this manual and literature accompanying the product.

Rotel products are designed to comply with international directives on the Restriction of Hazardous Substances (RoHS) in electrical and electronic equipment and the disposal of Waste Electrical and Electronic Equipment (WEEE). The crossed wheelie bin symbol indicates compliance and that the products must be appropriately recycled or processed in accordance with these directives.

This symbol means that this unit is double insulated. An earth connection is not required.
Important Safety Information
WARNING: There are no user serviceable parts inside. Refer all servicing to qualified service personnel.
WARNING: To reduce the risk of fire or electric shock, be sure that the apparatus shall not be exposed to dripping or splashing and that no objects filled with liquids, such as vases, shall be placed on the apparatus.
Do not allow foreign objects to get into the enclosure. If the unit is exposed to moisture, or a foreign object gets into the enclosure, immediately disconnect the power cord from the wall. Take the unit to a qualified service person for inspection and necessary repairs.
Read all the instructions before connecting or operating the component. Keep this manual so you can refer to these safety instructions.
Heed all warnings and safety information in these instructions and on the product itself. Follow all operating instructions.
Clean the enclosure only with a dry cloth or a vacuum cleaner.
You must allow 10 cm or 4 inches of unobstructed clearance around the unit. Do not place the unit on a bed, sofa, rug, or similar surface that could block the ventilation slots. If the component is placed in a bookcase or cabinet, there must be ventilation of the cabinet to allow proper cooling.
Keep the component away from radiators, heat registers, stoves, or any other appliance that produces heat.
The unit must be connected to a power supply only of the type and voltage specified on the rear panel of the unit.
Connect the component to the power outlet only with the supplied power supply cable or an exact equivalent. Do not modify the supplied cable in any way. Do not attempt to defeat grounding and/or polarization provisions. Do not use extension cords.
Do not route the power cord where it will be crushed, pinched, bent at severe angles, exposed to heat, or damaged in any way. Pay particular attention to the power cord at the plug and where it exits the back of the unit.
Main plug is used as the mains disconnect device and shall remain ready accessible.
The power cord should be unplugged from the wall outlet if the unit is to be left unused for a long period of time.
The apparatus shall be connected to a mains socket outlet with a protective earthing connection.
Immediately stop using the component and have it inspected and/or serviced by a qualified service agency if:
- The power supply cord or plug has been damaged.
- Objects have fallen or liquid has been spilled into the unit.
- The unit has been exposed to rain.
- The unit shows signs of improper operation
- The unit has been dropped or damaged in any way
Place the unit on a fixed, level surface strong enough to support its weight. Do not place it on a moveable cart that could tip over.

1: Front Panel Controls
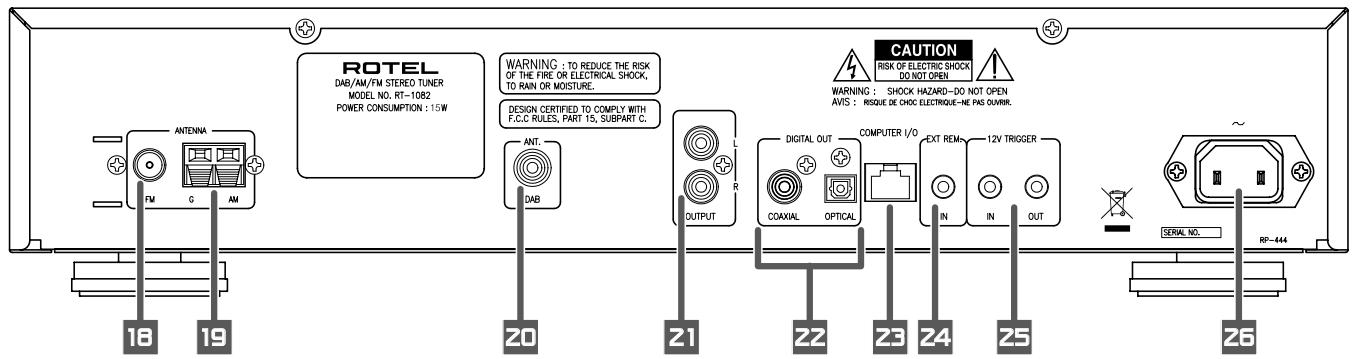
3: Rear Panel Connections
Branchements en face arriere
Anschlussmöglichkeiten an der Geräterückseite
Conexiones del Panel Posterior
De aansluitingen op de hinterkant
Connessioni sul pannello posteriore
Ansluttingar på baksidan
Разъемы слетноCoEdNHЯ на заней панец!
1 Antenne FM
FM-Antenne
Antena de FM
FM-antenne
Antenna FM
FM-antenn
FM aHTeHHa
2 Antenne AM
AM-Antenne
Antena de AM
Middengolfanterne
Antenna AM
AM-antenn
AM aHTeHHa
3 Antenne DAB
DAB-Antenne
Antena para DAB
DAB-antenne
Antenna DAB
DAB-antenn
DAB aHTehHa
4 Amplificateur
Verträker
Amplificador
Versterker
Amplificatore
Förstärkare
Ycunntenb
Important Notes
When making connections be sure to:
Turn off all the components in the system before hooking up any components, including loudspeakers.
Turn off all components in the system before changing any of the connections to the system.
It is also recommended that you:
Turn the volume control of the amplifier all the way down before the amplifier is turned on or off.
Remarques importantes
Figure 1: Front Panel Controls 3
Figure 2: RR-T95 Remote Control 3
Figure 3: Rear Panel Connections 4
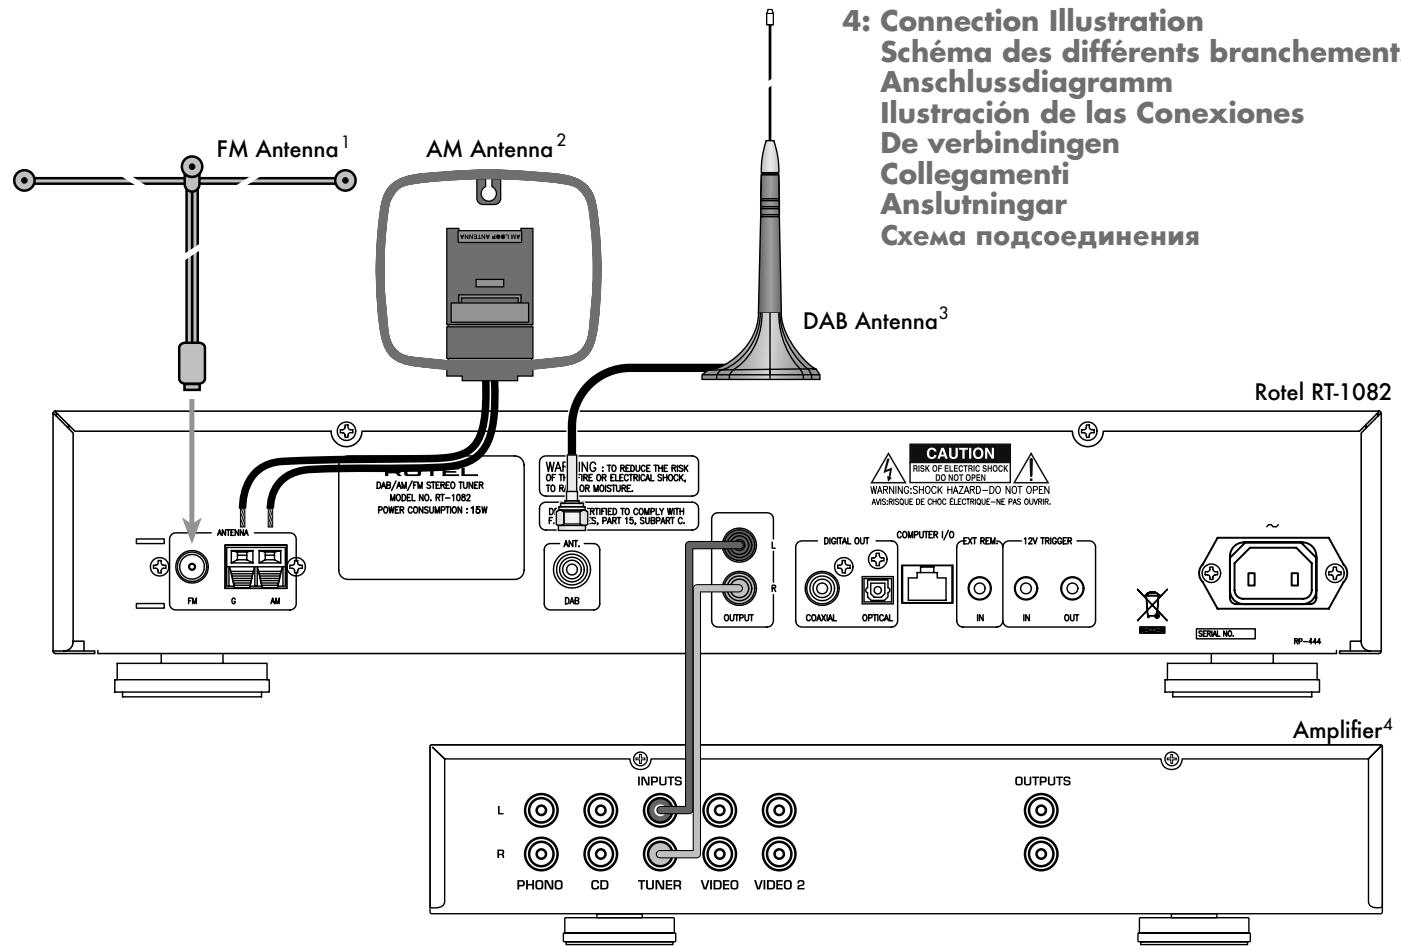
Figure 4: Connection Illustration 4
Important Notes 5
About Rotel 6
Getting Started. 6
A Few Precautions 7
Key Features 7
Unpacking 7
Placement 7
Rear Panel Connections 7
FM Antenna 18 7
AM Loop Antenna 7
DAB Antenna 7
RCA Outputs 7
DAB Digital Outputs 7
Computer I/O 23 8
EXT REMOTE IN Jack 24 8
12V TRIGGER Connection 25 8
AC Input 26 8
Basic Operating Controls. 8
Standby Button 1 and Standby LED 2 8
ON and OFF Buttons A 8
Remote Sensor 8
Front Panel Display 6 8
MEMORY Button 13 K 8
ENTER Button 11 8
SETUP Button 10 8
DIMMER Button 8
Basic Tuning Controls. 9
TUNING Controls 12 C J 9
BAND Buttons 17 B 9
FREQUENCY TUNING Mode 9
PRESET TUNING Mode 9
RDS PTY search mode 9
Numeric Buttons 9
Station Presets 7 E 9
Direct Access Tuning 15 L 10
Auto Tuning Button 14 H 10
TUNE/PRESET Button 15 10
PRESET SCAN Button F 10
FM MONO 4 1 10
RDS and RBDS Broadcast Reception 11
DISPLAYButton 11
PTY Button 5 G 11
TP Button 5 G 11
TA Button 5 G 11
AF Button 5G 12
Digital Audio Broadcast (DAB) 12
DAB Basic Information 12
BAND, DAB Buttons 17 B 12
UP/DOWN Buttons 12 C 12
ENTER Button 11 12
DISPLAYButton 12
MEMORY Button 12
NUMERIC Buttons 7 E 12
TUNE/PRESET Button 12
Setup Operation 12
SETUP Button 12
SETUP Menu 12
Searching for a DAB station 13
AUTO TUNE button 14 H 13
How to store DAB stations 13
How to call a PRESET 13
Specifications 14
About Rotel
A family whose passionate interest in music led them to manufacture high fidelity components of uncompromising quality founded Rotel 45 years ago. Over the years that passion has remained undiminished and the goal of providing exceptional value for audiophiles and music lovers regardless of their budget, is shared by all Rotel employees.
The engineers work as a close team, listening to, and fine tuning each new product until it reaches their exacting musical standards. They are free to choose components from around the world in order to make that product the best they can. You are likely to find capacitors from the United Kingdom and Germany, semiconductors from Japan or the United States, and toroidal power transformers manufactured in Rotel's own factory.
Rotel's reputation for excellence has been earned through hundreds of good reviews and awards from the most respected reviewers in the industry, who listen to music every day. Their comments keep the company true to its goal - the pursuit of equipment that is musical, reliable and affordable.
All of us at Rotel thank you for buying this product and hope it will bring you many hours of enjoyment.
Getting Started
Thank you for purchasing the Rotel RT-1082 DAB/AM/FM Stereo Tuner. Rotel's Balanced Design Concept combines advanced circuit board layout, comprehensive parts evaluation and extensive listening tests for superior sound and long term reliability. The Rotel RT-1082 will provide years of listening enjoyment.
A Few Precautions
Please read this manual carefully. In addition to installation and operating instructions, it provides valuable information on various RT-1082 system configurations as well as general information that will help you get optimum performance for your system. Please contact your authorized Rotel dealer for answers to any questions you might have. In addition, all of us at Rotel welcome your questions and comments.
Save the RT-1082 packaging material for future use. Shipping or moving the RT-1082 in anything other than the original packaging material may result in severe damage that is not covered by the warranty.
Register online at www.rotel.com/register and keep your original sales receipt. It is your proof of purchase in the event that warranty service is required.
Key Features
AM, FM and DAB tuning capabilities.
- User-friendly Fluorescent Display.
- 30 Station Presets for memorizing your favorite AM/FM stations; 99 presets for DAB stations.
- Manual frequency and preset tuning, auto-search tuning, preset scanning and frequency direct tuning.
- RDS (Radio Data System) capability for Europe and RBDS (Radio Broadcast Data Service) capability for the USA.
- DAB (Digital Audio Broadcast); a digital transmission available throughout Europe and Canada as well as many other supported regions.
- Stereo/mono switching.
12-volt trigger connections for remote turn on/off by Rotel preamplifiers and surround processors.
Full- function wireless remote control.
Unpacking
Remove the unit from its packing. Look for the handheld remote control and other accessories. Install the supplied batteries in the remote control. Save the packing and box as it will protect the RT-1082 if you move or need to return it for maintenance.
Placement
Place the RT-1082 on a solid, dry, level surface away from direct sunlight, excessive heat, high humidity or strong vibrations. The RT-1082 can generate some heat during normal operation. If installed in a cabinet, make sure that there is adequate ventilation. Make sure there is enough room behind the RT-1082 for easy hookup. Place the unit close to the other components in your audio/video system and, if possible, place it on its own shelf. This will make initial cable routing, hookup, and any subsequent system changes easier. It also minimizes potential interference or heat buildup from other components.
Don't stack heavy objects on top of the RT-1082. Do not expose the unit to moisture; this could damage the circuitry and cause a safety hazard.
Rear Panel Connections
The RT-1082 provides rear panel connections for audio line level output, an FM antenna, an AM antenna, a DAB antenna, a 12V Trigger, a remote IR sensor, DAB digital outputs and AC power input.
NOTE: Do not plug any system component into an AC source until system hookup is complete and you are confident that all component-to-component connections have been properly made.
FM Antenna 18
The RT-1082 is supplied with a T-shaped indoor FM antenna. Remove this antenna from the box and connect its attached coax F-type plug to the FM antenna connector on the RT-1082. For best reception, unfold the T-shaped antenna. Eyelets at both ends of the T allow tacking the antenna to a wall if desired. Experiment with positioning for best reception.
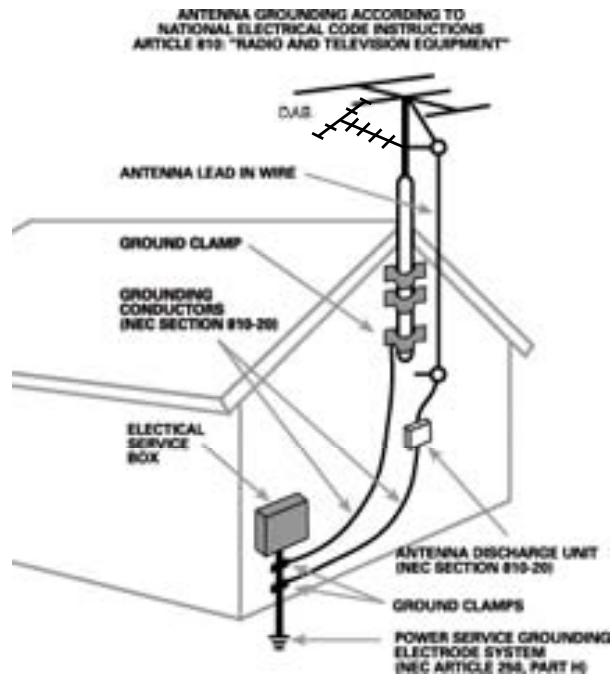
NOTE: To use an outdoor antenna, connect its 75 ohm coax lead wire to the FM connector in place of the indoor wire antenna, only after a professional contractor has installed the antenna system in accordance with local electrical codes. In the USA, you will need to use the supplied F-type converter to connect the 75 ohm coax cable to the antenna input.
AM Loop Antenna 19
The RT-1082 includes a loop antenna to receive AM radio signals. Remove this antenna from the box and locate it near the RT-1082.
Connect the 300 ohm twin-conductor wire from the loop antenna to the pair of screw terminals labeled AM LOOP, attaching one wire to each terminal. It does not matter which wire attaches to which terminal, but make sure that the connections are solid and that the two wires do not touch
You may need to rotate or otherwise reorient the antenna to find the best position.
NOTE: To use an outdoor antenna, connect its 300 ohm twin-conductor wire to the G and AM terminals in place of the loop antenna, only after a professional contractor has installed the antenna system in accordance with local electrical codes.
DAB Antenna 20
Included is a DAB indoor antenna. If you cannot obtain good reception using this supplied antenna, it is recommended to use an outdoor DAB antenna. The outdoor antenna can be connected with a F-Type connector (male) then to the "Antenna DAB" connection on the rear panel.
RCA Outputs 2
Line level RCA audio outputs send a fixed-level stereo signal from the RT-1082 to your pre-amplifier, system controller, or integrated amplifier.
Use a standard RCA audio cable to connect the LEFT OUTPUT jack to the left channel tuner input on your system controller and the RIGHT OUTPUT jack to the right channel tuner input on your system controller.
DAB Digital Outputs 22
One coaxial and one S/PDIF output capable of outputting available DAB (Digital Audio Broadcast) stations. DAB provides interference free, near CD quality audio as well as any corresponding broadcast data.
Computer I/O 2
The RT-1082 can be operated from a computer with audio system control software from third-party developers. This control is accomplished by sending operating codes from the computer via a hard wired RS-232 serial connection
In addition, the RT-1082 can be updated using special software from Rotel.
The COMPUTER I/O input provides the necessary network connections on the rear panel. It accepts standard RJ-45 8-pin modular plugs, such as those commonly used in 10-BaseT UTP Ethernet cabling. For additional information on the connections, cabling, software, and operating codes for computer control or updating of the RT-1082, contact your authorized Rotel dealer or Rotel Tech Support.
EXT REMOTE IN Jack 24
This 3.5mm mini-jack receives command codes from industry standard infrared receivers (Xantech, etc.) via hard-wired connections. This feature could prove useful when the unit is installed in a cabinet and the front panel sensor is blocked. Consult your authorized Rotel dealer for information on these external repeaters and the proper wiring of a jack to fit the mini-jack receptacle.
12V TRIGGER Connection 25
The RT-1082 can be activated by a 12 volt trigger signal from a Rotel preamplifier.
The trigger input accepts any control signal (AC or DC) ranging from 3 volts to 30 volts. When a cable is connected to the input and a trigger signal is present, the tuner is activated.
When the trigger signal is interrupted, the tuner goes into standby mode. The front panel indicator light remains lit, but the display goes dark and the unit will not operate.
The RT-1082 will also pass a 12V trigger signal to associated equipment using a trigger. The signal will remain 12V in normal operation.
AC Input 25
Your RT-1082 is configured at the factory for the proper AC line voltage in the country where you purchased it (120 volts AC at 60Hz in the USA and 230 volts AC at 50Hz in Europe). The AC line configuration is noted on a decimal on the back of your unit. Make sure that your unit is configured properly for your AC line voltage.
Plug the supplied cord into the AC INPUT receptacle on the back of the unit. Once all other rear panel connections are completed, plug the power cord into an AC wall outlet or switched AC outlet on another system component.
Basic Operating Controls
The following explanations will help you get familiar with the features and controls. When a function is available on both the front panel and the remote, a number (see front panel illustration) and a letter (see remote control illustration) are shown in the instructions. For example, to change from the AM to FM band, you can either press the front panel button or use the button on the remote. When only one identifier appears, that control is available only on the front panel or the remote, but not both.
NOTE: Controls used for tuning the DAB/ AM/FM receiver are described in the next sections of this manual.
Standby Button 1 and Standby LED 2
The STANDBY button is located on the front panel of the RT-1082 and is not duplicated on the remote control.
The STANDBY LED will be lit when the AC input line is connected.
ON and OFF Buttons A
Remote only
Pressing the ON button deactivates the standby mode and places the RT-1082 into normal operation. Pressing the OFF button places the RT-1082 into standby mode. Power is still supplied to the unit, but functions are disabled
Remote Sensor 3
This front panel sensor receives infrared signals from the remote control. Make sure you do not accidentally block this sensor with cables or accessories.
Front Panel Display
The large fluorescent display in the center portion of the RT-1082 provides status information used in operating the DAB/AM/FM receiver (such as station frequency display, band preset memory, RDS information, etc.).
MEMORY Button K
The MEMORY button is used to confirm and memorize various settings in the setup and operation of the RT-1082, including tuner station presets. Its use is described in detail in the relevant sections below.
ENTER Button
Pressing the ENTER button selects the highlighted parameter in the SETUP display.
SETUP Button
Opens and closes the RT-1082 setup menu. This provides the RT-1082 setup menus as well as the ability to change country modes by using the front panel ENTER, UP/DOWN BUTTONS.
DIMMER Button D
Available on the front panel and remote control, this button selects four display brightness settings. Press the button to cycle through the four settings.
NOTE: When the tuner is turned off then back on, the display reverts to its normal setting. The dimmer setting is also available in the SETUP menu for memory setup until the AC line is disconnected.
Basic Tuning Controls
The RT-1082 features a digital synthesized AM/FM tuner with RDS or RBDS capability, 30 station presets and a DAB tuner with a maximum of 99 station presets.
- Manual frequency tuning lets you tune up or down to the next station frequency. Set the TUNE/PRESET mode to TUNE. Turn off AUTO TUNING. Use the TUNING controls to tune up or down.
- Direct frequency tuning lets you enter the desired station frequency digits. Press the FREQUENCY DIRECT button on the remote or front panel and enter the digits using the NUMERIC buttons.
Automatic frequency search tuning lets you search up or down to find the next available broadcast signal. Set the TUNE/ PRESET mode to TUNE. Turn on AUTO TUNING. Use the TUNING controls to search up or down. - Memory station preset tuning lets you directly enter the number of a memorized station preset number. Enter the number of the memorized preset using the NUMERIC buttons for the AM/FM or DAB band.
- Preset scan tuning lets you scan up/down through the memorized station presets. Press the PRESET SCAN button to begin scanning the AM/FM bands.
- RDS (Europe) or RBDS (USA) tuning provides a range of special tuning and search features based on data codes encoded with the broadcast signal. See the RDS section of this manual for detailed information.
TUNING Controls 2C0J
A pair of buttons, labeled UP/DOWN on the front panel and the FREQ UP/DOWN and PRE-SET UP/DOWN buttons on the remote, serve as the main tuning controls for the RT-1082. You can use either the front panel or remote buttons; their function is identical. These controls provide different tuning functions, depending on the mode of operation.
BAND Buttons 17 B
The BAND button selects whether the tuner will receive DAB, AM or FM broadcast signals. Press the button to toggle back and forth between DAB, AM and FM. A corresponding indicator will light at the left portion of the front panel DISPLAY to confirm your choice. The currently tuned station frequency will be shown.
FREQUENCY TUNING Mode
- With AUTO TUNING off, press a TUNING button to manually jump to the next frequency, regardless of whether or not a station is broadcasting on that frequency. [See the TUNE/PRESET button and AUTO TUNING button sections for details on changing the tuning modes.]
- With AUTO TUNING on, press a TUNING button to start auto tuning. The tuner begins automatically scanning up or down through the frequencies until the next receivable signal is detected. If this is not the desired station, repeat the automatic tuning procedure to find the next station. Weak stations will be skipped during auto tuning. If no receivable signal is detected, the tuner will revert to the last previously tuned station. (See the TUNE/PRESET button and AUTO TUNING button sections for details on changing the tuning modes.)
PRESET TUNING Mode
Press a TUNING button to advance to the next memorized station preset. [See the TUNE/PRESET button section for details on changing the tuning modes.]
RDS PTY search mode
Press a TUNING button to select the desired program type from the scrolling list in the display. See the section on RDS tuning for more details. [See the RDS PTY button section for details.]
NOTE: Several indicators in the front panel display assist tuning. A large display shows the tuned frequency and increases or decreases during tuning. A signal strength indicator shows the strength of an incoming signal. A TUNED indicator lights when a sufficiently strong signal is received. An "ST" indicator lights when a stereo FM signal is received. In addition, indicators show the currently selected tuning mode.
Numeric Buttons
Station Presets 7 F
The RT-1082 can store up to 30 station presets for recall at any time using the NUMERIC keypad. These station presets can be used for any combination of AM stations and FM stations as well as 99 station presets for DAB.
The RT-1082 is delivered from the factory with a set of generic station presets that may or may not match any available stations in your area.
To memorize a new station preset:
- Tune to the desired station, AM or FM.
- Press the MEMORY button on the front panel. A MEMORY indicator will flash in the front panel display.
- While the MEMORY indicator is flashing, press the number of the preset where you wish to store the station frequency. For example, to memorize the station as preset 3, press the 3 button. To memorize preset 15, press the 1 button followed by the 5 button.
- A previously stored frequency is erased from memory when a new frequency is memorized for the same preset number.
To tune to a previously memorized station preset, press the preset number using the NUMERIC buttons. For example, to tune to preset 3, press the 3 button. To tune to preset 30, press the 3 button and then press the 0 button within 5 seconds.
NOTE: The NUMERIC buttons can also be used for FREQUENCY DIRECT tuning with the AM/FM band.
Direct Access Tuning 15
If you know the exact frequency of the desired station, you may tune it directly using the FREQUENCY DIRECT button and the NUMERIC buttons.
- Press the FREQUENCY DIRECT button to change the NUMERIC buttons from station preset to direct access mode. The station frequency in the front panel display will change to a series of bars, representing the digits of a station frequency, with the first bar blinking.
- Enter the first digit of the station frequency using the NUMERIC buttons. The digit will appear in the frequency display and the next bar will flash. Enter the remaining digits of the frequency. When all of the digits have been entered, the tuner will automatically tune to the displayed station frequency.
NOTE: On the USA version only, pressing 1 in the FM mode will enter 10 as the digit in the frequency display. On the European version, it is necessary to press 1 and then 0 to enter 10. For US FM stations, press only one digit following the decimal point as shown in the first example following. For European FM stations, press two digits after the decimal point as shown in the second example.
EXAMPLES:
- (USA FM) 87.50MHz Press 8 > 7 > 5
- (Europe FM) 87.50MHz Press 8 > 7 > 5 > 0
- (USA AM) 1610kHz Press 1 > 6 > 1
- (Europe AM) 1611kHz Press 1 > 6 > 1 > 1
If no frequency is entered within 5 seconds, the tuner will cancel FREQUENCY DIRECT tuning mode and revert to the last previously tuned station.
Auto Tuning Button H
The AUTO TUNING button toggles between the frequency search tuning feature and manual frequency tuning. When using the TUNING controls on the front panel or remote in AUTO TUNING mode, the tuner will begin automatically scanning up or down through the frequencies until the next receivable broadcast signal is detected. If this is not the desired station, use the TUNING controls again to find the next station. Weak stations will be skipped during auto tuning. If no receivable signal is detected, the tuner will revert to the previously tuned station. To toggle between FREQUENCY TUNING mode and AUTO TUNING mode, press the AUTO TUNING button. An AUTO indicator will appear in the display.
NOTE: AUTO TUNING mode is disengaged when the TUNE/PRESET button is set to PRESET tuning mode. See the following section.
TUNE/RESET Button 15
The TUNE/PRESET button toggles between FREQUENCY TUNING mode (the TUNING controls advance to the next station frequency) and PRESET TUNING mode (the TUNING controls advance to the next memorized station preset). To toggle between the two modes, press the TUNE/PRESET button. A PRESET indicator in the front panel DISPLAY will light when the PRESET mode is active.
NOTE: AUTO TUNING mode is disengaged when the TUNE/PRESET button is set to PRESET tuning mode.
PRESET SCAN Button F
This button activates a preset scanning feature. When you press the button, the tuner will automatically scan through all memorized station presets, playing each for five seconds before moving to the desired station preset, press the button again.
NOTE: If a PRESET station is currently tuned when the PRESET SCAN button is pressed, scanning will start with the next higher preset number and continue through all preset stations, stopping on the initial preset. If a PRESET station is not currently tuned when the button is pressed, scanning will start from PRESET 1 and continue to PRESET 30.
FM MONO 4①
The FM MONO button changes the FM mode from stereo reception to mono reception. In stereo mode, a stereo signal will be heard if the station is broadcasting a stereo signal and there is sufficient signal strength. A stereo indicator will light in the front panel display. In mono mode, a mono signal will be heard even if the station is broadcasting a stereo signal.
NOTE: Switching to mono mode can be a useful way to improve the reception of weak or distant FM signals. Less signal strength is required for clean mono reception than for stereo reception.
RDS and RBDS Broadcast Reception
The Rotel RT-1082 is equipped with RDS (Radio Data Systems) reception capabilities for Europe and RBDS (Radio Broadcast Data Service) capabilities for the United States. These broadcast systems provide additional functionality to FM radio reception by transmitting encoded information along with the radio signal. This signal is decoded by an RDS or RBDS receiver and can provide a range of informational features including:
- A display of the station's identifying name (e.g. BBC1).
- A display of the station's program content (e.g. ROCK or NEWS).
- Traffic information broadcasts.
- A scrolling text display for announcements or information.
In addition, RDS provides several advanced search features including
- The ability to search for a station with the desired program content (PTY).
- The ability to search for traffic information (TP).
- The ability to automatically search stations broadcasting special traffic announcements (TA).
RDS broadcasting has been widely available in many European markets for years. There are a large number of RDS stations and most users will be familiar with the features and operation. In the USA, implementation of the RBDS system is more recent. Fewer stations are currently broadcasting RBDS signals and the features may be less familiar to many users. Consult your authorized Rotel dealer for more information on RDS or RBDS broadcasting in your market.
NOTE: The RDS and RBDS features are entirely dependent on the broadcaster sending properly encoded signals. Thus, they will only be available in markets where RDS or RBDS is currently implemented and where stations are broadcasting these data signals. If there are no RDS or RBDS stations, the RT-1082 will function as a standard radio receiver.
NOTE: RDS and RBDS services are only available on FM broadcasts. The features and buttons described below are only operational in FM mode.
DISPLAY Button
There are five display options when the currently tuned station is broadcasting RDS information and the RDS indicator in the front panel display is lit. Press the DISPLAY button to step sequentially through the five available display options:
- Standard FREQUENCY display.
- PROGRAM SERVICE name. This is typically the station's call letters, such as BBC1). If the current station is not broadcasting an RDS signal, the display will show a blinking PS indication.
- PROGRAM TYPE. This is a description of the station's content from a standardized list of program types in each market (for example: NEWS, CURRENT AFFAIRS, INFO, SPORT, EDUCATION, DRAMA, CULTURE, SCIENCE, VARIORED, POP, ROCK, EASY LISTENING, LIGHT CLASSICAL, SERIOUS CLASSICAL, OTHER MUSIC, WEATHER, FINANCE, CHILDREN, SOCIAL AFFAIRS, RELIGION, PHONE IN, TRAVEL, LEISURE, JAZZ, COUNTRY, NATIONAL MUSIC, OLDIES, FOLK, and DOCUMENTARY). If the current station is not broadcasting an RDS signal, the display will show a blinking PT indication.
- CLOCK TIME. A time and date display broadcast by the station. If the current station is not broadcasting an RDS signal, the display will show a blinking CT indication.
- RADIO TEXT. Additional scrolling text messages broadcast by the station. If the current station is not broadcasting an RDS signal, the display will show a blinking RT indication.
PTY Button E G
The PTY search function permits you to scan available signals for RDS stations broadcasting a particular type of program content.
- Press the PTY button. The current RDS program content type will appear in the display.
- If desired, change to a different PROGRAM TYPE using the TUNING controls to scroll through the list.
- Press the PTY button a second time within 5 seconds. The tuner will attempt to find an RDS station broadcasting the selected type of program. If the button is not pressed within 5 seconds after selecting a program type, the PTY function will be cancelled.
- If no station is located for the desired content type, the tuner will return to the last previously tuned station.
- Cancel the PTY function by pressing any button (except DIMMER or FM MONO).
TP Button 5G
Searches for an RDS station broadcasting traffic information programming:
- Press the TP button. The tuner will attempt to find an RDS station broadcasting the traffic programming.
- If no station is located, the tuner will return to the last previously tuned station.
- Cancel the TP function by pressing any button (except DIMMER or FM MONO).
TA Button 5G
Searches for an RDS station broadcasting special traffic announcements:
- Press the TA button. The tuner will attempt to find an RDS station broadcasting traffic announcements.
- If no station is located, the tuner will return to the last previously tuned station.
- Cancel the TA function by pressing any button (except DIMMER or FM MONO).
AF Button 5G
- Press the AF button. The tuner will scan each of the alternate frequencies for the same programming in the stored list and tune to the strongest signal.
- If no station is located, the tuner will return to the last previously tuned station.
- If the signal strength of the new station is weaker, the tuner will revert to the previously tuned station.
Cancel the AF function by pressing any button (except DIMMER or FM MONO).
Digital Audio Broadcast (DAB)
DAB Basic Information
DAB is short for 'Digital Audio Broadcast' and is a new form of radio broadcasting which utilizes digital technology. DAB is capable of providing near CD quality audio with virtually interference free reception.
DAB operates in frequency band III (174 - 240MHz). Band III is divided into 41 channels labeled 5A to 13F.
DAB channels are categorized into ensembles, which are also known as multiplexes. Each multiplex provides a number of stations and each service contains a primary service that can contain secondary services. DAB technology allows broadcasters to transmit additional data along with the audio, which can include other audio channels, text and in the future, even images and computer data.
NOTE: When the DAB tuner is used for the first time the FL display will ask whether you want to auto-tune to find the available service in your area. For most applications auto-tune should only need to be carried out once. Select
BAND, DAB Buttons 176
The RT-1082 receives AM, FM and DAB signals. DAB mode is selected by pressing the BAND key on the front panel. Direct access to DAB mode can be selected using the DAB button on the remote control
UP / DOWN Buttons
The UP and DOWN keys available on the front panel and remote control can be used to change between stations and also for selecting options in the set-up menu (see SETUP MENU).
ENTER Button
Press the ENTER button on the front panel to confirm a selected parameter.
DISPLAYButtonM
The RT-1082 displays service identification in the upper portion. This is information received from the network. The RT-1082 allows for several display modes which are shown in the lower portion of the FL display. Press
- Program type: Displays genre or other program information.
- Ensemble name: Multiplex identification is displayed.
- Frequency: Indicates the frequency that the selected multiplex is transmitted on.
- Bit rate: The rate at which bits (information) are transmitted. This is expressed in thousands of bits per second (Kbps), which effectively shows the quality of the broadcast. The higher the bit rate is the better the sound quality is.
- Dynamic label segment: This is the text that scrolls across the FL display giving gives information on the play list and current program content. This feature is subject to the service provider and station.
- Signal strength: Indicates the input signal level to the DAB module in block format.
MEMORY Button K
The RT-1082 can store up to 99 DAB preset stations. When you want to save a selected station, press the memory button on the front panel, then one of the numerical buttons on the front panel that you wish to save the station to. FM and DAB memorized stations are separate meaning that a station can be saved to '1' on DAB and another station with the same number for DAB.
NUMERIC Buttons 7E
The numerical buttons can be used to store to a PRESET station or recall a PRESET.
TUNE/PRESET Button 15
The RT-1082 has two operating modes:
- DAB Manual Mode: When the tuner is selected to this mode you can scroll through all the available stations using the up and down keys.
- DAB Preset Mode: Use the preset button to enable you to use the up and down keys to scroll through your saved stations. Preset is displayed in the FL display when you have selected this operating mode.
Setup Operation
NOTE: The set-up menu features advanced settings. In most installations the factory default will be the optimal required setting for the RT-1082.
SETUP Button 10
The SETUP button on the front panel accesses the Setup menu used for the advanced settings of the RT-1082.
SETUP Menu
Press the SETUP button on the front panel to view the menu settings in the FL display. The operation can be cancelled by pressing SETUP again. The menu will also automatically be exited after a short period of when there is no key press.
Use the UP and DOWN keys on the front panel to scroll through the different menu settings. Press the enter button to confirm a selection.
The following options are available: Use of these features will require knowledge of your local DAB transmitter.
DAB DAC VOLUME – The RT-1082 allows level adjustments to the DAC volume. The DAC volume can be adjusted between 0 – 255 using the up and down keys. This feature can be used to match the output signal level of other equipment in your set-up.
DIMMER - Select to change the FL display brightness using the up and down keys. This can be adjusted to your preference.
FACTORY DEFAULT - Select when you wish to return the RT-1082 to its factory settings. Confirm factory default by pressing the ENTER button. WARNING: Selecting factory default will erase all saved settings.
TUNER AREA - Your tuner should be set to operate within the country of purchase. The tuner area can be set to either
VERSION - This feature will confirm the main software version of the RT-1082.
Front CPU Upgrade - select this option to upgrade the front CPU. Note: this menu selection is used only with the factory so there is no need for you to use this feature.
EXIT - Select to exit the set-up menu.
Searching for a DAB station
NOTE: When using the DAB tuner for the first time the FL display will ask whether you want to auto-tune to find the available service in your area. For most applications auto-tune should only need to be carried out once. Select YES to confirm the selection. The tuner will then search automatically for available stations on the DAB network. The number of stations received will depend on the location of your aerial and the available multiplexes in your location. For optimal reception we recommend using a dedicated outdoor antenna.
AUTO TUNE button H
You may also wish to repeat the search periodically to discover if any new multiplexes (i.e. group of services) have gone on air, or if you move the tuner to a different area.
NOTE: Auto tune will erase any preset stations saved to memory.
- Select the DAB tuner by pressing the BAND button 17 on the front panel or the DAB button 8 on the remote control.
- Press AUTO TUNE to search for first ensemble stations. The FL display will change to [DAB Auto Tuning] and <No> , <Yes> to perform.
- Choose <No> by keying the UP/DOWN buttons of front panel, press ENTER if you do not wish to retune. Choose <Yes> by keying the UP/DOWN buttons of the front panel, press ENTER to search new ensembles and replace current stations automatically.
How to store DAB stations
When auto tune is finished the service identification will be displayed. Use the up/down buttons to select the desired station.
To memorize the station press MEMORY followed by the your preference of number.
Example: "Memory" + "1" + "2"
Repeat this process for saving additional stations.
How to call a PRESET
After a station has been saved to memory it can be recalled using the number keys.
Example: "1" + "2"
Specifications
FM Tuner
Usable Sensitivity 14.2 dBf
50dB Quieting Sensitivity 20.2 dBf (mono)
45.3 dBf (stereo)
Signal to Noise Ratio (at 65 dBf) 73 dBf (mono)
70 dBf (stereo)
Harmonic Distortion (at 65 dBf) 0.2% (mono)
0.3% (stereo)
Frequency Response 10 Hz-15kHz, +3 dB
Capture Ratio 2.0 dB
Alternate Channel Selectivity 47 dB (+-400 kHz)
Spurious Response Ratio 90 dB
Image Rejection Ratio 80 dB
IF Rejection Ratio 80 dB
AM Suppression Ratio 55 dB
Stereo Separation (100Hz/1kHz/10kHz) 40 dB/45 dB/35 dB
Output level 1V
Antenna Input 75 ohms unbalanced
AM Tuner
Usable Sensitivity 500 V / m
Selectivity 25 dB
Harmonic Distortion 0.5%
Image Rejection Ratio 45 dB
Signal to Noise Ratio 40 dB
Output level 500 mV
Antenna Input Loop Antenna
DAB Tuner
Sensitivity -96dBm
Tuning Range Band III (174-240MHz)
Audio Data Rate 224Kbps (Max)
Frequency Response 20-20KHz
Analog Output 2.0V at 0dBFS
Antenna Output 50 ohms F connector
Digital Output S/PDIF Coaxial/Optical
Format/Sample Rate PCM/48KHz
General
Power Consumption 15 watts
Standby Power Consumption 5 watts
Power Requirements (AC) 120 volts, 60Hz (USA version)
230 volts, 50Hz (European version)
Weight 5.4 Kg/11.9lb
Dimensions (W x H x D) 432 x 92 x 343mm
17^1 / 8^ × 3^5 / 8^ × 13^1 / 2^
Panel Height 80mm / 3^3 / 16^
All specifications are accurate at the time of printing.
Rotel reserves the right to make improvements without notice.
Rotel and the Rotel HiFi logo are registered trademarks of The Rotel Co, Ltd., Tokyo Japan.

ATTENTION :
RISQUE D'ÉLECTROCUTION. NE PAS OUVRIR

ATTENTION: POUR RÉDUIRE LE RISQUE D'ÉLECTROCUTION, NE PAS RETIRER LE CAPOT. IL N'Y A A L'INTERIEUR AUCUNE PIECE SUSCEPTIBLE D'ETRE MODIFIÉE PAR L'UTILISATEUR. EN CAS DE PROBLEME, ADRESSE-VOUS À UN RÉPARATUR AGREE.
APPLICABLE FOR USA, CANADA OR WHERE APPROVED FOR THE USAGE
CAUTION: TO PREVENT ELECTRIC SHOCK, MATCH WIDE BLADE OF PLUG TO WIDE SLOT. INSERT FULLY.
ATTENTION: POUR EVITER LES CHOCSE ELECTRIQUES, INTRODUIRE LA LAME LA PLUS LARGE DE LA FICHE DANS LA BORNE CORRESPONDANTE DE LA PRESE ET POUSSER JUSQU AU FOND.

Digital Audio Broadcast (DAB)
Format/Samplingrate PCM/48 kHz
Sonstige Daten
Hetinstallenmenu (SET UP)
The Rotel Company Ltd. Tokyo, Japan.

ATTENZIONE
RISCHIO DI SCOSSA ELETTRICA, NON APRIRE

AVVERTENZA: PER RIDURRE IL RISCHIO DI SCOSSA ELETTRICA, NON TOGLIETE IL COPERCHIO. NON CONTIENE PARTI UTILI PER L'UTENTE. PER L'ASSISTENZA FATE RIFERIMENTO A PERSONALE QUALIFICATO.
APPLICABLE FOR USA, CANADA OR WHERE APPROVED FOR THE USAGE
CAUTION: TO PREVENT ELECTRIC SHOCK, MATCH WIDE BLADE OF PLUG TO WIDE SLOT. INSERT FULLY.
ATTENTION: POUR EVITER LES CHOCSE ELECTRIQUES, INTRODUIRE LA LAME LA PLUS LARGE DE LA FICHE DANS LA BORNE CORRESPONDANTE DE LA PRISE ET POUSSER JUSQU AU FOND.

Digital Audio Broadcast (DAB)
Distorsione armonica 0.5%
Formato/Sample rate PCM/48KHz
Generali
Consumo 15W
Consumo in standby 5W
Att valja stationer. 70
Digital Audio Broadcast (DAB). 73
Grundlaggande om DAB 73
BAND- och DAB-knapparna 17 B 73
UP/DOWN-knapparna 12 C 73
ENTER-knappen 11 73
DISPLAY-knappen 73
MEMORY-knappen 73
Numeriska knapparna 7 E 73
TUNE/PRESENT-knappen 15 73
Installation 73
SETUP-knappen 73
Inställningsmenyn 73
Soka after DAB-stationer 74
AUTO TUNE-knappen 74
Lagra DAB-stationer 74
Lyssna pa lagrad DAB-station 74
Specificationer 75
Om Rotel
Digital Audio Broadcast (DAB)
Söka after DAB-stationer
Signal to Noise Ratio (at 65 dBf) 73 dBf (mono)
70 dBf (stereo)
Harmonic Distortion (at 65 dBf) 0,2% (mono)
0,3% (stereo)
Frequency Response 10 Hz-15 kHz, ±3 dB
Capture Ratio 2,0 dB
Alternate Channel Selectivity 47 dB (±400 kHz)
Spurious Response Ratio 90 dB
Image Rejection Ratio 80 dB
IF Rejection Ratio 80 dB
AM Suppression Ratio 55 dB
Stereo Separation (100Hz/1 kHz/10 kHz) 40 dB/45 dB/35 dB
Output level 1 V
Antenna Input 75 ohms obalanserat
AM-mottagning
Usable Sensitivity 500 V / m
Selectivity 25 dB
Harmonic Distortion 0,5%
Image Rejection Ratio 45 dB
Signal to Noise Ratio 40 dB
Output level 500mV
Antenna Input Loop-antenn
DAB-mottagning
Sensitivity -96 dBm
Tuning Range Band III (174-240 MHz)
Audio Data Rate 224 kbit/s (Max)
Frequency Response 20 Hz-20 kHz
Analog Output 2,0 V vid 0 dBFS
Antenna Output 50-ohms F-kontakt
Digital Output S/PDIF koaxial/optisk
Format/Sample Rate PCM/48 kHz
Allmänt
Strömfürbrukning 15 watt
Baxhble nHctpyKu nn no 6e3oNaChocTn
IPEIOCTEPEXHEH: BHytpn HeT qacte, IocTyNbIX JIa 06cIyXNBAHNA NOIb3OBaTeJIHO. IOBepaTe o6cIyXNBAHNE KBaINcHmUnpoBaHHomy nepcoHaJy.
IPEIOCTEPEXKEHNE: IJIa CHNXeHnO ONACHoCTN Bo3ropaHn Mn NopaxHeH 3JIeKTPmueCKM TOKOM He NOdBepraTe DAHHb annapat BO3JeCTBnIO DOxJa MIn BJarn.
He onyckaite nonadahnnoctopohnix npemetob Bnytpb kopnyca. EcIn Bnytpb kopnyca nonaja Bnara mnn noctopohnni ppeMet, HemeJeHHo BbHbTe Bnky shypa nHTAHN n3 po3eKn. Doctabte annapat K KBaJIncnupOBaHHOMy cneuaHncty dIra ocmotpa BO3MOxKHO peMOHTa.
Ipejde yem noDcoeHnHb annapat n npapBnTb m, npouHTte BCE nHCTpyKuIN. CoxpaHnte pyKOBOcTBo no 3Kcnnyataun dJa TaJIbHeuero nCOnlB3OBAHN.
O6paaTe BnMaHne Ha npedoctepexeHryka3aHHbIe HA Kopnyce annapata n B daHHOM pykoBoDCTBe. YnpabJrte annapatom B COOTBETCTBn C NHCtpyKUmaMn.
Pon3BODnTe OuncTkU KOpnyCa TOnbKO cyXoTkaHbO nn nblnecoCOM.
OCTaBbTe He Mehee 10 cm CBO6oHORo npoctpanctBa BOKpyr annapata
dIra oecneueheny cipkynuyn Bo3dyxa. He CTabte annapat Ha
KPOBATb, DnBAH, KOBep nIN NIOOBHyO MArkyO NOBepxHOCTb, KOTOPa
MOXeT 3aRopOnITb BEHTUNLAUONHbE OTBepCTna. EcIn annapat
BCTpanBaetc B ShkaΦ nIN dpyroN KopnyC, 3TOT KopnyC DoJxhen
BEHTUNIPOBATcbdIra oecneuehenry OxJaXDeHn annapata.
Держinte annapat noДальше ot paДиаторов OTOnJIeHnI, oБorpeBaTeIeN, neeN nIHO6bIX dpyrnx yCTpoiCTB, BbldЯJOUx tenNo.
CeteBoe HAnpJxKeHne, K Kotopomy noCoeunHreTc annapa, DOnKHO COOTBETCTBOBAT Tpe6OBAHm, Yka3aHHbIM Ha 3aHne nane annapata. He nepedeIbBaIte BXOJaU B KOMPNeKT UHyp nHTAHn. He nonb3yute b ydInHntenMa.
He npoknabbaite shypr nitaHnB Mectax, rde OH moKet 6bIb nobpeckden nI neperpet. O6paaate oco6oe BnMaHne Ha cTeByo BNky I MeCTO BixOda shhpy n3 annapata.
Ecn npednonaraetc doctatoHOno He nCnoIb3OBaTb annapat, BInbTe BnKy shhpa nTuHnI 3 po3eTKn.
HemeIeHHo npeKpaTne noJIb3OBaTbc aannapatom u o6paTtecck KBaIINcNupOBaHOMy nepcoHany,ecn:
- Nobpekdehbl shypr nntahnna BnN
Bnytpb annapata nonan noctopohnne npedmetblnn KNDKOCTB. - Annapat nonan noq doxkb.
AnnapaT He cyHKcnoHpyeT DonKbIM 6pa3OM. - Annapat yrhoHnHn OH noBpeKdEh dpYm cnoC6oM.
Pa3meaIte annapat Ha yctoynboi, nlockoi nobepxnoCTn,doCTatoHNO npouHoi, Yo6bI BblepKAtb erO Bec. He CTabte annapat Ha TeJekky, KOTopaa MOKeT ONpOKuHytbcra.

Copepkanhe
Figure 1: OprahbI ynpablenHa npeednei nahe
Figure 2:Пульт ДУ RR-T95 3
Figure 3:Подсоeнненя Ha 30dнй панeн 4
Figure 4:Приимер поcodинени 4
Baxhble 3ameyannn 5
Baxkhble mHCTpykunn no 6e3onacnoctn.76
CoepeXaHne 77
Iepbile warr 77
MepblpeIOCTOpOxHocTn 78
OCHOBHbIeIOCTOnHCTBa 78
Pacnokobka 78
Pazmeuenie 78
IopoeHHeHH Ha 3aHne naneHn 78 FM aHTehHa 16 78
Pamoyha AM antheHHa 19 78
DAB aHTehHa 20 78
JIHeHbIyAynIOBbXoD(rHe3aRCA) 21 78
LcnpoBbBxOaD DAB CnHaJa 22 79
KombhOpTePbHb BXoD/ByxoD 23 79
THe3doEXTREMOTEIN 24 79
THe3do 12V Trigger 25 79
Bxod nntanna nepemehnhoro Toka 25 79
OchOBhIe opraHbI ynpaBLeHnA 79 Khonka Standby 1 m CBeToDIOStandby 2 79
KhoIKN ON u OFF A 79
IaTUnK DnCTAnuHOnHoY npabEnHa 79
Iinpnei nepeHne nanei 5 79
Khoika MEMORY 13 K 79
KhoNka ENTER 17
Khoika SETUP 10 79
Khoika DIMMER 8D 80
OchOBhble opraHbI ynpabLeHHn 80
Khoikn TUNING (HaetpoKa) 12 C J 80
Khoika BAND (Mana30H) 17 B 80
Pekmnaactpoknnaactotbl FREQUENCY TUNING 80
PRESET TUNING 80
Pekmm noncKa RDS PTY 80
LudpoBbIe KOnKn 80
BBoD B namrTaH cTOT padnoCTaHcH (npedBaPHTeJIbHa HAcTpoKa) 80
KhoIka FREQUENCY DIRECT (PpMaB BvOJ qAcoTob) 16 L 81
Pekim npaMoH hactpoKn 81 KhoNka AUTO TUNING
(AbTomatnuecka Hactpoika) 14 H 81
KhoNka TUNE/PRESET (HaTpoNka YactOtbI/ HaTpoNka Hn PpeDyctaHOBKn) 15 81
KhoJka PRESET SCAN (CkaHnpoBaHne npedyctaHObOK) F 81
Khoika FM MONO (MoHO npHem) 4 1 82
PdHOpnHem CmCnoJIb3ObaHnEM RDS mRBS 82
Khoika DISPLAY (Дисплев) 82
Khoika PTY (Tnn nporpammbi) 5G 82
KHonka TP (06tAHOBKa Ha doporax) 3G 83
Khojka TA (CneuaalbHbe coo6eHn
oDopoxHOM DmXkHeHH) 83
KHonka AF (AInbTePhaBbHbte qactoTb) 5G 83
LcnpoBoe padnoBeeaHne (DAB) 83
OCHOBHbIe NoHTnDAB 83
KhoIKN BAND,DAB 17B 83
KhoNKn BbePkn BnH3 (UP, DOWN) 12 C 83
Khoika ENTER 11 83
KhoNka DISPLAY 83
KhoIka MEMORY (Pamr) 13 K 84
LcnpobbIe KhoNKn NUMERIC 7 E 84
KhoNka TUNE/PRESET 15 84
YctahOBka Setup 84
Khoika SETUP 10 84
MeHIO SETUP 84
Поск DAB CTANCUH: 84
KHONKa AUTO TUNE (ABTOHOCTPOJka) 14 H 84
Kak 3aonmHb DAB cTAnu 84
Kak Bb3BaTb n3 pAmrTa cToaMuo PRESET 84
Texnueckne xapaKtepnctkn 85
Copepkanhe
KOMnAHnRA ROTEL oCHOBAHa 6Oone 45 let Ha3aI cEmbei, KOTOPaI n3-3a CTpACTHOI IIO6Bn K My3bIke 3aHJIaIc b IpON3BOIDCTBOM hi-fi KOMnHOENTOB.C rOamn 3Ta CTpACTb He yTuXnA, N CeroJHr CTpeMJIeHne cEMbN K O6ecNeueHnO ayDnOΦmIOB IN MEnOMaHOB, He3ABNCMO OT IX DnHACOBORo NOLOXeHnA, annapatypoB Bblcoaawero KaYeCTBa, pa3dEJaHT BCE cotpydnHKn Rotel.
Дужная KMOMHДA INHKeHepOB nPoCnIyuINBaET n HAcTpaNbaet KAKdoE HOBOe n3dJIeNe, nOKa OHO He 6ydet COOTBETCTBOBATb cambIM BbICOKM CTAnDapTAM. mnpedocTAbJeHa CBo6Oda Bbl6opa KOMnIekTyIOUxN NO BCemy Mpy, YTO6bl CdeIaTb annapat KAK MoXHo JyUwe. BepoTHo, Bbl CMOXeTe HauTN OTbOpHBie KOHDeHCaTOpbl N3 BeINKo6pHTAHIN n TepMaHN, nOlynpobODHnKn N3ЯNoHnN cLJAA, aTakKe TOponDaIbHbIe CNIOBbIe TpaHcCbOpMaTopbl, n3rotOBLeHHbIe Ha co6CTBeHHOM 3aBOe ROTEL.
Penytaun KOMpaHn ROTEL kak npoun3-BOaNTeJI pReBocXoHOn TExHKn NOtBepKDeHa COTHAMN NIOJXuTeJIbHbIXOT3bIBOB HArpaD OT Han6OJe yBaXaEmbIX3KcpeptOB. Xx KomMeHTapn NOMoraHOT KOMpaHn ToUHO dEprKaTbcra Kypca Ha npoun3BOCTBO KaueCTBeHHoro, HAdexHoro n DOctynHoro 06OpydoBaHna.
Mby, cotpydHnKoKOMpaHmROTEL,6naOapnBac3aNOKy3Toro n3eJn,Haedeemc, yTO OHO IOCTABNT BAM MHorO yDOBOJIbCTBn.
Первileшагn
Blaoradapm Bac 3a nokynky ctepeo DAB/ AM/FM TIOhepa Rotel RT-1082. KoHcENu rarpMOHMnHO KOHCTpyKTHBHO NOJHHeNn "Balanced Design" coUeTaet npOyMaHnOe pa3MeueHne DetaleH naNeuathOH nIATE, TuaTeNbHbI OT6Op KOMJIeKTOUxN MHOrOuNCLeHNbIe ceAHCbI npocnyuBaHn, YTO rapaHTnpHyOT BbICOaAWee KAeCTBO BOCpON3BeDeHn 3ByKa I DOJROBpeMHyU HAdExHoCTb. B COCTabe BbICOKOaYeCTBeHHoayDIOscTEmbl Ctepeo TIOhep Rotel RT-1082 6yDet CnyKtB Bam MHOrne roDbI.
Mepbl npedocTopoXhOCTn
BHHMATEIbHO npOHTaIte 3TO pyKOBoCTBO.
POMMO OCHOBHbIX IHCTpyKuN IO yCTaHOBKe N3cKnlyatauun, B HEM cOepeXATcpeKoMeHNaUIN, KOtOpBle NOMOyT BamMAKcIMaJIbHO IcNoJb3OBaTb BCE BO3MOX-HocTN BaWe CnCTEmbl. PO BcEM INTepeCyUoUIM Bac Bonpocam 6bpaauaTeCk YOnlHOMOeHHOMy DInepy Rotel. BceMbI, COTpydNHKn Rotel, BcerDa rotobbl OTBetNTb Ha BaUn Bonpocbl IN pInHrtb BaUn 3ameuHaHra.
CoxpaHnte Kopo6ky IJIra TpaHcnpTnObKn IN BCE OCTaIbHbIe yNakOBoUHbIe MATEpnaJIbI, 4TO6bl B DaIbHeIeM NMeT Bo3MOxHOCTb BOCNoJIb3ObATbcr NMI. NpeMeueHne IIN TpaHcnpTnObKa npOnrpBbAtenr RT-1082 B dpyroynapKBe MOXe TBi3BaTb cepbe3HbIe NOBpeXdEHHy UcToPcTBa, He NOKpbIBaemble rapaHTne.
3aperncptpnpytecb Ha caite KOMpaHnN www.rotel.com/register n o63aTeIbHo coxpaHnte yek n rapaHTnHbI TaIoh. 3To rIaBHBie DOKyMeHtbl, yOCTOBepraIOuIe daty NOKynK, B cnyuae O6paUeHn3 a rapaHTnHbIM O6cnyXnBAHnem .
OchOBhbIe IOCTOnHCTBa
- PnempaioocanuBAM,FMnDAB Dnana3oHax
-Дужесвеннык noлььоватиофуорецHTьдспл徳 - PamrTa Ha 30 cTahn B AM/FM dHaNa3OHaX; PamrTa Ha 99 cTahn B DAB dHaNa3OHe.
PyuHnHa HAcTpoKa, ABOTHAcTpoKa, BbI6Op cAhnU IN3 NAMrN, CKAHNPOBaHHe npeCToB, pRMOB BBOD qACTOTbl. - RDS (Radio Data System) Дя EBponьи NBDS (Radio Broadcast Data Service) Дя CLUJ.
DAB (Digital Audio Broadcast); npnem ucpoboro paioB Ebpone, Kaanae mMhorix npyrnx pernohax. - PepekJIIOUeHne cTepeo/MOHO
Bxod trprrrepHoro 12-BynpaBnaIOoero CnHaIa IJIA nCTAHUHOHORO BKJIIOUeHn OTo npeducnnteneu n npouecccopob Rotel. - POnHoΦyHKuHOHaJIbHbI nYbT D
PacnaKOBka
Octopoxho n3BleKnte annapat n3 ynaKobKn. Haidnte npbT npyrne npHaJekxHoctn. YcTaHOBnE B npblt 3IeMeHTbI nITAHn. CoXpaHnte ynakOBky Ha cIyau nepeee3da nn DoCTabKn annapata B peMOHT.
PazmecheHne
Iocabte RT-1082HaTbepyIOropnOHTaBHyIO NOBepxHOCTb IOdaJIbweOT npMaBIXcINHeHbIXIyey,IOToCHNKOBTeNIIaBarnB6paun. Bnpoucece HopmaJIbHOpa6oTBt RT-1082 BblJeAerTne. Ecn annapat BCTpanBaETcB Me6eB, o6ecneYbTe DOCTatoHYIO BEHTnlaquio. Y6eInTeCb, 7TO nO3aIN annapata OCTaIOcb HeKOTOpoe npoctpaHCTBO IraI NOCDoeHNHeHHKa6eNe. Pa3MeCTnte RT-1082 B6n3n DpyrXKOMNoHEnTO BaWe CnCTeMbI, n, PO BO3MOxHOCTn, H OTeJbHOH NoKe. 3To 06nerHT npOBedeHHe NepBOHaUaJIbHbIX MEXKOeHNHeHH N DaJIbHeHmX N3MeHENB CnCTeMe. TaKxe 3TO MNHMn3npyET Bo3MOxHOCTb HabeHHeHH NOMex Nn HarpeBA RT-1082 ot dpyroro 6OpyDoBaHna.
He CTABbTe TAgKeJIbe NpeMeTbI Ha KpbIuKy RT-1082. He DonyucKaIte nonaDaHnJ XnIKoCTN BHyTpB Kopnyca.
IopcoeHHeHna 3aHne paHelen
Ha 3aHne nane RT-1082 HaxoJtca rHe3da IInHeHoro aydno BbIXOda, rHe3do dI naocoeiHnra FM aHTeHHbl, DAB aHTeHHbl, KlemMbI dI naocoeiHnra AM aHTeHHbl, BXoD 12-B nyckoboro cHrHaIa, BXoN npOBDoHoi nepeDaun cHrHaIa nOcpaKpachoro ndTahOnHoro ynpabLeHnra, uOpoBoB bIXoD DAB cHrHaIa, a TAKKe BXoD nITAHnO ot cetn nepemehHoro TOka.
ПРМЕЧАН: He по引爆иные НОДИЗ KOMПОЕНTOB CNTСТЕВI K CETNпеременHorO TOKA, NOKA He BbINOЛHHTe BCE COEOINHENIA.
FM aHTehHa 18
B KOMJIeKT NocTabKn RT-1082 BxOJNT KOMHATHAR aHTEHHa, HMeHOUaT-O6pa3Hyo cOpMy n npedHa3HaueHHa dIy npHema paAnocnHaNoB FM. BbInbTe aHTehHy n3 Kopo6Kn u BCTabBe TseKep ee KoakCnaIbHorO Ka6eBa RHe3do "FM" TIOhePa RT-1082. IJra o6ceNeHn HauLyuWero npHema noJHoCTbHO pa3BepHnte aHTehHy BVne 6yKBbl T. Ha o6oX KOuaX aHTehHbI eCTb KpyrIble neTlN, no3BOJHOUsne npHno6xOIMoCTn npKpEnnt b ee K cTeHe. POn3KcpePmEHTnpUyTe, YTO6bl HAInn PoIoXeHne aHTehHbl, o6ceNuBAIOUee HauLyuHni npHem.
INPMMEAHNE:EcNbXOTnTe
NCNoB3OBaTB BHeuHIO aHTEHHy BMeCTO
KOMHATHOI npBOLOUHOI aHTEHbl,
NOcOeUNHte ee KOAKCNaJIbHbIM
Ka6eJEM C BOJHObIM cOpOTNBLeHneM
75 OM K rHe3Ny FM. OdHaKO deLaTb 3TO
MOxH0 TOJbKO IocNe TORO, KAK aHTehHa
6yDet yCTaHOBJeHa ONbTHbIM
CneuAnCTOM, 3HaKoMbIM C
DeiCTByUoUmH HopMaTHBaMn
3JeKTpo6e3oNaChOCTn.
Pamouhha AM aHTehHa 19
B KOMPJIeKTe RT-1082 mMeTcpaMoUHaa anTeHHa IJI npIeMa paDIOnepeDaY B AM dHaNA3OHaX. BbIHbTe aHTeHHy n3 Kopo6Kn yCTaHObITE pJdOM c RT-1082.
POncoeHnHTe DByxXnIbHbI K6be b C BOnHObbl CMnpOTnbIeHNem 300 OM OT aHTeHHbl K 3aXmHbIM KJIeMMam C o6o3NaeHNEM AM LOOP, noCoeHNJra TOJbKO OOnn npOBd K KaXdOMy n3 pa3bEmOB. He BaXHo, kaKo npOBd ndet Ha KaKo 3aXm, HO CoeINHeHne DOJXHO 6bITb HApExHbIM a npOBda He Kacatbcr dpyr dpyra.
Hannywero npneMa moKet notpe6oBATbca NOBepHyb aHTehHy.
INPMEAHNE: INCNOJb3OBAHnHapxHNoI aHTeHHbI, IODcoEINHnTe ee 300-OMhbi dByxHnbHki Ka6eJIb Kpa3bEmam G n AM terminals BmecTo pAmOuHOH aHTeHHbI, TOJIbKO nocLe TOrO, KAK KBaJIHnΦnUnpoBaHHbI ηKeTpNK UCTaHOBNT HapxHHyIO aHTeHHy B NOnHOM COOTBeTCTBn C npABnAMn 3JeKtpo6e3OanachOCTn B BaWei cTpaHe.
DAB aHTehHa 20
B KOMJIeKTe NOCTABJIeTcK OMHaTHaD DAB aHTehHa. Ecn n He He ydaetcNoJyUHTb xopoOee KaueCTBO npHema, peKoMeHdyETcN cNOJb3OBaTB HApXHyO DAB aHTehHy. HApXHyO aHTehHy MoXHO NoDCoeINHTb c NOMOsbIO F-pa3bema (nana) K rHe3dY "Antenna DAB" Ha 3aDHei naHEn.
CBeToIIONoHbI INHnKaTOp STANDBY LED 3aRopaetc npn IooCoeHNHeHH nHTAHNA AC.
KhoNkOn ON n OFF A
ToIbkoHa npIbTe
Haxatne Ha KhoNky ON BbIbOHT THOep RT-1082 n3 pexima standby n nepeboiteroB pexm HopmaIbHoi pa6oTb.Haxatne Ha KhoNky OFF nepeboit RT-1082 B pexim standby. HanpXeHne no-npexHeMy npdaetcHa Hero, Ho cyHKuHn He BblIOJIHIOITc.
P03B0JraTe Bbl6paTb OOnH n3 YetbIpexpeKIMOB JpKocTn DncJIe. Haxatne Ha KhoNkY nepe6npaet BapnaHTbl.
INPMEAHHE: EcIn TIOHeP BbIKHQUHTb, a 3aTeM BKJIQUHTb TO DnCIIeI BO3BpaUaTcR K HopMaJIbHOJ yCTAHOBKe IPKoCTn. Ho yCTAHOBKn DOCTyINbI TAkXe B MeHIO SETUP nIra 3aONMHAn, Noka TIOHeP He OTKIQUeH COBCem OT CETn.
OchOBhble opraHbI ynpabJeHnA
RT-1082 Ochauen uΦpObbl AM/FM TIOHEPOM C CnHTe3aTOpOM qactotbl C RDS NIN RBDS CNCTeMoI, pAMrTBHO Ha 30 cTAHcN, a TAKKHe DAB TIOHEPOM C pAMrTBHO HA MAKcIMyM 99 cTAHcN.
PexmpyHnHactpoKnNo3BOJlaretnoJeIOBATEbHOyBeJIuHbATbIyIyMeHbWbTbHaCTOHTaCPOKn.KhONKOITUNE/PRESETbbl6epntepeXmTUNE.OTKIOHHTpeXmAUTO TUNING.PpnOMoUKNHOHOKTUNINGBblIOHNHeHactpoKyHaHyxHyUHaCTOly.
Pexm npmaoHacpoKn no3BOJraet Hactpontbca pca3y Ha xeJaemyo padnoctaunHO. HaxMnte KhoNky FREQUENCY DIRECT HA nyIbTe N BBeInTe yactoty BeuaHna padnoctaunPi npn NOMOu nCpObix KhoNOK.
Bpexime ABtOMaTHueCKoro nonckocuyceTBnIeTc nonck BBePx nINn BnH3no dnaPAn3OHy cactOT do obHapyKeHH6bnXaHwe CTAHcNn CdoCTatoHOMoHbIM nI npEma CNrHaLOM.KhONKO TUNE/PRESET Bbl6epntepexmTUNE.BKIOHOHTe pexmAUTO TUNING.PnPiNoMOnOuOn OndOHn H3 KhoNOK TUNING 3anyctnte abTOMaTHueCKnnonck B HApRaBHeHH yBeJIuYeHHn nnYMeHbSeHHaCTOTbl.
Ha paHIOCTaHcHIO, cactota KOtOpO npedBapnteIbHO COxpaHeHa B pAMrTu, MOxHO HAcTPOINbCRA, BBeJa HOMep, NOI KOtOpbIM XpAHITcB N pAMrTu ee cactota (Homep npedyctaHOBKn). BBeJte 3OT HOMep cHΦpOBoBIM KHOKNAMn dJa AM/FM nN DAB dNaIa3OHa.
BpeKIme cKaHnPOBaHmI ppeDyctaHOBOK npOnCXoJNT HAcTpoKa Ha BCE BBeDeEHbIe B nAmrTb YactOTbl BeUAnHnNo OChPeDn. 3AnCyCTnB cKaHnPOBaHne, HaxMIne KONkY PRESET/SCAN.
Hactpoika cncnoIb3OBaHne mCnyk6bl RDS (Ebpona) nRBDS (CLJA) nCnoIb3yET CneuaJIbHbIe cyHKcnn noncka n HactpoIKn, ochOBaHHbe Ha cnJyke6hblx daHHbIX, nepeDaBaembIX BMeCTe CpadIOBEUATElbHbIM CNrHaIOM. IopO6hble CBeDEHn CoepXatcB pa3dJe, nocBraeHHom CnCTeme RDS.
KhoNkTUNING (HacTpoNka)
NapHbIe KhoNk
Khonka BAND (Диапазон) 17B
3ToKhONkOB BbI6HpaeTcRdNAna3OH qactOT HactpoKn DAB,AMnFM.Haxmamte Ha 3Tu KhoNkY dJa nepeKJIIOueHnMaJy DAB,AMnFM.BJeBoi qactn IucnIe IoBIAETCs COOTBETCTByIOUs nHIDKAtOp IN TekyaJqACTota HactpoKn B Bbl6paHHom dNana3OHe.
PexnHacptponKuactOtbl FREQUENCY TUNING
- Пи OTКЛIOUeHHoA bTOMaTnueckOHaCTpoIKe - AUTO TUNING OFF, Haxatne KhoNkTUNING Bbl3bIbAet nepexoK CcIeMy 3NaueHIOyactOTbI, He3ABuCmO OT TORO, BeuaET NHa 3ToI qACTOTE KAKAR-To CTAnzra NINHeT. [O6 n3MeHn pexMnOB hAcTPOiKNcM.B pa3dJIax, IocBauJeeHHbIX KhoNkAM TUNE/PreSET u AUTO TUNING.]
- PnB BKNoeHHo ABTomatueckoH hactpoKe - AUTO TUNING ON, Haxatne KhoNkTUNING 3anyckaet abTomatueckyIO hactpoKy. Tiohep 6ydet yBeInuHBaTB nIN yMehbWATb qactoty hactpoKn, noka He haindet cTahunIO CdoCTatoUHO MoOnbIM dIra npHema cTnHaON. Ecn 3Ta cTahnua Bac He yctpanBaET, ChOBA 3anyctnte abTomatueckyIO hactpoKy. Pn ABtomatuecko HactpoKe cTahunco Cna6blm cTnHaON IpponyckaHTcR. Ecn Tiohep He o6hApYkn HnKaKOro cTnHaJIa, To OH BepHeTcK NxCxOHDH
chaTote HAcTpOKn. [O6 n3MeHeHn peXmOB HAcTpOKn CM. B pa3JeIax, NocBraueHHbIX KHNkAM TUNE/PRESET n AUTO TUNING]
PRESET TUNING
B pexnme HactpoKn Ha npedyctahOBKn Haxatne KhoNk TUNUNG Bbl3bIbaet nepexoK HactpoKe Ha cIeMyOuNo nopraKy BBedeHHyO B PAmrTb qactoty. [O6 n3MeHmnn pexnMOB HactpoKn CM. B pa3dJIe, NocBraueHHom KhoNke TUNE/ PRESET]
Pexmm noncka RDS PTY
B pexKme noncKa RDS PTY (no Tnny nporpaMMbl) KhoNkoTUNING Bbl6nnpaetcHyXhbl Tn nporpaMMbl n3 npedctabHeHHoro Ha dinCnnee cnccka. [Cm. pa3deI o KhoNKe RDS PTY).]
INPMEAHHE: BbINONHtB HAcTPOky NOMORAOHT INDnKATOpbl Ha DnCnIe. IIncnIeN nOKa3bIAeT qactoty, KOTopAR B npOceCe HAcTPOkN yBeJIuHnBaETcR Nnn UMeHBsAeTc. INDnKATOp Cnbl CnHana OTPaKaET MoHocTb paDiNoCnHaJa B ToUke npHeMa. INDnKATOp "TUNED" CBETTC, KOrDa pPnHmAeTc DOCTaTOUHO CnIbHbN CnRHaN. INDnKATOp ST CBETTC, KOrDa pPnHmAeTc CTpeofoHNueckn CnrHaN FM. Kpome TORO, INDnKATOpbl OTPaKaOT Bb6paHHbIB DAHHbM MOMENT peXmHACTPOKn.
LncpObIe KHOJIKN
BBoI B pAmrTb qactOT paAnocTaHcni (npedBapntelbnaHa HacTroKa) 7E
B namr b RT-1082 moxho BBcTn do 30
yactot nno6bix paNocCTHn B AM n FM n IO 99 B DAB,TO6bl BNocIeCTBn
HactpanBaTbcra Ha Hnx C NOMoUbIO
uOPOBbIX KHOJOK.
RT-1082 NOCTABJRAETC cHa6bOpom yXe 3aHncaHHbIX B PAMrTb YACTOT, KOTOpbIe MOryt COOTBETCTBOBATb YACTOTAM pRINHMAeMbIX B BaWeM perNoHe paAnOCTAHcN, a MoYr N He COOTBETCTBOBATb
YTo6bI coxpaHntb B nAmrtn HOByIO yactoty:
- HactpoitTebc HaKeJaemyO CTaHnIO B AM uN FM dnaana3oHe.
- HaxmTe KhoIky MEMORY Ha nepeIHei naHei. Ha dinCIIee haCyHet MIRatb INdIKaTOp "MEMORY" (Pamr).
- Пoka магает Иndикатор "MEMORY", BVEHNTe HOMep, NOI KOTOpbIM XOTInTe COxpaHnTB TeKyuTo yactOty (HOMep npedyctaHOBKn). HApPmEp, YTO6bl BBecTN HOMep 3, HAXMITE KhoNkY "3". YTO6bl BBecTN HOMep 15, HAXMITE ChauJala "1", a 3aTeM "5".
- Panaee xpaHnBwEeecr nOJ 3TmH Omepom 3HaueHne qactotbCTnpaetcN Ha ero MecTo 3aINCbAeTc HOBoe.
UTo6bI HAcTpoNTbcHa CTaHcNIO,Hactota KOTOpOxpaHHTcBnAMrTu,BBeDInTe HOMep npEydCTaHOBKn UcΦpOBblm KNOpKamn. HanPmEp,UTo6bI HAcTpoNTbc Ha CTaHcNIO noHomepO3,HaxMnte KhONky"3". UTo6bI HAcTpoNTbcHa cTaHcNIO "30", HaxMnte KhONky"3",a 3atEm He nO3Xe 5-Tn CeKYHd "0".
PIMMEAHNE: UnpobBle KhoNko MoXHO TAKKHe NcNoJb3OBaTb DJIa BBOda qactotbl HAcTPOKn BpeXnme npraMoH NaCTPOKn.
KhoNka FREQUENCY DIRECT (PpmaoB BBOd YacToTbI) 16 Pekm npamn Hactponk
3Haa cactoty HxKHO paIIOCTAHU,MOXHO BbIIOHNHTb HAcTPOIKy HeNOCpeIDCTBeHHO HA 3Tu cactoty,ncnOJB3y KhoNKy FREQUENCY DIRECT n CnpobBie KhoKn.
- Haxmnte KhoNky FREQUENCY DIRECT, yTo6bl nepeBectn uDpObyu kJabnAtypy B pexM npAmoro BbOda qactotbl. Ha DnCnIeE B No3uXx 3HaueHnqactotbl No8BaTc npOeKpn, npChem npOePK B nepBOH no3uNn 6yDet MInatb.
- LcnpobbIMn KhoNkAMn BBeDnTe nepByu cnpy qactotb CTaHcnn. Ha nCnnee noBNTcB BBeDeHHa Bamn cPpa n HauHnet MRatb CmBOB BO BTOPOI No3nMn. BBeDnTe octabwneecr cPbl. Korda BCE cnPp6 BydYt BBeDhbl, TIOHEp ABTomAtneckn HAcTpOHTcHa Yka3aHHyHO Ha DnCnlee qactOTy.
PIMMEAHNE: B amepnKaHcKoM OMeJI N B pexJme FM Haxatne KhoNk C uΦpOi "1" BB3bBaET BBOd KOM6HaCmU nΦp 10. B eBpOeIcko MoEJI N dA BBOda 10 HxKHO HaxaTb "1", a 3aTeM "0". Pn HAcTPOKe B dAnap3OHe FM Ha amepnKaHcKne cTaNu, CneDyET BBeCTN TOIbKO Ondy UΦpy, CneDyUOuYO nocNe DEcTaTHNo TOnKn (CM. PnPBEdEHbI HNXe npImep). Pn HAcTPOKe B dAnap3OHe FM Ha ebPoneickne cTaNuN BBeIIne IBe ZnΦpbl, CneDyUOuNE nocNe DEcTaTHNo ToCKn (CM. BTOPO npImep).
PIMMEpbI:
- (CLIIA, FM) 87,50 MΓι Μαχκμητε 8 > 7 > 5
(EBpOa, FM) 87,50 MΓu HaxMnTe 8 > 7 > 5 > 0
CLJIA,AM)1610KΓuHaxMnTe1>6 >1
(Ebpona,AM)1611KΓuHaxMnte 1>6>1>1
EcIn B TeueHne 5 ckyHb Bbl He BBeDeTe 3HaueHne qactoTbI, TO THOp BblJeT n3 peXnMa npraMoH hAcToPkn N BepHeTcK nCXoDnHO qactote HAcToPkn.
KhoNka AUTO TUNING
(ABTOMATNUeCKa HAcTpoiKa) 14H
OcyuieCTBnIeT nepeKJIoueHne MeJy peXnMAMn pyHOn n ABTomatuecko HactpoKn qactotbl. B pexime aBTOMaTneCKoH aCtpoKn Ha dncnlee CBETNTc nHnKATOp AUTO, n Haxatne KHONoK TUNING Ha nepeDHe naneHn HnHa Nylte 3anyckaet aBTomatueckyo HactpoKy. Tohep 6ydet YbEnuNbBatb nn yMeHbWatb qactOTy HactpoKn, noka He haidet cTAnuO C DOCTatoH0 MoUhblm IJa npEma CnHaNoM. Ecnn 3ta cTAnuR Bac He yctpanBaet, chOba 3anyctnte aBTomatueckyo HactpoKy. Pn aBTomatueckoH aCtpoKe CTAnuN co Cna6bIM CNrHaNo m npOnyckaIOTc. Ecnn TIOheP He o6hApYknt HnKaKOro CnHaJa, TO OH BepHcTe K NcXoHNo qactote HACTPOKn.
PIMMEAHNE: Pn npepexode K pexmny Hactpoyn Ha npedyctaHOBKn c nOmoBIO KNOpKn TUNE/PRESET pexm ABTOMATuecko Hactpoyn BbIKNoHaeTc (cm. CneDyOnu pa3d).
KhoNka TUNE/PRESET (HacTpoNka qacToTbI/ HacTpoNka Ha npeducTaHOBKn) 15
OcyuieCTBnIeTnepeKJIouHHeMeJy peKIMAMn HAcTpOuKN Ha YactOTy (KHOKNAMTNUNG BbIbNpaETcyaCTota HAcTpOuKN) N HAcTpOuKN Ha IpeDyCTAHOBKn (KHOKNAMTNUNG BbIbNpaETcyaHomep npEYCTAHOBKn, T.e. paNDocHaun, Yactota KOTOpOINpEaBPteJIbHO 6blNa 3aNcaHa B pAmrTb nOd 3TM HOMepo).BpeKIMe HAcTpOuKN Ha IpeDyCTAHOBKn Ha DnCnlee NOABnIeTc HnNKatop "PRESET".
PIMMEAHNE: Pnp nepexode K
pexmy Hactpoikn Ha npedyctahOBKn C
nomoptyk HonkTUNET/PRESET pexm
ABTMATueckoi Hactpoikn
BbIKIIOaETc.
KhoNka PRESET SCAN (Санрованne npeducTaHOBOK) F
Pn Haxatnn 3ToN KhoNk TIOhe HauHET NooUpeRedHyO HAcTPOuKy Ha npedyCTaHOBKn, BocnpOn3BOJa CnHAn KaJDoi paIIOCTaHcNIN B TeueHne NpTN cekyHd, a 3aTeM nepexOJa K CNeDyIOSei. UTo6bl npePBATb CAnHIpOBaHne 3aIncAHbIX B PAmrT bactOT N OCTaHOBNTbcra HA HyXHoB Bam CTaHcNIn, Haxmnte 3Ty KhoNky eue pa3.
INPMEAHNE: EcnB BO BpemHaKxatn KhoNk PRESET SCAN TIOhep HAcTpoEH Ha CTAnuHO, uactota KOtopoH xpaHntcB nPamrTu,TO cKaHnpOBaHne HauHecrCo CToAun, KOtopoN pncBoeH cIeDyUoUsn IIO NopAky Homep, 3aTeM nocLe DEMOHCTpaun BCex OCTaJIbHbIX npDeYCTaHOBOK, TIOhep BepHeTcR K IcxOHDn HAcTpoKe. EcnB Bo BpeMa Haxatna KhoNk PRESET SCAN TIOhep He 6yDet HAcTpoEH Ha npDeyctaHOBky, cKaHnpOBaHne HauHecrC ppeDyCTaHOBKn Homep 1 n 3aKoHHTcR npDeYCTaHOBko 30.
KhoNka FM MONO (MoHo npHem) 4
OcyuieCTBlaet nepekIIOueHne MeKdy pexHMAMMOHO nCTepeo npnema B FM dnaa30he. Ctepeo npneM BO3MOxeh, ecn paiaocTAnu npepaet ctepeo cnHan, n OH nMeet doctatoHyo CNy B meTe npnema.TorgaHa nucnlee CBETNCn HnDKATOP cteopnpema.B pexmMoHO npnema TIOHEp 6ydet BbIDabatb MOHO cnHan, daXe ecn CTANu npedaeT ctepeo.
PIMMEAHNE: IpeKIOUeHne B MOHO pexMM MoKeT yIyUHTb CJIbIUMOCTb CIA6bIX FM cRHaJOB mN cRHaJOB OT yDaJIeHHbIX paIIOCTaHcN, TAK KAK dJa MOHO pInema DOCTaTOHcMeHbSeM OuHOCTHcIRHaJa.
KhoNkU PnDOWN Ha nepeDnei nanei n HA Nylte NcNoB3yOTcIa CMeHbI cTaNi, a TAKKe IJI Bbl6opa BapnaHTOB MeHIO yCTaHOBKn (cm. MeHIO SETUP MENU).
Khonka ENTER 1
Haxmnte ha KhoNky ENTER Ha nepeDnei nanei dny noTbepKdeHnBbIbpaHHoro napametpa.
Khonka DISPLAY 9M
RT-1082 noka3bBaet B BepxHey qactn FL
dnpner Tn cepBcA. 3Ta HnOpmaunra
npHHMaetcr n3 cetn N no3BoJareT
RT-1082 noka3bBaTb HeckoIbKO IOCTynhIx
peKIMOB.HaKMITE Ha KONky < DISPLAY>
dIe nepeKIOueHm MeKdy pa3NIuHbIMn
peKIMAMN:
Tn nporpammbi (nepeaun): Poka3bIbaet xahp nn npryu nHcOpmaunO nepeaue.
- HanmehoBaanhe ancam6n: NdeHTuΦNKATOp ancAm6n (MylbTnIeKca) BbIBODNTCn HA 3KpAH.
- Yactota: Инданаця часты, на Котори перадетсь bblбаннь мультплеск.
- Ckopoocbnotoka daHHbIX (6ntpeHt): Ckopoocb TBtbcayax 6nt B cekyHny (Kbps), demohctpnpyet kaeeCTBO nepeaun. Yem Bblse 6ntpeHt, tem lyuue KaeeCTBO 3Byka.
PaNtEKT(DHnHAMueckn cerMeHT MapKnupOBKn): 3To TEKCT, KOtOpBn npokpyuBaetc no FL dncIeIO n coepknt INDopMaunIO O pIeJ-JIcTe N coepXaHn TKyUeI nepeDaUN. 3Ta cyhKcua 3abucNT OT cepBncnpoBaJepa n paAnocTahUn.
Cnla cHana: INdkauny ypoBna BXoJHO rHana moDyJRA DAB B 6NoOHmΦopMaTe.
KhoNka MEMORY (PamrTb)
RT-1082 MoXeT 3aONMHTb Do 99 DAB CTAHn. EcIN BbI XOTnTe 3aONMHTb BB6paHHyo CTAHnIO, HAXMtE Ha KHOKy Memory Ha nepedneH naHEn, a 3aTeM odHy n3 uΦpObBix KHOnOK, NOd KOtOpoi Bbl XOTnTe COxPAnHTb HAcTPOyKHa CTAHnIO. PAmrB dIg FM N DAB pa3Haj, NoTOMy, KpOME cTAHnC cHomepom'1'B DAB IMeETcApyra CTAHnC tAKmJke Homepom B FM dIana3OHe.
LncpObBie KHOpKn NUMERIC 7E
UHPOBbIe KHOJKN MOXHO NcNOJIb3OBaTb IJIa 3aHeceHn CTaHnB NpMaTb-PRESET nIJIy Bbl3OBA INn HEE.
Khonka TUNE/PRESET 15
YRT-1082ectbIbapekma pa6oTbI:
PyHou DAB peKm: KOrJa TIOHep B 3OMpeKmE, Bbl MoXeTe npOKpyuHBaTb BCE IOCTynHbIe CTaHcN C NOMOcIbIO KHONOK BBePx n Bn3.
- Pexm DAB npceToB: NcnoIb3yTe KhoIkn npceToB dJa BbI6pa CTaIcuN n3 pAmTn.
YctaHOBka Setup
INPMEYAHNE: B MeHIO yCTAOHOBOK set-up NMeHOTc8 6OJee CNOXHbIe yCTAOHBKN TIOHEpa RT-1082.
Khonka SETUP 10
KhoKa SETUP Ha nepeHne napeHn BbI3bIbaet MeHIO Setup, nCNoJIb3yEmoe IJI 6OJIe cNOXHbIX HAcTpoEk RT-1082.
MeHIO SETUP
Haxmte Ha KhoNky SETUP Ha nepeedne nanei Ira npocmotpa onu meho Ha FL dncnnee. IIO6yO onepaunio moxHo oTmeHt, Haxab Ha KhoNky SETUP eapea. Ype3 HeKOTOpoe Bpem, ecn He HAXMAtb KhoNkI PyIbTa, THOpE BbiJET n3 MeHIO yCTAHOBKn.
NcnoB3yIe KhoNk UP DOWN Ha nepeDne IaHeJI dI npOKpyKn pa3JIuHbIX BapnAHTOB MeHO. HaxMITE Ha KhoNky EN- TER IaNoTBePckDeHn Bi6opa.
NMeHOTc CJIeIyUoJHne OuIN: OHaKo NcNoJIb3OBaHHe 3Tnx OByHKn Tpe6yET 3HaHn INΦOpMaUO BAWeM MecTHOM DAB nepeDatYnke.
TpomKocTB DAB DAC VOLUME: RT-1082 No3BOJAEr peryNIpOBaTB rpoKocTB no Oskane DAC (UAP - uqfoaHaIorOBoro npeo6pa3oBaTeJI). TpomKocTB DAC MOxHO peryNIpOBaTB B npedeJax 0-255 MCNoB3yK HONKnUp n down. 3Ta cyHKcJna OblyHNO NcNoB3yETc JnL corlacoBAHn YPOBHe CnHaJa C TIOhepa C dpymMn BAuMM KomHOHTAMn.
PnrgnyuweHne npKocTN DIMMER: IaI n3meHHe HpKocTN FL dncJIeB COOTBETCTBn C BAaHmN ppeJnoUteHnA, HaxnMaTe KhoNk up n down.
Bo3Bpat K 3aBOdCKnH HAcTpoiKaM NO yMOJIyAHIO FACTORY DEFAULT:ДЯ toro,уTO6bl BepHyb RT-1082 K 3aBOdCKm UCTAHOBkAM.ПОТВердпte eshe pa3 JeJIaHne BepHytcbK 3aBODCKM YCTAHOBkAM,HAXAB Ha ENTER.IPDEIOCTEPEXEHNE:Bb6Op 3aBOdCKnX HAcTpoeK NO yMOJIyAHIO COptet BCE BAuN HAcTpoiKn N3 PAmrTu.
3oHa pa6OtBi TIOhepa TUNER AREA: Heo6xOJIMO HOCTPOnTb BAa TIOHep IaIpa6OtBi B CTpaHE NOKyIKN. 3oHa pa6OtBi MeHReTcR c
BercnA VERSION:B 30mpa3dene yka3aHa TekyuaBercnI IO dIg RT-1082.
06HOBJIeHnIO npoueccopa Fronr CPU Upgrade: BbI6epnte 3Ty cTpOKy MeHIO nIIa 06HOBJIeHnIO npoueccopa CPU nIpeNdne nanei. PnmeuHne: 3Ta cTPOKa MeHIO nCNOJb3yeTc TOnbKO Ha fAp6PKe Hne npedHa3HaueHa dIra Bac.
BbIXoE XET: IJIy BblXoJa n3 MeHIO yCTaHOBKn set-up.
Ponck DAB cTahcH:
IPMMEAHHE:KordaDABTHOHeP BKJUaHOTnepBbpa3,FLdncnnei 3aIpaunBaet,XOTNEJIINBb3aynctntb ABTO HAcTPOky,HTo6blHaHTN BCE DOCTyHbIe cepBcbl B Baem paOnHe.B 6OJIbUnHCTBe CnyaEB ABOHaCTPOky DOCTATOHO npOBecTu ODNH Pa3. Bb6epnte
Khonka AUTO TUNE
(ABTOHACTPOKka) 14 H
BbMOxKTe NepnoDnueckN NOBTOpTaB NOnCK, ecIn B BaIeM perNoHe NOBuINcB HOBbIe MyIbTnIIeKcBt (T.e. rpynnbI cepBncOB) nnXe, ecIn Bbl nepeexaJIi BmecTe C TIOHEPOM B DpyrTuO6nactb.
NPMMEAHNE: Auto tune will erase any preset stations saved to memory.
- Select the DAB tuner by pressing the BAND button 17 on the front panel or the DAB button 8 on the remote control.
- Haxmte Ha KhoNky AUTO TUNE nIa noncka cHaJana aHcAm6JIe CTaHcIe. Ha FL dncJIee noBHTcra HaIINCb [DAB Auto Tuning]. BbIbepnte < No> IJIa OTMeHbI nn < Yes> IJIa ABTOHaCTpOKn.
- Bb6epnte
c nOmoUbIO KhoNOK UP/DOWN Ha nepeDneH naHeI, HaxMnte ENTER ecn Bbl He xOTnTe MeHrB hAcTpoKn. Bb6epnte C nOmoUbIO KhoNOK UP/DOWN Ha nepeDneH naHeI, 3aTeM hAxMnte ENTER dIy IOncKa HObIx aHcAm6JeN aABTO 3aMeHbI TeKyuXx CTaHcN.
Kak 3aONMHTb DAB cTahcHm
Korda aBTO hactpoika 3aKOHueHa,Ha 3kpahe 6ydet noka3an Hndntnukatop cepBaCA. NcnoIb3yTe KhoNk up/down Ira Bb6opa JekaemO CTAHnn.
Для занецнист ( нэгу, a 3atem келаим Homep. Hanpimep: "Memory" + "1" + "2"
Iobtopte 3ny npoceupy dlya 3aONMHANH NOJHNHTeNbHbIX CTAHn.
Kak Bbl3BaTb m3 namrnt CTahcHIO PRESET
3aheceHHABI NAMrTb CTAHUNMOKET 6bITb BbIBBACNOMOuBIO UPOBOBbIX KHOJOK.
Hanpmep: "1" + "2".
TexHnueckne xapakTepeNtukn
FM TIOHEP
Pa6oayyBCTBnteJbHocTb 14.2d5Φ
YyBCTBNTeIbHcOt b npn ocIa6JeHHn CnHaHa
Ha 50 d6 20.2 d6Φ (A
OthoueHne cHraH/zhm ( np65bΦ)
45.3 abΦ (creteo)
73 ab (MOHO)
70 d5Φ (ctpeo)
Tapmonueckne nckaeHnna ( np65Φ)
0.2% (MOHO)
0.3% (ctrepeo)
10 Hz-15 kHz, ±3 dB
Ko3cΦmncnent 3aXbata
2.0 ab
U36npatelbHoctb no cocedhemy KaHany
47ab (± 400 )
M36npatelenbhoctb no no6oohomy kahaany
90 AB
Iodablenne nomex no 3epkaibHomy KaHany
80d
H36npatelbno npomexkytohou qactote
80 n6
Ko3ΦnHENT NOaBHeNHa AM
55ab
Pa3eJenHe CTepeokAnaIob
40ab/45ab/35ab
(100Γu/1KΓu/10KΓu)
1B
BbIXoAnH yPoBeHb
75OM,He6aJahCHbI
ANTeHHbBxOa
AM Tiohep
Pa6oayyBCTBntbHoctb 500 B / M
H36npateIbHocTb 25 n6
TapmoHueckne nckaxKeHH 0.5%
IopabJIeHne nomex no 3epKaIbHomy KaHany 45 n6
OTHoWeHne CnHn/WM 40 n6
BbIXoHNo ypoBeHb 500MB
ANTeHHbBxOa
pamouhara aHTehha
DAB TIOHeP
UyBCTBNTeIbHocTb -96 IbM
Дианэзовы пинимаьх с actot Band III (174-240 Mf)
Aydno notok daHHbIX 224 K6nt/cek (MaKc.)
Hana3oh aydno yactot 20-20 K
AnorobBbIXo 2.0 B npn O dBFS
AHTeHHbI BxOd 50OM,Fpa3beM
LHcpoBoB BbIXoJ S/PDIF KOaKcnaJIbHbI/ONTueckn
Φopmat/γactotaДнckpeTn3aunn PCM/48K
06uhe xapakTepcntkn
Iotpe6JIaemM MoUHocTb 15 Bt
Iotpe6JeHne B pexKHe Standby 5Bt
Tpe6obAHNA K nHTaHnIO (AC) 120B,60Tc(CLUA)
230B,50T(Ebpona)
Bec 5.4 Kr
Pazmepb1 (LxxBxI) 437 x 92 x 343 MM
Bbicota nepeDnei nane 80 MM
Bce xapaektpnckn k yblnoTcTOnhmbHa Moemnt ny6nkaun.
KoMaHnR RoTeI octabTRe 3a co6o npabo BHocntb ynyuweHn6e3 yBeDMHeHn.
Rotel n lorotn "Rotel HiFi" yBlaHOTc3 aperncTpnpOBaHHbIMN TOBapHbIMN 3hakam KOMPAHm
The Rotel Co., Ltd., Tokno, JIoHnA.
ROTEL
The Rotel Co. Ltd.
10-10 Shinsen-Cho
Shibuya-Ku
Tokyo 150-0045
Japan
Phone: +81 3-5458-5325
Fax: +81 3-5458-5310
Rotel of America
54 Concord Street
North Reading, MA 01864-2699
USA
Phone: +1 978-664-3820
Fax: +1 978-664-4109
Rotel Europe
Dale Road
Worthing, West Sussex BN1 12BH
England
Phone: +44 (0)1903 221 761
Fax: +44 (0)1903 221 525