FUTURE 2200 - Vacuum Cleaner PALSON - Free user manual and instructions
Find the device manual for free FUTURE 2200 PALSON in PDF.
| Brand | PALSON |
| Model | FUTURE 2200 |
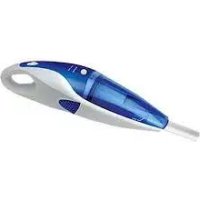
| Product type | Bagless canister vacuum cleaner |
| Power supply | 230 V / 50 Hz |
| Suction system | Cyclonic (air whirl) |
| Filtration system | Washable motor protection filter + outlet HEPA filter |
| Dust container | Transparent container with MAX mark |
| Hose | Adjustable height metal telescopic hose |
| Included accessories | Floor brush, hose brush, upholstery tool, crevice nozzle |
| Power adjustment | 3 levels: low (curtains), medium (velvet carpets), high (thick carpets) |
| Cord rewind | Automatic with push button |
| Cord length | Approximately 6 m (estimate) |
| Warranty | 3 years |
| Motor filter maintenance | Clean every 3 empties; washable in hot water without additives |
| HEPA filter replacement | Every 6 months |
| Safety | Do not vacuum liquids, hot ashes or sharp objects; do not use without filter |
| Use | Household use only |
Frequently Asked Questions - FUTURE 2200 PALSON
User questions about FUTURE 2200 PALSON
0 question about this device. Answer the ones you know or ask your own.
Ask a new question about this device
Download the instructions for your Vacuum Cleaner in PDF format for free! Find your manual FUTURE 2200 - PALSON and take your electronic device back in hand. On this page are published all the documents necessary for the use of your device. FUTURE 2200 by PALSON.
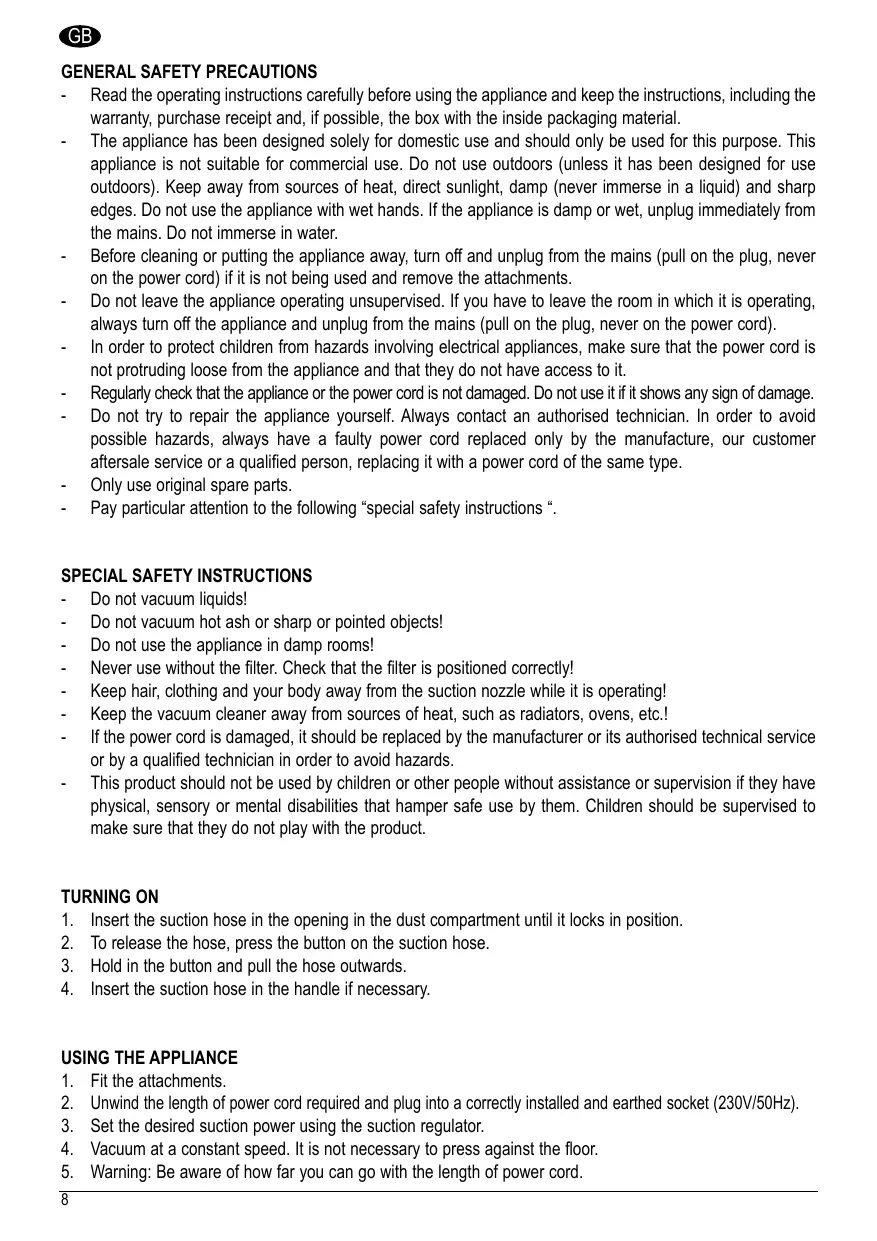
USER MANUAL FUTURE 2200 PALSON
Vacuum cleaner with filter
1 Outlet filter cover 1
2 Hose connection 3
3 Carrying handle 3
4 Suction power regulator
5 Dust container opening button
6 Parking rest
7 Wheels
8 On/Off switch
9 Power cord winder button
10 Power cord
11 Metal telescoping wand
12 Flexo hose
13 Brush attachment for floors
14 Brush-nozzle attachment
15 Upholstery attachment
GENERAL SAFETY PRECAUTIONS
- Read the operating instructions carefully before using the appliance and keep the instructions, including the warranty, purchase receipt and, if possible, the box with the inside packaging material.
- The appliance has been designed solely for domestic use and should only be used for this purpose. This appliance is not suitable for commercial use. Do not use outdoors (unless it has been designed for use outdoors). Keep away from sources of heat, direct sunlight, damp (never immerse in a liquid) and sharp edges. Do not use the appliance with wet hands. If the appliance is damp or wet, unplug immediately from the mains. Do not immerse in water.
Before cleaning or putting the appliance away, turn off and unplug from the mains (pull on the plug, never on the power cord) if it is not being used and remove the attachments. - Do not leave the appliance operating unsupervised. If you have to leave the room in which it is operating, always turn off the appliance and unplug from the mains (pull on the plug, never on the power cord).
In order to protect children from hazards involving electrical appliances, make sure that the power cord is not protruding loose from the appliance and that they do not have access to it.
Regularly check that the appliance or the power cord is not damaged. Do not use it if it shows any sign of damage. - Do not try to repair the appliance yourself. Always contact an authorised technician. In order to avoid possible hazards, always have a faulty power cord replaced only by the manufacture, our customer aftersale service or a qualified person, replacing it with a power cord of the same type.
Only use original spare parts. - Pay particular attention to the following "special safety instructions".
SPECIAL SAFETY INSTRUCTIONS
- Do not vacuum liquids!
- Do not vacuum hot ash or sharp or pointed objects!
- Do not use the appliance in damp rooms!
- Never use without the filter. Check that the filter is positioned correctly!
- Keep hair, clothing and your body away from the suction nozzle while it is operating!
- Keep the vacuum cleaner away from sources of heat, such as radiators, ovens, etc.!
If the power cord is damaged, it should be replaced by the manufacturer or its authorised technical service or by a qualified technician in order to avoid hazards. - This product should not be used by children or other people without assistance or supervision if they have physical, sensory or mental disabilities that hamper safe use by them. Children should be supervised to make sure that they do not play with the product.
TURING ON
- Insert the suction hose in the opening in the dust compartment until it locks in position.
- To release the hose, press the button on the suction hose.
- Hold in the button and pull the hose outwards.
- Insert the suction hose in the handle if necessary.
USING THE APPLIANCE
- Fit the attachments.
- Unwind the length of power cord required and plug into a correctly installed and earthed socket (230V/50Hz).
- Set the desired suction power using the suction regulator.
- Vacuum at a constant speed. It is not necessary to press against the floor.
- Warning: Be aware of how far you can go with the length of power cord.
Low suction power: For curtains and delicate fabrics.
Medium suction power: For velvet and fabric carpets and rugs.
High suction power: For thick carpets and flooring.
POWER CORD WINDER
Pull the power cord out to its maximum length, indicated by the yellow mark. Never pull the power cord beyond the red mark as this may damage the winder. This damage is not covered by the warranty.
WINDING
Press the power cord winding button and guide it into the vacuum cleaner. Hold the power cord to prevent it from tangling.
TELESCOPING WAND
- The adjustable length wand enables it to be adjusted to each person's height.
- Unlock the coupling by pressing the button in the direction indicated by the arrow.
- Slide the wand to the required length.
- To lock, release the button and listen for the click as it locks in the appropriate setting.
NOZZLE FITTINGS
Floor nozzle: For cleaning carpets and soft surfaces.
Slot nozzle: For vacuuming in corners and slots.
Brush and upholstery nozzle: Remember that the brush and upholstery nozzle is a "two-in-one" device. For upholstery, use the nozzle without the device. The brush device is located underneath the upholstery nozzle.
AIR INTAKE REGULATOR
Open the air intake regulator located on the hose attachment to adjust the air flow or remove objects stuck to the nozzle.
FILTERS
This appliance has three filtering systems.
- Transparent dust collector:
The traditional bag system has been replaced by a transparent dust collector into which both the large dirt particles and the tiny particles floating in the air are sucked by an air vortex produced by the high speed of the air circulating through the appliance.
The quantity of dust in the container can be readily viewed at any time. The container is also very easy to empty.
It is no longer necessary to buy dust bags. - Motor protection filter (in the dust container):
When the dust level has reached the MAX mark in the dust container, proceed as follows:
- Detach the dust container (see Figure 1).
Press the button to detach the dust container and pull the container outwards.
-
Remove the contents of the dust container (see Figure 2).
-
Remove the filter base (see Figure 3) and clean the motor protection filter, gently shaking and brushing it.
Reassemble the components.
Every three times the container is emptied or after vacuuming a very dirty floor, clean the filter by running water through the filter fabric in the opposite direction to the suction air circulation. Do not replace the dust container until it is completely dry!
- Outlet filter (Hepa filter):
The appliance is also fitted with an outlet filter.
- We recommend changing the filter every six months in order to ensure optimum operating condition.
- This filter is located on the rear of the appliance behind the ventilation grille.
- To open the ventilation grille, press lightly on the tab and pull it towards you.
Take out the filter and replace with a new one.
CLEANING AND STORAGE
Cleaning
- Before, cleaning pull out the plug from the mains socket!
- Clean the body with a dry cloth.
- Clean the motor protection filter approximately once every 3 times the vacuum cleaner is emptied.
- Clean the filter with hot water with nothing added to it. Reinstall in its position when it is completely dry.
Storage
- Wind in the power cord fully.
- Insert the nozzle hook in the storage bracket (6) located on the appliance's side.
This appliance has been inspected in accordance with all the currently applicable EC directives, such as the electromagnetic compatibility and low voltage directives. It has been manufactured to the latest safety standards.
We reserve the right to make technical changes without prior notice!
WARRANTY
The appliance supplied by our Company is covered by a 3-year warranty which starts on the purchase date. During the warranty period, any failure of the appliance or its attachments* that is attributable to faulty workmanship or materials will be corrected without cost, either by repairing it or, at our discretion, by replacing it. Repair or replacement under the warranty does not imply an extension of the warranty period or any right to a new warranty!
To receive service under the warranty, you must furnish the purchase receipt and the warranty certificate for this product. Without the purchase receipt and the stamped, dated warranty certificate, no replacement or repair will be made free of charge.
If you wish to make a claim during the warranty period, please return the complete appliance in its original packaging to the distributor together with the purchase receipt.
- A failure of the attachments does not automatically imply replacement without charge of the entire appliance. In such cases, please call our assistance phone centre. Broken glass or broken plastic parts will always be subject to a charge.
Faults in consumable or wearing parts, cleaning, maintenance or replacement of such parts are not covered by the warranty and therefore must be paid for.
Unauthorised tampering will automatically render the warranty null and void.
After expiry of the warranty
After expiry of the warranty, any repair can be performed by the authorised distributor or repair service. Such repairs will be charged for.
INSTRUCTIONS GÉNÉRALES DE SECURITÉ
PEYJIMPOBKA MOUHOCTN BCACbIBAHM
Hn3kaMouhoctb BCaCbBaHn:ДлЯЗанвсokиTOHKnxTKaHei.
CpeHra CkOpocTb BCaCbIbAHnA: IJIa IINHHOBOPChbIX 6apxATbIX KOBPOB N KOBPOBbIX TkaHei.
BbICOKa MoIOHOCb BCaCbIbAHnI: IJIa TOnJIcTBix N KOBPOB nIanaCOB.
OTCEKДЛЯВТГИBAHNYUHYPA
BbIyHb IHyp Ha MAKcImaJIbHyIO DInHy, KOTopar yka3aHa XeIToI nometKoH. He BbITraBaTb IHyp dAJIbe KpaCHO OTMeTKN, INaue YCTPOJcTBO BTAIRBaHnI Zhyp MoXeT BbTIu N3 cTpor. 3Tu HEnCnpabHocTH b RapaHTNo HE BKIOHe
BTRNBAHNEUHUPA
Hakatb Ka KhoNky BtRnBaHna U HapabTb erO, TTo6bl OH CMaTbIaIcra IpaBnIbHO. NdoepKmbaT b Hpy, TTo6bl OH He 3anyTanca.
TELECKONIMCHECKA BCAcBIBAOUJA TPYBUKA
BcablaibaouyU Tpy6ky 3mehemyoDnHHb moxno Otperynpobatb noD poCt IIO6Oro YenOBeka.
- Pa36JIOKINPOBaTb CoeINHeHne, HaxaB Ha KOnKy B HAnpAIBNeHn CTrpeJIKN.
Pa3dBnHyTB BcCabBaioUyTO Tpy6Ky Ha HnyKHyI DInHy.
-ДяблOKирOBин Накоть Na KINKу TAK,ЧтБы 6blI CnblIeH 3ByK ФИКcaU N TpyБи B HfyHOM MecTe.
BCNOMOΓATEIbHbIe HACADKIN
Hacadka nla ynctkn noOB: nla ynctkn KObpo Nmrgkx NOBepxHOtei.
Hacadka dny nctkn 1eien: P03boJare Ounuatab yrlbln einn.
Hacadka co 9eTko dny NCTkn Mebei: Obpatnte BHMaHne Ha to, YTO hacaIka co 9eTKo n HacaIka dny Mebei ObEHNHeB b ONDHom yCTpoNCTBE. Dny ONUCTKn ONBKn IcNoJIb3ObaTb HacaIky Be3 9eTKn. UTeKya yCTaHaBnBaETcra ND HacaIkw dny NCTkn ONBKn.
PEYJYTOPIODAUHBO3yXA
Pn6bOp oshaen CnCTeMoI n3 Tpex PnIbTPOB.
- PpO3paHbI NpJIeSc6OpHnK.
TpaHIOHHbMeoK DnI PbIIN 3aMeHEn npO3paHNO EMKOcTBIO-PbJIeNC6OpHNOM,B KOTOpBI cOBIpAOTcKpyHbIE YactNcB Ipr3N IN PnaBaIOUaB B03dyXe MeIKa NblB, BcAcblBaEMbIe Typ6yJIeHTbIM NOTOKOM BO3dyxa, CInPKUInpuyOuMm C BbICOKO CKOPoCTbIO.
B IIO6oE Bpem MOHO BnTeb KOINueCTBO bIJIIN B IIJIe6OpHNke, KOtOpBI TaKKe MOHO JERKO ONOPOOKHHTb.
- Heo6xoDnMoCTN B NOKyIKe MeKOB IJIЯ nbIIN BoJbIe He cyUcTeByET.
a a a a a a a a a a a a a a a a a a a a a a a a a
L
g C gaa a jagall alaoa a jaiail all
Jlaal Jla Jla
Aaiiall aikill gaiyaiall aylll aaiiell aaiiell 4 y b gawalg jgsaln jn jn jn jn jn jn
(jlll)dallalla 2
J Lai Jai jai jai jai jai MAX aalall jai jai jai jai jai jai jai
.(1jzj)
.
.(204)jlll 1
a 4 a 0 0 0 0 0 0 0 0 0 0 0 0 0 0 0 0 0 0 0 0 0 0 0 0 0 0 0 0 0 0 0 0 0 0 0 0 0
Jieell
aJyI yIyIyIyIyIyIyIyIyIyIyIyIyIyIyIyIyIy
a aaa a a a a a a a a a a a a a a a a a
yj jyj yj yj yj yj yj yj yj yj
aal llae aaii aai i 1
jzjj 1
iill jie waiall jwaiil Jui
jnnnne nnnnne nee eee aee
J 1
Lolati
alai sillil
Aii 6) 2i jill Jall
g 1
Aaallll lallll J 1s aaii i Ls Aaball aalllg
J 1
Jaaal
1 1
aaii i 1
a 1 a
a a a a a a a a a a a a a a a a a a a a a a
aallll lall g aillgaaagaae
a. gall
Aii jbiw ydiy
a
"dlg jyjll"olj rjzcllglallljll "olj g" 4g jll j! o111
a a a a a a a a a a a a a a a a a a a a a a a a a a a
1ggljg
aill aillll 1 1 g 1 g 1 g 1 g 1 g 1 g 1 g 1 g
a 1
olalil jll Joo ocl.1
e jzjg 1yabgl 0jzlal 1jzj yalal 4y jyjll Jnss 0jzj yjll jyjll s k albi jni -
aal alll aall ae aal alk y 100000000000000000000000000000000000
Aa jai Jauu Jauu Lus C a g a c a a a a a a a a a a a a a a a a a
a. 1
JL 12 JI 12 JI 12 JI 12 JI 12 JI 12 JI 12 JI 12 JI 12 JI 12 JI 12 JI 12 JI 12 JI 12 JI 12 JI 12 JI 12 JI 12 JI 12 JI 12 JI 12 J12 JI 12 JI 12 JI 12 JI 12 JI 12 JI 12 JI 12 JI 12 JI 12 JI 12 JI 12 JI 12 JI 12 JI 12 JI 12 JI 12 JI 12 JI 12 JI 12 JI
aaii aiai ai
Jlalg 1
!dall g jn Jlalll aaiy
!4pRg jLjaiw
!aiaiiaiaiaiaiaiaiaiaiaiaiaiaiaiaiaiaiaiaiaiaiaiaiaiaiaiaiaiaiaiaiaiaiaiaiaiaiaiaiaiaiaiaiaiaiaiaiaiaiaiaiaiaiaiaiaiaiaiaiaiaiaiaiaiaiaiaiaiaiaiaiaiaiaiaiaiaiaiaiaiaiaiaiaiaiaiaiaiaiaiaiaiaiaiaiaiaiaiaiaia
J 1
J 2
J 3
山
j521 jiaowiu
all
50/230 28 24