
WAP300N - Wireless Access Point LINKSYS - Free user manual and instructions
Find the device manual for free WAP300N LINKSYS in PDF.
| Product Type | Wireless N Access Point |
| Dimensions (without antennas) | 188.7 x 151.7 x 31.2 mm |
| Weight | 207 g (without antennas) / 229.6 g (with antennas) |
| Power Supply | 12 V, 0.5 A (adapter included) |
| Ethernet Connectivity | 1 x 10/100 Fast Ethernet port |
| Wireless Connectivity | Wi-Fi 802.11b/g/n, 2.4 GHz and 5 GHz bands |
| Antennas | 2 external removable dipole antennas (R-SMA connector) |
| Operation Modes | Access Point, Wireless Media Connector, Signal Amplifier, Wireless Bridge |
| Wireless Security | WEP, WPA, WPA2, MAC filtering |
| Wi-Fi Protected Setup (WPS) | Yes (button and PIN code) |
| Configuration | Web browser-based utility or setup CD |
| LED Indicators | Power, WPS, Ethernet, Wireless Activity |
| Buttons | Reset, WPS, Power (European model only) |
| Operating Temperature | 0 to 40 °C |
| Operating Humidity | 10% to 80% (non-condensing) |
| Certifications | FCC, CE, Wi-Fi (802.11b/g/n), WPA2, WMM |
Frequently Asked Questions - WAP300N LINKSYS
User questions about WAP300N LINKSYS
0 question about this device. Answer the ones you know or ask your own.
Ask a new question about this device
Download the instructions for your Wireless Access Point in PDF format for free! Find your manual WAP300N - LINKSYS and take your electronic device back in hand. On this page are published all the documents necessary for the use of your device. WAP300N by LINKSYS.
USER MANUAL WAP300N LINKSYS
natural_image
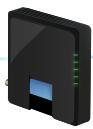
Black wireless router with two antennas and a brand logo on the cover, displayed against a blue gradient background (no text or symbols on device body)المحتويات
natural_image
Black wireless router with two external antennas (no visible text or symbols)محتويات الحزمة
natural_image
Front view of a black wireless router with two antennas and a control knob (no visible text or symbols)natural_image
Laptop displaying a webpage with images and text (no visible text or symbols on screen)كميوتر محول

natural_image
Blue-toned globe illustration showing continents and oceans (no text or symbols)إنترنت
مودم
natural_image
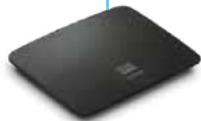
Black rectangular electronic device with a small hole on top (no visible text or symbols)موجه

natural_image
Black wireless router with two antennas (no visible text or symbols)WAP300N


كميوتر لوحي
natural_image
Illustration of a mobile phone with wireless signal icon above it, next to a smartphone displaying a red card (no text or symbols on devices)هاتف ذكی
natural_image
Blue-toned globe illustration showing continents and oceans (no text or symbols)إنترت

مودم

natural_image
Black electronic device with a USB port, shown in studio setting (no text or symbols visible)موجه لاسلكي

natural_image
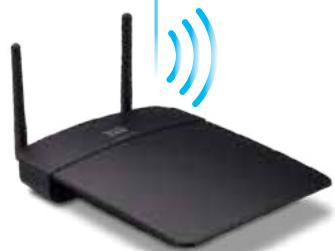
Black wireless router with two antennas and signal waves (no text or symbols)WAP300N

natural_image
Illustration of a classic Xbox internal console and a handheld game controller (no text or symbols visible)natural_image
Blue-toned globe illustration showing continents and oceans (no text or symbols)إنترنت
مودم
natural_image
Black electronic device with a silver strap and black body, no visible text or symbolsموجه لاسلكي

natural_image
Black wireless router with two antennas and two blue signal waves (no text or symbols)WAP300N
natural_image
Laptop displaying a webpage with images and text (no visible text or symbols on screen)كميويتر محول

natural_image
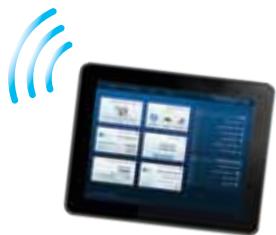
Digital tablet displaying a grid of app icons with wireless signal waves (no text or symbols on the device screen)كميوتر لوحي
وضع الجسر اللا스لكي
natural_image
Blue globe illustration showing continents and oceans (no text or labels)إنترت
مودم
موجه
Ethernet مبّل
natural_image
Illustration of a desktop computer with a screen displaying a cartoon character (no visible text or symbols)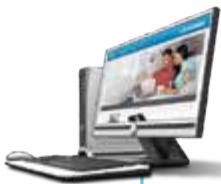
natural_image
Illustration of a desktop computer with a screen displaying a cartoon character (no text or symbols visible)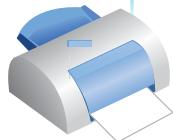
طابعة الشبكة

natural_image
Black wireless router with two antennas (no visible text or labels)
WAP300N
Ethernet مبّل
natural_image
Black wireless router with two antennas and a blue signal waves (no text or symbols)WAP300N

natural_image
Black wireless router with two visible antennas (no text or symbols)WAP300N

Ethernet مبّل

تلميحيات
- If your router has a Wi-Fi Protected Setup button, click or press that button, and then click the button on the right.

Wireless Media Connector

Wireless Range Extender

Wireless Bridge
- If your client asks for the Router's PIN number, enter this number 32744781 in your client device.
Wireless Media Connector

Wireless Range Extender

Wireless Bridge
| Select | Wireless Network Name | GHz | Signal | Security |
| Cisco06647_24g | 2.4 | 0% | WPA2 Personal | |
| SepiaMaple | 2.4 | 0% | WPA2 Personal | |
| SepiaMaple-guest | 2.4 | 0% | Disabled | |
| E4200v1RS | 2.4 | 29% | WPA2 Personal | |
| Cisco97475 | 2.4 | 0% | Disabled | |
| 160nnnnn | 2.4 | 15% | Disabled | |
| X3500 | 2.4 | 0% | WPA2 Personal |
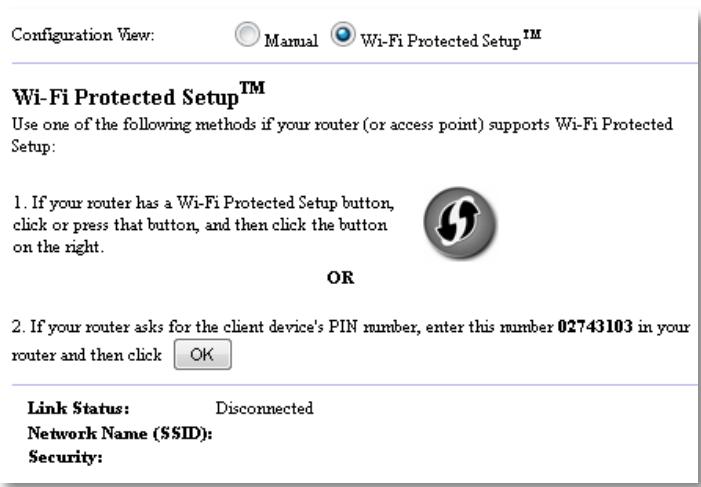
Use one of the following methods if your router (or access point) supports Wi-Fi Protected Setup:
- If your router has a Wi-Fi Protected Setup button, click or press that button, and then click the button on the right.

OR
- If your router asks for the client device's PIN number, enter this number 02743103 in your router and then click OK
Link Status:
Disconnected
Network Name (SSID):
Security:
- If your router has a Wi-Fi Protected Setup button, click or press that button, and then click the button on the right.

- If your router asks for the client device's PIN number, enter this number 02743103 in your
router and then click
OK
Save Wireless Range Extender .3
.( hectظ الإعداد) Settings
O
Access Point (default)
O
Wireless Media Connector
©
Wireless Range Extender
O
Wireless Bridge
Wireless Media Connector

Wireless Range Extender

Wireless Bridge
Local Wi-Fi MAC Address: 00:11:E0:04:2F:86
Remote Wireless Bridges' Wi-Fi MAC Addresses:
Note: When set to "Wireless Bridge" mode, this device will communicate only with another WAP300N in "Wireless Bridge" mode. Wireless settings, including wireless band, channel, channel width, security mode and passphrase/key, are required to be the same on all networked wireless bridges.
Wireless Band:

5 GHz

2.4 GHz
Channel Width:
Auto (20 MHz or 40 MHz)
Channel:
36 - 5.180GHz ▼
Channel Width:
Auto (20 MHz or 40 MHz)
Channel:
1 - 2.412GHz ▼
Wi-Fi (المحلی) Local Wi-Fi MAC Address
لها الجهاز. MAC
Wi-Fi (عناوين) Remote Wireless Bridges' Wi-Fi MAC Addresses
Channel Width (عرض ال Quintaa) — للحصول علىifr costly أداء في الشبكةNES-، عرض (النّة) : 40 MHz 40 km 5.12.44.45.46.47.48.49.50.51.52.53.54.55.56.57.58.59.60.61.62.63.64.65.66.67.68.69.70.71.72.73.74.75.76.77.78.79.80.81.82.83.84.85.86.87.88.89.90.91.92.93.94.95.96.97.98.99.100.101.102.103.104.105.106.107.108.109.110.111.112.113.114.115.116.117.118.119.120.121.122.123.124.125.126.127.128.129.130.131.132.133.134.135.136.137.138.139.140.141.142.143.144.145.146.147.148.149.150.151.152.153.154.155.156.157.158.159.160.161.162.163.164.165.166.167.168.169.170.171.172.173.174.175.176.177.178.179.180.181.182.183.184.185.186.187.188.189.190.191.192.193.194.195.196.197.198.199.200
Note: When set to "Wireless Bridge" mode, wireless settings, including wireless band, channel, channel width, security mode and passphrase/key, are required to be the same on all networked wireless bridges.
- 4.1. Exporting: Freight Client List (Queantime Embrales-Lalaskim) : Lefتح شاشته Wireless Client List (Queantime Embrales-Lalaskim). Exporting: Wireless Client List (Queantime Embrales-Ajahyaz, Aghez-Kembiyot) MAC Address (Enوان Status) (Mac
MAC Address ▼
| Interface | MAC Address | Status | Save to MAC Address Filter List |
| None | None | None |
Add
Refresh
Close
(اللا specialist MAC) Wireless MAC Filter < (اللا specialist) Wireless
Prevent PCs listed below from accessing the wireless network.

Permit PCs listed below to access the wireless network.
Wireless Client List
MAC 01:
MAC 02:
MAC 03:
MAC 04:
MAC 17:
MAC 18:
MAC 19:
MAC 20:
.2. (IP) Static IP (الجهاز) Device IP ( making IP) Static IP ( making IP) Static IP ( making IP) Static IP ( making IP) Static IP ( making IP) Static IP ( making IP) Static IP ( making IP) Static IP ( making IP) Static IP ( making IP) Static IP ( making IP) Static IP ( making IP) Static IP ( making IP) Static IP ( making IP) Static IP ( making IP) Static IP ( making IP) Static IP ( making IP) Static IP ( making IP) Static IP ( making I
Disabled (Default: Enabled)

Enabled

Disabled (Default: Disabled)
Access via Wireless:

Enabled

Disabled
Re-enter to confirm:

.4 (uncteur الإعداد) Save Settings انقر فوق
Backup Configurations
Warning! If you click OK, the device will reset to factory default and all previous settings will be erased.
Please select a file to upgrade the firmware:
Browse..
Start to Upgrade
natural_image
Top-down view of a black wireless router with two antennas and a circular indicator on the cover (no visible text or symbols)-أو-
| Operation Mode: | Access Point |
| MAC Address: | 00:11:E0:04:2F:86 |
| Network Name (SSID): | linksys |
| Network Mode: | 2.4G/5G Mixed |
| Radio Band: | 2.4 GHz |
| Channel: | 1 |
| Channel Width: | Auto (20 MHz or 40 MHz) |
| Security: | Disable |
| SSID Broadcast: | Enable |
| Firmware Version: | 1.0.00, build 35, Oct 17, 2012 |
| Firmware Verification: | 56bd32b111ca56fc37202b7be87a5b76 |
| MAC Address: | 00:11:E0:04:2F:8S |
| IP Address: | 10.100.1.1 |
| Subnet Mask: | 255.255.255.0 |
| Default Gateway: |
natural_image
Black wireless router with two antennas against a blue gradient background (no visible text or symbols)Brugervejledning
Indholdsfortegnelse
Oversigt
Pakkens indhold ....1
Linksys WAP300N .....26
Miljø 26
Oversigt

natural_image
Black wireless router with two visible antennas (no text or symbols)Pakkens indhold
natural_image
Front view of a black wireless router with two antennas and a control panel (no visible text or symbols)natural_image
Laptop displaying a webpage with images and text (no visible text or symbols on screen)Notebook-computer

natural_image
Globe illustration showing continents and oceans, no text or symbols presentInternettet

Modem

natural_image
Black rectangular electronic device with a small white dot on top (no visible text or symbols)Router

natural_image
Black wireless router with two antennas (no visible text or symbols)WAP300N


Tablet

natural_image
Illustration of a mobile phone with wireless signal waves and a smartphone displaying a red card (no text or symbols)Smartphone
natural_image
Blue gradient globe illustration showing continents and oceans (no text or symbols)Internettet

Modem

natural_image
Black wireless router device with network cable (no visible text or symbols)Trådløs router


natural_image
Black wireless router with two antennas and a blue signal icon emitting waves (no text or symbols)WAP300N

natural_image
Illustration of a silver and gray gaming console with a handheld controller (no text or symbols visible)Ethernet-kompatibel spilkonsol
natural_image
Blue-toned globe illustration showing continents and oceans (no text or labels)Internettet

Modem
natural_image
Black electronic device with a silver strap and logo, no visible text or symbolsTrådløs router

natural_image
Black wireless router with two antennas and two blue signal waves (no text or symbols)WAP300N

Ethernet-kompatibel spilkonsol

natural_image
Tablet displaying a grid of six icons with Wi-Fi signal waves, no visible text or symbols on the device screen.Tablet
TIP
Sådan bruges Wi-Fi Protected Setup
Access Point (default)
Wireless Media Connector
Wireless Range Extender
Wireless Bridge
| Select | Wireless Network Name | GHz | Signal | Security |
| Cisco06647_24g | 2.4 | 0% | WPA2 Personal | |
| SepiaMaple | 2.4 | 0% | WPA2 Personal | |
| SepiaMaple-guest | 2.4 | 0% | Disabled | |
| E4200v1RS | 2.4 | 29% | WPA2 Personal | |
| Cisco97475 | 2.4 | 0% | Disabled | |
| 160nnnnn | 2.4 | 15% | Disabled | |
| X3500 | 2.4 | 0% | WPA2 Personal |
- If your router has a Wi-Fi Protected Setup button, click or press that button, and then click the button on the right.

Local Wi-Fi MAC Address: 00:11:E0:04:2F:86
Remote Wireless Bridges' Wi-Fi MAC Addresses:
Note: When set to "Wireless Bridge" mode, this device will communicate only with another WAP300N in "Wireless Bridge" mode. Wireless settings, including wireless band, channel, channel width, security mode and passphrase/key, are required to be the same on all networked wireless bridges.
Wireless Band:

5 GHz

2.4 GHz
Channel Width:
Auto (20 MHz or 40 MHz)
Channel:
36 - 5.180GHz ▼
Channel Width:
Auto (20 MHz or 40 MHz)
Channel:
1 - 2.412GHz ▼
Local Wi-Fi MAC Address (Lokal Wi-Fi-MAC-adresse) - Enhedens Wi-Fi-MAC-adresse.
Remote Wireless Bridges' Wi-Fi MAC Addresses (Wi-Fi MAC-adresser for eksterne trådløse broer) - Indtast Wi-Fi MAC-adresseren for andre WAP300N trådløse broer, som du vil have denne WAP300N til at oprette forbindelse til.
- Indtast (A)'s Local Wi-Fi MAC Address i (B)'s felt Remote Wireless Bridges' Wi-Fi MAC Addresses (Wi-Fi MAC-adresser for eksterne trådløse broer).
- Indtast (B)'s Local Wi-Fi MAC Address i (A)'s felt Remote Wireless Bridges' Wi-Fi MAC Addresses (Wi-Fi MAC-adresser for eksterne trådløse broer).
Eksempel 2
- Indtast (A)'s og (C)'s Local Wi-Fi MAC Address i (B)'s felt Remote Wireless Bridges' Wi-Fi MAC Addresses (Wi-Fi MAC-adresser for eksterne trådløse broer).
- Indtast (B)'s Local Wi-Fi MAC Address i (A)'s felt Remote Wireless Bridges' Wi-Fi MAC Addresses (Wi-Fi MAC-adresser for eksterne trådløse broer).
- Indtast (B)'s Local Wi-Fi MAC Address i (C)'s felt Remote Wireless Bridges' Wi-Fi MAC Addresses (Wi-Fi MAC-adresser for eksterne trådløse broer).
Note: When set to "Wireless Bridge" mode, wireless settings, including wireless band, channel, channel width, security mode and passphrase/key, are required to be the same on all networked wireless bridges.
Prevent PCs listed below from accessing the wireless network.

Permit PCs listed below to access the wireless network.
Wireless Client List
MAC 01:
MAC 02:
MAC 03:
MAC 04:
MAC 17:
MAC 18:
MAC 19:
MAC 20:
| Interface | MAC Address | Status | Save to MAC Address Filter List |
| None | None | None |
Add
Refresh
Close
Disabled (Default: Enabled)

Enabled

Disabled (Default: Disabled)
Re-enter to confirm:
●●●●●
●●●●●
- Klik på Save Settings (Gem indstillinger).
Access via Wireless:

Enabled

Disabled
Backup Configurations
TIP
natural_image
Top-down view of a black wireless router with two antennas and a control knob (no visible text or symbols)-ELLER-
Warning! If you click OK, the device will reset to factory default and all previous settings will be erased.
Please select a file to upgrade the firmware:
Browse...
Start to Upgrade
| Firmware Version: | 1.0.00, build 35, Oct 17, 2012 |
| Firmware Verification: | S6bd32b111ca56fc37202b7be87a5b76 |
| MAC Address: | 00:11:E0:04:2F:8S |
| IP Address: | 10.100.1.1 |
| Subnet Mask: | 255.255.255.0 |
| Default Gateway: |
| Operation Mode: | Access Point |
| MAC Address: | 00:11:E0:04:2F:86 |
| Network Name (SSID): | linksys |
| Network Mode: | 2.4G/5G Mixed |
| Radio Band: | 2.4 GHz |
| Channel: | 1 |
| Channel Width: | Auto (20 MHz or 40 MHz) |
| Security: | Disable |
| SSID Broadcast: | Enable |
natural_image
Black wireless router with two antennas against a blue gradient background (no text or symbols visible on the device body)Benutzerhandbuch
Inhaltsverzeichnis
Übersicht
Lieferumfang ....1
Rückseite. 1
Untenansicht 2
Linksys WAP300N .....26
natural_image
Black wireless router with two visible antennas (no text or symbols)Lieferumfang
natural_image
Front view of a black wireless router with two antennas and a control panel (no visible text or symbols)natural_image
Globe illustration showing continents and oceans, no text or symbols presentInternet

Modem

natural_image
Black rectangular electronic device with a small hole on top (no visible text or symbols)Router

natural_image
Black wireless router with two antennas (no visible text or symbols)WAP300N


Tablet

natural_image
Illustration of a mobile phone with wireless signal waves and a smartphone displaying a red card (no text or symbols present)Smartphone
Wireless Media Connector-Modus
natural_image
Blue gradient globe illustration showing continents and oceans (no text or symbols)Internet

Modem

natural_image
Black wireless router device with network cable (no visible text or symbols)Wireless-Router


natural_image
Black wireless router with two antennas and a blue signal icon emitting waves (no text or symbols)WAP300N

natural_image
Illustration of a silver and gray gaming console with a handheld controller (no text or symbols visible)natural_image
Blue-toned globe illustration showing continents and oceans (no text or labels)Internet

Modem

natural_image
Black electronic device with a silver strap and logo, no visible text or symbolsWireless-Router

natural_image
Black wireless router with two antennas and two blue signal waves (no text or symbols)WAP300N
natural_image
Laptop displaying a webpage with icons and a 'Notebook-PC' label, accompanied by a wireless signal icon (no text on device)
natural_image
Tablet displaying a grid of six modules with wireless signal waves, no visible text or symbols on the devices.Tablet
Wireless Bridge-Modus
TIPPS
Wireless Media Connector

Wireless Range Extender

Wireless Bridge
Access Point (default)
Wireless Media Connector
Wireless Range Extender
Wireless Bridge
| Select | Wireless Network Name | GHz | Signal | Security |
| Cisco06647_24g | 2.4 | 0% | WPA2 Personal | |
| SepiaMaple | 2.4 | 0% | WPA2 Personal | |
| SepiaMaple-guest | 2.4 | 0% | Disabled | |
| E4200v1RS | 2.4 | 29% | WPA2 Personal | |
| Cisco97475 | 2.4 | 0% | Disabled | |
| 160nnnnn | 2.4 | 15% | Disabled | |
| X3500 | 2.4 | 0% | WPA2 Personal |
Configuration View: Manual Wi-Fi Protected Setup™
Wi-Fi Protected Setup ^TM
Use one of the following methods if your router (or access point) supports Wi-Fi Protected Setup:
- If your router has a Wi-Fi Protected Setup button, click or press that button, and then click the button on the right.

OR
- If your router asks for the client device's PIN number, enter this number 02743103 in your router and then click OK
Link Status: Disconnected Network Name (\$SID): Security:
- If your router has a Wi-Fi Protected Setup button, click or press that button, and then click the button on the right.

Local Wi-Fi MAC Address: 00:11:E0:04:2F:86
Remote Wireless Bridges' Wi-Fi MAC Addresses:
Note: When set to "Wireless Bridge" mode, this device will communicate only with another WAP300N in "Wireless Bridge" mode. Wireless settings, including wireless band, channel, channel width, security mode and passphrase/key, are required to be the same on all networked wireless bridges.
Wireless Band:

5 GHz

2.4 GHz
Channel Width:
Auto (20 MHz or 40 MHz)
Channel:
36 - 5.180GHz

Channel Width:
Auto (20 MHz or 40 MHz)
Channel:
1 - 2.412GHz

Note: When set to "Wireless Bridge" mode, wireless settings, including wireless band, channel, channel width, security mode and passphrase/key, are required to be the same on all networked wireless bridges.
Wireless > Wireless MAC Filter (Wireless-MAC-Filter)
Prevent PCs listed below from accessing the wireless network.

Permit PCs listed below to access the wireless network.
Wireless Client List
MAC 01:
MAC 02:
MAC 03:
MAC 04:
MAC 17:
MAC 18:
MAC 19:
MAC 20:
| Interface | MAC Address | Status | Save to MAC Address Filter List |
| None | None | None |
Add
Refresh
Close
Disabled (Default: Enabled)

Enabled

Disabled (Default: Disabled)
Re-enter to confirm:
●●●●●
Access via Wireless:

Enabled

Disabled
Backup Configurations
TIPP
natural_image
Front view of a black wireless router with two antennas and a control panel (no visible text or symbols)-ODER-
Warning! If you click OK, the device will reset to factory default and all previous settings will be erased.
Please select a file to upgrade the firmware:
Browse...
Start to Upgrade
| Firmware Version: | 1.0.00, build 35, Oct 17, 2012 |
| Firmware Verification: | 56bd32b111ca56fc37202b7be87a5b76 |
| MAC Address: | 00:11:E0:04:2F:85 |
| IP Address: | 10.100.1.1 |
| Subnet Mask: | 255.255.255.0 |
| Default Gateway: |
| Operation Mode: | Access Point |
| MAC Address: | 00:11:E0:04:2F:86 |
| Network Name (SSID): | linksys |
| Network Mode: | 2.4G/5G Mixed |
| Radio Band: | 2.4 GHz |
| Channel: | 1 |
| Channel Width: | Auto (20 MHz or 40 MHz) |
| Security: | Disable |
| SSID Broadcast: | Enable |
natural_image
Black wireless router with two antennas against a blue gradient background (no text or symbols visible on the device body)Οδηγός χρήσης
Linksys WAP300N .....26
natural_image
Black wireless router with two visible antennas (no text or symbols)natural_image
Front view of a black wireless router with two antennas and a control panel (no visible text or symbols)natural_image
Laptop displaying a webpage with images and text (no visible text or symbols on screen)Φορητός υπολογιστής

natural_image
Globe illustration showing continents and oceans, no text or symbols presentΔιαδίκτυο

Μόντεμ

natural_image
Black rectangular electronic device with a small hole on top (no visible text or symbols)Δρομολογητής

natural_image
Black wireless router with two antennas (no visible text or symbols)WAP300N


Tablet

natural_image
Illustration of a mobile phone with wireless signal waves and a smartphone displaying a red card (no text or symbols present)Smartphone
natural_image
Globe illustration showing continents and oceans (no text or labels)Διαδίκτυο

Μόντεμ

natural_image
Black wireless router device with network cable (no visible text or symbols)natural_image
Black wireless router with two antennas and a blue signal icon emitting waves (no text or symbols)WAP300N

natural_image
Illustration of a silver and gray gaming console with a handheld controller (no text or symbols visible)natural_image
Blue-toned globe illustration showing continents and oceans (no text or labels)Διαδίκτυο

Μόντεμ

natural_image
Black electronic device with a silver strap and logo, shown in studio setting (no text or symbols visible)natural_image
Black wireless router with two antennas and two blue signal waves (no text or symbols)WAP300N
natural_image
Digital tablet displaying a grid of app icons with wireless signal waves, no visible text or symbols on the device screen.Tablet
ΣΥΜΒΟΥΛΕΣ
Wireless Media Connector

Wireless Range Extender

Wireless Bridge
| Select | Wireless Network Name | GHz | Signal | Security |
| Cisco06647_24g | 2.4 | 0% | WPA2 Personal | |
| SepiaMaple | 2.4 | 0% | WPA2 Personal | |
| SepiaMaple-guest | 2.4 | 0% | Disabled | |
| E4200v1RS | 2.4 | 29% | WPA2 Personal | |
| Cisco97475 | 2.4 | 0% | Disabled | |
| 160nnnnn | 2.4 | 15% | Disabled | |
| X3500 | 2.4 | 0% | WPA2 Personal |
Configuration View: Manual Wi-Fi Protected Setup™
Wi-Fi Protected Setup ^TM
Use one of the following methods if your router (or access point) supports Wi-Fi Protected Setup:
- If your router has a Wi-Fi Protected Setup button, click or press that button, and then click the button on the right.

OR
- If your router asks for the client device's PIN number, enter this number 02743103 in your router and then click OK
Link Status: Disconnected Network Name (\$SID): Security:
- If your router has a Wi-Fi Protected Setup button, click or press that button, and then click the button on the right.

Local Wi-Fi MAC Address: 00:11:E0:04:2F:86
Remote Wireless Bridges' Wi-Fi MAC Addresses:
Note: When set to "Wireless Bridge" mode, this device will communicate only with another WAP300N in "Wireless Bridge" mode. Wireless settings, including wireless band, channel, channel width, security mode and passphrase/key, are required to be the same on all networked wireless bridges.
Wireless Band:

5 GHz

2.4 GHz
Channel Width:
Auto (20 MHz or 40 MHz)
Channel:
36 - 5.180GHz
Channel Width:
Auto (20 MHz or 40 MHz)
Channel:
1 - 2.412GHz
Note: When set to "Wireless Bridge" mode, wireless settings, including wireless band, channel, channel width, security mode and passphrase/key, are required to be the same on all networked wireless bridges.
Prevent PCs listed below from accessing the wireless network.

Permit PCs listed below to access the wireless network.
Wireless Client List
MAC 01:
MAC 02:
MAC 03:
MAC 04:
MAC 17:
MAC 18:
MAC 19:
MAC 20:
| Interface | MAC Address | Status | Save to MAC Address Filter List |
| None | None | None |
Add
Refresh
Close
Disabled (Default: Enabled)

Enabled

Disabled (Default: Disabled)
Re-enter to confirm:
●●●●●
Access via Wireless:

Enabled

Disabled
Backup Configurations
ΣΥΜΒΟΥΛΗ
natural_image
Top-down view of a black wireless router with two antennas and a control knob (no visible text or symbols)- ^' H-
Warning! If you click OK, the device will reset to factory default and all previous settings will be erased.
Please select a file to upgrade the firmware:
Browse...
Start to Upgrade
| Firmware Version: | 1.0.00, build 35, Oct 17, 2012 |
| Firmware Verification: | 56bd32b111ca56fc37202b7be87a5b76 |
| MAC Address: | 00:11:E0:04:2F:85 |
| IP Address: | 10.100.1.1 |
| Subnet Mask: | 255.255.255.0 |
| Default Gateway: |
| Operation Mode: | Access Point |
| MAC Address: | 00:11:E0:04:2F:86 |
| Network Name (SSID): | linksys |
| Network Mode: | 2.4G/5G Mixed |
| Radio Band: | 2.4 GHz |
| Channel: | 1 |
| Channel Width: | Auto (20 MHz or 40 MHz) |
| Security: | Disable |
| SSID Broadcast: | Enable |
natural_image
Black wireless router with two antennas against a blue gradient background (no text or symbols visible on the device body)User Guide
Contents
Overview
Package contents .....1
Back view 1
Bottom view 2
Setting Up: Basics
How to expand your home network ....3
What is a network? 3
How to expand your home network 3
Where to find more help....3
Operating modes 4
Access Point Mode 4
Wireless Media Connector mode 5
Wireless Range Extender mode 6
Wireless Bridge mode 7
How to install your WAP300N.....8
How to open the browser-based utility .....8
How to use Access Point mode....9
How to select Access Point mode 9
How to use Wi-Fi Protected Setup 9
How to manually set up your WAP300N 10
How to set up wireless security 11
How to use Wireless Media Connector mode....12
How to select Wireless Media Connector mode 12
How to run a wireless network site survey 12
How to use Wi-Fi Protected Setup 13
How to manually set up your WAP300N 14
How to use Wireless Range Extender mode....15
How to select Wireless Range Extender mode 15
How to run a wireless network site survey 16
How to use Wi-Fi Protected Setup 16
How to manually set up your WAP300N 16
How to use Wireless Bridge mode .....16
How to select Wireless Bridge mode 16
How to set up Wireless Bridge Mode 17
How to set up wireless security 18
Setting Up: Advanced
How to set up the MAC filter .....19
How to set up QoS (Quality of Service)....20
How to change the IP address .....20
How to change the password. . . . . . . . . . . . . . . . . . . . . . . . . . . . . . . . . . 21
How to change the idle timeout....21
How to disable wireless admin access .....21
How to change the browser-based utility's language. . . . . . . 21
Maintaining and Monitoring
Troubleshooting....22
How to back up and restore your WAP300N configuration . . . 22
How to reboot your WAP300N .....22
How to restore your WAP300N's factory settings. . . . . . . . . . 23
How to update your WAP300N....23
How to view device and local network information. . . . . . . 24
How to view wireless network information .....24
Specifications
Linksys WAP300N .....26
Environmental 26
Overview

natural_image
Black wireless router with two visible antennas (no text or symbols)Package contents
In addition to your device, the package includes:
• Quick Installation Guide
• Network (Ethernet) cable
- AC power adapter
- Setup CD containing setup software and documentation
• Detachable antennas (2)
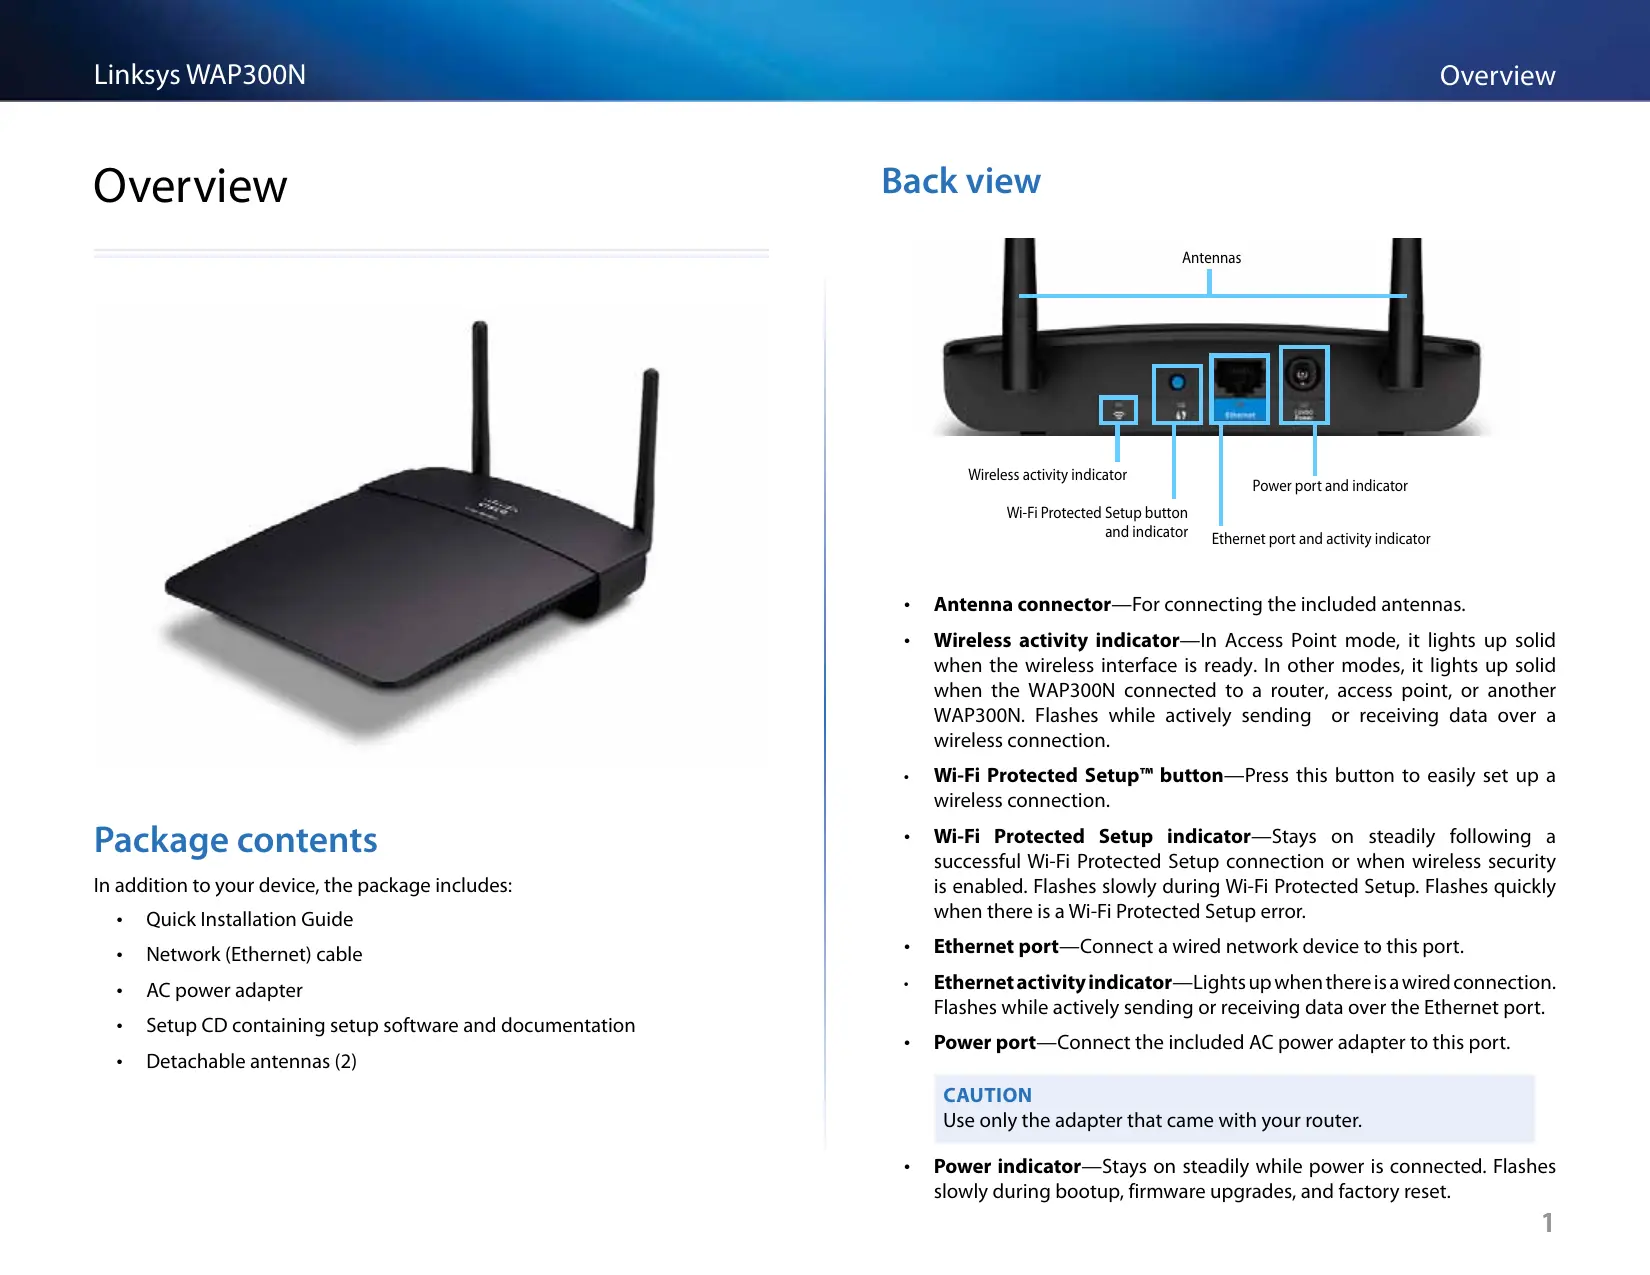
Back view
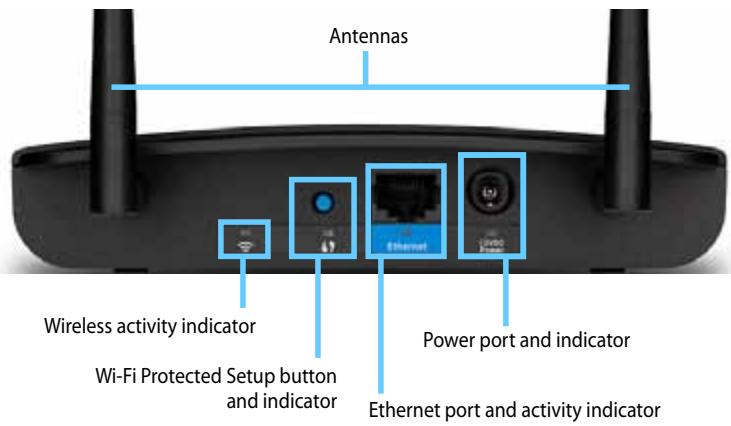
- Antenna connector—For connecting the included antennas.
- Wireless activity indicator—In Access Point mode, it lights up solid when the wireless interface is ready. In other modes, it lights up solid when the WAP300N connected to a router, access point, or another WAP300N. Flashes while actively sending or receiving data over a wireless connection.
- Wi-Fi Protected Setup™ button—Press this button to easily set up a wireless connection.
- Wi-Fi Protected Setup indicator—Stays on steadily following a successful Wi-Fi Protected Setup connection or when wireless security is enabled. Flashes slowly during Wi-Fi Protected Setup. Flashes quickly when there is a Wi-Fi Protected Setup error.
- Ethernet port—Connect a wired network device to this port.
- Ethernet activity indicator—Lights up when there is a wired connection. Flashes while actively sending or receiving data over the Ethernet port.
• Power port—Connect the included AC power adapter to this port.
CAUTION
Use only the adapter that came with your router.
- Power indicator—Stays on steadily while power is connected. Flashes slowly during bootup, firmware upgrades, and factory reset.
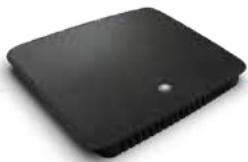
Bottom view
natural_image
Front view of a black wireless router with two antennas and a control panel (no visible text or symbols)- Reset button—Press and hold this button for 5 seconds to reset the device to its factory defaults.
Setting Up: Basics
How to expand your home network
What is a network?
A network is any group of devices that can communicate with each other. A typical home network may include multiple computers, a printer, a modem (for Internet access), and a router. A large home network may also have a switch, additional routers, access points, and many Internet-capable media devices such as TVs, game consoles, and web cameras.
How to expand your home network
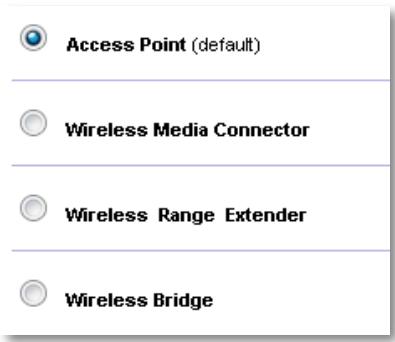
Your WAP300N provides several ways to increase your home network's capabilities and wireless range. You can use it as any of the following:
• Access Point mode (default)
• Wireless Media Connector mode
• Wireless Range Extender mode
- Wireless Bridge mode
Refer to the following pages for more detailed explanations and example diagrams.
Where to find more help
In addition to this User Guide, you can also find help at Linksys.com/support (documentation, downloads, FAQs, technical support, live chat, forums).
Operating modes
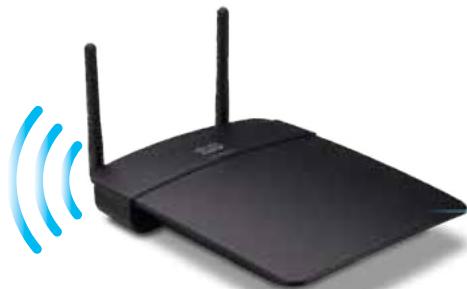
Access Point Mode
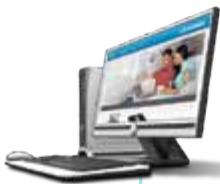
Adds wireless networking to an existing wired (Ethernet) network or upgrades an existing wireless network. For instructions about using this mode, see "How to use Access Point mode" on page 9.
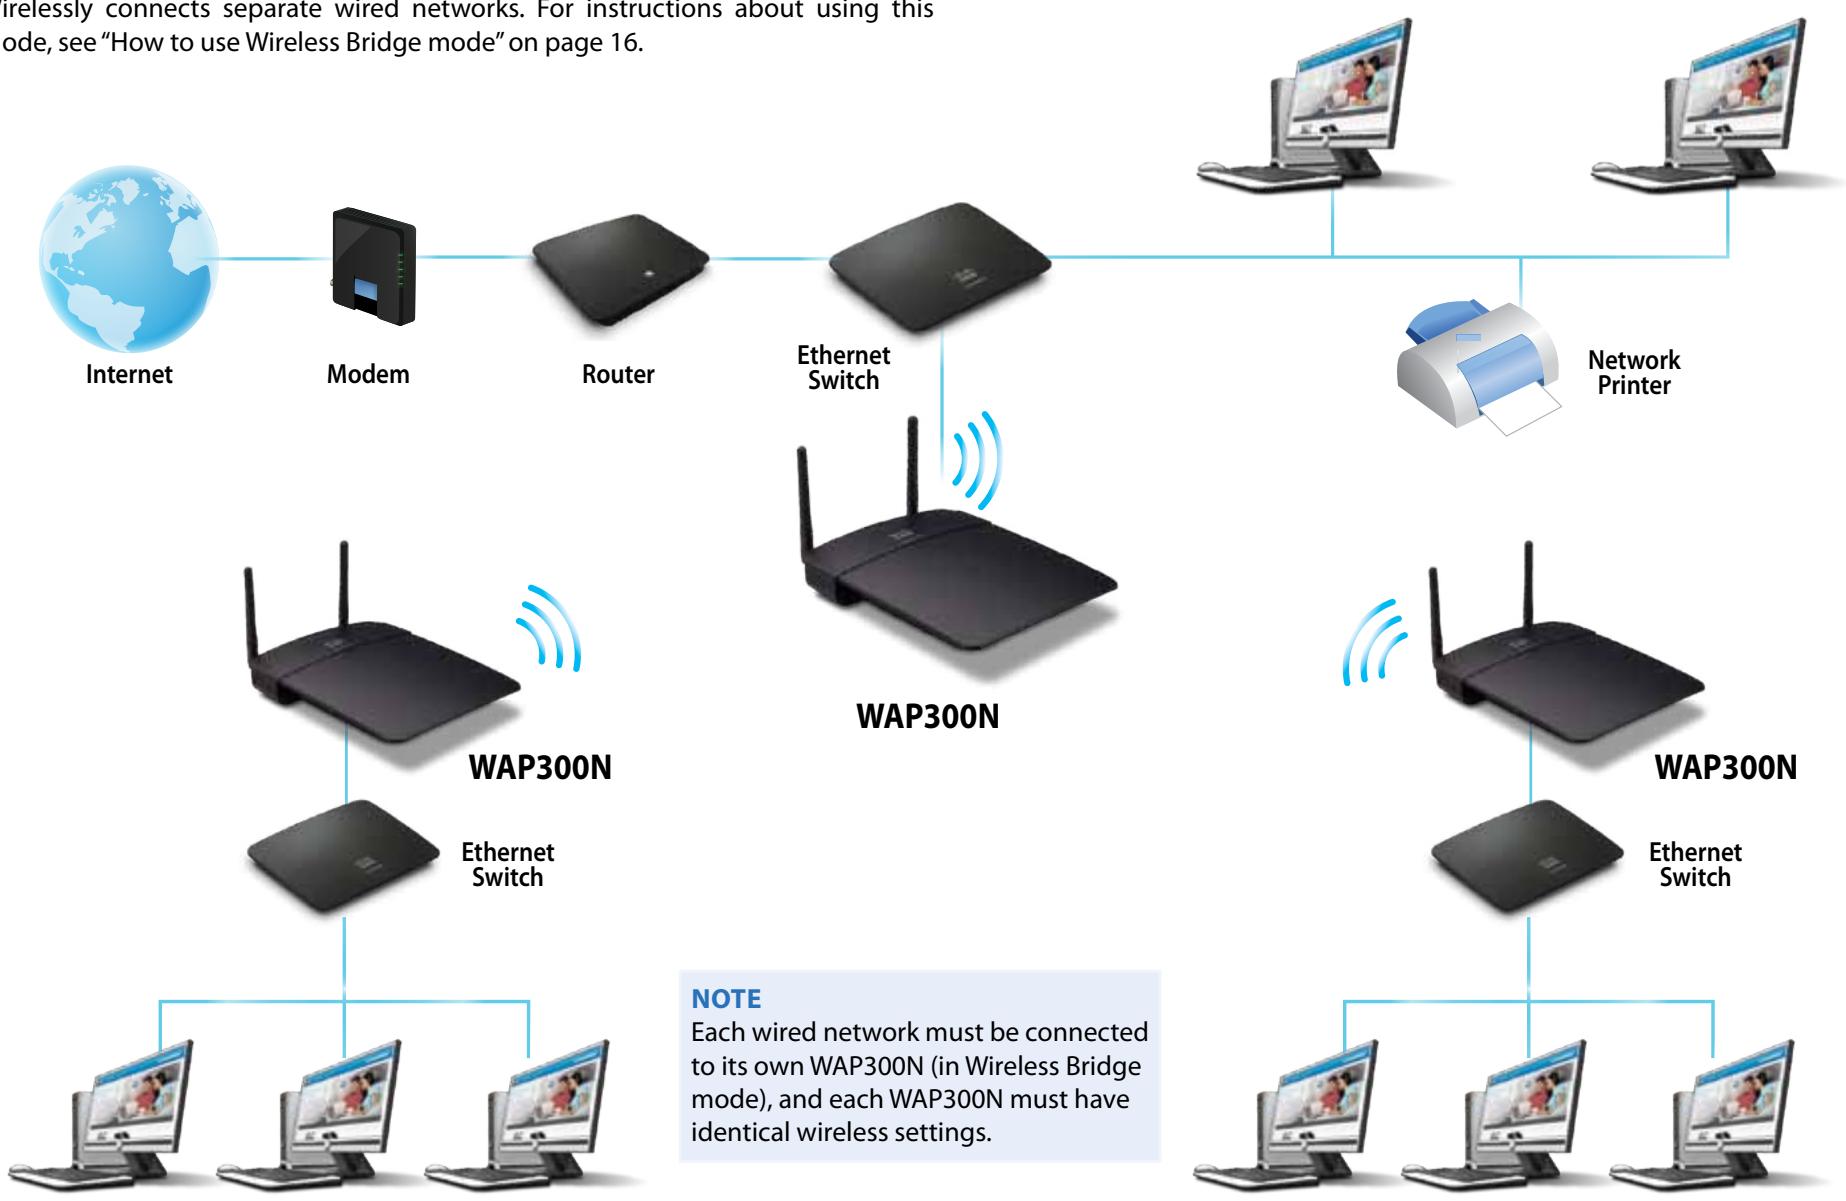
- If you have a wired network, this mode adds the ability to connect wireless devices (such as notebook computers, tablets, and smartphones) to the network.
- If you have an older wireless network, this mode adds Wireless-N (802.11n) networking support.
- If you have a Wireless-N (802.11n) 2.4 GHz-only network, this mode adds support for the 5 GHz band.


natural_image
Globe illustration showing continents and oceans, no text or symbols presentInternet

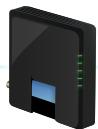
Modem

natural_image
Black rectangular electronic device with a small hole on top (no visible text or symbols)Router

natural_image
Black wireless router with two antennas (no visible text or symbols)WAP300N


Tablet

natural_image
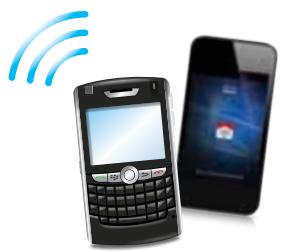
Illustration of a mobile phone with wireless signal waves and a smartphone displaying a red card (no text or symbols present)Smartphone
Wireless Media Connector mode
Adds wireless networking capability to any wired (Ethernet) device. For instructions about using this mode, see "How to use Wireless Media Connector mode" on page 12.
flowchart
graph LR
    A["Internet"] --> B["Modem"]
    B --> C["Wireless Router"]
    C --> D["WAP300N"]
    D --> E["Ethernet-Capable Game Console"]
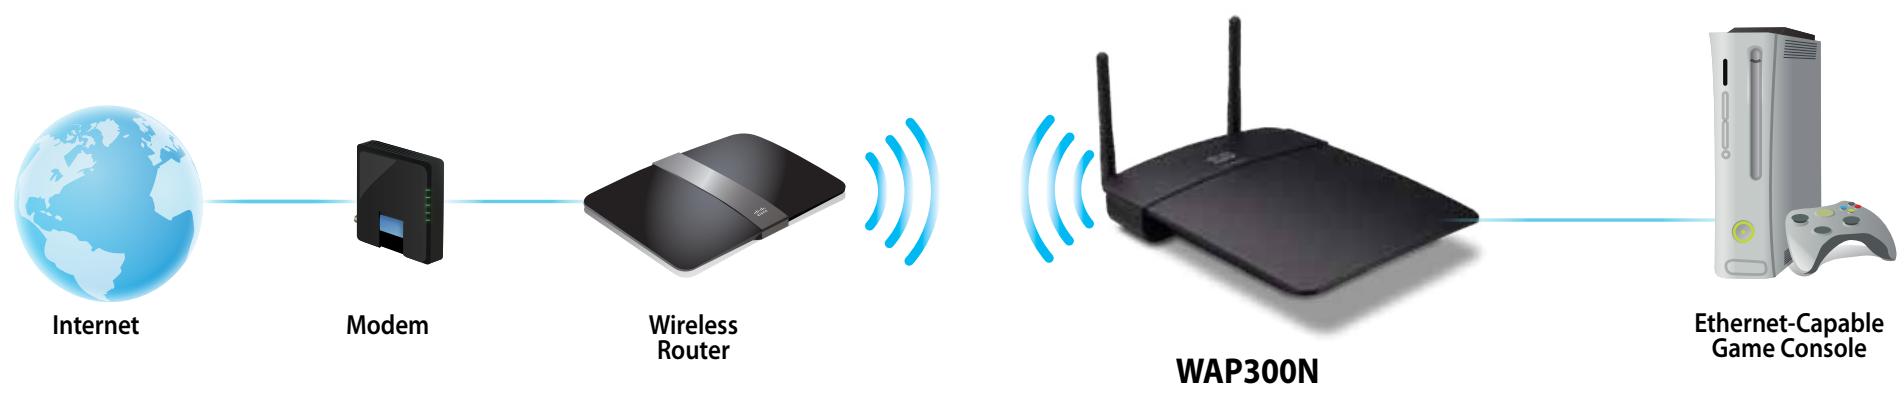
Wireless Range Extender mode
Extends the wireless range of an existing wireless network, and also adds wireless networking capability to any wired (Ethernet) device. For instructions about using this mode, see "How to use Wireless Range Extender mode" on page 15.

natural_image
Blue-toned globe illustration showing continents and oceans (no text or labels)Internet

Modem

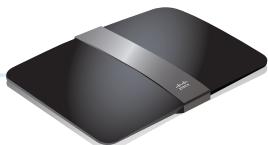
natural_image
Black electronic device with a silver strap and logo, shown in studio setting (no text or symbols visible)Wireless Router

natural_image
Black wireless router with two antennas and two blue signal waves (no text or symbols)WAP300N

Ethernet-Capable Game Console

natural_image
Tablet displaying a grid of app icons with wireless signal waves, no visible text or symbols on the device screen.Tablet
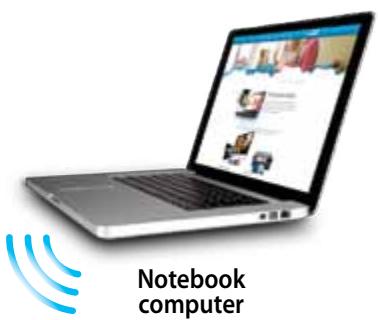
Wireless Bridge mode
Wirelessly connects separate wired networks. For instructions about using this mode, see "How to use Wireless Bridge mode" on page 16.
flowchart
graph TD
    A["Internet"] --> B["Modem"]
    B --> C["Router"]
    C --> D["Ethernet Switch"]
    D --> E["WAP300N"]
    E --> F["Ethernet Switch"]
    F --> G["WAP300N"]
    G --> H["Ethernet Switch"]
    H --> I["Network Printer"]
    I --> J["Internet"]
    style A fill:#f9f,stroke:#333
    style B fill:#ccf,stroke:#333
    style C fill:#cfc,stroke:#333
    style D fill:#fcc,stroke:#333
    style E fill:#cff,stroke:#333
    style F fill:#ffc,stroke:#333
    style G fill:#cfc,stroke:#333
    style H fill:#cfc,stroke:#333
    style I fill:#cfc,stroke:#333
    style J fill:#cfc,stroke:#333
    note bottom of G "NOTE Each wired network must be connected to its own WAP300N (in Wireless Bridge mode), and each WAP300N must have identical wireless settings."
How to install your WAP300N
The easiest way to install your WAP300N is to use the included Setup CD.
NOTE
The Setup CD can only help you set up the WAP300N in Access Point mode. For more information and examples of other modes, see the diagrams on pages 4 to 7.
To install your WAP300N:
- Insert the CD into your CD or DVD drive. Make sure that the computer is already connected to your home network.
- Click Set up your wireless access point.
If you do not see this:
For Windows, find and click Computer, then double-click the CD drive and the Setup icon.
For Mac, double-click the CD icon on your desktop, then double-click the Setup icon.
- Follow the on-screen instructions.
How to open the browser-based utility
For advanced configuration of the WAP300N, you need to open the browser-based utility.
To open the browser-based utility:
- Connect the WAP300N to your network. For example, use the included cable to connect your WAP300N to the Ethernet port on your network router or a networked computer.
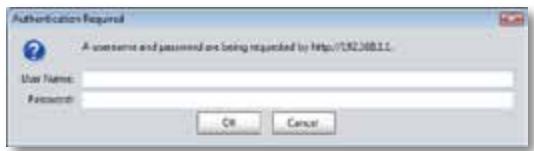
- Open a web browser on a computer connected to your network, then enter the IP address of your WAP300N. You are prompted for a user name and password.
TIPS
- If the WAP300N is connected to a network with a DHCP server (usually the network router), find the device's IP address in the DHCP client table of your router (refer to your router's documentation for help). Use that IP address to open the browser-based utility.
- If there is no DHCP server, or if the WAP300N is not wirelessly connected to any other device and it is connected with an Ethernet cable directly to a computer, then the WAP300N uses 10.100.1.1 as its IP address until a DHCP server is detected.
-
If you set a static IP address for the WAP300N through the browser-based utility, then enter the static IP address instead.
-
Leave the User name field blank, then type the password you created during Setup. If you did not create a new password, use the default password admin.
- Click OK. The main menu opens.
How to use Access Point mode
In addition to the topics below, see the topics "How to set up the MAC filter" on page 19 and "How to set up QoS (Quality of Service)" on page 20.
How to select Access Point mode
To select Access Point mode:
Setup > Operation Mode
- Log into the browser-based utility (see "How to open the browser-based utility" on page 8).
- Click the Setup tab, then click the Operation Mode page.
- Select Access Point (default), then click Save Settings.
How to use Wi-Fi Protected Setup
While in Access Point mode, you can use Wi-Fi Protected Setup ^™ to easily connect wireless network devices to your wireless network.
You can use three methods for Wi-Fi Protected Setup:
- Press the Wi-Fi Protected Setup button on each device
- Enter the client device's Wi-Fi Protected Setup PIN onto the WAP300N
- Enter the WAP300N's Wi-Fi Protected Setup PIN onto the client device.
To manually configure your network, see "How to manually set up your WAP300N" on page 10).
NOTE
Your WAP300N must have Wi-Fi Protected Setup enabled before you can use it to connect network devices. In the browser-based utility, click the Wireless tab, then click the Basic Wireless Settings page and make sure that Wi-Fi Protected Setup is set to Enabled.
How to connect a device using the Wi-Fi Protected Setup button
Use this method if your device has a Wi-Fi Protected Setup button or prompts you to press the Wi-Fi Protected Setup button on your WAP300N.
To connect a device using the Wi-Fi Protected Setup button:
- Press the Wi-Fi Protected Setup button on the network device you are connecting to.
- Within two minutes, press the Wi-Fi Protected Setup button on the back of the WAP300N.
-
OR -
a. Log into the WAP300N's browser-based utility (see "How to open the browser-based utility" on page 8).
b. Click the Wireless tab, then click the Basic Wireless Settings page.
c. For Configuration View, select Wi-Fi Protected Setup™.
d. Click the Wi-Fi Protected Setup button in the Wi-Fi Protected Setup screen. -
If your router has a Wi-Fi Protected Setup button, click or press that button, and then click the button on the right.

How to connect a device using its Wi-Fi Protected Setup PIN
Use this method if your device has a Wi-Fi Protected Setup PIN (Personal Identification Number).
To connect a device using the device's Wi-Fi Protected Setup PIN:
Wireless > Basic Wireless Settings
- Log into the browser-based utility (see "How to open the browser-based utility" on page 8).
- Click the Wireless tab, then click the Basic Wireless Settings page.
- For Configuration View, select Wi-Fi Protected Setup™.
-
Enter the PIN from the device into the PIN field on the WAP300N's Wi-Fi Protected Setup screen, then click Register.
-
If your client device has a Wi-Fi Protected Setup ^TM PIN number, enter that number here and then click Register
The Wi-Fi Protected Setup status, wireless band, network name (SSID), and security mode are displayed at the bottom of the screen.
How to connect a device using the WAP300N's Wi-Fi Protected Setup PIN
Use this method if your client device asks for the WAP300N's PIN (Personal Identification Number).
To connect a device using the WAP300N's Wi-Fi Protected Setup PIN:
Wireless > Basic Wireless Settings
- Log into the browser-based utility (see "How to open the browser-based utility" on page 8).
- Click the Wireless tab, then click the Basic Wireless Settings page.
-
For Configuration View, select Wi-Fi Protected Setup ^™ .
-
On the client device, enter the PIN listed on the WAP300N's Wi-Fi Protected Setup screen. It is also listed on the bottom of the WAP300N. In the example below, the WAP300N's PIN is 32744781.
-
If your client asks for the Router's PIN number, enter this number 32744781 in your client device.
The Wi-Fi Protected Setup status, wireless band, network name (SSID), and security mode are displayed at the bottom of the screen.
How to manually set up your WAP300N
To manually set up your access point:
Wireless > Basic Wireless Settings
- Log into the browser-based utility (see "How to open the browser-based utility" on page 8).
- Click the Wireless tab, then click the Basic Wireless Settings page.
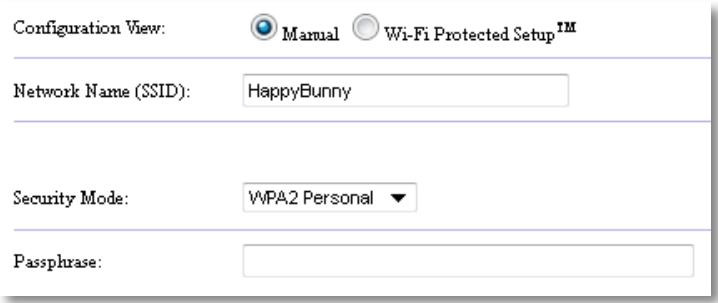
- For Configuration View, select Manual.
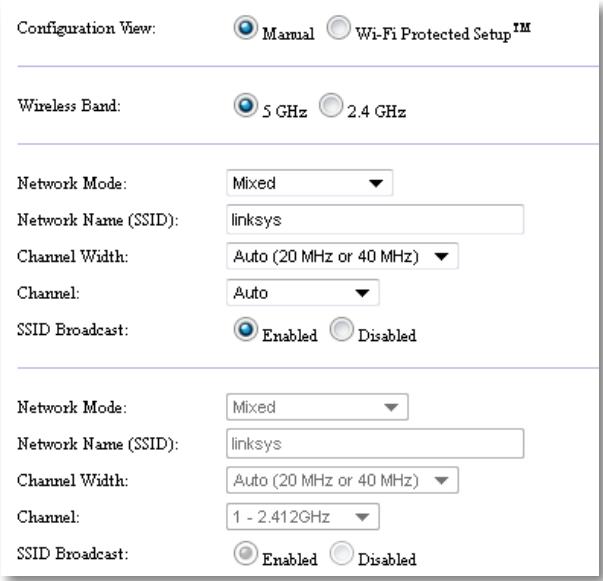
- Configure the following fields:
Wireless Band—Select the 2.4 GHz or 5 GHz radio band. The 5 GHz band is much less crowded than the 2.4 GHz band, so it is more likely to be free from interference. Although the 5 GHz band is ideal for streaming multimedia, not all wireless client devices support the 5 GHz radio band.
Network Mode (5 GHz)—Select your network's wireless standard. If you have both Wireless-N (802.11n) and Wireless-A (802.11a) devices in your network, keep the default setting, Mixed. If you have only Wireless-N devices in your network, select Wireless-N Only. If you have only Wireless-A devices in your network, select Wireless-A Only.
Network Mode (2.4 GHz)—Select your network's wireless standard. If you have Wireless-N (802.11n), Wireless-G (802.11g), and Wireless-B (802.11b) devices in your network, keep the default, Mixed. If you have only Wireless-N devices, select Wireless-N Only. If you have only Wireless-G and Wireless-B devices in your network, select Wireless-B/G Only. If you have only Wireless-G devices, select Wireless-G Only. If you have only Wireless-B devices, select Wireless-B Only.
Network Name (SSID)—The SSID is the name of your wireless network. This network name is shared among all the wireless devices connected to your wireless network. The SSID is case-sensitive.
Channel Width—For best performance in a Wireless-N network, select 40 MHz only (available only in the 5 GHz radio band) or Auto. In Auto mode, the WAP300N and the network client devices automatically switch to the 40 MHz mode if:
- Your wireless client devices support the 40 MHz mode in which two 20 MHz channels are bonded together for better performance.
and
• There is no adjacent interference.
Channel—Select the operating channel for your wireless network. Your WAP300N will automatically select the channel with the least amount of interference if you leave the default Auto setting. We recommend keeping the default (Auto).
SSID Broadcast—Select Enabled (default) to allow wireless client devices to "see" the wireless network name. If you do not want to broadcast the WAP300N's SSID, select Disabled. We recommend keeping the default setting (Enabled).
- Click Save Settings.
How to set up wireless security
To set up wireless security for your WAP300N in Access Point mode:
Wireless > Wireless Security
- Log into the browser-based utility (see "How to open the browser-based utility" on page 8).
- Click the Wireless tab, then click the Wireless Security page and select the Security Mode. (We recommend WPA2 Personal for most home networks.)
Depending on the security mode you selected, you may be asked to enter additional information (see the following table).
| Security mode | Information Required | Description |
| WPA2/WPA Mixed Mode, WPA2 Personal, WPA Personal | Passphrase | Enter the passphrase of 8-63 characters. |
| WPA2/WPA Enterprise Mixed Mode, WPA2 Enterprise, WPA Enterprise | RADIUS Server | Enter the IP address of the RADIUS server. |
| RADIUS Port | Enter the port number of the RADIUS server. The default is 1812. | |
| Shared Key | Enter the key shared between the router and the server. | |
| WEP | Encryption | Select a level of WEP encryption, 40/64-bit (10 hex digits) or 104/128-bit (26 hex digits). |
| Key 1 | Enter the WEP key of your network. Key 1 is the transmit key used by this device. | |
| RADIUS | RADIUS Server | Enter the IP address of the RADIUS server. |
| RADIUS Port | Enter the port number of the RADIUS server. The default is 1812. | |
| Shared Key | Enter the key shared between the router and the server. | |
| Encryption | Select a level of WEP encryption, 40/64-bit (10 hex digits) or 104/128-bit (26 hex digits). | |
| Key 2 | Enter the WEP key of your network. Key 2 is the transmit key used by this device. |
- After you have entered all required information, click Save Settings.
How to use Wireless Media Connector mode
In addition to the topics below, see the topic "How to set up QoS (Quality of Service)" on page 20.
How to select Wireless Media Connector mode
To select Wireless Media Connector mode:
Setup > Operation Mode
- Log into the browser-based utility (see "How to open the browser-based utility" on page 8).
- Click the Setup tab, then click the Operation Mode page.
3. Select Wireless Media Connector, then click Save Settings.
Access Point (default)
Wireless Media Connector
Wireless Range Extender
Wireless Bridge
We recommend using wireless network site survey to set up your WAP300N in Wireless Media Connector mode. Wireless network site survey identifies wireless networks with in the range of your WAP300N, so that you can easily select one of them to connect to. For instructions, see How to run a wireless network site survey below.
How to run a wireless network site survey
We recommend using wireless network site survey to set up your WAP300N in Wireless Media Connector mode. Wireless network site survey identifies wireless networks within range of your WAP300N, so that you can easily select one of them to connect to.
To run a wireless network site survey:
- Log into the browser-based utility (see "How to open the browser-based utility" on page 8).
- Click the Wireless tab, then click the Wireless Network Site Survey page. The site survey runs and displays the following information:
| Select | Wireless Network Name | GHz | Signal | Security |
| Cisco06647_24g | 2.4 | 0% | WPA2 Personal | |
| SepiaMaple | 2.4 | 0% | WPA2 Personal | |
| SepiaMaple-guest | 2.4 | 0% | Disabled | |
| E4200v1RS | 2.4 | 29% | WPA2 Personal | |
| Cisco97475 | 2.4 | 0% | Disabled | |
| 160nnnnn | 2.4 | 15% | Disabled | |
| X3500 | 2.4 | 0% | WPA2 Personal |
Number of Wireless Networks—The number of wireless networks that were detected.
Wireless Network Name—The network name (SSID) of each discovered wireless network.
Signal—The percentage of signal strength.
Security—The security method used by each wireless network. If the network supports Wi-Fi Protected Setup, the Wi-Fi Protected Setup icon appears next to the security method.
Refresh—Updates the on-screen information.
- To connect to a wireless network, select the network, then click Connect.
A screen opens that shows you the network name (SSID) and security mode of the selected wireless network. Depending on the security mode of the network, you may be asked to enter additional information (see the following table).
| Security mode | Information Required | Description |
| WPA/WPA2 Personal | Passphrase | Enter the passphrase shared by this device and your wireless router (or access point). |
| WEP | Encryption | Select a level of WEP encryption, 40 / 64-bit (10 hex digits) or 104 / 128-bit (26 hex digits). |
| Key 1 | Enter the WEP key of your network. Key 1 is the transmit key used by this device. | |
| Authentication | The default is Auto, which allows either open system or shared key authentication to be used. Select Open to use open system authentication (a WEP key is not used for authentication). Select Shared to use shared key authentication (a WEP key is used for authentication). |
- After you have entered all required information, click Connect to connect to the network.
How to use Wi-Fi Protected Setup
If your wireless router or access point supports Wi-Fi Protected Setup, you can use it to easily connect your WAP300N to your wireless router or access point.
You can use two methods for Wi-Fi Protected Setup:
- Press the Wi-Fi Protected Setup button on each device
- Enter the WAP300N's Wi-Fi Protected Setup PIN onto the router or access point.
To manually configure your network, see "How to manually set up your WAP300N" on page 14).
How to connect to a router or access point using the Wi-Fi Protected Setup button
Use this method to connect your WAP300N to a router or access point by pressing buttons on the two devices.
To connect to your router or access point using the Wi-Fi Protected Setup button:
- Press the Wi-Fi Protected Setup button on the back of the router or access point.
- Within two minutes, press the Wi-Fi Protected Setup button on the back of the WAP300N.
- OR -
a. Log into the WAP300N's browser-based utility (see "How to open the browser-based utility" on page 8).
b. Click the Wireless tab, then click the Basic Wireless Settings page.
c. For Configuration View, select Wi-Fi Protected Setup™.
d. Click the Wi-Fi Protected Setup button in the Wi-Fi Protected Setup screen.
- If your router has a Wi-Fi Protected Setup button, click or press that button, and then click the button on the right.

How to connect to a router or access point using the WAP300N's Wi-Fi Protected Setup PIN
Use this method if your router or access point asks for the WAP300N's PIN (Personal Identification Number).
To connect a device using the WAP300N's Wi-Fi Protected Setup PIN:
Wireless > Basic Wireless Settings
- Log into the browser-based utility (see "How to open the browser-based utility" on page 8).
- Click the Wireless tab, then click the Basic Wireless Settings page.
- For Configuration View, select Wi-Fi Protected Setup™.
-
On the router or access point's browser-based utility, enter the PIN listed on the WAP300N's Wi-Fi Protected Setup screen. It is also listed on the bottom of the WAP300N. In the example below, the WAP300N's PIN is 02743103.
-
If your router asks for the client device's PIN number, enter this number 02743103 in your router and then click OK
The Wi-Fi Protected Setup status, wireless band, network name (SSID), and security mode are displayed at the bottom of the screen.
- Click OK on the WAP300N's Wi-Fi Protected Setup screen.
How to manually set up your WAP300N
You can follow these instructions to connect your WAP300N to your router, or you can use Wireless Network Site Survey to connect. For more information about site survey, see "How to run a wireless network site survey" on page 12.
To manually set up your WAP300N in wireless media connector mode:
Wireless > Basic Wireless Settings
- Log into the browser-based utility (see "How to open the browser-based utility" on page 8).
- Click the Wireless tab, then click the Basic Wireless Settings page.
- For Configuration View, select Manual.
- Configure the following fields:
Network Name (SSID)—The SSID is the name of your wireless network. This network name is shared among all the wireless devices connected to your wireless network, so the SSID you enter here must match the router's SSID exactly (the SSID is case-sensitive).
Security Mode—Select the security mode that matches the security setting on your router or access point. If the setting here does not match the setting on your router or access point, it will not be able to connect.
Depending on the security mode you select, you may be asked to enter additional information. Refer to the following table.
| Security mode | Information Required | Description |
| WPA/WPA2 Personal | Passphrase | Enter the passphrase shared by this device and your wireless router (or access point). |
| WEP | Encryption | Select a level of WEP encryption, 40 / 64-bit (10 hex digits) or 104 / 128-bit (26 hex digits). |
| Key 1 | Enter the WEP key of your network. Key 1 is the transmit key used by this device. | |
| Authentication | The default is Auto, which allows either open system or shared key authentication to be used. Select Open to use open system authentication (a WEP key is not used for authentication). Select Shared to use shared key authentication (a WEP key is used for authentication). |
- Click Save Settings.
How to use Wireless Range Extender mode
How to select Wireless Range Extender mode
To select Wireless Range Extender mode:
Setup > Operation Mode
- Log into the browser-based utility (see "How to open the browser-based utility" on page 8).
- Click the Setup tab, then click the Operation Mode page.
- Select Wireless Range Extender, then click Save Settings.

Access Point (default)

Wireless Media Connector

Wireless Range Extender

Wireless Bridge
How to run a wireless network site survey
We recommend using wireless network site survey to set up your WAP300N in Wireless Range Extender mode. For instructions on using wireless network site survey to connect your WAP300N to a wireless router, see "How to run a wireless network site survey" on page 12).
How to use Wi-Fi Protected Setup
While in Range Extender mode, you can use Wi-Fi Protected Setup ^™ to easily connect your WAP300N to your wireless router and wireless client devices. The way you use Wi-Fi Protected Setup for your WAP300N varies, depending on whether your WAP300N has already connected to the router.
If your WAP300N has not yet connected to a router:
- To connect your WAP300N to a wireless router, follow the instructions in "How to use Wi-Fi Protected Setup" on page 13.
If your WAP300N has already connected to a router:
- To connect your WAP300N to a wireless client device, follow the instructions in "How to use Wi-Fi Protected Setup" on page 9.
How to manually set up your WAP300N
You can manually set up your WAP300N's connection to a wireless router, or you can change its existing connection to a wireless router.
If your WAP300N has not yet connected to a router:
- Follow the instructions in "How to manually set up your WAP300N" on page 14).
If your WAP300N has already connected to a router:
- Refer to "How to manually set up your WAP300N" on page 14) for information on the menu's fields.
- To connect to a different router, change the field values, then click Save Settings.
How to use Wireless Bridge mode
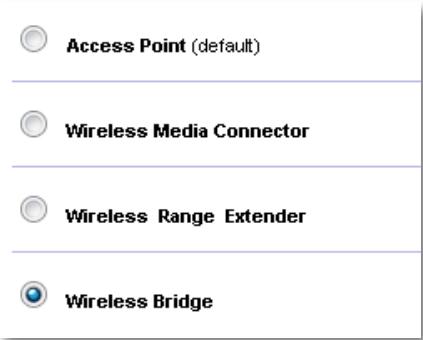
How to select Wireless Bridge mode
To select Wireless Bridge mode:
Setup > Operation Mode
- Log into the browser-based utility (see "How to open the browser-based utility" on page 8).
- Click the Setup tab, then click the Operation Mode page.
- Select Wireless Bridge, then click Save Settings.
How to set up Wireless Bridge Mode
To set up Wireless Bridge mode:
Wireless > Basic Wireless Settings
- Log into the browser-based utility (see "How to open the browser-based utility" on page 8).
- Click the Wireless tab, then click the Basic Wireless Settings page.
Local Wi-Fi MAC Address: 00:11:E0:04:2F:86
Remote Wireless Bridges' Wi-Fi MAC Addresses:
Note: When set to "Wireless Bridge" mode, this device will communicate only with another WAP300N in "Wireless Bridge" mode. Wireless settings, including wireless band, channel, channel width, security mode and passphrase/key, are required to be the same on all networked wireless bridges.
Wireless Band:

5 GHz

2.4 GHz
Channel Width:
Auto (20 MHz or 40 MHz)
Channel:
36 - 5.180GHz

Channel Width:
Auto (20 MHz or 40 MHz)
Channel:
1 - 2.412GHz

Local Wi-Fi MAC Address—The Wi-Fi MAC address of this device.
Remote Wireless Bridges' Wi-Fi MAC Addresses—Enter the Wi-Fi MAC addresses of other WAP300N wireless bridges that you want this WAP300N to connect to.
Wireless Band—Select the 2.4 GHz or 5 GHz radio band. The 5 GHz band is less crowded than the 2.4 GHz band, so that band is more likely to be free from interference.
Channel Width—For best performance in a Wireless-N network, select 40 MHz only (available only in the 5 GHz radio band) or Auto. In Auto mode, this device and other WAP300N devices connected to this one automatically switch to the 40 MHz mode if there is no interference.
Channel—Choose the operating channel for your wireless network.
CAUTION
While in Wireless Bridge mode, this device can communicate with other WAP300N devices only if they are also in Wireless Bridge mode and the wireless settings are all identical.
Example 1
You want to connect two wired networks together using Two WAP300N devices. One WAP300N will need to be on each network. We will call one (A) and the other (B). To make this work:
- Enter (A)'s Local Wi-Fi MAC Address into (B)'s Remote Wireless Bridges' Wi-Fi MAC Addresses field.
- Enter (B)'s Local Wi-Fi MAC Address into (A)'s Remote Wireless Bridges' Wi-Fi MAC Addresses field.
Example 2
You want to connect three wired networks together using three WAP300N devices. One WAP300N will need to be on each network. In this example, they will be called (A), (B), and (C). To make this work:
- Enter (A)'s and (C)'s Local Wi-Fi MAC Addresses into (B)'s Remote Wireless Bridges' Wi-Fi MAC Addresses field.
- Enter (B)'s Local Wi-Fi MAC Address into (A)'s Remote Wireless Bridges' Wi-Fi MAC Addresses field.
- Enter (B)'s Local Wi-Fi MAC Address into (C)'s Remote Wireless Bridges' Wi-Fi MAC Addresses field.
This establishes a wireless connection between (A) and (B) and another connection between (B) and (C). This approach links all three wired networks together.
CAUTION
Do not create a loop in your network. In the above example, a loop would be adding an (A)-to-(C) wireless connection, while you already had an (A)-to-(B) and (B)-to-(C) wireless connection.
How to set up wireless security
CAUTION
While in Wireless Bridge mode, this device can communicate with other WAP300N devices only if they are also in Wireless Bridge mode and the wireless settings are all identical.
To set up wireless security for your WAP300N in Wireless Bridge mode:
Wireless > Wireless Security
- Log into the browser-based utility (see "How to open the browser-based utility" on page 8).
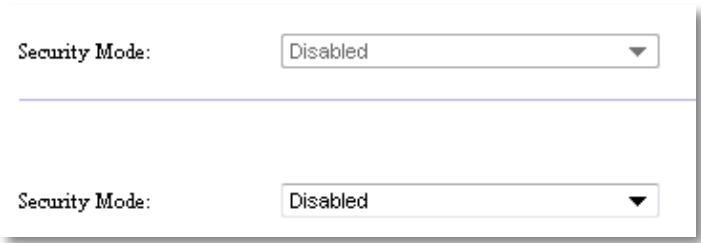
- Click the Wireless tab, then click the Wireless Security page and select the Security Mode. (WPA2 Personal is recommended for most home networks.)
Security Mode:
Disabled
Note: When set to "Wireless Bridge" mode, wireless settings, including wireless band, channel, channel width, security mode and passphrase/key, are required to be the same on all networked wireless bridges.
Depending on the security mode you selected, you may be asked to enter additional information (see the following table).
| Security mode | Information Required | Description |
| WPA2 Personal, WPA Personal | Passphrase | Enter the passphrase of 8-63 characters. |
| WEP | Encryption | Select a level of WEP encryption, 40/64-bit (10 hex digits) or 104/128-bit (26 hex digits). |
| Key 1 | Enter the WEP key of your network. Key 1 is the transmit key used by this device. |
- After you have entered all required information, click Save Settings.
Setting Up: Advanced
How to set up the MAC filter
For: Access Point mode only
When your WAP300N is in Access Point mode, you can filter access to your wireless network by specifying Wi-Fi MAC addresses of the wireless devices within range of your network.
To set up the MAC filter:
Wireless > Wireless MAC Filter
- Log into the browser-based utility (see "How to open the browser-based utility" on page 8).
- Click the Wireless tab, then click the Wireless MAC Filter page.

Enabled

Disabled

Prevent PCs listed below from accessing the wireless network.

Permit PCs listed below to access the wireless network.
Wireless Client List
MAC 01:
MAC 02:
MAC 03:
MAC 04:
MAC 17:
MAC 18:
MAC 19:
MAC 20:
- Configure the following settings:
Wireless MAC Filter—To filter wireless devices by MAC address, select Enabled. If you do not want to filter by MAC address, keep the default setting, Disabled.
Access Restriction—To block wireless access by MAC address, select Prevent. To allow wireless access by MAC address, select Permit.
MAC 01-32—Enter the Wi-Fi MAC addresses of the devices you want to block or allow.
- Optional: Click Wireless Client List to open the Wireless Client List screen. This screen shows computers and other devices on the wireless network. The list can be sorted by MAC Address or by Status.
MAC Address
| Interface | MAC Address | Status | Save to MAC Address Filter List |
| None | None | None |
Add
Refresh
Close
-
To add a device to the list, select Save to MAC Address Filter List, then click Add.
• To retrieve the latest network information, click Refresh.
• To return to the Wireless MAC Filter screen, click Close. -
Click Save Settings to apply your changes.
How to set up QoS (Quality of Service)
For: Access Point and Wireless Media Connector modes only
To set up QoS:
Wireless > QoS
- Log into the browser-based utility (see "How to open the browser-based utility" on page 8).
- Click the Wireless tab, then click the QoS page.
WMM Support
No Acknowledgement

Enabled

Disabled (Default: Enabled)

Enabled

Disabled (Default: Disabled)
- Configure the following settings:
WMM Support—Wi-Fi Multimedia (WMM) is a wireless QoS feature that improves quality for audio, video, and voice applications by prioritizing wireless traffic. To use WMM, the other wireless devices connected to the WAP300N must also support WMM.
No Acknowledgement—If you do not want the WAP300N to re-send data each time an error occurs, select Enabled. Otherwise, keep the default, Disabled.
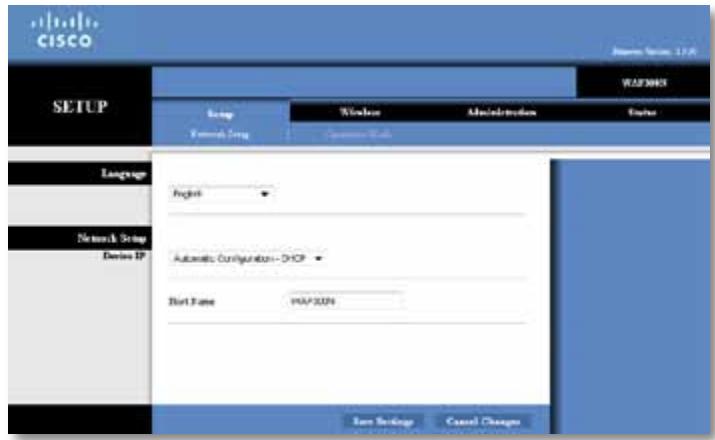
How to change the IP address
You can choose whether the WAP300N gets its IP address automatically (using the DHCP server) or manually (static IP) by setting it in the browser-based utility.
NOTES
- For most home networks, we recommend leaving this setting at Automatic Configuration - DHCP.
- If there is no DHCP server, or if the WAP300N is not wirelessly connected to any other device and it is connected with an Ethernet cable directly to a computer, then the WAP300N uses 10.100.1.1 as its IP address until a DHCP server is detected and a new IP address is assigned.
To set your WAP300N's IP address:
- Log into the browser-based utility (see "How to open the browser-based utility" on page 8).
- For Device IP, select Static IP, then complete the following fields:
- IP Address—Enter a unique IP address that will be used to access the browser-based utility.
- Subnet Mask—Enter the subnet mask of your network.
- Default Gateway—Enter the IP address of the default gateway for your network (in most cases, this is your router).
- Click Save Settings to apply your changes.
How to change the password
You can change the WAP300N's password to limit access to the browser-based utility.
To change the password:
- Log into the browser-based utility (see "How to open the browser-based utility" on page 8).
- Click the Administration tab, then click the Management page.
- Enter the new password in the Device Password field, then enter it again in the Re-enter to confirm field.
Device Password:

Re-enter to confirm:

- Click Save Settings.
How to change the idle timeout
You are automatically logged out of the browser-based utility after a period of inactivity. You can set the length of the inactive period.
To change the idle timeout:
- Log into the browser-based utility (see "How to open the browser-based utility" on page 8).
- Click the Administration tab, then click the Management page.
- Enter the new timeout period in the Idle Timeout field. You can enter a range of 60 to 3,600 seconds.
Idle Timeout:
600
(60-3600 seconds)
- Click Save Settings to apply your changes.
How to disable wireless admin access
For additional security, you can disable the ability to wirelessly log into the browser-based utility. With wireless access disabled, to run the browser-based utility you must use a wired connection.
To disable wireless admin access:
- Log into the browser-based utility (see "How to open the browser-based utility" on page 8).
- Click the Administration tab, then click the Management page.
- For Access via Wireless, select Disabled, then click Save Settings.
Access via Wireless:

Enabled

Disabled
How to change the browser-based utility's language
To change the browser-based utility's language:
Setup > Basic Setup
- Log into the browser-based utility (see "How to open the browser-based utility" on page 8). The Basic Setup page opens.
- For Language, select the language, then click Save Settings.
English

Maintaining and Monitoring
Troubleshooting
If you forgot your device password or static IP address
If you have forgotten your WAP300N admin password, or if you have set a static IP address but have forgotten it, you can reset the device to its factory default settings. To restore your WAP300N to its factory settings, see "How to restore your WAP300N's factory settings" on page 23.
How to back up and restore your WAP300N configuration
As with any valuable data, you should back up your WAP300N configuration, because it might contain many customized settings. Those settings would be lost if you reset your WAP300N to its factory defaults, and you would need to re-enter all of them manually. If you back up your device configuration, restoring settings is easy.
To back up your WAP300N configuration:
- Log into the browser-based utility (see "How to open the browser-based utility" on page 8).
- Click the Administration tab, then click the Management page.
- Click Back Up Configurations, then follow the on-screen instructions to save the file.
Backup:
Backup Configurations
TIP
To save multiple backup files, include the backup date in the filename as you save.
To restore your WAP300N configuration:
- Log into the browser-based utility (see "How to open the browser-based utility" on page 8).
- Click the Administration tab, then click the Management page.
- Click Browse and select the configuration file, then click Open.
- Click Restore Configurations, then follow the on-screen instructions.

How to reboot your WAP300N
After changing network settings, or as a troubleshooting step, it is sometimes necessary to reboot (restart) your WAP300N.
To reboot your WAP300N:
- Log into the browser-based utility (see "How to open the browser-based utility" on page 8).
- Click the Administration tab, then click the Management page.
- Click Start to Reboot.
Reboot:
Start to Reboot
-OR-
- Disconnect the power cable for ten seconds, then reconnect the cable.
How to restore your WAP300N's factory settings
If custom settings on your WAP300N are not working correctly, or if you have forgotten the access password or static IP address, you may need to restore your WAP300N to its factory settings.
CAUTION
Any settings you have saved previously will be lost when the factory default settings are restored.
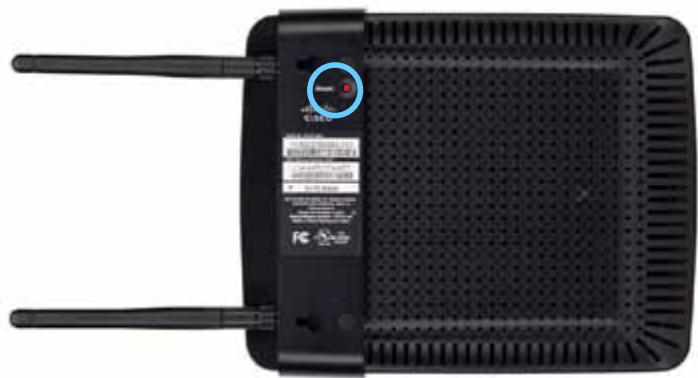
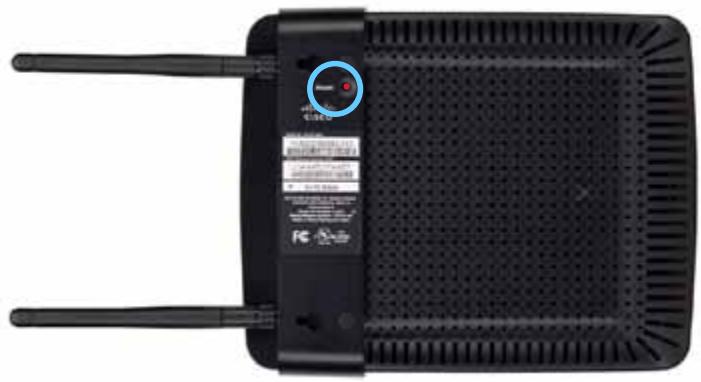
To restore your WAP300N's factory settings:
- While the device is still connected to power, use a stiff wire (such as a straightened paper clip) to press the Reset button on the bottom for about five seconds.
natural_image
Top-down view of a black wireless router with two antennas and a red indicator light (no visible text or symbols)-OR-
- Log into the browser-based utility (see "How to open the browser-based utility" on page 8).
- Click the Administration tab, then click the Factory Defaults page.
- Click Restore Factory Defaults.
A warning appears asking you to confirm.
Warning! If you click OK, the device will reset to factory default and all previous settings will be erased.
- Click OK. Your device is reset to factory defaults.
How to update your WAP300N
Linksys may periodically publish a firmware upgrade either to fix a problem or to add features to your WAP300N.
IMPORTANT
Do not interrupt the upgrade process. You should not turn off the device or press the Reset button during the upgrade. Doing so may permanently disable the device.
To upgrade the device's firmware:
- Open a web browser and go to www.linksys.com/support.
- Download the device's latest firmware update file. Take note of the location where the file was saved to.
- Log into the browser-based utility (see "How to open the browser-based utility" on page 8).
- Click the Administration tab, then click the Firmware Upgrade page.
- Click Browse, select the firmware upgrade file you saved previously, then click Open.

- Click Start to Upgrade, then follow the on-screen instructions.
How to view device and local network information
To view device and local network information:
- Log into the browser-based utility (see "How to open the browser-based utility" on page 8).
- Click the Status tab, then click the Device Info & Local Network page. Device and network information appears.
| Firmware Version: | 1.0.00, build 35, Oct 17, 2012 |
| Firmware Verification: | 56bd32b111ca56fc37202b7be87a5b76 |
| MAC Address: | 00:11:E0:04:2F:8S |
| IP Address: | 10.100.1.1 |
| Subnet Mask: | 255.255.255.0 |
| Default Gateway: |
Firmware Version—The device's current firmware version.
Firmware Verification—Used by technical support to verify the firmware.
MAC Address—The device's Ethernet port MAC address.
IP Address—The device's IP address, as seen on your local network.
Subnet Mask—The subnet mask configured for your local network.
Default Gateway—The default gateway configured for your local network.
How to view wireless network information
To view wireless network information:
- Log into the browser-based utility (see "How to open the browser-based utility" on page 8).
- Click the Status tab, then click the Wireless Network page. Wireless network information appears. Available information depends on the current operating mode, although the list below shows all possible fields.
| Operation Mode: | Access Point |
| MAC Address: | 00:11:E0:04:2F:86 |
| Network Name (SSID): | linksys |
| Network Mode: | 2.4G/5G Mixed |
| Radio Band: | 2.4 GHz |
| Channel: | 1 |
| Channel Width: | Auto (20 MHz or 40 MHz) |
| Security: | Disable |
| SSID Broadcast: | Enable |
Operation Mode—The current operation mode of the device.
MAC Address—The MAC address of the device's wireless (Wi-Fi) interface.
Link Status—The status of the wireless connection.
Network Name (SSID)—The name of your wireless network.
Network Mode—Your wireless network's network mode.
Channel Width—Your wireless network's channel width (in MHz).
Radio Band—Your wireless network's radio band (in GHz).
Channel—Your wireless network's channel setting.
Security—Your wireless network's security mode.
Bit Rate—The data transmission rate.
Signal—The percentage of signal strength is displayed.
SSID Broadcast—SSID broadcast status (enabled or disabled).
Specifications
Linksys WAP300N
| Model | WAP300N |
| Description | Linksys Wireless-N Access Point |
| Ethernet Port Speed | 10/100 Mbps (Fast Ethernet) |
| Radio Frequency | 2.4 or 5 GHz |
| Number of Antennas | 2 |
| Antenna Type | External dipole antenna with R-SMA connector |
| Detachable | Yes |
| Ports | Power, Ethernet |
| Buttons | Reset, Wi-Fi Protected SetupTM, Power (European model only) |
| LEDs | Power, Wi-Fi Protected Setup, Ethernet, Wireless |
| Wireless Security Features | WEP, Wi-Fi Protected AccessTM (WPA), Wi-Fi Protected AccessTM 2 (WPA2), Wireless MAC Filtering |
| Security Key Bits | Up to 128-bit encryption |
Environmental
| Dimensions | 188.7 × 151.7 × 31.2 mm (7.43" × 5.97" × 1.23") without external antennas |
| Unit Weight | 207.0 g (7.3 oz), without external antennas229.6 g (8.1 oz), with external antennas |
| Power | 12V, 0.5A |
| Certifications | FCC, UL/cUL, ICES-003, RSS210, CE, Wi-Fi (IEEE 802.11a/b/g/n), WPA2TM, WMM®,Wi-Fi Protected SetupTM |
| Operating Temperature | 0 to 40°C (32 to 104°F) |
| Storage Temperature | -20 to 60°C (-4 to 140°F) |
| Operating Humidity | 10 to 80% non-condensing |
| Storage Humidity | 5 to 90% non-condensing |
NOTES
For regulatory, warranty, and safety information, see the CD that came with your device or go to Linksys.com/support.
Specifications are subject to change without notice.
Maximum performance derived from IEEE Standard 802.11 specifications. Actual performance can vary, including lower wireless network capacity, data throughput rate, range and coverage. Performance depends on many factors, conditions and variables, including distance from the access point, volume of network traffic, building materials and construction, operating system used, mix of wireless products used, interference and other adverse conditions.
Visit linksys.com/support for award-winning 24/7 technical support

Cisco, the Cisco logo, and Linksys are trademarks or registered trademarks of Cisco and/or its affiliates in the United States and other countries. A listing of Cisco's trademarks can be found at www.cisco.com/go/trademarks. All other trademarks mentioned in this document are the property of their respective owners.

natural_image
Black wireless router with two antennas against a blue gradient background (no text or symbols visible on the device body)Guía del usuario
Contenido
Descripción general
Linksys WAP300N .....26
natural_image
Black wireless router with two visible antennas (no text or symbols)natural_image
Front view of a black wireless router with two antennas and a control panel (no visible text or symbols)natural_image
Globe illustration showing continents and oceans, no text or symbols presentInternet

Módem
natural_image
Black rectangular electronic device with a small hole on top (no visible text or symbols)Router

natural_image
Black wireless router with two antennas (no visible text or symbols)WAP300N


Tablet

natural_image
Illustration of a mobile phone with wireless signal waves and a smartphone displaying a red card (no text or symbols)Smartphone
natural_image
Blue-toned globe illustration showing continents and oceans (no text or labels)Internet

Módem

natural_image
Black electronic device with a silver strap and logo, shown in studio setting (no visible text or symbols)Router inalámbrico
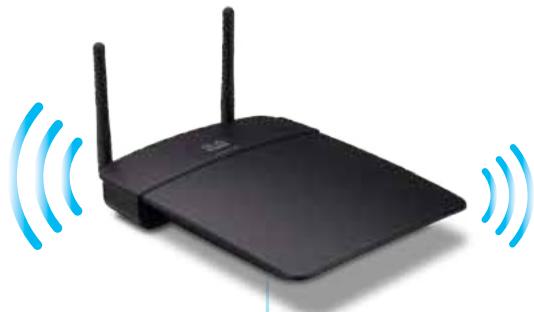
natural_image
Black wireless router with two antennas and two wireless waves (no text or symbols)WAP300N
natural_image
Tablet displaying a grid of six modules with wireless signal waves, no visible text or symbols on the devices.Tablet
CONSEJOS
- If your router has a Wi-Fi Protected Setup button, click or press that button, and then click the button on the right.

Access Point (default)
Wireless Media Connector
Wireless Range Extender
Wireless Bridge
| Select | Wireless Network Name | GHz | Signal | Security |
| Cisco06647_24g | 2.4 | 0% | WPA2 Personal | |
| SepiaMaple | 2.4 | 0% | WPA2 Personal | |
| SepiaMaple-guest | 2.4 | 0% | Disabled | |
| E4200v1RS | 2.4 | 29% | WPA2 Personal | |
| Cisco97475 | 2.4 | 0% | Disabled | |
| 160nnnnn | 2.4 | 15% | Disabled | |
| X3500 | 2.4 | 0% | WPA2 Personal |
Configuration View: Manual Wi-Fi Protected Setup™
Wi-Fi Protected Setup ^TM
Use one of the following methods if your router (or access point) supports Wi-Fi Protected Setup:
- If your router has a Wi-Fi Protected Setup button, click or press that button, and then click the button on the right.

OR
- If your router asks for the client device's PIN number, enter this number 02743103 in your router and then click OK
Link Status: Disconnected Network Name (\$SID): Security:
- If your router has a Wi-Fi Protected Setup button, click or press that button, and then click the button on the right.

Local Wi-Fi MAC Address: 00:11:E0:04:2F:86
Remote Wireless Bridges' Wi-Fi MAC Addresses:
Note: When set to "Wireless Bridge" mode, this device will communicate only with another WAP300N in "Wireless Bridge" mode. Wireless settings, including wireless band, channel, channel width, security mode and passphrase/key, are required to be the same on all networked wireless bridges.
Wireless Band:

5 GHz

2.4 GHz
Channel Width:
Auto (20 MHz or 40 MHz) ▼
Channel:
36 - 5.180GHz ▼
Channel Width:
Auto (20 MHz or 40 MHz) ▼
Channel:
1 - 2.412GHz ▼
Note: When set to "Wireless Bridge" mode, wireless settings, including wireless band, channel, channel width, security mode and passphrase/key, are required to be the same on all networked wireless bridges.
Prevent PCs listed below from accessing the wireless network.

Permit PCs listed below to access the wireless network.
Wireless Client List
MAC 01:
MAC 02:
MAC 03:
MAC 04:
MAC 17:
MAC 18:
MAC 19:
MAC 20:
| Interface | MAC Address | Status | Save to MAC Address Filter List |
| None | None | None |
Add
Refresh
Close
Disabled (Default: Enabled)

Enabled

Disabled (Default: Disabled)
Re-enter to confirm:
●●●●●
Access via Wireless:

Enabled

Disabled
Backup Configurations
SUGERENCIA
natural_image
Front view of a black wireless router with two antennas and a red indicator light on the top (no visible text or symbols)-0-
Warning! If you click OK, the device will reset to factory default and all previous settings will be erased.
Please select a file to upgrade the firmware:

| Firmware Version: | 1.0.00, build 35, Oct 17, 2012 |
| Firmware Verification: | 56bd32b111ca56fc37202b7be87a5b76 |
| MAC Address: | 00:11:E0:04:2F:85 |
| IP Address: | 10.100.1.1 |
| Subnet Mask: | 255.255.255.0 |
| Default Gateway: |
| Operation Mode: | Access Point |
| MAC Address: | 00:11:E0:04:2F:86 |
| Network Name (SSID): | linksys |
| Network Mode: | 2.4G/5G Mixed |
| Radio Band: | 2.4 GHz |
| Channel: | 1 |
| Channel Width: | Auto (20 MHz or 40 MHz) |
| Security: | Disable |
| SSID Broadcast: | Enable |
natural_image
Black wireless router with two antennas against a blue gradient background (no text or symbols visible on the device body)Guía del usuario
Contenido
General
Linksys WAP300N .....26
natural_image
Black wireless router with two visible antennas (no text or symbols)natural_image
Front view of a black wireless router with two antennas and a control panel (no visible text or symbols)natural_image
Laptop displaying a webpage with images and text (no visible text or symbols on screen)natural_image
Globe illustration showing continents and oceans, no text or symbols presentInternet

Módem

natural_image
Black rectangular electronic device with a small hole on top (no visible text or symbols)Router

natural_image
Black wireless router with two antennas (no visible text or symbols)WAP300N


Tableta

natural_image
Illustration of a mobile phone with wireless signal waves and a smartphone displaying a red card (no text or symbols present)natural_image
Blue gradient globe illustration showing continents and oceans (no text or symbols)Internet
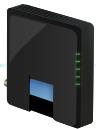
Módem

natural_image
Black electronic device with a white cable strap and brand logo (no visible text or symbols)Router inalámbrico


natural_image
Black wireless router with two antennas and a blue signal icon emitting waves (no text or symbols)WAP300N

natural_image
Illustration of a classic Xbox console with a cylindrical tower and a handheld controller (no text or symbols)natural_image
Blue-toned globe illustration showing continents and oceans (no text or labels)Internet

Módem

natural_image
Black electronic device with a silver strap and logo, no visible text or symbolsRouter inalámbrico

natural_image
Black wireless router with two antennas and two blue signal waves (no text or symbols)WAP300N
natural_image
Tablet displaying a grid of six modules with blue signal waves above, no visible text or symbols on the devices.Tableta
CONSEJOS
Wireless Media Connector

Wireless Range Extender

Wireless Bridge
Cómo utilizar Wi-Fi Protected Setup
Access Point (default)
Wireless Media Connector
Wireless Range Extender
Wireless Bridge
| Select | Wireless Network Name | GHz | Signal | Security |
| Cisco06647_24g | 2.4 | 0% | WPA2 Personal | |
| SepiaMaple | 2.4 | 0% | WPA2 Personal | |
| SepiaMaple-guest | 2.4 | 0% | Disabled | |
| E4200v1RS | 2.4 | 29% | WPA2 Personal | |
| Cisco97475 | 2.4 | 0% | Disabled | |
| 160nnnnn | 2.4 | 15% | Disabled | |
| X3500 | 2.4 | 0% | WPA2 Personal |
Configuration View: Manual Wi-Fi Protected Setup™
Wi-Fi Protected Setup ^TM
Use one of the following methods if your router (or access point) supports Wi-Fi Protected Setup:
- If your router has a Wi-Fi Protected Setup button, click or press that button, and then click the button on the right.

OR
- If your router asks for the client device's PIN number, enter this number 02743103 in your router and then click OK
Link Status: Disconnected Network Name (\$SID): Security:
- If your router has a Wi-Fi Protected Setup button, click or press that button, and then click the button on the right.

Local Wi-Fi MAC Address: 00:11:E0:04:2F:86
Remote Wireless Bridges' Wi-Fi MAC Addresses:
Note: When set to "Wireless Bridge" mode, this device will communicate only with another WAP300N in "Wireless Bridge" mode. Wireless settings, including wireless band, channel, channel width, security mode and passphrase/key, are required to be the same on all networked wireless bridges.
Wireless Band:

5 GHz

2.4 GHz
Channel Width:
Auto (20 MHz or 40 MHz)
Channel:
36 - 5.180GHz
Channel Width:
Auto (20 MHz or 40 MHz)
Channel:
1 - 2.412GHz
Note: When set to "Wireless Bridge" mode, wireless settings, including wireless band, channel, channel width, security mode and passphrase/key, are required to be the same on all networked wireless bridges.
Prevent PCs listed below from accessing the wireless network.

Permit PCs listed below to access the wireless network.
Wireless Client List
MAC 01:
MAC 02:
MAC 03:
MAC 04:
MAC 17:
MAC 18:
MAC 19:
MAC 20:
| Interface | MAC Address | Status | Save to MAC Address Filter List |
| None | None | None |
Add
Refresh
Close
Disabled (Default: Enabled)

Enabled

Disabled (Default: Disabled)
Re-enter to confirm:
●●●●●
Access via Wireless:

Enabled

Disabled
Backup Configurations
CONSEJO
natural_image
Front view of a black wireless router with two antennas and a control panel (no visible text or symbols)O
Warning! If you click OK, the device will reset to factory default and all previous settings will be erased.
Please select a file to upgrade the firmware:
Browse...
Start to Upgrade
| Firmware Version: | 1.0.00, build 35, Oct 17, 2012 |
| Firmware Verification: | 56bd32b111ca56fc37202b7be87a5b76 |
| MAC Address: | 00:11:E0:04:2F:85 |
| IP Address: | 10.100.1.1 |
| Subnet Mask: | 255.255.255.0 |
| Default Gateway: |
| Operation Mode: | Access Point |
| MAC Address: | 00:11:E0:04:2F:86 |
| Network Name (SSID): | linksys |
| Network Mode: | 2.4G/5G Mixed |
| Radio Band: | 2.4 GHz |
| Channel: | 1 |
| Channel Width: | Auto (20 MHz or 40 MHz) |
| Security: | Disable |
| SSID Broadcast: | Enable |
natural_image
Black wireless router with two antennas against a blue gradient background (no text or symbols visible on the device body)Käyttöopas
Sisällysluettelo
Yleiskatsaus
Pakkauksen sisältö. . . . . . . . . . . . . . . . . . . . . . . . . . . . . . . . . . . . . . . . . . . . . . . . . . . . . . 1
Kuva takaa....1
Kuva alhaalta ....2
natural_image
Black wireless router with two visible antennas (no text or symbols)Pakkauksen sisältö
natural_image
Front view of a black wireless router with two antennas and a control panel (no visible text or symbols)natural_image
Laptop displaying a webpage with abstract icons on its screen (no readable text or symbols)natural_image
Globe illustration showing continents with no text or symbolsInternet

Modeemi

natural_image
Black rectangular electronic device with a small hole on top (no visible text or symbols)Retitin

natural_image
Black wireless router with two antennas (no visible text or symbols)WAP300N


Tablet-laite

natural_image
Illustration of a mobile phone with wireless signal icon and smartphone displaying app (no text or symbols)Älypuhelin
Langaton medialiitin -tila
natural_image
Blue gradient globe illustration showing continents and oceans (no text or symbols)Internet

Modeemi
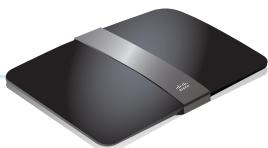
natural_image
Black wireless router device with network cable (no visible text or symbols)Langaton retitin


natural_image
Black wireless router with two antennas and a blue signal icon emitting waves (no text or symbols)WAP300N

natural_image
Illustration of a silver and gray gaming console with a handheld controller (no text or symbols visible)natural_image
Blue-toned globe illustration showing continents and oceans (no text or labels)Internet

Modeemi

natural_image
Black electronic device with a silver strap and logo, no visible text or symbolsLangaton retitin

natural_image
Black wireless router with two antennas and two blue signal waves (no text or symbols)WAP300N
natural_image
Tablet displaying a grid of six icons with Wi-Fi signal waves, no text or symbols presentTablet-laite
VIHJEITÄ
Wireless Media Connector

Wireless Range Extender

Wireless Bridge
| Select | Wireless Network Name | GHz | Signal | Security |
| Cisco06647_24g | 2.4 | 0% | WPA2 Personal | |
| SepiaMaple | 2.4 | 0% | WPA2 Personal | |
| SepiaMaple-guest | 2.4 | 0% | Disabled | |
| E4200v1RS | 2.4 | 29% | WPA2 Personal | |
| Cisco97475 | 2.4 | 0% | Disabled | |
| 160nnnnn | 2.4 | 15% | Disabled | |
| X3500 | 2.4 | 0% | WPA2 Personal |
- If your router has a Wi-Fi Protected Setup button, click or press that button, and then click the button on the right.

Local Wi-Fi MAC Address: 00:11:E0:04:2F:86
Remote Wireless Bridges' Wi-Fi MAC Addresses:
Note: When set to "Wireless Bridge" mode, this device will communicate only with another WAP300N in "Wireless Bridge" mode. Wireless settings, including wireless band, channel, channel width, security mode and passphrase/key, are required to be the same on all networked wireless bridges.
Wireless Band:

5 GHz

.4 GHz
Channel Width:
Auto (20 MHz or 40 MHz)
Channel:
36 - 5.180GHz

Channel Width:
Auto (20 MHz or 40 MHz)

Channel:
1 - 2.412GHz

Note: When set to "Wireless Bridge" mode, wireless settings, including wireless band, channel, channel width, security mode and passphrase/key, are required to be the same on all networked wireless bridges.
Prevent PCs listed below from accessing the wireless network.

Permit PCs listed below to access the wireless network.
Wireless Client List
MAC 01:
MAC 02:
MAC 03:
MAC 04:
MAC 17:
MAC 18:
MAC 19:
MAC 20:
| Interface | MAC Address | Status | Save to MAC Address Filter List |
| None | None | None |
Add
Refresh
Close
Disabled (Default: Enabled)

Enabled

Disabled (Default: Disabled)
Re-enter to confirm:
......
Access via Wireless:

Enabled

Disabled
Backup Configurations
VIHJE
natural_image
Front view of a black wireless router with two antennas and a control panel (no visible text or symbols)-TAI-
Warning! If you click OK, the device will reset to factory default and all previous settings will be erased.
| Firmware Version: | 1.0.00, build 35, Oct 17, 2012 |
| Firmware Verification: | S6bd32b111caS6fc37202b7be87aSb76 |
| MAC Address: | 00:11:E0:04:2F:85 |
| IP Address: | 10.100.1.1 |
| Subnet Mask: | 255.255.255.0 |
| Default Gateway: |
| Operation Mode: | Access Point |
| MAC Address: | 00:11:E0:04:2F:86 |
| Network Name (SSID): | linksys |
| Network Mode: | 2.4G/5G Mixed |
| Radio Band: | 2.4 GHz |
| Channel: | 1 |
| Channel Width: | Auto (20 MHz or 40 MHz) |
| Security: | Disable |
| SSID Broadcast: | Enable |
natural_image
Black wireless router with two antennas against a blue gradient background (no text or symbols visible on the device body)Linksys WAP300N .....26
natural_image
Black wireless router with two visible antennas (no text or symbols)natural_image
Front view of a black wireless router with two antennas and a control panel (no visible text or symbols)natural_image
Globe illustration showing continents with no text or symbolsInternet

Modem

natural_image
Black rectangular electronic device with a small hole on top (no visible text or symbols)Routeur

natural_image
Black wireless router with two antennas (no visible text or symbols)WAP300N


Tablette

natural_image
Illustration of a mobile phone with wireless signal waves and a smartphone displaying a red card (no text or symbols present)Smartphone
natural_image
Blue gradient globe illustration showing continents and oceans (no text or symbols)Internet

Modem

natural_image
Black wireless router device with network cable (no visible text or symbols)Routeur sans fil


natural_image
Black wireless router with two antennas and a blue signal icon emitting waves (no text or symbols)WAP300N

natural_image
Illustration of a silver and gray gaming console with a handheld controller (no text or symbols visible)natural_image
Blue-toned globe illustration showing continents and oceans (no text or labels)Internet

Modem

natural_image
Black electronic device with a silver strap and logo, no visible text or symbolsRouteur sans fil

natural_image
Black wireless router with two antennas and two wireless waves (no text or symbols)WAP300N
natural_image
Tablet displaying a grid of six icons with Wi-Fi signal waves, no visible text or symbols on the device screen.Tablette
Mode Pont sans fil
ASTUCES
Wireless Media Connector

Wireless Range Extender

Wireless Bridge
| Select | Wireless Network Name | GHz | Signal | Security |
| Cisco06647_24g | 2.4 | 0% | WPA2 Personal | |
| SepiaMaple | 2.4 | 0% | WPA2 Personal | |
| SepiaMaple-guest | 2.4 | 0% | Disabled | |
| E4200v1RS | 2.4 | 29% | WPA2 Personal | |
| Cisco97475 | 2.4 | 0% | Disabled | |
| 160nnnnn | 2.4 | 15% | Disabled | |
| X3500 | 2.4 | 0% | WPA2 Personal |
Use one of the following methods if your router (or access point) supports Wi-Fi Protected Setup:
- If your router has a Wi-Fi Protected Setup button, click or press that button, and then click the button on the right.

OR
- If your router asks for the client device's PIN number, enter this number 02743103 in your router and then click OK
Link Status:
Disconnected
Network Name (SSID):
Security:
- If your router has a Wi-Fi Protected Setup button, click or press that button, and then click the button on the right.

Comment configurer le mode Pont sans fil
Local Wi-Fi MAC Address: 00:11:E0:04:2F:86
Remote Wireless Bridges' Wi-Fi MAC Addresses:
Note: When set to "Wireless Bridge" mode, this device will communicate only with another WAP300N in "Wireless Bridge" mode. Wireless settings, including wireless band, channel, channel width, security mode and passphrase/key, are required to be the same on all networked wireless bridges.
Wireless Band:

5 GHz

4 GHz
Channel Width:
Auto (20 MHz or 40 MHz)
Channel:
36 - 5.180GHz

Channel Width:
Auto (20 MHz or 40 MHz)

Channel:
1 - 2.412GHz

Note: When set to "Wireless Bridge" mode, wireless settings, including wireless band, channel, channel width, security mode and passphrase/key, are required to be the same on all networked wireless bridges.
Prevent PCs listed below from accessing the wireless network.

Permit PCs listed below to access the wireless network.
Wireless Client List
MAC 01:
MAC 02:
MAC 03:
MAC 04:
MAC 17:
MAC 18:
MAC 19:
MAC 20:
| Interface | MAC Address | Status | Save to MAC Address Filter List |
| None | None | None |
Add
Refresh
Close
Disabled (Default: Enabled)

Enabled

Disabled (Default: Disabled)
Re-enter to confirm:

Access via Wireless:

Enabled

Disabled
Backup Configurations
ASTUCE
natural_image
Front view of a black wireless router with two antennas and a control panel (no visible text or symbols)OU
Warning! If you click OK, the device will reset to factory default and all previous settings will be erased.
Please select a file to upgrade the firmware:

| Firmware Version: | 1.0.00, build 35, Oct 17, 2012 |
| Firmware Verification: | 56bd32b111ca56fc37202b7be87a5b76 |
| MAC Address: | 00:11:E0:04:2F:85 |
| IP Address: | 10.100.1.1 |
| Subnet Mask: | 255.255.255.0 |
| Default Gateway: |
| Operation Mode: | Access Point |
| MAC Address: | 00:11:E0:04:2F:86 |
| Network Name (SSID): | linksys |
| Network Mode: | 2.4G/5G Mixed |
| Radio Band: | 2.4 GHz |
| Channel: | 1 |
| Channel Width: | Auto (20 MHz or 40 MHz) |
| Security: | Disable |
| SSID Broadcast: | Enable |
natural_image
Black wireless router with two antennas against a blue gradient background (no visible text or symbols)Linksys WAP300N .....26
natural_image
Black wireless router with two visible antennas (no text or symbols)natural_image
Front view of a black wireless router with two antennas and a control panel (no visible text or symbols)natural_image
Globe illustration showing continents and oceans, no text or symbols presentInternet

Modem

natural_image
Black rectangular electronic device with a small hole on top (no visible text or symbols)Routeur

natural_image
Black wireless router with two antennas (no visible text or symbols)WAP300N


Tablette

natural_image
Illustration of a mobile phone with wireless signal waves and a smartphone displaying a red card (no text or symbols present)Téléphone intelligent
natural_image
Blue-toned globe illustration showing continents and oceans (no text or labels)Internet

Modem

natural_image
Black electronic device with a silver strap and logo, no visible text or symbolsRouteur sans fil

natural_image
Black wireless router with two antennas and two wireless waves (no text or symbols)WAP300N
natural_image
Tablet displaying a grid of six modules with wireless signal waves, no visible text or symbols on the devices.Tablette
Mode Pont sans fil
CONSEILS
Comment utiliser la norme Wi-Fi Protected Setup (WPS)
Access Point (default)
Wireless Media Connector
Wireless Range Extender
Wireless Bridge
| Select | Wireless Network Name | GHz | Signal | Security |
| Cisco06647_24g | 2.4 | 0% | WPA2 Personal | |
| SepiaMaple | 2.4 | 0% | WPA2 Personal | |
| SepiaMaple-guest | 2.4 | 0% | Disabled | |
| E4200v1RS | 2.4 | 29% | WPA2 Personal | |
| Cisco97475 | 2.4 | 0% | Disabled | |
| 160nnnnn | 2.4 | 15% | Disabled | |
| X3500 | 2.4 | 0% | WPA2 Personal |
Configuration View: Manual Wi-Fi Protected Setup™
Wi-Fi Protected Setup ^TM
Use one of the following methods if your router (or access point) supports Wi-Fi Protected Setup:
- If your router has a Wi-Fi Protected Setup button, click or press that button, and then click the button on the right.

OR
- If your router asks for the client device's PIN number, enter this number 02743103 in your router and then click OK
Link Status: Disconnected Network Name (\$SID): Security:
- If your router has a Wi-Fi Protected Setup button, click or press that button, and then click the button on the right.

Local Wi-Fi MAC Address: 00:11:E0:04:2F:86
Remote Wireless Bridges' Wi-Fi MAC Addresses:
Note: When set to "Wireless Bridge" mode, this device will communicate only with another WAP300N in "Wireless Bridge" mode. Wireless settings, including wireless band, channel, channel width, security mode and passphrase/key, are required to be the same on all networked wireless bridges.
Wireless Band:

5 GHz

2.4 GHz
Channel Width:
Auto (20 MHz or 40 MHz)
Channel:
36 - 5.180GHz

Channel Width:
Auto (20 MHz or 40 MHz)

Channel:
1 - 2.412GHz

Local Wi-Fi MAC Address (Adresse MAC Wi-Fi locale) — Adresse MAC Wi-Fi de ce périphérique.
Note: When set to "Wireless Bridge" mode, wireless settings, including wireless band, channel, channel width, security mode and passphrase/key, are required to be the same on all networked wireless bridges.
Prevent PCs listed below from accessing the wireless network.

Permit PCs listed below to access the wireless network.
Wireless Client List
MAC 01:
MAC 02:
MAC 03:
MAC 04:
MAC 17:
MAC 18:
MAC 19:
MAC 20:
| Interface | MAC Address | Status | Save to MAC Address Filter List |
| None | None | None |
Add
Refresh
Close
Disabled (Default: Enabled)

Enabled

Disabled (Default: Disabled)
Re-enter to confirm:

Access via Wireless:

Enabled

Disabled
Backup Configurations
CONSEIL
natural_image
Top-down view of a black wireless router with two antennas and a red indicator light (no visible text or symbols)-OU-
Warning! If you click OK, the device will reset to factory default and all previous settings will be erased.
Please select a file to upgrade the firmware:

| Firmware Version: | 1.0.00, build 35, Oct 17, 2012 |
| Firmware Verification: | 56bd32b111ca56fc37202b7be87a5b76 |
| MAC Address: | 00:11:E0:04:2F:85 |
| IP Address: | 10.100.1.1 |
| Subnet Mask: | 255.255.255.0 |
| Default Gateway: |
| Operation Mode: | Access Point |
| MAC Address: | 00:11:E0:04:2F:86 |
| Network Name (SSID): | linksys |
| Network Mode: | 2.4G/5G Mixed |
| Radio Band: | 2.4 GHz |
| Channel: | 1 |
| Channel Width: | Auto (20 MHz or 40 MHz) |
| Security: | Disable |
| SSID Broadcast: | Enable |
natural_image
Black wireless router with two antennas against a blue gradient background (no visible text or symbols)Panduan Pengguna
Daftar lsi
Gambaran Umum
lsi paket ....1
Tampak belakang ....1
Tampak bawah....2
Menyetel: Dasar
Cara memperluas jaringan rumah Anda . . . . . . . . . . . . . . . . . . . 3
Mode pengoperasian....4
Mode Titik Akses 4
Mode Konektor Media Nirkabel 5
Mode Penambah Jangkauan Nirkabel 6
Mode Jembatan Nirkabel 7
Cara menginstal WAP300N Anda . . . . . . . . . . . . . . . . . . . . . . . . . . . . . . . . . . . . . . . . . . . . 8
Cara membuka utilitas berbasis browser. . . . . . . . . . . . . . . . . . . . . . . . . . . . . . . . . . . . . . . . . . . . . 8
Cara menggunakan mode Titik Akses. . . . . . . . . . . . . . . . . . . . . . . . . . . . . . . . . . . . . . . . . 9
Linksys WAP300N .....26
Lingkungan 26
Gambaran Umum

natural_image
Black wireless router with two external antennas (no visible text or symbols)Isi paket
natural_image
Front view of a black wireless router with two antennas and a control panel (no visible text or symbols)natural_image
Laptop displaying a webpage with images and text (no visible text or symbols on screen)
Komputer
Notebook

natural_image
Globe illustration showing continents and oceans, no text or symbols presentInternet

Modem

natural_image
Black rectangular electronic device with a small hole on top (no visible text or symbols)Router

natural_image
Black wireless router with two antennas (no visible text or symbols)WAP300N


Tablet

natural_image
Illustration of a mobile phone with wireless signal waves and a smartphone displaying a red card (no text or symbols present)Ponsel Cerdas
Mode Konektor Media Nirkabel
natural_image
Blue gradient globe illustration showing continents and oceans (no text or symbols)Internet

Modem

natural_image
Black wireless router device with network cable (no visible text or symbols)Router Nirkabel

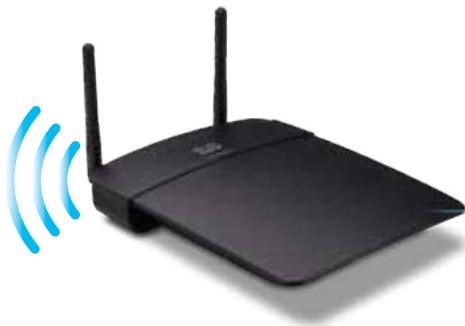
natural_image
Black wireless router with two antennas and a blue signal icon emitting waves (no text or symbols)WAP300N

natural_image
Illustration of a classic Xbox console with a vertical tower and a handheld controller (no text or symbols)Konsol Game Berkemampuan Ethernet
Mode Penambah Jangkauan Nirkabel
natural_image
Blue-toned globe illustration showing continents and oceans (no text or labels)Internet

Modem

natural_image
Black electronic device with a silver strap and logo, no visible text or symbolsRouter Nirkabel

natural_image
Black wireless router with two antennas and two blue signal waves (no text or symbols)WAP300N

Konsol Game Berkemampuan Ethernet


natural_image
Digital tablet displaying a grid of app icons with wireless signal waves, no visible text or symbols on the device screen.Tablet
Mode Jembatan Nirkabel
TIP
Wireless Media Connector

Wireless Range Extender

Wireless Bridge
| Select | Wireless Network Name | GHz | Signal | Security |
| Cisco06647_24g | 2.4 | 0% | WPA2 Personal | |
| SepiaMaple | 2.4 | 0% | WPA2 Personal | |
| SepiaMaple-guest | 2.4 | 0% | Disabled | |
| E4200v1RS | 2.4 | 29% | WPA2 Personal | |
| Cisco97475 | 2.4 | 0% | Disabled | |
| 160nnnnn | 2.4 | 15% | Disabled | |
| X3500 | 2.4 | 0% | WPA2 Personal |
Jumlah Jaringan Nirkabel—Jumlah jaringan nirkabel yang terdeteksi.
- If your router has a Wi-Fi Protected Setup button, click or press that button, and then click the button on the right.

Cara menyetel Mode Jembatan Nirkabel
Local Wi-Fi MAC Address: 00:11:E0:04:2F:86
Remote Wireless Bridges' Wi-Fi MAC Addresses:
Note: When set to "Wireless Bridge" mode, this device will communicate only with another WAP300N in "Wireless Bridge" mode. Wireless settings, including wireless band, channel, channel width, security mode and passphrase/key, are required to be the same on all networked wireless bridges.
Wireless Band:

5 GHz

.4 GHz
Channel Width:
Auto (20 MHz or 40 MHz)
Channel:
36 - 5.180GHz

Channel Width:
Auto (20 MHz or 40 MHz)
Channel:
1 - 2.412GHz

Alamat MAC Wi-Fi Lokal—Alamat MAC Wi-Fi perangkat ini.
Note: When set to "Wireless Bridge" mode, wireless settings, including wireless band, channel, channel width, security mode and passphrase/key, are required to be the same on all networked wireless bridges.
Prevent PCs listed below from accessing the wireless network.

Permit PCs listed below to access the wireless network.
Wireless Client List
MAC 01:
MAC 02:
MAC 03:
MAC 04:
MAC 17:
MAC 18:
MAC 19:
MAC 20:
| Interface | MAC Address | Status | Save to MAC Address Filter List |
| None | None | None |
Add
Refresh
Close
Cara menyetel QoS (Quality of Service)
Disabled (Default: Enabled)

Enabled

Disabled (Default: Disabled)
Re-enter to confirm:
●●●●●
- Klik Simpan Setelan.
Access via Wireless:

Enabled

Disabled
Backup Configurations
TIP
natural_image
Front view of a black wireless router with two antennas and a circular indicator on the top (no visible text or symbols)-ATAU-
- Login ke utilitas berbasis browser (lihat "Cara membuka utilitas berbasis browser" pada halaman 8).
- Klik tab Administrasi, kemudian klik halaman Default Pabrik.
- Klik Pulihkan Default Pabrik.
Warning! If you click OK, the device will reset to factory default and all previous settings will be erased.
| Firmware Version: | 1.0.00, build 35, Oct 17, 2012 |
| Firmware Verification: | S6bd32b111caS6fc37202b7be87aSb76 |
| MAC Address: | 00:11:E0:04:2F:85 |
| IP Address: | 10.100.1.1 |
| Subnet Mask: | 255.255.255.0 |
| Default Gateway: |
| Operation Mode: | Access Point |
| MAC Address: | 00:11:E0:04:2F:86 |
| Network Name (SSID): | linksys |
| Network Mode: | 2.4G/5G Mixed |
| Radio Band: | 2.4 GHz |
| Channel: | 1 |
| Channel Width: | Auto (20 MHz or 40 MHz) |
| Security: | Disable |
| SSID Broadcast: | Enable |
natural_image
Black wireless router with two antennas against a blue gradient background (no text or symbols visible on the device body)Guida per l'utente
Sommario
Come configurare QoS (Quality of Service) .....20
Linksys WAP300N .....26
Specifiche ambientali 26
natural_image
Black wireless router with two visible antennas (no text or symbols)natural_image
Front view of a black wireless router with two antennas and a control knob (no visible text or symbols)natural_image
Laptop displaying a webpage with images and text (no visible text or symbols on screen)
Computer notebook

natural_image
Globe illustration showing continents with no text or symbolsInternet

Modem

natural_image
Black rectangular electronic device with a small hole on top (no visible text or symbols)Router

natural_image
Black wireless router with two antennas (no visible text or symbols)WAP300N


Tablet

natural_image
Illustration of a mobile phone with wireless signal waves and a smartphone displaying a red card (no text or symbols present)Smartphone
natural_image
Blue-toned globe illustration showing continents and oceans (no text or symbols)Internet

Modem

natural_image
Black wireless router device with network cable (no visible text or symbols)Router wireless


natural_image
Black wireless router with two antennas and a blue signal icon emitting waves (no text or symbols)WAP300N

natural_image
Illustration of a classic Xbox game console with a vertical tower and a handheld controller (no text or symbols visible)natural_image
Blue-toned globe illustration showing continents and oceans (no text or labels)Internet

Modem

natural_image
Black electronic device with a silver strap and logo, shown in studio setting (no text or symbols visible)Router wireless

natural_image
Black wireless router with two antennas and two blue signal waves (no text or symbols)WAP300N

natural_image
Digital tablet displaying a grid of app icons with wireless signal waves, no visible text or symbols on the device screen.Tablet
SUGGERIMENTI
Wireless > Wireless Security (Wireless > Protezione wireless)
Access Point (default)
Wireless Media Connector
Wireless Range Extender
Wireless Bridge
| Select | Wireless Network Name | GHz | Signal | Security |
| Cisco06647_24g | 2.4 | 0% | WPA2 Personal | |
| SepiaMaple | 2.4 | 0% | WPA2 Personal | |
| SepiaMaple-guest | 2.4 | 0% | Disabled | |
| E4200v1RS | 2.4 | 29% | WPA2 Personal | |
| Cisco97475 | 2.4 | 0% | Disabled | |
| 160nnnnn | 2.4 | 15% | Disabled | |
| X3500 | 2.4 | 0% | WPA2 Personal |
Configuration View: Manual Wi-Fi Protected Setup™
Wi-Fi Protected Setup ^TM
Use one of the following methods if your router (or access point) supports Wi-Fi Protected Setup:
- If your router has a Wi-Fi Protected Setup button, click or press that button, and then click the button on the right.

OR
- If your router asks for the client device's PIN number, enter this number 02743103 in your router and then click OK
Link Status: Disconnected Network Name (\$SID): Security:
- If your router has a Wi-Fi Protected Setup button, click or press that button, and then click the button on the right.

Local Wi-Fi MAC Address: 00:11:E0:04:2F:86
Remote Wireless Bridges' Wi-Fi MAC Addresses:
Note: When set to "Wireless Bridge" mode, this device will communicate only with another WAP300N in "Wireless Bridge" mode. Wireless settings, including wireless band, channel, channel width, security mode and passphrase/key, are required to be the same on all networked wireless bridges.
Wireless Band:

5 GHz

2.4 GHz
Channel Width:
Auto (20 MHz or 40 MHz)
Channel:
36 - 5.180GHz ▼
Channel Width:
Auto (20 MHz or 40 MHz)
Channel:
1 - 2.412GHz ▼
Wireless > Wireless Security (Wireless > Protezione wireless)
Note: When set to "Wireless Bridge" mode, wireless settings, including wireless band, channel, channel width, security mode and passphrase/key, are required to be the same on all networked wireless bridges.
Wireless > Wireless MAC Filter (Wireless > Filtro MAC wireless)
Prevent PCs listed below from accessing the wireless network.

Permit PCs listed below to access the wireless network.
Wireless Client List
MAC 01:
MAC 02:
MAC 03:
MAC 04:
MAC 17:
MAC 18:
MAC 19:
MAC 20:
| Interface | MAC Address | Status | Save to MAC Address Filter List |
| None | None | None |
Add
Refresh
Close
Come configurare QoS (Quality of Service)
Disabled (Default: Enabled)

Enabled

Disabled (Default: Disabled)
Re-enter to confirm:
●●●●●
Access via Wireless:

Enabled

Disabled
Backup Configurations
SUGGERIMENTO
natural_image
Front view of a black wireless router with two antennas and a red indicator light (no visible text or symbols)-OPPURE-
Warning! If you click OK, the device will reset to factory default and all previous settings will be erased.
Please select a file to upgrade the firmware:
Browse...
Start to Upgrade
| Firmware Version: | 1.0.00, build 35, Oct 17, 2012 |
| Firmware Verification: | 56bd32b111ca56fc37202b7be87a5b76 |
| MAC Address: | 00:11:E0:04:2F:85 |
| IP Address: | 10.100.1.1 |
| Subnet Mask: | 255.255.255.0 |
| Default Gateway: |
| Operation Mode: | Access Point |
| MAC Address: | 00:11:E0:04:2F:86 |
| Network Name (SSID): | linksys |
| Network Mode: | 2.4G/5G Mixed |
| Radio Band: | 2.4 GHz |
| Channel: | 1 |
| Channel Width: | Auto (20 MHz or 40 MHz) |
| Security: | Disable |
| SSID Broadcast: | Enable |
natural_image
Black wireless router with two antennas against a blue gradient background (no text or symbols visible on the device body)QoS (Quality of Service) instellen .....20
Linksys WAP300N .....26
Omgeving 26
Overzicht

natural_image
Black wireless router with two visible antennas (no text or symbols)natural_image
Front view of a black wireless router with two antennas and a control panel (no visible text or symbols)natural_image
Globe illustration showing continents and oceans, no text or symbols presentInternet

Modem

natural_image
Black rectangular electronic device with a small hole on top (no visible text or symbols)Router

natural_image
Black wireless router with two antennas (no visible text or symbols)WAP300N


Tablet

natural_image
Illustration of a mobile phone with wireless signal waves and a smartphone displaying a red card (no text or symbols)Smartphone
Modus Wireless Media Connector (Draadloze mediaconnector)
natural_image
Blue gradient globe illustration showing continents and oceans (no text or symbols)Internet

Modem

natural_image
Black wireless router device with network cable (no visible text or symbols)Draadloze router


natural_image
Black wireless router with two antennas and a blue signal icon emitting waves (no text or symbols)WAP300N

natural_image
Illustration of a silver and gray gaming console with a handheld controller (no text or symbols)natural_image
Blue-toned globe illustration showing continents and oceans (no text or labels)Internet

Modem

natural_image
Black electronic device with a silver strap and logo, shown in studio setting (no text or symbols visible)Draadloze router
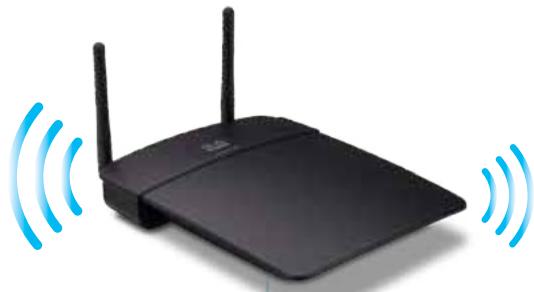
natural_image
Black wireless router with two antennas and two blue signal waves (no text or symbols)WAP300N
natural_image
Digital tablet displaying a grid of app icons with wireless signal waves, no visible text or symbols on the device screen.Tablet
Modus Wireless Bridge (Draadloze brug)
TIPS
Wireless (WLAN) > Wireless Security (WLAN-beveiliging)
| Select | Wireless Network Name | GHz | Signal | Security |
| Cisco06647_24g | 2.4 | 0% | WPA2 Personal | |
| SepiaMaple | 2.4 | 0% | WPA2 Personal | |
| SepiaMaple-guest | 2.4 | 0% | Disabled | |
| E4200v1RS | 2.4 | 29% | WPA2 Personal | |
| Cisco97475 | 2.4 | 0% | Disabled | |
| 160nnnnn | 2.4 | 15% | Disabled | |
| X3500 | 2.4 | 0% | WPA2 Personal |
Configuration View: Manual Wi-Fi Protected Setup™
Wi-Fi Protected Setup ^TM
Use one of the following methods if your router (or access point) supports Wi-Fi Protected Setup:
- If your router has a Wi-Fi Protected Setup button, click or press that button, and then click the button on the right.

OR
- If your router asks for the client device's PIN number, enter this number 02743103 in your router and then click OK
Link Status: Disconnected Network Name (SSID): Security:
- If your router has a Wi-Fi Protected Setup button, click or press that button, and then click the button on the right.

De modus Wireless Bridge (Draadloze brug) instellen
Stel als volgt de modus Wireless Bridge (Draadloze brug) in:
Wireless (Draadloos) > Basic Wireless Settings (Basisinstellingen WLAN)
Local Wi-Fi MAC Address: 00:11:E0:04:2F:86
Remote Wireless Bridges' Wi-Fi MAC Addresses:
Note: When set to "Wireless Bridge" mode, this device will communicate only with another WAP300N in "Wireless Bridge" mode. Wireless settings, including wireless band, channel, channel width, security mode and passphrase/key, are required to be the same on all networked wireless bridges.
Wireless Band:

5 GHz

2.4 GHz
Channel Width:
Auto (20 MHz or 40 MHz)
Channel:
36 - 5.180GHz

Channel Width:
Auto (20 MHz or 40 MHz)
Channel:
1 - 2.412GHz

Wireless (WLAN) > Wireless Security (WLAN-beveiliging)
Note: When set to "Wireless Bridge" mode, wireless settings, including wireless band, channel, channel width, security mode and passphrase/key, are required to be the same on all networked wireless bridges.
Wireless (WLAN) > Wireless MAC Filter (MAC-filter WLAN)
QoS (Quality of Service) instellen
Disabled (Default: Enabled)

Enabled

Disabled (Default: Disabled)
Re-enter to confirm:

- Klik op Save Settings (Instellingen opslaan).
Access via Wireless:

Enabled

Disabled
Backup Configurations
TIP
natural_image
Top-down view of a black wireless router with two Ethernet ports and a circular indicator on top (no visible text or symbols)-OF-
Warning! If you click OK, the device will reset to factory default and all previous settings will be erased.
Firmware Version: 1.0.00, build 35, Oct 17, 2012
Firmware Verification: S6bd32b111ca56fc37202b7be87a5b76
MAC Address: 00:11:E0:04:2F:85
IP Address: 10.100.1.1
Subnet Mask: 255.255.255.0
Default Gateway:
Operation Mode: Access Point
MAC Address: 00:11:E0:04:2F:86
Network Name (SSID): linksys
Network Mode: 2.4G/5G Mixed
Radio Band: 2.4 GHz
Channel: 1
Channel Width: Auto (20 MHz or 40 MHz)
Security: Disable
SSID Broadcast: Enable
natural_image
Black wireless router with two antennas against a blue gradient background (no text or symbols visible on the device body)Brukerhåndbok
Innhold
Oversikt
Pakkens innhold ....1
Installere WAP300N .....8
Åpne det webbaserte verktøyet . . . . . . . . . . . . . . . . . . . . . . . . . . . . . . . . . . . . . . . . . . . . . . . . . . . . . . . . 8
Konfigurere QoS (Quality of Service) .....20
Endre IP-adresse .....20
Endre passord .....21
Linksys WAP300N .....26
Omgivelser 26
Oversikt

natural_image
Black wireless router with two visible antennas (no text or symbols)Pakkens innhold
natural_image
Front view of a black wireless router with two antennas and a control panel (no visible text or symbols)natural_image
Globe illustration showing continents and oceans, no text or symbols presentInternett

Modem

natural_image
Black rectangular electronic device with a small hole on top (no visible text or symbols)Ruter

natural_image
Black wireless router with two antennas (no visible text or symbols)WAP300N


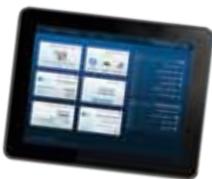
Nettbrett

natural_image
Illustration of a mobile phone with wireless signal waves and a smartphone displaying a red card (no text or symbols present)Smarttelefon
natural_image
Blue gradient globe illustration showing continents and oceans (no text or symbols)Internett

Modem

natural_image
Black wireless router device with network cable (no visible text or symbols)Trådløs ruter


natural_image
Black wireless router with two antennas and a blue signal icon emitting waves (no text or symbols)WAP300N

natural_image
Illustration of a classic Xbox internal console with a handheld controller (no text or symbols visible)Ethernet-aktivert spillkonsoll
natural_image
Blue-toned globe illustration showing continents and oceans (no text or labels)Internett

Modem

natural_image
Black electronic device with a silver strap and logo, no visible text or symbolsTrådløs ruter

natural_image
Black wireless router with two antennas and two blue signal waves (no text or symbols)WAP300N

Ethernet-aktivert spillkonsoll
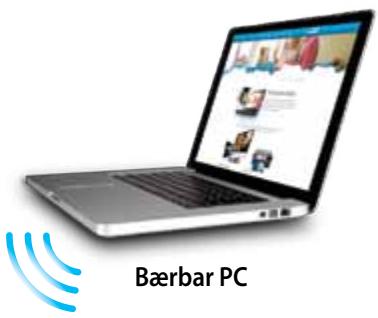

natural_image
Tablet displaying a grid of app icons with wireless signal waves, no visible text or symbols on the device screen.Nettbrett
TIPS
Bruke Wi-Fi Protected Setup
Wireless Media Connector

Wireless Range Extender

Wireless Bridge
| Select | Wireless Network Name | GHz | Signal | Security |
| Cisco06647_24g | 2.4 | 0% | WPA2 Personal | |
| SepiaMaple | 2.4 | 0% | WPA2 Personal | |
| SepiaMaple-guest | 2.4 | 0% | Disabled | |
| E4200v1RS | 2.4 | 29% | WPA2 Personal | |
| Cisco97475 | 2.4 | 0% | Disabled | |
| 160nnnnn | 2.4 | 15% | Disabled | |
| X3500 | 2.4 | 0% | WPA2 Personal |
- If your router has a Wi-Fi Protected Setup button, click or press that button, and then click the button on the right.

Local Wi-Fi MAC Address: 00:11:E0:04:2F:86
Remote Wireless Bridges' Wi-Fi MAC Addresses:
Note: When set to "Wireless Bridge" mode, this device will communicate only with another WAP300N in "Wireless Bridge" mode. Wireless settings, including wireless band, channel, channel width, security mode and passphrase/key, are required to be the same on all networked wireless bridges.
Wireless Band:

5 GHz

2.4 GHz
Channel Width:
Auto (20 MHz or 40 MHz)
Channel:
36 - 5.180GHz

Channel Width:
Auto (20 MHz or 40 MHz)
Channel:
1 - 2.412GHz

Local Wi-Fi MAC Address (Lokal Wi-Fi MAC-adresse) – Wi-Fi MAC-adressen til enheten.
Remote Wireless Bridges' Wi-Fi MAC Addresses (Wi-Fi MAC-adresser for eksterne trådløse broer) – Angi Wi-Fi MAC-adressene til andre trådløse WAP300N-broer du vil koble WAP300N til.
Note: When set to "Wireless Bridge" mode, wireless settings, including wireless band, channel, channel width, security mode and passphrase/key, are required to be the same on all networked wireless bridges.
- Konfigurer følgende innstillinger:
Wireless MAC Filter (Trådløst MAC-filter) – Hvis du vil filtrere trådløse enheter etter MAC-adresse, velger du Enabled (Aktivert). Hvis du ikke vil filtrere etter MAC-adresse, beholder du standardinnstillingen Disabled (Deaktivert).
| Interface | MAC Address | Status | Save to MAC Address Filter List |
| None | None | None | |
| Add | Refresh | Close |
Konfigurere QoS (Quality of Service)
Disabled (Default: Enabled)

Enabled

Disabled (Default: Disabled)
- Konfigurer følgende innstillinger:
Re-enter to confirm:

Access via Wireless:

Enabled

Disabled
Backup Configurations
TIPS
Hvis du vil lagre flere sikkerhetskopifiler, er det en god idé å ta med datoen for sikkerhetskopieringen i filnavnet når du lagrer filen.
natural_image
Front view of a black wireless router with two antennas and a red indicator light (no visible text or symbols)- ELLER -
Warning! If you click OK, the device will reset to factory default and all previous settings will be erased.
| Firmware Version: | 1.0.00, build 35, Oct 17, 2012 |
| Firmware Verification: | S6bd32b111caS6fc37202b7be87aSb76 |
| MAC Address: | 00:11:E0:04:2F:85 |
| IP Address: | 10.100.1.1 |
| Subnet Mask: | 255.255.255.0 |
| Default Gateway: |
| Operation Mode: | Access Point |
| MAC Address: | 00:11:E0:04:2F:86 |
| Network Name (SSID): | linksys |
| Network Mode: | 2.4G/5G Mixed |
| Radio Band: | 2.4 GHz |
| Channel: | 1 |
| Channel Width: | Auto (20 MHz or 40 MHz) |
| Security: | Disable |
| SSID Broadcast: | Enable |
Operation Mode (Driftsmodus) – Gjeldende driftsmodus for enheten.
MAC Address (MAC-adresse) – MAC-adressen til enhetens trådløse grensesnitt (Wi-Fi).
Link Status (Koblingsstatus) – Statusen for den trådløse tilkoblingen.
natural_image
Black wireless router with two antennas against a blue gradient background (no text or symbols visible on the device body)Linksys WAP300N .....27
natural_image
Black wireless router with two visible antennas (no text or symbols)Zawartość pudełka
natural_image
Front view of a black wireless router with two antennas and a control panel (no visible text or symbols)natural_image
Laptop displaying a webpage with images and text (no visible text or symbols on screen)Komputer przenośny

natural_image
Globe illustration showing continents with no text or symbolsInternet

Modem
natural_image
Black rectangular electronic device with a small white dot on top (no visible text or symbols)Router

natural_image
Black wireless router with two antennas (no visible text or symbols)WAP300N


Tablet

natural_image
Illustration of a mobile phone with wireless signal icon and smartphone displaying app (no text or symbols)Smartfon
natural_image
Blue gradient globe illustration showing continents and oceans (no text or symbols)Internet

Modem

natural_image
Black wireless router device with network cable (no visible text or symbols)natural_image
Black wireless router with two antennas and signal waves icon (no text or symbols)WAP300N

natural_image
Illustration of a classic Xbox console with a vertical tower and a handheld controller (no text or symbols)Konsola do gier z portem Ethernet
natural_image
Blue-toned globe illustration showing continents and oceans (no text or labels)Internet

Modem

natural_image
Black electronic device with a silver strap and logo, shown in studio setting (no text or symbols visible)natural_image
Black wireless router with two antennas and two blue signal waves (no text or symbols)WAP300N

Konsola do gier z portem Ethernet
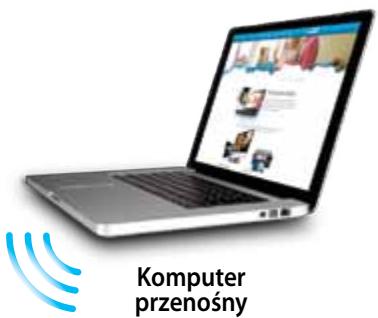
natural_image
Tablet displaying a grid of app icons with wireless signal waves, no visible text or symbols on the device screen.Tablet
WSKAZÓWKI
- If your router has a Wi-Fi Protected Setup button, click or press that button, and then click the button on the right.

| Select | Wireless Network Name | GHz | Signal | Security |
| Cisco06647_24g | 2.4 | 0% | WPA2 Personal | |
| SepiaMaple | 2.4 | 0% | WPA2 Personal | |
| SepiaMaple-guest | 2.4 | 0% | Disabled | |
| E4200v1RS | 2.4 | 29% | WPA2 Personal | |
| Cisco97475 | 2.4 | 0% | Disabled | |
| 160nnnnn | 2.4 | 15% | Disabled | |
| X3500 | 2.4 | 0% | WPA2 Personal |
Use one of the following methods if your router (or access point) supports Wi-Fi Protected Setup:
- If your router has a Wi-Fi Protected Setup button, click or press that button, and then click the button on the right.

OR
- If your router asks for the client device's PIN number, enter this number 02743103 in your router and then click OK
Link Status:
Disconnected
Network Name (SSID):
Security:
- If your router has a Wi-Fi Protected Setup button, click or press that button, and then click the button on the right.

Note: When set to "Wireless Bridge" mode, wireless settings, including wireless band, channel, channel width, security mode and passphrase/key, are required to be the same on all networked wireless bridges.
Prevent PCs listed below from accessing the wireless network.

Permit PCs listed below to access the wireless network.
Wireless Client List
MAC 01:
MAC 02:
MAC 03:
MAC 04:
MAC 17:
MAC 18:
MAC 19:
MAC 20:
| Interface | MAC Address | Status | Save to MAC Address Filter List |
| None | None | None |

Refresh
Close
Disabled (Default: Enabled)

Enabled

Disabled (Default: Disabled)
Re-enter to confirm:

Access via Wireless:

Enabled

Disabled
Backup Configurations
WSKAZÓWKA
natural_image
Front view of a black wireless router with two Ethernet ports and a circular indicator on top (no visible text or symbols)-LUB-
Warning! If you click OK, the device will reset to factory default and all previous settings will be erased.
Please select a file to upgrade the firmware:

| Firmware Version: | 1.0.00, build 35, Oct 17, 2012 |
| Firmware Verification: | 56bd32b111ca56fc37202b7be87a5b76 |
| MAC Address: | 00:11:E0:04:2F:85 |
| IP Address: | 10.100.1.1 |
| Subnet Mask: | 255.255.255.0 |
| Default Gateway: |
| Operation Mode: | Access Point |
| MAC Address: | 00:11:E0:04:2F:86 |
| Network Name (SSID): | linksys |
| Network Mode: | 2.4G/5G Mixed |
| Radio Band: | 2.4 GHz |
| Channel: | 1 |
| Channel Width: | Auto (20 MHz or 40 MHz) |
| Security: | Disable |
| SSID Broadcast: | Enable |
natural_image
Black wireless router with two antennas against a blue gradient background (no text or symbols visible on the device body)Manual do utilizador
Índice
Descrição geral
Linksys WAP300N .....26
Ambiente 26
Descrição geral

natural_image
Black wireless router with two visible antennas (no text or symbols)natural_image
Top-down view of a black wireless router with two antennas and a control knob (no visible text or symbols)natural_image
Globe illustration showing continents with no text or symbolsInternet

Modem

natural_image
Black rectangular electronic device with a small hole on top (no visible text or symbols)Router

natural_image
Black wireless router with two antennas (no visible text or symbols)WAP300N


Tablet

natural_image
Illustration of a mobile phone with wireless signal waves and a smartphone displaying a red card (no text or symbols present)Smartphone
Modo Centro multimédia sem fios
natural_image
Blue-toned globe illustration showing continents and oceans (no text or labels)Internet

Modem

natural_image
Black electronic device with a silver strap and logo, shown in studio setting (no text or symbols visible)Router sem fios

natural_image
Black wireless router with two antennas and two blue signal waves (no text or symbols)WAP300N
natural_image
Tablet displaying a grid of app icons with wireless signal waves, no visible text or symbols on the device screen.Tablet
Modo Ponte sem fios
SUGESTÕES
- If your router has a Wi-Fi Protected Setup button, click or press that button, and then click the button on the right.

Access Point (default)
Wireless Media Connector
Wireless Range Extender
Wireless Bridge
| Select | Wireless Network Name | GHz | Signal | Security |
| Cisco06647_24g | 2.4 | 0% | WPA2 Personal | |
| SepiaMaple | 2.4 | 0% | WPA2 Personal | |
| SepiaMaple-guest | 2.4 | 0% | Disabled | |
| E4200v1RS | 2.4 | 29% | WPA2 Personal | |
| Cisco97475 | 2.4 | 0% | Disabled | |
| 160nnnnn | 2.4 | 15% | Disabled | |
| X3500 | 2.4 | 0% | WPA2 Personal |
Number of Wireless Networks (Número de redes sem fios)—O número de redes sem fios detectadas.
Use one of the following methods if your router (or access point) supports Wi-Fi Protected Setup:
- If your router has a Wi-Fi Protected Setup button, click or press that button, and then click the button on the right.

OR
- If your router asks for the client device's PIN number, enter this number 02743103 in your router and then click OK
Link Status:
Disconnected
Network Name (SSID):
Security:
- If your router has a Wi-Fi Protected Setup button, click or press that button, and then click the button on the right.

Local Wi-Fi MAC Address: 00:11:E0:04:2F:86
Remote Wireless Bridges' Wi-Fi MAC Addresses:
Note: When set to "Wireless Bridge" mode, this device will communicate only with another WAP300N in "Wireless Bridge" mode. Wireless settings, including wireless band, channel, channel width, security mode and passphrase/key, are required to be the same on all networked wireless bridges.
Wireless Band:

5 GHz

2.4 GHz
Channel Width:
Auto (20 MHz or 40 MHz) ▼
Channel:
36 - 5.180GHz

Channel Width:
Auto (20 MHz or 40 MHz)

Channel:
1 - 2.412GHz

Note: When set to "Wireless Bridge" mode, wireless settings, including wireless band, channel, channel width, security mode and passphrase/key, are required to be the same on all networked wireless bridges.
Prevent PCs listed below from accessing the wireless network.

Permit PCs listed below to access the wireless network.
Wireless Client List
MAC 01:
MAC 02:
MAC 03:
MAC 04:
MAC 17:
MAC 18:
MAC 19:
MAC 20:
| Interface | MAC Address | Status | Save to MAC Address Filter List |
| None | None | None |

Refresh

Disabled (Default: Enabled)

Enabled

Disabled (Default: Disabled)
Re-enter to confirm:
●●●●●
Access via Wireless:

Enabled

Disabled
Backup Configurations
SUGESTÃO
natural_image
Front view of a black wireless router with two antennas and a red indicator light (no visible text or symbols)-OU-
Warning! If you click OK, the device will reset to factory default and all previous settings will be erased.
Please select a file to upgrade the firmware:
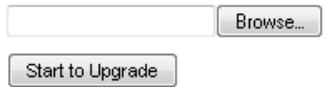
| Firmware Version: | 1.0.00, build 35, Oct 17, 2012 |
| Firmware Verification: | S6bd32b111caS6fc37202b7be87aSb76 |
| MAC Address: | 00:11:E0:04:2F:85 |
| IP Address: | 10.100.1.1 |
| Subnet Mask: | 255.255.255.0 |
| Default Gateway: |
| Operation Mode: | Access Point |
| MAC Address: | 00:11:E0:04:2F:86 |
| Network Name (SSID): | linksys |
| Network Mode: | 2.4G/5G Mixed |
| Radio Band: | 2.4 GHz |
| Channel: | 1 |
| Channel Width: | Auto (20 MHz or 40 MHz) |
| Security: | Disable |
| SSID Broadcast: | Enable |
Operation Mode (Modo de funcionamento)—O modo de funcionamento actual do dispositivo.
natural_image
Black wireless router with two antennas against a blue gradient background (no text or symbols visible on the device body)Guia do usuário
Índice
Visão geral
Linksys WAP300N .....26
natural_image
Black wireless router with two visible antennas (no text or symbols)natural_image
Front view of a black wireless router with two antennas and a control panel (no visible text or symbols)natural_image
Laptop with a wireless signal icon and 'Notebook' text, no readable document content on screen or laptop.
natural_image
Globe illustration showing continents and oceans, no text or symbols presentInternet

Modem

natural_image
Black rectangular electronic device with a small hole on top (no visible text or symbols)Roteador
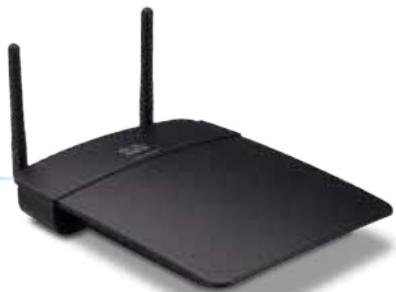
natural_image
Black wireless router with two antennas (no visible text or symbols)WAP300N


Tablet
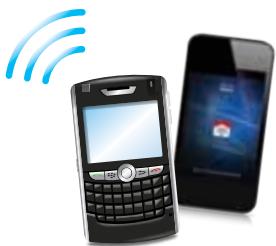
natural_image
Illustration of a mobile phone with wireless signal waves and a smartphone displaying a red card (no text or symbols present)Smartphone
natural_image
Blue gradient globe illustration showing continents and oceans (no text or symbols)Internet

Modem

natural_image
Black electronic device with a white cable strap and brand logo (no visible text or symbols)Roteador sem fio


natural_image
Black wireless router with two antennas and a blue signal icon emitting waves (no text or symbols)WAP300N

natural_image
Illustration of a classic Xbox console with a vertical tower and a handheld controller (no text or symbols)natural_image
Blue-toned globe illustration showing continents and oceans (no text or labels)Internet

Modem

natural_image
Black electronic device with a silver strap and logo, no visible text or symbolsRoteador sem fio

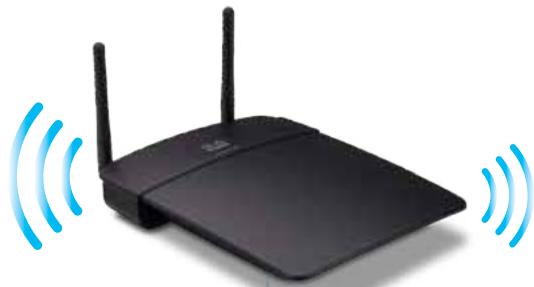
natural_image
Black wireless router with two antennas and two blue signal waves (no text or symbols)WAP300N
natural_image
Laptop with wireless signal icon and 'Notebook' text, no readable document content on screen or laptop
natural_image
Tablet displaying a grid of six icons with Wi-Fi signal waves, no visible text or symbols on the device screen.Tablet
Modo Wireless Bridge (Bridge sem fio)
DICAS
Access Point (default)
Wireless Media Connector
Wireless Range Extender
Wireless Bridge
| Select | Wireless Network Name | GHz | Signal | Security |
| Cisco06647_24g | 2.4 | 0% | WPA2 Personal | |
| SepiaMaple | 2.4 | 0% | WPA2 Personal | |
| SepiaMaple-guest | 2.4 | 0% | Disabled | |
| E4200v1RS | 2.4 | 29% | WPA2 Personal | |
| Cisco97475 | 2.4 | 0% | Disabled | |
| 160nnnnn | 2.4 | 15% | Disabled | |
| X3500 | 2.4 | 0% | WPA2 Personal |
- If your router has a Wi-Fi Protected Setup button, click or press that button, and then click the button on the right.

Como configurar o modo Wireless Bridge (Bridge sem fio)
Para configurar o modo Wireless Bridge (Bridge sem fio):
Local Wi-Fi MAC Address: 00:11:E0:04:2F:86
Remote Wireless Bridges' Wi-Fi MAC Addresses:
Note: When set to "Wireless Bridge" mode, this device will communicate only with another WAP300N in "Wireless Bridge" mode. Wireless settings, including wireless band, channel, channel width, security mode and passphrase/key, are required to be the same on all networked wireless bridges.
Wireless Band:

5 GHz

2.4 GHz
Channel Width:
Auto (20 MHz or 40 MHz) ▼
Channel:
36 - 5.180GHz ▼
Channel Width:
Auto (20 MHz or 40 MHz) ▼
Channel:
1 - 2.412GHz ▼
Note: When set to "Wireless Bridge" mode, wireless settings, including wireless band, channel, channel width, security mode and passphrase/key, are required to be the same on all networked wireless bridges.
Disabled (Default: Enabled)

Enabled

Disabled (Default: Disabled)
Re-enter to confirm:

Access via Wireless:

Enabled

Disabled
Backup Configurations
DICA
natural_image
Top-down view of a black wireless router with two antennas and a highlighted control knob (no visible text or symbols)-OU-
Warning! If you click OK, the device will reset to factory default and all previous settings will be erased.
Please select a file to upgrade the firmware:
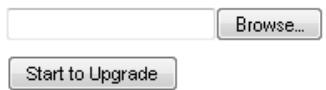
| Firmware Version: | 1.0.00, build 35, Oct 17, 2012 |
| Firmware Verification: | 56bd32b111ca56fc37202b7be87a5b76 |
| MAC Address: | 00:11:E0:04:2F:85 |
| IP Address: | 10.100.1.1 |
| Subnet Mask: | 255.255.255.0 |
| Default Gateway: |
| Operation Mode: | Access Point |
| MAC Address: | 00:11:E0:04:2F:86 |
| Network Name (SSID): | linksys |
| Network Mode: | 2.4G/5G Mixed |
| Radio Band: | 2.4 GHz |
| Channel: | 1 |
| Channel Width: | Auto (20 MHz or 40 MHz) |
| Security: | Disable |
| SSID Broadcast: | Enable |
natural_image
Black wireless router with two antennas against a blue gradient background (no visible text or symbols)Linksys WAP300N .....26
natural_image
Black wireless router with two visible antennas (no text or symbols)Комплектация
natural_image
Front view of a black wireless router with two antennas and a control panel (no visible text or symbols)natural_image
Globe illustration showing continents and oceans, no text or symbols presentИнтернет

Модем

natural_image
Black rectangular electronic device with a small hole on top (no visible text or symbols)Маршрутизатор

natural_image
Black wireless router with two antennas (no visible text or symbols)WAP300N


Планшет
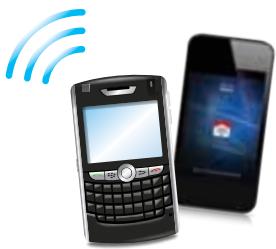
natural_image
Illustration of a mobile phone with wireless signal icon and smartphone displaying app (no text or symbols)Смартфон
natural_image
Blue globe illustration showing continents and oceans (no text or symbols)Интернет

Модем

natural_image
Black electronic device with a white strap and blue buttons, no visible text or symbols.natural_image
Black wireless router with two antennas and a blue signal icon emitting waves (no text or symbols)WAP300N

natural_image
Illustration of a classic Xbox console with a Sony controller (no text or symbols visible)natural_image
Blue-toned globe illustration showing continents and oceans (no text or labels)Интернет
Модем

natural_image
Black electronic device with a silver strap and logo, shown in studio setting (no text or symbols visible)natural_image
Black wireless router with two antennas and two blue signal waves (no text or symbols)WAP300N
natural_image
Digital tablet displaying a grid of six modules with wireless signal waves in the background (no text or symbols on the devices)Планшет
СОВЕТЫ
- If your router has a Wi-Fi Protected Setup button, click or press that button, and then click the button on the right.

| Select | Wireless Network Name | GHz | Signal | Security |
| Cisco06647_24g | 2.4 | 0% | WPA2 Personal | |
| SepiaMaple | 2.4 | 0% | WPA2 Personal | |
| SepiaMaple-guest | 2.4 | 0% | Disabled | |
| E4200v1RS | 2.4 | 29% | WPA2 Personal | |
| Cisco97475 | 2.4 | 0% | Disabled | |
| 160nnnnn | 2.4 | 15% | Disabled | |
| X3500 | 2.4 | 0% | WPA2 Personal |
- If your router has a Wi-Fi Protected Setup button, click or press that button, and then click the button on the right.

| Access Point (default) |
| Wireless Media Connector |
| Wireless Range Extender |
| Wireless Bridge |
Local Wi-Fi MAC Address: 00:11:E0:04:2F:86
Remote Wireless Bridges' Wi-Fi MAC Addresses:
Note: When set to "Wireless Bridge" mode, this device will communicate only with another WAP300N in "Wireless Bridge" mode. Wireless settings, including wireless band, channel, channel width, security mode and passphrase/key, are required to be the same on all networked wireless bridges.
Wireless Band:

5 GHz

2.4 GHz
Channel Width:
Auto (20 MHz or 40 MHz)
Channel:
36 - 5.180GHz ▼
Channel Width:
Auto (20 MHz or 40 MHz)
Channel:
1 - 2.412GHz ▼
Note: When set to "Wireless Bridge" mode, wireless settings, including wireless band, channel, channel width, security mode and passphrase/key, are required to be the same on all networked wireless bridges.
Prevent PCs listed below from accessing the wireless network.

Permit PCs listed below to access the wireless network.
Wireless Client List
MAC 01:
MAC 02:
MAC 03:
MAC 04:
MAC 17:
MAC 18:
MAC 19:
MAC 20:
| Interface | MAC Address | Status | Save to MAC Address Filter List |
| None | None | None |
Add
Refresh
Close
Disabled (Default: Enabled)

Enabled

Disabled (Default: Disabled)
Re-enter to confirm:

Access via Wireless:

Enabled

Disabled
Backup Configurations
COBET
natural_image
Top-down view of a black wireless router with two antennas and a highlighted control knob (no visible text or symbols)ИЛИ
Warning! If you click OK, the device will reset to factory default and all previous settings will be erased.
Please select a file to upgrade the firmware:
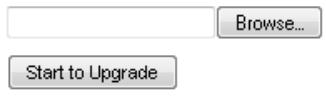
| Firmware Version: | 1.0.00, build 35, Oct 17, 2012 |
| Firmware Verification: | 56bd32b111ca56fc37202b7be87a5b76 |
| MAC Address: | 00:11:E0:04:2F:85 |
| IP Address: | 10.100.1.1 |
| Subnet Mask: | 255.255.255.0 |
| Default Gateway: |
| Operation Mode: | Access Point |
| MAC Address: | 00:11:E0:04:2F:86 |
| Network Name (SSID): | linksys |
| Network Mode: | 2.4G/5G Mixed |
| Radio Band: | 2.4 GHz |
| Channel: | 1 |
| Channel Width: | Auto (20 MHz or 40 MHz) |
| Security: | Disable |
| SSID Broadcast: | Enable |
natural_image
Black wireless router with two antennas against a blue gradient background (no visible text or symbols)Användarhandbok
Innehåll
Översikt
Förpackningens innehåll. . . . . . . . . . . . . . . . . . . . . . . . . . . . . . . . . . . . . . . . . . . . . . . . 1
Baksida....1
Undersida 2
Linksys WAP300N .....26
Omgivande miljö 26
Översikt

natural_image
Black wireless router with two visible antennas (no text or symbols)natural_image
Front view of a black wireless router with two antennas and a control panel (no visible text or symbols)natural_image
Globe illustration showing continents and oceans, no text or symbols presentInternet

Modem

natural_image
Black rectangular electronic device with a small hole on top (no visible text or symbols)Router

natural_image
Black wireless router with two antennas (no visible text or symbols)WAP300N


Surfplatta

natural_image
Illustration of a mobile phone with wireless signal waves and a smartphone displaying a red card (no text or symbols present)Smarttelefon
natural_image
Blue gradient globe illustration showing continents and oceans (no text or symbols)Internet

Modem

natural_image
Black wireless router device with network cable (no visible text or symbols)Trådlös router


natural_image
Black wireless router with two antennas and a blue signal icon emitting waves (no text or symbols)WAP300N

natural_image
Illustration of a silver and gray gaming console with a handheld controller (no text or symbols visible)natural_image
Blue-toned globe illustration showing continents and oceans (no text or labels)Internet

Modem

natural_image
Black electronic device with a silver strap and logo, shown in studio setting (no text or symbols visible)Trådlös router

natural_image
Black wireless router with two antennas and two blue signal waves (no text or symbols)WAP300N
natural_image
Tablet displaying a grid of six modules with wireless signal waves, no visible text or symbols on the devices.Surfplatta
TIPS
Access Point (default)
Wireless Media Connector
Wireless Range Extender
Wireless Bridge
| Select | Wireless Network Name | GHz | Signal | Security |
| Cisco06647_24g | 2.4 | 0% | WPA2 Personal | |
| SepiaMaple | 2.4 | 0% | WPA2 Personal | |
| SepiaMaple-guest | 2.4 | 0% | Disabled | |
| E4200v1RS | 2.4 | 29% | WPA2 Personal | |
| Cisco97475 | 2.4 | 0% | Disabled | |
| 160nnnnn | 2.4 | 15% | Disabled | |
| X3500 | 2.4 | 0% | WPA2 Personal |
Use one of the following methods if your router (or access point) supports Wi-Fi Protected Setup:
- If your router has a Wi-Fi Protected Setup button, click or press that button, and then click the button on the right.

OR
- If your router asks for the client device's PIN number, enter this number 02743103 in your router and then click OK
Link Status:
Disconnected
Network Name (SSID):
Security:
- If your router has a Wi-Fi Protected Setup button, click or press that button, and then click the button on the right.

Local Wi-Fi MAC Address: 00:11:E0:04:2F:86
Remote Wireless Bridges' Wi-Fi MAC Addresses:
Note: When set to "Wireless Bridge" mode, this device will communicate only with another WAP300N in "Wireless Bridge" mode. Wireless settings, including wireless band, channel, channel width, security mode and passphrase/key, are required to be the same on all networked wireless bridges.
Wireless Band:

5 GHz

2.4 GHz
Channel Width:
Auto (20 MHz or 40 MHz)
Channel:
36 - 5.180GHz ▼
Channel Width:
Auto (20 MHz or 40 MHz)
Channel:
1 - 2.412GHz ▼
Note: When set to "Wireless Bridge" mode, wireless settings, including wireless band, channel, channel width, security mode and passphrase/key, are required to be the same on all networked wireless bridges.
Prevent PCs listed below from accessing the wireless network.

Permit PCs listed below to access the wireless network.
Wireless Client List
MAC 01:
MAC 02:
MAC 03:
MAC 04:
MAC 17:
MAC 18:
MAC 19:
MAC 20:
| Interface | MAC Address | Status | Save to MAC Address Filter List |
| None | None | None |
Add
Refresh
Close
Disabled (Default: Enabled)

Enabled

Disabled (Default: Disabled)
Access via Wireless:

Enabled

Disabled
Backup Configurations
TIPS
natural_image
Front view of a black wireless router with two antennas and a control panel (no visible text or symbols)- ELLER -
Warning! If you click OK, the device will reset to factory default and all previous settings will be erased.
Please select a file to upgrade the firmware:
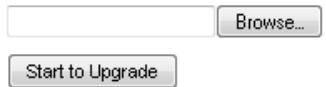
| Firmware Version: | 1.0.00, build 35, Oct 17, 2012 |
| Firmware Verification: | 56bd32b111ca56fc37202b7be87a5b76 |
| MAC Address: | 00:11:E0:04:2F:85 |
| IP Address: | 10.100.1.1 |
| Subnet Mask: | 255.255.255.0 |
| Default Gateway: |
| Operation Mode: | Access Point |
| MAC Address: | 00:11:E0:04:2F:86 |
| Network Name (SSID): | linksys |
| Network Mode: | 2.4G/5G Mixed |
| Radio Band: | 2.4 GHz |
| Channel: | 1 |
| Channel Width: | Auto (20 MHz or 40 MHz) |
| Security: | Disable |
| SSID Broadcast: | Enable |
Operation Mode (Driftläge) – Enhetens aktuella driftläge.
natural_image
Black wireless router with two antennas against a blue gradient background (no visible text or symbols)
natural_image
Black wireless router with two external antennas (no visible text or symbols)natural_image
Front view of a black wireless router with two antennas and a control panel (no visible text or symbols)natural_image
Blue globe illustration showing continents and oceans (no text or symbols)อินเทอร์เน็ต

โมเต็ม

natural_image
Black rectangular electronic device with a small hole on top (no visible text or symbols)เราเตอร์
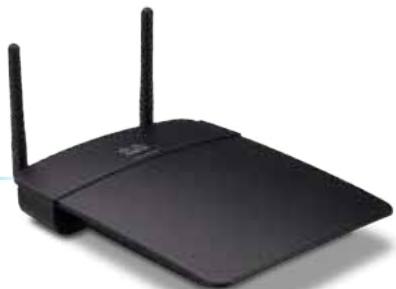
natural_image
Black wireless router with two antennas (no visible text or symbols)WAP300N
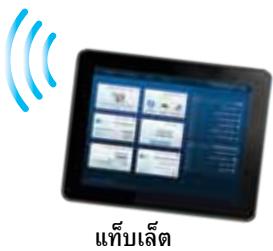

natural_image
Illustration of a mobile phone with wireless signal waves and a smartphone displaying a red card (no text or symbols present)สมาร์ทโฟน
natural_image
Globe illustration showing continents with no text or symbolsอินเทอร์เน็ต
โมเต็ม

natural_image
Black wireless router device with network cable (no visible text or symbols)เราเตอร์ ไร้สาย


natural_image
Black wireless router with two antennas and a blue signal icon emitting waves (no text or symbols)WAP300N

natural_image
Illustration of a classic Xbox console with a Sony controller (no text or symbols visible)natural_image
Blue globe illustration showing continents and oceans (no text or labels)อินเทอร์เน็ต

โมเด็ม

natural_image
Black electronic device with a silver strap and blue scroll wheel (no visible text or symbols)เราเตอร์ ไร้สาย

natural_image
Black wireless router with two antennas and two blue signal waves (no text or symbols)WAP300N
แท็บเล็ต
เฉล็ดลับ
Wireless Media Connector

Wireless Range Extender

Wireless Bridge
Access Point (default)
Wireless Media Connector
Wireless Range Extender
Wireless Bridge
| Select | Wireless Network Name | GHz | Signal | Security |
| Cisco06647_24g | 2.4 | 0% | WPA2 Personal | |
| SepiaMaple | 2.4 | 0% | WPA2 Personal | |
| SepiaMaple-guest | 2.4 | 0% | Disabled | |
| E4200v1RS | 2.4 | 29% | WPA2 Personal | |
| Cisco97475 | 2.4 | 0% | Disabled | |
| 160nnnnn | 2.4 | 15% | Disabled | |
| X3500 | 2.4 | 0% | WPA2 Personal |
Use one of the following methods if your router (or access point) supports Wi-Fi Protected Setup:
- If your router has a Wi-Fi Protected Setup button, click or press that button, and then click the button on the right.

OR
- If your router asks for the client device's PIN number, enter this number 02743103 in your router and then click OK
Link Status:
Disconnected
Network Name (SSID):
Security:
- If your router has a Wi-Fi Protected Setup button, click or press that button, and then click the button on the right.

Wireless Media Connector
Wireless Range Extender
Wireless Bridge
Local Wi-Fi MAC Address: 00:11:E0:04:2F:86
Remote Wireless Bridges' Wi-Fi MAC Addresses:
Note: When set to "Wireless Bridge" mode, this device will communicate only with another WAP300N in "Wireless Bridge" mode. Wireless settings, including wireless band, channel, channel width, security mode and passphrase/key, are required to be the same on all networked wireless bridges.
Wireless Band:

5 GHz

2.4 GHz
Channel Width:
Auto (20 MHz or 40 MHz)
Channel:
36 - 5.180GHz

Channel Width:
Auto (20 MHz or 40 MHz)
Channel:
1 - 2.412GHz

Note: When set to "Wireless Bridge" mode, wireless settings, including wireless band, channel, channel width, security mode and passphrase/key, are required to be the same on all networked wireless bridges.
Prevent PCs listed below from accessing the wireless network.

Permit PCs listed below to access the wireless network.
Wireless Client List
MAC 01:
MAC 02:
MAC 03:
MAC 04:
MAC 17:
MAC 18:
MAC 19:
MAC 20:
| Interface | MAC Address | Status | Save to MAC Address Filter List |
| None | None | None |
Add
Refresh
Close
Disabled (Default: Enabled)

Enabled

Disabled (Default: Disabled)
Re-enter to confirm:
●●●●●
Access via Wireless:

Enabled

Disabled
Backup Configurations
เฉล็ดลับ
- Good way to go back to new local business that is not just enough to do so as it will be a copyright
natural_image
Front view of a black wireless router with two antennas and a control panel (no visible text or symbols)หรือ
Warning! If you click OK, the device will reset to factory default and all previous settings will be erased.
Please select a file to upgrade the firmware:
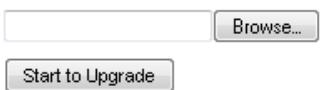
| Firmware Version: | 1.0.00, build 35, Oct 17, 2012 |
| Firmware Verification: | 56bd32b111ca56fc37202b7be87a5b76 |
| MAC Address: | 00:11:E0:04:2F:8S |
| IP Address: | 10.100.1.1 |
| Subnet Mask: | 255.255.255.0 |
| Default Gateway: |
| Operation Mode: | Access Point |
| MAC Address: | 00:11:E0:04:2F:86 |
| Network Name (SSID): | linksys |
| Network Mode: | 2.4G/5G Mixed |
| Radio Band: | 2.4 GHz |
| Channel: | 1 |
| Channel Width: | Auto (20 MHz or 40 MHz) |
| Security: | Disable |
| SSID Broadcast: | Enable |
natural_image
Black wireless router with two antennas against a blue gradient background (no text or symbols visible on the device body)Kullanıcı Kılavuzu
İçindekiler
Genel Bakış
Linksys WAP300N .....26
Çevresel 26
Genel Bakış
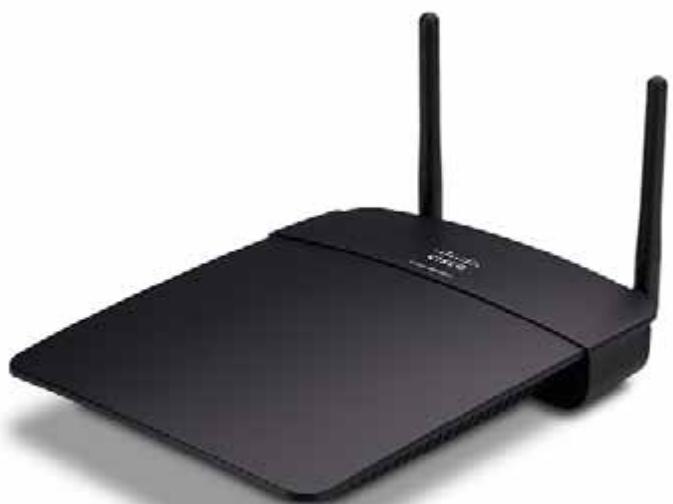
natural_image
Black wireless router with two visible antennas (no text or symbols)Paketin içindekiler
natural_image
Front view of a black wireless router with two antennas and a control panel (no visible text or symbols)natural_image
Globe illustration showing continents and oceans, no text or symbols presentInternet

Modem

natural_image
Black rectangular electronic device with a small hole on top (no visible text or symbols)Router

natural_image
Black wireless router with two antennas (no visible text or symbols)WAP300N


Tablet

natural_image
Illustration of a mobile phone with wireless signal waves and a smartphone displaying a red card (no text or symbols present)Akıllı Telefon
natural_image
Blue gradient globe illustration showing continents and oceans (no text or symbols)Internet

Modem

natural_image
Black wireless router device with network cable (no visible text or symbols)Kablosuz Router


natural_image
Black wireless router with two antennas and a blue signal icon emitting waves (no text or symbols)WAP300N

natural_image
Illustration of a silver and gray gaming console with a handheld controller (no text or symbols visible)natural_image
Blue-toned globe illustration showing continents and oceans (no text or labels)Internet

Modem

natural_image
Black electronic device with a silver strap and logo, shown in studio setting (no text or symbols visible)Kablosuz Router


natural_image
Black wireless router with two antennas and two blue signal waves (no text or symbols)WAP300N
natural_image
Tablet displaying a grid of six modules with wireless signal waves, no visible text or symbols on the devices.Tablet
İPUÇLARI
Wi-Fi Protected Setup'i kullanma
| Select | Wireless Network Name | GHz | Signal | Security |
| Cisco06647_24g | 2.4 | 0% | WPA2 Personal | |
| SepiaMaple | 2.4 | 0% | WPA2 Personal | |
| SepiaMaple-guest | 2.4 | 0% | Disabled | |
| E4200v1RS | 2.4 | 29% | WPA2 Personal | |
| Cisco97475 | 2.4 | 0% | Disabled | |
| 160nnnnn | 2.4 | 15% | Disabled | |
| X3500 | 2.4 | 0% | WPA2 Personal |
- If your router has a Wi-Fi Protected Setup button, click or press that button, and then click the button on the right.

Local Wi-Fi MAC Address: 00:11:E0:04:2F:86
Remote Wireless Bridges' Wi-Fi MAC Addresses:
Note: When set to "Wireless Bridge" mode, this device will communicate only with another WAP300N in "Wireless Bridge" mode. Wireless settings, including wireless band, channel, channel width, security mode and passphrase/key, are required to be the same on all networked wireless bridges.
Wireless Band:

5 GHz

2.4 GHz
Channel Width:
Auto (20 MHz or 40 MHz)
Channel:
36 - 5.180GHz

Channel Width:
Auto (20 MHz or 40 MHz)
Channel:
1 - 2.412GHz

Local Wi-Fi MAC Address (Yerel Wi-Fi MAC Adresi)—Bu aygıtin Wi-Fi MAC adresi.
Note: When set to "Wireless Bridge" mode, wireless settings, including wireless band, channel, channel width, security mode and passphrase/key, are required to be the same on all networked wireless bridges.
| Interface | MAC Address | Status | Save to MAC Address Filter List |
| None | None | None | |
| Add | Refresh | Close |
Disabled (Default: Enabled)

Enabled

Disabled (Default: Disabled)
Re-enter to confirm:

Access via Wireless:

Enabled

Disabled
Backup Configurations
iPUCU
natural_image
Front view of a black wireless router with two antennas and a control panel (no visible text or symbols)-VEYA-
Warning! If you click OK, the device will reset to factory default and all previous settings will be erased.
Please select a file to upgrade the firmware:
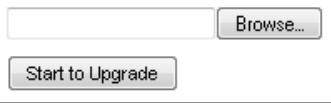
| Firmware Version: | 1.0.00, build 35, Oct 17, 2012 |
| Firmware Verification: | 56bd32b111ca56fc37202b7be87a5b76 |
| MAC Address: | 00:11:E0:04:2F:85 |
| IP Address: | 10.100.1.1 |
| Subnet Mask: | 255.255.255.0 |
| Default Gateway: |
| Operation Mode: | Access Point |
| MAC Address: | 00:11:E0:04:2F:86 |
| Network Name (SSID): | linksys |
| Network Mode: | 2.4G/5G Mixed |
| Radio Band: | 2.4 GHz |
| Channel: | 1 |
| Channel Width: | Auto (20 MHz or 40 MHz) |
| Security: | Disable |
| SSID Broadcast: | Enable |
natural_image
Black wireless router with two antennas against a blue gradient background (no text or symbols visible on the device body)Hướng dẫn sử dụng
Mục lục
Tóm tắt
Nội dung gói .....1
Măt sau. . . . . . . . . . . . . . . . . . . . . . . . . . . . . . . . . . . . . . . . . . . . . . . . . . . . . . . . . . . . . 1
Mặt dưới .....2
Cài đặt: Cơ bản
Cách mở rộng mạng gia đình. . . . . . . . . . . . . . . . . . . . . . . . . . . . . . . . . . . . . . . . . 3
Mạng là gì? 3
Linksys WAP300N .....26
Môi trường 26
Tóm tắt

natural_image
Black wireless router with two visible antennas (no text or symbols)Nội dung gói
natural_image
Front view of a black wireless router with two antennas and a control panel (no visible text or symbols)natural_image
Globe illustration showing continents and oceans, no text or symbols presentInternet
Modem

natural_image
Black rectangular electronic device with a small hole on top (no visible text or symbols)Bộ định tuyến

natural_image
Black wireless router with two antennas (no visible text or symbols)WAP300N


Máy tính bằng

natural_image
Illustration of a mobile phone with wireless signal waves and a smartphone displaying a red card (no text or symbols present)natural_image
Globe illustration showing continents and oceans (no text or labels)Internet

Modem

natural_image
Black electronic device with a USB port, shown in studio setting (no text or symbols visible)natural_image
Black wireless router with two antennas and a blue signal icon emitting waves (no text or symbols)WAP300N

natural_image
Illustration of a silver and gray gaming console with a handheld controller (no text or symbols visible)natural_image
Blue-toned globe illustration showing continents and oceans (no text or labels)Internet

Modem

natural_image
Black electronic device with a silver strap and logo, shown in studio setting (no visible text or symbols)natural_image
Black wireless router with two antennas and two blue signal waves (no text or symbols)WAP300N
natural_image
Tablet displaying a grid of six modules with wireless signal waves, no visible text or symbols on the devices.Máy tính bằng
MEO
Wireless Media Connector

Wireless Range Extender

Wireless Bridge
| Select | Wireless Network Name | GHz | Signal | Security |
| Cisco06647_24g | 2.4 | 0% | WPA2 Personal | |
| SepiaMaple | 2.4 | 0% | WPA2 Personal | |
| SepiaMaple-guest | 2.4 | 0% | Disabled | |
| E4200v1RS | 2.4 | 29% | WPA2 Personal | |
| Cisco97475 | 2.4 | 0% | Disabled | |
| 160nnnnn | 2.4 | 15% | Disabled | |
| X3500 | 2.4 | 0% | WPA2 Personal |
Use one of the following methods if your router (or access point) supports Wi-Fi Protected Setup:
- If your router has a Wi-Fi Protected Setup button, click or press that button, and then click the button on the right.

OR
- If your router asks for the client device's PIN number, enter this number 02743103 in your router and then click OK
Link Status:
Disconnected
Network Name (SSID):
Security:
- If your router has a Wi-Fi Protected Setup button, click or press that button, and then click the button on the right.

Local Wi-Fi MAC Address: 00:11:E0:04:2F:86
Remote Wireless Bridges' Wi-Fi MAC Addresses:
Note: When set to "Wireless Bridge" mode, this device will communicate only with another WAP300N in "Wireless Bridge" mode. Wireless settings, including wireless band, channel, channel width, security mode and passphrase/key, are required to be the same on all networked wireless bridges.
Wireless Band:

5 GHz

2.4 GHz
Channel Width:
Auto (20 MHz or 40 MHz)
Channel:
36 - 5.180GHz

Channel Width:
Auto (20 MHz or 40 MHz)
Channel:
1 - 2.412GHz

Note: When set to "Wireless Bridge" mode, wireless settings, including wireless band, channel, channel width, security mode and passphrase/key, are required to be the same on all networked wireless bridges.
Disabled (Default: Enabled)

Enabled

Disabled (Default: Disabled)
Access via Wireless:

Enabled

Disabled
Backup Configurations
MEO
natural_image
Top-down view of a black wireless router with two antennas and a red indicator light (no visible text or symbols)-HOĂC-
Warning! If you click OK, the device will reset to factory default and all previous settings will be erased.
| Firmware Version: | 1.0.00, build 35, Oct 17, 2012 |
| Firmware Verification: | 56bd32b111ca56fc37202b7be87a5b76 |
| MAC Address: | 00:11:E0:04:2F:8S |
| IP Address: | 10.100.1.1 |
| Subnet Mask: | 255.255.255.0 |
| Default Gateway: |
| Operation Mode: | Access Point |
| MAC Address: | 00:11:E0:04:2F:86 |
| Network Name (SSID): | linksys |
| Network Mode: | 2.4G/5G Mixed |
| Radio Band: | 2.4 GHz |
| Channel: | 1 |
| Channel Width: | Auto (20 MHz or 40 MHz) |
| Security: | Disable |
| SSID Broadcast: | Enable |