ZEN VISION M - Portable media player CREATIVE - Free user manual and instructions
Find the device manual for free ZEN VISION M CREATIVE in PDF.
User questions about ZEN VISION M CREATIVE
0 question about this device. Answer the ones you know or ask your own.
Ask a new question about this device
Download the instructions for your Portable media player in PDF format for free! Find your manual ZEN VISION M - CREATIVE and take your electronic device back in hand. On this page are published all the documents necessary for the use of your device. ZEN VISION M by CREATIVE.
USER MANUAL ZEN VISION M CREATIVE
Zen Vision Mini PM3.book Page 157 Friday, October 21, 2005 11:39 AM
Ta npwta 157
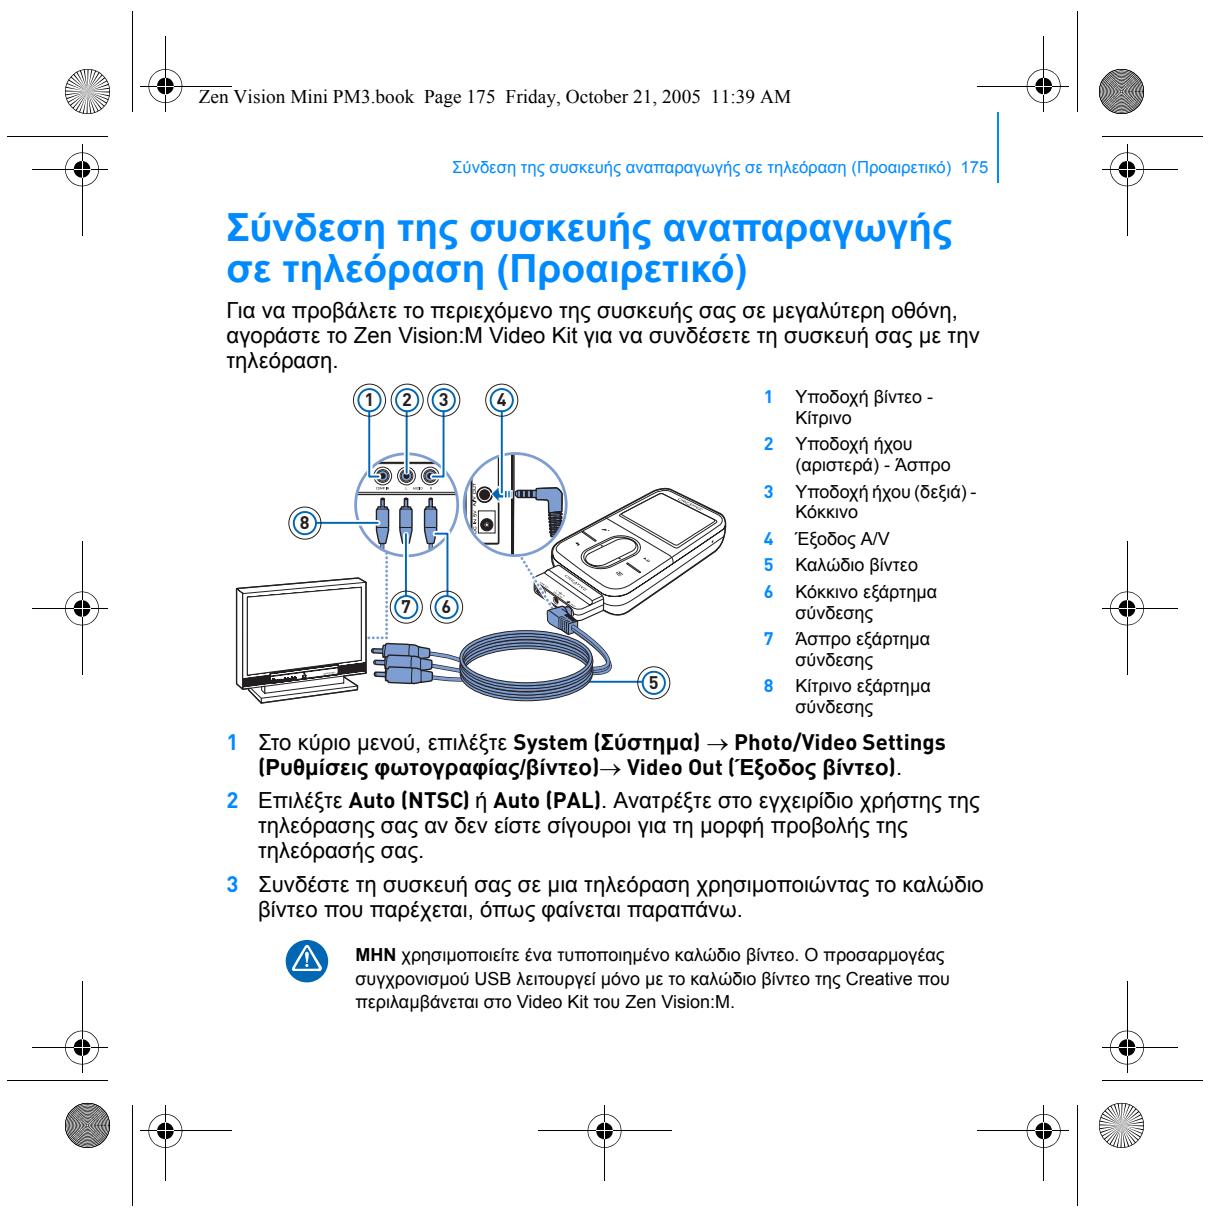
Zen Vision Mini PM3.book Page 169 Friday, October 21, 2005 11:39 AM
Diaxepian tsoukeunsvanapaywyns 169


NOTES