
A42C-6 - Cooker SMEG - Free user manual and instructions
Find the device manual for free A42C-6 SMEG in PDF.
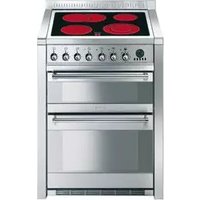


| Type of Product | Freestanding Cooker |
| Brand | Smeg |
| Model | A42C-6 |
| Fuel Type | Gas Hob, Electric Oven |
| Number of Gas Burners | 4 |
| Oven Type | Electric, Multifunction |
| Oven Capacity | 70 Liters |
| Dimensions (H x W x D) | 850 mm x 600 mm x 600 mm |
| Weight | 62 kg |
| Power Supply | 220-240 V, 50/60 Hz |
| Energy Efficiency Class (Oven) | A |
| Safety Features | Flame Failure Safety Device, Child Lock |
| Cleaning | Enamel Interior, Catalytic Panels (Optional) |
| Control Type | Knobs and Button Control |
| Door Type | Drop-Down Hinged Door with Removable Glass |
| Spare Parts Availability | Yes, Through Authorized Service Centers |
| Warranty | 2 Years (Standard) |
Frequently Asked Questions - A42C-6 SMEG
User questions about A42C-6 SMEG
0 question about this device. Answer the ones you know or ask your own.
Ask a new question about this device
Download the instructions for your Cooker in PDF format for free! Find your manual A42C-6 - SMEG and take your electronic device back in hand. On this page are published all the documents necessary for the use of your device. A42C-6 by SMEG.
USER MANUAL A42C-6 SMEG
INSTRUCTIONS FOR THE INSTALLER: these are intended for the qualified technician who must install the appliance, set it functioning and carry out an inspection test.

INSTRUCTIONS FOR THE USER: these contain user advice, description of the commands and the correct procedures for cleaning and maintenance of the appliance.
1. INSTRUCTIONS FOR SAFE AND PROPER USE

THIS MANUAL IS AN INTEGRAL PART OF THE APPLIANCE AND THEREFORE MUST BE KEPT IN ITS ENTIRETY AND IN AN ACCESSIBLE PLACE FOR THE WHOLE WORKING LIFE OF THE COOKER. WE ADVISE READING THIS MANUAL AND ALL THE INSTRUCTIONS THEREIN BEFORE USING THE COOKER. INSTALLATION MUST BE CARRIED OUT BY QUALIFIED PERSONNEL IN ACCORDANCE WITH THE REGULATIONS IN FORCE. THIS APPLIANCE IS INTENDED FOR DOMESTIC USES AND CONFORMS TO CURRENT REGULATIONS IN FORCE. THE APPLIANCE HAS BEEN BUILT TO CARRY OUT THE FOLLOWING FUNCTIONS: COOKING AND HEATING-UP OF FOOD. ALL OTHER USES ARE CONSIDERED IMPROPER. THE MANUFACTURER DECLINES ALL RESPONSIBILITY FOR IMPROPER USE.

DO NOT LEAVE THE PACKING IN THE HOME ENVIRONMENT. SEPARATE THE VARIOUS WASTE MATERIALS AND TAKE THEM TO THE NEAREST SPECIAL GARBAGE COLLECTION CENTRE.

IT IS OBLIGATORY FOR THE ELECTRICAL SYSTEM TO BE GROUNDED ACCORDING TO THE METHODS REQUIRED BY SAFETY RULES.

THE PLUG TO BE CONNECTED TO THE POWER CABLE AND THE SOCKET MUST BE THE SAME TYPE AND MUST CONFORM TO CURRENT REGULATIONS.
THE SOCKET MUST BE ACCESSIBLE AFTER THE APPLIANCE HAS BEEN BUILT IN.
IMMEDIATELY AFTER INSTALLATION CARRY OUT A BRIEF INSPECTION TEST OF THE APPLIANCE, FOLLOWING THE INSTRUCTIONS BELOW. SHOULD THE APPLIANCE NOT FUNCTION, DISCONNECT IT FROM THE SUPPLY AND CALL THE NEAREST TECHNICAL ASSISTANCE CENTRE.
NEVER ATTEMPT TO REPAIR THE APPLIANCE.

ALWAYS CHECK THAT THE CONTROL KNOBS ARE IN THE POSITION (OFF) WHEN YOU FINISH USING THE HOB.

NEVER PUT INFLAMMABLE OBJECTS INTO AN OVEN: IF THEY CATCH FIRE THEY COULD CAUSE A FIRE IN THE HOME.
GB-IE
Introduction
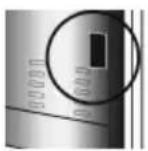
THE I.D. PLATE WITH TECHNICAL DATA, REGISTRATION NUMBER AND BRAND NAME IS VISIBLY POSITIONED ON THE REAR PROTECTIVE COVER OF THE APPLIANCE. A COPY OF THE PLATE IS INCLUDED WITH THE HANDBOOK AND YOU ARE ADVISED TO FIX IT IN THE APPROPRIATE SPACE ON THE INSIDE COVER PAGE.
THE PLATE MUST NEVER BE REMOVED.

DURING USE THE APPLIANCE BECOMES VERY HOT. TAKE CARE NOT TO TOUCH THE HEATING ELEMENTS INSIDE THE OVEN.

DO NOT PUT PANS WITHOUT PERFECTLY SMOOTH AND FLAT BOTTOMS ON THE COOKING HOB GRIDS.

DO NOT INSTALL THIS APPLIANCE ON A RAISED PLATFORM

ATTENTION: IN CASE OF A CRACK BEING DETECTED IN THE GLAZED CERAMIC HOB, IMMEDIATELY DISCONNECT FROM MAINS AND CONTACT THE NEAREST SERVICING CENTRE.

THE APPLIANCE IS DESIGNED FOR USE BY ADULTS. DO NOT ALLOW CHILDREN TO GO NEAR OR PLAY WITH IT.
WHILE COOKING WITH THE OVEN DOOR OPEN, A GREAT DEAL OF HEAT WILL COME OUT: KEEP CHILDREN AWAY FROM THE OVEN.

THIS APPLIANCE IS MARKED ACCORDING TO THE EUROPEAN DIRECTIVE 2002/96/EC ON WASTE ELECTRICAL AND ELECTRONIC EQUIPMENT (WEEE).
THIS GUIDELINE IS THE FRAME OF A EUROPEAN-WIDE VALIDITY OF RETURN AND RECYCLING ON WASTE ELECTRICAL AND ELECTRONIC EQUIPMENT.

BEFORE THE APPLIANCE IS PUT INTO OPERATION, ALL THE LABELS AND PROTECTIVE FILMS APPLIED INSIDE OR OUTSIDE MUST BE REMOVED.

The manufacturer declines all responsibility for damage to persons or things caused by non-observance of the above prescriptions or by interference with any part of the appliance or by the use of non-original spares.
2. INSTALLATION OF THE APPLIANCE

This unit is equipped with a type Y fire protection, and may be set against walls that are higher than the hob.

Built-in appliance

Free-standing installation

2.1 Electrical connection
Check that the voltage and dimensioning of the supply line correspond to the characteristics shown on the plate fixed to the rear protective cover of the appliance.
This plate must never be removed.

On the power line, install an omnipolar cut-off device with contact cut-off distance greater than or equal to 3 mm, located in an easily accessible position near the unit.
The appliance is fitted with a terminal board at the rear for electrical connections (see following diagram). To access, remove the rear cover.


For operation on 380-415V3N~: use an H05RR-F-type five-core cable (5 x 2.5 mm²).
For operation on 380-415V2N~: use an H05RR-F-type four-core cable (4 x 4 mm²).
For operation on 220-240V~: use an H05RR-F-type three-core cable (3 x 6 mm²).
The cable end to be connected to the appliance must be provided with an ground wire (yellow-green) at least 20 mm longer.


Instructions for the installer


Complete wiring up to power supply with an appropriately rated five-core plug (see data plate) or, in case of operation from a 220-240V~ power supply, with a three-core plug. Make sure that plug and wall socket are of the same type and are in conformity with regulations in force. Make sure that the appliance is properly earthed. Before powering, check that the power line is properly earthed. Avoid using adapters or shunters.

The manufacturer declines all responsibility for damage to persons or things caused by non-observance of the above prescriptions or by interference with any part of the appliance.

2.2 Positioning and levelling of the appliance
Having carried out the electricity hook-up, level the appliance using the four adjustable legs.
2.3 Instruction for wall fixing (only on some models)
1) Fix the screw to the wall and hook the chain (B); 2) Hook the chain to the hole positioned at the rear of the cooker by the gas pipe (A); 3) Once the chain is in position, push the cooker against the wall; 4) The height of the screw hole from floor level must not exceed 800 mm (C).

A

B

C
3. DESCRIPTION OF CONTROLS
3.1 Front control panel
All the cooker controls and commands are on the front panel.


The user has only to press the central key Ⓤ for 1/2 seconds to enable use of the oven on first use or after a power blackout. (only for the main oven)
DESCRIPTION OF SYMBOLS

FRONT LEFT-HAND COOKING ZONE

MAIN OVEN

REAR LEFT-HAND COOKING ZONE

AUXILIARY OVEN GRILL

REAR RIGHT-HAND COOKING ZONE

COOKING HOB CONTROL KNOB
Standard heating
The circle next to each knob indicates the cooking zone it controls. To heat, push and turn the knob to the desired position (1 to 9). Adjustment is continuous so that the appliance also operates at any intermediate value. To turn off, return the knob to 0.

Double heating
The circle next to each knob indicates the cooking zone it controls. To heat the inner cooking zone, push and turn the knob to the desired position (1 to 9).


To heat both the inner and outer cooking zones, turn the knob to ☐; and then release. The knob will thus return to 9. To adjust heating intensity, rotate the knob anticlockwise to the desired position. To return to heating of the inner cooking zone only, set the knob back to 0 and then turn to the desired position (1 to 9). To switch off, return knob to 0.
MAIN OVEN THERMOSTAT KNOB
Selection of cooking temperature is carried out by turning the knob clockwise to the required temperature, between 50° and 250°C.
The tell-tale light comes on to indicate that the oven is warming up. When it goes out it means that the required temperature has been reached.

Intermittent going on and off of the light means that oven temperature is being constantly maintained at the programmed level.
The oven is switched on by turning the knob clockwise to any one of the following functions:

NO FUNCTION SET
GRILL ELEMENT (SPIT)

VENTILATED HEATING ELEMENT + VENTILATION 50 ÷ 250°C
GRILL ELEMENT + VENTILATION (SPIT)

FROSTING (NO HEATING ELEMENT ENGAGED)
AUXILIARY OVEN THERMOSTAT KNOB
Selection of cooking temperature is carried out by turning the knob clockwise to the required temperature, between 50° and 250°C.
The tell-tale light comes on to indicate that the oven is warming up. When it goes out it means that the required temperature has been reached. Intermittent going on and off of the light means that oven temperature is being constantly maintained at the programmed level.

The oven is switched on by turning the knob clockwise to any one of the following functions except the oven light:

NO FUNCTION SET
UPPER AND LOWER HEATING ELEMENT

GRILL ELEMENT

HEATING ELEMENT + GRILL ELEMENT

LOWER HEATING ELEMENT
AUXILIARY OVEN VARIABLE GRILL KNOB
Position the auxiliary oven thermostat knob on the symbol or.
Turn the variable grill knob clockwise to the desired position.
When the signal light comes on the grill is engaged.

3.2 Electronic Analogue Clock

The instructions provided apply to the main oven only.

LIST OF FUNCTIONS

MINUTE-MINDER BUTTON
AUTOMATIC SWITCH-OFF TIMING BUTTON
TIME SETTING AND RESET
VALUE DECREASE BUTTON
VALUE INCREASE BUTTON
3.2.1 Setting the time
When the oven is used for the first time, or after a power blackout, the display flashes on and off at regular intervals. Press the ⏰ key for 1/2 seconds to stop the display flashing and start setting of the current time.
Press the value modification keys — or to increase or decrease by one minute for each time a key is pressed.
Press one of the two value modification keys until the current time appears. The clock will start from the time set 6/7 seconds after the last key is pressed.

At the end of each programmed cooking operation, the clock gives 8 beeps, repeated 3/4 times at intervals of about 1 and a half minutes. The beeps can be stopped at any moment by pressing any key.
3.2.2 Minute-minder
This function does not stop cooking but just triggers the beeps.
- When the ⏻ key is pressed the display illuminates, appearing as shown in figure 1;
- Press the + or - keys within 6/7 seconds to set the minute-minder. Whenever a key is pressed, 1 outside segment, representing 1 cooking minute will light up (figure 2 shows 10 cooking minutes).
- The countdown will start 6/7 seconds after the last key is pressed; at the end of it, you will hear the beeps.
- During cooking with countdown, the current time can be displayed by pressing the ⏱ key once; press again to return to the minute-minder display.
- At the end of the countdown, the oven has to be switched off by hand, by turning the thermostat to 0.


3.2.3 Programming
Cooking duration time: the 2nd button can be used to set the cooking time. Before setting it, turn the thermostat to the cooking temperature of choice and the function selector knob to any setting. To set the cooking time, proceed as follows:
- Press the 📄 key for 1/2 seconds; the pointer will move to position 12 (Fig. 1).
- Use the - and + keys to set the cooking time; whenever the + key is pressed, 1 minute will be added to the cooking time, and every 12 minutes a new inside segment will light up (figure 2 shows a cooking time of 1 hour).
- Once the required time has been set, cooking will start about 6 seconds after the last time the - or +. key is pressed.
- Once cooking has started, the display will show the current time, represented by the constantly on segments, and the minutes left until cooking finishes, represented by the flashing segments (every flashing segments indicates 12 minutes of cooking time left).
- When the end of the cooking time is reached, the timer will switch off the oven heating elements, the beeps will start and the numbers on the dial will flash.
- The cooking time can also be reset by deleting the program set; pressing the central key ⏰ for 1 or 2 seconds will delete the time set and the oven will have to be switched off by hand.


Caution: cooking times of more than 6 hours cannot be set.
Cooking start: as well as setting a cooking duration time, the user can also set the cooking start time (up to 12 hours after the current time). To set the cooking start/end time, proceed as follows.
- Set the cooking duration time as described in the previous point. - Within 6/7 seconds after the last time the - or + keys are pressed, press the 📁 key to set the cooking start time. The display will show the current time with the inside segments indicating the cooking end time illuminated. Use the - and + keys to set the cooking start time.
- 6/7 seconds after the last time a key is pressed, the display will show the current time and the cooking start and end times, indicated by the illuminated inside segments. The segments on the display will be constantly on until the current time is the same as the cooking start time; as soon as the current time reaches the cooking start time set, all the inside segments will start to flash, indicating that the oven has started cooking.
- When the end of the cooking time is reached, the timer will switch off the oven heating elements, the beeps will start and the numbers on the dial will flash.
- To reset the entire program set, keep the central key ⏰ pressed for 1 or 2 seconds: if cooking has already started the oven will have to be switched off by hand.
- The image on the right shows an example of programming: the current time is 7.06 and cooking is programmed to start at 8 o'clock and finish at 9.
- At 8 o'clock, the inside segments between 8 and 9 will start to flash and the hour pointer will remain still.

Caution: for the oven to start cooking after the programming procedure just described, the thermostat must be properly set on the temperature required.
3.2.4 "DEMO" Function
Models with analogue/digital programmer feature a "DEMO" function which deactivates the heating elements while leaving the other functions unchanged. To activate it, simply press the ⏻, , and keys and keep them held down for 3-4 seconds. A confirmation buzzer will inform the user that the function is active. When the "DEMO" function is active, the number 6 on the clock flashes at regular intervals. To deactivate it, simply repeat the same procedure.
4. USE OF THE COOKING HOB
4.1 Cooking zones
The appliance features 4 cooking zones of different diameter and power. Their position is clearly indicated by circles and the heat given off is defined by the markings on the glass surface.

The 4 cooking zones are of the HIGH-LIGHT type and come on after a few seconds of being activated. Heating intensity can be adjusted by means of the knobs located on the front panel from a minimum setting of 1 to a maximum setting of 9.
The cooking zones marked by two concentric circles ( ) and by a circle + fish-kettle ( ) feature double heating either within the inner circle or both circles.
The 4 signal lamps located between the cooking zones come on when the temperature of one or more of the heating zones exceeds 60° C.

The lamps go off upon temperature dropping to below approximately 60° C.

When using for the first time, it is advisable to heat up the cooking hob to its maximum temperature for enough time so as to burn off any possible oily manufacturing residues, the smell of which could otherwise be absorbed by the food.
For best results and energy saving, only use receptacles suitable for electric cooking:
- The bottom of the receptacles must be very thick and perfectly flat; before placing on the cooking hob, make sure that it, as well as the cooking hob itself, are perfectly clean and dry.
- To avoid scratching of the cooking hob, never use cast-iron receptacles or receptacles with a rough bottom.
- To avoid waste of energy, make sure that the diameter of the receptacle bottom is the same as that of the circle marked on the cooking hob.


Take care not to spill sugar or sweet mixtures on to the cooking hob when hot. Never place materials or substances which may melt (plastic or aluminium foil) on to the cooking hob. In the event, promptly switch off and remove the molten material with the scraper provided while the top is still warm to prevent it from being damaged. Failure to instantly clean the glazed ceramic hob could lead to encrustations which are impossible to remove once the hob has cooled down.


Important.
Beware of children in the vicinity as the signal lamps indicating residual heat are out of sight to them. In fact, even after having been turned off, the cooking hob remains hot for a certain period of time.
Make sure that children never touch the cooking hob.
4.2 Cooking tips
The following table shows the knob setting according to the type of food to be cooked or heated. Setting may vary depending on the amount of food and personal taste.
| KNOB SETTING | TYPE OF FOOD |
| 1 | TO MELT BUTTER, CHOCOLATE, AND THE LIKE. |
| 2-3 | TO HEAT FOOD, KEEP SMALL AMOUNTS OF WATER ON THE BOIL, AND WHIP UP SAUCES WITH EGG YOLK OR BUTTER. |
| 4-5 | TO HEAT SOLID OR LIQUID FOOD, KEEP SMALL AMOUNTS OF WATER ON THE BOIL, THAW DEEP-FROZEN FOOD, COOK OMELETTES OF 2 OR 3 EGGS, FRUIT AND VEGETABLES, AND THE LIKE. |
| 6 | TO STEW MEAT, FISH AND VEGETABLES, SIMMER FOOD, MAKE JAMS, AND SO ON. |
| 7-8 | TO ROAST MEAT, FISH, STEAKS, AND LIVER; TO SAUTÉ MEAT, FISH, EGGS AND SO ON. |
| 9 | TO DEEP-FRY POTATOES, ETC AND TO QUICK-BOIL WATER. |
5. USE OF THE OVENS
5.1 Warnings and general advice
Before using the oven for the first time, pre-heat it to maximum temperature (250°C) long enough to burn any manufacturing oily residues which could give the food a bad taste.
The user has only to press the central key ⏰ for 1/2 seconds to enable use of the oven on first use or after a power blackout.

To avoid problems that may be caused by any vapour in the ovens, open the doors in two phases: keep them half open (about 5 cm) for 4-5 seconds then open them completely. If you need to attend to the food the doors should be left open for the shortest time possible, thus avoiding lowering of internal temperature to a point that might jeopardise final cooking results.


During cooking, do not cover the bottom of the oven with aluminium or tin foil and do not place pans or oven trays on it as this may damage the enamel coating. If you wish to use greaseproof paper, place it so that it will not interfere with the hot air circulation inside the oven.
6. AVAILABLE ACCESSORIES
The main oven has 4 supports for positioning plates and racks at various heights and has upper protection.
The auxiliary oven has 2 supports.
Oven rack: for cooking food on plates, small cakes, roasts or food requiring light grilling.
Plate rack: for placing above plate for cooking foods that might drip.
Oven plate: useful for catching fat from foods on the rack above.
Pastry plate: for baking cakes, pizza and oven desserts.
Roasting spit: useful for cooking chicken, sausages and anything else requiring uniform cooking over the whole surface. Only for main oven.
Spit Frame: to be inserted in the guides of the main oven before using the spit.
Chromium-plated tubular gripper for removing hot racks and plates from the oven.


The chromium-plated tubular gripper is a very useful accessory in the kitchen. Besides firmly gripping plates and racks, it prevents direct contact (avoiding the use of oven gloves and fabric pot-holders).


Accessories on Request
Self cleaning oven panels can be requested through Authorised Service Centres.

Instructions for the user

7. COOKING HINTS

In fan-assisted mode preheating should be carried out at 30/40°C above the cooking temperature. This considerably shortens cooking times and reduces power consumption, as well as giving better cooking results.

Keep the oven door closed during cooking
7.1 Hot-air cooking


FUNCTION SWITCH

THERMOSTAT SELECTOR SWITCH FROM 50° TO 250°C


This system is suitable for cooking on several levels, including different types of food (fish, meat etc.), without the tastes and smells mingling. Air circulation in the oven ensures a uniform distribution of heat. Pre-heating is not necessary.

Multiple cooking is possible as long as the cooking temperature of the different foods is the same.
7.2 Hot-air grilling


FUNCTION SWITCH

THERMOSTAT SELECTOR SWITCH FROM 50° TO 250°C


Ensures uniform heat distribution with greater heat penetration into the food. Food will be lightly browned on the outside and remain soft inside. Keep the oven door closed during cooking. Heating up time must not exceed 60 minutes.

Keep the oven door closed during grilling. Grilling with the door open could permanently damage the oven and affect safety of operation.
7.3 Grill cooking


THERMOSTAT SWITCH IN POSITION


Permits rapid browning of foods. You are advised to place the pan in the highest guide. For short-term cooking of small quantities, place the grid in the third guide from the bottom. For long-term cooking and grills, put the grid in the lowest guide in accordance with the size of the pieces.
While cooking a great deal of heat will come out: keep children away from the oven.

Keep the oven door closed during grilling. Grilling with the door open could permanently damage the oven and affect safety of operation.
7.4 Defrosting


THERMOSTAT IN POSITION


The flow of air produced by the fan ensures quicker defrosting. The air circulating inside the oven is at room temperature.

The advantage of defrosting at room temperature is that it does not alter the taste and appearance of the food.
7.5 Traditional cooking


THERMOSTAT SELECTOR SWITCH FROM 50° TO 250°C


This traditional cooking method, in which heat comes from above and below, is suitable for cooking food on a single level. You have to preheat the oven until the set temperature is reached. Place the food in the oven only after the thermostat indicator light has turned off. Very fatty meats may be put in when the oven is still cold. Put frozen meat in immediately, without waiting for it to thaw. The only precaution you need to take is to set the temperature about 20°C lower and cooking time about 1/4 longer than you would for fresh meat.

Use high-rim pans to prevent fat splashing and dirtying the sides of the oven.

7.6 Delicate cooking


THERMOSTAT SWITCH IN POSITION


Ideal for pastries and cakes with wet covering and little sugar and damp desserts in moulds. Excellent results can also be achieved in completing cooking at the bottom and with dishes requiring heat in the lower area in particular. The plate is best inserted at bottom level.
7.7 Variable grill cooking


FUNCTION SWITCH

VARIABLE GRILL CHOICE BETWEEN MIN. AND MAX.


This function permits varying the power of the grill according to the quantity of food to be cooked.
Turn the thermostat knob clockwise to the desired position.
7.8 Spit cooking


This type of cooking is only for the main oven. Use it for small size pieces.
Prepare the food on the spit rod and block fork screws A. Insert the frame B in the third level from the bottom. Remove handle D and position the spit rod so the pulley E remains guided on frame B. Completely fit frame B until the tip of the spit rod fits into hole C on the back wall of the oven. Place an oven dish F on the bottom guide and pour in a little water to prevent smoke from forming.
Keep the oven door closed during cooking. Heating up time must not exceed 60 minutes.

It is normal for the thermostat light to going on and off during cooking. This indicates the temperature inside the oven is regular.

8. CLEANING AND MAINTENANCE
8.1 Cleaning the glazed ceramic hob

Before any intervention, disconnect the power supply of the device.

The cooking hob should be regularly cleaned; best after every use, once the residual heat signal lamps have gone off.

NEVER USE A STEAM JET TO CLEAN THE APPLIANCE.
Smudges from aluminium-bottom pans can be easily cleaned off with a cloth dampened in vinegar.
Remove any burnt residues after cooking with the scraper provided; rinse with water and wipe dry with a clean cloth. Regular use of the scraper considerably reduces the need for chemical detergents for the daily cleaning of the hob.

Never use abrasive or corrosive detergents (e.g. cleaning powders, oven sprays, spot-removers, wire sponges).
8.2 Cleaning stainless steel
8.2.1 Ordinary Daily Cleaning
To clean and preserve the stainless steel surfaces, always use only specific products that do not contain abrasives or chlorine-based acids.
How to use: pour the product on a damp cloth and wipe the surface, rinse thoroughly and dry with a soft cloth or deerskin.
8.2.2 Food stains or residues
Do not use metallic sponges or sharp scrapers: they will damage the surface.
Use normal non-abrasive products for steel, and a wooden or plastic tool if necessary.
Rinse thoroughly and dry with a soft cloth or deerskin.
Do not allow residues of sugary foods (such as jam) to set inside the oven. If left to set for too long, they might damage the enamel lining of the oven.


8.3 Cleaning the inside of the oven
For best oven upkeep clean regularly after having allowed to cool. Take out all removable parts.
Clean the oven rack and side guides with hot water and non-abrasive detergent. Rinse and dry.
8.3.1 Self-cleaning liners
The main oven is equipped with continuous self-cleaning enamelled liners.
These liners make the oven easier to clean and ensure its efficiency over time.
8.3.2 Using the self-cleaning liners
Periodically, to prevent food residues and unpleasant smells from accumulating inside the oven, the appliance should be operated empty at temperatures of not less than 200°C for a time varying from 30 to 60 minutes, in order to allow the self-cleaning liners to oxidise the residues present; when the oven has cooled, these will then be removed with a damp sponge.
8.3.3 Looking after the self-cleaning liners
The liners should not be cleaned with abrasive creams or ordinary detergents. Use a damp sponge only, so as not to damage the special characteristics of the enamel which coats the liners.
8.3.4 Assembling the self-cleaning liners
- Remove all accessories from the oven;
- Remove the side racks (fig.1);
- Extract the side liners "F" and "G" (fig. 2);
- Remove the back panel "A" after undoing the threaded ring-nut "C" (fig. 2).
- Reassemble the panels, restoring them to their original position.


8.4 Door glass
These should always be kept very clean. Use absorbent kitchen paper or, in case of hard to remove dirt, wash with a wet sponge and ordinary detergent.
9. EXTRAORDINARY MAINTENANCE
Ovens periodically require small maintenance interventions or replacement of parts subject to wear and tear such as gaskets, electric bulbs etc. Specific instructions for each intervention of this type appear below.

Before performing any operations requiring access to powered parts, switch off the power supply to the machine.
9.1 Replacement of light bulbs
Remove cover A by twisting anticlockwise, replace bulb B with another similar bulb (25 W). Refit the cover A.


Only use oven bulbs (T 300°C).
9.2 Removing the door
Open the door completely and fit the pins (supplied) into the holes from the inside. Close the door to an angle of about 45°, lift it and remove it from its seat. To replace, fit the hinges into the grooves provided, then lower the door until it comes to rest and extract the pins. If the pins are lost, two screwdrivers can also be used.

The door gaskets can be dismantled for thorough cleaning of the ovens. Before removing the gaskets the oven doors must be removed as previously described. With the doors removed, raise the tabs at the corners as shown in the figure.

- INSTRUCTIONS FOR SAFE AND PROPER USE
- GB-IE
- INTRODUCTION
- INSTALLATION OF THE APPLIANCE
- ELECTRICAL CONNECTION
- INSTRUCTIONS FOR THE INSTALLER
- POSITIONING AND LEVELLING OF THE APPLIANCE
- INSTRUCTION FOR WALL FIXING (ONLY ON SOME MODELS)
- DESCRIPTION OF CONTROLS
- FRONT CONTROL PANEL
- DESCRIPTION OF SYMBOLS
- COOKING HOB CONTROL KNOB
- STANDARD HEATING
- DOUBLE HEATING
- MAIN OVEN THERMOSTAT KNOB
- AUXILIARY OVEN THERMOSTAT KNOB
- AUXILIARY OVEN VARIABLE GRILL KNOB
- ELECTRONIC ANALOGUE CLOCK
- LIST OF FUNCTIONS
- SETTING THE TIME
- MINUTE-MINDER
- PROGRAMMING
- DEMO" FUNCTION
- USE OF THE COOKING HOB
- COOKING ZONES
- IMPORTANT
- COOKING TIPS
- USE OF THE OVENS
- WARNINGS AND GENERAL ADVICE
- AVAILABLE ACCESSORIES
- ACCESSORIES ON REQUEST
- INSTRUCTIONS FOR THE USER
- COOKING HINTS
- HOT-AIR COOKING
- FUNCTION SWITCH
- THERMOSTAT SELECTOR SWITCH FROM 50° TO 250°C
- HOT-AIR GRILLING
- GRILL COOKING
- THERMOSTAT SWITCH IN POSITION
- DEFROSTING
- THERMOSTAT IN POSITION
- TRADITIONAL COOKING
- DELICATE COOKING
- VARIABLE GRILL COOKING
- VARIABLE GRILL CHOICE BETWEEN MIN. AND MAX
- SPIT COOKING
- CLEANING AND MAINTENANCE
- CLEANING THE GLAZED CERAMIC HOB
- CLEANING STAINLESS STEEL
- ORDINARY DAILY CLEANING
- FOOD STAINS OR RESIDUES
- CLEANING THE INSIDE OF THE OVEN
- SELF-CLEANING LINERS
- USING THE SELF-CLEANING LINERS
- LOOKING AFTER THE SELF-CLEANING LINERS
- ASSEMBLING THE SELF-CLEANING LINERS
- DOOR GLASS
- EXTRAORDINARY MAINTENANCE
- REPLACEMENT OF LIGHT BULBS
- REMOVING THE DOOR
Brand : SMEG
Model : A42C-6
Category : Cooker