
Azur 7000 Series DST7020 - Iron PHILIPS - Free user manual and instructions
Find the device manual for free Azur 7000 Series DST7020 PHILIPS in PDF.
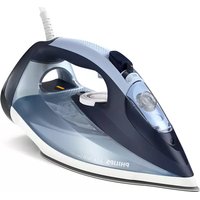

 FR
FR
 BG
BG
 CS
CS
 DA
DA
 DE
DE
 EL
EL
 EN
EN
 ES
ES
 ET
ET
 FI
FI
 HU
HU
 ID
ID
 IT
IT
 KK
KK
 KO
KO
 LT
LT
 LV
LV
 NL
NL
 NO
NO
 PL
PL
 PT
PT
 RO
RO
 RU
RU
 SK
SK
 SV
SV
 TH
TH
 TR
TR
 UK
UK
 ZH
ZH
| Product type | Steam iron |
| Brand | Philips |
| Model | Azur 7000 Series DST7020 |
| Dimensions (L x W x H) | 30 x 13 x 15 cm |
| Weight | 1.2 kg |
| Power supply | 220-240 V, 50-60 Hz |
| Power | 2400 W |
| Water tank capacity | 300 ml |
| Continuous steam output | 40 g/min |
| Intense steam output | 150 g/min |
| Soleplate type | Philips SteamGlide |
| Cord length | 2 m |
| Auto shut-off | Yes, after inactivity |
| Anti-scale system | Yes, built-in |
| Anti-drip function | Yes |
| Vertical steam function | Yes |
| Cleaning | Self-cleaning function |
| Maintenance | Regular descaling recommended |
| Safety | Auto shut-off in vertical position |
| Available spare parts | Tank, soleplate, filling cap |
Frequently Asked Questions - Azur 7000 Series DST7020 PHILIPS
User questions about Azur 7000 Series DST7020 PHILIPS
0 question about this device. Answer the ones you know or ask your own.
Ask a new question about this device
Download the instructions for your Iron in PDF format for free! Find your manual Azur 7000 Series DST7020 - PHILIPS and take your electronic device back in hand. On this page are published all the documents necessary for the use of your device. Azur 7000 Series DST7020 by PHILIPS.
USER MANUAL Azur 7000 Series DST7020 PHILIPS
Congratulations on your purchase and welcome to Philips! To fully benefit from the support that Philips offers, register your product at www.philips.com/welcome. Read this user manual, the important information leaflet, and the quick start guide carefully before you use the appliance. Save them for future reference.
Product overview

1 Water tank lid 2 Steam selector 3 Water spray 4 Cord 5 Cord winding 6 Indicator light 7 Steam boost trigger 8 Temperature dial 9 Quick Calc Release collector
Using the appliance
Type of water to use
Note: The iron may give off some steam when you use it for the first time. This stops after a short while.
Type of water to use
The appliance is suitable to be used with tap water. However, if you live in an area with hard water, we recommend that you mix an equal amount of tap water with distilled or demineralized water. This will prevent fast scale build up and prolong the lifetime of the appliance.
Do not add perfume, water from the tumble dryer, vinegar, starch, descaling agents, ironing aids, chemically descaled water or other chemicals, as they may cause water spitting, brown staining or damage to your appliance.
Filling the water tank

1 Do not plug in the iron.

2 Slide the steam selector to the right to select no steam mode/dry ironing mode

3 Flip open the water tank lid.

4 Fill water tank up to the MAX indication mark. Do not add any additives like perfume, fragrances, soap or vinegar.

5 Close the water tank lid firmly.
Setting the temperature and steam
 |  | |
| MAXLINEN | ||
| ●●●COTTON | ||
| ●●SILK | ECO | |
| ●SYNTHETICS |

ECO setting: Minimum constant steam is delivered continuously for garments with less creases. This setting also saves energy.

Two steam clouds: More constant steam is delivered continuously for tough creases.

For stubborn creases, set the steam setting to two steam clouds and press and hold the steam boost trigger below the handle. Maximum constant steam will be delivered continuously.
Preparing for use

Smoke can be visible during the first use, and it is normal. This ceases after a short while.
1 Check the garment label to ensure that the fabric is ironable and its appropriate temperature setting.

2 Turn the temperature dial to the appropriate ironable temperature indication according to the garment label.

3 Allow the iron to rest on its heel.

4 Insert the plug into an earthed socket and allow the iron rest on its heel. If using an extension plug, ensure that the power rating of the extension plug is suitable for the iron.

5 Wait for the iron to heat up. The indicator light will turn steady on while it is heating up.

6 Once the iron is ready to be used, the indicator light will switch off. The indicator light may turn on and off during ironing as the iron heats up periodically to maintain its temperature.
Ironing with steam
1 Slide the steam selector to ECO mode or steam mode.

2 Turn the temperature dial to between silk and linen based on the image.


3 Steam will be released during ironing.
No steam mode/dry ironing mode

1 Set the steam setting to no steam mode/dry ironing mode

2 After a short while, steam will cease during ironing.
Water spray

1 Press and release the water spray button at the top of the handle. Water will be sprayed out of the nozzle.
Horizontal & vertical steam boost
1 Set temperature dial to MAX setting between cotton and linen.

10
English

2 Vertical steam boost: Press and release the steam boost trigger in the vertical position to release shots of steam on hanging garments. Holding down the steam boost trigger in the vertical position will not deliver constant steam.

3 Vertical steam boost: Pull and stretch your hanging garment while using the steam boost to remove stubborn creases.

4 Do not use your bare hand as a supporting surface when you iron.

5 Do not position the iron towards yourself or others.
Auto shut off (DST7030, DST7040, DST7050, DST7060, DST7510 only)

1 To give you a peace of mind, the appliance will cool down on its own if it is left unattended for a period of time.
2 When the iron is not in use for more than 30 seconds while resting on its soleplate or 8 minutes while resting on its heel/ base, the iron will enter auto shut off mode.
3 The temperature of the iron will decrease in auto shut off mode. The Auto Shut Off light will also blink quickly to indicate the iron is at auto-off status. To completely switch off the iron, plug out the iron/ switch off the mains plug.
4 Picking up or moving the iron will reactivate it.
5 The indicator light will turn steady ON, indicating that the iron is heating up again.

6 Once the indicator light switches OFF, the iron is ready for use.
Cleaning and maintenance

1 Ensure the iron is not plugged in.

2 Ensure the iron is cooled down.

3 Wipe the soleplate with a damp cloth.

Note: To keep the soleplate smooth, avoid hard contact with metal objects. Never use a scouring pad, vinegar or other chemicals to clean the soleplate.

4 Do not wash/ clean the iron under running water as it may damage the electrical components within.
Calc-Clean

Tip: The Quick Calc Release function can be used at any time. If you live in a hard water area, use the function more frequently.
1 It is recommended to descale your iron after every 1 to 3 months of use to prolong its lifetime, or when brown stains/water is observed.
IMPORTANT: The Quick Calc Release automatically collects loose scale particles during ironing.

2 Ensure the iron is not plugged in.

3 Ensure the iron is cooled down.
14 English

4 Slide up the Quick Calc Release collector lever.

5 Pull out the Quick Calc Release collector lid.

6 Clean the Quick Calc Release collector lid with water.

7 Shake the iron to drain the water and scale particles from the opening of the iron.

8 Do not run water into the opening of the iron.

9 Shake the iron to drain the water and scale particles from the opening of the iron.

10 Push down the lever to lock the Quick Calc Release collector. You will hear a 'click' sound.
Storage

1 Slide the steam selector to select no steam mode/dry ironing mode

2 Unplug the iron.

3 Let the iron cool down.

4 Pour any remaining water out of the water tank.

5 Wind the power cord around the main body of the iron.
Troubleshooting
This chapter summarizes the most common problems you could encounter with the appliance. If you are unable to solve the problem with the information below, visit www.philips.com/support for a list of frequently asked questions or contact the Consumer Care Center in your country.
Problem Possible cause Solution
| My Philips Steam Iron does not produce steam. | There is no water/not enough water in the tank. | If there is no water in the water tank of your Philips Steam Iron, your iron is not able to generate steam. Please refill the water tank with water. After this, your iron should produce steam again. |
| The iron is not ready to steam. | Your iron is ready to produce steam when the indicator light switches off. | |
| The steam setting is set to no steam mode/dry ironing mode | Aways ensure that the temperature dial is at the 2-dot ●3 ●lot or ●te●HEN setting. Then, select a steam setting (ECO setting and 2-cloud setting) on the steam selector at the top of the handle.Ironing with steam with the temperature dial at the 1-dot or SYNTHETIC setting may cause wet spots/leaking as the temperature of the iron may not be hot enough to convert water to steam | |
| My Philips Steam Iron does not remove creases. | The temperature is set too low. | For irons with a temperature dial, please set the temperature according to the fabric that you are ironing. You can use the following table as a reference.Note: For some fabrics such as silk, wool, cotton and linen, steam would be needed to remove creases more efficiently. |
| Steam is not used. Switch the steam selector to or 2-cloECOettingYour Philips Iron does not produce steam when the temperature dial is at the 1-dot position, SYNTHETIC or Calc-Clean setting. You can get more steam by changing to a stronger steam setting, or using the steam boost function to help remove tough wrinkles.To remove creases in the vertical position, press and release the steam boost trigger or button to release a shot of steam. Holding down the trigger or button will not produce a continuous steam boost.Note that repeated usage of the steam boost in a short period of time may cause spitting or a reduction in the amount of steam produced. If this happens, wait for a short while before using the steam boost function again. | ||
| The steam boost in my Philips Steam Iron is not working. | The steam boost trigger has not been pressed and released. | To activate the steam boost in your Philips Steam Iron, press and release the steam boost button/trigger. Holding onto the steam boost button/trigger does not produce continuous steam boost. You may need to press the steam boost button/trigger several times on the first use for the pump to draw sufficient water.Note: We recommend to use the steam boost at the 3-dot temperature setting or higher. Using the steam boost at lower temperature settings may result in wet spots forming as the temperature of the iron may not be high enough to convert water into steam. |
| The steam boost function was used too often within a short period of time. | When you use the steam boost function of your Philips Steam Iron too often within a short period, the steam boost function will stop working for a while. In this case, please wait a couple of minutes before you use the steam boost again.For stubborn wrinkles, we recommend to use the steam boost with the steam setting at the no steam mode/dry ironing mode for the best effect. | |
| The iron is not ready to steam. | The iron is ready to steam when the indicator light switches off. | |
| My Philips Steam Iron produces smoke when heating up. | First usage. During production, some parts of the iron have been slightly greased. As a result of this, your iron may produce some smoke when it is switched on for the first few times, this is normal and should dissipate shortly. | |
| There is water in the soleplate. | Sometimes, there might still be some remaining water in your iron's soleplate after the last usage. This water will evaporate when your iron's soleplate heats up, and the steam generated may look like smoke. This is normal and should dissipate shortly. | |
| My iron is still producing smoke even after checking the above. | There could be an issue with the iron, we recommend you to contact us. | |
| There are water droplets/leaking on my garment during ironing. | First time usage. If you experience leaking/spitting during your first usage, perform the Calc Clean function once. If this does not resolve the leaking on your next use, we recommend you to contact us. | |
| The steam boost function was used too often within a short period of time. | Continue ironing in horizontal position and wait a while before you use the steam boost function again. | |
| There is a build up of scale/calcification in the iron. | If there is brown water or white flakes coming out of the iron, this may indicate a build up of calcification in the iron. Perform the Calc Clean function to clear this. If you live in an area with hard water, we recommend to use distilled water (or 50% distilled and 50% tap water) and perform the calc clean function once a month to prolong the lifetime of the iron.Note: the presence of white flakes on the very first use of the iron is normal. | |
| You have added other chemicals or additives into the water tank. | Fragrances/oils/chemicals/additives/descaling solutions should not be added into the water tank as they are damaging to the device. Please rinse the water tank, fill it up with water and descale your iron. | |
| You have not closed the water tank lid properly. | Close the lid firmly after filling. | |
| Steam has condensed onto the ironing board. | Steam may condense on the board cover, particularly when using irons that produce powerful levels of steam for a prolonged period of time. This can look like your iron is leaking from the soleplate. To prevent this, you can do the following:1 Select a lower steam setting than the setting you have been using or use steam during the first ironing strokes and then finish up with the dry-ironing strokes.2 You can also put an extra layer of cloth between the ironing board and the ironing board cover to minimize condensation.3 Replace the ironing board cover if the sponge material has worn out. | |
| Small droplets/wet spots that occur during start of ironing session. | If small droplets or wet spots occur during the start of the ironing session, this is normal as water might have collected in the soleplate from the previous ironing session, and the iron was used before it had fully heated up. Iron over the droplets/wet spots We recommend that the iron be stored in a vertical position with the steam setting set to no steam mode/dry ironing mode before it is unplugged to minimize the collection of water in the soleplate. | |
| The iron leaks after ironing. | If your iron leaks after unplugging/during storage, it may be because water has collected in the soleplate from leaving the steam setting on before the anti-drip feature activates. We recommend to set the steam selector to no steam mode/dry ironing mode before unplugging the iron. Empty the water tank and place the iron in the vertical position when cooling down/for storage. | |
| The iron leaves a shine or an imprint on the garment. | The surface to be ironed was uneven. | The iron is safe to use on all ironable garments. The shine or imprint is not permanent and disappears when you wash the garment. Avoid ironing over seams or folds. You can also place a cotton cloth over the area to be ironed to avoid imprints. |
| You have set a higher temperature than recommended for the fabric type. | Using a higher than recommended temperature setting for the fabric type may cause the iron to burn the fabric. Check your garment and that your iron is set to the correct temperature setting before ironing. The iron is safe to use on all ironable garments with the correct temperature setting. The shine or imprint is not permanent and disappears when you wash the garment. Avoid ironing over seams or folds. You can also place a cotton cloth over the area to be ironed to avoid imprints. | |
| The iron has stopped heating up. | Auto shut-off has been activated. | When your iron has not been used in 30 seconds in the horizontal position or 8 minutes in the vertical position), the iron will automatically shut-off. This is indicated by a constant blinking of the indicator light. To re-activate the iron, move the iron and the indicator light will light up again, indicating that the iron is heating up.If your iron has a dedicated Auto Shut Off light, the ASO light will blink when the iron enters the ASO state. When the iron is moved, the ASO light will switch off and the temperature indicator light will turn on, indicating that it is heating up again. |
| There is a power connection problem. | Please check the mains cord, the plug and the wall socket. Ensure that everything is properly connected. If you are using an extension plug, please ensure that power rating is suitable for the iron. | |
| The iron does not switch on anymore (I have tried the above but my iron still does not heat up). | If this is the case, there might be a problem with your iron. We recommend you to contact us. | |
| The indicator light on the iron is blinking/breathing. | Iron is heating up. The indicator light may turn on and off during ironing as the iron heats up periodically to maintain its temperature. | |
Introduction
22 Azerbaijani
1 Water tank lid 2 Steam selector 3 Water spray 4 Cord 5 Cord winding 6 Indicator light 7 Steam boost trigger 8 Temperature dial 9 Quick Calc Release collector
Using the appliance
Type of water to use
Note: The iron may give off some steam when you use it for the first time. This stops after a short while.
Type of water to use
The appliance is suitable to be used with tap water. However, if you live in an area with hard water, we recommend that you mix an equal amount of tap water with distilled or demineralized water. This will prevent fast scale build up and prolong the lifetime of the appliance.
Do not add perfume, water from the tumble dryer, vinegar, starch, descaling agents, ironing aids, chemically descaled water or other chemicals, as they may cause water spitting, brown staining or damage to your appliance.
Filling the water tank

1 Do not plug in the iron.

2 Slide the steam selector to the right to select no steam mode/dry ironing mode

3 Flip open the water tank lid.

4 Fill water tank up to the MAX indication mark. Do not add any additives like perfume, fragrances, soap or vinegar.

5 Close the water tank lid firmly.
Setting the temperature and steam
 |  | |
| MAXLINEN | /* | |
| ●●●COTTON | /* | |
| ●●SILK | ECO | |
| ●SYNTHETICS |

ECO setting: Minimum constant steam is delivered continuously for garments with less creases. This setting also saves energy.

Two steam clouds: More constant steam is delivered continuously for tough creases.

For stubborn creases, set the steam setting to two steam clouds and press and hold the steam boost trigger below the handle. Maximum constant steam will be delivered continuously.
Preparing for use

Smoke can be visible during the first use, and it is normal. This ceases after a short while.
1 Check the garment label to ensure that the fabric is ironable and its appropriate temperature setting.

2 Turn the temperature dial to the appropriate ironable temperature indication according to the garment label.

3 Allow the iron to rest on its heel.

4 Insert the plug into an earthed socket and allow the iron rest on its heel. If using an extension plug, ensure that the power rating of the extension plug is suitable for the iron.

5 Wait for the iron to heat up. The indicator light will turn steady on while it is heating up.

6 Once the iron is ready to be used, the indicator light will switch off. The indicator light may turn on and off during ironing as the iron heats up periodically to maintain its temperature.
Ironing with steam
1 Slide the steam selector to ECO mode or steam mode.

2 Turn the temperature dial to between silk and linen based on the image.


3 Steam will be released during ironing.
No steam mode/dry ironing mode

1 Set the steam setting to no steam mode/dry ironing mode

2 After a short while, steam will cease during ironing.
Water spray

1 Press and release the water spray button at the top of the handle. Water will be sprayed out of the nozzle.
Horizontal & vertical steam boost
1 Set temperature dial to MAX setting between cotton and linen.


2 Vertical steam boost: Press and release the steam boost trigger in the vertical position to release shots of steam on hanging garments. Holding down the steam boost trigger in the vertical position will not deliver constant steam.

3 Vertical steam boost: Pull and stretch your hanging garment while using the steam boost to remove stubborn creases.

4 Do not use your bare hand as a supporting surface when you iron.

5 Do not position the iron towards yourself or others.
Auto shut off (DST7030, DST7040, DST7050, DST7060, DST7510 only)

1 To give you a peace of mind, the appliance will cool down on its own if it is left unattended for a period of time.
2 When the iron is not in use for more than 30 seconds while resting on its soleplate or 8 minutes while resting on its heel/ base, the iron will enter auto shut off mode.
3 The temperature of the iron will decrease in auto shut off mode. The Auto Shut Off light will also blink quickly to indicate the iron is at auto-off status. To completely switch off the iron, plug out the iron/ switch off the mains plug.
4 Picking up or moving the iron will reactivate it.
5 The indicator light will turn steady ON, indicating that the iron is heating up again.

6 Once the indicator light switches OFF, the iron is ready for use.
Cleaning and maintenance

1 Ensure the iron is not plugged in.

2 Ensure the iron is cooled down.

3 Wipe the soleplate with a damp cloth.

Note: To keep the soleplate smooth, avoid hard contact with metal objects. Never use a scouring pad, vinegar or other chemicals to clean the soleplate.

4 Do not wash/ clean the iron under running water as it may damage the electrical components within.
Calc-Clean

Tip: The Quick Calc Release function can be used at any time. If you live in a hard water area, use the function more frequently.
1 It is recommended to descale your iron after every 1 to 3 months of use to prolong its lifetime, or when brown stains/water is observed.
IMPORTANT: The Quick Calc Release automatically collects loose scale particles during ironing.

2 Ensure the iron is not plugged in.

3 Ensure the iron is cooled down.

4 Slide up the Quick Calc Release collector lever.

5 Pull out the Quick Calc Release collector lid.

6 Clean the Quick Calc Release collector lid with water.

7 Shake the iron to drain the water and scale particles from the opening of the iron.

8 Do not run water into the opening of the iron.

9 Shake the iron to drain the water and scale particles from the opening of the iron.

10 Push down the lever to lock the Quick Calc Release collector. You will hear a 'click' sound.
Storage

1 Slide the steam selector to select no steam mode/dry ironing mode

2 Unplug the iron.

3 Let the iron cool down.

4 Pour any remaining water out of the water tank.

5 Wind the power cord around the main body of the iron.
Troubleshooting
This chapter summarizes the most common problems you could encounter with the appliance. If you are unable to solve the problem with the information below, visit www.philips.com/support for a list of frequently asked questions or contact the Consumer Care Center in your country.
Problem Possible cause Solution
| My Philips Steam Iron does not produce steam. | There is no water/not enough water in the tank. | If there is no water in the water tank of your Philips Steam Iron, your iron is not able to generate steam. Please refill the water tank with water. After this, your iron should produce steam again. |
| The iron is not ready to steam. | Your iron is ready to produce steam when the indicator light switches off. | |
| The steam setting is set to no steam mode/dry ironing mode | Aways ensure that the temperature dial is at the 2-dot ●3 ●lot or ●te●HEN setting. Then, select a steam setting (ECO setting and 2-cloud setting) on the steam selector at the top of the handle.Ironing with steam with the temperature dial at the 1-dot or SYNTHETIC setting may cause wet spots/leaking as the temperature of the iron may not be hot enough to convert water to steam | |
| My Philips Steam Iron does not remove creases. | The temperature is set too low. | For irons with a temperature dial, please set the temperature according to the fabric that you are ironing. You can use the following table as a reference.Note: For some fabrics such as silk, wool, cotton and linen, steam would be needed to remove creases more efficiently. |
| Steam is not used. Switch the steam selector to or 2-cloECOettingYour Philips Iron does not produce steam when the temperature dial is at the 1-dot position, SYNTHETIC or Calc-Clean setting. You can get more steam by changing to a stronger steam setting, or using the steam boost function to help remove tough wrinkles.To remove creases in the vertical position, press and release the steam boost trigger or button to release a shot of steam. Holding down the trigger or button will not produce a continuous steam boost.Note that repeated usage of the steam boost in a short period of time may cause spitting or a reduction in the amount of steam produced. If this happens, wait for a short while before using the steam boost function again. | ||
| The steam boost in my Philips Steam Iron is not working. | The steam boost trigger has not been pressed and released. | To activate the steam boost in your Philips Steam Iron, press and release the steam boost button/trigger. Holding onto the steam boost button/trigger does not produce continuous steam boost. You may need to press the steam boost button/trigger several times on the first use for the pump to draw sufficient water.Note: We recommend to use the steam boost at the 3-dot temperature setting or higher. Using the steam boost at lower temperature settings may result in wet spots forming as the temperature of the iron may not be high enough to convert water into steam. |
| The steam boost function was used too often within a short period of time. | When you use the steam boost function of your Philips Steam Iron too often within a short period, the steam boost function will stop working for a while. In this case, please wait a couple of minutes before you use the steam boost again.For stubborn wrinkles, we recommend to use the steam boost with the steam setting at the no steam mode/dry ironing mode for the best effect. | |
| The iron is not ready to steam. | The iron is ready to steam when the indicator light switches off. | |
Azerbaijani
| My Philips Steam Iron produces smoke when heating up. | First usage. During production, some parts of the iron have been slightly greased. As a result of this, your iron may produce some smoke when it is switched on for the first few times, this is normal and should dissipate shortly. | |
| There is water in the soleplate. | Sometimes, there might still be some remaining water in your iron's soleplate after the last usage. This water will evaporate when your iron's soleplate heats up, and the steam generated may look like smoke. This is normal and should dissipate shortly. | |
| My iron is still producing smoke even after checking the above. | There could be an issue with the iron, we recommend you to contact us. | |
| There are water droplets/leaking on my garment during ironing. | First time usage. If you experience leaking/spitting during your first usage, perform the Calc Clean function once. If this does not resolve the leaking on your next use, we recommend you to contact us. | |
| The steam boost function was used too often within a short period of time. | Continue ironing in horizontal position and wait a while before you use the steam boost function again. | |
| There is a build up of scale/calcification in the iron. | If there is brown water or white flakes coming out of the iron, this may indicate a build up of calcification in the iron. Perform the Calc Clean function to clear this. If you live in an area with hard water, we recommend to use distilled water (or 50% distilled and 50% tap water) and perform the calc clean function once a month to prolong the lifetime of the iron.Note: the presence of white flakes on the very first use of the iron is normal. | |
| You have added other chemicals or additives into the water tank. | Fragrances/oils/chemicals/additives/descaling solutions should not be added into the water tank as they are damaging to the device. Please rinse the water tank, fill it up with water and descale your iron. | |
| You have not closed the water tank lid properly. | Close the lid firmly after filling. | |
| Steam has condensed onto the ironing board. | Steam may condense on the board cover, particularly when using irons that produce powerful levels of steam for a prolonged period of time. This can look like your iron is leaking from the soleplate. To prevent this, you can do the following:1 Select a lower steam setting than the setting you have been using or use steam during the first ironing strokes and then finish up with the dry-ironing strokes.2 You can also put an extra layer of cloth between the ironing board and the ironing board cover to minimize condensation.3 Replace the ironing board cover if the sponge material has worn out. | |
| Small droplets/wet spots that occur during start of ironing session. | If small droplets or wet spots occur during the start of the ironing session, this is normal as water might have collected in the soleplate from the previous ironing session, and the iron was used before it had fully heated up. Iron over the droplets/wet spots We recommend that the iron be stored in a vertical position with the steam setting set to no steam mode/dry ironing mode before it is unplugged to minimize the collection of water in the soleplate. | |
| The iron leaks after ironing. | If your iron leaks after unplugging/during storage, it may be because water has collected in the soleplate from leaving the steam setting on before the anti-drip feature activates. We recommend to set the steam selector to no steam mode/dry ironing mode before unplugging the iron. Empty the water tank and place the iron in the vertical position when cooling down/for storage. | |
| The iron leaves a shine or an imprint on the garment. | The surface to be ironed was uneven. | The iron is safe to use on all ironable garments. The shine or imprint is not permanent and disappears when you wash the garment. Avoid ironing over seams or folds. You can also place a cotton cloth over the area to be ironed to avoid imprints. |
| You have set a higher temperature than recommended for the fabric type. | Using a higher than recommended temperature setting for the fabric type may cause the iron to burn the fabric. Check your garment and that your iron is set to the correct temperature setting before ironing. The iron is safe to use on all ironable garments with the correct temperature setting. The shine or imprint is not permanent and disappears when you wash the garment. Avoid ironing over seams or folds. You can also place a cotton cloth over the area to be ironed to avoid imprints. | |
Azerbaijani
| The iron has stopped heating up. | Auto shut-off has been activated. | When your iron has not been used in 30 seconds in the horizontal position or 8 minutes in the vertical position), the iron will automatically shut-off. This is indicated by a constant blinking of the indicator light. To re-activate the iron, move the iron and the indicator light will light up again, indicating that the iron is heating up.If your iron has a dedicated Auto Shut Off light, the ASO light will blink when the iron enters the ASO state. When the iron is moved, the ASO light will switch off and the temperature indicator light will turn on, indicating that it is heating up again. |
| There is a power connection problem. | Please check the mains cord, the plug and the wall socket. Ensure that everything is properly connected. If you are using an extension plug, please ensure that power rating is suitable for the iron. | |
| The iron does not switch on anymore (I have tried the above but my iron still does not heat up). | If this is the case, there might be a problem with your iron. We recommend you to contact us. | |
| The indicator light on the iron is blinking/breathing. | Iron is heating up. The indicator light may turn on and off during ironing as the iron heats up periodically to maintain its temperature. | |
Introduction
1 Water tank cap 2 Steam selector 3 Water spray 4 Cord 5 Cord storage 6 Indicator light 7 Steam trigger 8 Temperature dial 9 Quick Calc Release reservoir
Using the appliance
1 Do not plug the iron's plug into the outlet.

3 Steam will be released while ironing.
Steamless mode/dry ironing mode

1 Set the steam setting to steamless mode/dry ironing mode


1 Set the temperature dial to MAX setting (position between COTTON and LINEN).
Indonesian

5 Do not point the iron at yourself or others.
Auto shut-off (DST7030, DST7040, DST7050, DST7060, DST7510 only)

4 Slide the Quick Calc Release reservoir lever upward.

5 Pull the Quick Calc Release reservoir cap outward.

8 Do not fill water through the ironing holes.

9 Shake the iron to expel water and scale particles through the ironing holes.

10 Push the lever down to lock the Quick Calc Release container. Make sure you hear a "click".
Storage

3 Let the iron cool down.
52 Indonesian

5 Wind the power cord around the iron body.
Troubleshooting
1 Water tank cap 2 Steam selector 3 Water spray 4 Cord 5 Cord winding 6 Indicator light 7 Steam trigger 8 Temperature dial 9 Quick Calc Release collector
3 Steam will be released during ironing.
2 After a while, steam will stop during ironing.
Water spray


6 As soon as the indicator light goes off, the iron is ready for use.
5 Remove the cover of the Quick Calc Release collector.

3 Open the water tank cap.

| | ||
| MAXLEN | \( /\widehat{\widehat{\widehat{\widehat{\widehat{\widehat{\widehat{\widehat{\widehat{\widehat{\widehat{\widehat{\widehat{\widehat{\widehat{\widehat{\widehat{\widehat{\widehat{\widehat{\widehat{\widehat{\widehat{\widehat{\widehat{\widehat{\widehat{\widehat{\widehat{\widehat{\widehat{\widehat{\widehat{\widehat{\wedge}}}}}}}}}}}}}}}}}}}}}} | \( /\widehat{\widehat{\widehat{\widehat{\widehat{\widehat{\widehat{\widehat{\widehat{\widehat{\widehat{\widehat{\widehat{\widehat{\widehat{\widehat{\widehat{\widehat{\widehat{\widehat{\widehat{\widehat{\widehat{\widehat{\widehat{\widehat{\widehat{\widehat{\widehat{\widehat{\widehat{\widehat{\wedge}}}}}}}}}}}}}}}}}}}}}}}}} | |
| ●●●BAVLNA | \( /\widehat{\widehat{\widehat{\widehat{\widehat{\widehat{\widehat{\widehat{\widehat{\widehat{\widehat{\widehat{\widehat{\widehat{\widehat{\widehat{\widehat{\widehat{\widehat{\widehat{\widehat{\widehat{\widehat{\widehat{\widehat{\widehat{\widehat{\widehat{\widehat{\widehat{\widehat{\widehat{\widetilde{\wedge}}}}}}}}}}}}}}}}}}}}}}}}}} | ECO | |
| ●●HEDVÁBÍ | ECO | ||
| ●SYNTETICKÉ TKANINY | \( \widehat{\widehat{\widehat{\widehat{\widehat{\widehat{\widehat{\widehat{\widehat{\widehat{\widehat{\widehat{\widehat{\widehat{\widehat{\widehat{\widehat{\widehat{\widehat{\widehat{\widehat{\widehat{\widehat{\widehat{\widehat{\widehat{\widehat{\widehat{\widehat{\widehat{\widehat{\widehat{\widehat{\vee}}}}}}}}}}}}}}}}}}}}}}}}}} | \( \widehat{\widehat{\widehat{\widehat{\widehat{\widehat{\widehat{\widehat{\widehat{\widehat{\widehat{\widehat{\widehat{\widehat{\widehat{\widehat{\widehat{\widehat{\widehat{\widehat{\widehat{\widehat{\widehat{\widehat{\widehat{\widehat{\widehat{\widehat{\widehat{\widehat{\widehat{\widehat{\wedge}}}}}}}}}}}}}}}}}}}}}}}}} |

Czech

2 Unplug the iron.

3 Open the water tank lid.

Steam boost: More continuous maximum steam is delivered for stubborn creases.


3 Steam is released during ironing.
4 Slide the Quick Calc Release collector cover up.

2 Slide the steam selector to the right to select steam mode / dry ironing

3 Unscrew the water tank cap.

No steam mode / dry ironing mode

1 Set the steam control to no steam mode / dry ironing mode


8 Do not pour water into the iron's opening.
Estonian

3 Allow the appliance to cool down.

152
Spanish

1 Water tank cap 2 Steam selector button 3 Water spray 4 Cord 5 Cord winding 6 Indicator 7 Extra steam trigger 8 Temperature regulator 9 Quick Calc Release compartment
Using the appliance
Type of water to use
Note: When using the iron for the first time, you may notice a little steam. This will stop soon.
Type of water to use
1 Do not plug in the iron.

3 Open the water tank cap.

4 Fill the water tank up to the MAX mark. Do not add perfumes, fragrances, soap, or vinegar.

5 Close the water tank cap firmly.
Setting temperature and steam
 |  | ||
| MAXLAN | \( /\widehat{\widehat{\widehat{\widehat{\widehat{\widehat{\widehat{\widehat{\widehat{\widehat{\widehat{\widehat{\widehat{\widehat{\widehat{\widehat{\widehat{\widehat{\widehat{\widehat{\widehat{\widehat{\widehat{\widehat{\widehat{\widehat{\widehat{\widehat{\widehat{\widehat{\widehat{\widehat{\widehat{\widehat{\wedge}}}}}}}}}}}}}}}}}}}}}} | * | |
| ●●●PAMUK | \( /\widehat{\widehat{\widehat{\widehat{\widehat{\widehat{\widehat{\widehat{\widehat{\widehat{\widehat{\widehat{\widehat{\widehat{\widehat{\widehat{\widehat{\widehat{\widehat{\widehat{\widehat{\widehat{\widehat{\widehat{\widehat{\widehat{\widehat{\widehat{\widehat{\widehat{\widehat{\widehat{\wedge}}}}}}}}}}}}}}}}}}}}}}} | * | |
| ●●SVILA | ECO | ||
| ●SINTETIKA | ※ |

Two steam clouds: a higher consistent amount of steam is continuously released to remove stubborn creases.

For stubborn creases, set the steam setting to two steam clouds and then press and hold the extra steam trigger under the handle. The highest possible consistent amount of steam will be continuously released.
Preparing for use

2 Turn the temperature regulator to the appropriate temperature indicated on the garment's care label.

3 Place the iron in an upright position.

4 Plug the appliance into a grounded outlet and place the iron in an upright position. If you use an extension cord, make sure its specifications match the iron.

2 Turn the temperature dial between silk and linen, as shown in the figure.

1 Set the steam setting to no steam / dry ironing mode.


2 Additional steam in vertical position: Press and release the steam trigger to emit bursts of steam onto hanging clothes. If you keep holding the steam trigger while the iron is in an upright position, continuous steam will not be emitted.

3 Additional steam in vertical position: Pull and stretch the hanging garment while using the steam burst to remove stubborn wrinkles.

4 Do not support the garment with your bare hand while ironing.

2 Make sure the iron has cooled down.

4 Do not wash/clean the iron under running water from the tap, as this may damage the electrical components inside.
Calc-Clean

4 Pull the Quick Calc Release compartment handle upward.

5 Remove the Quick Calc Release compartment cover.

6 Clean the Quick Calc Release compartment cover with water.

7 Shake the iron to release water and scale particles from the openings of the iron.

9 Shake the iron to release water and scale particles from the openings of the iron.

3 Let the iron cool down.

4 Empty the remaining water from the water tank.

1 Do not connect the iron to the power source.

5 Close the water tank cap tightly.
5 Do not point the iron at yourself or other people.
1 Make sure the iron is not connected to the electrical outlet.

2 Make sure the iron is not connected to the electrical outlet.

7 Shake the iron to pour out water and scale particles through the iron's opening.

8 Do not pour water into the iron's opening.

9 Shake the iron to pour out water and scale particles through the iron's opening.

2 Unplug the iron's plug.

3 Allow the iron to cool down.

4 Drain the remaining water from the water tank.

3 Open the water tank lid.

4 Do not hold the iron with bare hands while ironing.


3 Steam is released during ironing.
No steam mode / dry ironing mode

1 Set the steam setting to no steam mode / dry ironing mode

2 After a short while, the steam stops while you are ironing.
Water spray

6 When the indicator light is off, the iron is ready for use.
1 Water tank lid 2 Steam selector 3 Water spray 4 Cord 5 Cord winding 6 Indicator light 7 Steam boost trigger 8 Temperature dial 9 Quick Calc Release collector
Type of water to use
Note: The iron may give off some steam when you use it for the first time. This stops after a short while.
Type of water to use
The appliance is suitable to be used with tap water. However, if you live in an area with hard water, we recommend that you mix an equal amount of tap water with distilled or demineralized water. This will prevent fast scale build up and prolong the lifetime of the appliance.
Do not add perfume, water from the tumble dryer, vinegar, starch, descaling agents, ironing aids, chemically descaled water or other chemicals, as they may cause water spitting, brown staining or damage to your appliance.
Filling the water tank

1 Do not plug in the iron.

2 Slide the steam selector to the right to select no steam mode/dry ironing mode

3 Flip open the water tank lid.

4 Fill water tank up to the MAX indication mark. Do not add any additives like perfume, fragrances, soap or vinegar.

5 Close the water tank lid firmly.
Setting the temperature and steam
| | |
| MAXLINEN | /* | |
| ●●●COTTON | /* | |
| ●●SILK | ECO | |
| ●SYNTHETICS |

ECO setting: Minimum constant steam is delivered continuously for garments with less creases. This setting also saves energy.

Two steam clouds: More constant steam is delivered continuously for tough creases.

For stubborn creases, set the steam setting to two steam clouds and press and hold the steam boost trigger below the handle. Maximum constant steam will be delivered continuously.
Preparing for use

Smoke can be visible during the first use, and it is normal. This ceases after a short while.
1 Check the garment label to ensure that the fabric is ironable and its appropriate temperature setting.

2 Turn the temperature dial to the appropriate ironable temperature indication according to the garment label.

3 Allow the iron to rest on its heel.

4 Insert the plug into an earthed socket and allow the iron rest on its heel. If using an extension plug, ensure that the power rating of the extension plug is suitable for the iron.

5 Wait for the iron to heat up. The indicator light will turn steady on while it is heating up.

6 Once the iron is ready to be used, the indicator light will switch off. The indicator light may turn on and off during ironing as the iron heats up periodically to maintain its temperature.
Ironing with steam
1 Slide the steam selector to ECO mode or steam mode.

2 Turn the temperature dial to between silk and linen based on the image.


3 Steam will be released during ironing.
No steam mode/dry ironing mode

1 Set the steam setting to no steam mode/dry ironing mode

2 After a short while, steam will cease during ironing.
Water spray

1 Press and release the water spray button at the top of the handle. Water will be sprayed out of the nozzle.
Horizontal & vertical steam boost
1 Set temperature dial to MAX setting between cotton and linen.


2 Vertical steam boost: Press and release the steam boost trigger in the vertical position to release shots of steam on hanging garments. Holding down the steam boost trigger in the vertical position will not deliver constant steam.

3 Vertical steam boost: Pull and stretch your hanging garment while using the steam boost to remove stubborn creases.

4 Do not use your bare hand as a supporting surface when you iron.

5 Do not position the iron towards yourself or others.
Auto shut off (DST7030, DST7040, DST7050, DST7060, DST7510 only)

1 To give you a peace of mind, the appliance will cool down on its own if it is left unattended for a period of time.
2 When the iron is not in use for more than 30 seconds while resting on its soleplate or 8 minutes while resting on its heel/ base, the iron will enter auto shut off mode.
3 The temperature of the iron will decrease in auto shut off mode. The Auto Shut Off light will also blink quickly to indicate the iron is at auto-off status. To completely switch off the iron, plug out the iron/ switch off the mains plug.
4 Picking up or moving the iron will reactivate it.
5 The indicator light will turn steady ON, indicating that the iron is heating up again.

6 Once the indicator light switches OFF, the iron is ready for use.
Cleaning and maintenance

1 Ensure the iron is not plugged in.

2 Ensure the iron is cooled down.

3 Wipe the soleplate with a damp cloth.

Note: To keep the soleplate smooth, avoid hard contact with metal objects. Never use a scouring pad, vinegar or other chemicals to clean the soleplate.

4 Do not wash/ clean the iron under running water as it may damage the electrical components within.
Calc-Clean

Tip: The Quick Calc Release function can be used at any time. If you live in a hard water area, use the function more frequently.
1 It is recommended to descale your iron after every 1 to 3 months of use to prolong its lifetime, or when brown stains/water is observed.
IMPORTANT: The Quick Calc Release automatically collects loose scale particles during ironing.

2 Ensure the iron is not plugged in.

3 Ensure the iron is cooled down.

4 Slide up the Quick Calc Release collector lever.

5 Pull out the Quick Calc Release collector lid.

6 Clean the Quick Calc Release collector lid with water.

7 Shake the iron to drain the water and scale particles from the opening of the iron.

8 Do not run water into the opening of the iron.

9 Shake the iron to drain the water and scale particles from the opening of the iron.

10 Push down the lever to lock the Quick Calc Release collector. You will hear a 'click' sound.
Storage

1 Slide the steam selector to select no steam mode/dry ironing mode

2 Unplug the iron.

3 Let the iron cool down.

4 Pour any remaining water out of the water tank.

5 Wind the power cord around the main body of the iron.
Troubleshooting
This chapter summarizes the most common problems you could encounter with the appliance. If you are unable to solve the problem with the information below, visit www.philips.com/support for a list of frequently asked questions or contact the Consumer Care Center in your country.
Problem Possible cause Solution
| My Philips Steam Iron does not produce steam. | There is no water/not enough water in the tank. | If there is no water in the water tank of your Philips Steam Iron, your iron is not able to generate steam. Please refill the water tank with water. After this, your iron should produce steam again. |
| The iron is not ready to steam. | Your iron is ready to produce steam when the indicator light switches off. | |
| The steam setting is set to no steam mode/dry ironing mode | Aways ensure that the temperature dial is at the 2-dot ●3 ●lot or ●te●HEN setting. Then, select a steam setting (ECO setting and 2-cloud setting) on the steam selector at the top of the handle.Ironing with steam with the temperature dial at the 1-dot or SYNTHETIC setting may cause wet spots/leaking as the temperature of the iron may not be hot enough to convert water to steam | |
| My Philips Steam Iron does not remove creases. | The temperature is set too low. | For irons with a temperature dial, please set the temperature according to the fabric that you are ironing. You can use the following table as a reference.Note: For some fabrics such as silk, wool, cotton and linen, steam would be needed to remove creases more efficiently. |
| Steam is not used. Switch the steam selector to or 2-cloEcoettingYour Philips Iron does not produce steam when the temperature dial is at the 1-dot position, SYNTHETIC or Calc-Clean setting. You can get more steam by changing to a stronger steam setting, or using the steam boost function to help remove tough wrinkles.To remove creases in the vertical position, press and release the steam boost trigger or button to release a shot of steam. Holding down the trigger or button will not produce a continuous steam boost.Note that repeated usage of the steam boost in a short period of time may cause spitting or a reduction in the amount of steam produced. If this happens, wait for a short while before using the steam boost function again. | ||
| The steam boost in my Philips Steam Iron is not working. | The steam boost trigger has not been pressed and released. | To activate the steam boost in your Philips Steam Iron, press and release the steam boost button/trigger. Holding onto the steam boost button/trigger does not produce continuous steam boost. You may need to press the steam boost button/trigger several times on the first use for the pump to draw sufficient water.Note: We recommend to use the steam boost at the 3-dot temperature setting or higher. Using the steam boost at lower temperature settings may result in wet spots forming as the temperature of the iron may not be high enough to convert water into steam. |
| The steam boost function was used too often within a short period of time. | When you use the steam boost function of your Philips Steam Iron too often within a short period, the steam boost function will stop working for a while. In this case, please wait a couple of minutes before you use the steam boost again.For stubborn wrinkles, we recommend to use the steam boost with the steam setting at the no steam mode/dry ironing mode for the best effect. | |
| The iron is not ready to steam. | The iron is ready to steam when the indicator light switches off. | |
| My Philips Steam Iron produces smoke when heating up. | First usage. During production, some parts of the iron have been slightly greased. As a result of this, your iron may produce some smoke when it is switched on for the first few times, this is normal and should dissipate shortly. | |
| There is water in the soleplate. | Sometimes, there might still be some remaining water in your iron's soleplate after the last usage. This water will evaporate when your iron's soleplate heats up, and the steam generated may look like smoke. This is normal and should dissipate shortly. | |
| My iron is still producing smoke even after checking the above. | There could be an issue with the iron, we recommend you to contact us. | |
| There are water droplets/leaking on my garment during ironing. | First time usage. If you experience leaking/spitting during your first usage, perform the Calc Clean function once. If this does not resolve the leaking on your next use, we recommend you to contact us. | |
| The steam boost function was used too often within a short period of time. | Continue ironing in horizontal position and wait a while before you use the steam boost function again. | |
| There is a build up of scale/calcification in the iron. | If there is brown water or white flakes coming out of the iron, this may indicate a build up of calcification in the iron. Perform the Calc Clean function to clear this. If you live in an area with hard water, we recommend to use distilled water (or 50% distilled and 50% tap water) and perform the calc clean function once a month to prolong the lifetime of the iron.Note: the presence of white flakes on the very first use of the iron is normal. | |
| You have added other chemicals or additives into the water tank. | Fragrances/oils/chemicals/additives/descaling solutions should not be added into the water tank as they are damaging to the device. Please rinse the water tank, fill it up with water and descale your iron. | |
| You have not closed the water tank lid properly. | Close the lid firmly after filling. | |
| Steam has condensed onto the ironing board. | Steam may condense on the board cover, particularly when using irons that produce powerful levels of steam for a prolonged period of time. This can look like your iron is leaking from the soleplate. To prevent this, you can do the following:1 Select a lower steam setting than the setting you have been using or use steam during the first ironing strokes and then finish up with the dry-ironing strokes.2 You can also put an extra layer of cloth between the ironing board and the ironing board cover to minimize condensation.3 Replace the ironing board cover if the sponge material has worn out. | |
| Small droplets/wet spots that occur during start of ironing session. | If small droplets or wet spots occur during the start of the ironing session, this is normal as water might have collected in the soleplate from the previous ironing session, and the iron was used before it had fully heated up. Iron over the droplets/wet spots We recommend that the iron be stored in a vertical position with the steam setting set to no steam mode/dry ironing mode before it is unplugged to minimize the collection of water in the soleplate. | |
| The iron leaks after ironing. | If your iron leaks after unplugging/during storage, it may be because water has collected in the soleplate from leaving the steam setting on before the anti-drip feature activates. We recommend to set the steam selector to no steam mode/dry ironing mode before unplugging the iron. Empty the water tank and place the iron in the vertical position when cooling down/for storage. | |
| The iron leaves a shine or an imprint on the garment. | The surface to be ironed was uneven. | The iron is safe to use on all ironable garments. The shine or imprint is not permanent and disappears when you wash the garment. Avoid ironing over seams or folds. You can also place a cotton cloth over the area to be ironed to avoid imprints. |
| You have set a higher temperature than recommended for the fabric type. | Using a higher than recommended temperature setting for the fabric type may cause the iron to burn the fabric. Check your garment and that your iron is set to the correct temperature setting before ironing. The iron is safe to use on all ironable garments with the correct temperature setting. The shine or imprint is not permanent and disappears when you wash the garment. Avoid ironing over seams or folds. You can also place a cotton cloth over the area to be ironed to avoid imprints. | |
| The iron has stopped heating up. | Auto shut-off has been activated. | When your iron has not been used in 30 seconds in the horizontal position or 8 minutes in the vertical position), the iron will automatically shut-off. This is indicated by a constant blinking of the indicator light. To re-activate the iron, move the iron and the indicator light will light up again, indicating that the iron is heating up.If your iron has a dedicated Auto Shut Off light, the ASO light will blink when the iron enters the ASO state. When the iron is moved, the ASO light will switch off and the temperature indicator light will turn on, indicating that it is heating up again. |
| There is a power connection problem. | Please check the mains cord, the plug and the wall socket. Ensure that everything is properly connected. If you are using an extension plug, please ensure that power rating is suitable for the iron. | |
| The iron does not switch on anymore (I have tried the above but my iron still does not heat up). | If this is the case, there might be a problem with your iron. We recommend you to contact us. | |
| The indicator light on the iron is blinking/breathing. | Iron is heating up. The indicator light may turn on and off during ironing as the iron heats up periodically to maintain its temperature. | |
Introduction
2 Unplug the iron.


3 Vertical steam shot: pull and stretch the garment while using the steam shot to remove persistent creases.

3 Vertical steam shot: Pull and stretch the hanging garment while using the steam shot to remove the most stubborn creases.

5 Remove the cap from the Quick Calc Release collector.

2 Unplug the iron.


1 Water tank lid 2 Steam selector 3 Water spray 4 Cord 5 Cord winding 6 Indicator light 7 Steam boost trigger 8 Temperature dial 9 Quick Calc Release collector
Type of water to use
Note: The iron may give off some steam when you use it for the first time. This stops after a short while.
Type of water to use
The appliance is suitable to be used with tap water. However, if you live in an area with hard water, we recommend that you mix an equal amount of tap water with distilled or demineralized water. This will prevent fast scale build up and prolong the lifetime of the appliance.
Do not add perfume, water from the tumble dryer, vinegar, starch, descaling agents, ironing aids, chemically descaled water or other chemicals, as they may cause water spitting, brown staining or damage to your appliance.
Filling the water tank

1 Do not plug in the iron.

2 Slide the steam selector to the right to select no steam mode/dry ironing mode

3 Flip open the water tank lid.

4 Fill water tank up to the MAX indication mark. Do not add any additives like perfume, fragrances, soap or vinegar.

5 Close the water tank lid firmly.
Setting the temperature and steam
| | |
| MAXLINEN | //* | |
| ●●●COTTON | //* | |
| ●●SILK | ECO | |
| ●SYNTHETICS |

ECO setting: Minimum constant steam is delivered continuously for garments with less creases. This setting also saves energy.

Two steam clouds: More constant steam is delivered continuously for tough creases.

For stubborn creases, set the steam setting to two steam clouds and press and hold the steam boost trigger below the handle. Maximum constant steam will be delivered continuously.
Preparing for use

Smoke can be visible during the first use, and it is normal. This ceases after a short while.
1 Check the garment label to ensure that the fabric is ironable and its appropriate temperature setting.

2 Turn the temperature dial to the appropriate ironable temperature indication according to the garment label.

3 Allow the iron to rest on its heel.

4 Insert the plug into an earthed socket and allow the iron rest on its heel. If using an extension plug, ensure that the power rating of the extension plug is suitable for the iron.

5 Wait for the iron to heat up. The indicator light will turn steady on while it is heating up.

6 Once the iron is ready to be used, the indicator light will switch off. The indicator light may turn on and off during ironing as the iron heats up periodically to maintain its temperature.
Ironing with steam
1 Slide the steam selector to ECO mode or steam mode.

2 Turn the temperature dial to between silk and linen based on the image.


3 Steam will be released during ironing.
No steam mode/dry ironing mode

1 Set the steam setting to no steam mode/dry ironing mode

2 After a short while, steam will cease during ironing.
Water spray

1 Press and release the water spray button at the top of the handle. Water will be sprayed out of the nozzle.
Horizontal & vertical steam boost
1 Set temperature dial to MAX setting between cotton and linen.


2 Vertical steam boost: Press and release the steam boost trigger in the vertical position to release shots of steam on hanging garments. Holding down the steam boost trigger in the vertical position will not deliver constant steam.

3 Vertical steam boost: Pull and stretch your hanging garment while using the steam boost to remove stubborn creases.

4 Do not use your bare hand as a supporting surface when you iron.

5 Do not position the iron towards yourself or others.
Auto shut off (DST7030, DST7040, DST7050, DST7060, DST7510 only)

1 To give you a peace of mind, the appliance will cool down on its own if it is left unattended for a period of time.
2 When the iron is not in use for more than 30 seconds while resting on its soleplate or 8 minutes while resting on its heel/ base, the iron will enter auto shut off mode.
3 The temperature of the iron will decrease in auto shut off mode. The Auto Shut Off light will also blink quickly to indicate the iron is at auto-off status. To completely switch off the iron, plug out the iron/ switch off the mains plug.
4 Picking up or moving the iron will reactivate it.
5 The indicator light will turn steady ON, indicating that the iron is heating up again.
Albanian

6 Once the indicator light switches OFF, the iron is ready for use.
Cleaning and maintenance

1 Ensure the iron is not plugged in.

2 Ensure the iron is cooled down.

3 Wipe the soleplate with a damp cloth.

Note: To keep the soleplate smooth, avoid hard contact with metal objects. Never use a scouring pad, vinegar or other chemicals to clean the soleplate.

4 Do not wash/clean the iron under running water as it may damage the electrical components within.
Calc-Clean

Tip: The Quick Calc Release function can be used at any time. If you live in a hard water area, use the function more frequently.
1 It is recommended to descale your iron after every 1 to 3 months of use to prolong its lifetime, or when brown stains/water is observed.
IMPORTANT: The Quick Calc Release automatically collects loose scale particles during ironing.

2 Ensure the iron is not plugged in.

3 Ensure the iron is cooled down.
Albanian

4 Slide up the Quick Calc Release collector lever.

5 Pull out the Quick Calc Release collector lid.

6 Clean the Quick Calc Release collector lid with water.

7 Shake the iron to drain the water and scale particles from the opening of the iron.

8 Do not run water into the opening of the iron.

9 Shake the iron to drain the water and scale particles from the opening of the iron.

10 Push down the lever to lock the Quick Calc Release collector. You will hear a 'click' sound.
Storage

1 Slide the steam selector to select no steam mode/dry ironing mode

2 Unplug the iron.

3 Let the iron cool down.

4 Pour any remaining water out of the water tank.

5 Wind the power cord around the main body of the iron.
Troubleshooting
This chapter summarizes the most common problems you could encounter with the appliance. If you are unable to solve the problem with the information below, visit www.philips.com/support for a list of frequently asked questions or contact the Consumer Care Center in your country.
Problem Possible cause Solution
| My Philips Steam Iron does not produce steam. | There is no water/not enough water in the tank. | If there is no water in the water tank of your Philips Steam Iron, your iron is not able to generate steam. Please refill the water tank with water. After this, your iron should produce steam again. |
| The iron is not ready to steam. | Your iron is ready to produce steam when the indicator light switches off. | |
| The steam setting is set to no steam mode/dry ironing mode | Aways ensure that the temperature dial is at the 2-dot ●3 ●lot or ●te ●MEN setting. Then, select a steam setting (ECO setting and 2-cloud setting) on the steam selector at the top of the handle.Ironing with steam with the temperature dial at the 1-dot or SYNTHETIC setting may cause wet spots/leaking as the temperature of the iron may not be hot enough to convert water to steam | |
| My Philips Steam Iron does not remove creases. | The temperature is set too low. | For irons with a temperature dial, please set the temperature according to the fabric that you are ironing. You can use the following table as a reference.Note: For some fabrics such as silk, wool, cotton and linen, steam would be needed to remove creases more efficiently. |
| Steam is not used. Switch the steam selector to or 2-cloEcoettingYour Philips Iron does not produce steam when the temperature dial is at the 1-dot position, SYNTHETIC or Calc-Clean setting. You can get more steam by changing to a stronger steam setting, or using the steam boost function to help remove tough wrinkles.To remove creases in the vertical position, press and release the steam boost trigger or button to release a shot of steam. Holding down the trigger or button will not produce a continuous steam boost.Note that repeated usage of the steam boost in a short period of time may cause spitting or a reduction in the amount of steam produced. If this happens, wait for a short while before using the steam boost function again. | ||
| The steam boost in my Philips Steam Iron is not working. | The steam boost trigger has not been pressed and released. | To activate the steam boost in your Philips Steam Iron, press and release the steam boost button/trigger. Holding onto the steam boost button/trigger does not produce continuous steam boost. You may need to press the steam boost button/trigger several times on the first use for the pump to draw sufficient water.Note: We recommend to use the steam boost at the 3-dot temperature setting or higher. Using the steam boost at lower temperature settings may result in wet spots forming as the temperature of the iron may not be high enough to convert water into steam. |
| The steam boost function was used too often within a short period of time. | When you use the steam boost function of your Philips Steam Iron too often within a short period, the steam boost function will stop working for a while. In this case, please wait a couple of minutes before you use the steam boost again.For stubborn wrinkles, we recommend to use the steam boost with the steam setting at the no steam mode/dry ironing mode for the best effect. | |
| The iron is not ready to steam. | The iron is ready to steam when the indicator light switches off. | |
| My Philips Steam Iron produces smoke when heating up. | First usage. During production, some parts of the iron have been slightly greased. As a result of this, your iron may produce some smoke when it is switched on for the first few times, this is normal and should dissipate shortly. | |
| There is water in the soleplate. | Sometimes, there might still be some remaining water in your iron's soleplate after the last usage. This water will evaporate when your iron's soleplate heats up, and the steam generated may look like smoke. This is normal and should dissipate shortly. | |
| My iron is still producing smoke even after checking the above. | There could be an issue with the iron, we recommend you to contact us. | |
| There are water droplets/leaking on my garment during ironing. | First time usage. If you experience leaking/spitting during your first usage, perform the Calc Clean function once. If this does not resolve the leaking on your next use, we recommend you to contact us. | |
| The steam boost function was used too often within a short period of time. | Continue ironing in horizontal position and wait a while before you use the steam boost function again. | |
| There is a build up of scale/calcification in the iron. | If there is brown water or white flakes coming out of the iron, this may indicate a build up of calcification in the iron. Perform the Calc Clean function to clear this. If you live in an area with hard water, we recommend to use distilled water (or 50% distilled and 50% tap water) and perform the calc clean function once a month to prolong the lifetime of the iron.Note: the presence of white flakes on the very first use of the iron is normal. | |
| You have added other chemicals or additives into the water tank. | Fragrances/oils/chemicals/additives/descaling solutions should not be added into the water tank as they are damaging to the device. Please rinse the water tank, fill it up with water and descale your iron. | |
| You have not closed the water tank lid properly. | Close the lid firmly after filling. | |
| Steam has condensed onto the ironing board. | Steam may condense on the board cover, particularly when using irons that produce powerful levels of steam for a prolonged period of time. This can look like your iron is leaking from the soleplate. To prevent this, you can do the following:1 Select a lower steam setting than the setting you have been using or use steam during the first ironing strokes and then finish up with the dry-ironing strokes.2 You can also put an extra layer of cloth between the ironing board and the ironing board cover to minimize condensation.3 Replace the ironing board cover if the sponge material has worn out. | |
| Small droplets/wet spots that occur during start of ironing session. | If small droplets or wet spots occur during the start of the ironing session, this is normal as water might have collected in the soleplate from the previous ironing session, and the iron was used before it had fully heated up. Iron over the droplets/wet spots We recommend that the iron be stored in a vertical position with the steam setting set to no steam mode/dry ironing mode before it is unplugged to minimize the collection of water in the soleplate. | |
| The iron leaks after ironing. | If your iron leaks after unplugging/during storage, it may be because water has collected in the soleplate from leaving the steam setting on before the anti-drip feature activates. We recommend to set the steam selector to no steam mode/dry ironing mode before unplugging the iron. Empty the water tank and place the iron in the vertical position when cooling down/for storage. | |
| The iron leaves a shine or an imprint on the garment. | The surface to be ironed was uneven. | The iron is safe to use on all ironable garments. The shine or imprint is not permanent and disappears when you wash the garment. Avoid ironing over seams or folds. You can also place a cotton cloth over the area to be ironed to avoid imprints. |
| You have set a higher temperature than recommended for the fabric type. | Using a higher than recommended temperature setting for the fabric type may cause the iron to burn the fabric. Check your garment and that your iron is set to the correct temperature setting before ironing. The iron is safe to use on all ironable garments with the correct temperature setting. The shine or imprint is not permanent and disappears when you wash the garment. Avoid ironing over seams or folds. You can also place a cotton cloth over the area to be ironed to avoid imprints. | |
| The iron has stopped heating up. | Auto shut-off has been activated. | When your iron has not been used in 30 seconds in the horizontal position or 8 minutes in the vertical position), the iron will automatically shut-off. This is indicated by a constant blinking of the indicator light. To re-activate the iron, move the iron and the indicator light will light up again, indicating that the iron is heating up.If your iron has a dedicated Auto Shut Off light, the ASO light will blink when the iron enters the ASO state. When the iron is moved, the ASO light will switch off and the temperature indicator light will turn on, indicating that it is heating up again. |
| There is a power connection problem. | Please check the mains cord, the plug and the wall socket. Ensure that everything is properly connected. If you are using an extension plug, please ensure that power rating is suitable for the iron. | |
| The iron does not switch on anymore (I have tried the above but my iron still does not heat up). | If this is the case, there might be a problem with your iron. We recommend you to contact us. | |
| The indicator light on the iron is blinking/breathing. | Iron is heating up. The indicator light may turn on and off during ironing as the iron heats up periodically to maintain its temperature. | |
1 Water tank lid 2 Steam selector 3 Water spray 4 Cord 5 Cord winding 6 Indicator light 7 Steam boost trigger 8 Temperature dial 9 Quick Calc Release collector
Type of water to use
Note: The iron may give off some steam when you use it for the first time. This stops after a short while.
Type of water to use
The appliance is suitable to be used with tap water. However, if you live in an area with hard water, we recommend that you mix an equal amount of tap water with distilled or demineralized water. This will prevent fast scale build up and prolong the lifetime of the appliance.
Do not add perfume, water from the tumble dryer, vinegar, starch, descaling agents, ironing aids, chemically descaled water or other chemicals, as they may cause water spitting, brown staining or damage to your appliance.
Filling the water tank

1 Do not plug in the iron.

2 Slide the steam selector to the right to select no steam mode/dry ironing mode

3 Flip open the water tank lid.

4 Fill water tank up to the MAX indication mark. Do not add any additives like perfume, fragrances, soap or vinegar.

5 Close the water tank lid firmly.
Setting the temperature and steam
| | |
| MAXLINEN | /* | |
| ●●●COTTON | /* | |
| ●●SILK | ECO | |
| ●SYNTHETICS |

ECO setting: Minimum constant steam is delivered continuously for garments with less creases. This setting also saves energy.

Two steam clouds: More constant steam is delivered continuously for tough creases.

For stubborn creases, set the steam setting to two steam clouds and press and hold the steam boost trigger below the handle. Maximum constant steam will be delivered continuously.
Preparing for use

Smoke can be visible during the first use, and it is normal. This ceases after a short while.
1 Check the garment label to ensure that the fabric is ironable and its appropriate temperature setting.

2 Turn the temperature dial to the appropriate ironable temperature indication according to the garment label.

3 Allow the iron to rest on its heel.

4 Insert the plug into an earthed socket and allow the iron rest on its heel. If using an extension plug, ensure that the power rating of the extension plug is suitable for the iron.

5 Wait for the iron to heat up. The indicator light will turn steady on while it is heating up.

6 Once the iron is ready to be used, the indicator light will switch off. The indicator light may turn on and off during ironing as the iron heats up periodically to maintain its temperature.
Ironing with steam
1 Slide the steam selector to ECO mode or steam mode.

2 Turn the temperature dial to between silk and linen based on the image.


3 Steam will be released during ironing.
No steam mode/dry ironing mode

1 Set the steam setting to no steam mode/dry ironing mode

2 After a short while, steam will cease during ironing.
Water spray

1 Press and release the water spray button at the top of the handle. Water will be sprayed out of the nozzle.
Horizontal & vertical steam boost
1 Set temperature dial to MAX setting between cotton and linen.


2 Vertical steam boost: Press and release the steam boost trigger in the vertical position to release shots of steam on hanging garments. Holding down the steam boost trigger in the vertical position will not deliver constant steam.

3 Vertical steam boost: Pull and stretch your hanging garment while using the steam boost to remove stubborn creases.

4 Do not use your bare hand as a supporting surface when you iron.

5 Do not position the iron towards yourself or others.
Auto shut off (DST7030, DST7040, DST7050, DST7060, DST7510 only)

1 To give you a peace of mind, the appliance will cool down on its own if it is left unattended for a period of time.
2 When the iron is not in use for more than 30 seconds while resting on its soleplate or 8 minutes while resting on its heel/ base, the iron will enter auto shut off mode.
3 The temperature of the iron will decrease in auto shut off mode. The Auto Shut Off light will also blink quickly to indicate the iron is at auto-off status. To completely switch off the iron, plug out the iron/ switch off the mains plug.
4 Picking up or moving the iron will reactivate it.
5 The indicator light will turn steady ON, indicating that the iron is heating up again.

6 Once the indicator light switches OFF, the iron is ready for use.
Cleaning and maintenance

1 Ensure the iron is not plugged in.

2 Ensure the iron is cooled down.

3 Wipe the soleplate with a damp cloth.

Note: To keep the soleplate smooth, avoid hard contact with metal objects. Never use a scouring pad, vinegar or other chemicals to clean the soleplate.

4 Do not wash/clean the iron under running water as it may damage the electrical components within.
Calc-Clean

Tip: The Quick Calc Release function can be used at any time. If you live in a hard water area, use the function more frequently.
1 It is recommended to descale your iron after every 1 to 3 months of use to prolong its lifetime, or when brown stains/water is observed.
IMPORTANT: The Quick Calc Release automatically collects loose scale particles during ironing.

2 Ensure the iron is not plugged in.

3 Ensure the iron is cooled down.

4 Slide up the Quick Calc Release collector lever.

5 Pull out the Quick Calc Release collector lid.

6 Clean the Quick Calc Release collector lid with water.

7 Shake the iron to drain the water and scale particles from the opening of the iron.

8 Do not run water into the opening of the iron.

9 Shake the iron to drain the water and scale particles from the opening of the iron.

10 Push down the lever to lock the Quick Calc Release collector. You will hear a 'click' sound.
Storage

1 Slide the steam selector to select no steam mode/dry ironing mode.

2 Unplug the iron.

3 Let the iron cool down.

4 Pour any remaining water out of the water tank.

5 Wind the power cord around the main body of the iron.
Troubleshooting
This chapter summarizes the most common problems you could encounter with the appliance. If you are unable to solve the problem with the information below, visit www.philips.com/support for a list of frequently asked questions or contact the Consumer Care Center in your country.
Problem Possible cause Solution
| My Philips Steam Iron does not produce steam. | There is no water/not enough water in the tank. | If there is no water in the water tank of your Philips Steam Iron, your iron is not able to generate steam. Please refill the water tank with water. After this, your iron should produce steam again. |
| The iron is not ready to steam. | Your iron is ready to produce steam when the indicator light switches off. | |
| The steam setting is set to no steam mode/dry ironing mode | Aways ensure that the temperature dial is at the 2-dot ●3 ●lot or ●te ●MEN setting. Then, select a steam setting (ECO setting and 2-cloud setting) on the steam selector at the top of the handle.Ironing with steam with the temperature dial at the 1-dot or SYNTHETIC setting may cause wet spots/leaking as the temperature of the iron may not be hot enough to convert water to steam | |
| My Philips Steam Iron does not remove creases. | The temperature is set too low. | For irons with a temperature dial, please set the temperature according to the fabric that you are ironing. You can use the following table as a reference.Note: For some fabrics such as silk, wool, cotton and linen, steam would be needed to remove creases more efficiently. |
| Steam is not used. Switch the steam selector to or 2-cloECOettingYour Philips Iron does not produce steam when the temperature dial is at the 1-dot position, SYNTHETIC or Calc-Clean setting. You can get more steam by changing to a stronger steam setting, or using the steam boost function to help remove tough wrinkles.To remove creases in the vertical position, press and release the steam boost trigger or button to release a shot of steam. Holding down the trigger or button will not produce a continuous steam boost.Note that repeated usage of the steam boost in a short period of time may cause spitting or a reduction in the amount of steam produced. If this happens, wait for a short while before using the steam boost function again. | ||
| The steam boost in my Philips Steam Iron is not working. | The steam boost trigger has not been pressed and released. | To activate the steam boost in your Philips Steam Iron, press and release the steam boost button/trigger. Holding onto the steam boost button/trigger does not produce continuous steam boost. You may need to press the steam boost button/trigger several times on the first use for the pump to draw sufficient water.Note: We recommend to use the steam boost at the 3-dot temperature setting or higher. Using the steam boost at lower temperature settings may result in wet spots forming as the temperature of the iron may not be high enough to convert water into steam. |
| The steam boost function was used too often within a short period of time. | When you use the steam boost function of your Philips Steam Iron too often within a short period, the steam boost function will stop working for a while. In this case, please wait a couple of minutes before you use the steam boost again.For stubborn wrinkles, we recommend to use the steam boost with the steam setting at the no steam mode/dry ironing mode for the best effect. | |
| The iron is not ready to steam. | The iron is ready to steam when the indicator light switches off. | |
| My Philips Steam Iron produces smoke when heating up. | First usage. During production, some parts of the iron have been slightly greased. As a result of this, your iron may produce some smoke when it is switched on for the first few times, this is normal and should dissipate shortly. | |
| There is water in the soleplate. | Sometimes, there might still be some remaining water in your iron's soleplate after the last usage. This water will evaporate when your iron's soleplate heats up, and the steam generated may look like smoke. This is normal and should dissipate shortly. | |
| My iron is still producing smoke even after checking the above. | There could be an issue with the iron, we recommend you to contact us. | |
| There are water droplets/leaking on my garment during ironing. | First time usage. If you experience leaking/spitting during your first usage, perform the Calc Clean function once. If this does not resolve the leaking on your next use, we recommend you to contact us. | |
| The steam boost function was used too often within a short period of time. | Continue ironing in horizontal position and wait a while before you use the steam boost function again. | |
| There is a build up of scale/calcification in the iron. | If there is brown water or white flakes coming out of the iron, this may indicate a build up of calcification in the iron. Perform the Calc Clean function to clear this. If you live in an area with hard water, we recommend to use distilled water (or 50% distilled and 50% tap water) and perform the calc clean function once a month to prolong the lifetime of the iron.Note: the presence of white flakes on the very first use of the iron is normal. | |
| You have added other chemicals or additives into the water tank. | Fragrances/oils/chemicals/additives/descaling solutions should not be added into the water tank as they are damaging to the device. Please rinse the water tank, fill it up with water and descale your iron. | |
| You have not closed the water tank lid properly. | Close the lid firmly after filling. | |
| Steam has condensed onto the ironing board. | Steam may condense on the board cover, particularly when using irons that produce powerful levels of steam for a prolonged period of time. This can look like your iron is leaking from the soleplate. To prevent this, you can do the following:1 Select a lower steam setting than the setting you have been using or use steam during the first ironing strokes and then finish up with the dry-ironing strokes.2 You can also put an extra layer of cloth between the ironing board and the ironing board cover to minimize condensation.3 Replace the ironing board cover if the sponge material has worn out. | |
| Small droplets/wet spots that occur during start of ironing session. | If small droplets or wet spots occur during the start of the ironing session, this is normal as water might have collected in the soleplate from the previous ironing session, and the iron was used before it had fully heated up. Iron over the droplets/wet spots We recommend that the iron be stored in a vertical position with the steam setting set to no steam mode/dry ironing mode before it is unplugged to minimize the collection of water in the soleplate. | |
| The iron leaks after ironing. | If your iron leaks after unplugging/during storage, it may be because water has collected in the soleplate from leaving the steam setting on before the anti-drip feature activates. We recommend to set the steam selector to no steam mode/dry ironing mode before unplugging the iron. Empty the water tank and place the iron in the vertical position when cooling down/for storage. | |
| The iron leaves a shine or an imprint on the garment. | The surface to be ironed was uneven. | The iron is safe to use on all ironable garments. The shine or imprint is not permanent and disappears when you wash the garment. Avoid ironing over seams or folds. You can also place a cotton cloth over the area to be ironed to avoid imprints. |
| You have set a higher temperature than recommended for the fabric type. | Using a higher than recommended temperature setting for the fabric type may cause the iron to burn the fabric. Check your garment and that your iron is set to the correct temperature setting before ironing. The iron is safe to use on all ironable garments with the correct temperature setting. The shine or imprint is not permanent and disappears when you wash the garment. Avoid ironing over seams or folds. You can also place a cotton cloth over the area to be ironed to avoid imprints. | |
| The iron has stopped heating up. | Auto shut-off has been activated. | When your iron has not been used in 30 seconds in the horizontal position or 8 minutes in the vertical position), the iron will automatically shut-off. This is indicated by a constant blinking of the indicator light. To re-activate the iron, move the iron and the indicator light will light up again, indicating that the iron is heating up.If your iron has a dedicated Auto Shut Off light, the ASO light will blink when the iron enters the ASO state. When the iron is moved, the ASO light will switch off and the temperature indicator light will turn on, indicating that it is heating up again. |
| There is a power connection problem. | Please check the mains cord, the plug and the wall socket. Ensure that everything is properly connected. If you are using an extension plug, please ensure that power rating is suitable for the iron. | |
| The iron does not switch on anymore (I have tried the above but my iron still does not heat up). | If this is the case, there might be a problem with your iron. We recommend you to contact us. | |
| The indicator light on the iron is blinking/breathing. | Iron is heating up. The indicator light may turn on and off during ironing as the iron heats up periodically to maintain its temperature. | |
Introduction
3 When not in use, place the iron on its heel.

1 Press and release the water spray button on the top of the handle. Water will spray from the nozzle.
3 Wipe the soleplate with a damp cloth.

4 Slide the Quick Calc Release collector lever upward.

5 Pull out the Quick Calc Release collector lid.

6 Clean the Quick Calc Release collector lid with water.

10 Press the lever to secure the Quick Calc Release collector. You will hear a click.
Storage

2 Unplug the iron from the power outlet.

1 Water tank cap 2 Steam setting selector 3 Spray nozzle 4 Cord 5 Cord winding 6 Indicator 7 Shot of steam trigger 8 Temperature dial 9 Quick Calc Release collector
Using the appliance
Type of water to use
Note: On first use, the iron may emit some steam. This will stop soon.
Type of water to use
This appliance is suitable for use with tap water. However, if you live in an area with hard water, we recommend mixing equal amounts of tap water and distilled or demineralized water. This will prevent rapid scale buildup and extend the life of the appliance.
Do not add perfume, water from a clothes dryer, vinegar, starch, descaling agents, ironing additives, chemically softened water, or other chemicals, as this may cause water spitting, brown stains, or damage to the appliance.
Filling the water tank

2 Move the steam setting selector to the right to select the no steam / dry ironing mode 🚗

5 Close the water tank cap firmly.
Setting temperature and steam
 |  | |
| MAKSLAN | /* | |
| PAMUK | /* | |
| ECOSVILA | ||
| SINTETIKA | * |

Two steam clouds: A larger amount of steam is applied consecutively, for stubborn creases.

For stubborn creases, set the steam setting to two steam clouds 📄 and press and hold the extra steam button under the handle. Maximum constant steam will be released continuously.
Before use

During the first use, you may see smoke, which is normal. It will disappear soon.
1 Check the label on the garment to make sure the fabric can be ironed and what the appropriate temperature setting is for it.

2 Turn the temperature dial to the appropriate mark according to the label on the garment.

3 Place the iron in an upright position.

4 Plug into a grounded outlet and let the iron stand on its base. If using an extension cord, make sure the rated power of the extension cord matches the iron.

5 Wait for the iron to heat up. The indicator light will stay on while the iron is heating.

6 When the iron is ready for use, the light will turn off. The light may turn on and off during ironing, as the iron periodically reheats to maintain the temperature.
Steam ironing
1 Move the steam setting selector to the ECO steam mode.

2 Turn the temperature dial to a position between silk and linen, as shown in the image.


1 Set the steam setting to no steam / dry ironing mode.

2 After a short time, steam will stop coming out during ironing.
Spray

1 Press and release the water spray button on top of the handle. Water will spray from the nozzle.
Horizontal and vertical steam burst
1 Set the temperature dial to the MAX setting, between cotton and linen.


3 Vertical steam burst: Stretch the hanging garment while using the steam burst to remove stubborn wrinkles.

6 When the indicator light turns off, the iron is ready for use.
2 Make sure the iron has cooled down.

3 Clean the soleplate with a damp cloth.

4 Push up the Quick Calc Release handle of the collector.

6 Clean the Quick Calc Release collector with water.

7 Shake the iron to empty water and scale particles from the opening.

8 Do not pour water into the iron opening.

9 Shake the iron to empty water and scale particles from the opening.

10 Push the handle down to lock the Quick Calc Release collector. You will hear a click.
Storage

1 Move the steam setting selector to select the no steam / dry ironing mode.

2 Unplug the iron from the wall outlet.

3 Allow the iron to cool down.

4 Pour out the remaining water from the water tank.

5 Wind the power cord around the main body of the iron.
Troubleshooting
This chapter briefly lists the most common problems that may occur with the appliance. If you cannot solve the problem with the information below, visit www.philips.com/support to find a list of frequently asked questions or contact the consumer support center in your country.
2 Unplug the iron from the wall outlet.

| | ||
| MAXLINNE | / | \( / | |
| \( BOMULL | / | \( / | |
| \( SIDEN | ECO | ||
| SYNTET | \( \widehat{\widehat{\widehat{\widehat{\widehat{\widehat{\widehat{\widehat{\widehat{\widehat{\widehat{\widehat{\widehat{\widehat{\widehat{\widehat{\widehat{\widehat{\widehat{\widehat{\widehat{\widehat{\widehat{\widehat{\widehat{\widehat{\widehat{\widehat{\widehat{\widehat{\widehat{\widehat{\widehat{v}}}}}}}}}}}}}}}}}}}}}}}}}}}} |

3 Steam is emitted during ironing.
5 Pull out the Quick Calc Release collector lid.

2 Unplug the iron.

1 Water tank lid 2 Steam selector 3 Water spray 4 Cord 5 Cord winding 6 Indicator light 7 Steam boost trigger 8 Temperature dial 9 Quick Calc Release collector
Using the appliance
Type of water to use
Note: The iron may give off some steam when you use it for the first time. This stops after a short while.
Type of water to use
The appliance is suitable to be used with tap water. However, if you live in an area with hard water, we recommend that you mix an equal amount of tap water with distilled or demineralized water. This will prevent fast scale build up and prolong the lifetime of the appliance.
Do not add perfume, water from the tumble dryer, vinegar, starch, descaling agents, ironing aids, chemically descaled water or other chemicals, as they may cause water spitting, brown staining or damage to your appliance.
Filling the water tank

1 Do not plug in the iron.

2 Slide the steam selector to the right to select no steam mode/dry ironing mode

3 Flip open the water tank lid.

4 Fill water tank up to the MAX indication mark. Do not add any additives like perfume, fragrances, soap or vinegar.

5 Close the water tank lid firmly.
Setting the temperature and steam
| | |
| MAXLINEN | /* | |
| ●●●COTTON | /* | |
| ●●SILK | ECO | |
| ●SYNTHETICS |

ECO setting: Minimum constant steam is delivered continuously for garments with less creases. This setting also saves energy.

Two steam clouds: More constant steam is delivered continuously for tough creases.

For stubborn creases, set the steam setting to two steam clouds and press and hold the steam boost trigger below the handle. Maximum constant steam will be delivered continuously.
Preparing for use

Smoke can be visible during the first use, and it is normal. This ceases after a short while.
1 Check the garment label to ensure that the fabric is ironable and its appropriate temperature setting.

2 Turn the temperature dial to the appropriate ironable temperature indication according to the garment label.

3 Allow the iron to rest on its heel.

4 Insert the plug into an earthed socket and allow the iron rest on its heel. If using an extension plug, ensure that the power rating of the extension plug is suitable for the iron.

5 Wait for the iron to heat up. The indicator light will turn steady on while it is heating up.

6 Once the iron is ready to be used, the indicator light will switch off. The indicator light may turn on and off during ironing as the iron heats up periodically to maintain its temperature.
Ironing with steam
1 Slide the steam selector to ECO mode in steam mode.

2 Turn the temperature dial to between silk and linen based on the image.


3 Steam will be released during ironing.
No steam mode/dry ironing mode

1 Set the steam setting to no steam mode/dry ironing mode.

2 After a short while, steam will cease during ironing.
Water spray

1 Press and release the water spray button at the top of the handle. Water will be sprayed out of the nozzle.
Horizontal & vertical steam boost
1 Set temperature dial to MAX setting between cotton and linen.


2 Vertical steam boost: Press and release the steam boost trigger in the vertical position to release shots of steam on hanging garments. Holding down the steam boost trigger in the vertical position will not deliver constant steam.

3 Vertical steam boost: Pull and stretch your hanging garment while using the steam boost to remove stubborn creases.

4 Do not use your bare hand as a supporting surface when you iron.

5 Do not position the iron towards yourself or others.
Auto shut off (DST7030, DST7040, DST7050, DST7060, DST7510 only)

1 To give you a peace of mind, the appliance will cool down on its own if it is left unattended for a period of time.
2 When the iron is not in use for more than 30 seconds while resting on its soleplate or 8 minutes while resting on its heel/ base, the iron will enter auto shut off mode.
3 The temperature of the iron will decrease in auto shut off mode. The Auto Shut Off light will also blink quickly to indicate the iron is at auto-off status. To completely switch off the iron, plug out the iron/ switch off the mains plug.
4 Picking up or moving the iron will reactivate it.
5 The indicator light will turn steady ON, indicating that the iron is heating up again.

6 Once the indicator light switches OFF, the iron is ready for use.
Cleaning and maintenance

1 Ensure the iron is not plugged in.

2 Ensure the iron is cooled down.

3 Wipe the soleplate with a damp cloth.

Note: To keep the soleplate smooth, avoid hard contact with metal objects. Never use a scouring pad, vinegar or other chemicals to clean the soleplate.

4 Do not wash/ clean the iron under running water as it may damage the electrical components within.
Calc-Clean

Tip: The Quick Calc Release function can be used at any time. If you live in a hard water area, use the function more frequently.
1 It is recommended to descale your iron after every 1 to 3 months of use to prolong its lifetime, or when brown stains/water is observed.
IMPORTANT: The Quick Calc Release automatically collects loose scale particles during ironing.

2 Ensure the iron is not plugged in.

3 Ensure the iron is cooled down.

4 Slide up the Quick Calc Release collector lever.

5 Pull out the Quick Calc Release collector lid.

6 Clean the Quick Calc Release collector lid with water.

7 Shake the iron to drain the water and scale particles from the opening of the iron.

8 Do not run water into the opening of the iron.

9 Shake the iron to drain the water and scale particles from the opening of the iron.

10 Push down the lever to lock the Quick Calc Release collector. You will hear a 'click' sound.
Storage

1 Slide the steam selector to select no steam mode/dry ironing mode.

2 Unplug the iron.

3 Let the iron cool down.

4 Pour any remaining water out of the water tank.

5 Wind the power cord around the main body of the iron.
Troubleshooting
This chapter summarizes the most common problems you could encounter with the appliance. If you are unable to solve the problem with the information below, visit www.philips.com/support for a list of frequently asked questions or contact the Consumer Care Center in your country.
Problem Possible cause Solution
| My Philips Steam Iron does not produce steam. | There is no water/not enough water in the tank. | If there is no water in the water tank of your Philips Steam Iron, your iron is not able to generate steam. Please refill the water tank with water. After this, your iron should produce steam again. |
| The iron is not ready to steam. | Your iron is ready to produce steam when the indicator light switches off. | |
| The steam setting is set to no steam mode/dry ironing mode | Aways ensure that the temperature dial is at the 2-dot ●3 ●lot or ●te●HEN setting. Then, select a steam setting (ECO setting and 2-cloud setting) on the steam selector at the top of the handle.Ironing with steam with the temperature dial at the 1-dot or SYNTHETIC setting may cause wet spots/leaking as the temperature of the iron may not be hot enough to convert water to steam |
| My Philips Steam Iron does not remove creases. | The temperature is set too low. | For irons with a temperature dial, please set the temperature according to the fabric that you are ironing. You can use the following table as a reference.Note: For some fabrics such as silk, wool, cotton and linen, steam would be needed to remove creases more efficiently. |
| Steam is not used. Switch the steam selector to or 2-cloECOettingYour Philips Iron does not produce steam when the temperature dial is at the 1-dot position, SYNTHETIC or Calc-Clean setting. You can get more steam by changing to a stronger steam setting, or using the steam boost function to help remove tough wrinkles.To remove creases in the vertical position, press and release the steam boost trigger or button to release a shot of steam. Holding down the trigger or button will not produce a continuous steam boost.Note that repeated usage of the steam boost in a short period of time may cause spitting or a reduction in the amount of steam produced. If this happens, wait for a short while before using the steam boost function again. | ||
| The steam boost in my Philips Steam Iron is not working. | The steam boost trigger has not been pressed and released. | To activate the steam boost in your Philips Steam Iron, press and release the steam boost button/trigger. Holding onto the steam boost button/trigger does not produce continuous steam boost. You may need to press the steam boost button/trigger several times on the first use for the pump to draw sufficient water.Note: We recommend to use the steam boost at the 3-dot temperature setting or higher. Using the steam boost at lower temperature settings may result in wet spots forming as the temperature of the iron may not be high enough to convert water into steam. |
| The steam boost function was used too often within a short period of time. | When you use the steam boost function of your Philips Steam Iron too often within a short period, the steam boost function will stop working for a while. In this case, please wait a couple of minutes before you use the steam boost again.For stubborn wrinkles, we recommend to use the steam boost with the steam setting at the no steam mode/dry ironing mode for the best effect. | |
| The iron is not ready to steam. | The iron is ready to steam when the indicator light switches off. | |
| My Philips Steam Iron produces smoke when heating up. | First usage. During production, some parts of the iron have been slightly greased. As a result of this, your iron may produce some smoke when it is switched on for the first few times, this is normal and should dissipate shortly. | |
| There is water in the soleplate. | Sometimes, there might still be some remaining water in your iron's soleplate after the last usage. This water will evaporate when your iron's soleplate heats up, and the steam generated may look like smoke. This is normal and should dissipate shortly. | |
| My iron is still producing smoke even after checking the above. | There could be an issue with the iron, we recommend you to contact us. | |
| There are water droplets/leaking on my garment during ironing. | First time usage. If you experience leaking/spitting during your first usage, perform the Calc Clean function once. If this does not resolve the leaking on your next use, we recommend you to contact us. | |
| The steam boost function was used too often within a short period of time. | Continue ironing in horizontal position and wait a while before you use the steam boost function again. | |
| There is a build up of scale/calcification in the iron. | If there is brown water or white flakes coming out of the iron, this may indicate a build up of calcification in the iron. Perform the Calc Clean function to clear this. If you live in an area with hard water, we recommend to use distilled water (or 50% distilled and 50% tap water) and perform the calc clean function once a month to prolong the lifetime of the iron.Note: the presence of white flakes on the very first use of the iron is normal. | |
| You have added other chemicals or additives into the water tank. | Fragrances/oils/chemicals/additives/descaling solutions should not be added into the water tank as they are damaging to the device. Please rinse the water tank, fill it up with water and descale your iron. | |
| You have not closed the water tank lid properly. | Close the lid firmly after filling. | |
| Steam has condensed onto the ironing board. | Steam may condense on the board cover, particularly when using irons that produce powerful levels of steam for a prolonged period of time. This can look like your iron is leaking from the soleplate. To prevent this, you can do the following:1 Select a lower steam setting than the setting you have been using or use steam during the first ironing strokes and then finish up with the dry-ironing strokes.2 You can also put an extra layer of cloth between the ironing board and the ironing board cover to minimize condensation.3 Replace the ironing board cover if the sponge material has worn out. | |
| Small droplets/wet spots that occur during start of ironing session. | If small droplets or wet spots occur during the start of the ironing session, this is normal as water might have collected in the soleplate from the previous ironing session, and the iron was used before it had fully heated up. Iron over the droplets/wet spots We recommend that the iron be stored in a vertical position with the steam setting set to no steam mode/dry ironing mode before it is unplugged to minimize the collection of water in the soleplate. | |
| The iron leaks after ironing. | If your iron leaks after unplugging/during storage, it may be because water has collected in the soleplate from leaving the steam setting on before the anti-drip feature activates. We recommend to set the steam selector to no steam mode/dry ironing mode before unplugging the iron. Empty the water tank and place the iron in the vertical position when cooling down/for storage. | |
| The iron leaves a shine or an imprint on the garment. | The surface to be ironed was uneven. | The iron is safe to use on all ironable garments. The shine or imprint is not permanent and disappears when you wash the garment. Avoid ironing over seams or folds. You can also place a cotton cloth over the area to be ironed to avoid imprints. |
| You have set a higher temperature than recommended for the fabric type. | Using a higher than recommended temperature setting for the fabric type may cause the iron to burn the fabric. Check your garment and that your iron is set to the correct temperature setting before ironing. The iron is safe to use on all ironable garments with the correct temperature setting. The shine or imprint is not permanent and disappears when you wash the garment. Avoid ironing over seams or folds. You can also place a cotton cloth over the area to be ironed to avoid imprints. | |
| The iron has stopped heating up. | Auto shut-off has been activated. | When your iron has not been used in 30 seconds in the horizontal position or 8 minutes in the vertical position), the iron will automatically shut-off. This is indicated by a constant blinking of the indicator light. To re-activate the iron, move the iron and the indicator light will light up again, indicating that the iron is heating up.If your iron has a dedicated Auto Shut Off light, the ASO light will blink when the iron enters the ASO state. When the iron is moved, the ASO light will switch off and the temperature indicator light will turn on, indicating that it is heating up again. |
| There is a power connection problem. | Please check the mains cord, the plug and the wall socket. Ensure that everything is properly connected. If you are using an extension plug, please ensure that power rating is suitable for the iron. | |
| The iron does not switch on anymore (I have tried the above but my iron still does not heat up). | If this is the case, there might be a problem with your iron. We recommend you to contact us. | |
| The indicator light on the iron is blinking/breathing. | Iron is heating up. The indicator light may turn on and off during ironing as the iron heats up periodically to maintain its temperature. | |
Introduction
1 Water tank lid 2 Steam selector 3 Water spray 4 Cord 5 Cord winding 6 Indicator light 7 Steam boost trigger 8 Temperature dial 9 Quick Calc Release collector
Type of water to use
Note: The iron may give off some steam when you use it for the first time. This stops after a short while.
Type of water to use
The appliance is suitable to be used with tap water. However, if you live in an area with hard water, we recommend that you mix an equal amount of tap water with distilled or demineralized water. This will prevent fast scale build up and prolong the lifetime of the appliance.
Do not add perfume, water from the tumble dryer, vinegar, starch, descaling agents, ironing aids, chemically descaled water or other chemicals, as they may cause water spitting, brown staining or damage to your appliance.
Filling the water tank

1 Do not plug in the iron.

2 Slide the steam selector to the right to select no steam mode/dry ironing mode

3 Flip open the water tank lid.

4 Fill water tank up to the MAX indication mark. Do not add any additives like perfume, fragrances, soap or vinegar.

5 Close the water tank lid firmly.
Setting the temperature and steam
| | |
| MAXLINEN | /\* | |
| ●●●COTTON | /\* | |
| ●●SILK | ECO | |
| ●SYNTHETICS |

ECO setting: Minimum constant steam is delivered continuously for garments with less creases. This setting also saves energy.

Two steam clouds: More constant steam is delivered continuously for tough creases.

For stubborn creases, set the steam setting to two steam clouds and press and hold the steam boost trigger below the handle. Maximum constant steam will be delivered continuously.
Preparing for use

Smoke can be visible during the first use, and it is normal. This ceases after a short while.
1 Check the garment label to ensure that the fabric is ironable and its appropriate temperature setting.

2 Turn the temperature dial to the appropriate ironable temperature indication according to the garment label.

3 Allow the iron to rest on its heel.

4 Insert the plug into an earthed socket and allow the iron rest on its heel. If using an extension plug, ensure that the power rating of the extension plug is suitable for the iron.

5 Wait for the iron to heat up. The indicator light will turn steady on while it is heating up.

6 Once the iron is ready to be used, the indicator light will switch off. The indicator light may turn on and off during ironing as the iron heats up periodically to maintain its temperature.
Ironing with steam
1 Slide the steam selector to ECO mode or steam mode.

2 Turn the temperature dial to between silk and linen based on the image.


3 Steam will be released during ironing.
No steam mode/dry ironing mode

1 Set the steam setting to no steam mode/dry ironing mode

2 After a short while, steam will cease during ironing.
Water spray

1 Press and release the water spray button at the top of the handle. Water will be sprayed out of the nozzle.
Horizontal & vertical steam boost
1 Set temperature dial to MAX setting between cotton and linen.


2 Vertical steam boost: Press and release the steam boost trigger in the vertical position to release shots of steam on hanging garments. Holding down the steam boost trigger in the vertical position will not deliver constant steam.

3 Vertical steam boost: Pull and stretch your hanging garment while using the steam boost to remove stubborn creases.

4 Do not use your bare hand as a supporting surface when you iron.

5 Do not position the iron towards yourself or others.
Auto shut off (DST7030, DST7040, DST7050, DST7060, DST7510 only)

1 To give you a peace of mind, the appliance will cool down on its own if it is left unattended for a period of time.
2 When the iron is not in use for more than 30 seconds while resting on its soleplate or 8 minutes while resting on its heel/ base, the iron will enter auto shut off mode.
3 The temperature of the iron will decrease in auto shut off mode. The Auto Shut Off light will also blink quickly to indicate the iron is at auto-off status. To completely switch off the iron, plug out the iron/ switch off the mains plug.
4 Picking up or moving the iron will reactivate it.
5 The indicator light will turn steady ON, indicating that the iron is heating up again.

6 Once the indicator light switches OFF, the iron is ready for use.
Cleaning and maintenance

1 Ensure the iron is not plugged in.

2 Ensure the iron is cooled down.

3 Wipe the soleplate with a damp cloth.

Note: To keep the soleplate smooth, avoid hard contact with metal objects. Never use a scouring pad, vinegar or other chemicals to clean the soleplate.

4 Do not wash/clean the iron under running water as it may damage the electrical components within.
Calc-Clean

Tip: The Quick Calc Release function can be used at any time. If you live in a hard water area, use the function more frequently.
1 It is recommended to descale your iron after every 1 to 3 months of use to prolong its lifetime, or when brown stains/water is observed.
IMPORTANT: The Quick Calc Release automatically collects loose scale particles during ironing.

2 Ensure the iron is not plugged in.

3 Ensure the iron is cooled down.

4 Slide up the Quick Calc Release collector lever.

5 Pull out the Quick Calc Release collector lid.

6 Clean the Quick Calc Release collector lid with water.

7 Shake the iron to drain the water and scale particles from the opening of the iron.

8 Do not run water into the opening of the iron.

9 Shake the iron to drain the water and scale particles from the opening of the iron.

10 Push down the lever to lock the Quick Calc Release collector. You will hear a 'click' sound.
Storage

1 Slide the steam selector to select no steam mode/dry ironing mode

2 Unplug the iron.

3 Let the iron cool down.

4 Pour any remaining water out of the water tank.

5 Wind the power cord around the main body of the iron.
Troubleshooting
This chapter summarizes the most common problems you could encounter with the appliance. If you are unable to solve the problem with the information below, visit www.philips.com/support for a list of frequently asked questions or contact the Consumer Care Center in your country.
Problem Possible cause Solution
| My Philips Steam Iron does not produce steam. | There is no water/not enough water in the tank. | If there is no water in the water tank of your Philips Steam Iron, your iron is not able to generate steam. Please refill the water tank with water. After this, your iron should produce steam again. |
| The iron is not ready to steam. | Your iron is ready to produce steam when the indicator light switches off. | |
| The steam setting is set to no steam mode/dry ironing mode | Aways ensure that the temperature dial is at the 2-dot ●3 ●lot or ●te●HEN setting. Then, select a steam setting (ECO setting and 2-cloud setting) on the steam selector at the top of the handle.Ironing with steam with the temperature dial at the 1-dot or SYNTHETIC setting may cause wet spots/leaking as the temperature of the iron may not be hot enough to convert water to steam | |
| My Philips Steam Iron does not remove creases. | The temperature is set too low. | For irons with a temperature dial, please set the temperature according to the fabric that you are ironing. You can use the following table as a reference.Note: For some fabrics such as silk, wool, cotton and linen, steam would be needed to remove creases more efficiently. |
| Steam is not used. Switch the steam selector to or 2-cloECOettingYour Philips Iron does not produce steam when the temperature dial is at the 1-dot position, SYNTHETIC or Calc-Clean setting. You can get more steam by changing to a stronger steam setting, or using the steam boost function to help remove tough wrinkles.To remove creases in the vertical position, press and release the steam boost trigger or button to release a shot of steam. Holding down the trigger or button will not produce a continuous steam boost.Note that repeated usage of the steam boost in a short period of time may cause spitting or a reduction in the amount of steam produced. If this happens, wait for a short while before using the steam boost function again. | ||
| The steam boost in my Philips Steam Iron is not working. | The steam boost trigger has not been pressed and released. | To activate the steam boost in your Philips Steam Iron, press and release the steam boost button/trigger. Holding onto the steam boost button/trigger does not produce continuous steam boost. You may need to press the steam boost button/trigger several times on the first use for the pump to draw sufficient water.Note: We recommend to use the steam boost at the 3-dot temperature setting or higher. Using the steam boost at lower temperature settings may result in wet spots forming as the temperature of the iron may not be high enough to convert water into steam. |
| The steam boost function was used too often within a short period of time. | When you use the steam boost function of your Philips Steam Iron too often within a short period, the steam boost function will stop working for a while. In this case, please wait a couple of minutes before you use the steam boost again.For stubborn wrinkles, we recommend to use the steam boost with the steam setting at the no steam mode/dry ironing mode for the best effect. | |
| The iron is not ready to steam. | The iron is ready to steam when the indicator light switches off. | |
562 Türkmençe
| My Philips Steam Iron produces smoke when heating up. | First usage. During production, some parts of the iron have been slightly greased. As a result of this, your iron may produce some smoke when it is switched on for the first few times, this is normal and should dissipate shortly. | |
| There is water in the soleplate. | Sometimes, there might still be some remaining water in your iron's soleplate after the last usage. This water will evaporate when your iron's soleplate heats up, and the steam generated may look like smoke. This is normal and should dissipate shortly. | |
| My iron is still producing smoke even after checking the above. | There could be an issue with the iron, we recommend you to contact us. | |
| There are water droplets/leaking on my garment during ironing. | First time usage. If you experience leaking/spitting during your first usage, perform the Calc Clean function once. If this does not resolve the leaking on your next use, we recommend you to contact us. | |
| The steam boost function was used too often within a short period of time. | Continue ironing in horizontal position and wait a while before you use the steam boost function again. | |
| There is a build up of scale/calcification in the iron. | If there is brown water or white flakes coming out of the iron, this may indicate a build up of calcification in the iron. Perform the Calc Clean function to clear this. If you live in an area with hard water, we recommend to use distilled water (or 50% distilled and 50% tap water) and perform the calc clean function once a month to prolong the lifetime of the iron.Note: the presence of white flakes on the very first use of the iron is normal. | |
| You have added other chemicals or additives into the water tank. | Fragrances/oils/chemicals/additives/descaling solutions should not be added into the water tank as they are damaging to the device. Please rinse the water tank, fill it up with water and descale your iron. | |
| You have not closed the water tank lid properly. | Close the lid firmly after filling. | |
| Steam has condensed onto the ironing board. | Steam may condense on the board cover, particularly when using irons that produce powerful levels of steam for a prolonged period of time. This can look like your iron is leaking from the soleplate. To prevent this, you can do the following:1 Select a lower steam setting than the setting you have been using or use steam during the first ironing strokes and then finish up with the dry-ironing strokes.2 You can also put an extra layer of cloth between the ironing board and the ironing board cover to minimize condensation.3 Replace the ironing board cover if the sponge material has worn out. | |
| Small droplets/wet spots that occur during start of ironing session. | If small droplets or wet spots occur during the start of the ironing session, this is normal as water might have collected in the soleplate from the previous ironing session, and the iron was used before it had fully heated up. Iron over the droplets/wet spots We recommend that the iron be stored in a vertical position with the steam setting set to no steam mode/dry ironing mode before it is unplugged to minimize the collection of water in the soleplate. | |
| The iron leaks after ironing. | If your iron leaks after unplugging/during storage, it may be because water has collected in the soleplate from leaving the steam setting on before the anti-drip feature activates. We recommend to set the steam selector to no steam mode/dry ironing mode before unplugging the iron. Empty the water tank and place the iron in the vertical position when cooling down/for storage. | |
| The iron leaves a shine or an imprint on the garment. | The surface to be ironed was uneven. | The iron is safe to use on all ironable garments. The shine or imprint is not permanent and disappears when you wash the garment. Avoid ironing over seams or folds. You can also place a cotton cloth over the area to be ironed to avoid imprints. |
| You have set a higher temperature than recommended for the fabric type. | Using a higher than recommended temperature setting for the fabric type may cause the iron to burn the fabric. Check your garment and that your iron is set to the correct temperature setting before ironing. The iron is safe to use on all ironable garments with the correct temperature setting. The shine or imprint is not permanent and disappears when you wash the garment. Avoid ironing over seams or folds. You can also place a cotton cloth over the area to be ironed to avoid imprints. | |
564 Türkmençe
| The iron has stopped heating up. | Auto shut-off has been activated. | When your iron has not been used in 30 seconds in the horizontal position or 8 minutes in the vertical position), the iron will automatically shut-off. This is indicated by a constant blinking of the indicator light. To re-activate the iron, move the iron and the indicator light will light up again, indicating that the iron is heating up.If your iron has a dedicated Auto Shut Off light, the ASO light will blink when the iron enters the ASO state. When the iron is moved, the ASO light will switch off and the temperature indicator light will turn on, indicating that it is heating up again. |
| There is a power connection problem. | Please check the mains cord, the plug and the wall socket. Ensure that everything is properly connected. If you are using an extension plug, please ensure that power rating is suitable for the iron. | |
| The iron does not switch on anymore (I have tried the above but my iron still does not heat up). | If this is the case, there might be a problem with your iron. We recommend you to contact us. | |
| The indicator light on the iron is blinking/breathing. | Iron is heating up. The indicator light may turn on and off during ironing as the iron heats up periodically to maintain its temperature. | |
Introduction
6 Clean the cap of the Quick Calc Release collector with water.

604 Кыргызча
1 Water tank lid 2 Steam selector 3 Water spray 4 Cord 5 Cord winding 6 Indicator light 7 Steam boost trigger 8 Temperature dial 9 Quick Calc Release collector
Using the appliance
Type of water to use
Note: The iron may give off some steam when you use it for the first time. This stops after a short while.
Type of water to use
The appliance is suitable to be used with tap water. However, if you live in an area with hard water, we recommend that you mix an equal amount of tap water with distilled or demineralized water. This will prevent fast scale build up and prolong the lifetime of the appliance.
Do not add perfume, water from the tumble dryer, vinegar, starch, descaling agents, ironing aids, chemically descaled water or other chemicals, as they may cause water spitting, brown staining or damage to your appliance.
Filling the water tank

1 Do not plug in the iron.

2 Slide the steam selector to the right to select no steam mode/dry ironing mode

3 Flip open the water tank lid.

4 Fill water tank up to the MAX indication mark. Do not add any additives like perfume, fragrances, soap or vinegar.

5 Close the water tank lid firmly.
Setting the temperature and steam
| | |
| MAXLINEN | / * | |
| ●●●COTTON | / * | |
| ●●SILK | ECO | |
| ●SYNTHETICS |

ECO setting: Minimum constant steam is delivered continuously for garments with less creases. This setting also saves energy.

Two steam clouds: More constant steam is delivered continuously for tough creases.

For stubborn creases, set the steam setting to two steam clouds and press and hold the steam boost trigger below the handle. Maximum constant steam will be delivered continuously.
Preparing for use

Smoke can be visible during the first use, and it is normal. This ceases after a short while.
1 Check the garment label to ensure that the fabric is ironable and its appropriate temperature setting.

2 Turn the temperature dial to the appropriate ironable temperature indication according to the garment label.

3 Allow the iron to rest on its heel.

4 Insert the plug into an earthed socket and allow the iron rest on its heel. If using an extension plug, ensure that the power rating of the extension plug is suitable for the iron.

5 Wait for the iron to heat up. The indicator light will turn steady on while it is heating up.

Once the iron is ready to be used, the indicator light will switch off. The indicator light may turn on and off during ironing as the iron heats up periodically to maintain its temperature.
Ironing with steam
1 Slide the steam selector to ECO mode or steam mode.

2 Turn the temperature dial to between silk and linen based on the image.


3 Steam will be released during ironing.
No steam mode/dry ironing mode

1 Set the steam setting to no steam mode/dry ironing mode

2 After a short while, steam will cease during ironing.
Water spray

1 Press and release the water spray button at the top of the handle. Water will be sprayed out of the nozzle.
Horizontal & vertical steam boost
1 Set temperature dial to MAX setting between cotton and linen.


2 Vertical steam boost: Press and release the steam boost trigger in the vertical position to release shots of steam on hanging garments. Holding down the steam boost trigger in the vertical position will not deliver constant steam.

3 Vertical steam boost: Pull and stretch your hanging garment while using the steam boost to remove stubborn creases.

4 Do not use your bare hand as a supporting surface when you iron.

5 Do not position the iron towards yourself or others.
Auto shut off (DST7030, DST7040, DST7050, DST7060, DST7510 only)

1 To give you a peace of mind, the appliance will cool down on its own if it is left unattended for a period of time.
2 When the iron is not in use for more than 30 seconds while resting on its soleplate or 8 minutes while resting on its heel/ base, the iron will enter auto shut off mode.
3 The temperature of the iron will decrease in auto shut off mode. The Auto Shut Off light will also blink quickly to indicate the iron is at auto-off status. To completely switch off the iron, plug out the iron/ switch off the mains plug.
4 Picking up or moving the iron will reactivate it.
5 The indicator light will turn steady ON, indicating that the iron is heating up again.

6 Once the indicator light switches OFF, the iron is ready for use.
Cleaning and maintenance

1 Ensure the iron is not plugged in.

2 Ensure the iron is cooled down.

3 Wipe the soleplate with a damp cloth.

Note: To keep the soleplate smooth, avoid hard contact with metal objects. Never use a scouring pad, vinegar or other chemicals to clean the soleplate.

4 Do not wash/ clean the iron under running water as it may damage the electrical components within.
Calc-Clean

Tip: The Quick Calc Release function can be used at any time. If you live in a hard water area, use the function more frequently.
1 It is recommended to descale your iron after every 1 to 3 months of use to prolong its lifetime, or when brown stains/water is observed.
IMPORTANT: The Quick Calc Release automatically collects loose scale particles during ironing.

2 Ensure the iron is not plugged in.

3 Ensure the iron is cooled down.

4 Slide up the Quick Calc Release collector lever.

5 Pull out the Quick Calc Release collector lid.

6 Clean the Quick Calc Release collector lid with water.

7 Shake the iron to drain the water and scale particles from the opening of the iron.

8 Do not run water into the opening of the iron.

9 Shake the iron to drain the water and scale particles from the opening of the iron.

10 Push down the lever to lock the Quick Calc Release collector. You will hear a 'click' sound.
Storage

1 Slide the steam selector to select no steam mode/dry ironing mode.

2 Unplug the iron.

3 Let the iron cool down.

4 Pour any remaining water out of the water tank.

5 Wind the power cord around the main body of the iron.
Troubleshooting
This chapter summarizes the most common problems you could encounter with the appliance. If you are unable to solve the problem with the information below, visit www.philips.com/support for a list of frequently asked questions or contact the Consumer Care Center in your country.
Problem Possible cause Solution
| My Philips Steam Iron does not produce steam. | There is no water/not enough water in the tank. | If there is no water in the water tank of your Philips Steam Iron, your iron is not able to generate steam. Please refill the water tank with water. After this, your iron should produce steam again. |
| The iron is not ready to steam. | Your iron is ready to produce steam when the indicator light switches off. | |
| The steam setting is set to no steam mode/dry ironing mode | Aways ensure that the temperature dial is at the 2-dot ●3 ●lot or ●te ●MEN setting. Then, select a steam setting (ECO setting and 2-cloud setting) on the steam selector at the top of the handle.Ironing with steam with the temperature dial at the 1-dot or SYNTHETIC setting may cause wet spots/leaking as the temperature of the iron may not be hot enough to convert water to steam | |
| My Philips Steam Iron does not remove creases. | The temperature is set too low. | For irons with a temperature dial, please set the temperature according to the fabric that you are ironing. You can use the following table as a reference.Note: For some fabrics such as silk, wool, cotton and linen, steam would be needed to remove creases more efficiently. |
| Steam is not used. Switch the steam selector to or 2-cloECOettingYour Philips Iron does not produce steam when the temperature dial is at the 1-dot position, SYNTHETIC or Calc-Clean setting. You can get more steam by changing to a stronger steam setting, or using the steam boost function to help remove tough wrinkles.To remove creases in the vertical position, press and release the steam boost trigger or button to release a shot of steam. Holding down the trigger or button will not produce a continuous steam boost.Note that repeated usage of the steam boost in a short period of time may cause spitting or a reduction in the amount of steam produced. If this happens, wait for a short while before using the steam boost function again. | ||
| The steam boost in my Philips Steam Iron is not working. | The steam boost trigger has not been pressed and released. | To activate the steam boost in your Philips Steam Iron, press and release the steam boost button/trigger. Holding onto the steam boost button/trigger does not produce continuous steam boost. You may need to press the steam boost button/trigger several times on the first use for the pump to draw sufficient water.Note: We recommend to use the steam boost at the 3-dot temperature setting or higher. Using the steam boost at lower temperature settings may result in wet spots forming as the temperature of the iron may not be high enough to convert water into steam. |
| The steam boost function was used too often within a short period of time. | When you use the steam boost function of your Philips Steam Iron too often within a short period, the steam boost function will stop working for a while. In this case, please wait a couple of minutes before you use the steam boost again.For stubborn wrinkles, we recommend to use the steam boost with the steam setting at the no steam mode/dry ironing mode for the best effect. | |
| The iron is not ready to steam. | The iron is ready to steam when the indicator light switches off. | |
| My Philips Steam Iron produces smoke when heating up. | First usage. During production, some parts of the iron have been slightly greased. As a result of this, your iron may produce some smoke when it is switched on for the first few times, this is normal and should dissipate shortly. | |
| There is water in the soleplate. | Sometimes, there might still be some remaining water in your iron's soleplate after the last usage. This water will evaporate when your iron's soleplate heats up, and the steam generated may look like smoke. This is normal and should dissipate shortly. | |
| My iron is still producing smoke even after checking the above. | There could be an issue with the iron, we recommend you to contact us. | |
| There are water droplets/leaking on my garment during ironing. | First time usage. If you experience leaking/spitting during your first usage, perform the Calc Clean function once. If this does not resolve the leaking on your next use, we recommend you to contact us. | |
| The steam boost function was used too often within a short period of time. | Continue ironing in horizontal position and wait a while before you use the steam boost function again. | |
| There is a build up of scale/calcification in the iron. | If there is brown water or white flakes coming out of the iron, this may indicate a build up of calcification in the iron. Perform the Calc Clean function to clear this. If you live in an area with hard water, we recommend to use distilled water (or 50% distilled and 50% tap water) and perform the calc clean function once a month to prolong the lifetime of the iron.Note: the presence of white flakes on the very first use of the iron is normal. | |
| You have added other chemicals or additives into the water tank. | Fragrances/oils/chemicals/additives/descaling solutions should not be added into the water tank as they are damaging to the device. Please rinse the water tank, fill it up with water and descale your iron. | |
| You have not closed the water tank lid properly. | Close the lid firmly after filling. | |
| Steam has condensed onto the ironing board. | Steam may condense on the board cover, particularly when using irons that produce powerful levels of steam for a prolonged period of time. This can look like your iron is leaking from the soleplate. To prevent this, you can do the following:1 Select a lower steam setting than the setting you have been using or use steam during the first ironing strokes and then finish up with the dry-ironing strokes.2 You can also put an extra layer of cloth between the ironing board and the ironing board cover to minimize condensation.3 Replace the ironing board cover if the sponge material has worn out. | |
| Small droplets/wet spots that occur during start of ironing session. | If small droplets or wet spots occur during the start of the ironing session, this is normal as water might have collected in the soleplate from the previous ironing session, and the iron was used before it had fully heated up. Iron over the droplets/wet spots We recommend that the iron be stored in a vertical position with the steam setting set to no steam mode/dry ironing mode before it is unplugged to minimize the collection of water in the soleplate. | |
| The iron leaks after ironing. | If your iron leaks after unplugging/during storage, it may be because water has collected in the soleplate from leaving the steam setting on before the anti-drip feature activates. We recommend to set the steam selector to no steam mode/dry ironing mode before unplugging the iron. Empty the water tank and place the iron in the vertical position when cooling down/for storage. | |
| The iron leaves a shine or an imprint on the garment. | The surface to be ironed was uneven. | The iron is safe to use on all ironable garments. The shine or imprint is not permanent and disappears when you wash the garment. Avoid ironing over seams or folds. You can also place a cotton cloth over the area to be ironed to avoid imprints. |
| You have set a higher temperature than recommended for the fabric type. | Using a higher than recommended temperature setting for the fabric type may cause the iron to burn the fabric. Check your garment and that your iron is set to the correct temperature setting before ironing. The iron is safe to use on all ironable garments with the correct temperature setting. The shine or imprint is not permanent and disappears when you wash the garment. Avoid ironing over seams or folds. You can also place a cotton cloth over the area to be ironed to avoid imprints. | |
| The iron has stopped heating up. | Auto shut-off has been activated. | When your iron has not been used in 30 seconds in the horizontal position or 8 minutes in the vertical position), the iron will automatically shut-off. This is indicated by a constant blinking of the indicator light. To re-activate the iron, move the iron and the indicator light will light up again, indicating that the iron is heating up.If your iron has a dedicated Auto Shut Off light, the ASO light will blink when the iron enters the ASO state. When the iron is moved, the ASO light will switch off and the temperature indicator light will turn on, indicating that it is heating up again. |
| There is a power connection problem. | Please check the mains cord, the plug and the wall socket. Ensure that everything is properly connected. If you are using an extension plug, please ensure that power rating is suitable for the iron. | |
| The iron does not switch on anymore (I have tried the above but my iron still does not heat up). | If this is the case, there might be a problem with your iron. We recommend you to contact us. | |
| The indicator light on the iron is blinking/breathing. | Iron is heating up. The indicator light may turn on and off during ironing as the iron heats up periodically to maintain its temperature. | |
1 Water tank lid 2 Steam selector 3 Water spray 4 Cord 5 Cord winding 6 Indicator light 7 Steam boost trigger 8 Temperature dial 9 Quick Calc Release collector
Type of water to use
Note: The iron may give off some steam when you use it for the first time. This stops after a short while.
Type of water to use
The appliance is suitable to be used with tap water. However, if you live in an area with hard water, we recommend that you mix an equal amount of tap water with distilled or demineralized water. This will prevent fast scale build up and prolong the lifetime of the appliance.
Do not add perfume, water from the tumble dryer, vinegar, starch, descaling agents, ironing aids, chemically descaled water or other chemicals, as they may cause water spitting, brown staining or damage to your appliance.
Filling the water tank

1 Do not plug in the iron.

2 Slide the steam selector to the right to select no steam mode/dry ironing mode

3 Flip open the water tank lid.

4 Fill water tank up to the MAX indication mark. Do not add any additives like perfume, fragrances, soap or vinegar.

5 Close the water tank lid firmly.
Setting the temperature and steam
| | |
| MAXLINEN | /* | |
| ●●●COTTON | /* | |
| ●●SILK | ECO | |
| ●SYNTHETICS |

ECO setting: Minimum constant steam is delivered continuously for garments with less creases. This setting also saves energy.

Two steam clouds: More constant steam is delivered continuously for tough creases.

For stubborn creases, set the steam setting to two steam clouds and press and hold the steam boost trigger below the handle. Maximum constant steam will be delivered continuously.
Preparing for use

Smoke can be visible during the first use, and it is normal. This ceases after a short while.
1 Check the garment label to ensure that the fabric is ironable and its appropriate temperature setting.

2 Turn the temperature dial to the appropriate ironable temperature indication according to the garment label.

3 Allow the iron to rest on its heel.

4 Insert the plug into an earthed socket and allow the iron to rest on its heel. If using an extension plug, ensure that the power rating of the extension plug is suitable for the iron.

5 Wait for the iron to heat up. The indicator light will turn steady on while it is heating up.

6 Once the iron is ready to be used, the indicator light will switch off. The indicator light may turn on and off during ironing as the iron heats up periodically to maintain its temperature.
Ironing with steam
1 Slide the steam selector to ECO mode or steam mode.

2 Turn the temperature dial to between silk and linen based on the image.


3 Steam will be released during ironing.
No steam mode/dry ironing mode

1 Set the steam setting to no steam mode/dry ironing mode.

2 After a short while, steam will cease during ironing.
Water spray

1 Press and release the water spray button at the top of the handle. Water will be sprayed out of the nozzle.
Horizontal & vertical steam boost
1 Set temperature dial to MAX setting between cotton and linen.

Macedonian

2 Vertical steam boost: Press and release the steam boost trigger in the vertical position to release shots of steam on hanging garments. Holding down the steam boost trigger in the vertical position will not deliver constant steam.

3 Vertical steam boost: Pull and stretch your hanging garment while using the steam boost to remove stubborn creases.

4 Do not use your bare hand as a supporting surface when you iron.

5 Do not position the iron towards yourself or others.
Auto shut off (DST7030, DST7040, DST7050, DST7060, DST7510 only)

1 To give you a peace of mind, the appliance will cool down on its own if it is left unattended for a period of time.
2 When the iron is not in use for more than 30 seconds while resting on its soleplate or 8 minutes while resting on its heel/ base, the iron will enter auto shut off mode.
3 The temperature of the iron will decrease in auto shut off mode. The Auto Shut Off light will also blink quickly to indicate the iron is at auto-off status. To completely switch off the iron, plug out the iron/ switch off the mains plug.
4 Picking up or moving the iron will reactivate it.
5 The indicator light will turn steady ON, indicating that the iron is heating up again.

6 Once the indicator light switches OFF, the iron is ready for use.
Cleaning and maintenance

1 Ensure the iron is not plugged in.

2 Ensure the iron is cooled down.

3 Wipe the soleplate with a damp cloth.

Note: To keep the soleplate smooth, avoid hard contact with metal objects. Never use a scouring pad, vinegar or other chemicals to clean the soleplate.

4 Do not wash/clean the iron under running water as it may damage the electrical components within.
Calc-Clean

Tip: The Quick Calc Release function can be used at any time. If you live in a hard water area, use the function more frequently.
1 It is recommended to descale your iron after every 1 to 3 months of use to prolong its lifetime, or when brown stains/water is observed.
IMPORTANT: The Quick Calc Release automatically collects loose scale particles during ironing.

2 Ensure the iron is not plugged in.

3 Ensure the iron is cooled down.

4 Slide up the Quick Calc Release collector lever.

5 Pull out the Quick Calc Release collector lid.

6 Clean the Quick Calc Release collector lid with water.

7 Shake the iron to drain the water and scale particles from the opening of the iron.

8 Do not run water into the opening of the iron.

9 Shake the iron to drain the water and scale particles from the opening of the iron.

10 Push down the lever to lock the Quick Calc Release collector. You will hear a 'click' sound.
Storage

1 Slide the steam selector to select no steam mode/dry ironing mode

2 Unplug the iron.

3 Let the iron cool down.

4 Pour any remaining water out of the water tank.

5 Wind the power cord around the main body of the iron.
Troubleshooting
This chapter summarizes the most common problems you could encounter with the appliance. If you are unable to solve the problem with the information below, visit www.philips.com/support for a list of frequently asked questions or contact the Consumer Care Center in your country.
Problem Possible cause Solution
| My Philips Steam Iron does not produce steam. | There is no water/not enough water in the tank. | If there is no water in the water tank of your Philips Steam Iron, your iron is not able to generate steam. Please refill the water tank with water. After this, your iron should produce steam again. |
| The iron is not ready to steam. | Your iron is ready to produce steam when the indicator light switches off. | |
| The steam setting is set to no steam mode/dry ironing mode | Aways ensure that the temperature dial is at the 2-dot ●3 ●lot or ●te ●MEN setting. Then, select a steam setting (ECO setting and 2-cloud setting) on the steam selector at the top of the handle.Ironing with steam with the temperature dial at the 1-dot or SYNTHETIC setting may cause wet spots/leaking as the temperature of the iron may not be hot enough to convert water to steam | |
| My Philips Steam Iron does not remove creases. | The temperature is set too low. | For irons with a temperature dial, please set the temperature according to the fabric that you are ironing. You can use the following table as a reference.Note: For some fabrics such as silk, wool, cotton and linen, steam would be needed to remove creases more efficiently. |
| Steam is not used. Switch the steam selector to or 2-cloEcoettingYour Philips Iron does not produce steam when the temperature dial is at the 1-dot position, SYNTHETIC or Calc-Clean setting. You can get more steam by changing to a stronger steam setting, or using the steam boost function to help remove tough wrinkles.To remove creases in the vertical position, press and release the steam boost trigger or button to release a shot of steam. Holding down the trigger or button will not produce a continuous steam boost.Note that repeated usage of the steam boost in a short period of time may cause spitting or a reduction in the amount of steam produced. If this happens, wait for a short while before using the steam boost function again. | ||
| The steam boost in my Philips Steam Iron is not working. | The steam boost trigger has not been pressed and released. | To activate the steam boost in your Philips Steam Iron, press and release the steam boost button/trigger. Holding onto the steam boost button/trigger does not produce continuous steam boost. You may need to press the steam boost button/trigger several times on the first use for the pump to draw sufficient water.Note: We recommend to use the steam boost at the 3-dot temperature setting or higher. Using the steam boost at lower temperature settings may result in wet spots forming as the temperature of the iron may not be high enough to convert water into steam. |
| The steam boost function was used too often within a short period of time. | When you use the steam boost function of your Philips Steam Iron too often within a short period, the steam boost function will stop working for a while. In this case, please wait a couple of minutes before you use the steam boost again.For stubborn wrinkles, we recommend to use the steam boost with the steam setting at the no steam mode/dry ironing mode for the best effect. | |
| The iron is not ready to steam. | The iron is ready to steam when the indicator light switches off. | |
| My Philips Steam Iron produces smoke when heating up. | First usage. During production, some parts of the iron have been slightly greased. As a result of this, your iron may produce some smoke when it is switched on for the first few times, this is normal and should dissipate shortly. | |
| There is water in the soleplate. | Sometimes, there might still be some remaining water in your iron's soleplate after the last usage. This water will evaporate when your iron's soleplate heats up, and the steam generated may look like smoke. This is normal and should dissipate shortly. | |
| My iron is still producing smoke even after checking the above. | There could be an issue with the iron, we recommend you to contact us. | |
| There are water droplets/leaking on my garment during ironing. | First time usage. If you experience leaking/spitting during your first usage, perform the Calc Clean function once. If this does not resolve the leaking on your next use, we recommend you to contact us. | |
| The steam boost function was used too often within a short period of time. | Continue ironing in horizontal position and wait a while before you use the steam boost function again. | |
| There is a build up of scale/calcification in the iron. | If there is brown water or white flakes coming out of the iron, this may indicate a build up of calcification in the iron. Perform the Calc Clean function to clear this. If you live in an area with hard water, we recommend to use distilled water (or 50% distilled and 50% tap water) and perform the calc clean function once a month to prolong the lifetime of the iron.Note: the presence of white flakes on the very first use of the iron is normal. | |
| You have added other chemicals or additives into the water tank. | Fragrances/oils/chemicals/additives/descaling solutions should not be added into the water tank as they are damaging to the device. Please rinse the water tank, fill it up with water and descale your iron. | |
| You have not closed the water tank lid properly. | Close the lid firmly after filling. | |
| Steam has condensed onto the ironing board. | Steam may condense on the board cover, particularly when using irons that produce powerful levels of steam for a prolonged period of time. This can look like your iron is leaking from the soleplate. To prevent this, you can do the following:1 Select a lower steam setting than the setting you have been using or use steam during the first ironing strokes and then finish up with the dry-ironing strokes.2 You can also put an extra layer of cloth between the ironing board and the ironing board cover to minimize condensation.3 Replace the ironing board cover if the sponge material has worn out. | |
| Small droplets/wet spots that occur during start of ironing session. | If small droplets or wet spots occur during the start of the ironing session, this is normal as water might have collected in the soleplate from the previous ironing session, and the iron was used before it had fully heated up. Iron over the droplets/wet spots We recommend that the iron be stored in a vertical position with the steam setting set to no steam mode/dry ironing mode before it is unplugged to minimize the collection of water in the soleplate. | |
| The iron leaks after ironing. | If your iron leaks after unplugging/during storage, it may be because water has collected in the soleplate from leaving the steam setting on before the anti-drip feature activates. We recommend to set the steam selector to no steam mode/dry ironing mode before unplugging the iron. Empty the water tank and place the iron in the vertical position when cooling down/for storage. | |
| The iron leaves a shine or an imprint on the garment. | The surface to be ironed was uneven. | The iron is safe to use on all ironable garments. The shine or imprint is not permanent and disappears when you wash the garment. Avoid ironing over seams or folds. You can also place a cotton cloth over the area to be ironed to avoid imprints. |
| You have set a higher temperature than recommended for the fabric type. | Using a higher than recommended temperature setting for the fabric type may cause the iron to burn the fabric. Check your garment and that your iron is set to the correct temperature setting before ironing. The iron is safe to use on all ironable garments with the correct temperature setting. The shine or imprint is not permanent and disappears when you wash the garment. Avoid ironing over seams or folds. You can also place a cotton cloth over the area to be ironed to avoid imprints. | |
| The iron has stopped heating up. | Auto shut-off has been activated. | When your iron has not been used in 30 seconds in the horizontal position or 8 minutes in the vertical position), the iron will automatically shut-off. This is indicated by a constant blinking of the indicator light. To re-activate the iron, move the iron and the indicator light will light up again, indicating that the iron is heating up.If your iron has a dedicated Auto Shut Off light, the ASO light will blink when the iron enters the ASO state. When the iron is moved, the ASO light will switch off and the temperature indicator light will turn on, indicating that it is heating up again. |
| There is a power connection problem. | Please check the mains cord, the plug and the wall socket. Ensure that everything is properly connected. If you are using an extension plug, please ensure that power rating is suitable for the iron. | |
| The iron does not switch on anymore (I have tried the above but my iron still does not heat up). | If this is the case, there might be a problem with your iron. We recommend you to contact us. | |
| The indicator light on the iron is blinking/breathing. | Iron is heating up. The indicator light may turn on and off during ironing as the iron heats up periodically to maintain its temperature. | |
Introduction
Russian

5 Remove the Quick Calc Release container lid.

1 Water tank lid 2 Steam selector 3 Water spray 4 Cord 5 Cord winding 6 Indicator light 7 Steam boost trigger 8 Temperature dial 9 Quick Calc Release collector
Using the appliance
Type of water to use
Note: The iron may give off some steam when you use it for the first time. This stops after a short while.
Type of water to use
The appliance is suitable to be used with tap water. However, if you live in an area with hard water, we recommend that you mix an equal amount of tap water with distilled or demineralized water. This will prevent fast scale build up and prolong the lifetime of the appliance.
Do not add perfume, water from the tumble dryer, vinegar, starch, descaling agents, ironing aids, chemically descaled water or other chemicals, as they may cause water spitting, brown staining or damage to your appliance.
Filling the water tank

1 Do not plug in the iron.

2 Slide the steam selector to the right to select no steam mode/dry ironing mode

3 Flip open the water tank lid.

4 Fill water tank up to the MAX indication mark. Do not add any additives like perfume, fragrances, soap or vinegar.

5 Close the water tank lid firmly.
Setting the temperature and steam
| | |
| MAXLINEN | //* | |
| COTTON | //* | |
| SILK | ECO | |
| SYNTHETICS |

ECO setting: Minimum constant steam is delivered continuously for garments with less creases. This setting also saves energy.

Two steam clouds: More constant steam is delivered continuously for tough creases.

For stubborn creases, set the steam setting to two steam clouds and press and hold the steam boost trigger below the handle. Maximum constant steam will be delivered continuously.
Preparing for use

Smoke can be visible during the first use, and it is normal. This ceases after a short while.
1 Check the garment label to ensure that the fabric is ironable and its appropriate temperature setting.

2 Turn the temperature dial to the appropriate ironable temperature indication according to the garment label.

3 Allow the iron to rest on its heel.

4 Insert the plug into an earthed socket and allow the iron rest on its heel. If using an extension plug, ensure that the power rating of the extension plug is suitable for the iron.

5 Wait for the iron to heat up. The indicator light will turn steady on while it is heating up.

6 Once the iron is ready to be used, the indicator light will switch off. The indicator light may turn on and off during ironing as the iron heats up periodically to maintain its temperature.
Ironing with steam
1 Slide the steam selector to ECO mode or steam mode.

2 Turn the temperature dial to between silk and linen based on the image.


3 Steam will be released during ironing.
No steam mode/dry ironing mode

1 Set the steam setting to no steam mode/dry ironing mode

2 After a short while, steam will cease during ironing.
Water spray

1 Press and release the water spray button at the top of the handle. Water will be sprayed out of the nozzle.
Horizontal & vertical steam boost
1 Set temperature dial to MAX setting between cotton and linen.


2 Vertical steam boost: Press and release the steam boost trigger in the vertical position to release shots of steam on hanging garments. Holding down the steam boost trigger in the vertical position will not deliver constant steam.

3 Vertical steam boost: Pull and stretch your hanging garment while using the steam boost to remove stubborn creases.

4 Do not use your bare hand as a supporting surface when you iron.

5 Do not position the iron towards yourself or others.
Auto shut off (DST7030, DST7040, DST7050, DST7060, DST7510 only)

1 To give you a peace of mind, the appliance will cool down on its own if it is left unattended for a period of time.
2 When the iron is not in use for more than 30 seconds while resting on its soleplate or 8 minutes while resting on its heel/ base, the iron will enter auto shut off mode.
3 The temperature of the iron will decrease in auto shut off mode. The Auto Shut Off light will also blink quickly to indicate the iron is at auto-off status. To completely switch off the iron, unplug the iron or switch off the mains plug.
4 Picking up or moving the iron will reactivate it.
5 The indicator light will turn steady ON, indicating that the iron is heating up again.

6 Once the indicator light switches OFF, the iron is ready for use.
Cleaning and maintenance

1 Ensure the iron is not plugged in.

2 Ensure the iron is cooled down.

3 Wipe the soleplate with a damp cloth.

Note: To keep the soleplate smooth, avoid hard contact with metal objects. Never use a scouring pad, vinegar or other chemicals to clean the soleplate.

4 Do not wash or clean the iron under running water as it may damage the electrical components within.
Calc-Clean

Tip: The Quick Calc Release function can be used at any time. If you live in a hard water area, use the function more frequently.
1 It is recommended to descale your iron after every 1 to 3 months of use to prolong its lifetime, or when brown stains or water is observed.
IMPORTANT: The Quick Calc Release automatically collects loose scale particles during ironing.

2 Ensure the iron is not plugged in.

3 Ensure the iron is cooled down.

4 Slide up the Quick Calc Release collector lever.

5 Pull out the Quick Calc Release collector lid.

6 Clean the Quick Calc Release collector lid with water.

7 Shake the iron to drain the water and scale particles from the opening of the iron.

8 Do not run water into the opening of the iron.

9 Shake the iron to drain the water and scale particles from the opening of the iron.

10 Push down the lever to lock the Quick Calc Release collector. You will hear a 'click' sound.
Storage

1 Slide the steam selector to select no steam mode/dry ironing mode

2 Unplug the iron.

3 Let the iron cool down.

4 Pour any remaining water out of the water tank.

5 Wind the power cord around the main body of the iron.
Troubleshooting
This chapter summarizes the most common problems you could encounter with the appliance. If you are unable to solve the problem with the information below, visit www.philips.com/support for a list of frequently asked questions or contact the Consumer Care Center in your country.
Problem Possible cause Solution
| My Philips Steam Iron does not produce steam. | There is no water/not enough water in the tank. | If there is no water in the water tank of your Philips Steam Iron, your iron is not able to generate steam. Please refill the water tank with water. After this, your iron should produce steam again. |
| The iron is not ready to steam. | Your iron is ready to produce steam when the indicator light switches off. | |
| The steam setting is set to no steam mode/dry ironing mode | Aways ensure that the temperature dial is at the 2-dot ●3 ●lot or ●te●HEN setting. Then, select a steam setting (ECO setting and 2-cloud setting) on the steam selector at the top of the handle.Ironing with steam with the temperature dial at the 1-dot or SYNTHETIC setting may cause wet spots/leaking as the temperature of the iron may not be hot enough to convert water to steam |
| My Philips Steam Iron does not remove creases. | The temperature is set too low. | For irons with a temperature dial, please set the temperature according to the fabric that you are ironing. You can use the following table as a reference.Note: For some fabrics such as silk, wool, cotton and linen, steam would be needed to remove creases more efficiently. |
| Steam is not used. Switch the steam selector to or 2-cloECOettingYour Philips Iron does not produce steam when the temperature dial is at the 1-dot position, SYNTHETIC or Calc-Clean setting. You can get more steam by changing to a stronger steam setting, or using the steam boost function to help remove tough wrinkles.To remove creases in the vertical position, press and release the steam boost trigger or button to release a shot of steam. Holding down the trigger or button will not produce a continuous steam boost.Note that repeated usage of the steam boost in a short period of time may cause spitting or a reduction in the amount of steam produced. If this happens, wait for a short while before using the steam boost function again. | ||
| The steam boost in my Philips Steam Iron is not working. | The steam boost trigger has not been pressed and released. | To activate the steam boost in your Philips Steam Iron, press and release the steam boost button/trigger. Holding onto the steam boost button/trigger does not produce continuous steam boost. You may need to press the steam boost button/trigger several times on the first use for the pump to draw sufficient water.Note: We recommend to use the steam boost at the 3-dot temperature setting or higher. Using the steam boost at lower temperature settings may result in wet spots forming as the temperature of the iron may not be high enough to convert water into steam. |
| The steam boost function was used too often within a short period of time. | When you use the steam boost function of your Philips Steam Iron too often within a short period, the steam boost function will stop working for a while. In this case, please wait a couple of minutes before you use the steam boost again.For stubborn wrinkles, we recommend to use the steam boost with the steam setting at the no steam mode/dry ironing mode for the best effect. | |
| The iron is not ready to steam. | The iron is ready to steam when the indicator light switches off. | |
| My Philips Steam Iron produces smoke when heating up. | First usage. During production, some parts of the iron have been slightly greased. As a result of this, your iron may produce some smoke when it is switched on for the first few times, this is normal and should dissipate shortly. | |
| There is water in the soleplate. | Sometimes, there might still be some remaining water in your iron's soleplate after the last usage. This water will evaporate when your iron's soleplate heats up, and the steam generated may look like smoke. This is normal and should dissipate shortly. | |
| My iron is still producing smoke even after checking the above. | There could be an issue with the iron, we recommend you to contact us. | |
| There are water droplets/leaking on my garment during ironing. | First time usage. If you experience leaking/spitting during your first usage, perform the Calc Clean function once. If this does not resolve the leaking on your next use, we recommend you to contact us. | |
| The steam boost function was used too often within a short period of time. | Continue ironing in horizontal position and wait a while before you use the steam boost function again. | |
| There is a build up of scale/calcification in the iron. | If there is brown water or white flakes coming out of the iron, this may indicate a build up of calcification in the iron. Perform the Calc Clean function to clear this. If you live in an area with hard water, we recommend to use distilled water (or 50% distilled and 50% tap water) and perform the calc clean function once a month to prolong the lifetime of the iron.Note: the presence of white flakes on the very first use of the iron is normal. | |
| You have added other chemicals or additives into the water tank. | Fragrances/oils/chemicals/additives/descaling solutions should not be added into the water tank as they are damaging to the device. Please rinse the water tank, fill it up with water and descale your iron. | |
| You have not closed the water tank lid properly. | Close the lid firmly after filling. | |
| Steam has condensed onto the ironing board. | Steam may condense on the board cover, particularly when using irons that produce powerful levels of steam for a prolonged period of time. This can look like your iron is leaking from the soleplate. To prevent this, you can do the following:1 Select a lower steam setting than the setting you have been using or use steam during the first ironing strokes and then finish up with the dry-ironing strokes.2 You can also put an extra layer of cloth between the ironing board and the ironing board cover to minimize condensation.3 Replace the ironing board cover if the sponge material has worn out. | |
| Small droplets/wet spots that occur during start of ironing session. | If small droplets or wet spots occur during the start of the ironing session, this is normal as water might have collected in the soleplate from the previous ironing session, and the iron was used before it had fully heated up. Iron over the droplets/wet spots We recommend that the iron be stored in a vertical position with the steam setting set to no steam mode/dry ironing mode before it is unplugged to minimize the collection of water in the soleplate. | |
| The iron leaks after ironing. | If your iron leaks after unplugging/during storage, it may be because water has collected in the soleplate from leaving the steam setting on before the anti-drip feature activates. We recommend to set the steam selector to no steam mode/dry ironing mode before unplugging the iron. Empty the water tank and place the iron in the vertical position when cooling down/for storage. | |
| The iron leaves a shine or an imprint on the garment. | The surface to be ironed was uneven. | The iron is safe to use on all ironable garments. The shine or imprint is not permanent and disappears when you wash the garment. Avoid ironing over seams or folds. You can also place a cotton cloth over the area to be ironed to avoid imprints. |
| You have set a higher temperature than recommended for the fabric type. | Using a higher than recommended temperature setting for the fabric type may cause the iron to burn the fabric. Check your garment and that your iron is set to the correct temperature setting before ironing. The iron is safe to use on all ironable garments with the correct temperature setting. The shine or imprint is not permanent and disappears when you wash the garment. Avoid ironing over seams or folds. You can also place a cotton cloth over the area to be ironed to avoid imprints. | |
| The iron has stopped heating up. | Auto shut-off has been activated. | When your iron has not been used in 30 seconds in the horizontal position or 8 minutes in the vertical position), the iron will automatically shut-off. This is indicated by a constant blinking of the indicator light. To re-activate the iron, move the iron and the indicator light will light up again, indicating that the iron is heating up.If your iron has a dedicated Auto Shut Off light, the ASO light will blink when the iron enters the ASO state. When the iron is moved, the ASO light will switch off and the temperature indicator light will turn on, indicating that it is heating up again. |
| There is a power connection problem. | Please check the mains cord, the plug and the wall socket. Ensure that everything is properly connected. If you are using an extension plug, please ensure that power rating is suitable for the iron. | |
| The iron does not switch on anymore (I have tried the above but my iron still does not heat up). | If this is the case, there might be a problem with your iron. We recommend you to contact us. | |
| The indicator light on the iron is blinking/breathing. | Iron is heating up. The indicator light may turn on and off during ironing as the iron heats up periodically to maintain its temperature. | |


1 Water tank lid 2 Steam selector 3 Water spray 4 Cord 5 Cord winding 6 Indicator light 7 Steam boost trigger 8 Temperature dial 9 Quick Calc Release collector
Type of water to use
Note: The iron may give off some steam when you use it for the first time. This stops after a short while.
Type of water to use
The appliance is suitable to be used with tap water. However, if you live in an area with hard water, we recommend that you mix an equal amount of tap water with distilled or demineralized water. This will prevent fast scale build up and prolong the lifetime of the appliance.
Do not add perfume, water from the tumble dryer, vinegar, starch, descaling agents, ironing aids, chemically descaled water or other chemicals, as they may cause water spitting, brown staining or damage to your appliance.
Filling the water tank

1 Do not plug in the iron.

2 Slide the steam selector to the right to select no steam mode/dry ironing mode.

3 Flip open the water tank lid.

4 Fill water tank up to the MAX indication mark. Do not add any additives like perfume, fragrances, soap or vinegar.

5 Close the water tank lid firmly.
Setting the temperature and steam
| | |
| MAXLINEN | //* | |
| ●●●COTTON | //* | |
| ●●SILK | ECO | |
| ●SYNTHETICS |

ECO setting: Minimum constant steam is delivered continuously for garments with less creases. This setting also saves energy.

Two steam clouds: More constant steam is delivered continuously for tough creases.

For stubborn creases, set the steam setting to two steam clouds and press and hold the steam boost trigger below the handle. Maximum constant steam will be delivered continuously.
Preparing for use

Smoke can be visible during the first use, and it is normal. This ceases after a short while.
1 Check the garment label to ensure that the fabric is ironable and its appropriate temperature setting.

2 Turn the temperature dial to the appropriate ironable temperature indication according to the garment label.

3 Allow the iron to rest on its heel.

4 Insert the plug into an earthed socket and allow the iron rest on its heel. If using an extension plug, ensure that the power rating of the extension plug is suitable for the iron.

5 Wait for the iron to heat up. The indicator light will turn steady on while it is heating up.

6 Once the iron is ready to be used, the indicator light will switch off. The indicator light may turn on and off during ironing as the iron heats up periodically to maintain its temperature.
Ironing with steam
1 Slide the steam selector to ECO model or steam mode


2 Turn the temperature dial to between silk and linen based on the image.


3 Steam will be released during ironing.
No steam mode/dry ironing mode

1 Set the steam setting to no steam mode/dry ironing mode

2 After a short while, steam will cease during ironing.
Water spray

1 Press and release the water spray button at the top of the handle. Water will be sprayed out of the nozzle.
Horizontal & vertical steam boost
1 Set temperature dial to MAX setting between cotton and linen.


2 Vertical steam boost: Press and release the steam boost trigger in the vertical position to release shots of steam on hanging garments. Holding down the steam boost trigger in the vertical position will not deliver constant steam.

3 Vertical steam boost: Pull and stretch your hanging garment while using the steam boost to remove stubborn creases.

4 Do not use your bare hand as a supporting surface when you iron.

5 Do not position the iron towards yourself or others.
Auto shut off (DST7030, DST7040, DST7050, DST7060, DST7510 only)

1 To give you a peace of mind, the appliance will cool down on its own if it is left unattended for a period of time.
2 When the iron is not in use for more than 30 seconds while resting on its soleplate or 8 minutes while resting on its heel/ base, the iron will enter auto shut off mode.
3 The temperature of the iron will decrease in auto shut off mode. The Auto Shut Off light will also blink quickly to indicate the iron is at auto-off status. To completely switch off the iron, plug out the iron/ switch off the mains plug.
4 Picking up or moving the iron will reactivate it.
5 The indicator light will turn steady ON, indicating that the iron is heating up again.

6 Once the indicator light switches OFF, the iron is ready for use.
Cleaning and maintenance

1 Ensure the iron is not plugged in.

2 Ensure the iron is cooled down.

3 Wipe the soleplate with a damp cloth.

Note: To keep the soleplate smooth, avoid hard contact with metal objects. Never use a scouring pad, vinegar or other chemicals to clean the soleplate.

4 Do not wash or clean the iron under running water as it may damage the electrical components within.
Calc-Clean

Tip: The Quick Calc Release function can be used at any time. If you live in a hard water area, use the function more frequently.
1 It is recommended to descale your iron after every 1 to 3 months of use to prolong its lifetime, or when brown stains/water is observed.
IMPORTANT: The Quick Calc Release automatically collects loose scale particles during ironing.

2 Ensure the iron is not plugged in.

3 Ensure the iron is cooled down.

4 Slide up the Quick Calc Release collector lever.

5 Pull out the Quick Calc Release collector lid.

6 Clean the Quick Calc Release collector lid with water.

7 Shake the iron to drain the water and scale particles from the opening of the iron.

8 Do not run water into the opening of the iron.

9 Shake the iron to drain the water and scale particles from the opening of the iron.

10 Push down the lever to lock the Quick Calc Release collector. You will hear a 'click' sound.
Storage

1 Slide the steam selector to select no steam mode/dry ironing mode

2 Unplug the iron.

3 Let the iron cool down.

4 Pour any remaining water out of the water tank.

5 Wind the power cord around the main body of the iron.
Troubleshooting
This chapter summarizes the most common problems you could encounter with the appliance. If you are unable to solve the problem with the information below, visit www.philips.com/support for a list of frequently asked questions or contact the Consumer Care Center in your country.
Problem Possible cause Solution
| My Philips Steam Iron does not produce steam. | There is no water/not enough water in the tank. | If there is no water in the water tank of your Philips Steam Iron, your iron is not able to generate steam. Please refill the water tank with water. After this, your iron should produce steam again. |
| The iron is not ready to steam. | Your iron is ready to produce steam when the indicator light switches off. | |
| The steam setting is set to no steam mode/dry ironing mode | Aways ensure that the temperature dial is at the 2-dot ●3 ●lot or ●te ●MEN setting. Then, select a steam setting (ECO setting and 2-cloud setting) on the steam selector at the top of the handle.Ironing with steam with the temperature dial at the 1-dot or SYNTHETIC setting may cause wet spots/leaking as the temperature of the iron may not be hot enough to convert water to steam | |
| My Philips Steam Iron does not remove creases. | The temperature is set too low. | For irons with a temperature dial, please set the temperature according to the fabric that you are ironing. You can use the following table as a reference.Note: For some fabrics such as silk, wool, cotton and linen, steam would be needed to remove creases more efficiently. |
| Steam is not used. Switch the steam selector to or 2-cloEcoettingYour Philips Iron does not produce steam when the temperature dial is at the 1-dot position, SYNTHETIC or Calc-Clean setting. You can get more steam by changing to a stronger steam setting, or using the steam boost function to help remove tough wrinkles.To remove creases in the vertical position, press and release the steam boost trigger or button to release a shot of steam. Holding down the trigger or button will not produce a continuous steam boost.Note that repeated usage of the steam boost in a short period of time may cause spitting or a reduction in the amount of steam produced. If this happens, wait for a short while before using the steam boost function again. | ||
| The steam boost in my Philips Steam Iron is not working. | The steam boost trigger has not been pressed and released. | To activate the steam boost in your Philips Steam Iron, press and release the steam boost button/trigger. Holding onto the steam boost button/trigger does not produce continuous steam boost. You may need to press the steam boost button/trigger several times on the first use for the pump to draw sufficient water.Note: We recommend to use the steam boost at the 3-dot temperature setting or higher. Using the steam boost at lower temperature settings may result in wet spots forming as the temperature of the iron may not be high enough to convert water into steam. |
| The steam boost function was used too often within a short period of time. | When you use the steam boost function of your Philips Steam Iron too often within a short period, the steam boost function will stop working for a while. In this case, please wait a couple of minutes before you use the steam boost again.For stubborn wrinkles, we recommend to use the steam boost with the steam setting at the no steam mode/dry ironing mode for the best effect. | |
| The iron is not ready to steam. | The iron is ready to steam when the indicator light switches off. | |
| My Philips Steam Iron produces smoke when heating up. | First usage. During production, some parts of the iron have been slightly greased. As a result of this, your iron may produce some smoke when it is switched on for the first few times, this is normal and should dissipate shortly. | |
| There is water in the soleplate. | Sometimes, there might still be some remaining water in your iron's soleplate after the last usage. This water will evaporate when your iron's soleplate heats up, and the steam generated may look like smoke. This is normal and should dissipate shortly. | |
| My iron is still producing smoke even after checking the above. | There could be an issue with the iron, we recommend you to contact us. | |
| There are water droplets/leaking on my garment during ironing. | First time usage. If you experience leaking/spitting during your first usage, perform the Calc Clean function once. If this does not resolve the leaking on your next use, we recommend you to contact us. | |
| The steam boost function was used too often within a short period of time. | Continue ironing in horizontal position and wait a while before you use the steam boost function again. | |
| There is a build up of scale/calcification in the iron. | If there is brown water or white flakes coming out of the iron, this may indicate a build up of calcification in the iron. Perform the Calc Clean function to clear this. If you live in an area with hard water, we recommend to use distilled water (or 50% distilled and 50% tap water) and perform the calc clean function once a month to prolong the lifetime of the iron.Note: the presence of white flakes on the very first use of the iron is normal. | |
| You have added other chemicals or additives into the water tank. | Fragrances/oils/chemicals/additives/descaling solutions should not be added into the water tank as they are damaging to the device. Please rinse the water tank, fill it up with water and descale your iron. | |
| You have not closed the water tank lid properly. | Close the lid firmly after filling. | |
| Steam has condensed onto the ironing board. | Steam may condense on the board cover, particularly when using irons that produce powerful levels of steam for a prolonged period of time. This can look like your iron is leaking from the soleplate. To prevent this, you can do the following:1 Select a lower steam setting than the setting you have been using or use steam during the first ironing strokes and then finish up with the dry-ironing strokes.2 You can also put an extra layer of cloth between the ironing board and the ironing board cover to minimize condensation.3 Replace the ironing board cover if the sponge material has worn out. | |
| Small droplets/wet spots that occur during start of ironing session. | If small droplets or wet spots occur during the start of the ironing session, this is normal as water might have collected in the soleplate from the previous ironing session, and the iron was used before it had fully heated up. Iron over the droplets/wet spots We recommend that the iron be stored in a vertical position with the steam setting set to no steam mode/dry ironing mode before it is unplugged to minimize the collection of water in the soleplate. | |
| The iron leaks after ironing. | If your iron leaks after unplugging/during storage, it may be because water has collected in the soleplate from leaving the steam setting on before the anti-drip feature activates. We recommend to set the steam selector to no steam mode/dry ironing mode before unplugging the iron. Empty the water tank and place the iron in the vertical position when cooling down/for storage. | |
| The iron leaves a shine or an imprint on the garment. | The surface to be ironed was uneven. | The iron is safe to use on all ironable garments. The shine or imprint is not permanent and disappears when you wash the garment. Avoid ironing over seams or folds. You can also place a cotton cloth over the area to be ironed to avoid imprints. |
| You have set a higher temperature than recommended for the fabric type. | Using a higher than recommended temperature setting for the fabric type may cause the iron to burn the fabric. Check your garment and that your iron is set to the correct temperature setting before ironing. The iron is safe to use on all ironable garments with the correct temperature setting. The shine or imprint is not permanent and disappears when you wash the garment. Avoid ironing over seams or folds. You can also place a cotton cloth over the area to be ironed to avoid imprints. | |
| The iron has stopped heating up. | Auto shut-off has been activated. | When your iron has not been used in 30 seconds in the horizontal position or 8 minutes in the vertical position), the iron will automatically shut-off. This is indicated by a constant blinking of the indicator light. To re-activate the iron, move the iron and the indicator light will light up again, indicating that the iron is heating up.If your iron has a dedicated Auto Shut Off light, the ASO light will blink when the iron enters the ASO state. When the iron is moved, the ASO light will switch off and the temperature indicator light will turn on, indicating that it is heating up again. |
| There is a power connection problem. | Please check the mains cord, the plug and the wall socket. Ensure that everything is properly connected. If you are using an extension plug, please ensure that power rating is suitable for the iron. | |
| The iron does not switch on anymore (I have tried the above but my iron still does not heat up). | If this is the case, there might be a problem with your iron. We recommend you to contact us. | |
| The indicator light on the iron is blinking/breathing. | Iron is heating up. The indicator light may turn on and off during ironing as the iron heats up periodically to maintain its temperature. | |
738 Thai

2 Unplug the iron

1 Water tank lid 2 Steam selector 3 Water spray 4 Cord 5 Cord winding 6 Indicator light 7 Steam boost trigger 8 Temperature dial 9 Quick Calc Release collector
Type of water to use
Note: The iron may give off some steam when you use it for the first time. This stops after a short while.
Type of water to use
The appliance is suitable to be used with tap water. However, if you live in an area with hard water, we recommend that you mix an equal amount of tap water with distilled or demineralized water. This will prevent fast scale build up and prolong the lifetime of the appliance.
Do not add perfume, water from the tumble dryer, vinegar, starch, descaling agents, ironing aids, chemically descaled water or other chemicals, as they may cause water spitting, brown staining or damage to your appliance.
Filling the water tank

1 Do not plug in the iron.

2 Slide the steam selector to the right to select no steam mode/dry ironing mode

3 Flip open the water tank lid.

4 Fill water tank up to the MAX indication mark. Do not add any additives like perfume, fragrances, soap or vinegar.

5 Close the water tank lid firmly.
Setting the temperature and steam
| | |
| MAXLINEN | / * | |
| COTTON | / * | |
| SILK | ECO | |
| SYNTHETICS |

ECO setting: Minimum constant steam is delivered continuously for garments with less creases. This setting also saves energy.

Two steam clouds: More constant steam is delivered continuously for tough creases.

For stubborn creases, set the steam setting to two steam clouds and press and hold the steam boost trigger below the handle. Maximum constant steam will be delivered continuously.
Preparing for use

Smoke can be visible during the first use, and it is normal. This ceases after a short while.
1 Check the garment label to ensure that the fabric is ironable and its appropriate temperature setting.

2 Turn the temperature dial to the appropriate ironable temperature indication according to the garment label.

3 Allow the iron to rest on its heel.

4 Insert the plug into an earthed socket and allow the iron rest on its heel. If using an extension plug, ensure that the power rating of the extension plug is suitable for the iron.

5 Wait for the iron to heat up. The indicator light will turn steady on while it is heating up.

6 Once the iron is ready to be used, the indicator light will switch off. The indicator light may turn on and off during ironing as the iron heats up periodically to maintain its temperature.
Ironing with steam
1 Slide the steam selector to ECO mode in steam mode.

2 Turn the temperature dial to between silk and linen based on the image.


3 Steam will be released during ironing.
No steam mode/dry ironing mode

1 Set the steam setting to no steam mode/dry ironing mode.

2 After a short while, steam will cease during ironing.
Water spray

1 Press and release the water spray button at the top of the handle. Water will be sprayed out of the nozzle.
Horizontal & vertical steam boost
1 Set temperature dial to MAX setting between cotton and linen.


2 Vertical steam boost: Press and release the steam boost trigger in the vertical position to release shots of steam on hanging garments. Holding down the steam boost trigger in the vertical position will not deliver constant steam.

3 Vertical steam boost: Pull and stretch your hanging garment while using the steam boost to remove stubborn creases.

4 Do not use your bare hand as a supporting surface when you iron.

5 Do not position the iron towards yourself or others.
Auto shut off (DST7030, DST7040, DST7050, DST7060, DST7510 only)

1 To give you a peace of mind, the appliance will cool down on its own if it is left unattended for a period of time.
2 When the iron is not in use for more than 30 seconds while resting on its soleplate or 8 minutes while resting on its heel/ base, the iron will enter auto shut off mode.
3 The temperature of the iron will decrease in auto shut off mode. The Auto Shut Off light will also blink quickly to indicate the iron is at auto-off status. To completely switch off the iron, plug out the iron/ switch off the mains plug.
4 Picking up or moving the iron will reactivate it.
5 The indicator light will turn steady ON, indicating that the iron is heating up again.

6 Once the indicator light switches OFF, the iron is ready for use.
Cleaning and maintenance

1 Ensure the iron is not plugged in.

2 Ensure the iron is cooled down.

3 Wipe the soleplate with a damp cloth.

Note: To keep the soleplate smooth, avoid hard contact with metal objects. Never use a scouring pad, vinegar or other chemicals to clean the soleplate.

4 Do not wash/ clean the iron under running water as it may damage the electrical components within.
Calc-Clean

Tip: The Quick Calc Release function can be used at any time. If you live in a hard water area, use the function more frequently.
1 It is recommended to descale your iron after every 1 to 3 months of use to prolong its lifetime, or when brown stains/water is observed.
IMPORTANT: The Quick Calc Release automatically collects loose scale particles during ironing.

2 Ensure the iron is not plugged in.

3 Ensure the iron is cooled down.

4 Slide up the Quick Calc Release collector lever.

5 Pull out the Quick Calc Release collector lid.

6 Clean the Quick Calc Release collector lid with water.

7 Shake the iron to drain the water and scale particles from the opening of the iron.

8 Do not run water into the opening of the iron.

9 Shake the iron to drain the water and scale particles from the opening of the iron.

10 Push down the lever to lock the Quick Calc Release collector. You will hear a 'click' sound.
Storage

1 Slide the steam selector to select no steam mode/dry ironing mode.

2 Unplug the iron.

3 Let the iron cool down.

4 Pour any remaining water out of the water tank.

5 Wind the power cord around the main body of the iron.
Troubleshooting
This chapter summarizes the most common problems you could encounter with the appliance. If you are unable to solve the problem with the information below, visit www.philips.com/support for a list of frequently asked questions or contact the Consumer Care Center in your country.
Problem Possible cause Solution
| My Philips Steam Iron does not produce steam. | There is no water/not enough water in the tank. | If there is no water in the water tank of your Philips Steam Iron, your iron is not able to generate steam. Please refill the water tank with water. After this, your iron should produce steam again. |
| The iron is not ready to steam. | Your iron is ready to produce steam when the indicator light switches off. | |
| The steam setting is set to no steam mode/dry ironing mode | Aways ensure that the temperature dial is at the 2-dot ●3 ●lot or ●te●HEN setting. Then, select a steam setting (ECO setting and 2-cloud setting) on the steam selector at the top of the handle.Ironing with steam with the temperature dial at the 1-dot or SYNTHETIC setting may cause wet spots/leaking as the temperature of the iron may not be hot enough to convert water to steam | |
| My Philips Steam Iron does not remove creases. | The temperature is set too low. | For irons with a temperature dial, please set the temperature according to the fabric that you are ironing. You can use the following table as a reference.Note: For some fabrics such as silk, wool, cotton and linen, steam would be needed to remove creases more efficiently. |
| Steam is not used. Switch the steam selector to or 2-cloECOettingYour Philips Iron does not produce steam when the temperature dial is at the 1-dot position, SYNTHETIC or Calc-Clean setting. You can get more steam by changing to a stronger steam setting, or using the steam boost function to help remove tough wrinkles.To remove creases in the vertical position, press and release the steam boost trigger or button to release a shot of steam. Holding down the trigger or button will not produce a continuous steam boost.Note that repeated usage of the steam boost in a short period of time may cause spitting or a reduction in the amount of steam produced. If this happens, wait for a short while before using the steam boost function again. | ||
| The steam boost in my Philips Steam Iron is not working. | The steam boost trigger has not been pressed and released. | To activate the steam boost in your Philips Steam Iron, press and release the steam boost button/trigger. Holding onto the steam boost button/trigger does not produce continuous steam boost. You may need to press the steam boost button/trigger several times on the first use for the pump to draw sufficient water.Note: We recommend to use the steam boost at the 3-dot temperature setting or higher. Using the steam boost at lower temperature settings may result in wet spots forming as the temperature of the iron may not be high enough to convert water into steam. |
| The steam boost function was used too often within a short period of time. | When you use the steam boost function of your Philips Steam Iron too often within a short period, the steam boost function will stop working for a while. In this case, please wait a couple of minutes before you use the steam boost again.For stubborn wrinkles, we recommend to use the steam boost with the steam setting at the no steam mode/dry ironing mode for the best effect. | |
| The iron is not ready to steam. | The iron is ready to steam when the indicator light switches off. | |
| My Philips Steam Iron produces smoke when heating up. | First usage. During production, some parts of the iron have been slightly greased. As a result of this, your iron may produce some smoke when it is switched on for the first few times, this is normal and should dissipate shortly. | |
| There is water in the soleplate. | Sometimes, there might still be some remaining water in your iron's soleplate after the last usage. This water will evaporate when your iron's soleplate heats up, and the steam generated may look like smoke. This is normal and should dissipate shortly. | |
| My iron is still producing smoke even after checking the above. | There could be an issue with the iron, we recommend you to contact us. | |
| There are water droplets/leaking on my garment during ironing. | First time usage. If you experience leaking/spitting during your first usage, perform the Calc Clean function once. If this does not resolve the leaking on your next use, we recommend you to contact us. | |
| The steam boost function was used too often within a short period of time. | Continue ironing in horizontal position and wait a while before you use the steam boost function again. | |
| There is a build up of scale/calcification in the iron. | If there is brown water or white flakes coming out of the iron, this may indicate a build up of calcification in the iron. Perform the Calc Clean function to clear this. If you live in an area with hard water, we recommend to use distilled water (or 50% distilled and 50% tap water) and perform the calc clean function once a month to prolong the lifetime of the iron.Note: the presence of white flakes on the very first use of the iron is normal. | |
| You have added other chemicals or additives into the water tank. | Fragrances/oils/chemicals/additives/descaling solutions should not be added into the water tank as they are damaging to the device. Please rinse the water tank, fill it up with water and descale your iron. | |
| You have not closed the water tank lid properly. | Close the lid firmly after filling. | |
| Steam has condensed onto the ironing board. | Steam may condense on the board cover, particularly when using irons that produce powerful levels of steam for a prolonged period of time. This can look like your iron is leaking from the soleplate. To prevent this, you can do the following:1 Select a lower steam setting than the setting you have been using or use steam during the first ironing strokes and then finish up with the dry-ironing strokes.2 You can also put an extra layer of cloth between the ironing board and the ironing board cover to minimize condensation.3 Replace the ironing board cover if the sponge material has worn out. | |
| Small droplets/wet spots that occur during start of ironing session. | If small droplets or wet spots occur during the start of the ironing session, this is normal as water might have collected in the soleplate from the previous ironing session, and the iron was used before it had fully heated up. Iron over the droplets/wet spots We recommend that the iron be stored in a vertical position with the steam setting set to no steam mode/dry ironing mode before it is unplugged to minimize the collection of water in the soleplate. | |
| The iron leaks after ironing. | If your iron leaks after unplugging/during storage, it may be because water has collected in the soleplate from leaving the steam setting on before the anti-drip feature activates. We recommend to set the steam selector to no steam mode/dry ironing mode before unplugging the iron. Empty the water tank and place the iron in the vertical position when cooling down/for storage. | |
| The iron leaves a shine or an imprint on the garment. | The surface to be ironed was uneven. | The iron is safe to use on all ironable garments. The shine or imprint is not permanent and disappears when you wash the garment. Avoid ironing over seams or folds. You can also place a cotton cloth over the area to be ironed to avoid imprints. |
| You have set a higher temperature than recommended for the fabric type. | Using a higher than recommended temperature setting for the fabric type may cause the iron to burn the fabric. Check your garment and that your iron is set to the correct temperature setting before ironing. The iron is safe to use on all ironable garments with the correct temperature setting. The shine or imprint is not permanent and disappears when you wash the garment. Avoid ironing over seams or folds. You can also place a cotton cloth over the area to be ironed to avoid imprints. | |
| The iron has stopped heating up. | Auto shut-off has been activated. | When your iron has not been used in 30 seconds in the horizontal position or 8 minutes in the vertical position), the iron will automatically shut-off. This is indicated by a constant blinking of the indicator light. To re-activate the iron, move the iron and the indicator light will light up again, indicating that the iron is heating up.If your iron has a dedicated Auto Shut Off light, the ASO light will blink when the iron enters the ASO state. When the iron is moved, the ASO light will switch off and the temperature indicator light will turn on, indicating that it is heating up again. |
| There is a power connection problem. | Please check the mains cord, the plug and the wall socket. Ensure that everything is properly connected. If you are using an extension plug, please ensure that power rating is suitable for the iron. | |
| The iron does not switch on anymore (I have tried the above but my iron still does not heat up). | If this is the case, there might be a problem with your iron. We recommend you to contact us. | |
| The indicator light on the iron is blinking/breathing. | Iron is heating up. The indicator light may turn on and off during ironing as the iron heats up periodically to maintain its temperature. | |
Product introduction
1 Make sure the iron's power plug is unplugged.

3 Open the water tank cap.

5 Close the water tank cap tightly.
Setting temperature and steam amount
 |  | |
| 最高亚麻 | /* | |
| ●●●棉质 | /* | |
| ●●丝质 | ECO | |
| ●化纤 | ※ |

3 Place the iron upright.


3 Steam will be released during ironing.
No steam / dry ironing mode

1 Set the steam setting to no steam / dry ironing mode.

2 After a moment, the steam will disappear during ironing.
Spray button

4 Do not use your hand as a support surface while ironing.

5 Never point the iron towards yourself or others.
1 Make sure the iron is unplugged.

2 Make sure the iron has cooled down naturally.

3 Wipe the soleplate with a damp cloth.

4 Slide the EZ DECALC collector lever upwards.

5 Pull out the EZ DECALC collector cover.

6 Clean the EZ DECALC collector cover with water.

8 Do not pour water into the openings of the iron.

2 Unplug the iron.

3 Let the iron cool down naturally.

4 Pour out the remaining water from the water tank.

5 Wind the power cord around the iron body.
Troubleshooting
1 Do not plug in the iron.

3 Open the water tank cap.

5 Make sure the water tank cap is closed properly.
Setting temperature and steam
| | |
| MAX (最大)LINEN (亞麻) | /* | |
| ●●●COTTON (棉) | /* | |
| ●●SILK (絲) | ECO | |
| ●SYNTHETICS (合成纖維) | ※ |

3 Place the iron upright.

3 Steam will be released during ironing.
No steam mode / Dry ironing mode

2 After a while, steam will stop during ironing.
Water spray

5 Do not point the iron at yourself or others.
6 After the indicator light turns off, you can start using the iron.
Cleaning and Maintenance

1 Make sure the iron is unplugged.

2 Make sure the iron has cooled down.

3 Wipe the soleplate with a damp cloth.

2 Make sure the iron is unplugged.

3 Make sure the iron has cooled down.

4 Slide the anti-calc collector lever upward.

5 Pull out the anti-calc collector cover.

6 Clean the anti-calc collector cover with water.

8 Do not add water to the iron's openings.

10 Press the lever down to lock the anti-calc collector. You will hear a click.
Storage

2 Unplug the iron.

3 Let the iron cool down.

4 Empty the remaining water from the water tank.

5 Wrap the cord around the iron body.
Troubleshooting
3 Open the water tank lid by flipping it up.

5 Close the water tank lid tightly.
Temperature and steam settings
| | ||||||||
| 최대마 | / | \( / | \( / | \( / | \( / | \( /_ | \( ECO | ||
| ECO | |||||||||
| ECO | |||||||||
| ECO |

3 Stand the iron upright.


2 Check that the iron has cooled down.

3 Check that the iron has cooled down.

2 Unplug the iron.

3 Let the iron cool down.

826 Arabic


- Dry ironing
Fill the water tank 3.


On clothes 2.
- On its base
It turns on and off in 6
According to the picture.

Steam bursts 2
During ironing 4.

Other people. 5
(Eq. DST7510, DST7060, DST7050, DST7040, DST7030)

A moment of time.
832 Arabic

4 minutes during 2
Liberia again.

Gaza for use.
Arabic 833
Cleaning and maintenance

with a power source.

Iron has cooled down 2.

- Damp cloth


with a power source|^r.2.
Iron has cooled down 3.
quickly upwards 4.
Arabic 835

quickly outwards.5

quickly with water.6.

in the iron's opening.

in the iron opening.

in the iron opening.9
836 Arabic

. You will hear a sound 10
"click."
the tangzin

- the CAF iron

- power source

on the iron will turn off.3.

any remaining water. 4.


main for the iron.5
water tank with door 1
for the hand, steam 2
water spray 3
4
Cable collector 5
Indicator light 6
Steam boost button 7
Temperature dial 8
Quick steam 9
Using the appliance
Type of water to use
843 Persian

- 1. Wait for the iron to heat up.

Tighten it securely. 5.
Setting temperature and steam
| حداکتر نخى | ||
| ECO | ||
| الياف مصنوعي |


In case of 4
It stays on. 5.
846 Persian


It finishes completely.
Water spray
will be filled.
, do not use.

refrain from. 5.
849 Persian
- becoming

3(Auto Shut O

turns on. 4.

- becoming. 5.
850 Persian

is in use 6
has been attached.

clean with a damp cloth.


Descaling
has been attached.

Faris

Pull up.4

Pull out.5

Clean with water. 6.

Let it come out.

- Do not pour water into it.


853 61042
Let it come out.9
You will hear a "click" 10
Then.
Maintenance
- Place it in the slot
Unplug it.
Let the iron cool down.


Pour out b.

PHILIPS and the Philips Shield Emblem are registered trademarks of Koninklijke Philips N.V. and are used under license.
This product has been manufactured by and is sold under the responsibility of Versuni Holding B.V., and Versuni Holding B.V. is the warrantor in relation to this product.
2025 © Versuni Holding B.V.
642001019157 (09/2025)


- PRODUCT OVERVIEW
- USING THE APPLIANCE
- TYPE OF WATER TO USE
- FILLING THE WATER TANK
- PREPARING FOR USE
- IRONING WITH STEAM
- NO STEAM MODE/DRY IRONING MODE
- WATER SPRAY
- HORIZONTAL & VERTICAL STEAM BOOST
- ENGLISH
- AUTO SHUT OFF (DST7030, DST7040, DST7050, DST7060, DST7510 ONLY)
- CLEANING AND MAINTENANCE
- CALC-CLEAN
- STORAGE
- TROUBLESHOOTING
- INTRODUCTION
- AZERBAIJANI
- STEAMLESS MODE/DRY IRONING MODE
- INDONESIAN
- AUTO SHUT-OFF (DST7030, DST7040, DST7050, DST7060, DST7510 ONLY)
- CZECH
- NO STEAM MODE / DRY IRONING MODE
- ESTONIAN
- SPANISH
- ALBANIAN
- BEFORE USE
- STEAM IRONING
- SPRAY
- HORIZONTAL AND VERTICAL STEAM BURST
- КЫРГЫЗЧА
- MACEDONIAN
- RUSSIAN
- PRODUCT INTRODUCTION
- NO STEAM / DRY IRONING MODE
- SPRAY BUTTON
- THE TANGZIN
- DESCALING
Brand : PHILIPS
Model : Azur 7000 Series DST7020
Category : Iron