ECCO PRO 2036 - Aquarium filter EHEIM - Free user manual and instructions
Find the device manual for free ECCO PRO 2036 EHEIM in PDF.
User questions about ECCO PRO 2036 EHEIM
0 question about this device. Answer the ones you know or ask your own.
Ask a new question about this device
Download the instructions for your Aquarium filter in PDF format for free! Find your manual ECCO PRO 2036 - EHEIM and take your electronic device back in hand. On this page are published all the documents necessary for the use of your device. ECCO PRO 2036 by EHEIM.
USER MANUAL ECCO PRO 2036 EHEIM
Powerful and efficient, the energy-saving filter
IMPORTANT SAFETY INSTRUCTIONS
WARNING - To guard against injury, basic safety precautions should be observed, including the following.
a) READ AND FOLLOW ALL SAFETY INSTRUCTIONS.
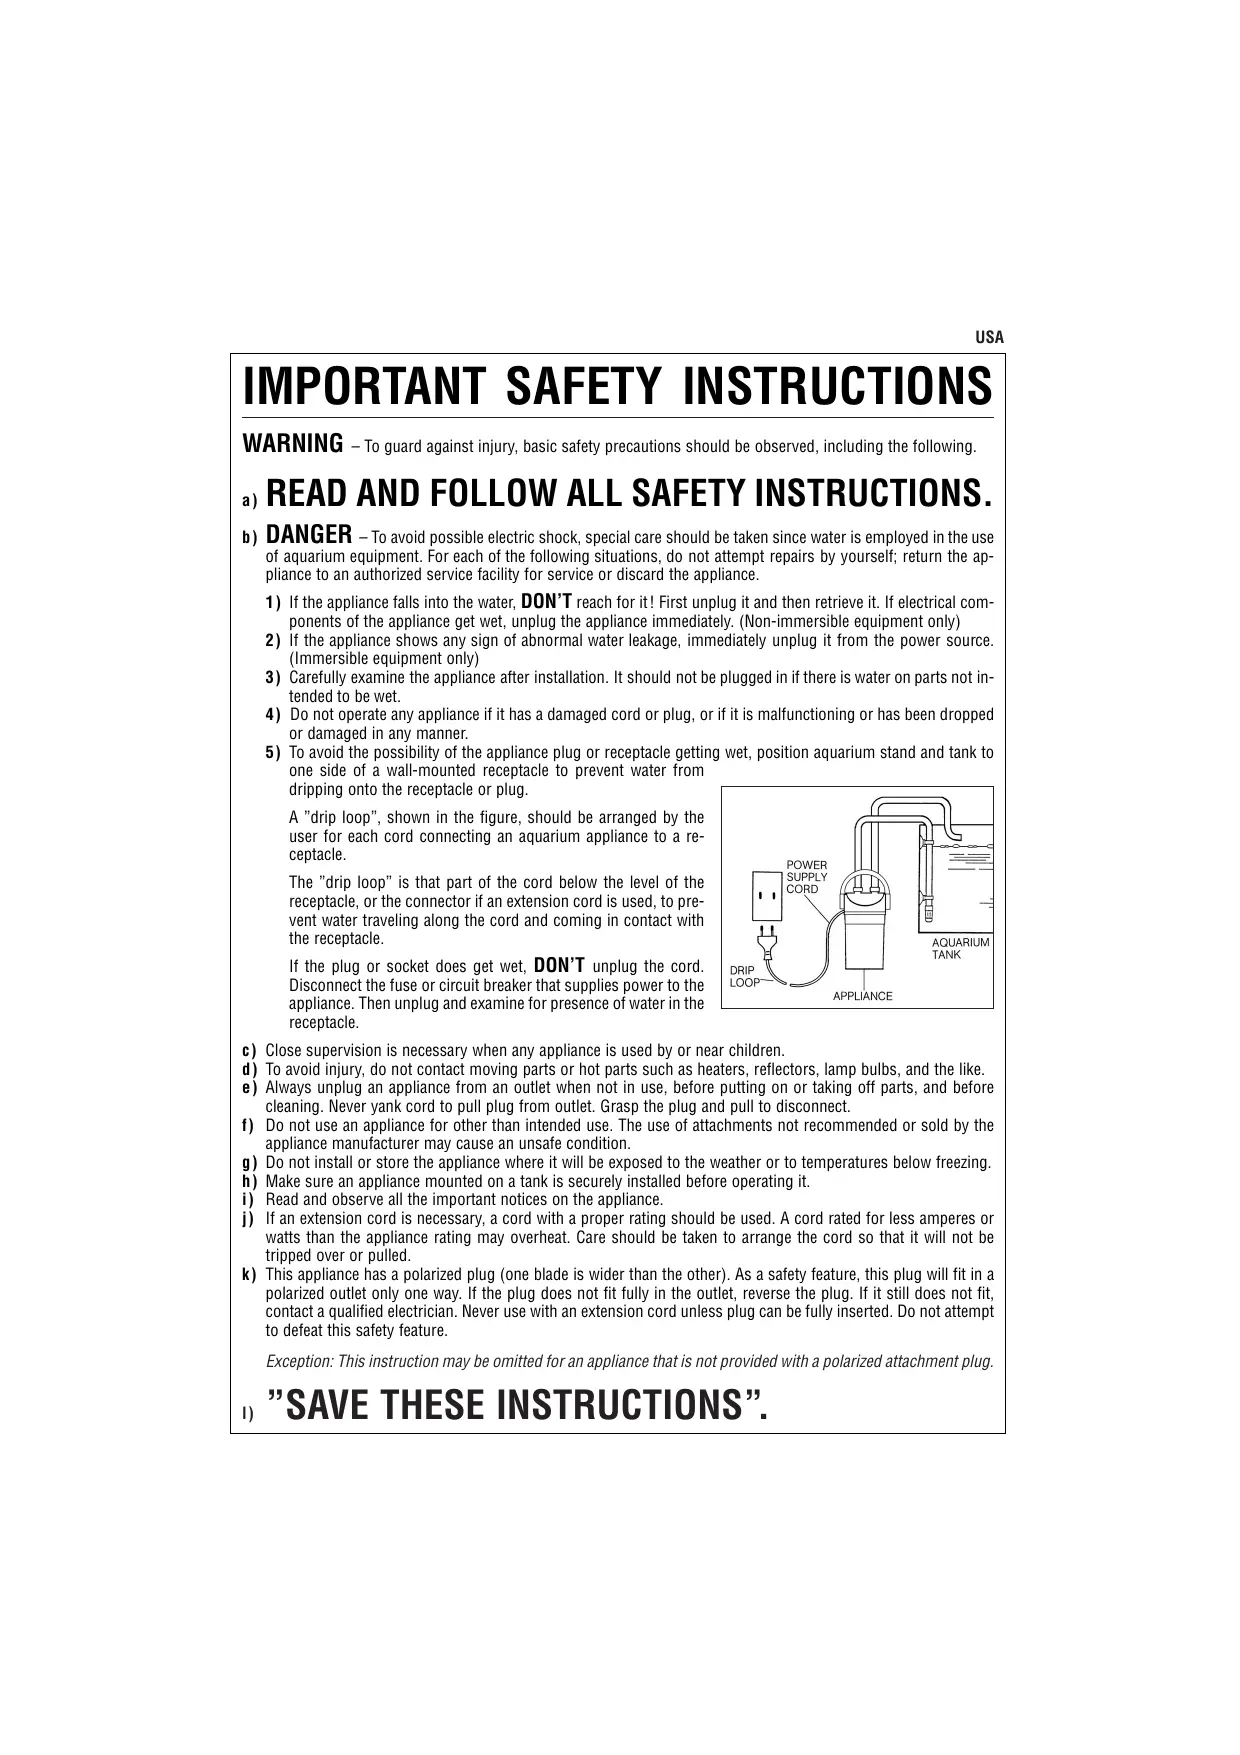
b) DANGER - To avoid possible electric shock, special care should be taken since water is employed in the use of aquarium equipment. For each of the following situations, do not attempt repairs by yourself; return the appliance to an authorized service facility for service or discard the appliance.
1) If the appliance falls into the water, DON'T reach for it! First unplug it and then retrieve it. If electrical components of the appliance get wet, unplug the appliance immediately. (Non-immersible equipment only)
2) If the appliance shows any sign of abnormal water leakage, immediately unplug it from the power source. (Immersible equipment only)
3) Carefully examine the appliance after installation. It should not be plugged in if there is water on parts not intended to be wet.
4) Do not operate any appliance if it has a damaged cord or plug, or if it is malfunctioning or has been dropped or damaged in any manner.
5) To avoid the possibility of the appliance plug or receptacle getting wet, position aquarium stand and tank to one side of a wall-mounted receptacle to prevent water from dripping onto the receptacle or plug.
A "drip loop", shown in the figure, should be arranged by the user for each cord connecting an aquarium appliance to a receptacle.
The "drip loop" is that part of the cord below the level of the receptacle, or the connector if an extension cord is used, to prevent water traveling along the cord and coming in contact with the receptacle.
If the plug or socket does get wet, DON'T unplug the cord. Disconnect the fuse or circuit breaker that supplies power to the appliance. Then unplug and examine for presence of water in the receptacle.

c) Close supervision is necessary when any appliance is used by or near children.
d) To avoid injury, do not contact moving parts or hot parts such as heaters, reflectors, lamp bulbs, and the like.
e) Always unplug an appliance from an outlet when not in use, before putting on or taking off parts, and before cleaning. Never yank cord to pull plug from outlet. Grasp the plug and pull to disconnect.
f) Do not use an appliance for other than intended use. The use of attachments not recommended or sold by the appliance manufacturer may cause an unsafe condition.
g) Do not install or store the appliance where it will be exposed to the weather or to temperatures below freezing.
h) Make sure an appliance mounted on a tank is securely installed before operating it.
i) Read and observe all the important notices on the appliance.
j) If an extension cord is necessary, a cord with a proper rating should be used. A cord rated for less amperes or watts than the appliance rating may overheat. Care should be taken to arrange the cord so that it will not be tripped over or pulled.
k) This appliance has a polarized plug (one blade is wider than the other). As a safety feature, this plug will fit in a polarized outlet only one way. If the plug does not fit fully in the outlet, reverse the plug. If it still does not fit, contact a qualified electrician. Never use with an extension cord unless plug can be fully inserted. Do not attempt to defeat this safety feature.
Exception: This instruction may be omitted for an appliance that is not provided with a polarized attachment plug.
1) "SAVE THESE INSTRUCTIONS".

THANK YOU
for purchasing of your new EHEIM ecco filter which has an impressive range of advantages in terms of function, handling and quality. Innovative technology combined with the simplest operation and characteristic design are the outstanding features of the latest EHEIM filter generation. EHEIM ecco is a result of intensive development, which does justice to all aspects of the practical requirements of aquarists.
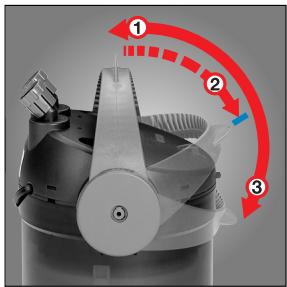
The very shape of the filter signals a new technical concept. The practical carrier handle is a multi-function lever, and as such, fulfils various functions. It serves to activate the integrated priming function ② , which facilitates start-up during installation and after cleaning. With the handle the filter can also be opened ③ or closed easily with a flick of the wrist - at the same time it is safely locked in place ①.
The device is supplied complete with filter material and is immediately ready for operation. Practical filter media containers, safety hose connections and shut-off taps make operation and maintenance child's play. Thanks to the coordinated relationship between pump performance and volume, the EHEIM ecco filter ensures reliable long-term cleaning with a permanent circulation and simultaneous oxygen enrichment of the aquarium water - a guarantee for ideal water cleaning and a successful aquarium hobby.

Safety instructions

For indoor use only. For use with aquariums.
All electrical equipment in the water must be disconnected from the mains during care and maintenance work.

The connecting line of this device can not be replaced. When the line is damaged, the device must no longer be used. Never carry the pump by the cable; do not bend the cable.

Attention: Filters may only be operated in an upright standing position.

This equipment is not intended for use by persons (including children) with limited physical, sensory or mental abilities or for persons with no experience or knowledge unless they are supervised by a person responsible for safety or unless they have received from such a person instructions on how to use the equipment.
Children should be supervised to ensure that they do not play with the equipment.

Notice: These divices produce magnetic fields which might cause electronic and mechanical disturbances or damages. This also refers to pacemakers. Please consult the manuals of medical equipment for the required safety margins.

Attention: Maintenance work presents the risk of crushing th fingers due to high magnetic forces.
Do not clean the unit - or parts of it - in the dishwater. Not dishwater resistant.

Do not dispose of this product as normal household waste. Take it to your local refuse collection site.

Since a wide variety of varnishes and polishes are used when processing timer, the appliance feet can leave visible traces on furniture or parquet floors as a result of chemical reactions. Therefore the device should not be placed on unprotected wooden surfaces.
The product is qualified in accordance with the respective national regulations and guidelines and meets EC standards.

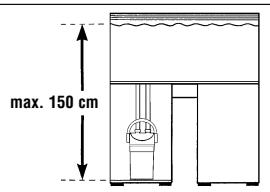
To achieve optimal operational safety there must be a maximum of 150~cm between the surface of the water and the bottom of the filter.
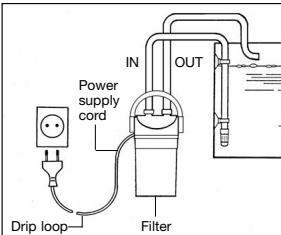
For your own protection, it is advisable to make a loop in the electrical cable to catch drips and prevent any water running along the cable from entering the socket.
If an extension socket is used, it must be placed above the filter mains connection.
See cover flap:
1 Threaded socket 2 suction and pressure joints 3 pump head 4 safety lock 5 sealing ring 6 preliminary filter pad 7 preliminary filter 8 lid 9 carbon filter pad 10 fine filter pad 11 filter media containers with filter material 12 slot 13 multi-function lever 14 filter canister 15 rubber feet 16 pump chamber 17 impeller 18 ball with ball cage 19 pump chamber cover 20 2 × union nuts 21 2 × shut-off taps 22 outlet elbow 23 intake pipe with intake strainer 24 suction holders.
A - D Installation
First stick the 4 rubber feet to the bottom of the filter canister. The shut-off taps are then screwed onto the suction and pressure joints of the filter - which can be rotated in the required direction of the hose - by means of the threaded sockets 1 and are marked with the stickers IN/OUT (Fig. B).
Then fix the outlet elbow to the aquarium by means of the suction holders. Join the intake pipe with the intake strainer and attach them to the inside of the tank by means of the suction holders (Fig. C). Cut the hoses to the required lengths and push them onto the intake pipe and outlet elbow for at least 1 cm. Make sure the hoses do not sag.
Connect the intake pipe to the suction joint "IN" of the filter, and the outlet elbow to the pressure joint "OUT" (Fig. D). Secure hoses at both connections by tightening the union nuts in the direction of the pipe.

Note: All hose connections must be checked at regular intervals for correct fitting.
E-G Initial operation
The external filter already contains the necessary standard filter material made of special filter pads, a preliminary filter with filter foam, a carbon filter pad and a fine filter pad. Rinse the filter material in the basket und running water until the water runs off clear. When you have finished installing the hose, the device is completely ready for operation.
Suction function: Now open both shut-off taps on the hose connections (Fig. E) and slowly move down the multifunction lever until it is flush with the safety lock (Fig. F), lever position ②. Water is hereby sucked out of the aquarium and the overflow is established, so that the filter canister fills automatically.
As soon as the water begins to flow into the filter canister, slowly move the multi-function lever back to its vertical operating position until it locks noticeably into place (Fig. G), lever position ①. Once the system is completely filled, the filter is put into operation via the mains connection. WARNING: If the system is operated in lever position ②, mechanical and biological filtration cannot be guaranteed.
H-M Opening and closing the filter
Opening:
IMPORTANT. First close the shut-off tap on the suction side "IN" (Fig. H), and afterwards the tap on the pressure side "OUT" (Fig. I) before disconnecting the mains plug (Fig. J). Loosen both taps by turning the threaded sockets 1 to separate the hose assembly from the filter.

WARNING: If the taps are not separated from the pump head the filter cannot be opened.
Now slowly move the multi-function lever into its horizontal position ② and then release the safety lock by applying strong pressure (Fig. L) so that the lever can be pushed over until it is touching the filter canister (Fig. M), lever position ③ . The pump head is thereby automatically pulled out of its seal and can be taken off.

Closing:
IMPORTANT. Never fill the filter canister completely with water. For fitting the pump head the multifunction lever must be flush with the filter canister, lever position ③ , so that the two side bolts on the pump head can be fitted into the slots of the lever. IMPORTANT. When closing, make sure that the sealing ring fits into its groove all round the canister.
Then move the function lever slowly over the safety lock back to its vertical operating position, lever position ①, whereby the upper part is automatically pulled into its seal.

Make sure of proper handling to avoid jamming your fingers.
N - R Cleaning and care
Wash out the filter media at regular intervals and replace it after every 2-3 cleaning operations. You will notice that it is time to exchange the filter material when the water outflow of the filter reduces noticeably.
For initial operation the filter contains a carbon pad, which is used for adsorbing residues of cleaning agents, amongst other things. Remove the carbon pad from the lid after approximately 2 weeks, since the cleaning power is then exhausted.
First close the shut-off tap on the suction side "IN" and then the tap on the pressure side "OUT" before you unplug the device from the mains (Figs. H-J). Unscrew the threaded sockets of the taps to separate the hose system from the filter. Then the filter is opened by means of the multi-function handle, as described above.
Remove the preliminary filter (Fig. N) and then the filter inserts (filter baskets), which are completely interlocked with each other (Fig. O) and which can be separated by a slight twist (Fig. P). Remove the preliminary filter and rinse it in lukewarm water (Fig. Q). Remove the white filter pad from the lid and renew it after every cleaning process (order no. 2616320).
Place the fine filter pad in the lid and then twist the lid on to the filter inserts (filter baskets). The preliminary filter is then installed on the lid (Fig. R).
The EHEIM ecco filter is particularly suited to water treatment by layer filtering which is approximately 30% more efficient than the method with standard filter media. For this purpose we recommend EHEIM filter media with mechanical, biological, adsorptive or chemical functions.
The layers in the filter inserts are always arranged according to the displayed model (see cover page).
S - U Pump chamber, ball valve and sealing ring
From time to time you should clean the pump chamber, ball valve and hoses in order to ensure the perfect functioning of your filter.
The pump chamber can be opened by pressing both cover plates together and simultaneously pulling upwards by the bearing (Fig. S). The pump wheel, chamber, cover and cooling channel are cleaned with a soft brush (order no. 4009560). Afterwards the cover is pushed back onto the pump head until the spring catches lock.
The ball valve is accessible when the pump chamber is open. It ensures automatic sealing during the suction phase when the filter is started up. Pull out the ball cage (Fig. U), extract the ball and clean the parts with a soft brush. When replacing the ball make sure that it is mobile.
To ensure proper functioning of the multifunction handle the o-ring must be dampened or lubricated with vaseline. If it becomes more difficult to move the multifunction handle after a while you should renew the o-ring (order no. 7314058).
For a convenient cleaning of the hose system of your aquarium we recommend the EHEIM Universal cleaning brush – (order no. 4005570).
MERCI
Reproduction or copying - even parts thereof - only with the express permission of the producer.