
AUT1211 - Water filter PHILIPS - Free user manual and instructions
Find the device manual for free AUT1211 PHILIPS in PDF.


| Product type | Filter cartridge for pitcher |
| Brand | Philips |
| Model | AUT1211 |
| Usage | Tap water filtration |
| Filtration technology | Activated carbon and ion exchange |
| Filtration capacity | Up to 150 liters per cartridge |
| Recommended lifetime | 1 month or 150 liters (whichever comes first) |
| Contaminant reduction | Chlorine, lead, copper, limescale |
| Housing material | BPA-free plastic |
| Compatibility | Philips AUT series pitchers (AUT1000, AUT2000, etc.) |
| Dimensions (height) | Approximately 10 cm |
| Dimensions (diameter) | Approximately 5 cm |
| Net weight | Approximately 50 g |
| Operating temperature | Cold water (4-30°C) |
| Recommended water pressure | Standard household pressure |
| Maintenance | Store in a cool, dry place |
| Replacement | Every month or after 150 liters |
| Certifications | Complies with French standards |
Frequently Asked Questions - AUT1211 PHILIPS
User questions about AUT1211 PHILIPS
0 question about this device. Answer the ones you know or ask your own.
Ask a new question about this device
Download the instructions for your Water filter in PDF format for free! Find your manual AUT1211 - PHILIPS and take your electronic device back in hand. On this page are published all the documents necessary for the use of your device. AUT1211 by PHILIPS.
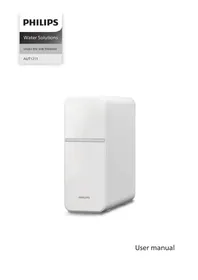
USER MANUAL AUT1211 PHILIPS
Under-the-sink filtration
AUT1211

Languages
English 3
Bulgarian 17
Czech 31
Greek 45
Spanish 59
French 73
Italian 87
Polish 101
Portuguese 115
Romanian 129
Russian 143
CONTENTS
I. Product Introduction 01
II. Product Specifications 01
III. Product overview and installation illustration 02
IV. Installation 02
Preparation before installation 03
Installing the three-way ball valve 03
Installing the faucet 05
Installing the system 06
V. Instructions 07
Before first use
VI. Maintenance 08
Routine maintenance 08
Filter lifetime 09
Filter cartridge replacement 09
VII. Precautions 10
VIII. Troubleshooting 11
IX. Guarantee & Service 12
X. Packaging list 12
I. Product Introduction
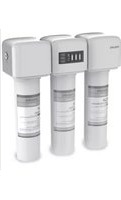
Congratulations on your purchase and welcome to Philips! This is a 3-stage microfiltration system that effectively reduces particulate, chlorine taste and odor, lead, VOCs, PFOA, PFOS, and microplastics*. It also softens water and prevents limescale build-up.
Read this user manual carefully before you use the appliance. Save it for future reference.
* The substances removed or reduced by this system are not necessarily in all user's water.
II. Product Specifications
| Product name Philips under-the-sink water filtration system | |
| Product model | AUT1211/10 |
| Water flow rate | 2.5 liters/minute |
| Filtration capacity | 3650L for AUT811/101200L for AUT820IEX/10 |
| Inlet water pressure 0.1-0.4 MPa** | |
| Inlet water temperature | 5-38 °C |
| Environment temperature 4-40 °C | |
| Applicable water source | Municipal tap water, which meets all European Directive on Water for Human Consumption 98/83 requirements and its national transpositions in the various EU member states. |
** When the inlet water pressure exceeds 0.4 MPa, a pressure relief valve should be installed before the system. When the inlet water pressure is below 0.1 MPa, a pressure booster should be installed before the system. The pressure relief valve is included in the accessories bag and the pressure booster needs to be purchased separately.
III. Product overview and installation illustration

① Main unit ② CB compound filter ③ Resin filter ④ Resin filter ⑤ Front cover ⑥ Faucet ⑦ 1/4"PE pipe ⑧ Accessories set ⑨ Test strip
IV. Installation
Notes:
- Before installation, it is important to check the condition of the system to make sure it has not been damaged during transport.
- Unpack the system and its accessories. Remove the protective packaging material. Recyclable materials have been used for the packaging and should be disposed of in the appropriate recycling bins or at the specific local recycling center.
WARNING: Keep plastic bags out of the reach of children, as they may be dangerous.
- Check if anything is missing according to the packing list and the overview.
- Given that the system will improve the quality of your drinking water, all tools to be used in the installation process should be clean, rust and grease-free.
- The installation process should be carried out under appropriate hygienic conditions, taking all necessary precautions concerning materials and components that will come into contact with water to be treated or consumed.
- Avoid external contamination of the system through improper handling, using gloves, sanitizing gel, and washing hands as often as is necessary during the installation process, first use, and system maintenance.
- The system and installation shall comply with applicable local regulations.
- This product cannot be disposed of with other domestic waste products.
At the end of the product's service life, it should be returned to the place of purchase, or at a local recycling center, indicating that it contains electric and electronic components. The appropriate collection and treatment of the product, which no longer are to be used, contributes to the preservation of natural resources and avoids any potential public health risks.

1. Preparations before installation
Choose a suitable position to install the system;
Check the packing list and make sure you have all the accessories on the list;
Prepare necessary tools for installation:

PTFE tape, screwdriver, wrench, flashlight, and a drill.
a. Please check the installation accessories according to the packing list in the instruction manual. b. Please cut off the water and power before installation.
2. Installing the three-way ball valve
a. Turn off the cold water supply. Turn on the kitchen cold water faucet to release the pressure and allow water to drain from the line. Disconnect the cold water hose from the cold water valve.


b. Insert the nut of the three-way ball valve onto the 1/4" PE pipe and insert the pipe into the convex connector of the three-way ball valve. Tighten the nut with a wrench.

c. Install the three-way ball valve on the cold water valve.
Please don't miss the gasket inside the three-way ball valve during installation.

d. Connect the cold water hose with the three-way ball valve and screw it tightly with a wrench.
Please don't miss the gasket in the cold water hose during installation.

e. Switch off the three-way ball valve. Turn on the cold water supply. Wipe the connections with a tissue to see if there is leakage. If the tissue stays dry, it means the three-way ball valve is installed properly.

3. Installing the faucet
Note:
Select an appropriate installation position. The environment where the faucet is installed should adhere to any appropriate hygiene and sanitation conditions. Make sure the faucet sits flat on top of the sink or countertop surface.
a. Drill a hole with a diameter of 25mm. Skip this step if there is already a hole in the sink or the countertop surface.
b. Install the faucet according to the diagram. Screw the faucet rod nut to the faucet rod, and screw it tightly. Under the sink, insert the quick connector to the faucet pipe, and use a clip to secure the connections.

4. Installing the system
Note:
Please check if there is sufficient space for installing the system itself, its accessories, connections, and for servicing and repair. Under no circumstances should the system be installed outdoors. The environment where the system is installed should adhere to any appropriate hygiene and sanitation conditions. Avoid any external dripping liquids from pipes or drains etc. onto the system.
This system should be placed on a stable and flat surface. Keep the system away from heat. It shall not be placed in a place that may have inflammable gas leakage.
a. Find a proper place for the system.

b. Connect the water inlet and the three-way ball valve.
Measure the length of the 1/4" pipe you need to connect the system and the three-way ball valve, and cut it accordingly with a pipe cutter. Insert one end of the 1/4" pipe to the three-way ball valve, and the other end to the water inlet hole at the back of the system. Use a clip to secure the pipe at the hole.
c. Connect the water outlet and the faucet.
Measure the length of the 1/4" pipe you need to connect the system and the faucet, and cut it accordingly with a pipe cutter. Insert one end of the pipe into the quick connector which has been connected with the faucet. Insert the other end of the pipe into the water outlet hole at the back of the system. Use a clip to secure the pipe at the hole.

d. Check if the system is installed properly, and turn on the three-way ball valve.

V. Before the first-time use
- Check the local water hardness by using the test strip and matching the color with the color chart.

- Take out the filter cartridges by turning them counterclockwise. Mark the replacement date of each filter, according to the filter lifetime information in Chapter VI. Re-insert all the filters back in the system.

- Turn on the faucet. Wipe all the joints and connections with tissue to check if there is leakage. If the tissue stays dry, it means the system is installed properly. Let the water run for 10 minutes to flush the filter cartridges. Now the system is ready to use.
Note: The water can be collected to water flowers or plants.
VI. Maintenance
1. Routine maintenance
- Organic solvent such as gasoline shall not be used for wiping the housing of the device. If cleaning is required, please gently wipe the surface of the product with a wet cloth.
- If the system is not used for more than 2 days, let water run for at least 10 minutes to flush the filters and the system.
- If the system will not be used for an extended period (more than 3 days), take out the filter cartridges, seal them with plastic wraps, and store them in the refrigerator (not in the freezer). Before using it again, let water run for at least 10 minutes to flush the filters and the system.
2. Filter lifetime
Note:
For the best performance, please change your filter cartridge according to the filter lifetime indicator, or the filter replacement cycle suggested below. When a significantly lower flow rate is observed, we recommend changing the filters as well.
This system can only work with Philips filters.
| Resin filter pack lifetime (Model Code: AUT820IEX/10) | Carbonfilter lifetime(Model Code: AUT811/10) | ||
| Household size | Very hard water area (above 303) | Medium - Hard water area (178-303) | |
| 1 | 6 months | 10 months | 24 months |
| 2 | 3 months | 5 months | 20 months |
| 3 | 2 months | 3 months | 12 months |
| 4 | 1.5 months | 2 months | 10 months |
* The actual lifetime of the filter cartridge depends on the local tap water quality and daily usage. The recommended replacement cycle is an average based on different local tap water quality. If the local tap water quality is below the average, the actual lifetime of the cartridge would differ from the recommended replacement cycle. If the filter cartridge is blocked, please replace it.
3. Filter cartridge replacement
a. Turn off the water supply before replacing the filter cartridges. b. Remove the front cover. c. Turn the filter cartridge that needs to be replaced counterclockwise and pull it out. d. Remove the packaging of the new filter cartridge and insert it into the system. Rotate clockwise to align the triangle icon on the filter cartridge with the lock icon on the system. e. Turn on the faucet. Let water run for a minimum of 10 minutes to flush away air and carbon compounds from the filter.


VII. Precautions
- Always use municipal tap water as the water source. Do not use water that is micro-biologically unsafe or of unknown quality without adequate disinfection before or after the system.
- This system is not intended for use by persons (including children) with reduced physical sensory or mental capabilities, or lack of experience and knowledge unless they have been given supervision or instruction concerning the use of the appliance by a person responsible for their safety. Children should be supervised to ensure that they do not play with the system.
- Be sure to handle the system gently and carefully. Do not attempt to modify or repair the system yourself, otherwise, the warranty becomes invalid.
- This device is intended for domestic use only.
- The inlet water temperature of the system should be within 5-38°C. When the inlet water temperature exceeds 38°C, the filter could be damaged and become invalid. If the inlet water temperature is lower than 5°C, it may cause freezing and the parts of the system to rupture, resulting in water leakage.
- Do not reverse the installation order of the filter cartridges to avoid affecting the performance of the system.
- If turn on the faucet to empty the system.
- Events of faults include: · Leakage · The product is cracked or damaged · There is an abnormal sound · The machine does not work
Please contact consumer care for inspection immediately.
- If not using the system for an extended period, turn off the water supply, and turn on the faucet to release the internal pressure to avoid damage to the system.
VIII. Troubleshooting
| Problem Possible causes Solutions | ||
| The flow rate gets slower. | Filter is blocked. Replace the filter. | |
| Inlet water pressure is low. | Wait until the inlet water pressure gets stable, or install a pressure boost before the system if the inlet water pressure is constantly lower than 0.1 MPa. | |
| The cold water valve or the faucet is not fully turned on. | Fully turn on the cold water valve or the faucet. | |
| Water leakage. | Pipelines or filter cartridges are not installed properly. | Re-install the system according to this user manual. |
| Damaged parts. | Contact consumer care. | |
| No water comes out from the faucet. | Cold water valve or the three-way ball valve is turned off. | Turn on the valves. |
| Filter is blocked. Replace the filter. | ||
| Filter cartridges not installed properly. | Re-install the filter cartridges according to this user manual. | |
| Contact consumer care.Other abnormal cir | ||
| Poor outlet water quality. | Filter has reached the end of life. Replace the filter. | |
| The system hasn't been used for some time. | Turn on the faucet and allow the water to run for 5-10 minutes. | |
| The inlet water quality is poor. | Always use municipal tap water as the water source. Do not use water that is micro-biologically unsafe or of unknown quality without adequate disinfection before or after the system. | |
IX. Guarantee & Service
If you need information or if you have any problems, please visit www.philips.com or contact the consumer care center in your country. If there is no consumer care center in your country, go to a local dealer. Within two years from the date of purchase, you will receive free warranty service for any damage caused by the manufacturing process, or components under normal operation confirmed by our maintenance service. The warranty service does not include frequently replaced consumable components, auxiliary devices, transportation fees, and door-to-door service. Please show the proof of purchase to the service personnel during maintenance.
X. Packaging list
| Part name Quantity | |
| Main unit | 1 pc |
| Front cover | 1 pc |
| CB filter | 1 pc |
| Resin filter | 2 pc |
| Faucet | 1 pc |
| 1/4" PE pipe (white) | 1 pc |
| Accessories set | 1 pc |
| Test strip | 1 pc |
| User manual | 1 pc |

Register your product and learn more via the website link below:
www.philips.com/water
Specifications are subject to change without notice
© 2023 AquaShield
All rights reserved.
Philips and the Philips Shield Emblem are registered trademarks of
Koninklijke Philips N.V. and are used under license.
This product has been manufactured by and is sold under the responsibility of
Hong Kong AquaShield Health Technology Company Limited
and Hong Kong AquaShield Health Technology Company Limited is the warrantor in relation to this product.
Rev A AUG 23

Contents


① Main unit
② Carbon filter
③ Resin filter
④ Resin filter
⑤ Front cover
⑥ Faucet


VII. Precautions


VII. Precautions


VII. Precautions


Register your product and learn more via the website link below:
www.philips.com/water
PTFE tape Screwdriver Wrench Flashlight Pipe cutter Cloth Electric screwdriver


VII. Precautions


VII. Precautions


- LANGUAGES
- CONTENTS
- PRODUCT INTRODUCTION
- PRODUCT SPECIFICATIONS
- PRODUCT OVERVIEW AND INSTALLATION ILLUSTRATION
- INSTALLATION
- NOTES
- WARNING: KEEP PLASTIC BAGS OUT OF THE REACH OF CHILDREN, AS THEY MAY BE DANGEROUS
- PREPARATIONS BEFORE INSTALLATION
- INSTALLING THE THREE-WAY BALL VALVE
- INSTALLING THE FAUCET
- NOTE
- INSTALLING THE SYSTEM
- BEFORE THE FIRST-TIME USE
- MAINTENANCE
- ROUTINE MAINTENANCE
- FILTER LIFETIME
- FILTER CARTRIDGE REPLACEMENT
- PRECAUTIONS
- GUARANTEE & SERVICE
- PACKAGING LIST
Brand : PHILIPS
Model : AUT1211
Category : Water filter