
SYS-391HT - Home Theater System DENON - Free user manual and instructions
Find the device manual for free SYS-391HT DENON in PDF.
| Product Type | 5.1 Home Theater System (with active subwoofer) |
| Brand | DENON |
| Model | SYS-391HT |
| Front Speakers | SC-F391 (2-way, 3 drivers, 6 ohms) |
| Center Speaker | SC-C391 (2-way, 3 drivers, 6 ohms) |
| Surround Speakers | SC-R391 (full range, 1 driver, 6 ohms) |
| Subwoofer | DSW-391 (active, 20 cm woofer, 100 W dynamic) |
| Speaker Impedance | 6 ohms |
| Maximum Power per Speaker | 60 W (IEC) / 120 W (peak) |
| Frequency Response (front and center speakers) | 150 Hz – 22 kHz |
| Frequency Response (surround speakers) | 150 Hz – 20 kHz |
| Frequency Response (subwoofer) | 20 Hz – 150 Hz |
| Dimensions (front speaker) | 125 x 320 x 155 mm |
| Dimensions (center speaker) | 320 x 125 x 155 mm |
| Dimensions (surround speaker) | 125 x 320 x 155 mm |
| Dimensions (subwoofer) | 280 x 356 x 410 mm |
| Weight (front speaker) | 2,0 kg |
| Weight (center speaker) | 2,0 kg |
| Weight (subwoofer) | 10,4 kg |
| Power Supply (subwoofer) | 230 V AC, 50 Hz (Europe) |
| Power Consumption (subwoofer) | 65 W (max), 0,5 W (standby) |
| Special Functions | Auto standby, level adjustment, RCA connection |
| Cleaning | Dry, soft cloth; avoid solvents |
| Safety | Ventilation space >0,3 m; do not obstruct |
Frequently Asked Questions - SYS-391HT DENON
User questions about SYS-391HT DENON
0 question about this device. Answer the ones you know or ask your own.
Ask a new question about this device
Download the instructions for your Home Theater System in PDF format for free! Find your manual SYS-391HT - DENON and take your electronic device back in hand. On this page are published all the documents necessary for the use of your device. SYS-391HT by DENON.
USER MANUAL SYS-391HT DENON
The lightning flash with arrowhead symbol, within an equilateral triangle, is intended to alert the user to the presence of uninsulated “dangerous voltage” within the product’s enclosure that may be of sufficient magnitude to constitute a risk of electric shock to persons.

The exclamation point within an equilateral triangle is intended to alert the user to the presence of important operating and maintenance (servicing) instructions in the literature accompanying the appliance.
WARNING:
TO REDUCE THE RISK OF FIRE OR ELECTRIC SHOCK, DO NOT EXPOSE THIS APPLIANCE TO RAIN OR MOISTURE.
IMPOTANT SAFETY INSTRUCTIONS
- Read these instructions.
- Keep these instructions.
- Heed all warnings.
- Follow all instructions.
- Do not use this apparatus near water.
- Clean only with dry cloth.
- Do not block any ventilation openings.
Install in accordance with the manufacturer's instructions. - Do not install near any heat sources such as radiators, heat registers, stoves, or other apparatus (including amplifiers) that produce heat.
- Do not defeat the safety purpose of the polarized or grounding-type plug. A polarized plug has two blades with one wider than the other. A grounding type plug has two blades and a third grounding prong. The wide blade or the third prong are provided for your safety. If the provided plug does not fit into your outlet, consult an electrician for replacement of the obsolete outlet.
- Protect the power cord from being walked on or pinched particularly at plugs, convenience receptacles, and the point where they exit from the apparatus.
- Only use attachments/accessories specified by the manufacturer.
- Use only with the cart, stand, tripod, bracket, or table specified by the manufacturer, or sold with the apparatus. When a cart is used, use caution when moving the cart/apparatus combination to avoid injury from tip-over.
- Unplug this apparatus during lightning storms or when unused for long periods of time.
- Refer all servicing to qualified service personnel. Servicing is required when the apparatus has been damaged in any way, such as power-supply cord or plug is damaged, liquid has been spilled or objects have fallen into the apparatus, the apparatus has been exposed to rain or moisture, does not operate normally, or has been dropped.
- Batteries shall not be exposed to excessive heat such as sunshine, fire or the like.

CAUTION:
To completely disconnect this product from the mains, disconnect the plug from the wall socket outlet. The mains plug is used to completely interrupt the power supply to the unit and must be within easy access by the user.
VORSICHT:
- DECLARATION OF CONFORMITY
We declare under our sole responsibility that this product, to which this declaration relates, is in conformity with the following standards: EN60065, EN55013, EN55020, EN61000-3-2 and EN61000-3-3. Following the provisions of Low Voltage Directive 2006/95/EC and EMC Directive 2004/108/EC, the EC regulation 1275/2008 and its frame work Directive 2009/125/EC for Energy-related Products (ErP).
EN60065, EN55013, EN55020, EN61000-3-2 und EN61000-3-3. Following the provisions of low voltage directive 2006/95/EC and EMC directive 2004/108/EC, the EC regulation 1275/2008 and its frame work directive 2009/125/EC for energy-related products (ErP).
- DECLARATION DE CONFORMITE
Division of D&M Germany GmbH
A NOTE ABOUT RECYCLING:
This product's packaging materials are recyclable and can be reused. Please dispose of any materials in accordance with the local recycling regulations.
When discarding the unit, comply with local rules or regulations.
Batteries should never be thrown away or incinerated but disposed of in accordance with the local regulations concerning battery disposal.
This product and the supplied accessories, excluding the batteries, constitute the applicable product according to the WEEE directive.
HINWEIS ZUM RECYCLING:
UMA NOTA SOBRE A RECICLAGEM:
* For proper heat dispersal, do not install this unit in a confined space, such as a bookcase or similar enclosure.
- More than 0.3 ~m is recommended.
- Do not place any other equipment on this unit.
Unit configuration 1
Accessories 1
Before using 1
Cautions on installation 1
Installation 2
Moving the unit 2
Cleaning 2
Other cautions 2
Part names and functions 3
Rear panel (DSW-391) 3
Connections 3
Speaker connections (SC-F391, SC-C391, SC-R391) 3
Connecting the speaker cables 3
Subwoofer connections (DSW-391) 4
Auto standby function 4
Connecting the power cord 4
Playback 4
Using the subwoofer 4
Troubleshooting 5
Specifications 5
Getting started
Thank you for purchasing this DENON product. To ensure proper operation, please read this owner's manual carefully before using the product.
After reading them, be sure to keep them for future reference.
Unit configuration
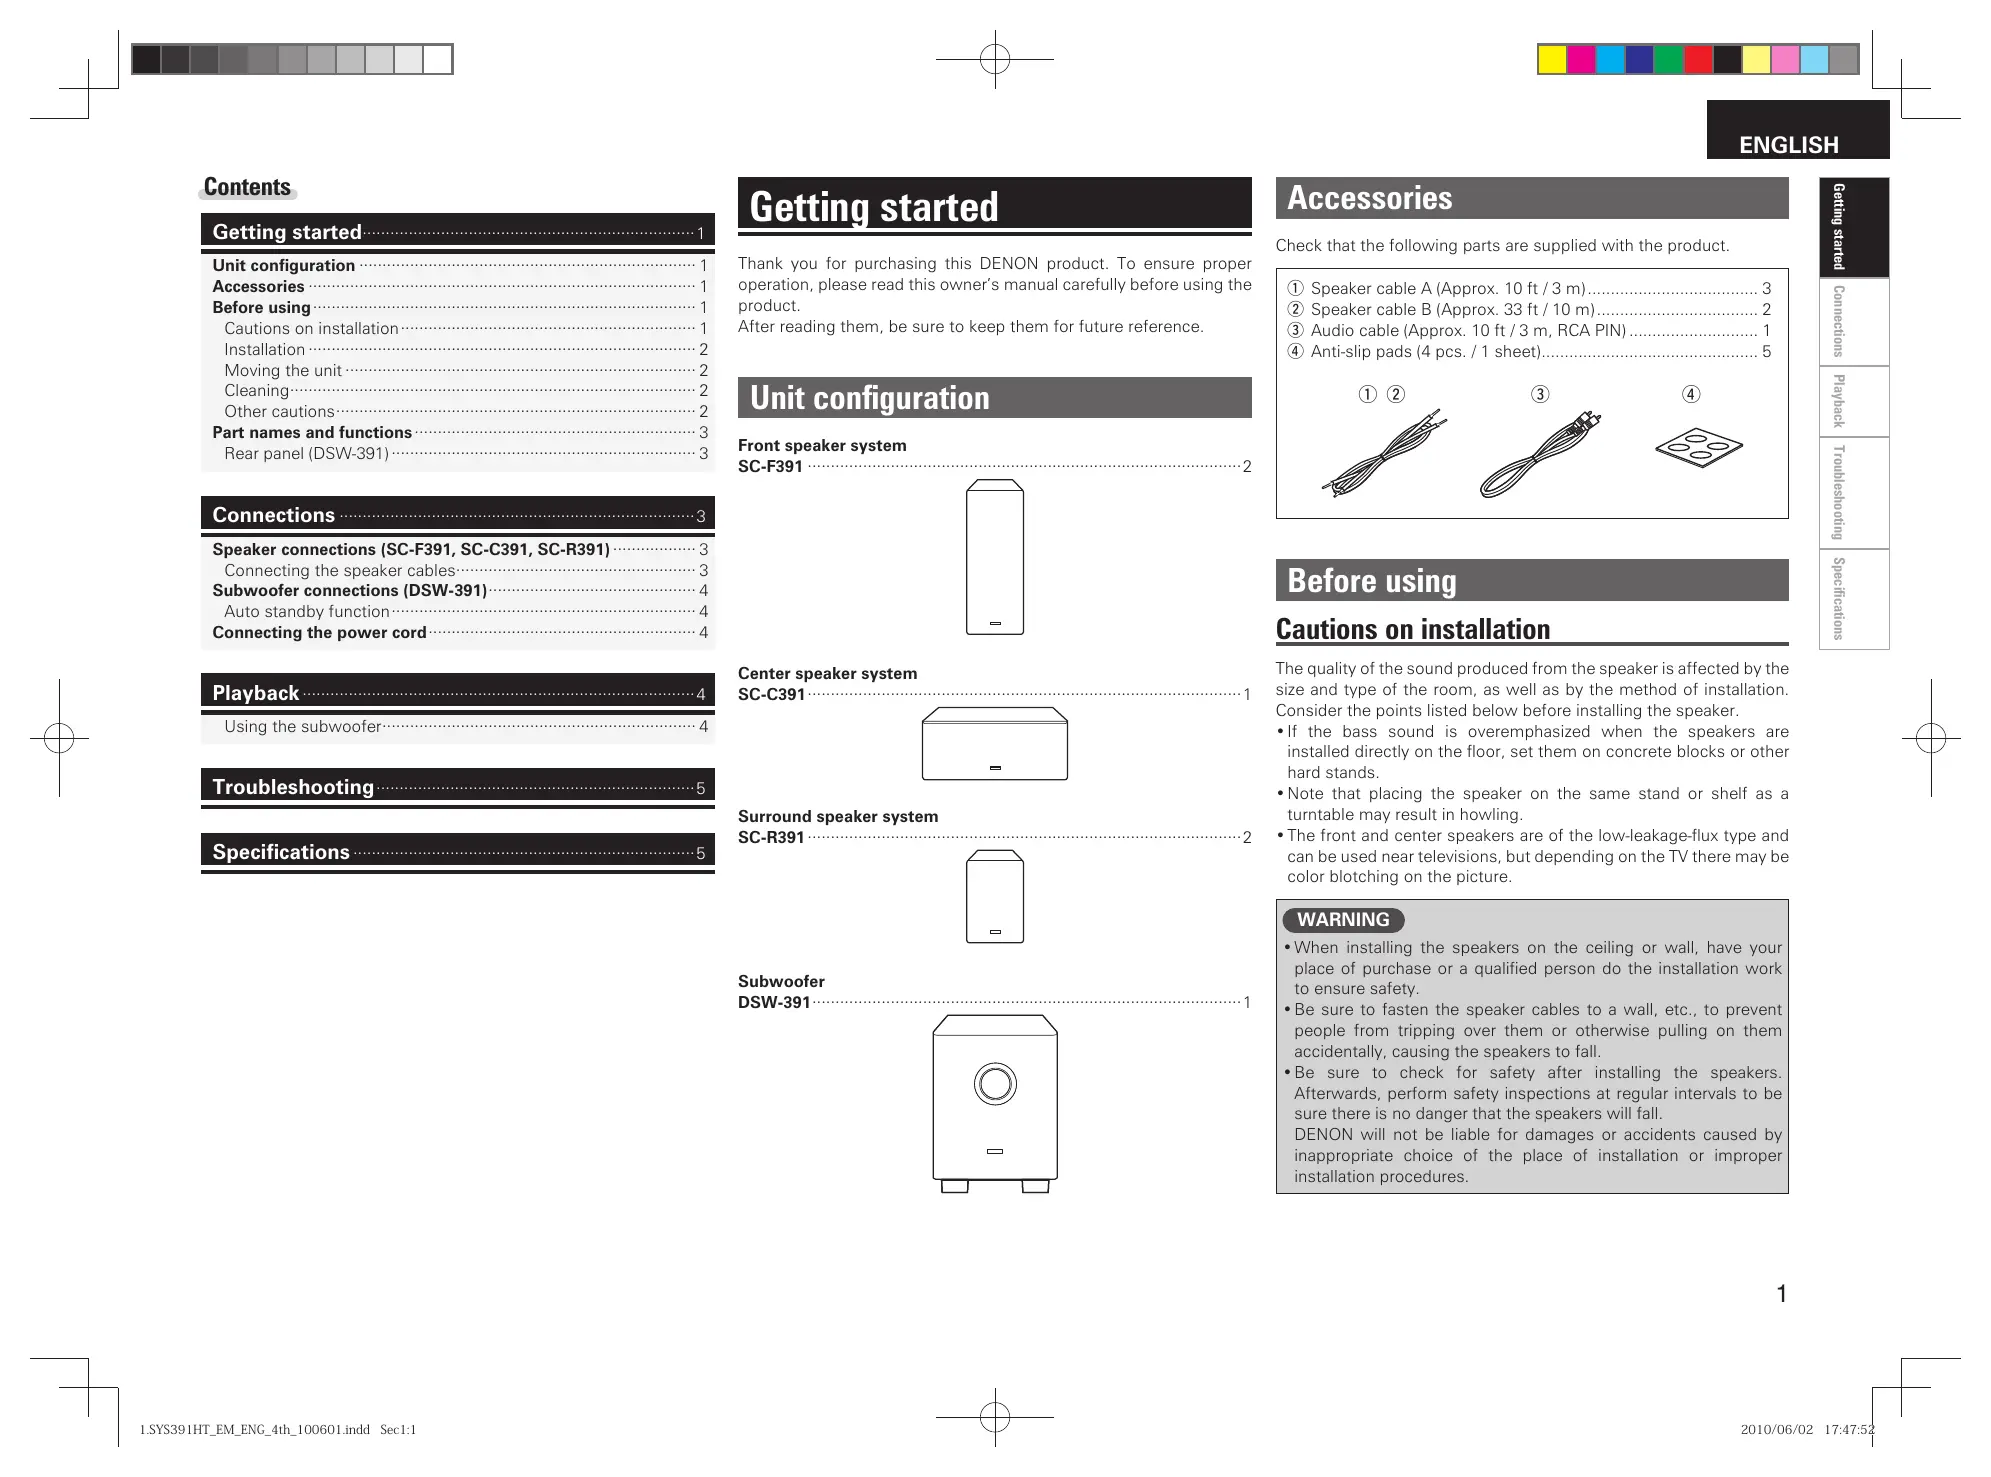
Front speaker system
SC-F391 2
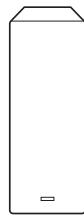
Center speaker system
SC-C391 1
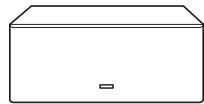
Surround speaker system
SC-R391 2
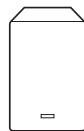
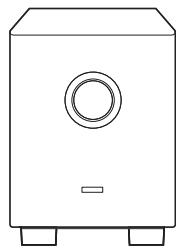
Subwoofer
DSW-391 1
natural_image
Line drawing of a simple rectangular box with a circular vent and two side legs (no text or symbols)Accessories
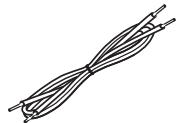
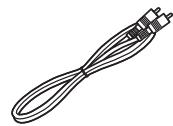
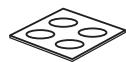
Check that the following parts are supplied with the product.
① Speaker cable A (Approx. 10 ft / 3 m).... 3
② Speaker cable B (Approx. 33 ft / 10 m)....2
③ Audio cable (Approx. 10 ft / 3 m, RCA PIN)....1
④ Anti-slip pads (4 pcs. / 1 sheet)....5
① ②
③
④
Before using
Cautions on installation
The quality of the sound produced from the speaker is affected by the size and type of the room, as well as by the method of installation. Consider the points listed below before installing the speaker.
- If the bass sound is overemphasized when the speakers are installed directly on the floor, set them on concrete blocks or other hard stands.
- Note that placing the speaker on the same stand or shelf as a turntable may result in howling.
- The front and center speakers are of the low-leakage-flux type and can be used near televisions, but depending on the TV there may be color blotching on the picture.
WARNING
- When installing the speakers on the ceiling or wall, have your place of purchase or a qualified person do the installation work to ensure safety.
- Be sure to fasten the speaker cables to a wall, etc., to prevent people from tripping over them or otherwise pulling on them accidentally, causing the speakers to fall.
- Be sure to check for safety after installing the speakers. Afterwards, perform safety inspections at regular intervals to be sure there is no danger that the speakers will fall.
DENON will not be liable for damages or accidents caused by inappropriate choice of the place of installation or improper installation procedures.
Before using
Installation
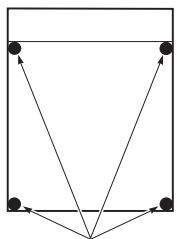
When placing the speakers on a stand, etc.
Stick the included anti-slip pads (cork, approximately 1 mm thick) on the four corners of the bottom surface.
SC-F391
SC-R391
flowchart
graph TD
    A["●"] --> B["●"]
    B --> C["●"]
    C --> D["●"]
    D --> E["●"]
    E --> F["●"]
    F --> G["●"]
    G --> H["●"]
    H --> I["●"]
    I --> J["●"]
    J --> K["●"]
    K --> L["●"]
    L --> M["●"]
    M --> N["●"]
    N --> O["●"]
    O --> P["●"]
    P --> Q["●"]
    Q --> R["●"]
    R --> S["●"]
    S --> T["●"]
    T --> U["●"]
    U --> V["●"]
    V --> W["●"]
    W --> X["●"]
    X --> Y["●"]
    Y --> Z["●"]
Anti-slip pads
SC-C391

flowchart
graph TD
    A["•"] --> B["•"]
    B --> C["•"]
    C --> D["•"]
    D --> E["•"]
    E --> F["•"]
    F --> G["•"]
    G --> H["•"]
    H --> I["•"]
    I --> J["•"]
    J --> K["•"]
    K --> L["•"]
    L --> M["•"]
    M --> N["•"]
    N --> O["•"]
    O --> P["•"]
    P --> Q["•"]
    Q --> R["•"]
    R --> S["•"]
    S --> T["•"]
    T --> U["•"]
    U --> V["•"]
    V --> W["•"]
    W --> X["•"]
    X --> Y["•"]
    Y --> Z["•"]
Anti-slip pads
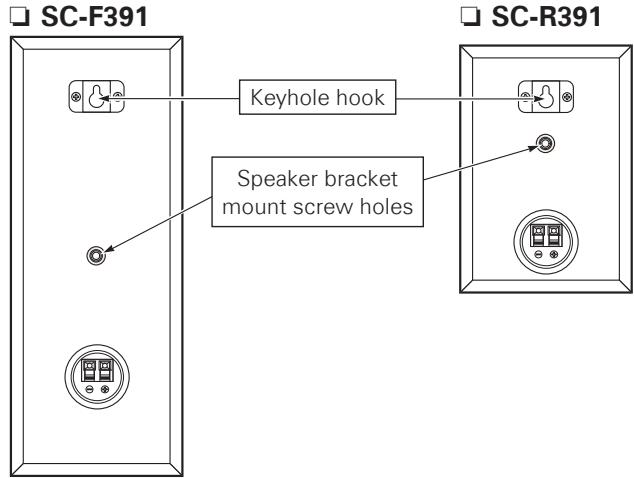
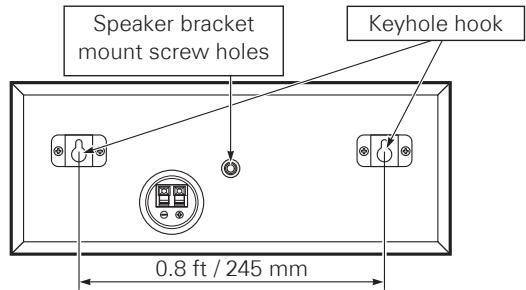
When mounting the speakers on a bracket
- You can use the M5 nuts inserted in the back of the speakers.
- The speakers can be mounted on a wall using the keyhole hooks on its rear panel.
- When you mount the speakers, follow the instructions in the manual included with the ceiling mount bracket, and be sure to install them properly and securely.
SC-C391
Moving the speakers
- Do not subject the speakers to shock.
- Turn off the power and unplug the power cord from the power outlet (DSW-391). Next, disconnect all connection cables to other systems before moving the speakers.
Cleaning
- Use a dry wiping cloth and wipe lightly to remove dirt from the cabinet and operation panel.
- When using chemically treated cloths, follow the precautions provided for them.
- Do not use benzene, thinners, or other organic solvents or insecticides on the speakers since they may cause a change in quality or color.
Other cautions
- Raising the amplifier's volume excessively and playing with distorted sound could damage the amplifier and speakers. Enjoy the sound at a reasonable volume level.
- When moving the speakers, note that applying strong force to the surface of the speaker through the speaker net could damage the speaker.
Part names and functions
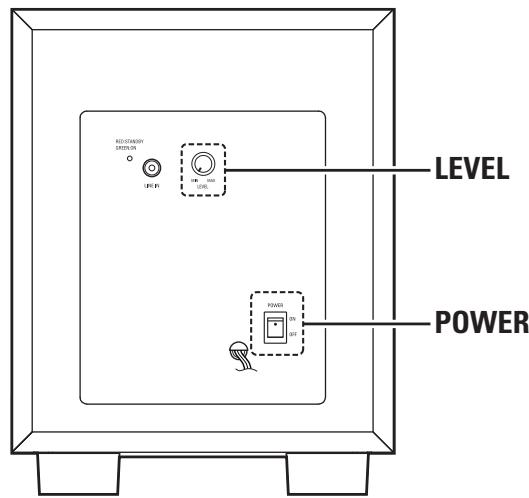
Rear panel (DSW-391)
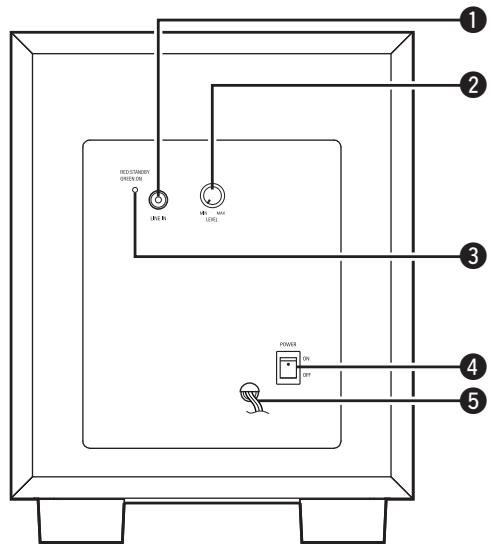
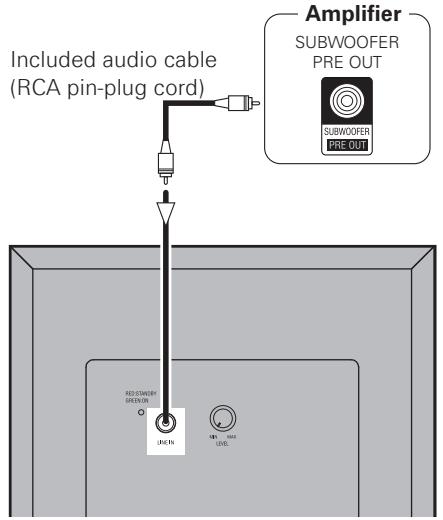
① Line input connector (LINE IN)
Connect this connector to the amplifier's "SUBWOOFER PRE OUT" connector using the included audio cable.
② Volume adjustment control (LEVEL)
Use this control to adjust the volume of the subwoofer.
③ Status indicator
The two-colored light indicates the subwoofer's operating status, as follows:
- Power "ON" ……Lights green
- Standby mode……Lights red
- Power "OFF" Indicator off
4 Power operation switch (POWER ON/OFF)
- Set this switch to "ON" to turn on power.
- Set this switch to "OFF" to turn off power.
5 Power cord
Connections
When connecting the speakers to an amplifier, be sure to read the amplifier's owner's manual carefully and connect properly.
Speaker connections (SC-F391, SC-C391, SC-R391)
- Connect the input terminals on the rear panel of the speaker with the speaker output terminals on the amplifier, using the included speaker cables.
- Labels on the back of each speaker are marked "FR", "FL", "C", "SR", "SL". Connect each speaker to the following amplifier terminals. Be sure to connect each speaker with correct polarity (+, -).
- FR To the amplifier's front-right speaker terminal.
- FL To the amplifier's front-left speaker terminal
- C To the amplifier's center speaker terminal
- SR To the amplifier's surround-right speaker terminal.
- SL To the amplifier's surround-left speaker terminal.

Amplifiers have various speaker output terminals.
Check the owner's manual of the amplifier you are using for details.
NOTE
- Be sure to turn the amplifier's power off before connecting the speakers to the amplifier.
- If the polarities are inverted, the phase may be off and the sound may have no bass component, making it seem unnatural. Be sure to connect the polarities properly.
Connecting the speaker cables
Black : “−” (negative)
Black cable
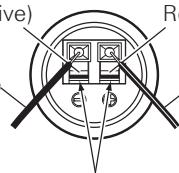
Red : “+” (positive)
Black with white line cable
Lever
1 Peel off the sheath from the tip of the speaker cable, then firmly twist the wires by hand so that they do not stick out and cause short-circuits.
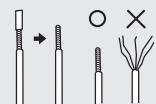
2 Press and lower the lever, and insert the cable's core wire into the hole.
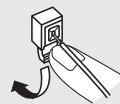
3 Release the lever. Gently pull on the speaker cable to check that it is firmly connected.


Once connections are completed, pull gently on the speaker cables to check that they are securely connected.
NOTE
Do not let the core wires of two speaker cables touch each other. Doing so will short-circuit the amplifier circuitry and damage the amplifier.


Subwoofer connections (DSW-391)
Connect this input to the pre-out connector for the subwoofer on the amplifier's SUBWOOFER PRE OUT using the included audio cable.
NOTE
- Do not plug the power cord into an AC power outlet until all connections have been completed.
- Note that clamping pin-plug cords and power cords together or running pin-plug cords near the power transformer could result in humming or noise.
Auto standby function
This subwoofer is automatically set to the standby mode if no signal is input for 5 to 15 minutes, to save electricity.
The power turns on immediately when a signal is input.
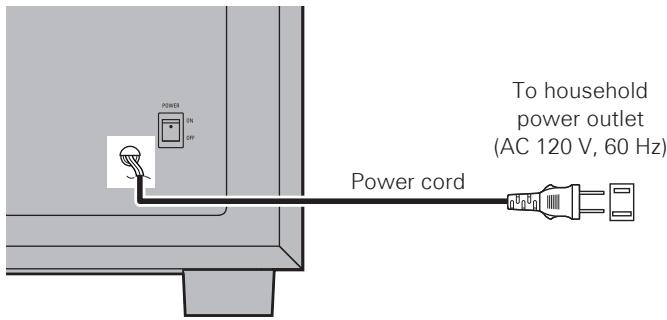
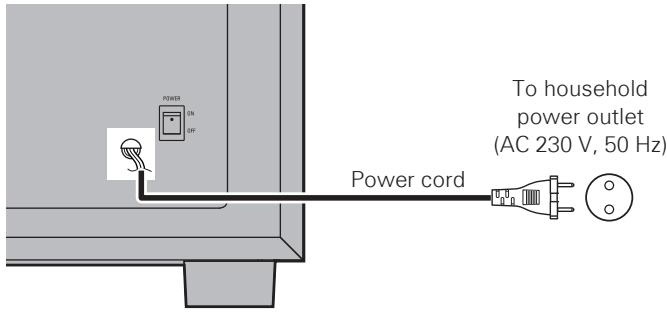
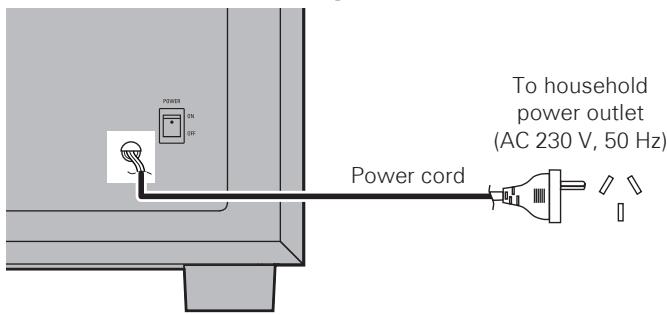
Connecting the power cord
Wait until all connections have been completed before connecting the power cord.
For North American model only
For European model only
For Austrarian model only
NOTE
Insert the AC plug securely. Incomplete connections could cause noise.
Playback
Using the subwoofer
1 Set POWER to the "ON" position.
2 Adjust the volume using LEVEL.
Troubleshooting
If a problem should arise, first check the following:
- Are the connections correct?
- Is the set being operated as described in the owner's manual?
- Are the other components operating properly?
If this unit does not operate properly, check the items listed in the table below. Should the problem persist, there may be a malfunction.
In that case, disconnect the power immediately and contact your place of purchase.
| Symptom | Cause | Countermeasure | Page |
| Subwoofer (DSW-391): Indicator does not light and no sound is produced when power is turned on. | • AC power plug is not securely connected. | • Check the connection of the AC power plug. | 4 |
| Subwoofer (DSW-391): Indicator lights but no sound is produced. | • Cables are not securely connected.• Volume adjustment control is turned all the way down.• Protective circuit has been activated due to excess input or rise in temperature. | • Connect securely.• Turn the control and set it to the desired position.• Set the power switch to the “OFF” position, wait at least 1 minute, then set the power switch back to the “ON” position.If the problem persists, unplug the power cord from the AC power outlet and contact your place of purchase. | 43, 4– |
| Subwoofer (DSW-391): Sound is distorted. | • Volume level is too high.• Sound is being distorted on connected amplifier. | • Turn the volume adjustment control counterclockwise to lower the volume.• Do not amplify the bass sound on the amplifier. (Lower the amplifier bass adjustment control or volume.) | 3, 4– |
| Subwoofer (DSW-391): Oscillation (loud continuous sound). | • Volume of subwoofer or amplifier set too high. | • Lower the volume of the subwoofer or amplifier. | 3, 4 |
| Volume does not adjust in sync with volume of amplifier. | • The subwoofer is connected to a terminal other than the amplifier’s SUBWOOFER PREOUT connector (to terminals with a set output level). | • Connect the subwoofer to the amplifier’s SUBWOOFER PREOUT connector. | – |
Specifications
Front speaker (SC-F391)
Type:
2-way, 3-speakers
Closed box / Low-leakage-flux
Drive units:
8 cm cone bass-mid x 2
Input impedance:
2.5 cm high range x 1
Max. input:
6 Ω
Frequency range:
60 W (IEC)
Dimensions:
120 W (PEAK)
Weight:
150 Hz - 22 kHz
125 (W) × 320 (H) × 155 (D) mm (4-59/64" × 12-19/32" × 6-7/64")
2.0 kg (4 lbs 6.6 oz)
☐ Center speaker (SC-C391)
Type:
2-way, 3-speakers
Closed box / Low-leakage-flux
Drive units:
8 cm cone bass mid x 2
Input impedance:
2.5 cm high range x 1
Max. input:
6 Ω
Frequency range:
60 W (IEC)
120 W (PEAK)
Dimensions:
150 Hz - 22 kHz
320 (W) × 125 (H) × 155 (D) mm (12-19/32" × 4-59/64" × 6-7/64")
Weight:
2.0 kg (4 lbs 6.6 oz)
□ Surround speaker (SC-R391)
Type:
Full-range, 1-speaker
Closed box
Drive units:
8 cm cone full range x 1
Input impedance:
6 Ω
Max. input:
60 W (IEC)
Frequency range:
120 W (PEAK)
Dimensions:
150 Hz – 20 kHz
Weight:
125 (W) × 180 (H) × 155 (D) mm (4-59/64" × 7-3/32" × 6-7/64")
1.1 kg (2 lbs 6.8 oz)
Subwoofer (DSW-391)
Type:
Reflex box
Built-in amplifier
Drive unit:
20 cm cone woofer x 1
Frequency range:
20 Hz – 150 Hz
Dynamic power:
100 W
Input impedance:
22 kΩ
Power supply:
120 V / 60 Hz (North America model)
230 V / 50 Hz (European model/Australian model)
Power consumption:
65 W
MAX. 0.5 W (Standby)
Dimensions:
280 (W) × 356 (H) × 410 (D) mm (11-1/32" × 14-1/64" × 16-9/64")
Weight:
10.4 kg (22 lbs 14.8 oz)
Inhalt
Erste Schritte....1
natural_image
Line drawing of a simple rectangular box with a circular vent and two side legs (no text or symbols)Zubehör
natural_image
Line drawing of a simple rectangular box with a circular vent and two side legs (no text or symbols)Accessoires
125 (L) x 180 (H) x 155 (P) mm (4-59/64" x 7-3/32" x 6-7/64")
Poids:
1,1 kg (2 lbs 6.8 oz)
Subwoofer (DSW-391)
Type:
Caisson réflexe
natural_image
Line drawing of a simple rectangular box with a circular vent and two side legs (no text or symbols)ITALIANO
Accessori
125 (L) × 320 (A) × 155 (P) mm
Peso:
2,0 kg
□ Altoparlante centrale (SC-C391)
Tipo:
2 vie, 3 altoparlanti
320 (L) × 125 (A) × 155 (P) mm
Peso:
2,0 kg
□ Altoparlante surround (SC-R391)
Tipo:
Gamma completa, 1 altoparlante
125 (L) × 180 (A) × 155 (P) mm
Peso:
1,1 kg
Subwoofer (DSW-391)
Tipo:
Contenitore reflex
natural_image
Line drawing of a simple rectangular box with a circular vent and two side legs (no text or symbols)Accesorios
125 (A) × 180 (A) × 155 (P) mm (4-59/64" × 7-3/32" × 6-7/64")
Peso:
1,1 kg (2 lbs 6,8 oz)
Subwoofer (DSW-391)
Tipo:
Caja de reflexión
Amplificador incorporado
Unidad principal:
Cono de woofer de 20 cm x 1
natural_image
Line drawing of a simple rectangular box with a circular vent and two side legs (no text or symbols)Acessórios
Se colocar as colunas num suporte, etc.
Coluna frontal (SC-F391)
Tipo:
2 vias, 3 colunas
Caixa fechada / Fluxo de baixa perda
125 (L) × 320 (A) × 155 (P) mm
2,0 kg
Coluna central (SC-C391)
Tipo:
2 vias, 3 colunas
Caixa fechada / Fluxo de baixa perda
320 (L) × 125 (A) × 155 (P) mm
2,0 kg
Coluna surround (SC-R391)
Tipo:
Amplitude total, 1 coluna
Caixa fechada
125 (L) × 180 (A) × 155 (P) mm
1,1 kg
Subwoofer (DSW-391)
Tipo:
Caixa de reflexo
Amplificador incorporado
natural_image
Line drawing of a simple rectangular box with a circular vent and two side legs (no text or symbols)Accessoires
8 cm conus bass-mid x 2
8 cm conus bass-mid x 2
20 cm conus woofer x 1
Frequentiebereik:
20 Hz – 150 Hz
Dynamisch vermogen:
100 W
Ingangsimpedantie:
22 kΩ
Stroomtoevoer:
natural_image
Line drawing of a simple rectangular box with a circular vent and two side legs (no text or symbols)Tillbehör
natural_image
Line drawing of a simple rectangular box with a circular vent and two side legs (no text or symbols)Аксессуары
natural_image
Line drawing of a simple rectangular box with a circular vent and two side legs (no text or symbols)Akcesoria
natural_image
Line drawing of a simple rectangular box with a circular vent and two side legs (no text or symbols)Aksesuarlar
- WARNING:
- IMPOTANT SAFETY INSTRUCTIONS
- CAUTION:
- VORSICHT:
- - DECLARATION OF CONFORMITY
- - DECLARATION DE CONFORMITE
- A NOTE ABOUT RECYCLING:
- HINWEIS ZUM RECYCLING:
- UMA NOTA SOBRE A RECICLAGEM:
- Connections 3
- Playback 4
- Troubleshooting 5
- Specifications 5
- Getting started
- Unit configuration
- Accessories
- Before using
- Cautions on installation
- WARNING
- Installation
- When placing the speakers on a stand, etc.
- When mounting the speakers on a bracket
- Moving the speakers
- Cleaning
- Other cautions
- Part names and functions
- Rear panel (DSW-391)
- ① Line input connector (LINE IN)
- ② Volume adjustment control (LEVEL)
- ③ Status indicator
- Power operation switch (POWER ON/OFF)
- Power cord
- Connections
- Speaker connections (SC-F391, SC-C391, SC-R391)
- NOTE
- Connecting the speaker cables
- Subwoofer connections (DSW-391)
- Auto standby function
- Connecting the power cord
- Playback
- Using the subwoofer
- Troubleshooting
- If a problem should arise, first check the following:
- Specifications
- Inhalt
- Erste Schritte....1
- Zubehör
- Accessoires
- Subwoofer (DSW-391)
- ITALIANO
- Accessori
- □ Altoparlante centrale (SC-C391)
- □ Altoparlante surround (SC-R391)
- Accesorios
- Acessórios
- Se colocar as colunas num suporte, etc.
- Coluna frontal (SC-F391)
- Coluna central (SC-C391)
- Coluna surround (SC-R391)
- Tillbehör
- Аксессуары
- Akcesoria
- Aksesuarlar
Brand : DENON
Model : SYS-391HT
Category : Home Theater System