Approx APPUSB150DA - Network card / adapter

APPUSB150DA - Network card / adapter Approx - Free user manual and instructions

Find the device manual for free APPUSB150DA Approx in PDF.

📄 93 pages English EN Download 💬 AI Question 10 questions ⚙️ Specs
Notice Approx APPUSB150DA - page 29
Pick your language and provide your email: we'll send you a specifically translated version.
Product Type USB Wi-Fi Network Adapter
Interface USB 2.0
Wi-Fi Standard IEEE 802.11b/g/n
Maximum Speed 150 Mbps
Frequency Band 2.4 GHz
Antenna Integrated
Dimensions (L x W x H) 70 x 20 x 10 mm
Weight 10 g
Power Supply Via USB port (5 V)
Power Consumption 2.5 W max
Operating Temperature 0 °C to 40 °C
Operating Humidity 10 % to 90 % without condensation
Wireless Security WEP 64/128-bit, WPA, WPA2
Compatible Operating Systems Windows 7/8/10, macOS, Linux
Package Contents Adapter, user manual, driver CD (optional)
Warranty 2 years
Maintenance and Cleaning Clean with a dry, non-abrasive cloth
Safety Precautions Do not expose to moisture, do not open the casing
Repairability Not user-repairable, contact customer service

Frequently Asked Questions - APPUSB150DA Approx

How to install the Approx APPUSB150DA Wi-Fi adapter?
Insert the adapter into a free USB port. The operating system will automatically detect the device. If the drivers do not install automatically, use the included CD or download the drivers from the Approx website.
Which operating system is compatible with this adapter?
It is compatible with Windows 7/8/10, macOS and Linux (kernel 2.6+).
What is the maximum speed of the APPUSB150DA?
The theoretical maximum speed is 150 Mbps under 802.11n standard. In practice, it depends on distance and obstacles.
Why is my adapter not recognized by Windows?
Try changing the USB port. Make sure the drivers are installed. In Device Manager, look for unrecognized devices and update the drivers manually.
Does the adapter support 5 GHz network?
No, it only works on the 2.4 GHz band. It is not compatible with 5 GHz networks.
How to clean the adapter?
Unplug it, then wipe the surface with a soft, dry cloth. Do not use chemical products.
What to do if the Wi-Fi connection is unstable?
Move the adapter closer to the router, keep it away from sources of interference (microwaves, cordless phones). Update the drivers and check the power settings.
Can I use this adapter on a TV or game console?
Yes, if the device has a USB port and supports mass storage class Wi-Fi adapters (usually under Linux or Android). Check compatibility with the manufacturer.
Does the adapter heat up normally?
Slight heating is normal. If it becomes very hot to the touch, unplug it and check that it is not obstructed.
Where to find the drivers if I lost the CD?
Download the drivers from the official Approx website (generic brand). Search for the model APPUSB150DA in the support section.

User questions about APPUSB150DA Approx

0 question about this device. Answer the ones you know or ask your own.

Ask a new question about this device

The email remains private: it is only used to notify you if someone responds to your question.

No questions yet. Be the first to ask one.

Download the instructions for your Network card / adapter in PDF format for free! Find your manual APPUSB150DA - Approx and take your electronic device back in hand. On this page are published all the documents necessary for the use of your device. APPUSB150DA by Approx.

USER MANUAL APPUSB150DA Approx

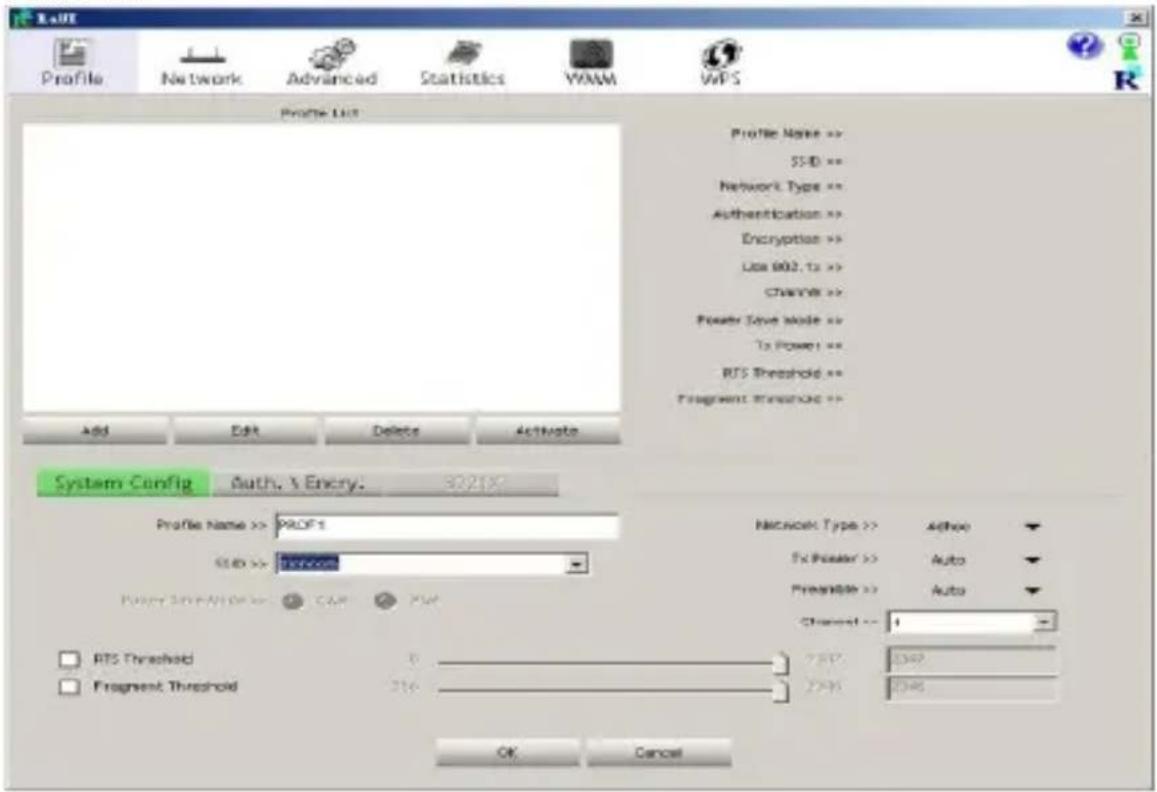
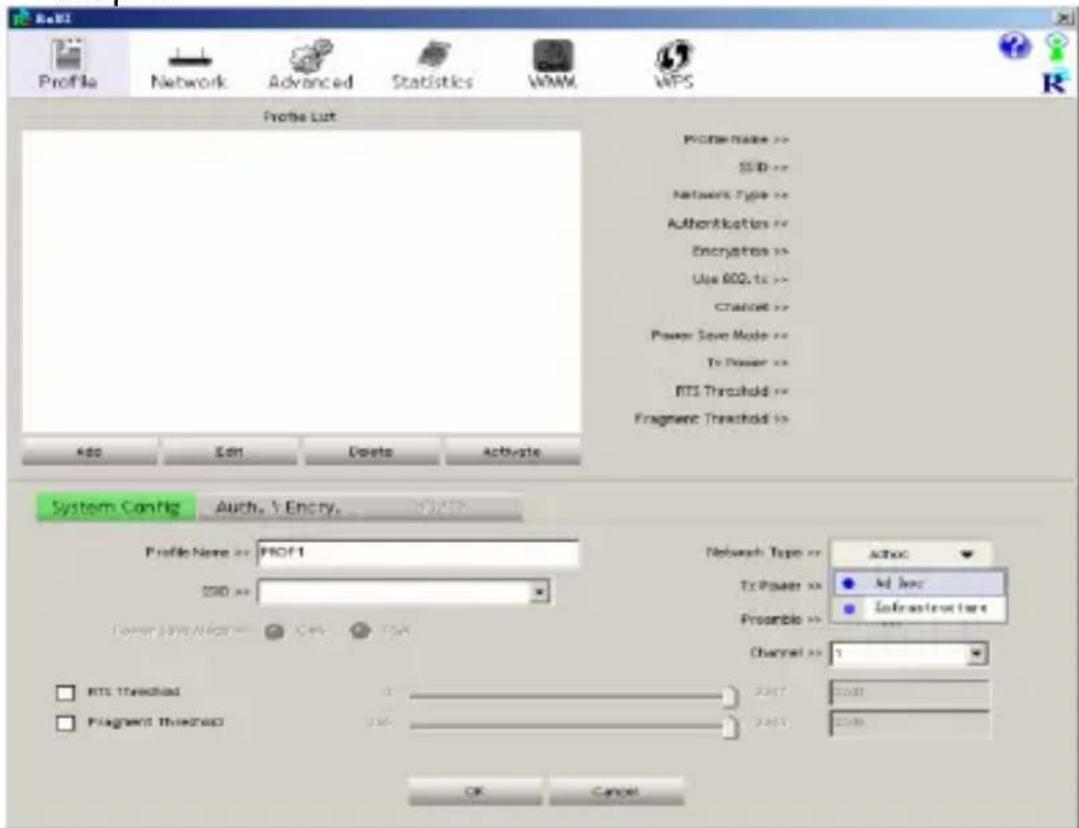
Paso 1:
Profile List Profile Name >> SSID >> Network Type >> Authentication >> Encryption >> Use RCI.1x >> Channel >> Power Save Mode >> To Power >> RTS Threshold >> Fragment Threshold >> Add Edit Delete Activate System Config Auth. \ Entry. 50%> Profile Name >> RIOF1 SID >> Power Save Mode >> OK Cancel Network Type >> Address To Power >> Proactive >> Channel >> RTS Threshold Fragment Threshold OK Cancel

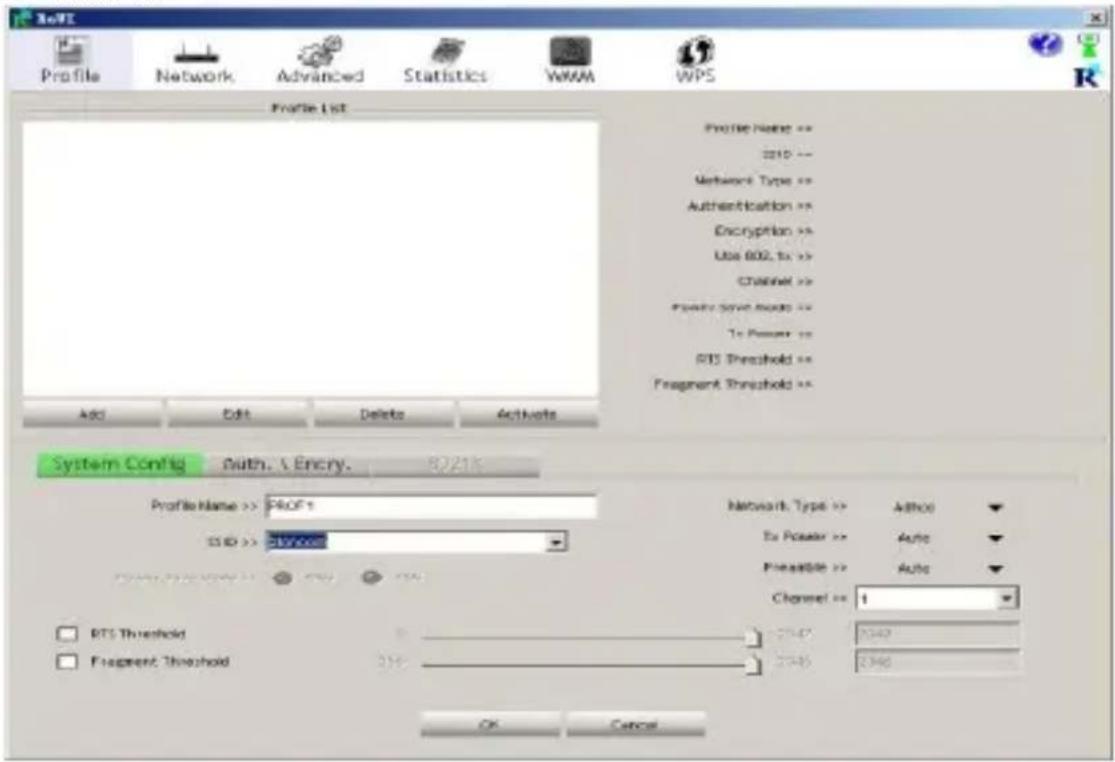
Paso 2:
Profile Network Advanced Statistics WAM WPS Profile List Profile Name >> SSID >> Network Type >> Authentication >> Encryption >> Use 802.1s >> Channel >> Power Save Mode >> To Power >> RTS Threshold >> Fragment Threshold >> Add Edit Delete Activate System Config Auth, & Enery: 3021% Profile Name >> PROF1 SSID >> PROF1 Proxy Show/All Order: CMM PMP RDS Threshold 0 Fragment Threshold 216 Network Type >> Action FX Provider >> Auto Preamble >> Auto Channel = 4 7547: 2347 2946: 2346 OK Cancel

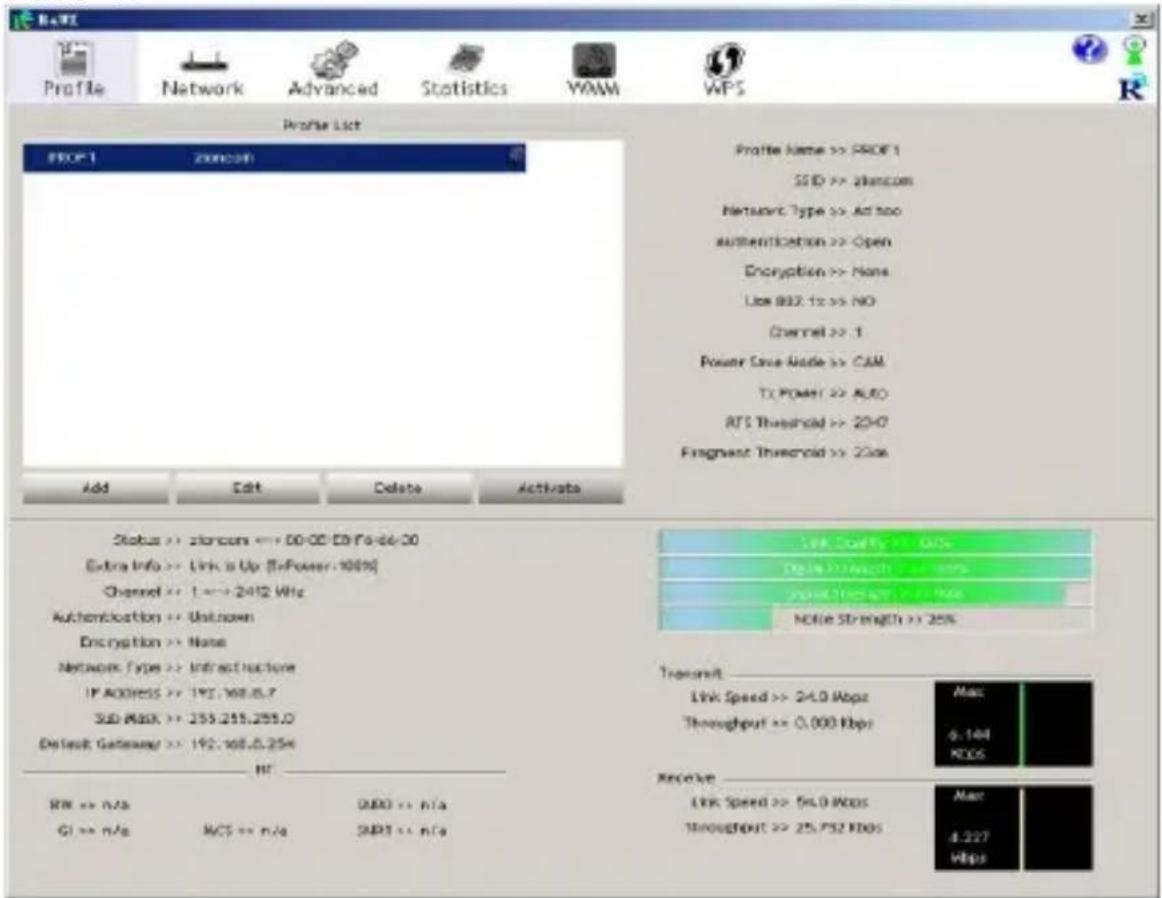
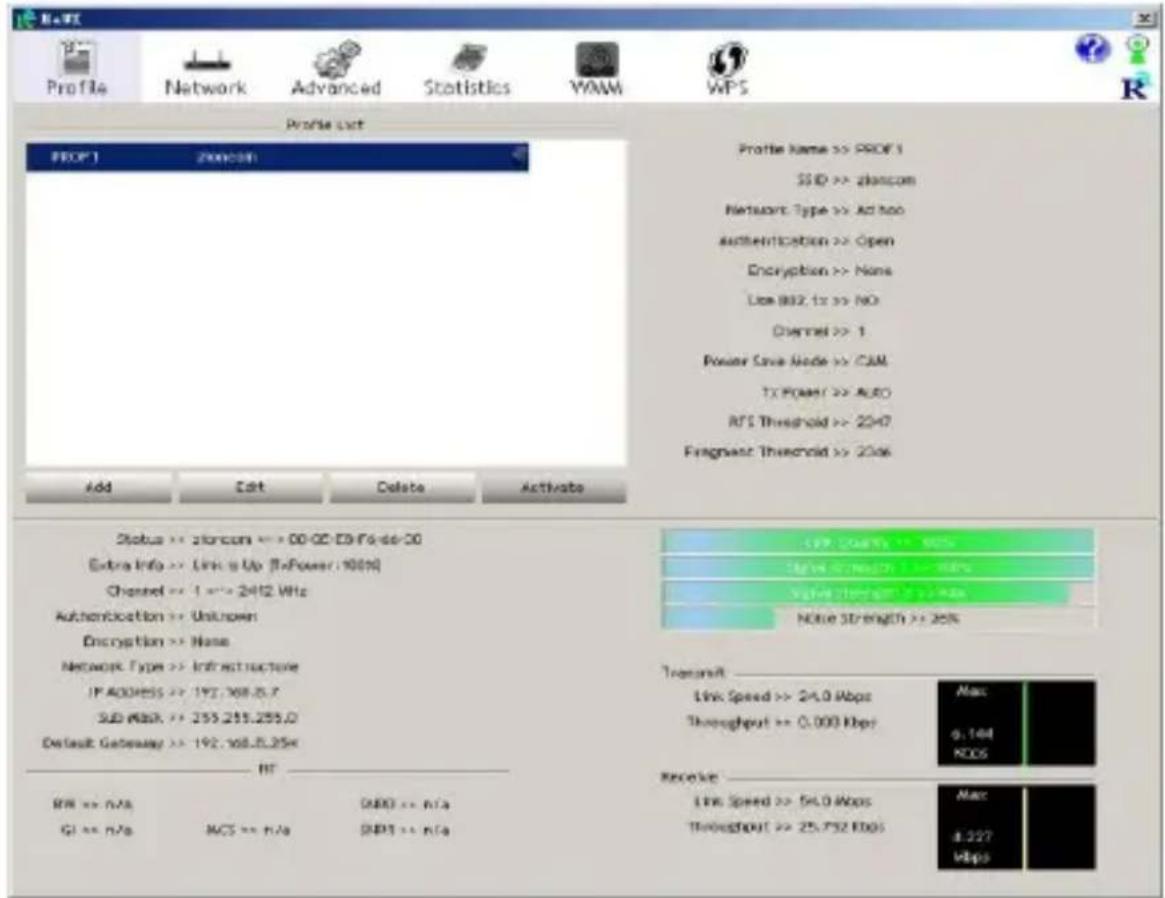
Paso 3:
Profile List PROF1 Zoon.com Profile Name >> PROF1 SSID >> zionscom Network Type >> Act too authentication >> Open Encryption >> None Use 802.1x >> NO Channel >> 1 Power Save Node >> CAM TX Power >> AUTO ATS Threshold >> 2940 Fragment Threshold >> 23xx Add Edit Delete Activate Status >> zionscom >> 00-00 EBITside-00 Extra Info >> Link is Up (InPower: 100%) Channel >> 1 >> 2412 Wtg Authentication >> Unknown Encryption >> None Network Type >> Infrastructure IP ADDRESS >> 192.168.6.7 SUD MASK >> 255.255.255.0 Default Gateway >> 192.168.0.25% NT RW >> n/a 0W0 >> n/a GI >> n/a NC5 >> n/a NCP3 >> n/a Link Speed >> 24.0 Mbps Throughput >> 0.000 Kbps Max 6.144 NCLS Receive Link Speed >> 54.0 Mbps Throughput >> 25.752 Mbps Max 4.227 Mbps

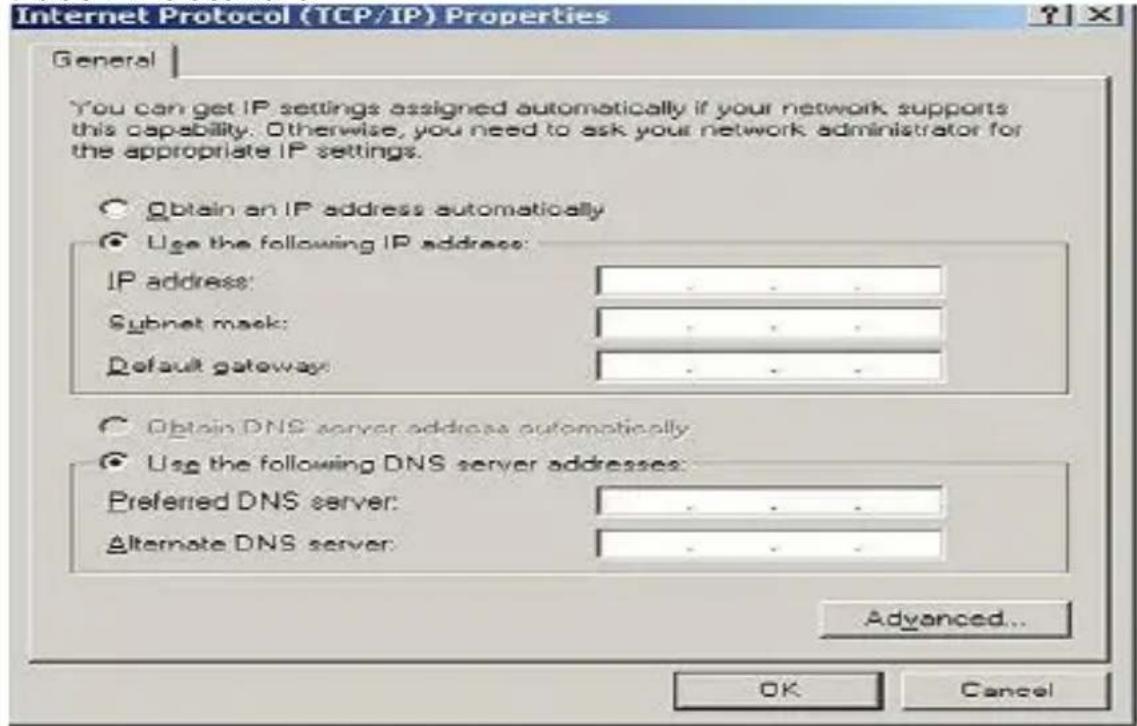
Paso 2: Obtendrá
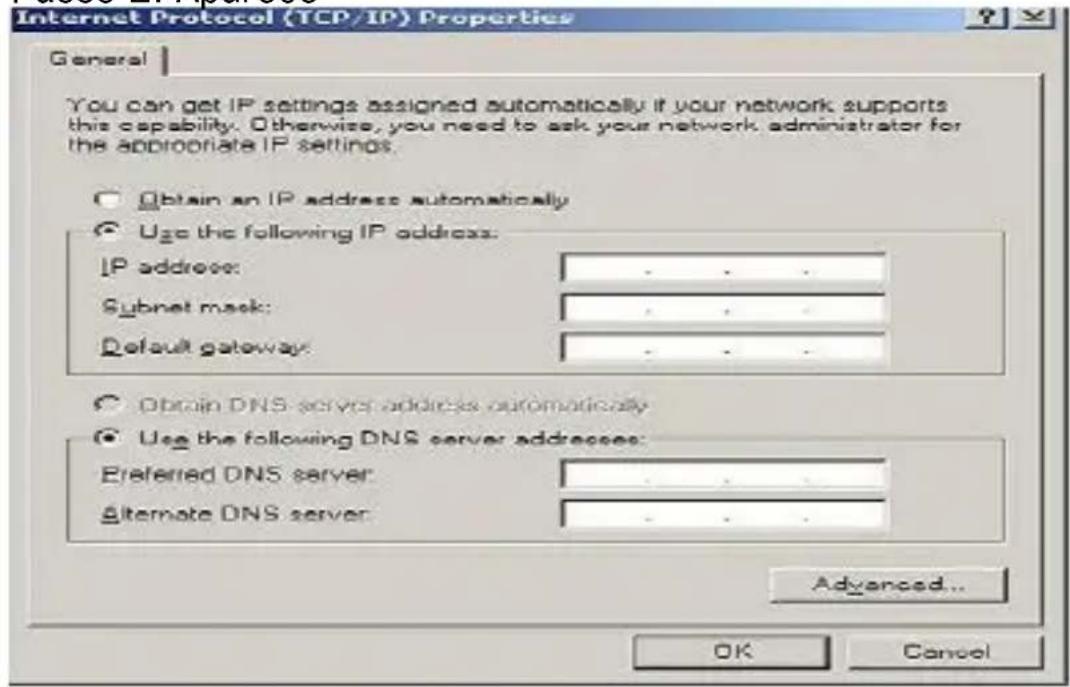
Internet Protocol (TCP/IP) Properties General You can get IP settings assigned automatically if your network supports this capability. Otherwise, you need to ask your network administrator for the appropriate IP settings. Obtain an IP address automatically Use the following IP address: IP address: .... Subnet mask: .... Default gateway: .... Obtain DNS server address automatically Use the following DNS server addresses: Preferred DNS server: .... Alternate DNS server: .... Advanced... OK Cancel

Figure WPS función

Chapter 1. Introduction and product description Chapter 1. In

1.1 Product Overview.
1.2 Features.

Chapter 2. Package Content Chapter 2. Package Content

Chapter 3. Specifications Chapter 3. Specifications

Chapter 4. Displantation Guidel Installation Guide

4.1 Hardware Installation.
4.2 Software Installation.
4.2.1 For Windows XP, Windows Vista, Windows 7.

Chapter 5. Configuration Guide Chapter 5. Configuration Guide

5.1 For Windows XP, Windows Vista, Windows 7.

5.2 WPS.

Chapter 6. Obtaining technical supporter 6. Obtaining techni

  1. Introduction and product description 1. Introduction and product descript

Thank you for choosing APPUSB150DA 150Mbps Wireless USB APPUSB150 AdapterAdapter

1.31P3oduProductOverview Product Overview

APPUSB150DA is designed to provide a high-speed and unrivaled wireless performance for your computer. With a faster wireless connection, you can get a better Internet experience, such as downloading, gaming, video streaming and so on.

Use the most advanced wireless networking technology IEEE802.11n standard. When 802.11n devices are in both connection ends, MIMO technology utilizes twice radio wave length band to increase three times transmission speed. APPUSB150DA supports WPS, which can help you create a wireless connection with effortless security setup, to prevent outside intrusion and protect your personal information from being exposed. It is a perfect solution for small office and home needs.

1.41FeatureFeatures

  • Complies with IEEE 802.11n (Draft 2.0), IEEE 802.11g, IEEE 802.11b standards.
  • Provides USB v2.0 interface.
    • 150Mbps wireless transmission rate.
  • Provides two methods of operation: Infrastructure and AD-Hoc.
  • Adopts CCA technology which automatically avoids channel conflicts using its channel selection feature.
  • Wi-Fi protected Security (WPS), set your security at a push of button.
  • Supports 64/128/152-bit WEP, complies with 128 bit WPA standard(TKIP/AES).
    • Supports MIC, IV Expansion, Shared Key Authentication, IEEE 802.1X.
    • Simple Configuration and monitoring.

• Supports WindowsXP 32/64, Vista 32/64, Win7 32/64, Linux, Mac.
- Seamlessly compatible with 802.11b/g/n devices.

2. Package Contents2. Package Contents

The following contents should be found in your box:

  • 1 APPUSB150DA 150Mbps Wireless USB Adapter
  • 1 Detachable wifi antenna.
  • Quick Installation Guide.

One Resource CD for APPUSB150DA, including:

  • Drivers and Ralink WLAN Utility.
  • User Guide.
  • Other Helpful Information

Note: Note:

Make sure that the package contains the above items. If any of the listed items are damaged or missing, please contact your distributor.

3. Specifications3. Specifications

StandardStandardIEEE802.11N, IEEE802.11G, IEEE802.11B
Modulation TypeMODIDAT/OCType 6-QAM/64-QAM
StandardStandardIEEE802.11N, IEEE802.11G, IEEE802.11B
InterfaceUSB v2.0
Frequency2.4~2.4835 GHz
Data Rate11n: Up to 150Mbps11g: Up to 54Mbps11b: Up to 11Mbps
Data SecurityData64/128/152bitWEP, WPA/WPA2WPA-RSK/WPA2-PSK(TKIP/AES)WPS(wi-fi Protected system)
LED IndicatorLEDACT (Connect with flashing)
Wireless RF Power11g:15±1dbm;11b:18±1dbm;11n:13±1dbm
Work Mode WorkAd-HocModeInfrastructure
Chipset ChipsetRalink3070
WPSWPSOne-touch button
Antenna Antenna1* detachable antenna
Receiver Receiver SensitivitySensitivity135M: -65 dBm@10% PER54M: -68 dBm@10% PER11M: -85 dBm@8% PER6M: -88 dBm@10% PER1M: -90 dBm@8% PER
Operating SystemWindowsXP32/64, Vista 32/64, Win7 32/64,Operating SystemLinux, Mac
EnvironmentEnvironmentOperating Temperature: 040°C (32°F~104°F)Storage Temperature: -40~7040°F~158°FRelative humidity: 10%~90% non-condensingStorage Humidity: 5%~95% non-condensing

4. Installation Guide

4.1 Hardware Installation

Plug the Adapter directly to the USB port on your computer.

Note:

The prompted Found New Hardware Wizard screen will pop up when the adapter is installed correctly.

4.2 Software Installation4.2 Software Installation

4.2.1 For Windows XP, Vista and 7.4.2.1 For Windows XP, Vista and 7.

  1. Install the driver

5.

a. Insert the installation CD into your CD-ROM driver,

double click the icon

Approx APPUSB150DA - Note: - 1

Approx APPUSB150DA - Note: - 2

to start setup.

Ralink Wireless LAN - InstallShield Wizard License Agreement Please read the following license agreement carefully RALINK Wireless Utility for Windows 98/ME/2000/XP Visits Copyright (C) Ralink TECHNOLOGY CORP. All Right Reserved. Thank you for purchasing Ralink Wireless product! SOFTWARE PRODUCT LICENSE The SOFTWARE PRODUCT is protected by copyright laws and international copyright treaties, as well as other intellectual property laws and treaties. The SOFTWARE PRODUCT is licensed, not sold. 1. GRANT OF LICENSE. This End-User License Agreement grants you the following: rights installation and Use. You may install and use an unlimited number of copies of the SOFTWARE PRODUCT. Reproduction and Distribution. You may reproduce and distribute on unlimited number of copies of the SOFTWARE PRODUCT; provided that each copy shall be a true and complete copy, including all copyright and trademark notices, and shall be accompanied by a copy of this EULA. Copies of the SOFTWARE PRODUCT may be distributed at a standalone product or included with your own product. I accept the terms of the license agreement I do not accept the terms of the license agreement InstallShield < Back Next > Cancel

b. Choose Ralink configuration Tool and click next to go on

Ralink Wireless LAN - InstallShield Wizard Setup Type Select the setup type that best suit your needs. Choose to install... • Install drivers and Raleigh WtLAN Units • Install drivers only Ralink Install Date: < Back Next > Cancel

c. Choose optimize for wifi mode and click next to go on

Ralink Wireless LAN - InstallShield Wizard Setup Type Select the setup type that best sells your needs Select Configuration Tool ● Ralink Configuration Tool ● Microsoft Zero Configuration Tool Insolve it < Back Next > Cancel

d. Choose Click Install to begin the installation and click Install to go on

Ralink Wireless LAN - InstallShield Wizard Ready to install the Prop-on The wizard is ready to begin installation. Click: Install to begin the installation If you want to review or change any or your installation settings, click Back. Click: Cancel to exit the wound. Ralink InstallShield < Back [Install] Cancel

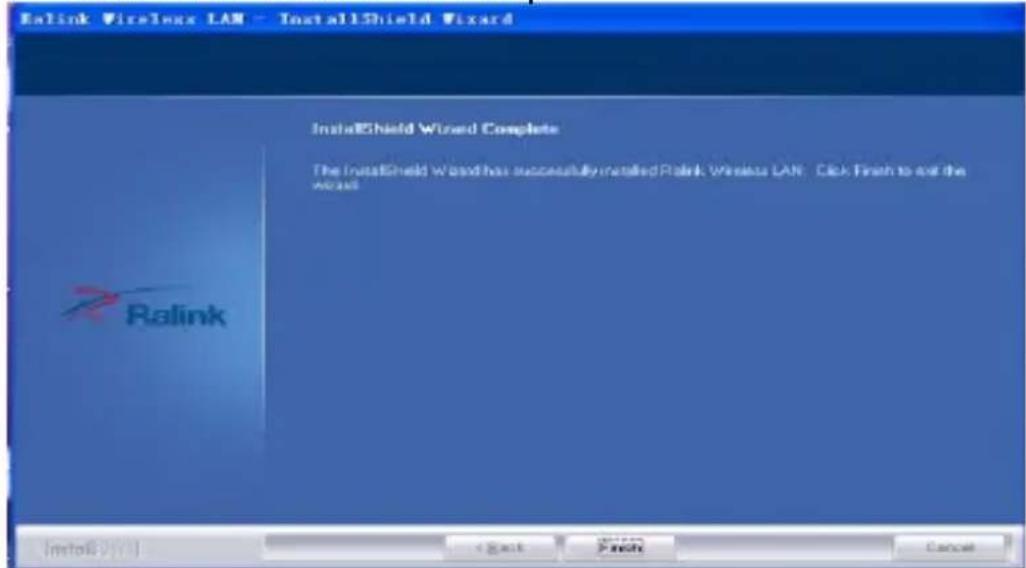
e. Click Finish to end the setup

Ralink Wireless LAN - InstallShield Wizard InstallShield Wizard Complete The InstallShield Wizard has successfully installed Ralink Wireless LAN. Click Finish to exit the Wizard Ralink InstallShield Wizard < Back Finish Cancel

5. Configuration Guide5. Configuration Guide

5.1 For Windows XP, Vista y 7.5.1 For Windows XP, Vista y 7.

  1. Plug in your usb wireless LAN adapter, it will be recognized and auto installed. Just confirmed it like below:
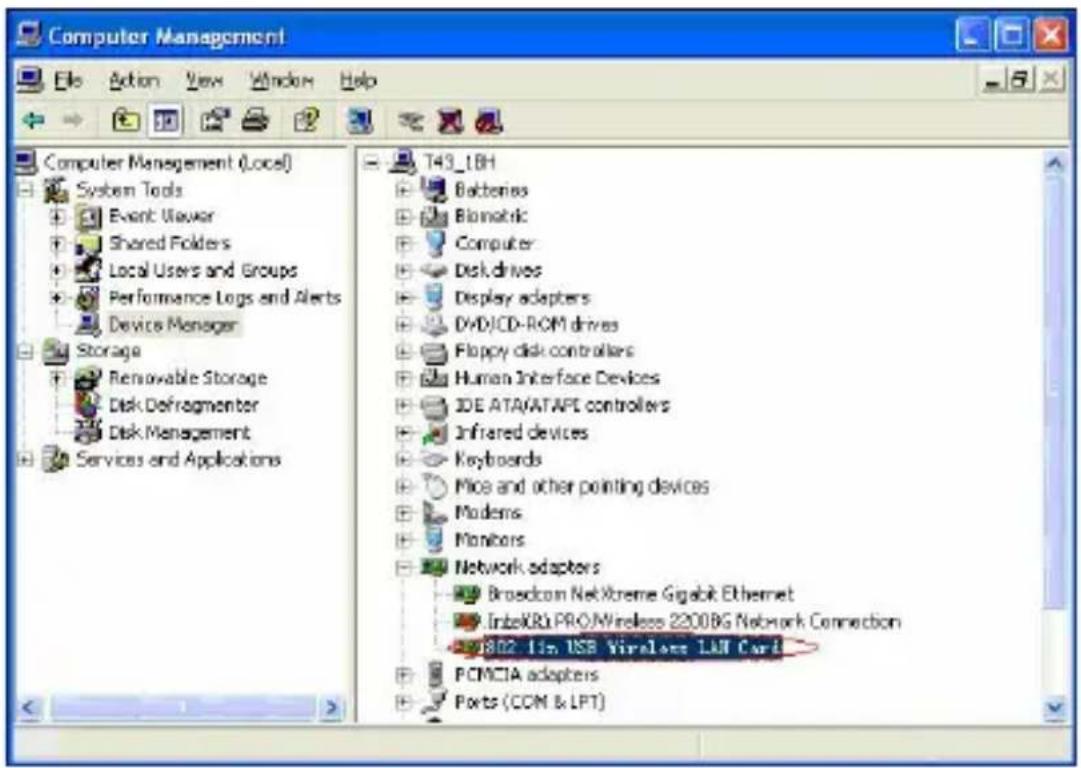
Computer Management File Action View Window Help Computer Management (Local) System Tools Event Viewer Shared Folders Local Users and Groups Performance Logs and Alerts Device Manager Storage Renovable Storage Disk Defragmenter Disk Management Services and Applications T43_1BH Batteries Bimatic Computer Disk drives Display adapters DVD/CD-ROM drives Floppy disk controllers Human Interface Devices IDE ATA/ATAPE controllers Infrared devices Keyboards Mice and other pointing devices Modems Monitors Network adapters Broadcom NetXtreme Gigabit Ethernet InfoKBU PRO/Wireless 2200BG Network Connection USB2.15.USB Wireless LAN Card PCMCIA adapters Ports (COM & LPT)

2. Make infrastructure connection Double click the icon in red circle
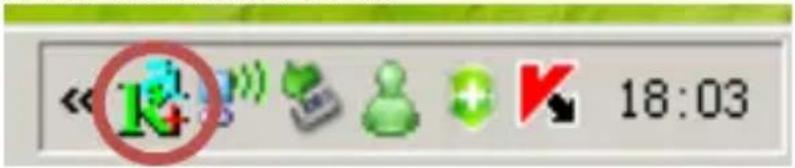
< K:5 18:03

You will see:

Approx APPUSB150DA - Make infrastructure connection Double click the icon in red circle - 2

bar | IP Address | Percentage (%) | | :--- | :--- | | 11 | 81% | | 11 | 81% | | 6 | 99% | | 11 | 50% | | 1 | 100% | | 1 | 100% | | 6 | 100% | Status: Zloncom; Link to Up; [ToPower: 100%] Channels: 1 <= 2412 MHz; central channel: 3 Authentication: > 40 9480 >> 28 Transmit Link Speed: 270.0 Mbps Throughput: 0.000 Kbps Receive Link Speed: 81.0 Mbps Max 0.000 Kbps

You can click the button Rescan to find which AP is in range, the will show on the window, choice one you want to connect, and click the button connect.

An infrastructure connection is accomplished.

Note, please choose correct channel setting as legally permitted. For example, if ch13 is permitted in your country, and you set your router at ch13, while you choose ch1-ch11(default setting), you will never find the AP, and you will have to choose ch1-ch13 setting in Advanced page as below.
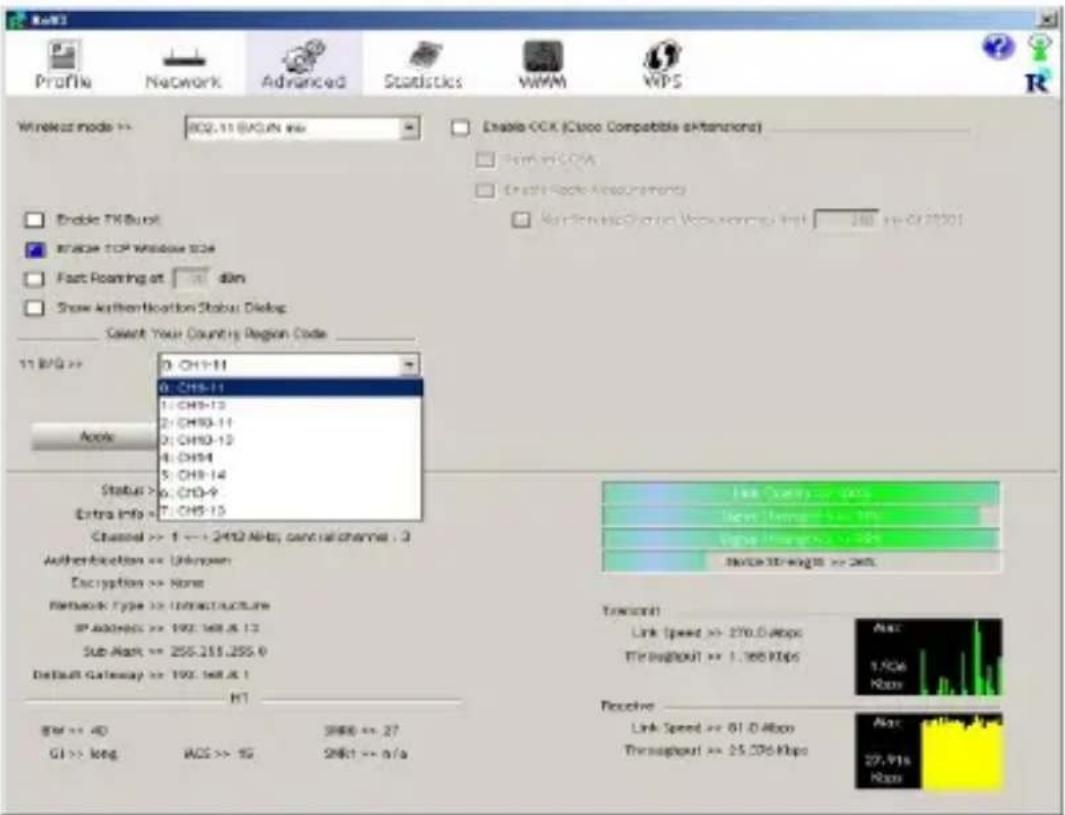
Profile Network Advanced Statistics WWW WPS Wireless node >: 802.11 (W)AN inc Enable OCK (Cisco Compatible eIntentions) Ener W/CCOS Enroll Rock Measurements Rerentek/Chang Vocuowang Intl 246 in-072901 Enable TX Burst Apache TCP Window S24 Fast Roaming at : dim Show Authentication Status Dialog Select Your Country Region Code 11 BPG >> 0: CH1-11 0: CH3-11 1: CH3-13 2: CH3-11 3: CH3-13 4: CH34 5: CH3-14 6: CH3-9 7: CH3-15 Status >: Extra Info >: Channel >> 1 -> 2402 MHz; central channel : 3 Authentication >= Unknown Encryption >= None Network Type >= Infrastructure IP Address >= 190.168.8.12 Sub Mask >= 255.255.255.0 Default Gateway >= 190.168.8.1 HT Befi <= 40 GI >> long AOS >> 1G S888 <= 27 S881 <= n/a Line Speed >= 200 Line Length >= 100 Line Width >= 0.5 Line X3-wg 00 -> 240. Transcort Link Speed >= 270.0 Mbps Throughput >= 1.366 Kbps Acc 1.5Km None Receptive Link Speed >= 81.0 Mbps Throughput >= 25.276 Kbps Acc 27.91s None

  1. Some help information in Ralink Wireless utility

• How to find out your ip address:

LoPE Profile Network Advanced Statistics VWWW VIPS Sorted by >> 55ID Channel Signal Show dEn AP List >> 11 B G 01% 81% 99% 50% 900% 900% 900% Rscen Connect Add to Profile Status: https://00-06-00-CF-03-B4 Extra Info: Link is Up (TriPamen 1000) Channel: 1.1.2412 MHz, central channel: 3 Authentication: Unknown Encryption: None Network Type: Infrastructure IP Address: 103-168.8-13 Site Name: 20K-20K-216.0 Default Channels: 103-168.8-1 HT 59K = 4) CI = 2mg SARQ = 26 DRA = n/a Link Speed: 01.0 Mbps Throughput: 25.444 Mbps MAC 25.444 900%

4. Make Ad-hoc mode connection

• 4.1 Make an Ad-hoc SSID
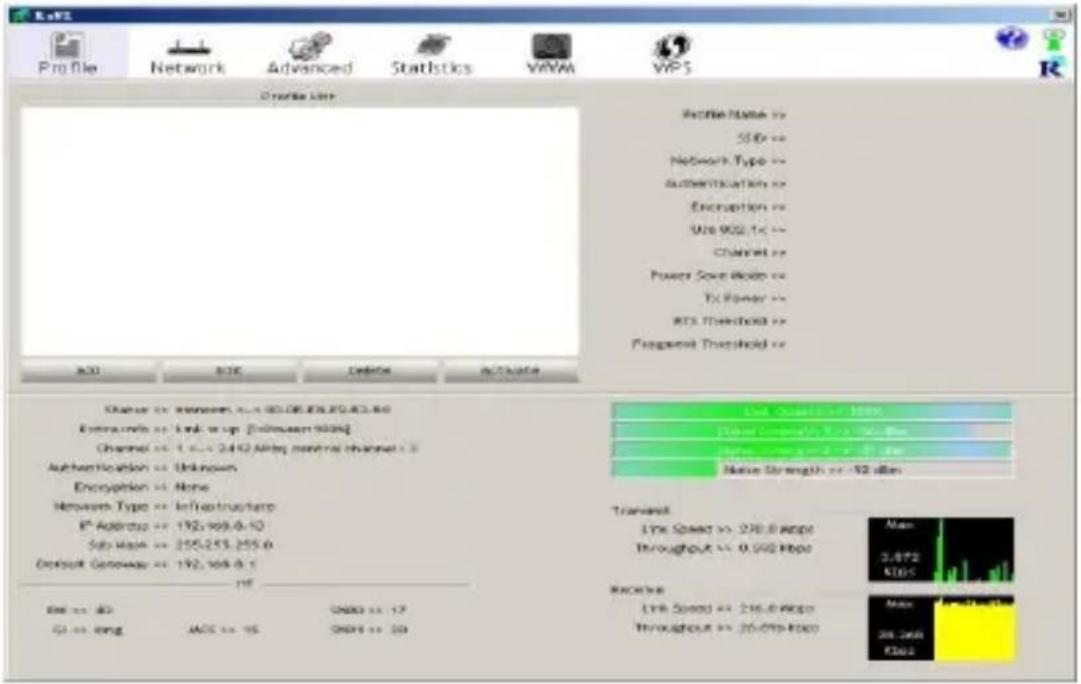
Profile List Profile Name: xx SSD: xx Network Type: xx Authentication: xx Encryption: xx Use 902.1x: xx Channel: xx Power Save Mode: xx TX Power: xx RTS Threshold: xx Fragment Threshold: xx A30 B16 Cm56 A30A40B30B30B30B30B30B30B30B30B30B30B30B30B30B30B30B30B30B30B30B30B30B30B30B30B30B30B30B30B30B30B30B30B30B3 Channel: xx External: xx External: xx External: xx External: xx External: xx External: xx External: xx External: xx External: xx External: xx External: xx External: xx External: xx External: xx External: xx External: xx External: xx External: xx External: xx External: xx External: xx External: xx External: xx External: xx External: xx Internal: xx Internal: xx Internal: xx Internal: xx Internal: xx Internal: xx Internal: xx Internal: xx Internal: xx Internal: xx Internal: xx Internal: xx Internal: xx Internal: xx Internal: xx Internal: xx Internal: xx Internal: xx Internal: xx Internal: xx Internal: xx Internal: xx Internal: xx Internal: xx Internal: xx External: xx External: xx External: xx External: xx External: xx External: xx External: xx External: xx External: xx External: xx External: xx External: xx External: xx External: xx External: xx External: xx External: xx External: xx External: xx External: xx External: xx External: xx External: xx External: xx Eastern: xx Eastern: xx Eastern: xx Eastern: xx Eastern: xx Eastern: xx Eastern: xx Eastern: xx Eastern: xx Eastern: xx Eastern: xx Eastern: xx Eastern: xx Eastern: xx Eastern: xx Eastern: xx Eastern: xx Eastern: xx Eastern: xx Eastern: xx Eastern: xx Eastern: xx Eastern: xx Eastern: xx Eastern: xx External: xx External: xx External: xx External: xx External: xx External: xx External: xx External: xx External: xx External: xx External: xx External: xx External: xx External: xx External: xx External: xx External: xx External: xx External: xx External: xx External: xx External: xx External: xx External: xx

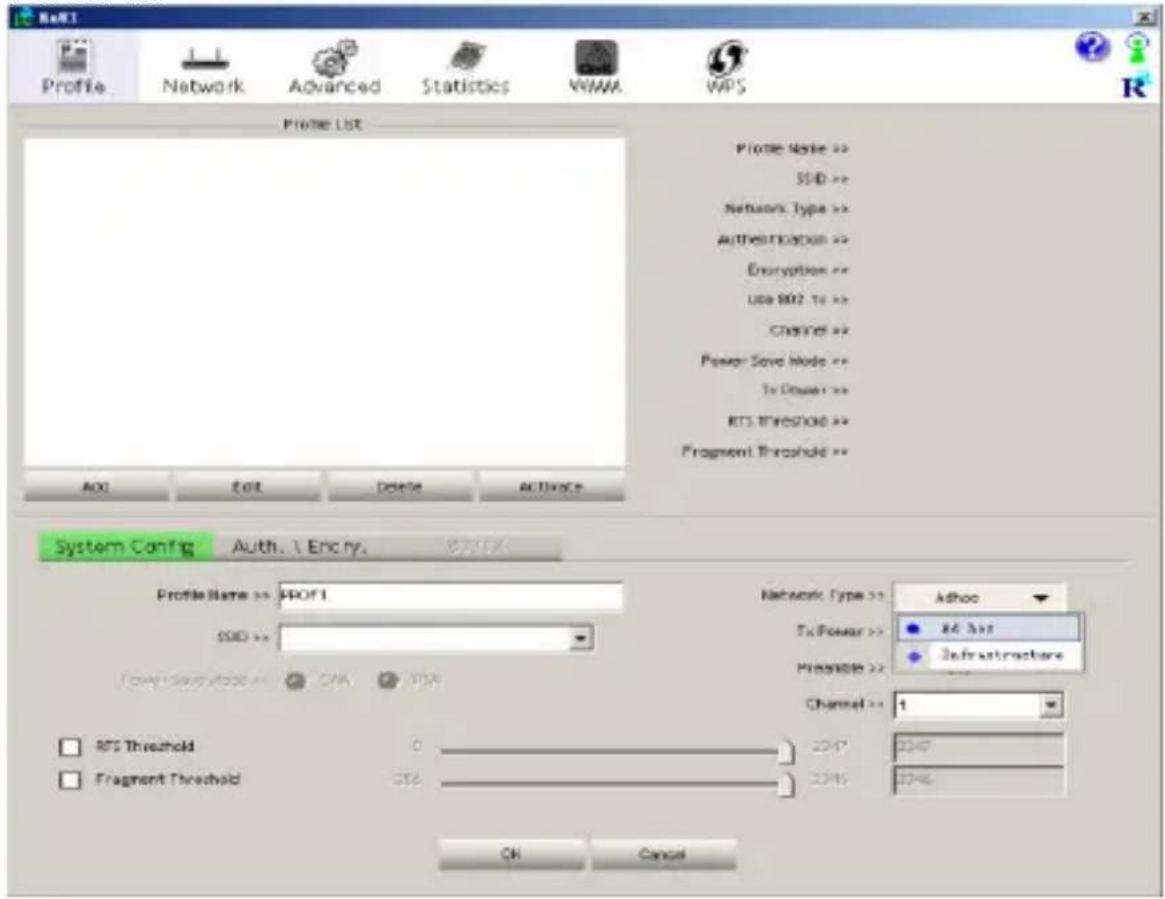
- Step 1:

R-8E Profile Network Advanced Statistics WMM WPS Profile List Profile Name >> SSID >> Network Type >> Authentication >> Encrytes >> Use 602 to >> Crashset >> Power Save Mode >> To Power >> RTS Threshold >> Fragment Threshold >> Add Edit Delete Activate System Config Auth. Y Encry. Profile Name >> PROF1 SDD >> Lower Style/Not >> OK Cancel Network Type >> To Power >> Pro承包 >> Channel >> RTS Threshold Fragment Threshold 2347 2348 Action Ad Invc Infrastructure OK Cancel

- Step 2:

L47 Profile Network Advanced Statistics VWAM MPS Profile List Profile Name: -- 2010:** Network Type: -- Authentication: -- Encryption: -- Use VGA to use Channel: -- Power Save Mode: -- To Power: -- DTC Threshold: -- Fragment: BL/WRMD: >> Add Edit Delete Activate System Config Auth. 1 Entry: Profile Name: 360000+ 500000+ Channel: 1 Access Type: Auto Portion Mode: Auto Channel: 1 RGB Threshold Fragment Threshold OK Cancel

- Step 3:

Profile List PROF1 SIO Profile Name => PROF1 SIO => switches Network Type => Ad hoc Authentication => Open Encryption => None Use SIO: 1x => NCI Channel => 1 Power Case Mode => CAM Tx Power => Auto RFS Threshold => 2347 Fragment Threshold => 2346 Status => switches => 00-80/CA Pivod-30 Extra info => Link: a Up (InPower: 100k) Channel => 1x => 2402 MHz Authentication => Unknown: Encryption => None Network Type => Infrastructure IP Address => 192, 965.0.7 Sub Pack => 258.2.95.255.0 Default Gateway => 192, 965.8.254 HP SPX >> 8.1p QI >> 8.1p AICS >> mfg SPB3 >> mfg SPB3 >> mfg Line Speed => 26.0 Mbps Throughput => 0.009 Kbps Max 6.146 E2ps Receivable Line Speed => 56.0 Mbps Throughput => 25.752 Mbps Max 4.227 Mtpo

- Step 1: At its property page, double click item Internet Protocol (TCP/IP)

Network and Dial-up Connections File Edit View Favorites Tools Advanced Help Address Network and Dial-up Connections Make New Connection Local Area Connection Local Area Connection 3 Local Area Connection 5 Network and Dial-up Connections Local Area Connection 3 Properties Type: LAN Connection Status: Network cable unplugger Ralink Wireless LAN Card v2 #1 Local Area Connection 3 Properties General Sharing Connect using Link Wireless LAN Card v2.840 Configure Components checked are used by this connection: Client for Microsoft Networks File and Printer Sharing for Microsoft Networks AE (S Protocol (IEEE 802.1x) v3.4.3.0 Internet Protocol (TCP/IP) Install... Uninstall Properties Description Allows your computer to access resources on a Microsoft network. Show icon in taskbar when connected

- Step 2: You will get

Internet Protocol (TCP/IP) Properties General You can get IP settings assigned automatically if your network supports this capability. Otherwise, you need to ask your network administrator for the appropriate IP settings. Obtain an IP address automatically Use the following IP address: IP address: .... Subnet mask: .... Default gateway: .... Obtain DNS server address automatically Use the following DNS server addresses: Preferred DNS server: .... Alternate DNS server: .... Advanced... OK Cancel

- Step 3: Fill the IP address blank, example as below:

Internet Protocol (TCP/IP) Properties General You can get IP settings assigned automatically if your network supports this capability. Otherwise, you need to ask your network administrator for the appropriate IP settings. Obtain an IP address automatically Use the following IP address: IP address: 192 . 160 . 1 . 1 Subnet mask: 255 . 255 . 255 . 0 Default gateway: Obtain DNS server address automatically Use the following DNS server addresses: Preferred DNS server: Alternate DNS server: Advanced... OK Cancel

- Step 4: Click ok to finish the setup
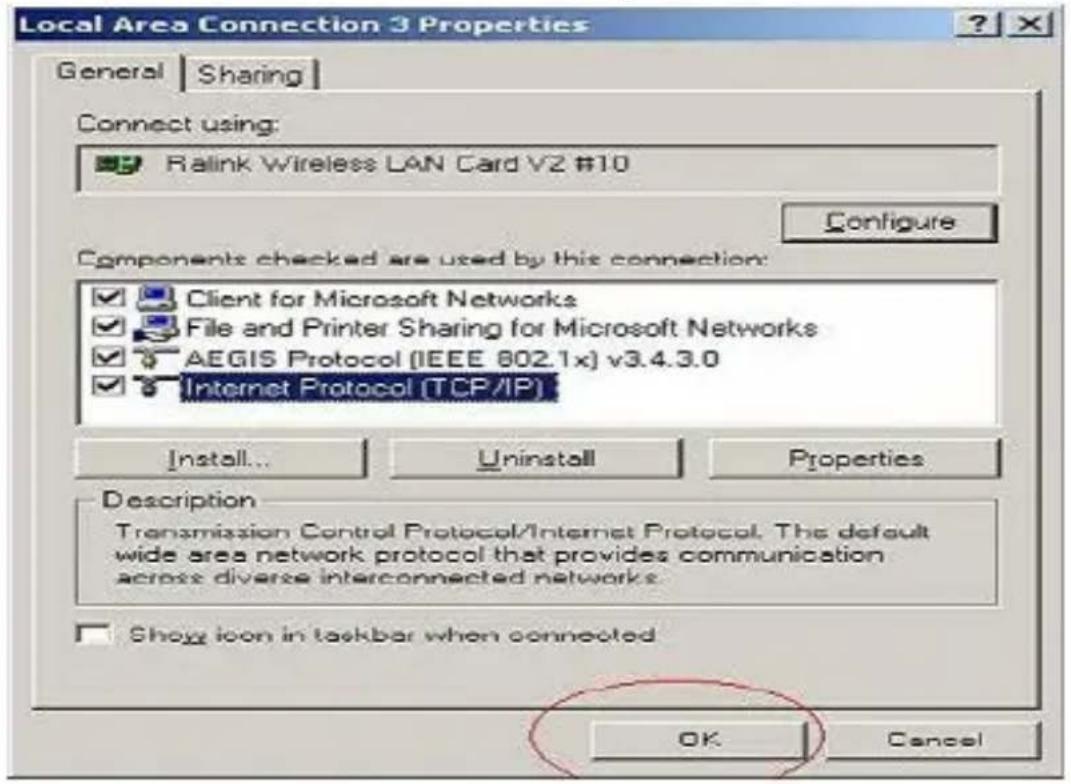
Local Area Connection 3 Properties General Sharing Connect using: Ralink Wireless LAN Card V2 #10 Configure Components checked are used by this connection: ✓ Client for Microsoft Networks ✓ File and Printer Sharing for Microsoft Networks ✓ AEGIS Protocol (IEEE 802.1x) v3.4.3.0 ✓ Internet Protocol (TCP/IP) Install... Uninstall Properties Description Transmission Control Protocol/Internet Protocol. The default wide area network protocol that provides communication across diverse interconnected networks. Show icon in taskbar when connected OK Cancel

• 4.3 Ad-Hoc setup for one point accomplished
• 4.4 Setup another Ad-hoc point as step 1, 2, 3 and 4.
- 4.5 Ad-hoc mode link accomplished. And you can visit each other.

Note: To make an AdNoteModeLink.DoRemember to choice the link. Do re same channel. Its static IP address should be in the same netsub, and the SSID should be the same too.and the SSID should be the same too.

5.2 WPS5.2 WPS

WPS (Wi-Fi Protected Setup) function allows you to quickly add a new wireless device to an existing network.

This wireless card supports Wi-Fi Protected Setup (WPS), you can establish a wireless connection between wireless card and router by using either Push Button Configuration (PBC) method or PIN method.

MPS IP List D: US Bureau AP1-AP2 DD-01 08-06-25-27 1 D: US Bureau Unknown_Temple DD-02-03-28-03-03 1 D: US Branch AP1-AP2-AP2-AP2-AP2-AP2-AP2-AP2-AP2-AP2-AP2-AP2-AP2-AP2-AP2-AP2-AP2-AP2-AP2-AP2-AP2-AP2-AP2-AP2-AP2-AP2-AP2-AP2-AP2-AP2-AP2-AP2-AP2-AP2-AP2- WPS For/No List EPC MPS Associate ID Progress in OK BPC MPS Provider ID MPS Status is Documented Automatically select the IP Type: AP1 == 08.03 IP-03.01 AD K/TA Info: UPX 96.60 [UPower 9999] Channel: 6 == 243V000 MHz Authentication: WPI Description: BIP-AU1 Network Type: Infrastructure IP Address: FPU_566.3.0 Set Array: 555.255.255.9 Default Gateway: FPU_566.3.2MB RT Bit == min G1 == B1p SOMC 11 m/s MPS = B1p SOMC 11 m/s Transport: UPX Speed: 54.8 Mbps Throughput: > 8.00 Mbps Record: UPX Speed: 08.3 Mbps Throughput: > 8.00 Mbps Access: USB One Mbps

Figure WPS function

Note: If you need Note: If you more information inform please consult the please call help Ralink WLAN help Ralink Utility.

6 OBTAINING TECHNICAL SUPPORT6 OBTAINING TECHNICAL SUPPORT

While we hope your experience with the APPUSB150DA 150Mbps Wireless USB Adapter is enjoyable and easy to use, you may experience some difficulties or have questions that this User Guide has not answered. Please contact your reseller and ask them for help first. If they are unable to resolve your issue, please contact our company.

This user manual is based on the latest version of our APPUSB150DA.

If your APPUSB150DA does support some special functions showed in the manual, please contact our technical support team. Thank you for your support and attention, for further operation details, please check the full version user manual of our APPUSB150DA.

http://www.approx.es/index.php?modo=catalogo&m=87&idcat=69

CONTENUCONTENU

  1. Guide de Configuration5. Guide de Configuration

Vous verrez:

Approx APPUSB150DA - Vous verrez: - 1

bar | Network | IP Address | | :--- | :--- | | 11 | 81% | | 11 | 81% | | 6 | 99% | | 11 | 50% | | 1 | 100% | | 1 | 100% | | 6 | 100% |

- Étape 2:

Profile Network Advanced Statistics WMM WKS Profile List Profile Name >> SSD >> Network Type >> Authentication >> Encrivation >> Use 602.1x >> Channel >> Power Save Mode >> Tx Power >> RTS Threshold >> Fragment Threshold >> ADD CRL SDDTo ALLToTo System Config Auth.1 Entry: R0200 ProfileName >> PROF1 SSD >> Chancor Network Type >> Adhoc Tx Power >> Auto Presence >> Auto Channel >> RBS Threshold 9 2547 2548 2549 Fragment Threshold OK Cancel

- Étape 3:

Profile Network Advanced Statistics WMAA WPS Profile List Profile Name => PROF1 SIO => okancom Network Type => Ad hoc Authentication => Open Engrption => None Use R02/Tr => NO Channel => 1 Power Save Alade => CAA Tr Power => Auto RTS Threshold => 2347 Fragment Threshold => 2386 Add Edit Delete Activate Status => Security => 800K-800K+sec30 Extra Info => Link to Up. [ToPower: 900%] Channel => 5 => 2412 Mhz Authentication => Unknown Encryption => None Network Type => infrastructure IP Address => 992.168.8.7 Sub Alaska => 200.265.265.0 Default Gateway => 992.168.8.264 HT SPD => n/a G1 => n/a MOS => n/a SPD => n/a LV3 < LWT => 100% Signal Strength => 100% Signal Strength => 100% Noise Strength => 20% Frontset Link Speed => 24.0 Mbps Throughput => 0.000 Mbps Max 6.194 Rppr Recency Link Speed => 54.0 Mbps Throughput => 25.752 Mbps Max 4.227 Mbps

Figure WPS fonction

Es erscheint dann:
Approx APPUSB150DA - - Étape 3: - 2

bar | Channel | Percentage (%) | | :--- | :--- | | 11 | 81 | | 11 | 81 | | 6 | 99 | | 11 | 50 | | 1 | 100 | | 1 | 100 | | 6 | 100 | Notre Strength >> 24N Line Speed >> 270.0 Mbps Throughput >> 0.000 Kbps Line Speed >> 61.0 Mbps Max Send by >x Send by >y Send by >z Send by >w Send by >x Send by >y Send by >w Send by >z Send by >w Send by >y Send by >w Send by >z Send by >w Send by >y Send by >w Send by >z Send by >w Send by >y Send by >w Send by >z Send by >w Send by >y Send by >w Send by >z Send by >w Send by >y Send by >w Send by >z Send by >u Send by >v Send by >w Send by >y Send by >w Send by >z Send by >w Send by >y Send by >w Send by >z Send by >u Send by >v Send by >w Send by >y Send by >w Send by >z Send by >u Send by >v Send by >w Send by >y Send by >w Send by >z Send by >u Send by >v Send by >w Send by >y Send by >w Send by >z Send by >u Send by >v Send by >w Send by >z Send by >u Send by >v Send by >w Send by >z Send by >u Send by >v Send by >w Send by >z Send by >u Send by >v Send by >w Send by >z Send by >u Send by >v Send by >w Send by >z Send by >u Send by >w Send by >z Send by >u Send by >v Send by >w Send by >z Send by >u Send by >v Send by >w Send by >z Send by >u Send by >v Send by >w Send by >z Send by >u Send by >v Send by >w Send by >z Send by >u Send by >u Send by >v Send by >w Send by >z Send by >u Send by >v Send by >w Send by >z Send by >u Send by >v Send by >w Send by >z Send by >u Send by >v Send by >w Send by >z Send by >u Send by >v Send by >w Send by >x Send by >= 40 S### >= 20

Schritt 2:
Profile Network Advanced Statistics WMM WPS Profile List Profile Name >> 2010 >> Network Type >> Authentication >> Encryption >> Use 800, to >> Channel >> Frame Show Mode >> To Power >> PTS Threshold >> Fragment Threshold >> Add Edit Delete Activate System Config Auth. & Encry. 8221% Profile Name >> Profile 55 ID >> Profile Network Type >> Author To Power >> Auto Possible >> Auto Channel >= 1 PTS Threshold Fragment Threshold 2745 2346 OK Cancel

Schritt 3:
Profile Network Advanced Statistics WWAM WPS Profile List PROF1 wconon Profile Name => PROF1 SSD => wconon Network Type => Ad hoc Authentication => Open Encryption => None Use 002.1x => NO Channel >> 1 Power Save Mode => CAN TX Power => Auto RTS Threshold => 2342 Fragment Threshold => 2346 ACU OUT Delete Activate Status => 200008 <= 60-8E+5E+9E+6630 Extra Info => Link is Up (ExPower: 1000) Cable => 1 <= 2492 MHz Authentication => Unknown Encryption => None Network Type => Infrastructures IP Address => 192.160.0.7 Sub Mask => 255.255.255.0 Default Gateway => 192.160.0.264 IE DA => a/a GI => a/a MAC => n/a SNR => n/a SNR1 => n/a Link Speed => 24.0 Mbps Throughput => 0.000 KBm Max 6.166 Mbps Recycle: Link Speed => 54.0 Mbps Throughput => 25.752 KBm Max 4.227 Mbps

bar | Channel | Percentage (%) | | :--- | :--- | | Nihuan | 11 | | HICVAN_SW1 | 6 | | RTL8-RS-VPN-OW | 11 | | shoncom | 1 | | Apache | 1 | | smk | 6 | | 81X | 81X | | 99X | 99X | | 50X | 50X | | 100X | 100X | | 100% | 100% | | 100% | 100% | Status: Zinconos ↔ 00-0E-CB-F9-B3-B4 Extra info: Link is Up [TuPower] 100% Channel: 1 ↔ 2412 bits; central channel: 0 Authentication: Unknown Encryption: None Network Type: Infrastructure IP Address: 192,168.6.13 Sub Mask: 295,255,255.0 Default Gateway: 192,168.8.1 HT BW: <= 40 SHRQ: <= 26 Line Speed: 81.0 Mbps Max Throughput: 0.000 Kbps Receive Max

Passo 2:
EAFE Profile Network Advanced Statistics WAM WPS Profile List Profile Name >> SSID >> Network Type >> Authentication >> Encryption >> Use 802. to >> Channel >> Power Save Mode >> Tx Power >> RTS Threshold >> Fragment Threshold >> Add Edit Delete Active System Config Auth.1 Entry: 60200 Profile Name >> SSID >> Power Save Mode <> RSS Threshold Fragment Threshold Network Type >> Tx Power >> Presetion >> Channel >> OK Cancel Network Type >> Tx Power >> Auto Auto Channel >> RSS Threshold Fragment Threshold 2547 2547 2546 OK Cancel

Passo 3:
Profile List PROF1 200030 Profile Name => PROF1 SSID => zionscom Network Type => Ad hoc authentication => Open Encryption => None Use 992.1x => NO Channel => 1 Power Save Mode => CAM Tx Power => Auto RTS Threshold => 2247 Fragment Threshold => 2246 ADO EDIT Delete ACTuate Status => Zionscom => 00-05-REFAe-ex-CI Extra Info => Link: Up (InPower: 980) Channel => 1 => 2442 MHz Authentication => Unknown Encryption => None Network Type => Infrastructure IP Address => 192.168.0.7 Sub Mask => 255.255.255.0 Default: Gateway => 192.168.0.25x NT Link Speed => 26.0 Mbps Throughput => 0.000 Kbps Max 6.144 NCOS Receiver Link Speed => 56.0 Mbps Throughput => 25.752 Kbps Max 4.227 Mbps

Figura funzione WPS

Aparece:

Approx APPUSB150DA - - Étape 3: - 7

bar | Channel | Speed (Mbps) | | :--- | :--- | | Midvan | 812 | | HIDVAN_GW1 | 998 | | RTLBIHG-VPN-GW | 508 | | zioncom | 100% | | Approx | 100% | | zmk | 100% | | Channel | Speed (Mbps) | | :--- | :--- | | Midvan | 812 | | HIDVAN_GW1 | 998 | | RTLBIHG-VPN-GW | 508 | | zioncom | 100% | | Approx | 100% | | zmk | 100% | | Channel | Speed (Mbps) | | :--- | :--- | | Midvan | - | | HIDVAN_GW1 | - | | RTLBIHG-VPN-GW | - | | zioncom | - | | Approx | - | | zmk | - | | Channel | Speed (Mbps) | | :--- | :--- | | Midvan | - | | HIDVAN_GW1 | - | | RTLBIHG-VPN-GW | - | | zioncom | - | | Approx | - | | zmk | - | | Channel | Speed (Mbps) | | :--- | :--- | | Midvan | - | | HIDVAN_GW1 | - | | RTLBIHG-VPN-Gw | - | | zioncom | - | | Approx | - | | zmk | - | | Channel | Speed (Mbps) | | :--- | :--- | | Midvan | - | | HIDVAN_GW1 | - | | RTLBIHG-VPN-GW | - | | zioncom | - | | Approx | - | | zmk | - | | Channel | Speed (Mbps) | | :--- | :--- | | Midvan > 00:00:00:09:43:44 Extra Info > Link Is Up [TxPower:100%] Channels > 1 <= 2412 kHz central channel : 3 Authentication > Unknown Encryption > None Network Type > Infrastructure IP Address > 192.166.8.13 Sub Mask > 255.255.255.0 Default Gateway > 192.166.8.1 HT RW >> 40 SNRQ >> 26 Signal AP List >> Line: 270.0 Mbps Signal Strength: 7.667 Noise Strength: 26% Transmit Link Speed > 270.0 Mbps Throughput > 0.000 Kbps Receptive Link Speed > 61.0 Mbps Map: 0.000 Kbps Map:

Passo 1:
Profile Network Advanced Statistics WAAA WPS Profile List Profile Name >> SSD >> Network Type >> Authentication >> Encryption >> USB 802.16 >> Channel >> Power Save Mode >> To Power >> RTS Threshold >> Fragment Threshold >> Add Exit Delete ACTivate System Config Auth. / Encry. Profile Name > PROF1 SSD >> Power Save Mode > CHA RTS Network Type >> To Power >> Presence >> Channel >> RTS Threshold 0 Fragment Threshold 2247 2246 2245 OK Cancel Adhoc Rd Sub Infrastructure

Passo 2:
Profile Network Advanced Statistics WMM WPS Profile List Profile Name >> SSID >> Network Type >> Authentication >> Encryption >> Use 802.12 >> Channel >> Power Source Mode >> To Power >> RTS Threshold >> Fragment Threshold >> Add Edit Delete Activate System Config Auth, & Enery. 3221% Profile Name >> PROF: SSID >> S-670000 Proxy Source Mode: CUB PUB Network Type >> Tx Power >> Aggregate >> Channel >> RTS Threshold Fragment Threshold 0 2547 2548 OK Cancel

Passo 3:
Profile List PROF 1 200008 Profile Name >> PROF 1 SDD >> zloncom Network Type >> Active Authentication >> Open Encryption >> None Line 882.1x >> NO Channel >> 1 Power Save Node >> CAM TX Power >> AUTO RTS Threshold >> 2247 Fragment Threshold >> 2246 Add Edit Delete Activate Status >> Storage >> 00-CC-CH-F6-de-30 Extra Info >> Link is Up (ToPower: 10000) Channel >> 1 ==> 2412 MHz Authentication >> Unknown Encryption >> None Network Type >> Infrastructure IP ADDRESS >> 192.168.25.7 SUB MASK >> 255.255.255.0 Default Gateway >> 192.168.25.25x RT RW >> n/a G1 >> n/a ACS >> n/a DWD >> n/a DWP >> n/a $19.00008 > 90% $14.00008 > 90% $12.00008 > 90% Noise Strength >> 25% Transmit Link Speed >> 24.0 Mbps Throughput >> 0.000 Mbps Max a.144 KOS Receive Link Speed >> 54.0 Mbps Throughput >> 25.752 Mbps Max a.227 Mbps

Passo 2: Aparece
Internet Protocol (TCP/IP) Properties General You can get IP settings assigned automatically if your network supports this capability. Otherwise, you need to ask your network administrator for the appropriate IP settings. Obtain an IP address automatically Use the following IP address: IP address: .... Subnet mask: .... Default gateway: .... Obtain DNS server addresses automatically Use the following DNS server addresses: Preferred DNS server: .... Alternate DNS server: .... Advanced... OK Cancel

Manual assistant
Powered by Anthropic
Waiting for your message
Product information

Brand : Approx

Model : APPUSB150DA

Category : Network card / adapter