
Home Bread Baguette PF6101 - Bread maker TEFAL - Free user manual and instructions
Find the device manual for free Home Bread Baguette PF6101 TEFAL in PDF.


| Product Type | Bread Maker |
| Brand | Tefal |
| Model | Home Bread Baguette PF6101 |
| Dimensions (L x W x H) | Approx. 30 x 30 x 30 cm |
| Weight | Approx. 5.5 kg |
| Power Supply | 220-240V, 50/60Hz |
| Power Consumption | 650 W |
| Bread Capacity | Up to 1 kg (2 lbs) |
| Number of Programs | 12 automatic programs |
| Special Programs | Baguette, Whole Wheat, Gluten-Free, Dough, etc. |
| Crust Control | 3 crust levels: light, medium, dark |
| Timer Delay | Up to 15 hours |
| Keep Warm Function | Automatic 1-hour keep warm |
| Viewing Window | Yes, for monitoring baking process |
| Non-Stick Pan | Yes, removable and dishwasher safe |
| Measuring Cup and Spoon | Included |
| Safety Features | Automatic shut-off, cool-touch handle |
| Cleaning | Wipe exterior with damp cloth; pan and kneading blade washable |
| Spare Parts Available | Replacement pans and kneading blades available |
| Manual Languages | Multiple (EN, FR, DE, etc.) |
| Warranty | 2 years standard |
Frequently Asked Questions - Home Bread Baguette PF6101 TEFAL
User questions about Home Bread Baguette PF6101 TEFAL
0 question about this device. Answer the ones you know or ask your own.
Ask a new question about this device
Download the instructions for your Bread maker in PDF format for free! Find your manual Home Bread Baguette PF6101 - TEFAL and take your electronic device back in hand. On this page are published all the documents necessary for the use of your device. Home Bread Baguette PF6101 by TEFAL.
USER MANUAL Home Bread Baguette PF6101 TEFAL
1 ОПИСАНИЕ
1. Разопаковане

- Старт
10. Стоп



1 FOPIS
1. VYBALENÍ
2. PŘED POUŽITÍM SPOTŘEBIČE
3. ČIŠTĚNÍ NÁDOBY

4. SPUŠTĚNÍ
8. SPUSŤTE PROGRAM
10. ZASTAVENÍ PROGRAMU
11. VYJMUTÍ CHLEBA


1 LEÍRÁS
1. KICSOMAGOLÁSA
8. PROGRAM INDÍTÁSA
10. A PROGRAM LEÁLLÍTÁSA




1. ROZPAKOWANIE
3. CZYSZCZENIE FORMY
8. WŁĄCZANIE PROGRAMU



11. WYJMOWANIE CHLEBA (TEN ETAP NIE DOTYCZY „CHLEBA O RECEPTURZE WŁASNEJ“)

1. DEZAMBALAREA
2. ÎNAINTE DE A UTILIZA APARATUL
3. CURĂȚAREA CUVEI

4. PORNIRE

8. START PROGRAM
10. ÎNTRERUPEREA UNUI PROGRAM


1. ODSTRÁNENIE OBALU
2. PRED POUŽITÍM SPOTREBIČA
3. VLOŽTE PRÍSADY


4. SPUSTENIE
6. ZVOL'TE HMOTNOST CHLEBA
8. SPUSTITE PROGRAM
10. ZASTAVTE PROGRAM

11. VYKLOPTE SVOJ CHLIEB Z NADOBKY (Táto
etapa sa netýka režimu „Jednotlivé chleby“)


4 ČISTENIE A ÚDRŽBA

- Ak je to potrebné, odmontujte vrchnák a umyte ho v teplej vode.
SK

• Vyberte z pekárne nádobu na chlieb.
• Jemne si pomúčte pracovnú dosku.
- Vyberte cesto z nádoby a položte ho na dosku.
- Z cesta vytvarujte gul'u a nožom ju rozdel'te na 4 časti.
- Dostanete tak 4 bochníky s rovnakou hmotnostou, ktoré musíte následne vyformovat do tvaru bagiet.

- Bread pan
- Kneading paddles
- Lid with window
- Control panel
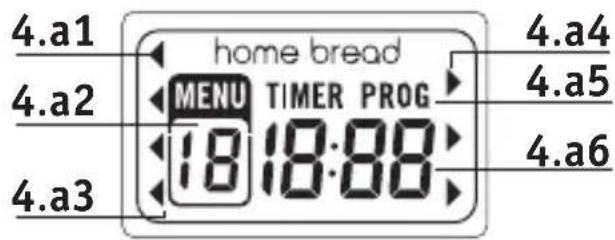
a. Display screen
a1. Baguette shaping indicator
a2. Menu selection
a3. Weight indicator
a4. Crust colour
a5. Delay start
a6. Timer display
b. Choice of programmes
c. Weight selection
d. Buttons for setting the delayed start and setting the time for programme 12
e. Operating indicator light
f. On/off button
g. Select crust colour
- Baguette cooking support
- 2 non-stick baguette baking trays
Accessories:
- Slitter
- a. Tablespoon measure = tbsp
b. Teaspoon measure = tsp - Hook for lifting out kneading paddles
- Brush
- Graduated beaker
2 SAFETY INSTRUCTIONS IMPORTANT SAFEGUARDS
- This appliance is not intended to be operated by means of an external timer or separate remote-control system.
-
This appliance is intended for domestic household use only. It is not intended to be used in the following applications, and the guarantee will not apply for:
-
staff kitchen areas in shops, offices and other working environments;
- farm houses;
- by clients in hotels, motels and other residential type environments;
- bed and breakfast type environments.
- This appliance is not intended for use by persons (including children) with reduced physical, sensory or mental capabilities, or lack of experience and knowledge, unless they have been given supervision or instruction concerning use of the appliance by an adult responsible for their safety.
Children should be supervised to ensure
that they do not play with the appliance.
- If the power supply cord is damaged, it must be replaced by the manufacturer or its service agent or a similarly qualified person in order to avoid a hazard.
- This appliance can be used by children aged from 8 years and above and persons with reduced physical, sensory or mental capabilities or lack of experience and knowledge if they have been given supervision or instruction concerning use of the appliance in a safe way and understand the hazards involved. Children shall not play with the appliance. Children under the age of 8 years should not use this appliance unless continuous supervision by a responsible adult is given. Cleaning and user maintenance shall not be made by children unless they are older than 8 years and supervised.
Keep the appliance and its cord out of reach of children less than 8 years.
- Your appliance is intended for domestic use inside the home only at an altitude below 4000 m.
- Caution: risk of injury to improper use of the appliance.
- Caution: the surface of heating element is subject to residual heat after use.
- The appliance must not be immersed in water or any other liquid.
- Do not exceed the quantities indicated in the recipes.
In the bread pan:
- do not exceed a total of 1500 g of dough,
- do not exceed a total of 930 g of flour and 15 g of yeast.
In the baguette baking trays:
- Do not cook over 450 g of dough at a time.
- Do not use more than 280 g of flour and 6 g of yeast per cooking batch.
- Use a cloth or a wet sponge to clean the parts in contact with food.
- Please read the instructions carefully before using your appliance for the first time. The manufacturer cannot be held responsible in the event of improper use.
- For your safety, this appliance conforms with applicable standards and regulations (Directives on low voltage, electromagnetic compatibility, materials in contact with foodstuffs, environment, etc.)
- Use on a flat, stable heat-resistant work surface, away from any contact with water and never use underneath a built in kitchen alcove.
- Make sure that the power it uses corresponds to your electrical supply system. Any error in connection will cancel the guarantee.
- Your appliance must be plugged in to an earthed power socket otherwise you run the risk of receiving an electric shock which may cause serious injury. For your own safety you must make sure that your earthing complies with the mains installation standards applicable in your country. If your mains installation isn't earthed you must ask an approved electrician to bring your mains up to the required standards before you plug any appliances in.
- Your appliance is designed for indoor home use only.
- Unplug the appliance when you have finished using it and when you clean it.
- Do not use the appliance if:
- the supply cord is defective or damaged,
- the appliance has fallen to the floor and shows visible signs of damage or does not function correctly.
In either case, the appliance must be sent to the nearest approved service centre to eliminate any risk. See the guarantee documents.
All interventions other than cleaning and everyday maintenance by the customer must be performed by an authorised service centre.
- Do not immerse the appliance, power cord or plug in water or any other liquid.
- Do not leave the power cord hanging within reach of children.
- The power cord must never be close to or in contact with the hot parts of your appliance, near a source of heat or over a sharp corner.
- Never move the appliance while it is in use.
- Do not touch the viewing window during and just after operation. The window can reach a high temperature.
- Do not pull on the supply cord to unplug the appliance.
- Only use an extension lead which is in good condition and which has an earth plug, and ensure that the lead wire has a cross section at least equal to that supplied with the product.
- Do not place the appliance on other appliances.
- Do not use the appliance as a source of heating.
- Never use the appliance to cook preparations other than bread and jam.
- Do not place paper, card or plastic in the appliance and place nothing on it.
- Should any part of the appliance catch fire, do not attempt to extinguish it with water. Unplug the appliance. Smother flames with a damp cloth.
For your safety, only use accessories and spare parts designed for your appliance.
- At the end of the programme, always use oven gloves to handle the pan or hot parts of the appliance. The appliance and baguette accessory become very hot during use.
- Never obstruct the air vents.
- Be very careful, steam can be released when you open the lid at the end of or during the programme.
- The sound pressure level of this appliance has been measured as being 69 dBA.(decibel A-weighting)

Environment protection first!
i Your appliance contains valuable materials which can be recovered or recycled.
Leave it at a local civic waste collection point.
3 BEFORE USING FOR THE FIRST TIME

1. REMOVE PACKAGING
- Take your appliance out of its packaging. Keep your warranty card and carefully read the operating instructions before using your appliance for the first time - Install your appliance on a stable surface. Remove the accessories and any stickers either inside or on the outside of the appliance.


Warning
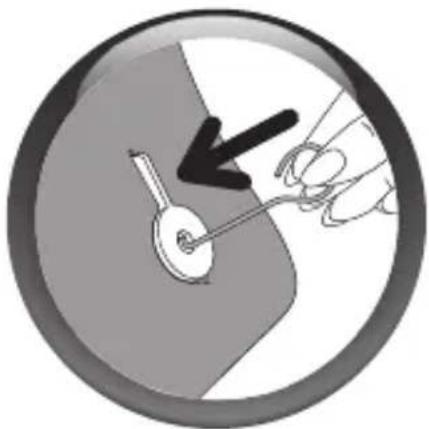
• This scoring tool is very sharp. Handle it with care.
2. BEFORE USING YOUR APPLIANCE
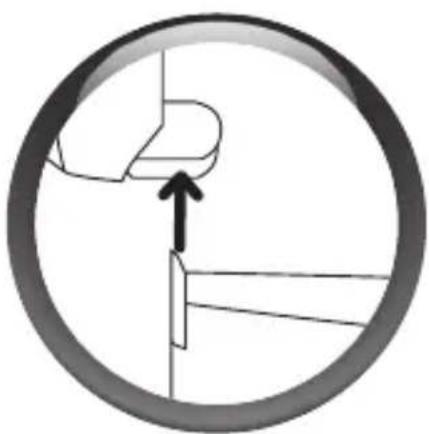
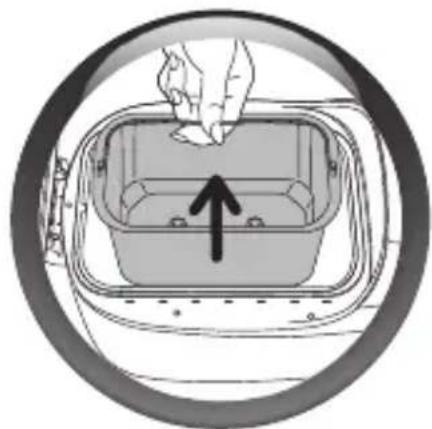
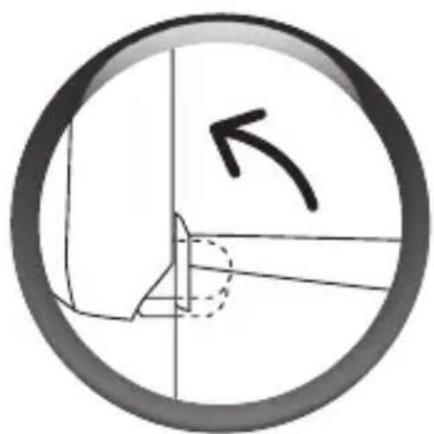
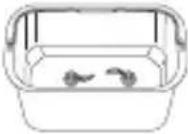
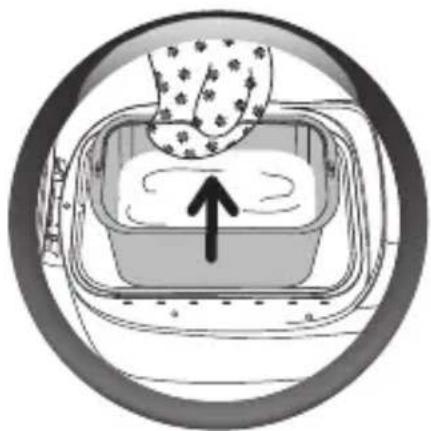
- Remove the baking pan by pulling the handle upwards.
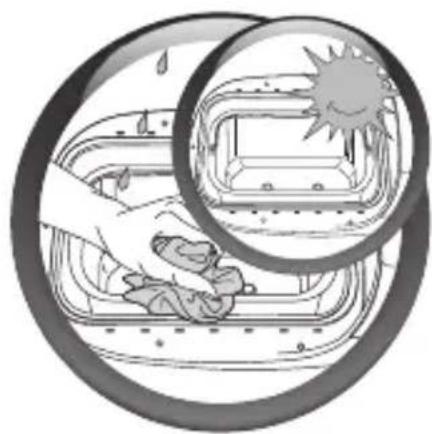

3. CLEANING THE PAN
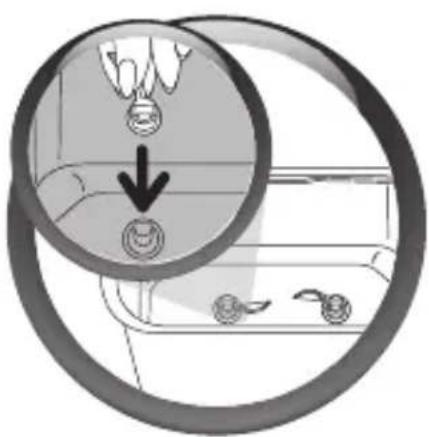
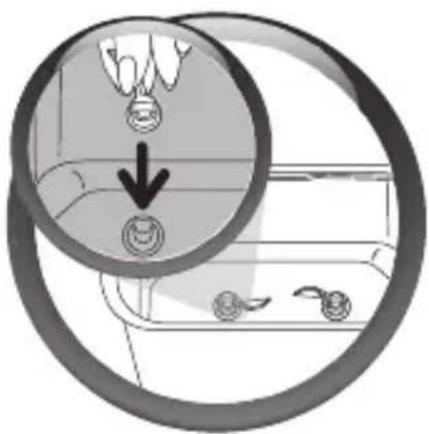
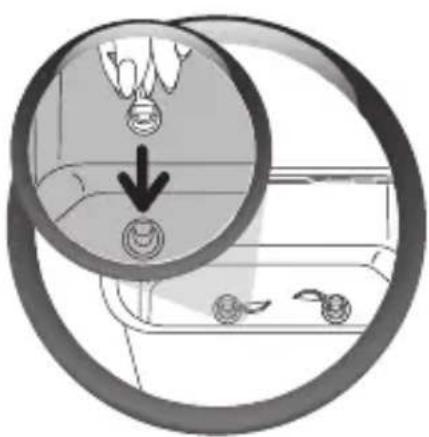
- Clean the pan of the appliance with a damp cloth. Dry thoroughly. A slight odour may be given off when used for the first time. - Then fit the mixers.

The kneading is improved if the kneading blades are set facing each other.
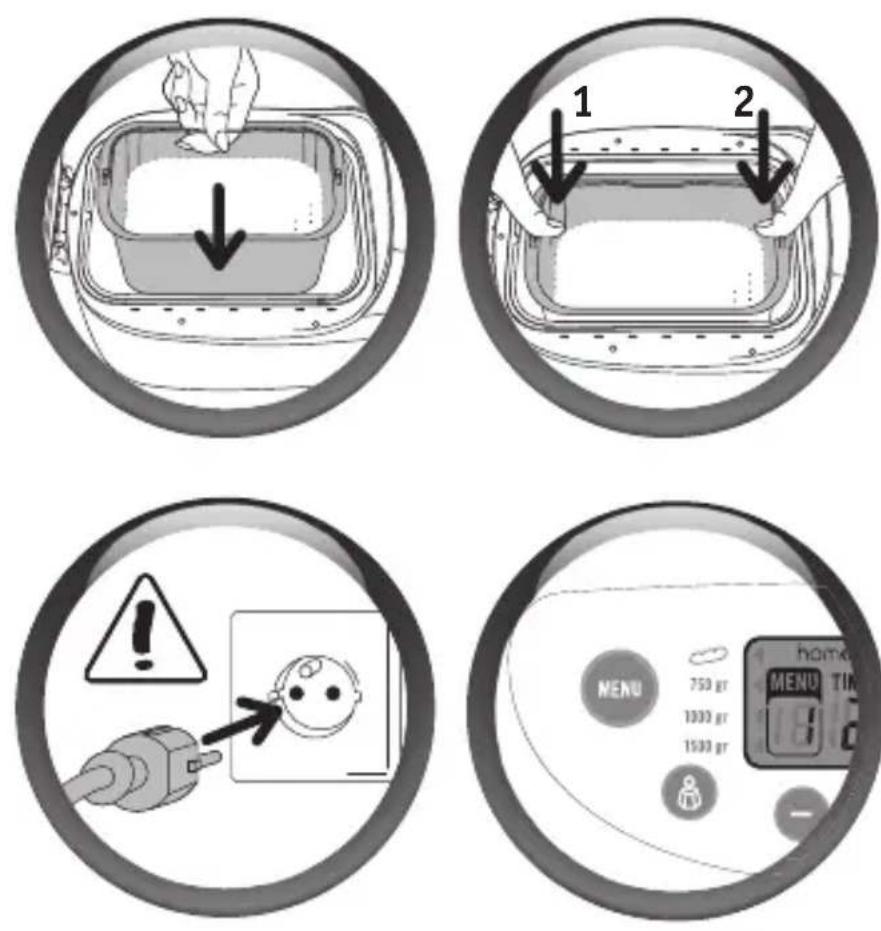
4. STARTING UP
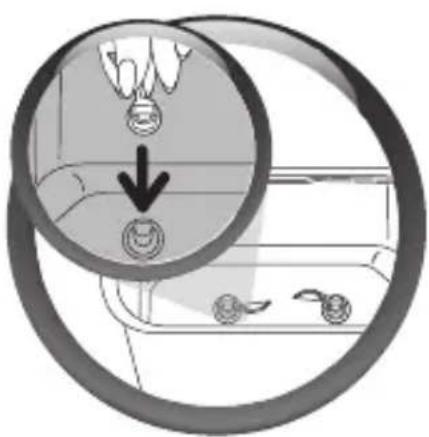
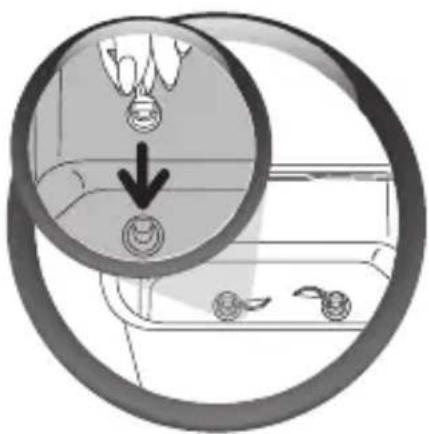
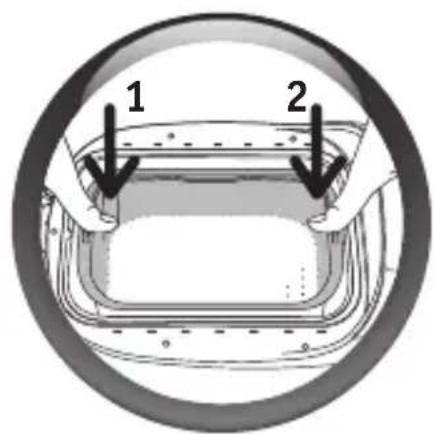
- Place the bread pan in the breadmaker.
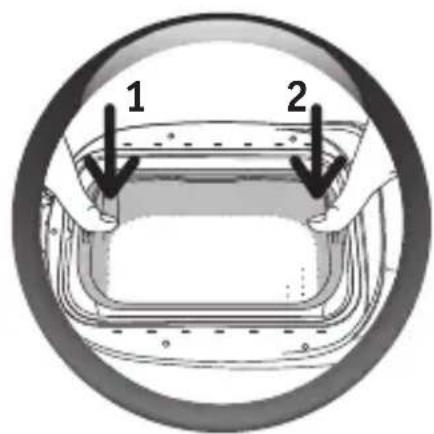
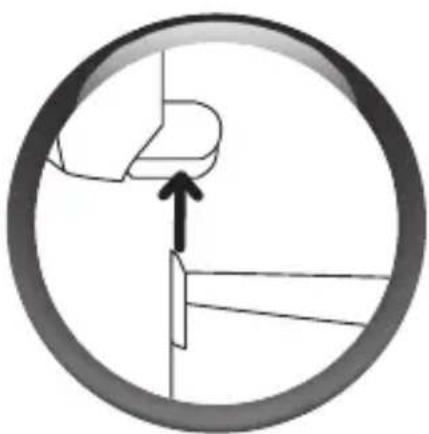
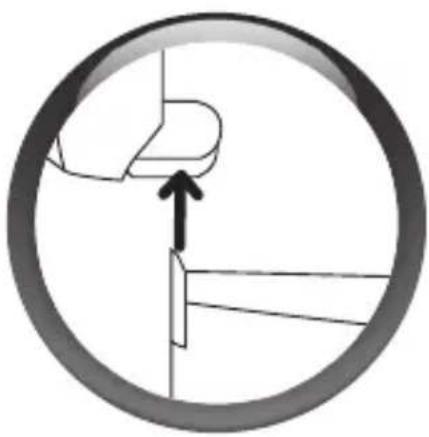
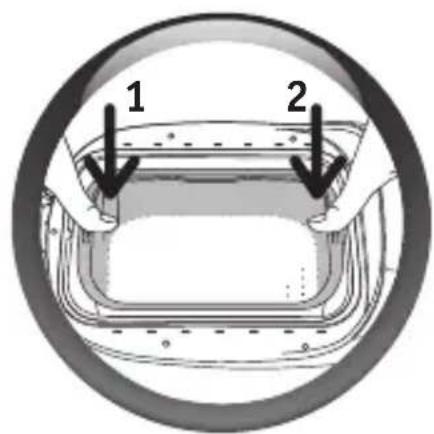
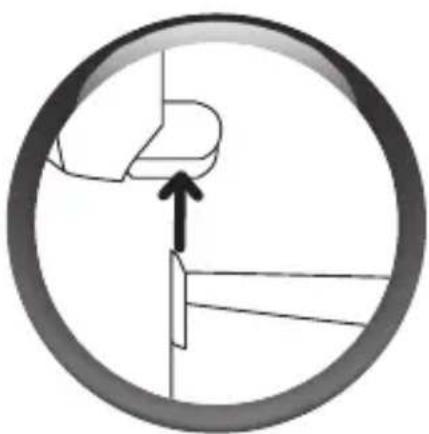
- Replace the bread trough and press on one side then the other to engage the mixer drives and clip it in on both sides.
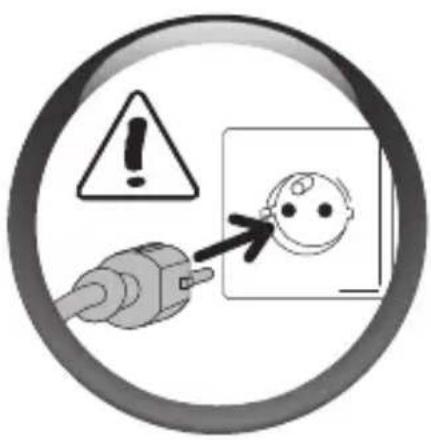
- Unwind the lead and connect it to an earthed electrical socket.
• After the acoustic signal, programme 1 and medium browning are displayed by default.

To get to know your bread maker we suggest trying the BASIC BREAD recipe for your first loaf. See the "BASIC BREAD PROGRAMME" instructions on page 166.

5. SELECT A PROGRAMME (SEE CHARACTERISTICS IN THE TABLE ON THE NEXT PAGE)
- A default setting is displayed for each programme. You will therefore have to select the desired settings manually.
- Choosing a programme triggers a series of steps which are carried out automatically one after another.

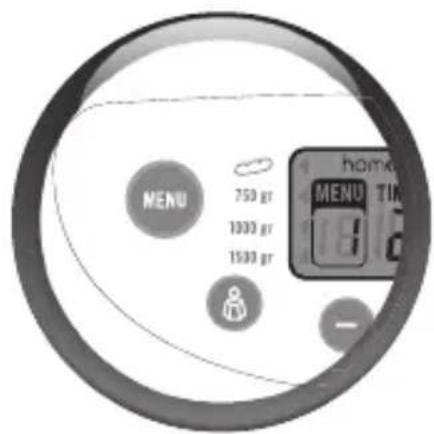
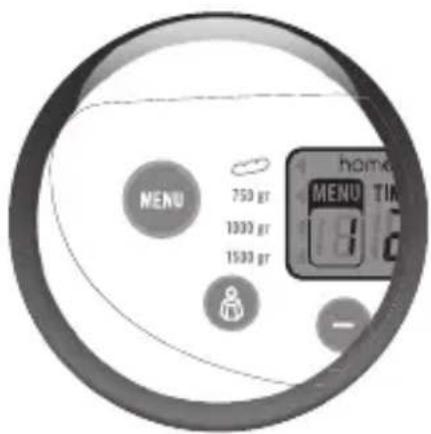
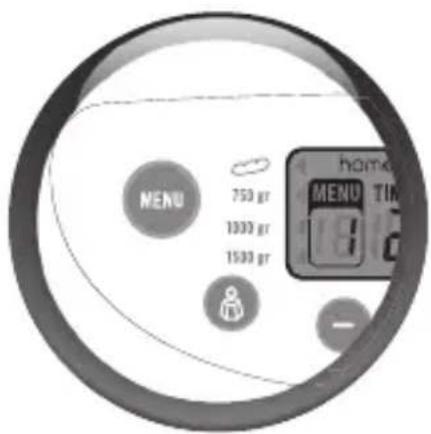
- Press the "menu" button to choose from a variety of different programmes. To scroll through programmes 1 to 16, successively press the "menu" button.
- The time corresponding to the programme selected is automatically displayed.
| ACCESSORIES | DISCOVER THE PROGRAMS PROPOSED IN THE MENU | |
 | 1. Baguette | The Baguette program allows you to make your own baguettes at home.The program consists of two stages.1st stage > Mixing the dough and letting it rise2nd stage > CookingThe cooking cycle starts after you have prepared the dough (in order to help you do this, we have included a complementary guide in your bread-making machine). |
| 2. Sugared Baguettes | For small sweet breads: Viennese, milk breads, brioches etc... | |
| 3. Cooking your Baguettes | Program 3 allows you to cook your baguettes from previously prepared dough. The machine should not be left unattended while program 3 is running. To interrupt the cycle manually before it ends, press the button continually for more than 3 seconds. | |
 | 4. Basic White Bread | This programme allows you to make most white bread recipes using wheat flour. |
| 5. French Bread | Programme 5 is for traditional French white bread recipes airy in the middle. | |
| 6. Wholemeal Bread | Programme 6 is selected when using flour for wholemeal bread. | |
| 7. Sweet Bread | Programme 7 is suited to recipes which contain more fat and sugar. If you use ready made mixes for making brioches or milk loaves, do not exceed 1000 g of dough in total. | |
| 8. Super Fast White Bread | Programme 12 is specific to the QUICK bread recipe which you will find in the recipe book supplied with the appliance. The water for this recipe must be 35°C maximum. | |
| 9. Gluten Free Bread | This kind of bread is suitable for people who cannot digest the gluten (coeliac disease) in several grains (wheat, barley, rye, oats, kamut, spelt, etc.). The tank should always be cleaned so that there is no risk of contamination with other flours. In the case of a strict gluten-free diet, make sure that the yeast used is also gluten free. The consistency of gluten-free flours means they do not mix as well. The dough therefore has to be folded in from the edges during the kneading process with a flexible plastic spatula. Gluten-free bread is thicker in consistency and lighter in colour than normal bread. The only weight available for this program is 1,000g. | |
| ACCESSORIES | 10. Salt Free Bread | Reducing salt consumption can help reduce the risks of cardio-vascular problems. |
 | 11. Omega 3 Rich Bread | This bread is rich in Omega 3 fatty acid thanks to its balanced and nutritionally whole recipe. Omega 3 fatty acids contribute to the health and well functioning of the cardio-vascular system. |
| 12. Loaf Cooking | This baking programme enables you to cook for 10 to 70 minutes only, which time can be adjusted by groups of 10 minutes, for light, medium or dark browning. It can be selected on its own and used:a) in association with the raised dough programme,b) to heat or crisp up bread that has already been cooked and which has cooledc) to finish baking in the event of a prolonged power cut during a baking cycle. This programme cannot be used to bake individual loaves. The breadmaker should not be left unattended when using programme 12. To stop the cycle before the end, stop the programme manually by pressing the button for a long time. | |
| 13. Bread Dough | The Leavened Dough programme does not bake. It is a kneading and rising programme for all leavened doughs such as pizza dough, rolls, sweet buns. | |
| 14. Cake | Program 14 makes it possible to make pastries and cakes using baking powder. For this programme, only the 1000g weight is available. | |
| 15. Jam | Programme 15 automatically cooks jam in the tank. The fruit must be roughly chopped and pitted. | |
| 16. Pasta Dough | Programme 16 only kneads. It is for unleavened pasta, like noodles for example. | |


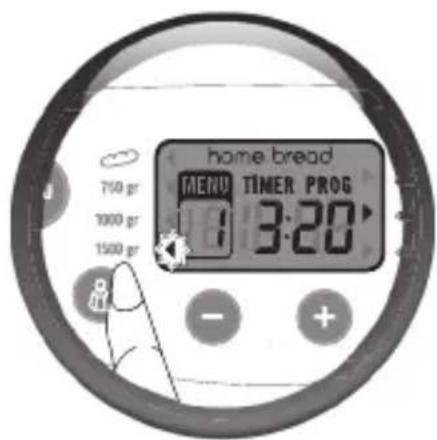
6. SELECTING THE BREAD WEIGHT
- The bread weight is set by default at 1500 g. This weight is shown for informational purposes.
- Some recipes will not allow you to make a 750 g bread.
• Refer to the recipe details for more information.
• The setting of the weight is not available for programmes 3, 9, 12, 13, 14, 15, 16.
- For programmes 1 to 2, you can select two weights: - Approximately 400 g for 1 batch (4 baguette), the visual indicator lights up opposite 750 g. - Approximately 800 g for 2 batches (8 baguette), the visual indicator lights up opposite 1500 g.
- Press the button to set the chosen product – 750 g, 1000 g or 1500 g. The indicator light against the selected setting comes on.
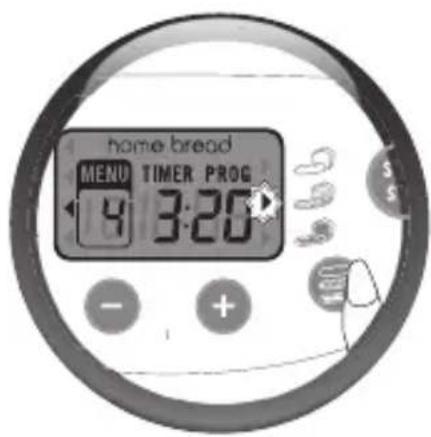
7. SELECTING THE CRUST COLOUR
• The crust colour is set to medium by default.
• The browning setting is not available for programmes 13, 15, 16. Three choices are possible: LOW/MEDIUM/HIGH.
- If you want to change the default setting, press the button until the indicator light facing the desired setting comes on.
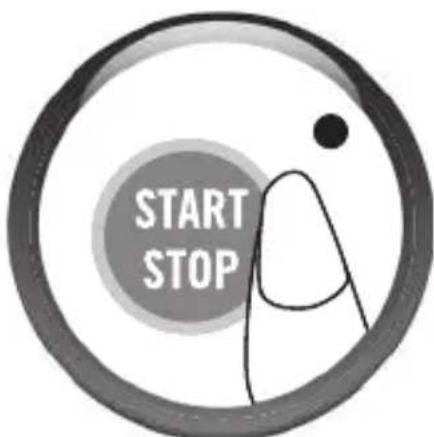
8. STARTING A PROGRAMME
- In order to open the selected program, press the button. The program starts. The corresponding time appears on screen. The successive stages follow one another automatically.
9. USING THE DELAY START PROGRAMME
- You can programme the appliance so that your bread is ready at the time you choose, up to 15 hours in advance.
The timer programme is not available for programmes 3, 8, 12, 13, 14, 15, 16.
This stage takes place after selecting the programme, browning level and weight.
The programme time is displayed. Calculate the time difference between when you start the programme and time when you want the preparation to be ready. The machine automatically includes the duration of the programme cycles. Use buttons and to display the time calculated (upwards and downwards). Pressing quickly gives movement in 10 min steps. Holding the button down longer gives continuous movement in 10 min steps.
Example 1: it is 20:00 and you want your bread to be ready at 7:00 the next morning. Programme 11 hours using buttons + and - . Press button 📄 . An acoustic signal is emitted.
PROG is displayed and the 2 dots on the timer flash. The countdown begins. The pilot lamp lights up. No acoustic signal will be emitted while a programme is running in delayed timer mode. If you make a mistake or wish to change the time setting, press and hold down button until it emits an acoustic signal. The default time is displayed.
Start the operation again.
Example 2: In the case of baguette programme 1, it is 8:00 and you want your baguettes to be ready at 19:00h. Programme 11 hours using the + and - keys. Press the 📋 button. An acoustic signal is emitted. PROG is displayed and the 2 dots on the timer flash. The countdown begins. The pilot lamp lights up. If you make a mistake or wish to change the time setting, press and hold down button until it emits an acoustic signal. The default time is displayed.
Start the operation again.
PLEASE NOTE: you should plan to shape your baguettes 47 min. before the end of the cooking time (i.e. at 18:13) or, if making a double batch, 2X47 min. before the end of the cooking time (i.e. at 17:26).
For cooking times for other individual roll programmes, see the table of cooking times on p. 316.
The shaping times for the individual roll programmes are not included in the calculation of the delayed start times.
Some ingredients are perishable. Do not use the time programme for recipes containing: fresh milk, yogurt, cheese or fresh fruit.
In delayed start, silent mode is automatically activated.
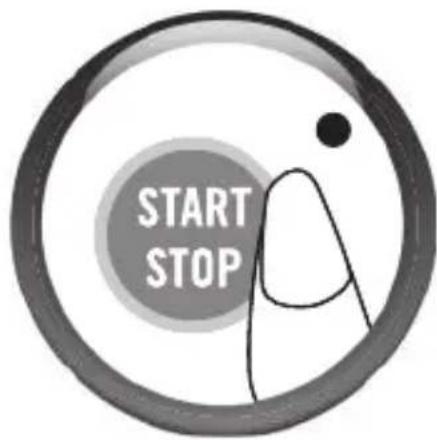
10. STOPPING A PROGRAMME
- At the end of the cycle, the programme stops automatically; 0:00 appears. Several beeps are emitted and the operating indicator light blinks.
- To stop the programme underway or cancel the delayed start, press and hold the button 5 sec.


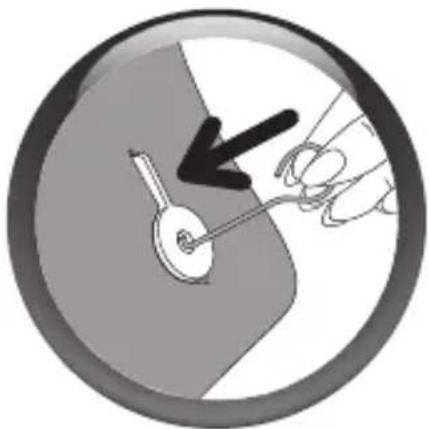

11. TAKING YOUR BREAD OUT OF THE PAN
(This step does not concern the "baguette")
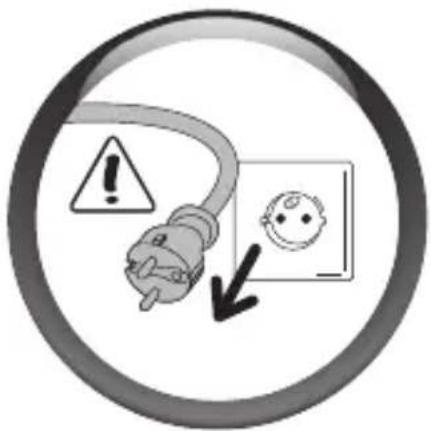
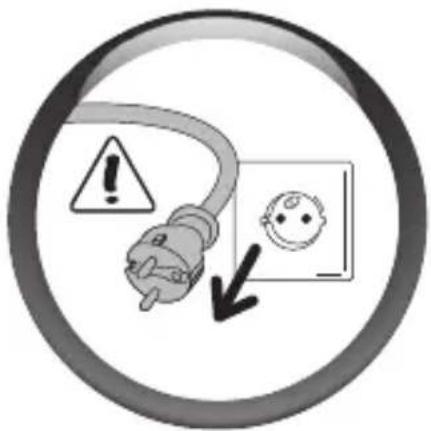
- Unplug the breadmaker at the end of the cooking or warming cycle.
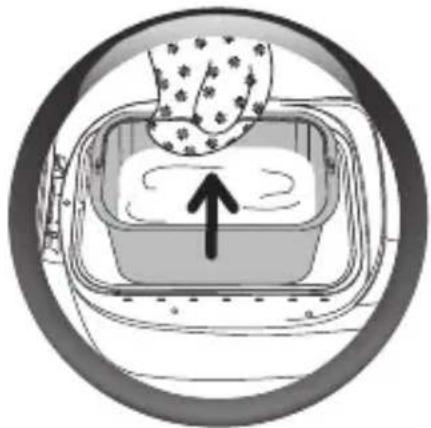
- Remove the baking pan by pulling the handle upwards. Always use oven gloves because the pan handle and the inside of the lid are hot.
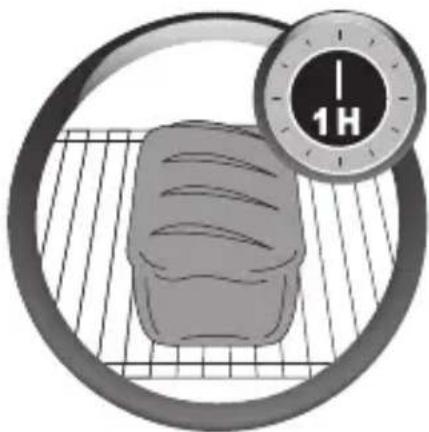
- Turn out the hot bread and place it on a rack for at least 1 hour to cool.
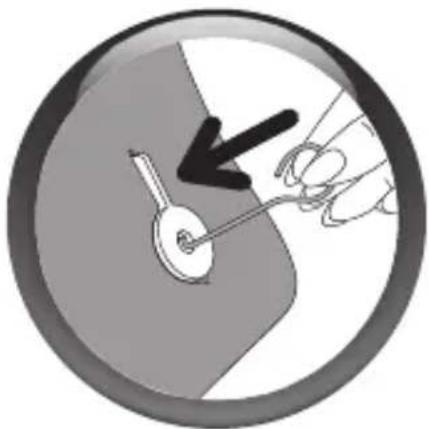
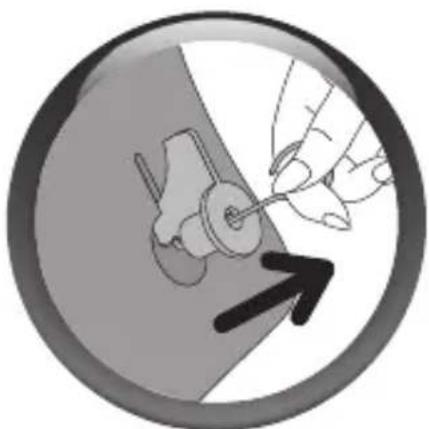
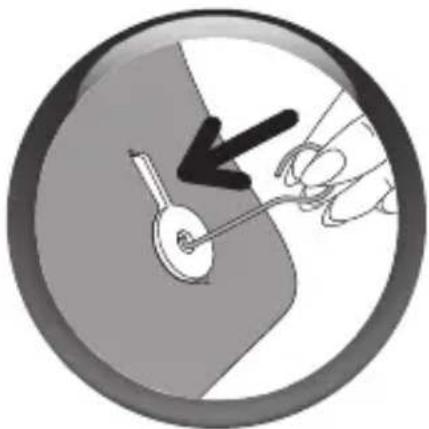
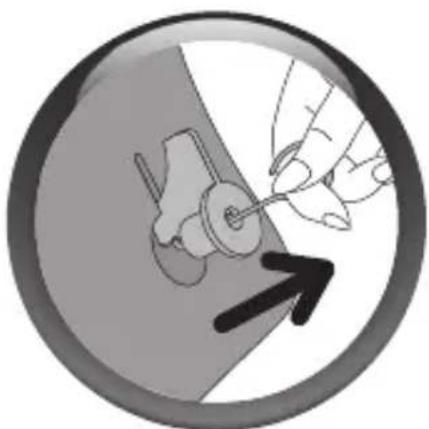
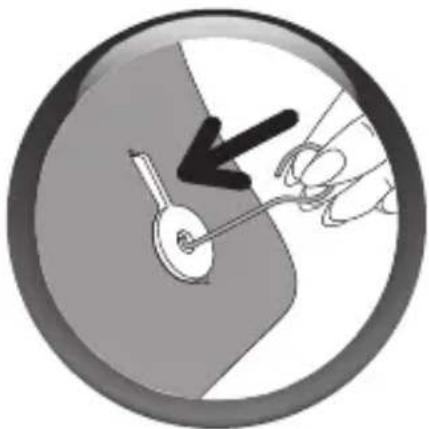
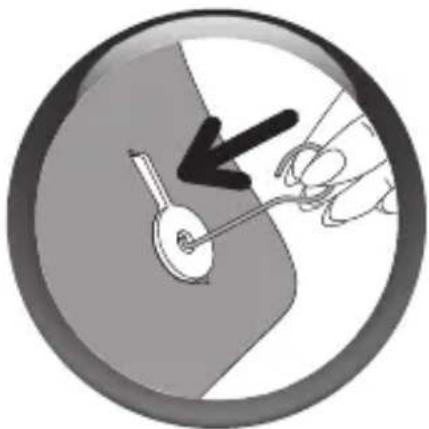
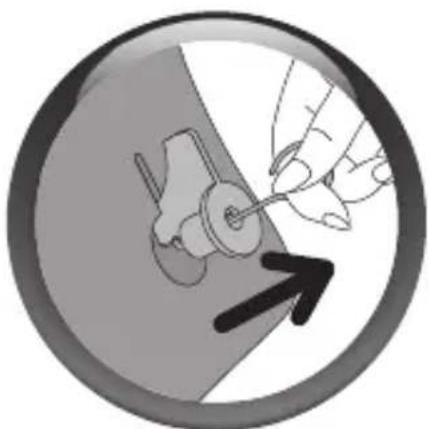
- It may happen that the kneading paddles remain stuck in the loaf when it is turned out. In this case, use the hook accessory as follows:
once the loaf is turned out, lay it on its side while still hot and hold it down with one hand, wearing an oven glove,
with the other hand, insert the hook in the axis of the kneading paddle and pull gently to release the kneading paddle,
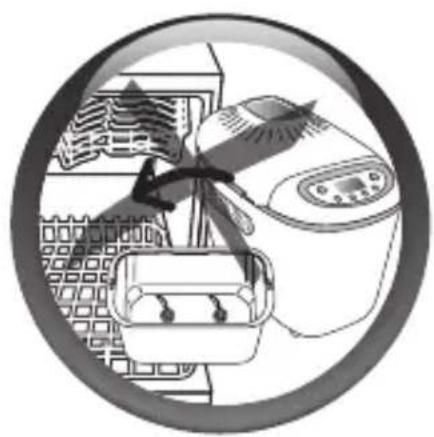
repeat for the second kneading paddle, turn the loaf upright and stand on a grid to cool.
- To preserve the pan's non-stick qualities, do not use metallic utensils to turn out the bread.
4 CLEANING AND MAINTENANCE

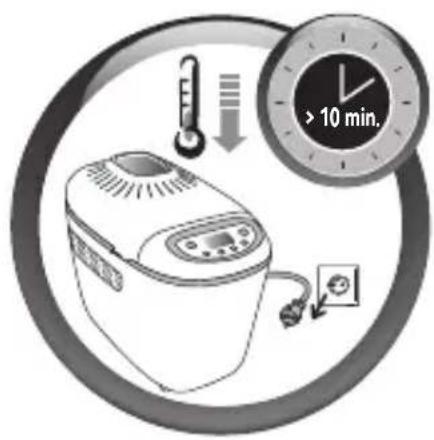
- Unplug the device and leave it to cool with the lid open.
- Remove the lid, if you need to turn the product over.
- Clean the outside and inside of the appliance with a damp sponge. Dry carefully.
- Wash the tank, the mixing blades, the baking tray and the non-stick plates with hot soapy water.
- If the kneading blades stay in the mixing bowl, soak for 5 to 10 minutes.
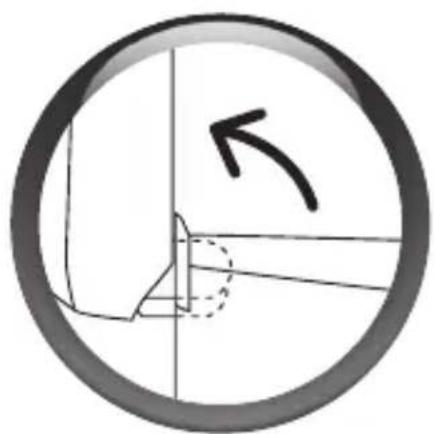

- If necessary, remove the lid to clean it with hot water.
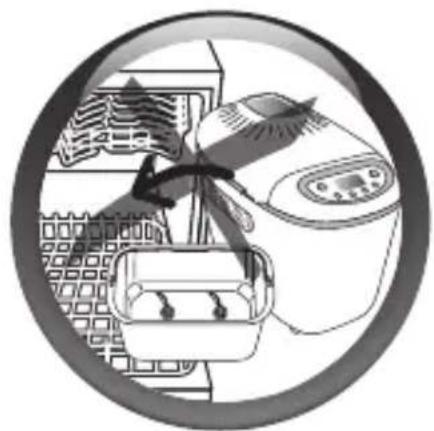
- Do not wash any part in a dishwasher.
- Do not use household cleaning products, scouring pads or alcohol. Use a soft, damp cloth.
- Never immerse the body of the appliance or the lid.
- Do not store the baking tray and the non-stick plates in the bread machine as this could scratch its coating.
5 CYCLES
- A table page 316-320 describes the breakdown of the various programme cycles.
Kneading > Rest > Rising > Baking > Warming
| For forming the dough's structure so that it can rise better. | Allows the dough to rest to improve kneading quality. | Time during which the yeast works to let the bread rise and to develop its aroma. | Transforms the dough into bread and gives it a golden, crusty crust. | Keeps the bread warm after baking. It is recommende that the bread should be turned out promptly after baking, however. |
Kneading:

During this cycle, and for programmes 1, 2, 4, 5, 6, 7, 9, 10, 11, 14, you have the possibility of adding ingredients: dried fruit and nuts, olives, bacon pieces, etc. A sound signal will tell you when to intervene.
While the programs mentioned above are underway, press the MENU button once to find out how much time there is left until the “add ingredients” signal sounds.
For programmes 1 to 2, press the MENU button twice to find out how find out how much time remains before shaping the baguettes.
Please refer to the Cooking Times table on pages316-320, and to the "extra" column.
This column indicates the time that will appear on the screen of your device when you hear the sound signal.
In order to find out exactly when you will hear the sound signal, just subtract the time that appears in the "extra" column from the total cooking time.
Ex: if "extra" = 2:51 and "total cooking time" = 3:13, the ingredients can be added after 22 minutes.
Warming: for programmes 1, 2, 4, 5, 6, 7, 8, 9, 10, 11, 14, you can leave your preparation in the appliance. A one-hour warming cycle automatically follows baking. The display remains at 0:00 during keeping warm hour. A beep is heard at regular intervals.
The operating indicator light flashes.
At the end of the cycle the appliance stops automatically and beeps several times.
6 INGREDIENTS
Fat and oil: fats make the bread softer and tastier. It will also keep better and for longer. Too much fat slows down rising. If you use butter, make sure that it is cold and dice it to distribute it evenly in the preparation. Do not add warm butter. Avoid the fat coming into contact with the yeast because the fat could prevent the yeast from rehydrating.
Eggs: eggs enrich the dough, improve the colour and encourage good development of the interior. Recipes are calculated for one medium egg weighing 50 g; if the eggs are larger, add less liquid; if the eggs are smaller then you will have to add a little more liquid.
Milk: you can use fresh milk (cold, unless stated otherwise in the recipe) or powdered milk. Milk also has an emulsifying effect which forms more regular air cells and therefore gives the interior of the bread a good appearance.
Water: water rehydrates and activates the yeast. It also hydrates the starch in the flour and allows the interior of the bread to be formed. Water may be partially or completely replaced by milk or other liquids. Temperature: see paragraph in the "preparation of recipes" section (page 163).
Flour: the weight of the flour varies considerably depending on the type of flour used. Depending on the quality of the flour, the baking results of the bread may also vary. Keep the flour in an airtight container because it reacts to ambient conditions, either absorbing or losing humidity. It is preferable to use "strong", "bread making quality" or "bakery" flour rather than standard flour. Adding oats, bran, wheat germ, rye or even whole grains to the bread dough will give a heavier bread that has not risen as much.
The use of T55 flour is recommended, unless stated otherwise in the recipes. If using special flour mixtures for bread or brioche or milk bread, do not exceed a total of 1000 g of dough. See the manufacturer's recommendations for the use of these
preparations. Sieving the flour also affects results: the more complete the flour is (i.e. it contains part of the wheat grain husk, the less the dough will rise and the heavier the bread will be.
Sugar: use white or brown sugar or honey. Do not use sugar lumps. Sugar feeds the yeast, gives the bread a good flavour and improves browning of the crust.
Salt: gives the bread taste and regulates the activity of the yeast. It should not come into contact with the yeast. Thanks to the salt, the dough is firm, compact and does not rise too quickly. It also improves the structure of the dough.
Yeast: baker's yeast comes in several forms: fresh in small cubes, dried active yeast for rehydration or instant dried yeast. Yeast is sold in supermarkets (bakery or chilled sections), but you can also buy fresh yeast at the bakery. Fresh or instant dried yeast should be directly incorporated into the baking pan of your machine with the other ingredients. However, you can break up the fresh yeast with your fingers to spread it around the mixture. Only dried active yeast (which comes in small balls) should be mixed with a little warm water before use. The ideal temperature is around 35° C; below this it will be less effective and above this it risks losing its activity. Make sure that you keep to the recommended doses and think about multiplying the quantities if you use fresh yeast (see the table of equivalences below).
Quantity/weight equivalence between dried yeast and fresh yeast:
Dried yeast (cc)
| 1 | 1,5 | 2 | 2,5 | 3 | 3,5 | 4 | 4,5 | 5 |
| Fresh yeast (g) | ||||||||
| 9 | 13 | 18 | 22 | 25 | 31 | 36 | 40 | 45 |
Additives (nuts, olives, chocolate chips, etc): you can customise your recipes with any additional ingredients you like, taking care that:
You pay attention to the acoustic signal for adding ingredients, especially the most fragile ones
The more solid grains (such as linseed or sesame) can be incorporated from the start of kneading to facilitate the use of the machine (e.g. delayed start)
You freeze chocolate chips so that they are more resistant to kneading.
Very wet or very fatty ingredients are drained well (e.g. . olives or bacon), dried on kitchen paper and lightly dusted with flour for better incorporation and smoothness
Ingredients should not be incorporated in quantities that are too large, at the risk of disrupting the correct development of the dough, keep to the quantities indicated in the recipes
No additives fall outside the pan.
7 PRATICAL ADVICE
1. Preparing the recipes
- All ingredients used must be at room temperature (unless otherwise indicated) and must be weighed exactly.
Measure liquids with the graduated beaker supplied. Measure liquids with the graduated beaker supplied. Use the double doser supplied to measure teaspoons on one side and tablespoons on the other. All spoon measures are level and not heaped. Incorrect measurements give bad results.
- Follow the preparation order.
Liquids (butter, oil, eggs, water, milk)
Powdered milk
Salt
Specific solid ingredients
Sugar
Flour, second half
Flour, first half
Yeast
- It is important to measure the quantity of flour precisely. That is why you should weigh out flour using a kitchen scale. Use packets of flaked dried yeast (sold in the Uk as Easy Bake or Fast Action Yeast). Unless otherwise indicated in the recipe, do not use baking powder. Once a packet of yeast has been opened, it should be sealed, stored in a cool place and used within 48 hours.
• To avoid spoiling the proving of the dough, we advise that all ingredients should be put in the bread pan at the start and that you should avoid opening the lid during use (unless otherwise indicated). Carefully follow the order of ingredients and quantities indicated in the recipes. First the liquids, then the solids. Yeast should not come into contact with liquids, sugar or salt.
- Bread preparation is very sensitive to temperature and humidity conditions. In case of high heat, use liquids that are cooler than usual. Likewise, if it is cold, it may be necessary to warm up the water or milk (never exceeding 35°C). For best results, we recommend that you stick to an overall temperature of 60°C (water temperature + flour temperature + surrounding air temperature). For example: if the surrounding air temperature in your home is 19°C, make sure that the flour temperature is 19°C and the water temperature is 22°C (19 + 19 + 22 = 60°C).
- It can also sometimes be useful to check the state of the dough during the second kneading: it should form an even ball which comes away easily from the walls of the pan. > if not all of the flour has been blended into the dough, add a little more water, > if the dough is too wet and sticks to the sides, you may need to add a little flour. Such corrections should be undertaken very gradually (no more than 1 tablespoon at a time) and wait to see if there is an improvement before continuing.
- A common error is to think that adding more yeast will make the bread rise more. Too much yeast makes the structure of the bread more fragile and it will rise a lot and then fall while baking. You can determine the state of the dough just before baking by touching it lightly with your fingertips: the dough should be slightly resistant and the fingerprint should disappear little by little.
- When shaping the dough, do not work it for too long because you may not get the expected result after cooking.
2. Using your bread machine
- If there is a power cut: if, during the cycle, the programme is interrupted by a power cut or mishandling, the machine has a 7-min protection time during which the settings are saved. The cycle starts again where it stopped. Beyond that time, the settings are lost.
- If you do make two loaves in succession with the traditional Loaf programme, wait 1 hour before starting the second loaf. Otherwise the error code E01 is displayed (except for programmes 1 and 12).
* When you use the Baguette program after the dough had been kneaded and has risen, you must use the dough within an hour after you hear the sound signals. After one hour, the machine restarts and the Baguette program is lost.
8 PREPARING AND MAKING BAGUETTES
To make this bread you need all of the accessories dedicated to this function: 1 baguette baking stand (5), 2 non-stick plates for baking baguettes (6), 1 slashing tool (7) and 1 pastry brush (10).
1. How to mix and grow your dough
- Plug in the bread maker.

- After the acoustic signal, programme 1 is displayed by default.
- Select the browning level.
- We advise against only baking one batch because the result would be too well done.
- If you opt for baking 2 batches: it is advisable to shape all your rolls and keep half in the fridge for the second batch.
- Press the button. The pilot lamp lights up and the 2 dots on the timer flash. The dough kneading cycle begins, followed by the dough rising.
Notes:
- During the kneading stage, it is normal for some parts not to be well mixed.
- When the preparation is completed the bread maker switches to standby. Several acoustic signals tell you when the dough has been kneaded and has risen and the pilot lamp also flashes. The baguette shaping indicator lights up.
After the dough kneading and rising stages, you must use your dough within an hour of hearing the beeps. Beyond that, the machine resets and the programme is lost. In this case, we recommend using programme 3 for baking the baguettes.
2. Example of preparation and baking of baguettes
To help you through those steps, refer to the baguette shaping guide supplied. We are showing you what a baker does, but after a few trials, you will be able to create your own shapes. Whatever you do, the result is guaranteed.

- Remove the pan from the machine.
- Lightly flour the work surface.
• Take the dough out of the pan and place it on the work surface. - Shape the dough into a ball and use a knife to divide it into 4 pieces.
- You will obtain 4 pieces of equal weight which are to be shaped into baguettes.
For lighter baguettes, leave the dough pieces to rest for 10 minutes before shaping them.
The length obtained for the baguette should correspond to the size of the non-stick plate (approximately 18 cm).
You can vary the flavours by adding ingredients to your rolls. To do this, just moisten the dough pieces and then roll them in sesame or poppy seeds.
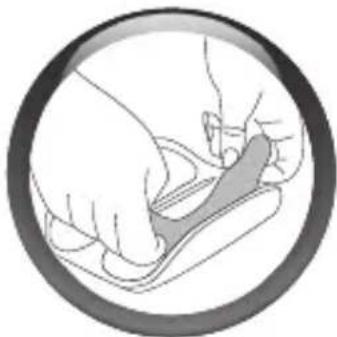
• After preparing the baguettes, lay them out on the non-stick plates.
The seam of the baguettes should be at the bottom.
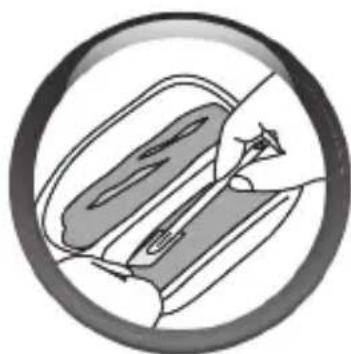

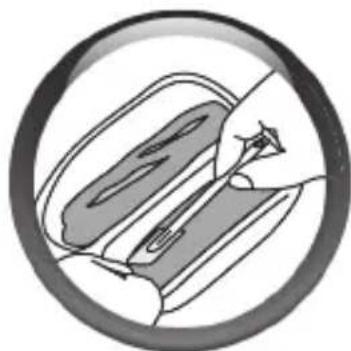
- For best results, slash the top of the baguettes diagonally using a serrated knife or the slashing tool supplied to obtain a 1 cm opening.
You can vary the presentation of your baguettes and make incisions using scissors along the length of the baguette.
- Using the pastry brush provided, generously moisten the top of the baguettes, avoiding water accumulating on the non-stick plates.
- Place the 2 non-stick plates containing the baguettes on the baguette stand supplied.
• Install the baguette stand in your bread maker instead of the pan. - Press the button again to restart the programme and start baking your baguettes.
- At the end of the baking cycle, there are 2 solutions available to you: when baking 4 baguettes
- Unplug the bread maker. Remove the baguette stand.
• Always use oven gloves because the stand is very hot. - Remove the baguettes from the non-stick plates and leave them to cool on a rack.
when baking 8 baguettes (2x4)
- Remove the baguette stand. Always use oven gloves because the stand is very hot.

- Remove the baguettes from the non-stick plates and leave them to cool on a rack.
• Take the other 4 baguettes out of the fridge (already slashed and moistened). - Position them on the plates (without burning yourself).
- Put the stand in the machine and press again.
- At the end of the baking time you can unplug the machine.
- Remove the baguettes from the non-stick plates and leave them to cool on a rack.

BASIC BREAD (PROGRAM 4)
tsp > teaspoon
tbsp > tablespoon

Browning > Medium

Unit weight > 1000 g
Ingredients
Water > 325 ml
Salt > 2 tsp
Sugar > 2 tbsp
Powdered milk > 2.5 tbsp
T55 Flour > 600 g
Dehydrated yeast > 1.5 tsp
To start your recipe, please refer to stages 1 to 7 in the "Use" section.
2 Then start the BASIC BREAD program by pressing the button. The use signal turns on.
The digital watch colon flashes.
The cycle begins.

3 Once the cycle is completed, please refer to stage 6.
Important: Based on the same principle, you can make other traditional bread recipes such as:
French Bread, Whole Bread, Sweet Bread, Quick Bread, Gluten-Free Bread, Salt-Free Bread. Just select the corresponding program on your appliance menu.

BAGUETTE (PROGRAM 1)
Makes 4 baguettes weighing about 100 g each
tsp > teaspoon
tbsp > tablespoon

Browning > Medium
Ingrédients
Water > 170 ml
Salt > 1 tsp
T55 Flour > 280 g
Dehydrated yeast > 1 tsp
To make this recipe, please refer to section 8, "Preparing and making baguettes".

In order to make your baguettes even softer, add 1 tbsp of oil to your recipe. If you wish to make your 4 breads browner, add 2 tsp of sugar to your ingredients.
9 HOW TO IMPROVE YOUR RESULTS
1. FOR THE BREADS
| The bread hasn't turned out as you hoped? This table should help you to improve things | RESULTS | |||||
| Bread rises too much | Bread falls after rising too much | Bread does not rise enough | Crust not golden enough | Sides brown but bread not fully cooked | Top and sides floury | |
| POSSIBLE CAUSES |  |  |  |  |  |  |
| The button was pressed during baking | [08Z4] | |||||
| Not enough flour |  | |||||
| Too much flour | [2084] | ● | ||||
| Not enough yeast | [KX6A] | |||||
| Too much yeast | [62AD] |  | ||||
| Not enough water |  | ● | ||||
| Too much water | [603C] | ● | ||||
| Not enough sugar | [15YC] | |||||
| Poor quality flour |  |  | ||||
| Wrong proportions of ingredients (too much) |  | |||||
| Water too hot | [22TG] | |||||
| Water too cold |  | |||||
| Wrong programme |  |  | ||||
2. FOR THE BAGUETTES
| The bread hasn't turned out as you hoped? This table should help you to improve things | POSSIBLE CAUSE SOLUTION | |
| The dough is not the same width all along. | The shape of the initial rectangle is not regular or does not have the same thickness. | Roll out with the rolling pin if necessary. |
| The dough is sticky; it is difficult to shape the rolls. | There is too much water in the preparation. | Reduce the quantity of water. |
| The water has been incorporated in the recipe at too high a temperature. | Lightly flour the hands but not the dough or the work surface if possible and continue to make the rolls. | |
| The dough tears. | The flour lacks gluten. Use pastry | flour (T 45). |
| The dough lacks flexibility. Leave | to rest for 10 min before shaping. | |
| The shapes are irregular. | Weigh the dough pieces so that they are all the same size. | |
| The dough is compact/the dough is hard to shape. | The recipe needs more water. | Check the recipe or add water if the flour is not absorbent enough. |
| There is too much flour in the preparation. | Roughly pre-shape and leave to rest before final shaping.Add a little water at the start of kneading. | |
| The dough has been worked too much. | Leave to stand for 10 min before shaping.Flour the work surface as little as possible.Shape the dough by working it as little as possible.Shape the dough in 2 stages with a 5 min. rest in between. | |
| The rolls touch each other and are not baked enough. | Incorrect positioning on the plates. | Optimise the space on the plates to set out the dough pieces. |
| Dough too liquid. | Add the correct amount of liquid. | |
| Recipes are for eggs weighing 50 gr. | ||
| f the eggs are larger reduce the amount of water. | ||
| The rolls are stuck to the plates and have burned. | Too much browning agent. | Choose a lower browning level.Avoid letting the browning agent run onto the plate. |
| You have wet the dough pieces too much. | Remove the excess water applied with the pastry brush. | |
| The supporting plates are too sticky. | Lightly oil the supporting plates before placing the dough pieces on them. | |
| The rolls are not brown enough. | You have forgotten to brush your dough pieces with water before putting them in the oven. | Be more careful next time you make bread. |
| You have put too much flour on the rolls during shaping. | Brush them well with water using the pastry brush before putting them in the oven. | |
| The ambient temperature is high (+30°C). | Use colder water (between 10 and 15°C) and/or a little less yeast. | |
| The rolls have not risen enough. | You have forgotten to add yeast to the recipe / not enough yeast. | Follow the instructions in the recipe. |
| Your yeast may have been out of date. | Check the Best Before date. | |
| Your recipe needed more water. | Check the recipe or add water if the flour is too absorbent. | |
| The rolls have been crushed too much during shaping. | Handle the dough as little as possible during shaping. | |
| Dough worked too much. | ||
| The rolls have risen too much. | Too much yeast. Add less yeast. | |
| Risen too much. | Flatten the rolls slightly once they have been placed on the plates. | |
| The incisions in the dough are not open. | The dough is sticky: you have added too much water to the recipe. | Start the roll shaping stage again, lightly flouring your hands, but not the dough or the work surface if possible. |
| The blade is not sharp enough. | Use the blade supplied or, if not a very sharp serrated knife. | |
| Your cuts are not firm enough. | Cut with a swift movement, without hesitation. | |
| The cuts have a tendency to close up or do not open during baking. | The dough was too sticky: you have added too much water to the recipe. | Check the recipe or add flour if it is not absorbing the water enough. |
| The surface of the dough was not stretched enough during shaping. | Start again, pulling the dough more when rolling it around the thumb. | |
| The dough tears at the edges on baking. | The cut on the dough piece is not deep enough. | See page 165 for the ideal shape of the cuts. |
10 TECHNICAL TROUBLESHOOTING GUIDE
| PROBLEmS | SOLUTIONS |
| The kneading paddles remain stuck in the bread trough. | ·Let it soak before removing it. |
| The kneading paddles remain stuck in the loaf. | ·Use the accessory to turn out the loaf (page 159). |
| After pressing on nothing happens. | ·The machine is too hot. Wait for 1 hour between 2 cycles (error code E01). ·A delayed start has been programmed. |
| After pressing on the motor is on but no kneading takes place. | ·The pan has not been correctly inserted. ·Kneading paddle missing or not installed properly. |
| After a delayed start, the bread has not risen enough or nothing happens. | ·You forgot to press on after programming. ·The yeast has come into contact with salt and/or water. ·Kneading paddle missing. |
| Burnt smell. | ·Some of the ingredients have fallen outside the pan: let the machine cool down and clean the inside of the machine with a damp sponge and without any cleaning product. ·The preparation has overflowed: the quantity of ingredients used is too great, notably liquid. Follow the proportions given in the recipe. |
11 WARRANTY
- This product has been designed for domestic use only. Any professional use, innappropriate use or failure to comply with the instructions, the manufacturer accepts no responsibility and the guarantee will not apply.
- Read the instructions for use carefully before using your appliance for the first time: any use which does not conform to these instructions will absolve the manufacturer from any liability.
12 ENVIRONmENT
- In accordance with current regulations, before disposing of an appliance no longer needed, the appliance must be rendered inoperative (by unplugging it and cutting off the supply cord).

ESPAÑOL página
ES
1 DESCRIPCIÓN
1. DESEMBALAJE

3. LIMPIEZA DE LA CUBA
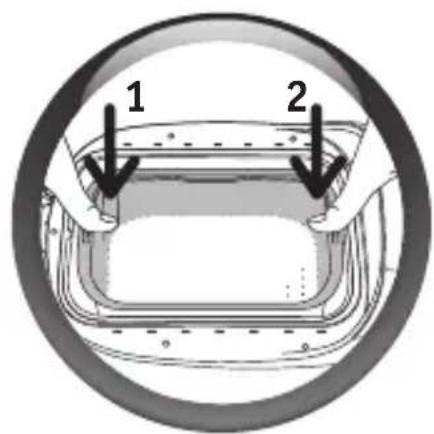
4. ARRANQUE
- Introduzca la cuba de pan.

8. ARRANQUE DE UN PROGRAMA
10. PARAR UN PROGRAMA
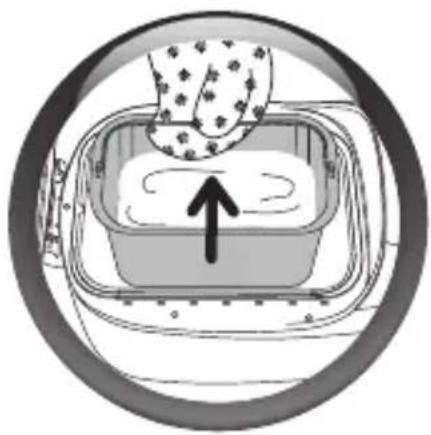


11. EXTRAER EL MOLDE
Conecte la panificadora.

1 OPIS
- Posuda za hleb
- Lopatice za mešenje
- Poklopac sa prozorom za nadgledanje
- Kontrolna ploča
a. Displej
a1. Pokazivač oblikovanja bageta
a2. Odabir u meniju
a3. Nivo zapečenosti
a4. Odloženi start
a5. Prikaz vremena pečenja
b. Izbor programa
c. Odabir težine
d. Taster za podešavanje
odloženog starta i vremena
potrebnog za programe 12
e. Indikator lampica - svetli kad je aparat uključen
f. Taster uključi/isključi
g. Izbor nivoa zapečenosti
- Držač za pečenje bageta
- Dve nelepljive posude za bagete
Pribor:
- Nož za zarezivanje
- a. Velika merna kašika b. Mala merna kašika
- Kuka za vađenje lopatica za mešanje
- Četkica
- Merna posuda

② BEZBEDNOSNA UPUTSTVA VAŽNA UPOZORENJA
1. RASPAKIVANJE
- Odmotajte aparat, sačuvajte garantni list i pročitajte uputstvo pre prve upotrebe aparata.
- Postavite aparat na čvrstu podlogu. Skinite svu ambalažu, nalepnice i pribor koji je u pakovanju.


Upozorenje
- Pribor (nož za zarezivanje hleba) vrlo je oštar. Oprezno i pažljivo ga upotrebljavajte.

2. PRE UPOTREBE APARATA
- Uklonite posudu za pečenje povlačenjem ručke nagore.


3. ČIŠĆENJE POSUDE
- Posudu aparata očistite mokrom krpom. Dobro osušite. Prilikom prve upotrebe može se širiti blagi miris.
- Namestite lopatice za mešenje.

Testo se bolje mesi ako su lopatice za mešanje postavljene jedna nasuprot drugoj.



4. POČNITE SA RADOM
• Postavite posudu za hleb.
- Pritisnite posudu sa jedne, zatim sa druge strane, da bi nalegla na spone, a kopče se dobro zakopćale s obe strane.
8. AKTIVIRAJTE PROGRAM
- Da biste pokrenuli odabrani program, pritisnite taster Program počinje. Prikazano je vreme koje odgovara programu. Naredne etape automatski se odvijaju jedna za drugom.
9. KORISTITE PROGRAM SA ODLOŽENIM STARTOM
10. ZAUSTAVITE PROGRAM
- Na kraju ciklusa, program se automatski zaustavlja; na displeju se pokazuje 0:00. Čuje se više zvučnih signala uz treperenje signalnog svetla koja pokazuje da aparat radi.
- Za zaustavljanje programa u toku rada ili za poništavanje programiranog odloženog početka rada, pet sekundi držite pritisnut taster 📄.


11. IZVADITE HLEB IZ POSUDE (Ova se etapa ne odnosi na «Pojedinačne hlebove»)
- Izvadite kabl aparata iz utičnice i ostavite aparat sa podignutim poklopcem da se ohladi.
- Skinite poklopac ukoliko je to potrebno.
- Vlažnim sunderom očistite spoljašnju i unutrašnju stranu aparata. Dobro ih osušite.
- Operite vrućom vodom i deterdžentom posudu za hleb, lopatice za mešenje, postolje za pečenje i nelepljive posude.
- Ako lópatice za mešenje ostanu zaglavljene u posudi, potopite ih u vodu na 5 do 10 minuta.


- Nijedan deo aparata nije podoban za pranje u mašini za sudove.
- Ne koristite sredstva za čišćenje u domaćinstvu, abrazivna sredstva za čišćenje, niti alkohol. Koristite mekanu i vlažnu krpu.
- Ne potapajte telo aparata ili poklopac u vodu ili druge tečnosti.
- Pazite da ne oštetite nelepljivu posudu prilikom čišćenja aparata.
5 CIKLUSI U PROCESU PEČENJA HLEBA
Tabela na stranama 316.-320. opisuje cikluse različitih programa.
Mešenje Mešenjem se oblikuje struktura testa da bi bolje naraslo.
Mirovanje Omogućava testu da se opusti da bi se poboljšao kvalitet mešenja.
Narastanje Vreme za koje kvasac omogućava hlebu da naraste i razvije njegovu aromu.
Pečenje Pretvara testo u ukusni hleb sa mekanom sredinom i zlatnom hrskavom koricom.
Održavanje toplote Na ovaj način se hleb nakon pečenja održava toplim. Preporučuje se da se nakon pečenja hleb pravilno okrene.
Mešenje:

Tokom ovog ciklusa, osim u programima 1, 2, 4, 5, 6, 7, 9, 10, 11 i 14, imate mogućnost da dodate sastojke: suvo voće, masline, kockice slanine, itd... Zvučni signal vam daje znak u kom trenutku da intervenišete.
Tokom trajanja navedenog programa pritisnite jednom taster MENU da bi znali vreme preostalo do oglasavanja zvučnog signala za "dodavanje sastojaka".
Iz programa 1 i 2, pritisnite dugme za MENI da biste otkrili koliko je vremena ostalo da se baget umesi.

Pogledajte tabelu u kojoj je prikazano vreme pripreme (strane 316. -320.) i kolonu „dodatno”. Ova kolona pokazuje vreme koje će biti prikazano na ekranu aparata u trenutku oglašavanja zvučnog signala.
- Izvadite posudu iz aparata.
- Pospite radnu ploču brašnom.
- Uklonite testo iz posude i stavite ga na radnu ploču.
- Testom oblikujte kuglu i nožem rasecite testo na 4 dela.
- Dobićete 4 loptice jednake težine, koje treba da oblikujete u bagete.
- Nakon pripremanja bageta, stavite ih na nelepljive plehove.
Zatvorena ivica bageta treba da se nalazi ispod.

- Za optimalne rezultate, zarežite bagete dijagonalno odozgo koristeći nazubljeni nožić ili kuhinjske špatule da biste dobili otvore širine 1 cm.
- Izvadite rešetku sa plehovima za pečenje i ostavite je da se ohladi..
- Izvadite preostala 4 bageta iz frižidera (koja ste prethodno zarezali i navlažili).
- Namestite ih na plehove (koji nisu vrući).
• Vratite rešetku u kućnu pekaru i ponovo pritisnite taster - Nakon pečenja, isključite aparat iz struje.
- Izvadite rešetku sa plehovima za pečenje i ostavite je da se ohladi.

OSNOVNI HLEB (PROGRAM 4)
kk > kafena kašičica
sk > supena kašika

Preplanulost kore
srednja

Težina po komadu
1000 g
Sastojci
Ulje > 2 sk
Voda > 325 ml
So > 2 kk
Šećer > 2 sk
Mleko u prahu > 2,5 sk
Oštro brašno > 600 g
Suvi kvasac > 1,5 kk

Za početak pripreme testa pratite korake od 1 do 7 iz dela „Upotreba”.

Zatim pokrenite program OSNOVNI HLEB, pritisnite taster. Svetli pokazivač radnog stanja.
1 OPIS
1. ODMATANJE
- Odmotajte svoj uređaj, sačuvajte jamstveni list i pažljivo pročitajte uputu za uporabu prije prve uporabe uređaja.
- Postavite uređaj na čvrstu podlogu. Uklonite svu ambalažu, naljepnice i različit pribor unutar i izvan uređaja.


Upozorenje
- Ovaj je pribor (nož za zarezivanje kruha) vrlo oštar. Oprezno njime rukujte.

2. PRIJE UPORABE UREĐAJA

3. ČIŠĆENJE POSUDE
8. ZAPOČNITE PROGRAM
- Za pokretanje odabranog programa, pritisnite tipku . Program počinje. Prikazano je vrijeme koje odgovara programu. Dalje faze provode se automatski jedna za drugom.
9. KORISTITE PROGRAM S ODGOĐENIM POČETKOM RADA
- Možete programirati pečenje s odgođenim početkom pečenja, do 15 sati unaprijed. Timer nije dostupan kod programa 3, 8, 12, 13, 14, 15, 16.
Ova faza se odvija nakon odabira programa, razine tamnjenja i težine.
Prikazuje se vrijeme programa. Izračunajte vremensku razliku između pokretanja programa i vremena kada želite da bude gotovo. Uređaj automatski uključuje trajanje programa ciklusa. Koristite tipke . i i prikazat će se izračunato vrijeme ( prema gore i prema dolje ). Brzim pritiskom dodajete 10 minuta u koracima. Držeći pritisnutim dulje, dodajete 10 min kontinuirano.
Primjer 1: sada je 20:00 sati i želite da vaš kruh bude spreman u 7:00 ujutro. Programirajte 11 sati pomoću tipke i+. Pritisnite tipku . Zvučni signal se emitira.
10. ZAUSTAVITE PROGRAM
- Na kraju ciklusa, program se automatski zaustavlja; na zaslonu se pokazuje 0:00. Čuje se više zvučnih signala uz treperenje signalnog svjetla koje pokazuje da uređaj radi.
- Za zaustavljanje programa u tijeku ili poništenje programiranog odgođenog početka rada, 5 sekundi držite potisnutu tipku.

11. IZVADITE KRUH IZ POSUDE (Ova se etapa ne odnosi na «Peciva»)

- Izvadite još vruć kruh iz kalupa i ostavite ga 1h na rešetki da se ohladi.
- Može se dogoditi da lopatice za miješenje ostanu zaglavljene u kruhu prilikom vađenja iz kalupa.
U tom slučaju, koristite pribor, odnosno kuku za vađenje lopatica, na sljedeći način:
kad je kruh izvađen iz kalupa, položite ga još toplog na bok i pridržavajte ga rukom na koju ste stavili kuhinjsku rukavicu,
umetnite kuku za vađenje lopatica u osovinu lopatice za miješenje i blago povucite kako biste je uklonili.
ponovite ovaj postupak kod druge lopatice za miješenje,
podignite iznova kruh i ostavite ga da se hladi na rešetki. - Kako bi se očuvao neprianjajući sloj na posudi, ne rabite metalne predmete za vađenje kruha iz kalupa.
4 ČIŠĆENJE I ODRŽAVANJE

- Izvadite priključni vod uređaja iz utičnice i ostavite da se uređaj ohladi tako što ćete odignuti poklopac.
- Odvojite poklopac ukoliko trebate preokrenuti uređaj.
- Vlažnom spužvom očistite vanjsku i unutarnju stranu uređaja. Dobro osušite.

- Nakon pripreme baguetta, rasporedite ih na neprianjajući pladanj.

Za najbolje rezultate, zarežite gornji dio baguetta dijagonalno nazubljenim nožem ili uključenim priborom za rezanje, tako da dobijete otvor od 1 cm.

OSNOVNI KRUH (PROGRAM 4)
1 OPIS
2. PRED UPORABO NAPRAVE

3. ČIŠČENJE PLOCEVINASTE POSODE ZA PEKO


4. VKLOP APARATA
• Vstavite pločevinasto posodo za peko kruh.
- Pritisnite na eni strani pločevinaste posode za peko, nato jo na drugi strani vstavite v vodilo, tako da je posoda iz obeh strani dobro pritrjena.
- Izvlecite kabel in ga priključite na ozemljeno električno vtičnico.
- Po pisku se bosta prikazala program 1 in srednja zapečenost.

Da bi spoznali vaš aparat za peko kruha, vam priporočamo, da kot prvo peko kruha preizkusite recept OSNOVNI KRUH. Glejte "PROGRAM OSNOVNI KRUH" stran 263.
8. ZAGON PROGRAMA
- Za zagon izbranega programa pritisnite tipko . Prikaže se čas trajanja programa. Zaporedni koraki si samodejno sledijo drug za drugim.
9. UPORABA ODLOŽENEGA ČASA PROGRAMA
10. ZAUSTAVITEV PROGRAMA

11. JEMANJE KRUHA IZ KOVINSKE POSODE ZA PEKO
(Ta faza ne zadeva "posameznih vrst kruha".)


4 ČIŠČENJE IN VZDRŽEVANJE

- Izklopite aparat in počakajte, da se ohladi ob odprtem pokrovu.
- Odstranite pokrov, će želite premešati zmesi.
- Zunanji in notranji del aparata očistite z vlažno krpo. Temeljito posušite.
- Kovinsko posodo za peko, mesilni kljuki, nosilec za peko in nesprijemljivi plošči očistite s toplo milnato vodo.
- Če gnetilki ostaneta v kovinski posodi za epko, vanjo nalijte vodo in ju pustite namakati v vodi 5 do 10 minut.

- Odstranite posodo za kruh iz aparata.
- Narahlo pomokajte delovno površino.
- Odstranite testo iz posode in ga položite na delovno površino.
- Iz testa oblikujte žogo in jo z nožem razdelite na 4 kose testa.
- Dobite 4 enako težke kose testa, ki jih morate oblikovati v štruce.
Za bolj zračne štruce naj kosi testa počivajo 10 minut pred pripravo.

1. RASPAKIVANJE
- Odmotajte aparat, sačuvajte garantni list i pažljivo pročitajte uputstvo za upotrebu prije prve upotrebe aparata.
- Postavite aparat na čvrstu podlogu. Skinite svu ambalažu, naljepnice i pribor koji je u pakiranju.


Avertissement
2. PRIJE UPOTREBE VAŠEG APARATA

3. ČIŠĆENJE POSUDE
- Posudu aparata očistite mokrom krpom. Dobro osušite. Prilikom prve upotrebe može se širiti blagi miris.
- Prilagodite potom lopatice za miješanje.

4. ZAPOČNITE SA UPOTREBOM

- Odmotajte kabal i uključite ga u električnu utičnicu s uzemljenjem.
- Nakon zvučnog signala, program 1 i srednji stepen zapečenosti pokažu se prema prethodno definiranim postavkama.

Kako biste se upoznali sa radom vašeg aparata, savjetujemo vam da najprije isprobate recept za OSNOVNI HLJEB. Vidi « PROGRAM OSNOVNI HLJEB » strana 287.
5. ODABERITE PROGRAM (POGLEDAJTE KARAKTERISTIKE U TABELI NA SLJEDEĆOJ STRANICI)
- Za svaki se program na displeju pojavljuju prethodno odabrani programi. Zbog toga treba ručno odabrati željeni program.
- Izbor jednog programá pokreče niz koraka koji se automatski odvijaju jedan za drugim.

- Pritisnite tipku "MENU" koja Vam omogućava odabir određenog broja različitih programa. Svaki put kada pritisnete tipku "MENU" broj programa na ekranu se mijenja od 1 do 16.
• Vrijeme pripreme koje odgovara odabranom programu automatski se prikazuje na displeju.
| PRIBOR | ISPROBAJTE PROGRAME PRIKAZANE NA MENIJU | |
 | 1. Baguette | Program Baguette omogućuje da pečete željene bagete. Program se odvija u 2 koraka.1.korak > Miješenje i podizanje tijesta2.korak > pečenjeGklus kuvanja nastupa nakon pripremanja bageta (kao pomoć za pripremanje bageta, potražite smjernice za pomoć pri pečenju vašim pekačem). |
| 2. Slatki bageti | Za slatka peciva: bečko pecivo, mliječno pecivo, brioche itd... | |
| 3. Pečeni bageti | Program 3 omogućuje da pečete unaprijed pripremljena tijesta za bagete. Ne ostavljajte pekač bez nadzora kada primjenjujete program 3. Da bi zaustavili ciklus prije završetka, ručno prekinite program držanjem tastera [IMAGE]. | |
 | 4. Osnovni bijeli hljeb | Program 4 se koristi za pripremu raznih vrsta peciva hljeba od bijelog (pšeničnog) brašna. |
| 5. Francuski hljeb | Program 5 odgovara receptu za tradicionalni francuski, hrskavi, bijeli hljeb. | |
| 6. Integralni hljeb | Odaberite program 6 kada koristite brašno za hljeb od integralnih žitarica. | |
| 7. Slatki hljeb | Program 7 je prilagođen receptima koji sadrže više masnoća i šećera. Úkoliko već koristite pripremljena tijesta za brioše ili mliječni hljeb, nemojte staviti više od ukupno 1.000 g tijesta. | |
| 8. Super brzi bijeli hljeb | Program 8 je posebno prilagođen za pripremu prema receptima za brzi hljeb, koji ćete naći u knjižici recepata uz aparat. Za taj recept, voda treba da bude maksimalne temperature 35°C. | |
| 9. Hljeb bez glutena | Pogodan je za osobe koje ne podnose gluten (odnosno koje boluju od celijakije), jer se ovaj sastojak nalazi u više žitarica (pšenica, ječam, raž, zob...). Posudu za hljeb treba temeljno čistiti da bi se izbjegao rizik da dođe u dodir sa drugim vrstama brašna. U slučaju stroge ishrane bez glutena, uvjerite se da i kvasac koji koristite takođe ne sadrži gluten. Sastav brašna bez glutena ne daje idealno tijesto. Tijesto se lijepi za ivice posude i mora se skidati pomoću mekane plastične lopatice. Hljeb bez glutena biće gušći i svijetliji nego običan hljeb.Za ovaj program možete da izaberete samo težinu 1000 g. | |
 | 12. Hljeb bez soli | Smanjenim unosom soli smanjuje se opasnost od bolesti srca i krvnih sudova. |
| 11. Hljeb bogat sa Omega 3 | Ovaj hljeb je bogat Omega 3 masnim kiselinama sa smjesom koja je izbalansirana i potpuno hranjiva. Omega 3 masne kiseline doprinose funkciji kardio-vaskularnog sistema. | |
| 12. Pečenje hljeba | Program za pečenje podrazumijeva samo pečenje u trajanju od 10 do 70 minuta, sa podešavanjima u intervalima od deset minuta, za tri stepena zapečenosti: svijetlu, srednju i tamnu koricu. Može se upotrebljavati :a) zajedno s programom za dizana tijesta,b) za podgrijavanje već pečenog i ohlađenog hljeba ili da biste njegovu koricu učinili hrskavijom,c) za završetak pečenja u slučaju dužeg nestanka struje za vrijeme jednog ciklusa pečenja hljeba. Ovaj program ne podrazumjeva pečenje pojedinačnih hljebova.Pekač hljeba ne smete ostaviti bez nadzora prilikom korištenja programa 12.Za prekidanje ciklusa prije kraja, ručno zaustavite program dužim pritiskom na tipku. | |
| 13. Tijesto za hljeb | Program za tijesta ne predviđa pečenje. Odgovara programu za miješenje i narastanje bilo kojeg tijesta.Npr.: tijesto za pizzu. | |
| 14. Tjestenina | Program 14 predviđen je samo za miješenje. Namijenjen je za pripremu raznih tjestenina, rezanaca... | |
| 15. Kolač | Program 15 omogućava pripremu poslastica i kolača sa praškom za pecivo. Za taj je program na raspolaganju samo težina od 1.000 g. | |
| 16. Tjestenina | Program 16 predviđen je samo za miješenje. Namijenjen je za pripremu raznih tjestenina, rezanaca... | |
Zapamtite: za najbolje rezultate sa bečkim bagetama, molimo pratite ova uputstva:
-Hladna voda direktno iz frižidera
-Poluobrano mlijeko direktno iz frižidera
-Brašno direktno iz frižidera
-Kesice sa sastojcima za pripremu tijesta
-Kesica sa kvasacem za pripremu tijesta
-Narezani puter direktno iz frižidera.
6. ODABERITE TEŽINU HLJEBA
- Težina hljeba podešena je na standardnih 1.500 g. Navedena težina je indikativna.
- Neki recepti ne omogućuju pečenje hljeba težine 750 g.
- Za preciznije podatke, pogledajte detalje recepata.
• Nema mogućnosti postavljanja težine za programe 3, 9, 12, 13, 14, 15, 16.
8. AKTIVIRAJTE PROGRAM
- Za pokretanje željenog programa, pritisnite taster. Program se pokreće. Prikazano je trajanje programa. Koraci se izvršavaju jedan nakon drugog automatski.
9. UPOTRIJEBITE PROGRAM SA ODGOĐENIM STARTOM
10. ZAUSTAVITE PROGRAM
- Na kraju ciklusa, program se automatski zaustavlja; na displeju se prikazuje 0:00. Oglašava se više zvučnih signala uz treperenje signalnog svijetla koja pokazuju da aparat radi.
- Za zaustavljanje programa u toku rada ili za poništavanje programiranog odgođenog starta, 5 sekundi držite pritisnutu tipku 📄.

11. IZVADITE HLJEB IZ POSUDE (Ova se faza ne odnosi na «Pojedinačne hljebove»)
- Pri završetku pečenja, isključite pekač hljeba iz struje.
- Izvadite posudu za pečenje tako da povučete dršku prema gore. Uvijek koristite kuhinjske rukavice jer su drška posude i unutrašnjost poklopca vrući.

- Izvadite još uvijek vruć hljeb iz posude i ostavite ga 1h na rešetki da se ohladi.
- Može se dogoditi da lopatice za mješanje ostanu zaglavljene u hljebu prilikom vađenja iz posude. U tom slučaju, koristite pribor, odnosno kuku za vađenje lopatica, na slijedeći način:
kad je hljeb izvađen iz posude, položite ga još toplog na stranu i pridržavajte ga rukom na koju ste stavili kuhinjsku rukavicu,
umetnite kuku za vađenje lopatica u osovinu lopatice za miješenje i blago povucite da biste je uklonili.
ponovite ovaj postupak kod druge lopatice za miješenje, podignite iznova hljeb i ostavite ga da se hladi na rešetki. - Da bi se očuvala neprijanjajuća obloga posude, ne koristite metalne predmete za vađenje hljeba iz posude.

4 ČIŠĆENJE I ODRŽAVANJE

- Izvadite kabal aparata iz utičnice i ostavite aparat sa podignutim poklopcem da se ohladi.
- Sklonite poklopac ukoliko želite očistiti aparat.
- Vlažnom spužvom očistite spoljašnju i unutrašnju stranu aparata. Dobro osušite.
- Operite vrućom vodom i sapunicom posudu za hljeb, lopatice za miješenje, postolje za pečenje i posudu sa neprijanjajućom oblogom.
- Ako lopatice za miješenje ostanu zaglavljene u posudi, potopite ih u vodu na 5 do 10 minuta.

- Ako je potrebno, skinite poklopac kako biste ga očistili toplom vodom.
- Nijedan dio aparata se ne može prati u mašini za suđe.
- Ne koristite sredstva za čišćenje kuće, abrazivna sredstva za čišćenje, niti alkohol. Koristite mekanu i vlažnu krpu.
- Ne potapajte tijelo aparata ili poklopac u vodu ili druge tečnosti.
- Pazite da ne oštetite posudu sa neprijanjajućom oblogom prilikom čišćenja aparata.
5 CIKLUSI U PROCESU PEČENJA HLJEBA
Tabela na stranicama 316-320 opisuje različite programe pečenja.
Miješenje
- Izvadite posudu iz aparata.
- Pospite malo brašna po vašoj radnoj površini.
- Izvadite tijesto iz posude i stavite ga na vašu radnu površinu.
- Tijesto oblikujte u kuglu i narežite u 4 komada.
- Dobit ćete 4 komada jednake težine, koje oblikujete u bagete peciva.
Kako bi pecivo bilo prozračno, ostavite ga da stoji 10 minuta prije nego što ga oblikujete.
Dužina 1 bagete peciva treba odgovarati dužini neprijanjajućeg kalupa (približno 18 cm).
- Nakon što oblikujete bagete pecivo, postavite ih u neprijanjajuće kalupe.

- Za optimalan rezultat, zarežite dijagonalno gornju stranu peciva običnim nožem ili nožem za rezanje koji je priložen uz pekač, kako biste dobili prorez dubine 1 cm.
Možete promijeniti izgled svojih bagete peciva tako što ćete pomoću makaza napraviti zareze po čitavoj dužini hljebčića.
- Izvadite bagete peciva iz neprijanjajućih kalupa i ostavite ih da se ohlade na rešetki.
- Izvadite preostala 4 bagete peciva iz frižidera (koja ste ranije prerezali i navlažili).
- Postavite ih u kalupe (pazite da se ne opržite).
• Vratite postolje u aparat i ponovo pritisnite . - Po završetku pečenja možete isključiti aparat.
- Izvadite peciva bagete iz neprijanjajućih kalupa i ostavite ih da se ohlade na rešetki.

OBIČNI HLJEB (PROGRAM 4)
cc > mala žličica
cs > velika žlica
Zapečenost > srednja
Jedinica težine > 1000 g
Sastojci
Ulje > 2 cs
Voda > 325 ml
So > 2 cc
Sećer > 2 cs
1 AÇIKLAMA
1. AMBALAJI AÇMA
2. CİHAZI KULLANMADAN ÖNCE

3. HAZNENİN TEMİZLENMESİ
6. EKMEK AĞIRLIĞININ SEÇİMİ
8. PROGRAM BAŞLATMA
10. PROGRAM BİTİRME

11. EKMEĞİNİZİ HAZNEDEN CIKARMAK


Note: the total time does not include the time to keep warm.


- 1 ОПИСАНИЕ
- РАЗОПАКОВАНЕ
- СТОП
- 1 FOPIS
- VYBALENÍ
- PŘED POUŽITÍM SPOTŘEBIČE
- ČIŠTĚNÍ NÁDOBY
- SPUŠTĚNÍ
- SPUSŤTE PROGRAM
- ZASTAVENÍ PROGRAMU
- VYJMUTÍ CHLEBA
- 1 LEÍRÁS
- KICSOMAGOLÁSA
- PROGRAM INDÍTÁSA
- A PROGRAM LEÁLLÍTÁSA
- ROZPAKOWANIE
- CZYSZCZENIE FORMY
- WŁĄCZANIE PROGRAMU
- WYJMOWANIE CHLEBA (TEN ETAP NIE DOTYCZY „CHLEBA O RECEPTURZE WŁASNEJ“)
- DEZAMBALAREA
- ÎNAINTE DE A UTILIZA APARATUL
- CURĂȚAREA CUVEI
- PORNIRE
- START PROGRAM
- ÎNTRERUPEREA UNUI PROGRAM
- ODSTRÁNENIE OBALU
- PRED POUŽITÍM SPOTREBIČA
- VLOŽTE PRÍSADY
- SPUSTENIE
- ZVOL'TE HMOTNOST CHLEBA
- SPUSTITE PROGRAM
- ZASTAVTE PROGRAM
- VYKLOPTE SVOJ CHLIEB Z NADOBKY (TÁTO
- 4 ČISTENIE A ÚDRŽBA
- ACCESSORIES
- 2 SAFETY INSTRUCTIONS IMPORTANT SAFEGUARDS
- IN THE BREAD PAN
- IN THE BAGUETTE BAKING TRAYS
- ENVIRONMENT PROTECTION FIRST
- 3 BEFORE USING FOR THE FIRST TIME
- REMOVE PACKAGING
- WARNING
- BEFORE USING YOUR APPLIANCE
- CLEANING THE PAN
- STARTING UP
- SELECT A PROGRAMME (SEE CHARACTERISTICS IN THE TABLE ON THE NEXT PAGE)
- SELECTING THE BREAD WEIGHT
- SELECTING THE CRUST COLOUR
- STARTING A PROGRAMME
- USING THE DELAY START PROGRAMME
- STOPPING A PROGRAMME
- TAKING YOUR BREAD OUT OF THE PAN
- 4 CLEANING AND MAINTENANCE
- 5 CYCLES
- KNEADING
- 6 INGREDIENTS
- THE USE OF T55 FLOUR IS RECOMMENDED, UNLESS STATED OTHERWISE IN THE RECIPES. IF USING SPECIAL FLOUR MIXTURES FOR BREAD OR BRIOCHE OR MILK BREAD, DO NOT EXCEED A TOTAL OF 1000 G OF DOUGH. SEE THE MANUFACTURER'S RECOMMENDATIONS FOR THE USE OF THESE
- 7 PRATICAL ADVICE
- PREPARING THE RECIPES
- USING YOUR BREAD MACHINE
- 8 PREPARING AND MAKING BAGUETTES
- HOW TO MIX AND GROW YOUR DOUGH
- NOTES
- EXAMPLE OF PREPARATION AND BAKING OF BAGUETTES
- WHEN BAKING 8 BAGUETTES (2X4)
- BASIC BREAD (PROGRAM 4)
- INGREDIENTS
- BAGUETTE (PROGRAM 1)
- INGRÉDIENTS
- 9 HOW TO IMPROVE YOUR RESULTS
- FOR THE BREADS
- FOR THE BAGUETTES
- 11 WARRANTY
- 12 ENVIRONMENT
- ESPAÑOL PÁGINA
- 1 DESCRIPCIÓN
- DESEMBALAJE
- LIMPIEZA DE LA CUBA
- ARRANQUE
- ARRANQUE DE UN PROGRAMA
- PARAR UN PROGRAMA
- EXTRAER EL MOLDE
- 1 OPIS
- PRIBOR
- ② BEZBEDNOSNA UPUTSTVA VAŽNA UPOZORENJA
- RASPAKIVANJE
- UPOZORENJE
- PRE UPOTREBE APARATA
- ČIŠĆENJE POSUDE
- POČNITE SA RADOM
- AKTIVIRAJTE PROGRAM
- KORISTITE PROGRAM SA ODLOŽENIM STARTOM
- ZAUSTAVITE PROGRAM
- IZVADITE HLEB IZ POSUDE (OVA SE ETAPA NE ODNOSI NA «POJEDINAČNE HLEBOVE»)
- 5 CIKLUSI U PROCESU PEČENJA HLEBA
- MEŠENJE
- OSNOVNI HLEB (PROGRAM 4)
- SASTOJCI
- ODMATANJE
- PRIJE UPORABE UREĐAJA
- ZAPOČNITE PROGRAM
- KORISTITE PROGRAM S ODGOĐENIM POČETKOM RADA
- IZVADITE KRUH IZ POSUDE (OVA SE ETAPA NE ODNOSI NA «PECIVA»)
- 4 ČIŠĆENJE I ODRŽAVANJE
- OSNOVNI KRUH (PROGRAM 4)
- PRED UPORABO NAPRAVE
- ČIŠČENJE PLOCEVINASTE POSODE ZA PEKO
- VKLOP APARATA
- ZAGON PROGRAMA
- UPORABA ODLOŽENEGA ČASA PROGRAMA
- ZAUSTAVITEV PROGRAMA
- JEMANJE KRUHA IZ KOVINSKE POSODE ZA PEKO
- 4 ČIŠČENJE IN VZDRŽEVANJE
- AVERTISSEMENT
- PRIJE UPOTREBE VAŠEG APARATA
- ZAPOČNITE SA UPOTREBOM
- ODABERITE PROGRAM (POGLEDAJTE KARAKTERISTIKE U TABELI NA SLJEDEĆOJ STRANICI)
- ODABERITE TEŽINU HLJEBA
- UPOTRIJEBITE PROGRAM SA ODGOĐENIM STARTOM
- IZVADITE HLJEB IZ POSUDE (OVA SE FAZA NE ODNOSI NA «POJEDINAČNE HLJEBOVE»)
- 5 CIKLUSI U PROCESU PEČENJA HLJEBA
- MIJEŠENJE
- OBIČNI HLJEB (PROGRAM 4)
- 1 AÇIKLAMA
- AMBALAJI AÇMA
- CİHAZI KULLANMADAN ÖNCE
- HAZNENİN TEMİZLENMESİ
- EKMEK AĞIRLIĞININ SEÇİMİ
- PROGRAM BAŞLATMA
- PROGRAM BİTİRME
- EKMEĞİNİZİ HAZNEDEN CIKARMAK
Brand : TEFAL
Model : Home Bread Baguette PF6101
Category : Bread maker