
Aluminium Collection HR1866 - Juicer PHILIPS - Free user manual and instructions
Find the device manual for free Aluminium Collection HR1866 PHILIPS in PDF.


| Product Type | Juicer |
| Brand | Philips |
| Model | Aluminium Collection HR1866 |
| Color | Aluminium Silver |
| Material | Die-cast aluminium body |
| Motor Power | 800 W |
| Speed Settings | 2 speeds |
| Pulp Separation | Automatic pulp ejection |
| Juice Capacity | 1.5 L |
| Pulp Container | 2.0 L |
| Feeding Tube Diameter | 63 mm |
| Dimensions (LxWxH) | 400 x 300 x 250 mm |
| Weight | 5.5 kg |
| Voltage | 220-240 V, 50/60 Hz |
| Power Cord Length | 1.2 m |
| Safety Features | Safety lock arm, overload protection |
| Dishwasher Safe Parts | Juice jug, pulp container, lid, strainer |
| Accessories Included | Cleaning brush |
| Warranty | 2 years |
Frequently Asked Questions - Aluminium Collection HR1866 PHILIPS
User questions about Aluminium Collection HR1866 PHILIPS
0 question about this device. Answer the ones you know or ask your own.
Ask a new question about this device
Download the instructions for your Juicer in PDF format for free! Find your manual Aluminium Collection HR1866 - PHILIPS and take your electronic device back in hand. On this page are published all the documents necessary for the use of your device. Aluminium Collection HR1866 by PHILIPS.
USER MANUAL Aluminium Collection HR1866 PHILIPS
Register your product and get support at
www.philips.com/welcome
HR1866
natural_image
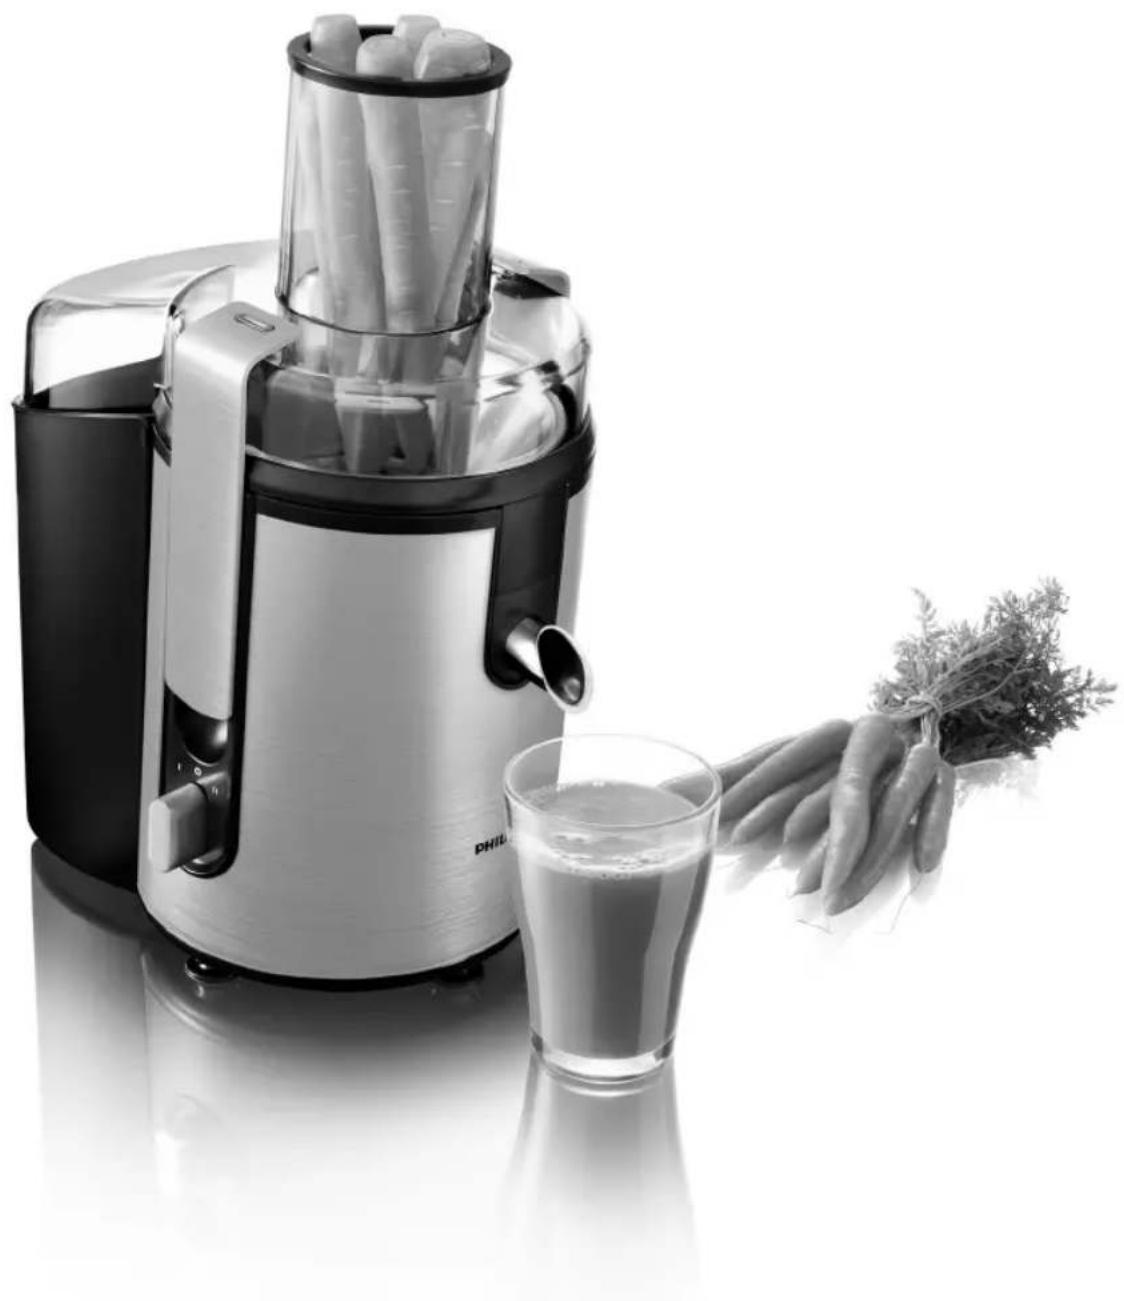
Black-and-white photo of a Philips juice<|im_start|> Greenland tea machine with fresh carrots, accompanied by a glass of juice and a hand holding fresh carrots (no text or symbols visible)PHILIPS

natural_image
Diagram of three open panels with grid patterns and directional arrows, no text or symbols present


ENGLISH 6
DANSK 13
DEUTSCH 20
ΕΛΛΗΝΙΚΑ 28
ESPAÑOL 36
SUOMI 43
FRANÇAIS 50
ITALIANO 58
NEDERLANDS 65
NORSK 72
PORTUGUÊS 79
SVENSKA 87
TÜRKÇE 94
فار 104
العربية 109
6 ENGLISH
Introduction
Congratulations on your purchase and welcome to Philips! To fully benefit from the support that Philips offers, register your product at www.philips.com/welcome.
Your new juicer has a special, slightly tilted design that leans 5^ to the side of the juice outflow opening to ensure maximum juice output.
General description (Fig. 1)
A Pusher
B Feeding tube
C Lid
D Filter
E Juice collector
F Spout
G Pulp container
H Clamps
Control knob
J Driving shaft
K Motor unit
L Cord storage compartment
M Juice jug lid
N Foam separator
Juice jug
P Cleaning brush
Important
Read this user manual carefully before you use the appliance and save it for future reference.
Danger
- Do not immerse the motor unit in water or any other liquid, nor rinse it under the tap.
Warning
- Check if the voltage indicated on the base of the appliance corresponds to the local mains voltage before you connect the appliance.
- Do not use the appliance if the plug, the mains cord or other components are damaged.
- If the mains cord is damaged, you must have it replaced by Philips, a service centre authorised by Philips or similarly qualified persons in order to avoid a hazard.
- This appliance is not intended for use by persons (including children) with reduced physical, sensory or mental capabilities, or lack of experience and knowledge, unless they have been given supervision or instruction concerning use of the appliance by a person responsible for their safety.
- Children should be supervised to ensure that they do not play with the appliance.
- Never let the appliance operate unattended.
- If you detect cracks in the filter or if the filter is damaged in any way, do not use the appliance anymore and contact the nearest Philips service centre.
- Never reach into the feeding tube with your fingers or an object while the appliance is running. Only use the pusher for this purpose.
- Do not touch the small cutting blades in the base of the filter. They are very sharp.
Caution
- This appliance is intended for household use only.
- Never use any accessories or parts from other manufacturers or that Philips does not specifically recommend. If you use such accessories or parts, your guarantee becomes invalid.
- Make sure all parts are correctly mounted before you switch on the appliance.
- Only use the appliance when both clamps are locked.
ENGLISH 7
- Only unlock the clamps after you have switched off the appliance and the filter has stopped rotating.
- Do not remove the pulp container when the appliance is operating.
- Always unplug the appliance after use.
Electromagnetic fields (EMF)
This Philips appliance complies with all standards regarding electromagnetic fields (EMF). If handled properly and according to the instructions in this user manual, the appliance is safe to use based on scientific evidence available today.
Preparing for use
1 Wash all detachable parts (see chapter 'Cleaning').
2 Pull the mains cord out of the cord storage compartment at the back of the appliance (Fig. 2).
3 Place the juice collector in the appliance (1). To place the pulp container, tilt it forwards slightly (2). Insert the top end of the pulp container first and then push home the bottom end (Fig. 3).
To empty the pulp container while you are juicing, switch off the appliance and carefully remove the pulp container.
Note: Reassemble the empty pulp container before you continue juicing.
4 Put the filter in the juice collector (1). Hold the lid over the filter and lower it into position (2) (Fig. 4).
Make sure the filter is fitted securely onto the driving shaft ('click').
Always check the filter before use. If you detect any cracks or damage, do not use the appliance. Contact the nearest Philips service centre or take the appliance to your dealer.
5 Snap the two clamps onto the lid to lock it into place ('click') (1). Align the groove in the pusher with the small protrusion on the inside of the feeding tube and slide the pusher into the feeding tube (2) (Fig. 5).
Make sure the clamps are locked into position on either side of the lid.
6 Put the lid on the juice jug to avoid splattering. Place the juice jug under the spout (Fig. 6).
7 Push the spout downwards before you start juicing.
Note: When the spout is in upward position, it functions as a drip stop when the appliance is switched off. However, if you leave the spout in upward position during juicing, juice splashes out the spout.
Using the appliance
The appliance only functions if all parts are assembled properly and the lid is properly locked in place with the clamps.
1 Wash the fruit and/or vegetables and cut them into pieces that fit into the feeding tube. (Fig. 7)
2 Make sure the juice jug is placed under the spout and the spout is in downward position.
3 Turn the control knob to setting 1 (low speed) or 2 (normal speed) to switch on the appliance. (Fig. 8)
4 Put the pre-cut pieces in the feeding tube and gently press them down towards the rotating filter with the pusher (Fig. 9).
Do not exert too much pressure on the pusher, as this could affect the quality of the end result. It could even cause the filter to come to a halt.
ENGLISH8
Never insert your fingers or an object into the feeding tube.
After you have processed all ingredients and the juice flow has stopped, switch off the appliance and wait until the filter has stopped rotating.
5 Push the spout upwards to prevent juice from dripping out of the spout.
6 Slide the foam separator into the juice jug (1) and place the lid on the juice jug (2). In this way, the foam stays behind in the jug when you pour out the juice. (Fig. 10)
Note: If you want your drink to have a foamy layer, do not use the foam separator.
Note: If you want to store the juice in the refrigerator, make sure the lid is on the juice jug.
Recipe
Horseradish soup
Ingredients:
- 80g butter
- 1 litre vegetable broth
- 50ml horseradish juice (approx. 1 root)
- 250ml whipping cream
- 125ml white wine
- Lemon juice
- salt
- 3-4 tbsps flour
1 Peel the horseradish with a knife.
2 Juice the horseradish.
Note: This appliance can process 4.8kg of horseradish in approx. 1 minute (not including the time required to remove the pulp). When you juice horseradish, switch off and unplug the appliance and remove the pulp from the pulp container, the lid and the sieve after you have processed 1.2kg. When you have finished processing the horseradish, switch off the appliance and let it cool down to room temperature.
3 Melt the butter in a pan.
4 Slightly sauté the flour.
5 Add the broth.
6 Add the horseradish juice.
7 Add the whipping cream and white wine.
8 Add lemon juice and salt to taste.
Tips
Preparation
- Use fresh fruit and vegetables, as they contain more juice. Pineapples, beetroots, celery stalks, apples, cucumbers, carrots, spinach, melons, tomatoes, pomegranates, oranges and grapes are particularly suitable for processing in the juicer.
- Fruits that contain starch, such as bananas, papayas, avocados, figs and mangoes are not suitable for processing in the juicer. Use a food processor, blender or bar blender to process these fruits.
- The juicer is not suitable for processing very hard and/or fibrous or starchy fruits or vegetables such as sugar cane.
-
Leaves and leaf stalks of e.g. lettuce can also be processed in the juicer.
-
Remove stones from cherries, plums, peaches, etc. You do not have to remove cores or seeds from fruits like melons, apples and grapes.
- You do not have to remove thin peels or skins. Only remove thick peels that you would not eat, e.g. those of oranges, pineapples, kiwis, melons and uncooked beetroots.
- You can juice citrus fruits with your juicer. We advise you to peel them before juicing because the peel may be chemically treated and because the white pith contains bitter-tasting compounds that influence the taste of the juice.
Juicing
- When you prepare apple juice, keep in mind that the thickness of the apple juice depends on the kind of apple you use. The juicier the apple, the thinner the juice. Choose a kind of apple that produces the type of juice you prefer.
- For hard fruits/vegetables (e.g. apples, beetroot and carrots) we advise you to use speed 2 (normal speed). For soft fruit (e.g. berries, kiwi, grapes, tomatoes, cucumbers and melon) we advise you to use speed 1 (low speed).
- If you juice soft fruits, put the fruit in the feeding tube one by one to obtain an optimal juice output. Do not exert any pressure on the fruit with the pusher.
- To extract the maximum amount of juice, always press down the pusher slowly.
Serving
- If you want clear juice without a foam layer, put the foam separator in the jug. If you want cloudy juice with a foam layer, remove the foam separator from the jug.
- Apple juice turns brown very quickly. To slow down this process, add a few drops of lemon juice.
- Drink the juice immediately after you have extracted it. If it is exposed to air for some time, the juice loses its taste and nutritional value.
Fruit and vegetable facts
| Fruit/vegetable | Vitamins/minerals Kilojoule/calorie | count | Juicing speed |
| Apples Vitamin C 200g=150kJ | (72 cals) | high | |
| Apricots High in dietary fibre, contains potassium | 30g=85kJ (20 cals) | low | |
| Beetroot Good source of folate, dietary fibre, vitamin C and potassium | 160g=190kJ (45 cals) | high | |
| Blueberries Vitamin C 125g=295kJ | (70 cals) | low | |
| Brussels sprouts Vitamin C, B, B6, E, folate and dietary fibre | 100g=110kJ (26 cals) | low | |
| Cabbage | Vitamin C, folate, potassium, B6 and dietary fibre | 100g=110kJ (26 cals) | high |
| Carrots | Vitamin A, C, B6 and dietary fibre | 120g=125kJ (30 cals) | high |
| Celery | Vitamin C and potassium | 80g=55kJ (7 cals) high | |
| Cucumber | Vitamin C 280g=120kJ | (29 cals) | low |
ENGLISH
| Fruit/vegetable Vitamins/minerals Kilojoule/calorie | count | Juicing speed | |
| Fennel Vitamin C and dietary fibre 300g=145kJ | (35 cals) | low | |
| Grapes Vitamin C, B6 and potassium 125g=355kJ | (85 cals) | low | |
| Kiwi fruit Vitamin C and potassium 100g=100kJ | (40 cals) | low | |
| Melons Vitamin C, folate, dietary fibre and vitamin A | 200=210kJ (50 cals) | low | |
| Nectarines Vitamin C, B3, potassium and dietary fibre | 180g=355kJ (85 cals) | high | |
| Peaches Vitamin C, B3, potassium and dietary fibre | 150g=205kJ (49 cals) | high | |
| Pears Dietary fibre 150g=250kJ | (60 cals) | high | |
| Pineapples | Vitamin C | 150g=245kJ (59 cals) | high |
| Raspberries | Vitamin C, iron, potassium and magnesium | 125g=130kJ (31 cals) | low |
| Tomatoes | Vitamin C, dietary fibre, vitamin E, folate and vitamin A | 100g=90kJ (22 cals) | low |
Cleaning
Never use scouring pads, abrasive cleaning agents or aggressive liquids such as alcohol, petrol or acetone to clean the appliance.
The appliance is easier to clean if you do so immediately after use.
1 Switch off the appliance. Remove the plug from the wall socket and wait until the filter has stopped rotating.
2 Remove the dirty parts from the motor unit. Dissassemble the appliance in the following order:
- Remove the pulp container;
- Remove the pusher;
- Open the clamps;
- Remove the lid.
3 Remove the juice collector together with the filter (Fig. 11).
4 Clean all parts except the motor unit with the cleaning brush in warm water with some washing-up liquid and rinse them under the tap (Fig. 12).
Note: All detachable parts are dishwasher-safe. Place the detachable plastic parts on the top tray of the dishwasher. Make sure they are placed well away from the heating element.
5 Clean the motor unit with a damp cloth.
Never immerse the motor unit in water nor rinse it under the tap.
Environment
- Do not throw away the appliance with the normal household waste at the end of its life, but hand it in at an official collection point for recycling. By doing this, you help to preserve the environment (Fig. 13).
Guarantee and service
If you need service or information or if you have a problem, please visit the Philips website at www.philips.com or contact the Philips Consumer Care Centre in your country (you find its phone number in the worldwide guarantee leaflet). If there is no Consumer Care Centre in your country, go to your local Philips dealer.
Troubleshooting
This chapter summarises the most common problems you could encounter with the appliance. If you are unable to solve the problem with the information below, contact the Consumer Care Centre in your country.
Problem Solution
| The appliance does not work. | The appliance is equipped with a safety system. If the parts have not been assembled properly, the appliance does not work. Check whether the parts have been assembled in the right way, but switch off the appliance before you do so. |
| The appliance makes a lot of noise, gives off an unpleasant smell, is too hot to touch, gives off smoke etc. | Check if any fruit or vegetable is stuck in the sieve. If so, switch off the appliance, remove the stuck part and start juicing again. It is common for a new appliance to produce an unpleasant smell or emit a little smoke when it is first used. The phenomenon stops after you have used the appliance a few times. The appliance may also produce an unpleasant smell or emit some smoke if it has been used too long. In this case switch off the appliance and let it cool down for 60 minutes. If the problem persists, contact the Philips Consumer Care Centre in your country. |
| The filter is blocked. Switch off the appliance, clean the feeding tube and the filter and process a smaller quantity. | |
| The filter touches the feeding tube or vibrates strongly during processing. | Switch off the appliance and unplug it. Check if the filter is placed properly in the juice collector. The ribs in the bottom of the filter have to fit properly onto the driving shaft. Check if the filter is damaged. Cracks, crazes, a loose grating disc or any other irregularity may cause malfunction. |
| If you detect any cracks or damage in the filter, do not use the appliance anymore and contact the Philips Consumer Care Centre in your country for replacement of the filter. | |
| Juice splashes out of the spout during juicing. | The spout is in upward position. Make sure the spout is in downward position during juicing. |
Frequently asked questions
This chapter lists the questions most frequently asked about the appliance. If you cannot find the answer to your question, contact the Consumer Care Centre in your country.
ENGLISH12
Problem Solution
| Why does the pulp feel wet? | The wetness of the pulp depends on the consistency of the fruits and vegetables and the amount of fibre they contain (fibre can block the mesh holes of the sieve so that the juice flows into the pulp container instead of the jug). To extract the maximum amount of juice from the fruits or vegetables, clean the sieve in between batches, put the items to be juiced in the feeding tube one by one and do not exert too much pressure on the pusher. Please note that, regardless of what type of juice extractor you use, pulp will always be slightly wet, even if the juicer has already extracted the maximum amount of juice from the fruits or vegetables. |
| Does processing fruits with a lot of pigment result in discolouration of the appliance? | Discolouration may occur when you juice fruits or vegetables with strong colours such as carrots or beetroot. Most of the stains can be easily removed by cleaning the discoloured part or parts in the dishwasher or in hot water with some washing-up liquid. If the stains are difficult to remove, try using some cooking oil. Put a few drops of cooking oil on a dish towel or a piece of paper kitchen towel and rub the stains. Then clean the parts again in the dishwasher or in hot water with some washing-up liquid. |
| What makes this appliance so safe? | The appliance does not work unless both clamps have been snapped home properly. However, you should never reach into the feeding tube with your fingers or an object while the appliance is running, to avoid contact with the rotating sieve and its sharp blades. |
| Do I have to use the juice jug every time I juice? | No, you can use a glass instead of the jug if you only want to obtain a small amount of juice. However, if you want to obtain clear juice, you have to use the jug with the foam separator in it. |
| What do I have to do if the appliance is damaged? | If any part of the appliance is damaged, do not use the appliance anymore and contact the Philips Consumer Care Centre in your country for replacement of the damaged part. |
Introduktion
natural_image
Diagram of three open panels with grid patterns and directional arrows, no text or symbols present
www.philips.com

100% recycled paper 100% papier recyclé
4222.005.0074.2



- PHILIPS
- ENGLISH
- Introduction
- General description (Fig. 1)
- Important
- Danger
- Warning
- Caution
- ENGLISH 7
- Electromagnetic fields (EMF)
- Preparing for use
- Using the appliance
- ENGLISH8
- Recipe
- Horseradish soup
- Tips
- Preparation
- Juicing
- Serving
- ENGLISH
- Cleaning
- Environment
- Guarantee and service
- Troubleshooting
- Frequently asked questions
- ENGLISH12
- Introduktion
Brand : PHILIPS
Model : Aluminium Collection HR1866
Category : Juicer