
TCU-61 - Cd player/recorder DENVER - Free user manual and instructions
Find the device manual for free TCU-61 DENVER in PDF.


| Product Type | CD player/recorder with FM tuner |
| Brand | Denver |
| Model | TCU-61 |
| Dimensions (W x H x D) | 430 x 100 x 280 mm |
| Weight | 3.5 kg |
| Power supply | 230 V ~ 50 Hz |
| Compatible disc types | Audio CD, CD-R, CD-RW |
| Main functions | CD playback, recording on CD-R/RW, FM tuner with 30 presets, AUX input, headphone output |
| Recorded audio format | Audio CD (PCM 16-bit/44.1 kHz) |
| Recording speed | 1x (simultaneous playback and recording) |
| Audio inputs | 1 x AUX (RCA stereo), 1 x microphone (3.5 mm jack) |
| Audio outputs | 1 x line (RCA stereo), 1 x headphone (3.5 mm jack) |
| Display | Backlit LCD screen |
| Remote control | Included (CR2025 battery included) |
| Cleaning | Clean the device with a dry, soft cloth. Do not use abrasive products. |
| Safety | Unplug before cleaning. Do not expose to moisture. Use only recommended accessories. |
| Spare parts and repairability | Repairability index: 6.5/10. Available parts: belts, laser heads, power supply. Contact Denver after-sales service. |
| Warranty | 2 years |
| Package contents | Device, remote control, RCA audio cable, FM antenna, user manual |
Frequently Asked Questions - TCU-61 DENVER
User questions about TCU-61 DENVER
0 question about this device. Answer the ones you know or ask your own.
Ask a new question about this device
Download the instructions for your Cd player/recorder in PDF format for free! Find your manual TCU-61 - DENVER and take your electronic device back in hand. On this page are published all the documents necessary for the use of your device. TCU-61 by DENVER.
USER MANUAL TCU-61 DENVER
denver-electronics.com

INSTRUCTION MANUAL
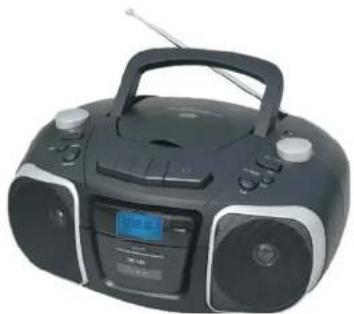
natural_image
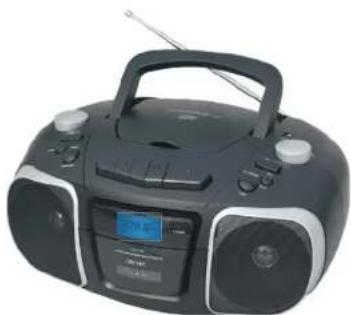
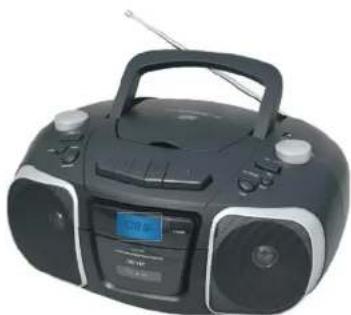
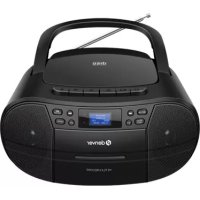
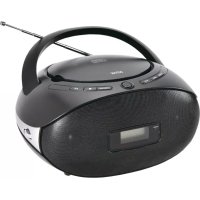
Black portable electronic device with analog dials and a digital display (no visible text or symbols)Before connection operating or adjusting this product Please read these instructions completely Please keep this manual.
TCU-61
CAUTION:
TO REDUCE THE RISK OF ELECTRIC SHOCK, DO NOT REMOVE COVER (OR BACK), NO USER-SERVICEABLE PARTS INSIDE, REFER SERVICING TO QUALIFIED SERVICE PERSONNEL.
WARNING:
TO PREVENT FIRE OR SHOCK HAZARD, DO NOT EXPOSE THIS EQUIPMENT TO RAIN OF MOISTURE.

This "bolt of lightning" indicates uninsulated materia within your unit which may cause an electrical shock, for the safety or everyone in your household, please do not remove product covering.
USING AC POWER
Using AC Power
- Connect the AC power cord into AC Socket and Standard household wall outlet. The batteries will be automatically disconnected. For dual voltage version, Make sure that the AC VOLTAGE SELECTOR is switched to your local voltage.
- Connect the power cord to the AC socket. Inlet and the wall outlet, the power supply is now connected and ready for use.
- To switch off completely, unplug the power cord from the wall outlet.
* Unplug the power cord from the wall outlet to protect your set during heavy thunderstorms.
Battery Operation
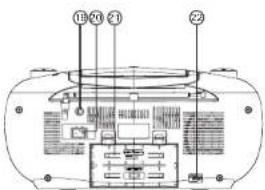
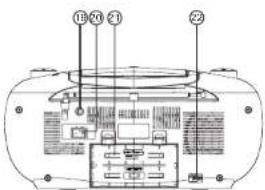
The battery compartment is located on the back of the cabinet.
* Remove the battery compartment door by pressing downward on the tabs as shown in figure 1 below.
* Insert B C size (UM-2) batteries into the battery compartment as shown in figure 2 below. Be sure to observe the polarity markings which are engraved inside the battery compartment. If the batteries are inserted incorrectly, the unit will not operate.
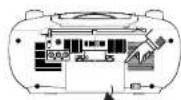
B×R14C CELLUM-2

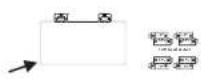
^ Replace the battery compartment door.
NOTE: The AC power cord must be disconnected from the AC socket on the back of the unit. In order for the unit to operate on battery power.

-1-
-2-
FIG 1


-3-
English
CONTROLS
POWER SUPPLY
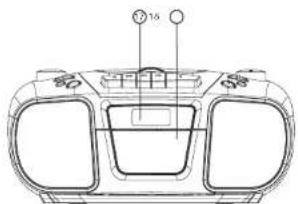
Top and front panels (See fig)
-
VOLUME KNOB
-
FUNCTION SELECT
-
ED BUTTON
-
POWER BUTTON
-
REPEAT BUTTON
-
TIME/PROGRAM BUTTON
-
CASSETTE PLAY KEYS
-
CD DOOR
-
FM ANTENNA
-
STOP BUTTON
-
PLAY/PAUSE BUTTON
-
USB JACK
-
RANDOM BUTTON
-
MUTE BUTTON
-
BACK/NEXT KNOB
-
(PRE-UP BUTTON
PRE-ON BUTTON)
-
LCD DISPLAY
-
CASSETTE DOOR
-
AUX JACK
-
POWER SWITCH
-
BATTERY DOOR
-
AC SOCKET
1. VOLUME KNOB
- Adjust volume level.
- FUNCTION SELECT
Select source of sound CD/USB/AUX/
TAPE/RADIO.
- EQ BUTTON
-Press the button to change EO CD/MP3/USB/
AUX/RADIO's music style.
-When playing the music, Press this button
is in the popular jazz-FLR-classica-rock.
- INTRO BUTTON
-Press the INTRO button into 10 seconds
browsing repertoire state.
- REPEAT BUTTON
-Repeat a track CD/MP3/USB program.
-Repeat mode:normal->repeat 1->repeat all->
repeat album ->normal
- TIME/PROGRAM BUTTON
In standby mode, press this button and then press
I and I<< to adjust the time.
-Program and review programmed track numbers.
-In the working status, press this button
can on CD/MP3/USB/RADIO for programming.
- CASSETTE PLAY KEYS
PLAY ( ◀) - start playback
F.REW (▶) -rewind the tape
toward the beginning.
F.FWD (◀) -advance the tape
toward the end.
STOP/EJECT ▪ - stop the tape
- open the cassette compartment
PAUSE (▶) - interrupt recording or
playback
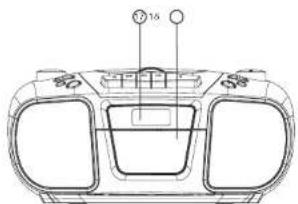
8. CD DOOR
-Lift the CD lid to open/close the CD door.
- FM ANTENNA
-To improve FM reception.
- STOP BUTTON
-Stop CO/MP3/USB playback;
erase a CD program
- PLAY/PAUSE BUTTON
-Start or pause MP3/CD/USB play.
-In the radio mode, press the play/pause button
enter the automatic channel scan mode.
- USB JACK
-To listen to your USB flash memory.
-Stick with MP3 music files.
13. RANDOM BUTTON
-In a CD/MP3/USB mode,
press this button can be played at random.
- MUTE BUTTON
-Press the mute button allows CD/MP3/USB
AUX/the RADIO to enter the mute state.
- BACK/NEXT KNDB
BACK KNOB
BACK track selection.
Rotate and hold more than 1.5 sec BACK
search intra track.
-In the radio mode, rotate BACK will enter
the low end of the manual channel scan mode.
NEXT KNOB
-NEXT track selection.
-Rotate and hold more than 1.5 sec
forward search intra track.
-In the radio mode, rotate NEXT will enter
the high-end manual channel scan mode.
- PRE-UP/PRE-DN BUTTON
-In the radio mode, press PRE-UP button Mark
place to choose the next channel
-In the mp3 mode, press PRE-UP button Mark
place enter into the next folder
-In the radio mode, press PRE-DN button Mark
place to choose the back channel.
-In the mp3 mode, press PRE-ON button Mark
place to enter the back folder.
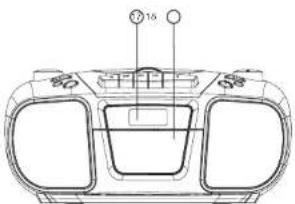
- LCD DISPLAY
-Show the FM dial frequency.
-Show the number of tracks.
-
CASSETTE DOOR
-
AUX JACK
-Press FUNCTION button,
select MP3/AUX station.
Play MP3, DISCMAN, WALKMAN AUX
insert when no disc.
NOTE: Please take out the CD disc.
- POWER SWITCH
-To control the unit electrical source on/off.
- BATTERY DOOR
-To open battery compartment.
- AC SOCKET
-Inlet for power cord.
-4-
USE RADIO
Radio reception
-
Press FUNCTION button select RADIO mode.
-
Tune to required station byroBAGK/TUNE DN or NEXT/TUNE UP.
Manual Tuning: Rotate BACK or NEXT and then release within 1 sec.
Auto Tuning: Press the play/pause button enter the automatic channel
scan mode, and to be put automatically sets.
Preset Channel:(FM 30 Preset memories)
(1)R或E或NORNEXTbuttonSelectdesiredstation.
(2) Press PROGRAM button once, The MEMORY number indicator begins steady in the display.
(3) Press PRESET-UP or PRESET DOWN buttons to select the desired number.
(4) Press PROGRAM button to save that station.
(5) Repeat steps (1) to (4) procedures for other stations.
3. After end of program. Press PRE-UP or PRE-DN to start play the frequency that you selected.
4.R[Note]or [VOL+] to adjust the volume.
5. Extend TELESCOPIC ANTENNA to its full length if you are listening to FM broadcasting.
5. Turn off the radio by press FUNCTION button select other mode or press power button to off the unit.
7. Switch on again after shut down, the memory frequency still exists.
USE AUX
To listen music with a mp3 discman walkman
-
Connect to the AUX
-
press function selector to AUX, the sound source of the mp3
or discman or walkman will output from the unit.
-Rotate the volume control to adjust the volume.
-The unit can't control the player.
USING THE CASSETTE
UNDERSTANDING THE BUTTONS
PLAY - Press to play cassettes.
REW - From stop mode, press to rewind the tape toward the beginning.
F.FWD - From stop mode, press to advance the tape toward the end.
STOP/EJ. - Press to stop current tape activity or to open the cassette compartment door when
no buttons are active.
PAUSE - Press to interrupt tape play or record mode, press the second time to resume tape play
or tape record mode.
PLAY A CASSETTE TAPE
-
Press FUNC button select TAPE mode.
-
Press STOP/EJ.key to open the cassette compartment door.
-
Insert a recorded cassette and close the cassette compartment door.
-
Press PLAY to start playback.
-
To interrupt playback, press PAUSE, To resume, press the key again.
-
Press REW/F.FWD to move tape to the desired starting point.
-
Adjust the volume to your desired listening level.
-
To stop the tape, press STOP/EJ.
- The keys are automatically released at the end of the tape, except if PAUSE has been activated.
PROGRAM METHOD
(1) Press the [PROGRAM] key at STOP mode, system will go to PROGRAM mode.
-The PRG icon and P01 will blink at 2Hz. This prompts the user to enter the first songs in the program PLAY list.
(2) The user can select the desire tracks by using [NEXT], [BACK] keys.
Once these keys are pressed, the Display will show the selected track.
(3) After select the desired track, press [PROGRAM] key again and it will be stored in the memory.
MP3 Maximum 99 and CD Maximum 20 tracks can be programmed when Repeat steps (2) to (3) procedures.
(4) If press the [STOP] key during the program mode, then the selected TRACKS will be stored in the memory and return to STOP mode (Continuous Play mode)
(5) If press the [PLAY] key during the program mode, it will start the program PLAY mode.
PLAY start from P01 Track
Erasing a program
You can erase the content of the memory by:
- While playing, press STOP button twice.
- Opening the CD door
-Select the other mode.
CD/MP3 PLAYER
CD/MP3 Player
Playing a CD/MP3
This CD-player can play Audio Discs, MP3 CD-R. Do not try to play CD-ROM, CDi, VCD, DVD or computer CD.
- Press function button to CD state.
- to open the cd door, press cd open button.
- insert amp3/cd or cd-r, with the printed side facing up and press cd door gently to close.
- press play/pause on the set to start playback.
-
Press the pause button to pause play, press the play button back playing.
-
to stop cd playback, press stop. note: cd/mp3 play will also stop when: -you open the cd compartment;
-you select radio sound source;
-the cd/mp3 has reached to the end.
selecting a different track.
during playback you can use back or next to select a particular track.
*if you have selected a track number in the stop or pause position, press play to start playback.
- Resistance briefly for the next track, or press repeatedly until the desired track number appears in the display.
- Backonce briefly to return to the beginning of a current track.
• Fluctd more than once briefly for a previous track.
finding a passage within a track 1.Ranathold down back or next.
•the cd is played at high speed. 2.when you recognize the passage you want release back or next.
→normal playback resumes. different play modes:repeat repeat-play the current track continuously. repeat all-plays the entire cd continuously. playing tracks in random order after press the random button, the tracks will be played in random order.
Playing a USBPlaying a USB
USB Audio functions
1) press function button or stop usb button to choose the usb state.
2) PLAY/PAUSE
3) NEXT, BACK Skip search
4) Program Track(MP3 99 Track; CD 20 Track)
5) Repeatnormal->repeat 1->repeat all->repeat album ->normal
6) Maximum Folder: 99 Folders
7) Maximum File : 999 Files
*Notice :
-When the unit has not the disc. Inserting the usb card will automatically real usb card, it read the USB first while having the USB.
-The unit don't support the HDD all and the portion usb with mp3 player.
Note: at the mode of CD/MP3 / USB, the Icd will display the number of song or the song playing time.
Power Off
-When the unit idle on USB/SD/CASSETTE/AUX mode over 10 min. Then the unit will Power Off mode automatically, for saving energy.
No sound/power
-Volume not adjusted
•Adjust the VOLUME
-Power cord not securely connected
- Connect the AC power cord properly
-Batteries dead/incorrectly insert -Insert (fresh) batteries correctly
Display does not function properly/
No reaction to operation of any of the controls
-Electrostatic discharge
- Switch off and unplug the set. Reconnect after a few seconds
Poor cassette sound quality
Dust and dirt on the heads, etc.
- Clean deck parts etc., seeMaintenance -Use of incompatible cassette types (METAL or CHROME)
• Only use NORMAL (IEC I) for recording
No disc indication
- No CD/MP3 inserted
- Insert a CD,MP3, CD-R.
-CD badly scratched or dirty
-Replace/clean CD, see Maintenance
- CD-R is blank or the disc is
not finalized
• Use a finalized CD-R.
CD/MP3/USB playback does not work
- CD/MP3 badly scratched/dirty/USB
- Replace/clean CD/MP3/USB
(see maintenance)
-Laser lens steamed up
- Wait until lens has adjusted to room temperature
The CD/MP3 skips tracks
- CD/MP3 damaged or dirty
* Replace or clean CD/MP3
-Program is active
• Quit Program mode(s)
ALL RIGHTS RESERVED, COPYRIGHT DENVER ELECTRONICS A/S
DENVER
www.denver-electronics.com


Electric and electronic equipment contains materials, components and substances that can be hazardous to your health and the environment, if the waste material (discarded electric and electronic equipment) is not handled correctly.
Electric and electronic equipment is marked with the crossed out trash can symbol, seen above. This symbol signifies that electric and electronic equipment should not be disposed of with other household waste, but should be disposed of separately.
All cities have established collection points, where electric and electronic equipment can either be submitted free of charge at recycling stations and other collection sites, or be collected from the households. Additional information is available at the technical department of your city.
Please fill the blank with the model number of this player for future reference
Importer:
DENVER ELECTRONICS A/S
Stavneagervej 22, DK-8250 EGAA, DENMARK
www.facebook.com/denverelectronics
DENVER
denver-electronics.com

BEDIENUNGSANLEITUNG
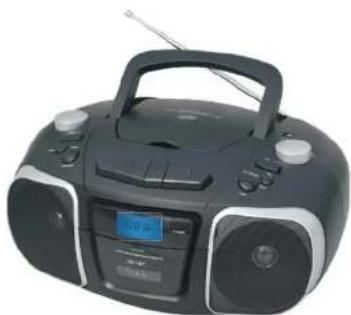
natural_image
Black portable electronic device with analog buttons and a digital display (no visible text or symbols)TCU-61

-3-
German
TASTE
STROMVERSORGUNG
NORMALE (IEC I) Kassetten
denver-electronics.com
BETJENINGSVEJLEDNING
natural_image
Black portable electronic device with analog buttons and a digital display (no visible text or symbols)TCU-61
The battery compartment is located on the back of the cabinet.
FIG 1

natural_image
Technical line drawing of a vehicle dashboard with no visible text or symbols
-3-
Dansk
KNAPPER
STRÖMFORSYNING
- Knappen EQ (equalizer)
denver-electronics.com
GEBRUIKSHANDLEIDING

natural_image
Black portable electronic device with analog buttons and a digital display (no visible text or symbols)TCU-61
AC-VOEDING GEBRUIKEN

-3-
Nederlands
BEDIENINGEN
VOEDING
1.VOLUMEKNOP
2.FUNCTIESELECTIE
3.EQ-TOETS
4.AAN/UITTOETS
5.HERHAALTOETS
6.TUD/PROGRAMMEERTOETS
7.CASSETTE AFSPEELTOETSEN
0.CD-KLEPJE
9.FM-ANTENNE
10.STOPTOETS
- START/PAUZETOETS
12.USB-POORT
13.WILLEKEURIG-TOETS
14.DEMPTOETS
15.VORIGE/VOLGENDE-KNOP
16.(GEHEUGEN OMHODGTDETS
/GEHEUGEN OMLAAGTOETS)
17.LCD-DISPLAY
18.CASSETTEKLEPJE
19.AUX-INGANG
20.AAN/UITSCHAKELAAR
21.BATTERIJKLEPJE
22.AC-INGANG
6) Maximum folders: 99 folders
-CD-R is is blanco of de disk is onvoltooid
denver-electronics.com
KÄYTTÖOHJE

natural_image
Black portable electronic device with analog buttons and a digital display (no visible text or symbols)TCU-61


-3-
Finnish
SÄÄTIMET
VIRTALÄHDE
Toistau MP3, DISCMAN, WALKMAN AUX,
denver-electronics.com

GUIDE D'UTILISATION

natural_image
Black portable electronic device with analog buttons and a digital display (no visible text or symbols)TCU-61
-1-
FONCTIONNEMENT SUR SECTEUR
8 PILES R14 C (UM-2)


-3-
French
TOUCHES DE COMMANDE
ALIMENTATION ELECTRIQUE
1.BOUTON VOLUME
- SELECTEUR DE FONCTION
3.TOUCHE EQ
4.TOUCHE MARCHE
5.TOUCHE REPETER
6.TOUCHE HEURE/PROGRAMME
- TOUCHES DE LECTURE DE
CASSETTE
- PORTE DU CD
9.ANTENNE FM
10.TOUCHE STOP
- TOUCHE LECTURE/PAUSE
12.PORT USB
13.TOUCHE LECTURE ALEATOIRE
- TOUCHE COPER LE SON
15.BOUTON SUIVANT/PRECEDENT
16.(TOUCHES PRE-UP/PRE-DN)
17.ECRAN LCD
-
PORTE DE CASSETTE
-
ENTREE AUX
20.INTERRUPTEUR
D'ALIMENTATION
21.COUVERCLE DU
COMPARTIMENT A PILE
22.ENTREE SECTEUR
REMARQUE: Retirez le disque CD.
20.INTERRUPTEUR D'ALIMENTATION
denver-electronics.com

INSTRUKCJA OBSŁUGI

natural_image
Black portable electronic device with analog buttons and a digital display (no visible text or symbols)TCU-61

natural_image
Technical line drawing of a vehicle dashboard with no visible text or symbols
-3-
Polish
ELEMENTY STEROWANIA
ZASILANIE
denver-electronics.com
MANUAL DE INSTRUÇÕES

natural_image
Black portable electronic device with analog buttons and a digital display (no visible text or symbols)TCU-61
-1-


Portuguese
COMANDOS
ALIMENTAÇÃO
Painéis superior e frontal (Ver fig. 1)
1. BOTÃO VOLUME
repeat album ->normal
6.BOTÃO PROGRAMAR/HORA
denver-electronics.com

natural_image
Black portable electronic device with analog buttons and a digital display (no visible text or symbols)TCU-61

Spanish
CONTROLES
ALIMENTACIÓN
Paneles superior y frontal (Véase figura 1)
1.BOTÓN DE VOLUMEN
denver-electronics.com

BRUKSANVISNING
natural_image
Black portable electronic device with analog buttons and a digital display (no visible text or symbols)TCU-61
-1-
ANVÄNDA NÄTSTRÖM
Använda nätström

-3-
Swedish
KONTROLLER
STRÖMKÄLLA
denver-electronics.com
natural_image
Black portable electronic device with analog dials and a digital display (no visible text or symbols)TCU-61

natural_image
Technical line drawing of a vehicle dashboard with no visible text or symbols
-3-
1.MANOPOLA VOLUME
- INSTRUCTION MANUAL
- CAUTION:
- WARNING:
- USING AC POWER
- Battery Operation
- English
- CONTROLS
- POWER SUPPLY
- Top and front panels (See fig)
- VOLUME KNOB
- CD DOOR
- RANDOM BUTTON
- USE RADIO
- USE AUX
- USING THE CASSETTE
- PROGRAM METHOD
- CD/MP3 PLAYER
- Playing a CD/MP3
- Playing a USBPlaying a USB
- Power Off
- No sound/power
- Display does not function properly/
- Poor cassette sound quality
- No disc indication
- CD/MP3/USB playback does not work
- The CD/MP3 skips tracks
- BEDIENUNGSANLEITUNG
- BETJENINGSVEJLEDNING
- GEBRUIKSHANDLEIDING
- AC-VOEDING GEBRUIKEN
- KÄYTTÖOHJE
- GUIDE D'UTILISATION
- FONCTIONNEMENT SUR SECTEUR
- INSTRUKCJA OBSŁUGI
- MANUAL DE INSTRUÇÕES
- Painéis superior e frontal (Ver fig. 1)
- BOTÃO VOLUME
- 6.BOTÃO PROGRAMAR/HORA
- Paneles superior y frontal (Véase figura 1)
- 1.BOTÓN DE VOLUMEN
- BRUKSANVISNING
- ANVÄNDA NÄTSTRÖM
Brand : DENVER
Model : TCU-61
Category : Cd player/recorder