
RC-6403 - Walkie-talkie TRISTAR - Free user manual and instructions
Find the device manual for free RC-6403 TRISTAR in PDF.


| Product Type | Walkie-talkie |
| Brand | TriStar |
| Model | RC-6403 |
| Dimensions (approx.) | 17 x 6 x 4 cm |
| Weight (with batteries) | Approximately 250 g |
| Power Supply | 4 AAA batteries (not included) |
| Number of channels | 8 channels |
| Maximum range | Up to 5 km in open field |
| Main functions | Walkie-talkie, VOX (hands-free), channel scan, built-in speaker |
| Frequency | PMR446 (446 MHz) |
| CTCSS/DCS code | Yes, to avoid interference |
| Display | Backlit LCD screen |
| Housing material | ABS plastic |
| Maintenance and cleaning | Wipe with a soft, dry cloth. Do not use abrasive products. |
| Safety | Use only recommended batteries. Do not expose to moisture. |
| Spare parts and repairability | Contact TriStar after-sales service for spare parts. Repair by a professional recommended. |
| General information | Compliant with European regulations. Recreational and light professional use. |
Frequently Asked Questions - RC-6403 TRISTAR
User questions about RC-6403 TRISTAR
0 question about this device. Answer the ones you know or ask your own.
Ask a new question about this device
Download the instructions for your Walkie-talkie in PDF format for free! Find your manual RC-6403 - TRISTAR and take your electronic device back in hand. On this page are published all the documents necessary for the use of your device. RC-6403 by TRISTAR.
USER MANUAL RC-6403 TRISTAR
natural_image
Black and white photo of a walkie-talkie with a digital display and antenna (no visible text or symbols)TOPCOM®
Twintalker 5400
USER GUIDE
HANDLEIDING
MANUEL D'UTILISATEUR
BEDIENUNGSANLEITUNG
MANUAL DE USUARIO
BRUKSANVISNING
BRUGERVEJLEDNING
ANVANDARHANDBOK
KAYTTOOHJE
MANUALE D'USO
MANUAL DO UTILIZADOR
UŽIVATELSKA PŘÍRUČKA
Οδηγιεσ Χρησησ
INSTRUKCJA OBSEŁUGI
UZIVATEL'SKY MANUAL
V1.0-08'11
CE
UK The CE symbol indicates that the unit, complies with the essential requirements of the FATE directive.
UK The lectures described in this manual are published with reservation to modifications.
Thank you for purchasing the Twintalker 5400. It's a long range, low powered radio communication device with a range of maximum 10 Km. It has no running costs other than the minimal cost of re-charging the batteries. The Twintalker operates on 8 channels.
1.1 Intended purpose
It can be used for recreational purposes. For example: to keep in contact during travelling with 2 or more cars, biking, skiing. It can be used to keep in contact with your children when they are playing outside, etc...
2 C E M a r k
The CE symbol on the unit, user guide and giftbox indicates that the unit complies with the essential requirements of the R&TTE directive 1995/5/EC.
3 Safety instructions
3.1 General
Please read carefully through the following information concerning safety and proper use. Make yourself familiar with all functions of the device. Keep this manual in a safe place for future use.
3.2 Burning Injuries
• If the cover of the antenna is damaged, do not touch because when an antenna comes in contact with the skin, a minor burn may result when transmitting.
- Batteries can cause properly damage such as burns if conductive material such as jewellery, keys or beaded chains touches exposed terminals. The material may complete an electrical circuit (short circuit) and become quite hot. Exercise care in handling any charged battery, particularly when placing it inside a pocket, purse or other container with metal objects.
3.3 Injuries
Do not place your device in the area over an air bag or in the air bag deployment area. Air bags inflate with great force. If a PMR is placed in the bag deployment area and the air bag inflates, the communicator may be propelled with great force and cause serious injury to the occupants of the vehicle.
- Keep the PMR at least 15 centimetres away from a pacemaker. - Turn your PMR OFF as soon as interference is taking place with medical equipment.
3.4 Danger of explosion
Do not replace batteries in a potentially explosive atmosphere. Contact sparking may occur while installing or removing batteries and cause an explosion.
- Turn your PMR off when in any area with a potentially explosive atmosphere. Sparks in such areas could cause an explosion or fire resulting in bodily injury or even death.
- Never throw batteries in fire as they may explode.

Areas with potentially explosive atmospheres are often, but not always, clearly marked. They include fuelling areas such as below deck on boats, fuel or chemical transfer or storage facilities; areas where the air contains chemicals or particles, such as grain, dust or metal powders; and any other area where you would normally be advised to turn off your vehicle engine.
3.5 Poisoning danger
- Keep batteries away from small children.
3.6 Legal
• In some countries it is prohibited to use your PMR while driving a vehicle. In this case leave the road before using the device.
- Turn your PMR OFF when on board an aircraft when instructed to do so. Any use of the PMR must be in accordance with airline regulations or crew instructions.
• Turn your PMR OFF in any facilities where posted notices instruct you to do so. Hospitals or health care facilities may be using equipment that is sensitive to external RF energy.
• Replacing or modifying the antenna may affect the PMR radio specifications and violate the CE regulations. Unauthorised antennas could also damage the radio.
3.7 Notes
- Do not touch the antenna while transmitting, it could affect the range. - Remove the batteries if the device is not going to be used for a long period.
4 Cleaning and maintenance
- To clean the unit, wipe with a soft cloth dampened with water. Don't use a cleaner or solvents on the unit; they can damage the case and leak inside, causing permanent damage.
- Battery contacts may be wiped with a dry lint-free cloth.
3
5 Disposal of the device (environment)

At the end of the product lifecycle, you should not throw this product into the normal household garbage but bring the product to a collection point for the recycling of electrical and electronic equipments. The symbol on the product, user guide and/or box indicate this. Some of the product materials can be re-used if you bring them to a recycling point. By re-using some parts or raw materials from used products you make an important contribution to the protection of the environment. Please contact your local authorities in case you need more information on the collection points in your area.
6 Using a PMR device
To communicate between PMR devices they need to be set all on the same channel and sub-channel (CTCSS/DCS) and within receiving range (up to max 10 km in open field). Since these devices use free frequency bands (channels), all devices in operation share these channels(total 8 channels - Annex A). Therefore, privacy is not guaranteed. Anybody with a PMR set to your channel can overhear the conversation. If you want to communicate (transmitting a voice signal) you need to press the PTT-key [14] Once this key pressed, the device will go into transmit mode and you can speak into the microphone. All other PMR devices in range on the same channel and in standby mode (not transmitting) will hear your message. You need to wait until the other party stops transmitting before you can reply to the message. At the end of each transmission the unit will send a beep if the Roger Beep is enable (See chapter *12.12 Roger Beep On/Off.). To reply, just press the PTT-key and speak into the microphone.

If 2 or more users press the PTT-key at the same time the receiver will receive only the longest signal and the other signal(s) will be suppressed. Therefore you should only transmit a signal (press PTT-key) when the channel is free.

The range of radio waves is strongly affected by obstacles such as buildings, concrete/metal structures, the unevenness of the landscape, woodland, plants, ... This implies that the range between two or more PMR's may in some extreme cases be restricted to a maximum of a few tens of meters. You will soon notice that PMR works best when there is a minimum of obstacles between users.
7 Included in the package
• 2 x Twintalker 5400
- 1 x Duo charger
• 1 x Power adapter
- 2 x NiMH battery pack
- 2 x Belt clip
• U 's e r g u l d e
8 Getting started
8.1 Installing / Removing the belt clip
-
To remove the bell clip from the unit, push the bell clip (B) towards the antenna, while pulling the clip tab (A).
-
When re-installing the bell clip, a click indicates that the bell clip is locked into position.
8.2 Installing the batteries
-
Open the battery compartment. Push the latch (C) downwards.
-
Put in the battery. The battery pack label will indicate the correct position of the battery.
-
Before closing the battery door, check the rubber seal around the battery compartment. Make sure that the seal is in good condition and that there is no foreign matter under the seal.
-
Close the battery compartment door and lock the battery door by using the latch.
9 Charging the batteries
The desktop charger provides drop-in charging convenience.
-
Put the desktop charger on a flat surface.
-
Plug one end of the supplied adapter into an easy accessible electric socket and the other end into the connector on the backside of the desktop charger.
-
Make sure that the radio is turned OFF.
-
Put the radio in the charger
-
The charging LED will turn on if it's properly inserted and charging.
It will take about 16 hours to fully charge the Ni-Mh battery.


Do not short-circuit the batteries or dispose in fire. Remove the batteries if this device is not going to be used for a long period.
Do not charge non rechargeable batteries like Alkaline batteries in the charger. This might damage the PMR's and charger unit.
10 Description
See folded cover page - Illustration 1
-
LCD display
-
Optional headset connector
-
Optional charger connector
-
On/Off (Menu key
-
ОПОН-Я МЕНА КУ,
-
Speaker volume up 7. Speaker volume down
-
Speaker von
-
Microphages
-
Мисторию
-
Speaker
-
Call / Key lock key
-
Channel down
13 Channel
- Channel up
-
Monitor key MON
-
Monics
-
PTT-key
11 LCD display information
See folded cover page - Illustration 2
-
RX icon
-
Battery level indication
-
TX icon
-
Keylock icon
-
Volume icon
(2. Volume)
-
Vox Icon
-
Channel indication
-
Sub channel indication
-
Scan icon
-
Call icon
12 Using the Twintalker 5400

If the segments and icons of the displays are shown in light grey in this user guide, it indicates that they are blinking.
12.1 Turning the Unit ON/OFF
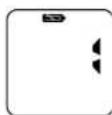
To turn ON: - Press and hold the - key for 2 seconds. The unit will "beep" and the LCD display will display the current channel.
To switch OFF: +Press and hold the - key on 2 seconds The unit will 'beep' and the LCD display will turn blank.
12.2 Battery Charge Level / Low Battery Indication
The battery charge level is indicated by the battery icon on the LCD Screen.


Battery full
Battery low
Battery almost empty
Twintalker 5400

When the battery is almost empty, the unit will turn OFF automatically after 30 seconds.
12.3 Adjusting Speaker Volume
There are 5 speaker volume levels (0.7)

- Press the - key stand-by-mode to increase the speaker volume. The volume level is displayed.
- Press the - key - to decrease the speaker volume.
• After 5 seconds, the unit will go back to idle status.
12.4 Receiving a signal
The unit is continuously in the receive mode when the unit is switched ON and not transmitting.

In order for other people to receive your transmission, they must also be on the same channel and have set the same sub-channel (Chapter 12.6 and 12.7).
12.5 Transmitting a signal
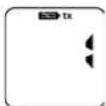
- Press and hold the PTT - key ⑭ to transmit. The TX symbol is displayed. - Hold the unit in a vertical position with the microphone 10cm from the mouth and speak into the microphone ⑧ - Release the PTT - key ⑭ when you want to stop transmitting
12.6 Changing channels

- Use the - key of the - key to go to a higher-order channel. - Press the PTT - key to confirm
12.7 Sub-channels : CTCSS (Continious Tone Coded Squelch System)
DCS (Digital Coded Squelch)
License free PMR radio's operating on the 445 MHz frequency band, have 8 available radio channels. If there are many PMR users in your neighborhood, there is a chance that some of these users are operating on the same radio channel.
To prevent that you receive signals from other users, sub-channels have been integrated. Two PMR radio's will only be able to communicate with each other when they are operating on the same radio channel and when they have selected exactly the same sub-channel.
There are two kind of sub-channels
• Continuous Tone Coded Squelch System (CTCSS)
• Digital Coded Squelch (DCS)
When using CTCSS, a low frequency tone (between 67 and 250 Hz) will be transmitted along with the voice signal. There are 38 available tones to choose from. You are free to choose one of these 38 available tones. Due to filtering, these tones will generally not be audible so they will not disturb the communication.
DCS is similar to CTCSS, but instead of sending a continuous tone of a selected frequency, a digital data transmission is added to the radio signal. This Digital Code is transmitted at a really low rate, around 134 bits per second (the code is 23 bits long). Only the PMR's of the latest generation will support DCS. There are d3 available DCS codes that can be used. Since earlier models will only support CTCSS it will be better to use DCS to prevent that other users will be audible during your PMR conversations.
Twintalker 5400
12.7.1 Changing sub-channels

Press the ⏻→ - key ⑤ : The current selected sub-channel (or "oF" in case of no sub-channel) will blink.
• Use the - key of CH▲ key to select the dashed sub-channel;
1..38: CTCSS code (1..38)
39.121: DCS code (1.83)
- Press the PTT - key to confirm

Annex B will show all detailed information about the CTCSS and DCS sub-channel codes.
12.8 Making a call

When you press the -key you will transmit a call tone to the other users on the same
channel/sub-channel. This will indicate that you want to start a conversation.
- Press the - key • 10

There are 5 different call tones. You can select a call tone in the menu:
+Press the - key four times ⑤
+ Use the - key of CH-▲- key to select the call tone ⑪
- Press the PTT - key to con#m.
12.9 Monitor
You can use the monitor function to check for weaker signals in the current channel
• Press the MON - key to station monitoring.
• If you hold this key for more than 3 seconds, the radio will go into continuous monitoring mode.
- Press the key again to disable the monitor function.
12.10 Channel Scan
Channel scan performs a search for active signals in an endless loop from channel 1 to 6.
Once an active channel is found, the scanning will stop so you can listen to the conversation.
If there is no more activity on the found channel, the scanning will resume after two seconds. If you press the PTT-key of the found channel, the scan function will end and the radio will remain on this channel
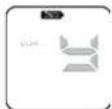
- Press the - key two times 5
+ Use the - key clt▲- key to select Y for scanning ⑪
- Press the - key to confirm Scanning will begin
+ The scanning will stop once the PTT - key is pressed.
12.11 VOX
When the optional headset (without PTT-key) is connected, the voice activated transmission function (VOX) can be used.
This way, the user does not need to press the PTT button to start transmitting. The Twintalker 5400 will start transmitting when you start talking into the microphone of the headset.

- Press the - key three times 5
• Use the CH▲-key ② or the CH▼ - key ⑪ to select the VOX level or oF to disable VOX. (there are 5 VOX levels)
- Level 1: Highest sensitive for quite environments
- Level 5: Lowest sensitivity for noisy environments
- Press the PTT - key to confirm
12.12 Roger Beep On/Off
After the PTT - key is released, the unit will send out a roger beep to confirm that you have stopped talking.

The Roger Beep can be switched On or Off:
- Press the the - key five times ⑤
• Use the CH▲-key(12) or the CH▼-key(11) to enable (Y) or disable (n) the
Roger Beep
- Press the PTT - key to confirm
12.13 Key Beep On/Off
When a key is pressed, a tone can be heard.

The key beep can be switched On or Off:
- Press the - key six times ⑤
• Use the CH▲ - key ⑰ for the CH▼ - key ⑪ to enable (Y) or disable (n) the
key tone
- Press the PTT - key to confirm
12.14 Key lock
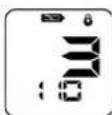
- Press and hold the -key for free seconds to activate/deactivate the key
lock function.

When key lock is enabled, the PTT-key 14, the volume control-keys, the monitor-key (MON) and the call-
key the 🔒 will still be operational. All other keys are locked.
13 Warranty
13.1 Warranty period
The devices have a 24-month warranty period. The warranty period starts on the day the new unit is purchased. There is no warranty on standard or rechargeable batteries.
Consumables or defects causing a negligible effect on operation or value of the equipment are not covered. The warranty has to be proven by presentation of the original or copy of the purchase receipt, on which the date of purchase and the unit-model are indicated
13.2 Warranty exclusions
Damage or defects caused by incorrect treatment or operation and damage resulting from use of non-original parts or accessories are not covered by the warranty.
The warranty does not cover damage caused by outside factors, such as lightning, water and fire, nor any damage caused during transportation. No warranty can be claimed if the serial number on the unit has been changed, removed or rendered illegible. Any warranty claims will be invalid if the unit has been repaired, altered or modified by the buyer.
This product is in compliance with the essential requirements and other relevant provisions of the R & TTE directive 1999/5/EC.
The Declaration of conformity can be found on :
http://www.topcom.net/support/cedeclarations.php
Twintalker 5400
1 Inleiding
• Continuous Tone Coded Squelch System (CTCSS)
• Digital Coded Squelch (DCS)
39.121: DCS-code (1...83)
1..38: code CTCSS (1..38)
39..121: code DCS (1..83)
+Press the - key four times ⑤
• Continuous Tone Coded Squelch System (CTCSS)
• Digital Coded Squelch (DCS)
• Continuous Tone Coded Squelch System (C/CSS)
• Digital Coded Squelch (DCS)
3.5 Fare for forgifting
• Continuous Tone Coded S
• Digital Coded Squelch (DCS)
Bos (English coded equation)
39..121: DCS-koodi (1...03)
The following table provides the results of the 2017 Annual Report on the Consolidated Financial Statements.
12.11 VOX
39.121: codice DCS (1...83)
8.2 Instalar as pilhas
9 Carreqar as pilhas
• Continuous Tone Coded Squelch System (CTCSS)
• Digital Coded Squelch (DCS)
12.7 Podkanály: CTCSS (Continuous Tone Coded Squelch System)/
DCS (Digital Coded Squelch)
• CTCSS (Continuous Tone Coded Squelch System)
• DCS (Digital Coded Squelch)
Annex A
Operation frequencies
| Channel Number RX Frequency (MHz) TX Frequency (MHz) | |
| 1 446.00625 446 00625 | |
| 2 446.01875 446 01875 | |
| 3 446.03125 446 03125 | |
| 4 446.04375 446 04375 | |
| 5 446.05625 446 05625 | |
| 6 446.06875 446 06875 | |
| 7 446.08125 446 08125 | |
| 8 446.09375 446 09375 |
Annex B
Sub-channel codes
| CTCSS Code ChartCode Freq [Hz] Code Freq [Hz] Code Freq [Hz] Code Freq [Hz] | ||||||
| 1671197.421356.581192.8 | ||||||
| 271.91210022141.332203.5 | ||||||
| 374.413103523146.233210.7 | ||||||
| 47716107224151.434218.1 | ||||||
| 579.715100925156.735225.7 | ||||||
| 682.516104826162.236233.8 | ||||||
| 785.417108827167.937241.8 | ||||||
| 888.5181028173.838250.3 | ||||||
| 991.519107339179.9 | ||||||
| 1094.820101650186.2 | ||||||
| DCS Code ChartCode DCS Code Code DCS Code Code DCS Code Code DCS Code | ||||||
| 390236014 | 881315102532 | |||||
| 400256115 | 282331103546 | |||||
| 410266215 | 589343104565 | |||||
| 420316315 | 684346105606 | |||||
| 430326415 | 285351106612 | |||||
| 440436515 | 586364107624 | |||||
| 450476612 | 287365108627 | |||||
| 460616717 | 488371109631 | |||||
| 470546820 | 889411110632 | |||||
| 480656922 | 380412111654 | |||||
| 490717022 | 881415112662 | |||||
| 500727124 | 392423113664 | |||||
| 510737224 | 493431114703 | |||||
| 520747324 | 594432115712 | |||||
| 531347425 | 105445116723 | |||||
| 541357526 | 196464117731 | |||||
| 551367626 | 897463118732 | |||||
| 561257726 | 598466119734 | |||||
| 571317822 | 199505120743 | |||||
| 5813279320 | 100506121754 | |||||
| 5913480311 | 1105156 | |||||
Annex C
Technical specifications
| Frequency range: 446.00625 ... 446.09375 MHz | |
| Channel spacing: | 12.5 KHz |
| Radio Channels: | 8 |
| 121 Sub-channels: | 38 CTCSS / 83 DCS |
| Maximum RF output power: | 0.5 W |
| Modulation: | FM - F3E |
| Antenna type: Fixed | |
| Battery type: | 4.8V (Ni-MH pack) |
| Power adapter: | 9V 210mA |
| IP-standard: | IPX7 (submersible) |
This product is in compliance with the essential requirements and other relevant provisions of the R & TTE directive 1999/5/EC.
The Declaration of conformity can be found on: http://www.topcom.net/support/cedeclarations.php
TOPCOM®
Visit our website
www.topcom.net
- TOPCOM®
- Twintalker 5400
- USER GUIDE
- Intended purpose
- Safety instructions
- General
- Burning Injuries
- Injuries
- Danger of explosion
- Poisoning danger
- Legal
- Notes
- Cleaning and maintenance
- Disposal of the device (environment)
- Using a PMR device
- Included in the package
- Getting started
- Installing / Removing the belt clip
- Installing the batteries
- Charging the batteries
- Description
- LCD display information
- Using the Twintalker 5400
- Turning the Unit ON/OFF
- Battery Charge Level / Low Battery Indication
- Adjusting Speaker Volume
- Receiving a signal
- Transmitting a signal
- Changing channels
- Sub-channels : CTCSS (Continious Tone Coded Squelch System)
- DCS (Digital Coded Squelch)
- Inleiding
- Fare for forgifting
- Instalar as pilhas
- Carreqar as pilhas
- Podkanály: CTCSS (Continuous Tone Coded Squelch System)/
Brand : TRISTAR
Model : RC-6403
Category : Walkie-talkie