
KCM106 - Coffee machine Koenic - Free user manual and instructions
Find the device manual for free KCM106 Koenic in PDF.


| Product type | Filter coffee machine |
| Brand | Koenic |
| Model | KCM106 |
| Rated power | 1000 W |
| Rated frequency | 50/60 Hz |
| Supply voltage | 220-240 V |
| Tank capacity | 8 to 12 cups |
| Carafe type | Thermal carafe with glass interior |
| Automatic shut-off | Yes, after brewing |
| Aroma protection | Protective lid on the carafe |
| Recommended paper filter | Size 1x4 |
| Removable funnel | Yes |
| Base with power indicator | Yes |
| Recommended descaling | With vinegar |
| Cleaning the base unit | Damp cloth, do not immerse |
| Carafe dishwasher safe | No |
| Carafe microwave safe | No |
| Rinse cycles before first use | 2 to 3 cycles with clean water |
| Cooling time between cycles | 5 minutes |
| Intended use | Household use only |
| Safety | Grounded plug |
Frequently Asked Questions - KCM106 Koenic
User questions about KCM106 Koenic
0 question about this device. Answer the ones you know or ask your own.
Ask a new question about this device
Download the instructions for your Coffee machine in PDF format for free! Find your manual KCM106 - Koenic and take your electronic device back in hand. On this page are published all the documents necessary for the use of your device. KCM106 by Koenic.
USER MANUAL KCM106 Koenic
Coffee Maker Professional Aluminium Edition
KCM106
DE Gebrauchsanweisung
EL Οδηγίες χρήσης
EN User Manual
ES Manual de instrucciones
FR Mode d'emploi
HU Kezelési leírás
IT Manuale dell'utente
NL Gebruiksaanwijzing
PL Instrukcja obsługi
PT Instruções de utilização
RU Руководство пользователя
sv Bruksanvisning
TR Kullanım Kilavuzu
ZH 用户手册
natural_image
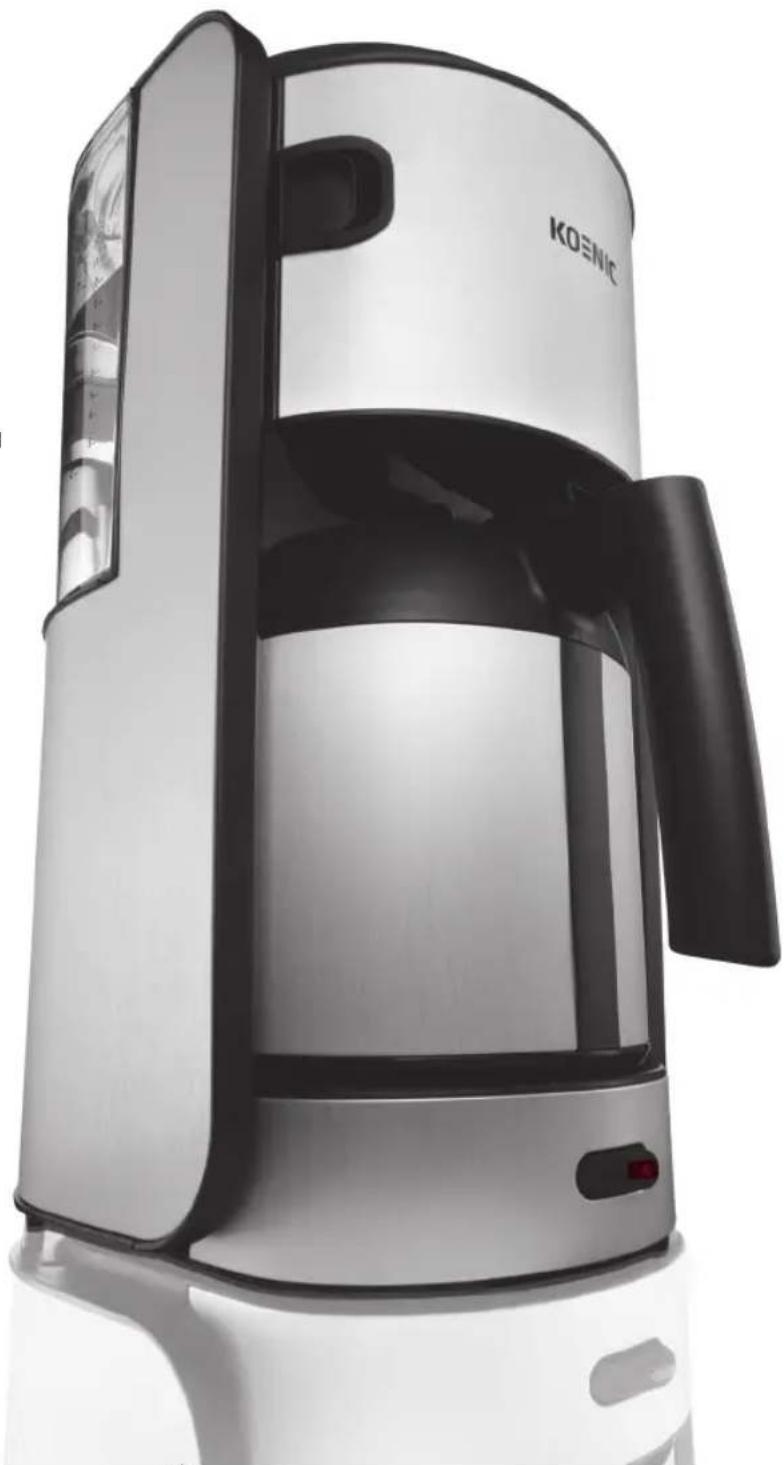
Exterior view of a modern KOENIC coffee maker with black handle and white base (no visible text or symbols)


| Deutsch | 4 - 7 |
| Ελληνικά | 8 - 11 |
| English | 12 - 15 |
| Español | 16 - 19 |
| Français | 20 - 23 |
| Magyar | 24 - 27 |
| Italiano | 28 - 31 |
| Nederlands | 32 - 35 |
| Polski | 36 - 39 |
| Português | 40 - 43 |
| Русский | 44 - 47 |
| Svenska | 48 - 51 |
| Türkçe | 52 - 55 |
| 汉语 | 56 - 59 |
natural_image
Close-up of a white electrical outlet plug with a black cable, showing a red arrow pointing to the plug (no text or symbols visible)natural_image
Close-up of a white electrical outlet plug with a black cable, showing a red arrow pointing to the outlet (no text or symbols visible)natural_image
Illustration of a faucet with a red arrow pointing to a water tank (no text or symbols)natural_image
Close-up of a black cylindrical device with a red arrow pointing to its side, showing a circular opening (no text or symbols visible)natural_image
Close-up of a black and silver coffee maker with a red arrow pointing to its lid (no text or symbols visible)natural_image
Close-up of a modern kitchen blender with a red arrow pointing to its side (no text or symbols visible)natural_image
Close-up of a black and white thermosink with a red downward arrow indicating cooling effect (no text or symbols visible)natural_image
Close-up of a white electrical plug with a black cable and red arrow pointing to the plug tip (no text or symbols visible)natural_image
Close-up of a white electrical outlet plug with a black cable, showing a red arrow pointing to the plug (no text or symbols visible)natural_image
Illustration of a faucet with a red arrow pointing to the faucet handle (no text or symbols present)natural_image
Close-up of a black cylindrical device with a red arrow pointing to its side, showing internal components (no text or symbols)natural_image
Close-up of a kitchen blender with a red arrow indicating a drop, no visible text or symbolsnatural_image
Close-up of a modern kitchen blender with a red arrow pointing to its side (no visible text or symbols)natural_image
Close-up of a black and silver thermosink with a red arrow pointing to the lid (no text or symbols visible)IMPORTANT SAFETY INSTRUCTIONS. READ CAREFULLY AND KEEP FOR FUTURE REFERENCE.
- Make sure the voltage indicated on the appliance corresponds to your local mains voltage.
- For safety reasons, this class I appliance is provided with a plug with earth connection. Always connect this appliance to a mains socket outlet with a protective earthing connection.
- This appliance is not intended for use by persons (including children) with reduced physical, sensory or mental capabilities, or lack of experience and knowledge, unless they have been given supervision or instruction concerning use of the appliance by a person responsible for their safety. Children should be supervised to ensure that they do not play with the appliance.
- If the supply cord is damaged, it must be replaced by the manufacturer or its service agent or similarly qualified person in order to avoid hazard.
- WARNING: Do not immerse appliance in water. Danger of electric shock.
- Only use the appliance with the accessories provided. Switch off the appliance before removing the jug from its stand.
• Appliance intended to be used in household and similar applications such as staff kitchen areas in shops, offices and other working environments, farm houses, by clients in hotels, motels and other residential type environment, bed and breakfast type environments.
- This appliance is only intended for making filter coffee. Do not heat or boil any other liquids or food, in order to avoid hazardous situations.
• Always place the appliance and jug on a dry, flat and stable surface.
- Do not use this appliance outdoors or for commercial purposes. This unit is intended for household use only.
- Do not expose this appliance to rain or humidity. Do not touch with wet hands.
- Regularly check if the supply cord, appliance or extension cable are defective. If found defective, do not put appliance into operation. Immediately pull the plug.
- Place the supply cord or any extension cord in a way that pulling or tripping over it is impossible. Do not allow the supply cord to hang down within easy reach.
- Never carry or pull the appliance by the supply cord. Do not pull the supply cord over sharp edges. Do not jam or bend it.
- Switch the appliance off and disconnect the plug from the mains when not in use.
- Never pull the plug by the supply cord or with wet hands. Disconnect the mains plug in case of faults during use, before cleaning or moving the appliance, and after use.
- Fill the reservoir with water only – do not use any other liquids.
- Do not operate the appliance by means of an external timer or separate remote-control system.
- The base unit, supply cord and plug must not come in contact with water. Should this happen, disconnect the plug immediately.
- Never put the appliance or supply cord on hot surfaces or near open flames.
• Always switch the appliance off before filling with water.
- Do not touch the housing during and some time after operation. It will get very hot. Only lift the jug by the handle.
- If coffee is prepared for several times consecutively, always switch off the device for about 5 minutes before operating again.
- Danger of injuries caused by scalding! Do not open the top cover during operation.
- Do not leave the appliance unattended while turned on or plugged in.
- Do not use the appliance in explosive or flammable environments.
- Ensure the top cover is closed before starting operation.
EN
Intended use
This appliance is only intended for preparing filter coffee. Only use according to these instructions. Improper use is dangerous and will void any warranty claim. Observe the safety instructions.
Disposal

The crossed-out wheeled bin logo requires the separate collection of waste electric and electronic equipment (WEEE). Electric and electronic equipment may contain dangerous and hazardous substances. Do not dispose of this appliance as unsorted municipal waste. Return it to a designated collection point for the recycling of WEEE. By doing so, you will help to conserve resources and protect the environment. Contact your retailer or local authorities for more information.
English
Congratulations
Thanks for your purchase of a KOENIC product. Please read this manual carefully and keep it for future reference.
Before first time use
For a perfect taste, run the appliance 2 or 3 times with cold, fresh water (without coffee). Each time the water has run through, switch off the appliance and let it cool down for 5 minutes.
Making coffee
- Use grip recess on the water tank and lift it out.
- Fill the water tank with cold, fresh water to desired level. Do not fill below 2 cups or beyond 8/12 cups mark. Reattach water tank on coffee maker.
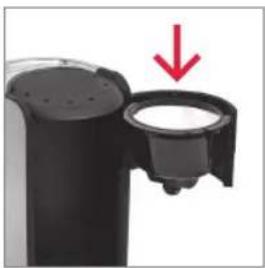
- Place the funnel correctly. Lower the handle until it locks into place.
- Insert a paper filter (1x4) and fill with the desired amount of ground coffee. Close the swing-out filter till it locks into place.
- Switch on the appliance. When all the water has run through, the brewing process is finished. Appliance switches off automatically.
- Remove the jug from the stand.
Cleaning and care
-
Unplug the coffee maker from the mains supply and allow it to cool down.
-
Clean the base unit with a slightly damp, lint-free cloth. Do not immerse in water.
- Rinse the inside of the thermo jug with hot water. To remove coffee deposits add some detergent and apply the screw-in lid. After a view hours, rinse with fresh water. Wipe the outside with a clean damp cloth.
- Clean the funnel in hot sudsy water; rinse and dry thoroughly.
- Do not use any abrasive cleaning agents.

natural_image
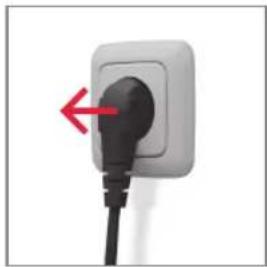
Close-up of a white electrical outlet plug with a black cable and red arrow pointing to the socket (no text or symbols visible)Before use, plug in the appliance.

natural_image
Close-up of a white electrical plug with a black cable, showing a red arrow pointing to the plug (no text or symbols visible)After use unplug the appliance.

natural_image
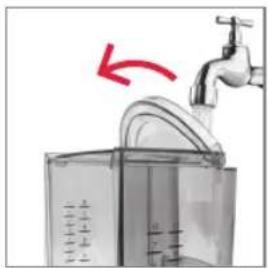
Illustration of a faucet with a red arrow pointing to a water tank (no text or symbols)Fill the water tank with water.

Do not exceed the 8/12 cups mark.
natural_image
Close-up of a black mechanical component with a red arrow pointing to a circular opening (no text or symbols visible)Open funnel holder. Insert paper filter and ground coffee.
natural_image
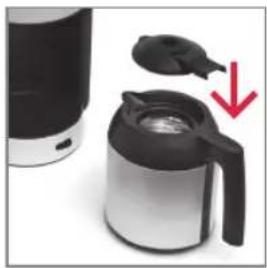
Close-up of a black and silver coffee maker with a red downward arrow indicating a drop or adjustment (no text or symbols visible)Apply aroma protection lid to the jug.
natural_image
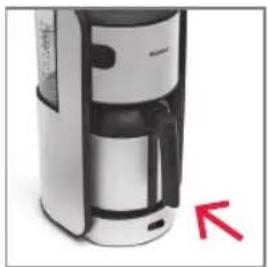
Close-up of a modern kitchen blender with a red arrow pointing to its side (no visible text or symbols)Place thermo jug on the stand and switch on.

natural_image
Close-up of a black and white thermosink with a red downward arrow indicating cooling effect (no text or symbols visible)When brewing is finished, remove thermo jug and apply screw-in lid.

1 Water tank
2 Water level indication
3 Stand
4 Funnel
5 Screw-in lid
6 Aroma protection lid
7 Thermo jug
8 Power on key with indicator
9 Funnel holder
10 Swing-out filter release
11 Top cover
Descaling
- Add 2-3 tablespoons of vinegar essence to approx. 250 ml cold water.
- Pour this mixture into the water tank. Place a paper filter into the funnel (without ground coffee) and operate the appliance as described in section MAKING COFFEE. Repeat the descaling process if necessary.
- Ventilate the room during the descaling process and do not breathe in the vinegar vapours.
- After descaling, let the appliance run twice more with only water rinsing off any vinegar or scale residue.
Technical Data
Rated voltage: 220-230 V Rated power input: 1000 W Rated frequency: 50/60 Hz

Thermo jug caution
- Avoid shocks and great differences in temperature.
- Do not stir in the thermo jug.
- If the glass surface in the thermo jug is damaged, stop using it immediately.
- Do not wash in a dishwasher.
- Do not use in a microwave oven.
natural_image
Close-up of a white electrical outlet plug with a black cable and red arrow pointing to the socket (no text or symbols visible)natural_image
Close-up of a white electrical plug with a black cable, showing a red arrow pointing to the plug (no text or symbols visible)natural_image
Illustration of a faucet spraying water onto a storage cabinet (no text or symbols)natural_image
Close-up of a black cylindrical device with a red arrow pointing to its side, showing a circular opening (no text or symbols visible)natural_image
Close-up of a black and silver coffee maker with a red downward arrow indicating a drop or adjustment (no text or symbols visible)natural_image
Close-up of a modern kitchen blender with a red arrow pointing to its side (no text or symbols visible)natural_image
Close-up of a black and silver thermosink with a red downward arrow indicating a drop or change (no text or symbols visible)natural_image
Close-up of a white electrical outlet plug with a black cable, showing a red arrow pointing to the plug (no text or symbols visible)natural_image
Close-up of a black electrical plug with a red arrow pointing to its socket (no text or symbols visible)natural_image
Illustration of a faucet with a red arrow pointing to a water tank (no text or symbols)natural_image
Close-up of a black cylindrical device with a red arrow pointing to its side, showing a circular opening (no text or symbols)natural_image
Close-up of a black and white kitchen kettle with a red arrow pointing to its lid (no text or symbols visible)natural_image
Close-up of a white thermosink with a black lid and red arrow pointing to the side (no visible text or symbols)natural_image
Close-up of a black and silver coffee maker with a red arrow pointing to its lid (no text or symbols visible)natural_image
Close-up of a white electrical outlet plug with a black cable and red arrow pointing to the socket (no text or symbols visible)natural_image
Close-up of a white electrical plug with a black cable, showing a red arrow pointing to the plug (no text or symbols visible)natural_image
Illustration of a faucet with a red arrow pointing to a water tank (no text or symbols)natural_image
Close-up of a black mechanical component with a red arrow pointing to a circular opening (no text or symbols visible)natural_image
Close-up of a black and silver coffee maker with a red downward arrow indicating cooling effect (no text or symbols visible)natural_image
Close-up of a modern kitchen blender with a red arrow pointing to its side (no text or symbols visible)natural_image
Close-up of a black and white thermosink with a red downward arrow indicating cooling effect (no text or symbols visible)natural_image
Close-up of a white electrical outlet plug with a black cable and red arrow pointing to the socket (no text or symbols visible)natural_image
Close-up of a white electrical plug with a black cable, showing a red arrow pointing to the plug (no text or symbols visible)natural_image
Illustration of a faucet pouring liquid into a container with a red arrow indicating flow direction (no text or symbols)natural_image
Close-up of a black cylindrical device with a red arrow pointing to its side, showing a circular opening (no text or symbols visible)natural_image
Close-up of a black and silver coffee maker with a red downward arrow indicating a drop or adjustment (no text or symbols visible)natural_image
Close-up of a modern kitchen blender with a red arrow pointing to its side (no visible text or symbols)natural_image
Close-up of a black and white thermosink with a red downward arrow indicating a drop or change (no text or symbols visible)natural_image
Close-up of a white electrical outlet plug with a black cable and red arrow pointing to the socket (no text or symbols visible)natural_image
Close-up of a white electrical plug with a black cable, showing a red arrow pointing to the plug (no text or symbols visible)natural_image
Illustration of a faucet with a red arrow pointing to a water tank (no text or symbols)natural_image
Close-up of a black mechanical device with a red arrow pointing to a circular component (no text or symbols visible)natural_image
Close-up of a black and silver coffee maker with a red downward arrow indicating cooling effect (no text or symbols visible)natural_image
Close-up of a modern kitchen blender with a red arrow pointing to its side (no text or symbols visible)natural_image
Close-up of a black and white thermosink with a red downward arrow indicating cooling effect (no text or symbols visible)1 Waterreservoir
2 Waterniveau-indicatie
3 Voet
4 Filter
5 Schroefdeksel
6 Aromadeksel
Ontkalken
natural_image
Close-up of a white electrical outlet plug with a black cable, showing a red arrow pointing to the plug (no text or symbols visible)natural_image
Close-up of a white electrical plug with a black cable and red arrow pointing to the socket (no text or symbols visible)natural_image
Illustration of a faucet with a red arrow pointing to a water tank (no text or symbols)natural_image
Close-up of a black cylindrical device with a red arrow pointing to its side, showing a circular opening (no text or symbols visible)natural_image
Close-up of a black and silver coffee maker with a red arrow pointing to its lid (no text or symbols visible)natural_image
Close-up of a modern thermosink with a red arrow pointing to the side panel (no visible text or symbols)natural_image
Close-up of a kitchen blender with a red arrow indicating cooling effect (no text or symbols visible)natural_image
Close-up of a white electrical outlet plug with a black cable and red arrow pointing to the socket (no text or symbols visible)natural_image
Close-up of a white electrical plug with a black cable, showing a red arrow pointing to the plug (no text or symbols visible)natural_image
Illustration of a faucet with a red arrow pointing to a water tank (no text or symbols)natural_image
Close-up of a black cylindrical device with a red arrow pointing to its side, showing a circular opening (no text or symbols visible)natural_image
Close-up of a black and silver coffee maker with a red downward arrow indicating a drop or adjustment (no text or symbols visible)natural_image
Close-up of a modern thermosink with a glass lid and red arrow pointing to the side (no visible text or symbols)Coloque a cafeteira térmica e ligue a máquina de café.

natural_image
Close-up of a black and silver kitchen blender with a red downward arrow indicating cooling effect (no text or symbols visible)natural_image
Close-up of a white electrical outlet plug with a black cable and red arrow pointing to the socket (no text or symbols visible)natural_image
Close-up of a white electrical plug with a black cable, showing a red arrow pointing to the plug (no text or symbols visible)natural_image
Illustration of a faucet spraying water onto a storage cabinet (no text or symbols)natural_image
Close-up of a black cylindrical device with a red arrow pointing to its side, showing a circular opening (no text or symbols visible)natural_image
Close-up of a black and silver coffee maker with a red downward arrow indicating a drop or adjustment (no text or symbols visible)natural_image
Close-up of a modern thermosink with a glass lid and red arrow pointing to the side (no visible text or symbols)natural_image
Close-up of a black and silver kitchen blender with a red downward arrow indicating cooling effect (no text or symbols visible)natural_image
Close-up of a white electrical outlet plug with a black cable and red arrow pointing to the socket (no text or symbols visible)natural_image
Close-up of a white electrical plug with a black cable, showing a red arrow pointing to the plug (no text or symbols visible)natural_image
Illustration of a faucet with a red arrow pointing to a water tank (no text or symbols)natural_image
Close-up of a black mechanical component with a red arrow pointing to a circular opening (no text or symbols visible)natural_image
Close-up of a black and silver coffee maker with a red downward arrow indicating a drop or adjustment (no text or symbols visible)natural_image
Close-up of a modern kitchen blender with a red arrow pointing to its side (no text or symbols visible)natural_image
Close-up of a black and white thermosink with a red downward arrow indicating cooling effect (no text or symbols visible)natural_image
Close-up of a white electrical outlet plug with a black cable, showing a red arrow pointing to the plug (no text or symbols visible)natural_image
Close-up of a black electrical plug with a red arrow pointing to its socket (no text or symbols visible)natural_image
Illustration of a faucet with a red arrow pointing downward, next to a transparent container (no text or symbols)natural_image
Close-up of a black cylindrical device with a red arrow pointing to its side, showing internal components (no text or symbols)natural_image
Close-up of a black and silver coffee maker with a red arrow pointing to its lid (no text or symbols visible)natural_image
Close-up of a modern kitchen blender with a red arrow pointing to its side (no text or symbols visible)natural_image
Close-up of a black and silver thermosink with a red downward arrow indicating a drop or change (no text or symbols visible)natural_image
Close-up of a white electrical outlet plug with a black cable and red arrow pointing to the socket (no text or symbols visible)使用前,插上该电器。
natural_image
Close-up of a white electrical plug with a black cable, showing a red arrow pointing to the plug (no text or symbols visible)使用后始终拔出电器。
natural_image
Illustration of a faucet with a red arrow pointing to a water tank (no text or symbols)水壶装入水。

不能超过8/12杯的标志。
清洁与维护
natural_image
Close-up of a black mechanical component with a red arrow pointing to a circular opening (no text or symbols visible)natural_image
Close-up of a black and silver coffee maker with a red downward arrow indicating a drop or adjustment (no text or symbols visible)罐子上使用芳香保护盖。

natural_image
Close-up of a modern kitchen blender with a red arrow pointing to its side (no text or symbols visible)在架子上放置热水壶,打开开关。

natural_image
Close-up of a black and white thermosink with a red downward arrow indicating cooling effect (no text or symbols visible)烧煮过程结束后移出热水壶,使用旋进盖。
ZH

Brand : Koenic
Model : KCM106
Category : Coffee machine