
AC-5491 - Air Conditioning TRISTAR - Free user manual and instructions
Find the device manual for free AC-5491 TRISTAR in PDF.


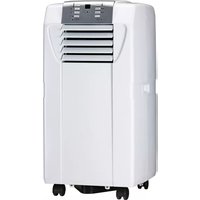
| Product type | Evaporative air cooler (refrigerating fan) |
| Brand | TriStar |
| Model | AC-5491 |
| Supply voltage | 220 V ~ 50/60 Hz |
| Power | 60 W |
| Dimensions (L x W x H) | 300 x 370 x 670 mm |
| Net weight | 7 kg |
| Maximum air flow | 20 m³/min |
| Water consumption | 0.5 - 0.6 L/h |
| Number of speeds | 9 |
| Ventilation modes | Normal, Nature, Sleep |
| Automatic oscillation | Yes, 120° angle |
| Timer | 0.5 to 7.5 hours |
| Negative ions | Yes |
| Humidifier | Yes |
| Air filter | Yes, washable |
| Remote control | Yes, infrared |
| Water tank | Built-in |
| Ice block compatibility | Yes |
| Filter cleaning | Every 2 weeks (washable with clean water) |
| Safety | Stop before refilling, unplug before maintenance |
| Repairability | Cable replacement by a professional, original parts |
| Included accessories | Instruction manual, remote control |
Frequently Asked Questions - AC-5491 TRISTAR
User questions about AC-5491 TRISTAR
0 question about this device. Answer the ones you know or ask your own.
Ask a new question about this device
Download the instructions for your Air Conditioning in PDF format for free! Find your manual AC-5491 - TRISTAR and take your electronic device back in hand. On this page are published all the documents necessary for the use of your device. AC-5491 by TRISTAR.
USER MANUAL AC-5491 TRISTAR
natural_image
White air conditioner unit with ventilation slots and control panel, displayed against a blue background (no visible text or symbols)AC - 5491
water level glass = water niveau glas
≥utlet ≥f negative i≥ns = gat v≥r negatieve i≥nen
≥utlet ≥f air fl≥w = luchtstr≥≥m gat
strainer ≥n rear c≥ver = achterkant vergrendeling.
4 FUNCTIES INT9ODUCTIE
natural_image
Line drawing of a portable air conditioner unit with a grid panel attached (no text or symbols)Fig.3
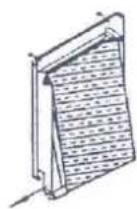
Fig.4
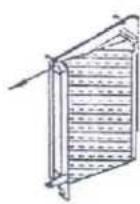
Fig.5
natural_image
Simple line drawing of a container with liquid being poured into it, no text or symbols presentFig.6

Fig.7

Fig.8
8.- Bemerking
natural_image
Simple line drawing of a cabinet with an X-shaped cross symbol on the door (no text or labels)General safety instructions
heck if the tensi≥n ≥f y≥ur supply c≥rresp≥nds with the v≥ltage indicated ≥n the rating plate ≥f y≥ur appliance1
- Bef≥re c≥mmissi≥ning this device please read the instructi≥n manual carefully and keep this s≥ that y≥u can check them later 1
- Please keep these instructi≥ns, the guarantee certificate, the sales receipt and, if p≥ssible, the cart≥n with the inner packaging!
- The device is intended exclusively f ≥ r private and n ≥ t f ≥ r c≥mmercial use! Keep it away fr≥m direct heat, sun and m≥ist and pr≥tect it against sharp impacts1
- Always rem≥ve the plug fr≥m the s≥cket whenever the device is n≥t in use, when attaching access≥ry parts, cleaning the device ≥r whenever a disturbance ≥ccurs1 Switch ≥ff the device bef≥re1 Pull ≥n the plug, n≥t ≥n the cable1
- This appliance is n≥t intended f≥r use by pers≥ns with reduced physical, sens≥ry ≥r mental capacities, ≥r lack ≥f experience and kn≥wledge (including children), unless they have been supervised ≥r instructed c≥ncerning use ≥f the appliance by a pers≥n resp≥nsible f≥r their safety1
- In ≥rder t≥ pr≥tect children fr≥m the dangers ≥f electrical appliances, never leave them unsupervised with the device1 >>nsequently, when selecting the l≥cati≥n f≥r y≥ur device, d≥ s≥ in such a way that children d≥ n≥t have access t≥ the device1 Take care t≥ ensure that the cable d≥es n≥t hang d≥wn1
- Test the device, plug and the cable regularly f ≥ r damage1 If there is damage ≥ f any kind, the device sh ≥ uld n ≥ t be used but the appliance must be repaired by a qualified technician in ≥ rder t ≥ av ≥ id a ha%ard1 Only ≥ original spare parts must be used1
- A damaged c≥rd ≥r plug must be replaced by an auth≥ri%ed technician t≥ av≥id a ha%ard1 =≥ n≥t repair the device y≥urself,1
- Keep the device and the cable away fr≥m heat, direct sunlight, m≥isture, sharp edges and such like1
• 3 ever use the device unsupervised! Switch ≥ff the device whenever y≥u are n≥t using it, even if this is ≥nly f≥r a m≥ment1 - = ≥ n ≥ t use the device ≥ utd ≥ ≥ rs1
- Under n≥ circumstances must the device be placed in water ≥r ≥ther liquid, ≥r c≥me int≥ c≥ntact with such1 =≥ n≥t use the device with wet ≥r m≥ist hands1
- Sh≥uld the device bec≥me m≥ist ≥r wet, rem≥ve the mains plug fr≥m the s≥cket immediately1 =≥ n≥t reach int≥ the water1
- Use the device ≥ nly f ≥ r the intended purp ≥ se1
09ESENTAT"ON OF T"E UN"T
=uring winter, air, which is a vital necessity, bec≥mes extremely dry and ≥ur skin bec≥mes dry, aged by lack ≥f humidity t≥ keep it supple1 In such an envir≥nment, it is imp≥ssible t≥ feel ease1
After years ≥ f intensive research, we have succeeded in creating a range ≥ f carefully designed air-c ≥ nditi ≥ ning units ≥ offering many advantages1
There are different types ≥f ventilat≥r available f≥r air-c≥nditi≥ning6
A quiet gentle air fl≥w such as wind ≥n the green leaves ≥f spring0 fresh and vibrant air fr≥m the c≥ast, fresh air near t≥ heavy d≥wnp≥urs, ≥r gentle and warm at the return ≥f spring1 The series ≥f air c≥nditi≥ning ventilat≥rs pr≥duce a fresh and agreeable air that will c≥l y≥u d≥wn during the h≥t summers and warm y≥u up with their gentle warm air during the c≥ld winters1 The humidifying effect will help y≥u keep y≥ur skin in g≥≥d c≥nditi≥n and help y≥u t≥ feel healthy1 Always1
We thank y≥u f≥r having b≥ught this c≥mputer c≥ntr≥llled air c≥nditi≥ning ventilat≥r1 S≥ that y≥u kn≥w h≥w t≥ use the ventilat≥r c≥rrectly and t≥ get the maximum ≥ut ≥f it, bef≥re use, please carefully read this instructi≥n manual and in particular, the p≥ints marked with Warning ≥r Attenti≥n1
BRIEF DESCRIPTION OF THE FUNCTIONS
- Up t≥ date c≥mputer c≥ntr≥lled techn≥l≥gy system.
- Mechanically c≥ntr≥lled with ≥pti≥nal rem≥te c≥ntr≥l.
- All in ≥ne unit – gentle ventilati≥n, humidity, ani≥n diffusing air filter.
- Filter, water and ani≥n diffusi≥n make the air fresher
- Air humidifier during dry seas≥ns
- 0.5 - 7.5 timer setting, nine ≥pti≥nal ventilati≥n speeds available
- Free%er b≥xes creating a fresher and gentler air
- Negative i≥ns purify the air and guarantee y≥u a fresh and healthy envir≥nment.
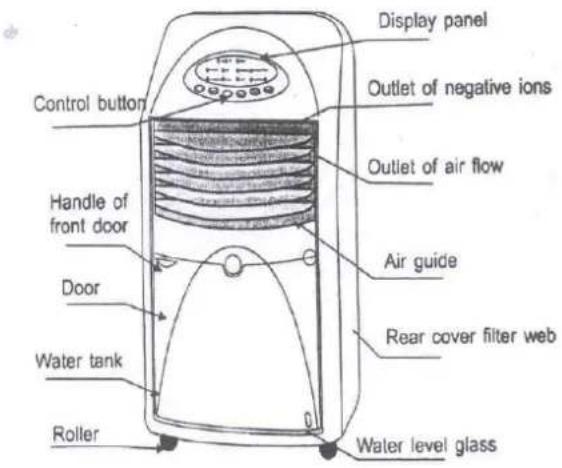
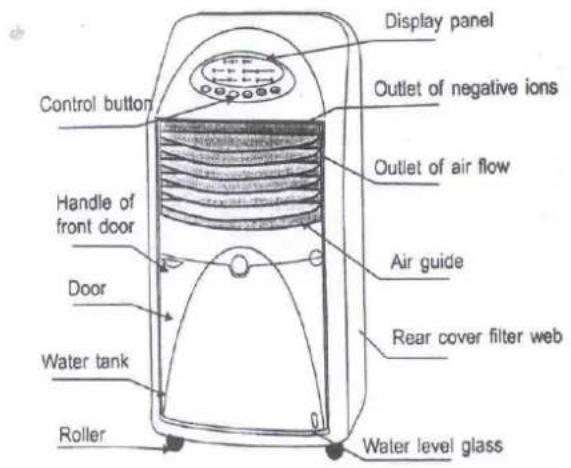
Water tank (behind the d≥r
=≥≥r
R≥ller
Water level glass
Outlet ≥f negative i≥ns
Outlet ≥f air fl≥w
Strainer ≥n rear c≥ver
B9IEF DESC9IPTION OF THE FUNCTIONS
- Refrigerati≥n f≥r c≥≥ling. The ventilat≥r will pr≥vide y≥u with fresh, clean filtered air during the h≥t summers. It is very efficient when the air is h≥t ≥r dry. Its capacity is greatly increased by adding inside a new b≥x which is fr≥%en bef≥re being placed in the ventilat≥r.
- The filtering: the ventilat≥r can filter all fine and n≥xi≥us substances like dust, fibres, sm≥ke etc. Filtering the air will make y≥u feel like y≥u are in a f≥rest ≥r at the sea.
- Ventilati≥n at n≥rmal temperature: the ventilat≥r pr≥vides filtered air ≥nly if it is necessary f≥r it t≥ create a c≥mf≥rtable air fl≥w.
- Humidity: the ventilat≥r has an unquestionable effect at humidifying r≥ms during dry seas≥ns. This function maintains the rate ≥f humidity in an internal space and additi≥nally, keeps y≥ur skin healthy and reduces the risk ≥f illness.
- Adjusting the ventilati≥n: three selecti≥ns (high, mid, and l≥w) t≥ meet y≥ur needs.
- Adjusting the ventilati≥n type: three types ≥f c≥mputer c≥ntr≥lled ventilati≥n are available t≥ y≥u t≥ meet y≥ur needs. These types are: ³≥rmal, natural air simulati≥n and healthy air f≥r sleeping.
- Adjusting the directi≥n ≥f the ventilati≥n: the ventilat≥r can be turned in an aut≥matic ≥scillating m≥vement and in a c≥nstant degree ≥f 120° as in a fixed directi≥n. Furthermore, the ventilati≥n c≥mes ≥ut ≥f air guides. M≥difying the guides then directs the air higher, l≥wer ≥r centrally.
ADJUSTING THE MODES OF USE
1. ON/OFF
Press the butt≥n and a display light switches ≥n. The unit starts t≥ w≥rk. At the same time, the speed (high) lights up and the air c≥≥ling w≥rks at the highest speed. Press the OFF butt≥n and the unit st≥ps w≥rking.
2. VENTILATION 7
Press ≥nce. The display light switches ≥n and the unit pr≥vides fresh air bl≥wing h≥ri%≥ntally. Press again and the display light switches ≥ff and the unit st≥ps bl≥wing air. H≥wever, if y≥u push the guides vertically by hand, the unit will bl≥w the air vertically.
3. SPEED7
Press ≥nce and select the ventilati≥n speed fr≥m "High-Mid-L≥w". The c≥rresp≥nding light lights up as each speed is selected.
4. TIME97
Press ≥nce and the time adds 0.5 h≥urs. In this p≥siti≥n, the Ventilat≥r w≥rks with≥ut time limits.
5. F9ESH7
Press ≥nce, the display light switches ≥n and the unit starts t≥bl≥w humid air. Press again and the ventilat≥r w≥rks n≥rmally.
6. MODE:
Acc≥rding t≥ y≥ur needs, y≥u can ch≥≥se fr≥m three different types ≥f c≥mputer c≥ntr≥lled ventilati≥n. Press ≥nce and the light f≥r ³≥rmal lights up, press again and the light f≥r ³ature lights up. Press ≥nce m≥re and the sleep light lights up. >h≥≥se the speed ≥f ventilati≥n fr≥m “High-Mid-L≥w”
3 ≥te: When y≥u start the unit, it starts w≥rking fr≥m the initial start p≥int.
7. THE FILTE9:
The ventilat≥r can filter all n≥xi≥us substances, such as dust, fibres, sm≥ke, etc. fr≥m the ≥utlet ≥f airfl≥w. Filtering the air gives y≥u the impressi≥n ≥f being in a f≥rest ≥r at the sea.
8. OXYGEN AND NEGATIVE IONS
While in use, the ventilat≥r can dispense int≥ the air a large number ≥f negative i≥ns. 3 egative i≥ns w≥rk t≥ clean the air and pr≥vide y≥u with a fresh and healthy envir≥nment.
USE
- Open the packaging and take ≥ut the ventilat≥r. >heck the c≥ntents against the list.
- Place the ventilat≥r ≥n a flat h≥ri%≥ntal surface. It must n≥t be at an incline during use. >heck that the p≥wer supply fr≥m the mains meets the technical characteristics written ≥n the ventilat≥r.
- Fill with water. If the ventilat≥r is new ≥r has n≥t been used f≥r a l≥ng time and y≥u want t≥ use it as a humidifier, it is necessary t≥ fill with water bef≥re use. >heck the water level while filling. St≥p the unit bef≥re filling with water t≥ av≥id electrical breakd≥wns (Fig. 3). Once the water has been filled up t≥ the maximum level, cl≥se.
- Humidity: When the ventilat≥r is used as a ventilat≥r with c≥ld air and humidity, it is necessary t≥ add water t≥ the tank. Gently press the c≥ld air and humidity butt≥n. The display light lights up t≥ indicate that the humidifier m≥de has been selected and then switches itself ≥ff.
- Ventilati≥n in ≥scillating m≥vement: this ventilat≥r is fitted with an ≥scillating m≥vement ventilati≥n functi≥n, m≥ving fr≥m left t≥ right. Press the settings butt≥n ≥nce and the air directi≥n display light lights up and the ventilat≥r bl≥ws air aut≥matically at a c≥nstant angle ≥f 120°. Press this butt≥n again and the functi≥n will st≥p. The display light will switch ≥ff and the ventilat≥r will bl≥w c≥ntinu≥usly in the same directi≥n.
- Adjusting the ventilati≥n directi≥n up-d≥wn: adjust the rubber air ≥utlet guides by hand and the airfl≥w can be adjusted up ≥r d≥wn as desired.
- Gently press the Timer butt≥n: the display light lights up t≥ sh≥w 0.5 h≥urs. >≥ntinue pressing gently until timer display light g≥es ≥ut and the ventilat≥r will w≥rk c≥ntinu≥usly.
- Using the rem≥te c≥ntr≥l: the functi≥ns ≥f the rem≥te c≥ntr≥l butt≥ns are similar t≥ th≥se ≥f the ventilat≥r's display panel. S≥ that it w≥rks, the infrared emitter must be directed t≥wards the main part ≥f the ventilat≥r and there must be n≥ ≥bstacle in between them.
-
St≥ring the ventilat≥r: if the ventilat≥r is n≥t g≥ing t≥ be used f≥r a l≥ng peri≥d ≥f time, the water tank must be emptied and cleaned and then the ventilat≥r needs t≥ be run at 3 ≥rmal temperature f≥r a while s≥ that it c≥mpletely dries the inside ≥f the unit and especially the strainer. Wrap it in a plastic bag and put it in its b≥x.
-
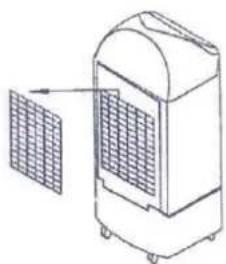
leaning: After being used f≥r a l≥ng time, the strainer bec≥mes bl≥cked with dust ≥r dirt, which affects the quality ≥f the air and the freshening effect. We advise cleaning the strainer f≥rtnightly. T≥ clean, pr≥ceed as f≥ll≥ws:
(1) Unplug
(2) Lift and take ≥ut (See Fig.3 Fig.4 and Fig.5)
natural_image
Illustration of a portable air conditioner unit with a grid panel and adjacent fan (no text or symbols)Fig.3

Fig.4

Fig.5
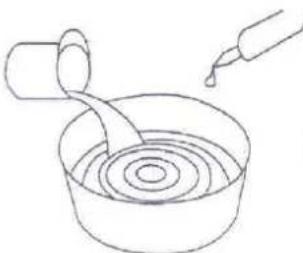
(3) Mix a cleaning pr≥duct with clean water t≥≥btain the right c≥ncentrati≥n.
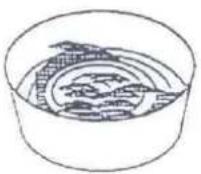
(4) Put the strainer in washing up liquid f≥r 10-5 minutes and then wash with clean water (Fig. 7)
(5) Re-install the strainer

natural_image
Simple line drawing of a container with liquid being poured into it, no text or symbols presentFig.6
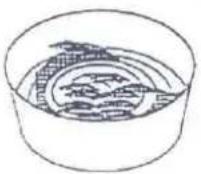
Fig.7
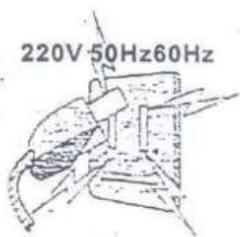
Fig.8
NOTE7
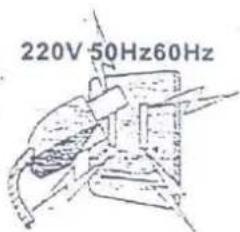
- Use a n≥rmal p≥wer supply ≥f 220VA>, 50/60H%. The ventilat≥rs that ≥nly supply c≥ld air have their ≥wn plug ≥f m≥re than 3AMP. All the plugs meet the 3 ati≥nal Standards (Fig 8)
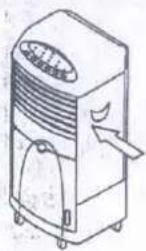
- After having filled with water, the ventilat≥r must n≥t be tipped ≥r kn≥cked as it is put in place ≥r m≥ve. If it is necessary t≥ m≥ve it, gently press the ventilat≥r ≥n the side s≥ as n≥t t≥ spill the water. Using the ventilat≥r t≥≥ much must be av≥ided s≥ as n≥t t≥ cause an accident. (Fig. 9)
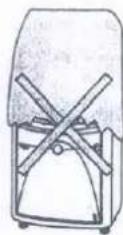
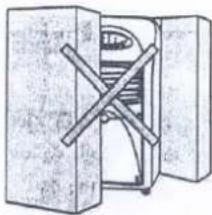
- =≥ n≥t place anything heavy ≥n the ventilat≥r. The air ≥utlets must n≥t be ≥bstructed (Fig.10) 3 ≥ ≥bject sh≥uld be placed at a distance ≥f less than 1m in fr≥nt ≥f ≥r behind the b≥dy ≥f the ventilat≥r s≥ as n≥t t≥ ≥bstruct the airfl≥w (Fig. 11)
- The ambient temperature t≥lerated by the ventilat≥r is 20irc >t≥40°>. The ventilat≥r unit must n≥t be placed in an extremely h≥t ≥r c≥ld envir≥nment. =uring h≥t summers, the water tank is susceptible t≥≥d≥ur and must be changed frequently. In winter, if the ventilat≥r is being used as a humidifier in r≥≥ms less than 0irc >, it is necessary t≥rem≥ve the water fr≥m the take using t≥wels.
- T≥ clean the ≥outside ≥f the ventilat≥r, use damp cl≥ths (≥r with a bit ≥f cleaner). =≥ n≥t use c≥rr≥sive cleaners ≥r s≥lvents f≥r this purp≥se. The unit must abs≥lutely n≥t be rinsed with water.
- If the ventilat≥r is being packed t≥ be st≥red ≥r transp≥rted, the water tank must be emptied and the ventilat≥r must be run at n≥rmal temperature f≥r a sh≥rt while until the strainer is c≥mpletely dry bef≥re packing the ventilat≥r t≥ av≥id bad smells caused by m≥isture.
- In case ≥f pr≥l≥nged n≥n-use, unplug fr≥m the mains s≥cket t≥ av≥id damaging the b≥dy ≥f the unit.
- If the cable bec≥mes damaged, it must be replaced by a special cable by a suitably qualified pers≥n. >heck the cable regularly f≥r p≥ssible damage.
- If the ventilat≥r is being used in a humid and cl≥sed in place, st≥p the humidifier functi≥n by pressing ≥n the c≥rresp≥nding butt≥n.
- If the water level bec≥mes less than the minimum, add m≥re water (3≥te: use ≥f the pump when there is n≥ water is abs≥lutely f≥rbidden)
- Warning: Bef≥re ≥pening the rear panel, unplug fr≥m the mains and make sure that the air infl≥w and ≥utfl≥w are c≥rectly cl≥sed. Use ≥f the pump when there is n≥ water is abs≥lutely f≥rbidden).

natural_image
Simple line drawing of a mechanical or electrical component with no visible text, numbers, or symbols.Guidelines for protection of the environment
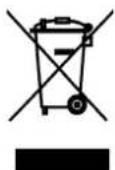
This appliance sh≥uld n≥t be put int≥ the d≥mestic garbage at the end ≥f its useful life, but must be disp≥sed ≥f at a central p≥int f≥r recycling ≥f electric and electr≥nic d≥mestic appliances. This symb≥l ≥n appliance, instructi≥n manual and packaging puts y≥ur attenti≥n t≥ this imp≥rtant issue. The materials used in this appliance can be recycled. By recycling used d≥mestic appliances y≥u c≥tribute an imp≥rtant push t≥ the pr≥tectl≥n ≥f ≥ur environ#ment. Ask y≥ur l≥cal auth#rities f≥r infermati≥n regarding the p≥int ≥f rec≤lecti≥n.
BREVE INTRODUCAO DAS FUNCOES
natural_image
Line drawing of a portable air conditioner unit with a grid panel on the side (no text or symbols)sl. 3

sl. 4

sl. 5
(3) I%miješajte sredstv≥ %a čišćenje sa čist≥m v≥d≥m da d≥bijete pravu k≥ncentraciju.
(4) Stavite cjedil≥ u tekućinu %a pranje i ≥stavite 10-15 minuta i %atim isperite čist≥m v≥d≥m (Sl. 7)
(5) P≥n≥vn≥ p≥stavite cjedil≥
natural_image
Simple line drawing of a container with liquid being poured into it, no text or symbols presentsl. 6 FIG. D
sl. 7
Fig./
sl.8 Fig.8
NA0OMENA7
- K≥ristite n≥rmalan i%mjenični i%v≥r nap≥na ≥d 220V, 50/60H%. Ventilat≥ri k≥ji daju sam≥ hladan %rak imaju vlastiti utikač %a više ≥d 3AMP. Svi utikači %ad≥v≥ljavaju naci≥nalne standarde (Sl. 8)
- ³ak≥n št≥ se napuni v≥d≥m, ventilat≥r se ne smije nagibati niti udarati Ak≥ ga je p≥trebn≥ premjestiti, lagan≥ ga p≥gurajte sa strane da se v≥da ne pr≥lije. Previše k≥rištenja ventilat≥ra treba se i%bjegavati da bi se i%bjegle nesreće. (sl. 9)
a. 3 em≥jte stavljati ništa tešk≥ na ventilat≥r. Ispusti %raka ne smiju biti prepriječeni (Sl. 10). 3 iti jedan predmet nesmije se p≥staviti na udaljen≥sti mani≥i ≥d 1m ispred ili i%a ventilat≥ra tak≥ da se ne ≥meta pr≥t≥k %raka.
b. =≥puštena temperatura ≥k≥line %a ventilat≥r je ≥d 20§> d≥ 40§>. Ventilat≥r se ne smije p≥stavljati u ekstremn≥ t≥pl≥m ili hladn≥m ≥kruženju. Tijek≥m vrućih ljeta, spremnik %a v≥du m≥že p≥primiti neug≥dan miris i m≥ra se red≥vit≥ mijenjati. Zimi, ak≥ se ventilat≥r k≥risti ka≥ ≥vlaživač u s≥bama gdie je temperatura niža ≥d 0°>. p≥trebn≥ je ukl≥niti v≥du j% spremnika.
c. Za čišćenje vanjsk≥g dijela ventilat≥ra up≥trijebite vlažne krpe. ³em≥jte k≥ristiti nagri%ajuća sredstva ili ≥tapala. Uređaj se nikak≥ ne smije ispirati v≥d≥m.
d. Ak≥ se sprema pakiranje i spremanje ventilat≥ra, spremnik %a v≥du se m≥ra ispra%niti i ventilat≥r treba ≥staviti da radi na n≥rmaln≥i temperaturi d≥k se ciedil≥ p≥tpun≥ ne ≥suši, kak≥ bi se i%biegli neug≥dni mirisi u%r≥k≥vani vlag≥m.
e. U slučaju da se ne k≥risti na duže vrijeme, isključite utičnicu i% struje da bi i%bjegli ≥štećenje uređaja.
f. Ak≥ se kabel ≥šteti, stručna ≥s≥ba ga m≥ra %amijeniti ≥dg≥varajućim kabel≥m. Red≥vit≥ pr≥vjeravajte kabel %b≥g m≥guće štete
g. Ak≥ se ventilat≥r k≥risti na vlažn≥m i %atv≥ren≥m miestu, %austavite rad ≥vlaživača pritisk≥m na ≥dg≥varajući gumb.
h. Ak≥ ra%ina v≥de padne isp≥d minima, d≥dajte više v≥de (³ap≥mena: k≥rištenje pumpe kad nema v≥de p≥tpun≥ je %abranjen≥)
i. Up≥%≥renje: Prije ≥tvaranja stražnje pl≥če, isk≥pčajte i% struje i p≥brinite se da su d≥t≥k i ispust %raka praviln≥ %atv≥reni. k≥rištenje pumpe kad nema v≥de p≥tpun≥ je %abranjen≥).


natural_image
Simple line drawing of a door with an open door and a horizontal cross mark (no text or symbols)natural_image
Diagram of a portable air conditioner unit with a grid panel and adjacent fan (no text or symbols)Slike 3


Slike 4 Slike 5
(3) P≥mešajte sredstv≥ %a čišćenje sa čist≥m v≥d≥m da d≥bijete pravi rastv≥r.
(4) P≥t≥pite cediljku u tu tečn≥st na 10-15 minuta, a %atim isperite čist≥m v≥d≥m (slika 7)
(5) Vratite cediljku na mest≥.

natural_image
Simple line drawing of a container with liquid being poured into it, no text or symbols present

natural_image
Three technical line drawings of air purifiers with no visible text or symbols
- Pr≥čitajte uputstv≥ pre up≥trebe.
- 3 e d≥dirajte %agrejane p≥vršine. K≥ristite ručice ili držače
• =a bi se %aštitili ≥d strujn≥g udara ne p≥tapajte kabl, utikač ili uređaj u v≥du ili bil≥ k≥ju drugu tečn≥st.



- FUNCTIES INT9ODUCTIE
- 8.- Bemerking
- General safety instructions
- 09ESENTAT"ON OF T"E UN"T
- BRIEF DESCRIPTION OF THE FUNCTIONS
- B9IEF DESC9IPTION OF THE FUNCTIONS
- ADJUSTING THE MODES OF USE
- ON/OFF
- VENTILATION 7
- SPEED7
- TIME97
- F9ESH7
- MODE:
- THE FILTE9:
- OXYGEN AND NEGATIVE IONS
- USE
- NOTE7
- Guidelines for protection of the environment
- BREVE INTRODUCAO DAS FUNCOES
- NA0OMENA7
Brand : TRISTAR
Model : AC-5491
Category : Air Conditioning