
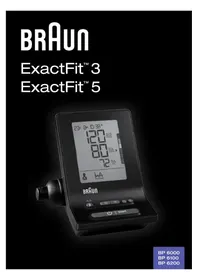
ExactFit 5 BP6200 - Sphygmomanometer BRAUN - Free user manual and instructions
Find the device manual for free ExactFit 5 BP6200 BRAUN in PDF.


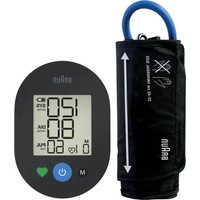
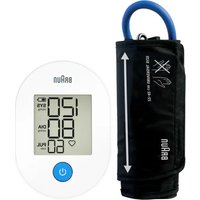
| Product type | Automatic upper arm blood pressure monitor |
| Brand | Braun |
| Model | ExactFit 5 BP6200 |
| Dimensions (approx.) | 120 x 80 x 50 mm |
| Weight (without batteries) | Approximately 500 g |
| Power supply | 4 AA alkaline batteries (LR6) |
| Battery life | Approximately 300 measurements |
| Measurement method | Oscillometric |
| Measurement range - Blood pressure | 0 to 300 mmHg |
| Measurement range - Pulse | 40 to 199 beats/min |
| Accuracy - Blood pressure | ± 3 mmHg |
| Accuracy - Pulse | ± 5 % max. |
| Memory capacity | 60 measurements per user (Users A and B) |
| Main functions | Automatic inflation, irregular heartbeat detector, WHO/ESH blood pressure level indicator, 7-day average function (morning/evening/day), backlight |
| Cuff sizes | Small/Medium (22-32 cm) and Large/XLarge (32-42 cm) |
| Operating temperature | +10 °C to +40 °C |
| Storage temperature | -20 °C to +60 °C |
| Operating/storage humidity | Less than 85% RH |
| Atmospheric pressure | 860 to 1,060 hPa |
| Classification | IP22 protection, Class BF, internal power supply |
| Care and cleaning | Clean the device with a slightly damp cloth and mild cleaner; clean the cuff with a dry cloth. Do not use strong detergents. |
| Safety | Do not use in the presence of flammable anesthetic mixture; do not use on a wound or injury; consult a doctor in case of arrhythmia or pacemaker use. |
| Spare parts and repairability | Cuffs available in two sizes; do not disassemble the device; contact customer service for any repairs. |
| General information | Lifespan: 5 years; complies with EU directives; warranty via consumer card. |
Frequently Asked Questions - ExactFit 5 BP6200 BRAUN
User questions about ExactFit 5 BP6200 BRAUN
0 question about this device. Answer the ones you know or ask your own.
Ask a new question about this device
Download the instructions for your Sphygmomanometer in PDF format for free! Find your manual ExactFit 5 BP6200 - BRAUN and take your electronic device back in hand. On this page are published all the documents necessary for the use of your device. ExactFit 5 BP6200 by BRAUN.
USER MANUAL ExactFit 5 BP6200 BRAUN
Braun upper arm blood pressure monitor has been developed for accurate and comfortable blood pressure measurements. The measuring accuracy of Braun's upper arm blood pressure monitor was tested at the time of manufacture and was proven by clinical research in accordance with ESH.
What you should know about blood pressure
Blood pressure constantly changes throughout the day. It rises sharply in the early morning and declines during the late morning. Blood pressure rises again in the afternoon and finally drops to a low level at night. Also, it may vary in a short period of time. Therefore, readings from successive measurements can fluctuate.

Blood pressure readings taken from a healthy 31-year-old male, measured at 5-minute intervals Blood pressure measured in a doctor's office only provides a momentary value. Repeated measurements at home better reflect one's actual blood pressure values under everyday conditions. Moreover, many people have a different blood pressure when they measure at home, because they tend to be more relaxed than when in the doctor's office. Regular blood pressure measurements taken at home can provide your doctor with valuable information on your normal blood pressure values under actual «everyday» conditions. The World Health Organisation (WHO) has set up the following standard blood pressure values when measured at resting pulse.
Blood pressure Normal Mild Severe
(mmHg)
values
hypertension
hypertension
SYS = systole (upper value) up to 140 140-180 over 180
DIA = diastole (lower value) up to 90 90-110 over 110

• To ensure accurate measuring results, carefully read the complete use instructions.
- This product is intended for household use only. Keep product and batteries away from children.
• People suffering from cardiac arrhythmia, vascular constriction, arteriosclerosis in extremities, diabetes or users of cardiac pacemakers should consult their doctor before measuring their blood pressure themselves, since deviations in blood pressure values may occur in such cases.
- If you are under medical treatment or taking any medication, please consult your doctor first.
• The use of this blood pressure monitor is not intended as a substitute for consultation with your doctor.
Product description (See page 2-3, Fig. 1)
- Start button 🔊
- Memory button M
- Date / time adjust button ▲
- Set button Ⓛ
- Average button
- User A / B switch
- LCD display
- Hose port
- Connector
- Arm cuff (supplied with 2 cuffs)
- Air hose
- Battery compartment cover (4 X 1.5V type AA (LR6) batteries)
Inserting batteries (See Fig. 2-3)
- Remove the battery compartment cover at the bottom of the unit and insert 4 AA LR6 alkaline batteries with correct polarity (see symbol in the battery compartment).
- Note: always re-set date and time after replacing new batteries to make sure the measurement results are stored with correct date and time.

Only discard empty batteries.
They should not be disposed of in the household waste, but at appropriate collection sites or at your retailer.
Key rules for accurate blood pressure measurement
- Always take readings at the same time of day, ideally in the morning and evening, under the same conditions.
- Do not measure within 30 minutes after smoking or consuming coffee or tea. Take off wrist watch and jewelry before fitting the cuff on the measuring arm.
- While taking a measurement, sit down, relax, keep still, and do not move or speak.
- Wrap the cuff snugly around your arm. The cuff must be at heart level.
- Do not vibrate the unit during measurement, or the proper measurement will not be achieved.
- Perform measurement quietly in a relaxed position.
- Sit in a chair with your feet flat on the floor.
- Do not wrap the cuff over jacket or sweater sleeve or measurement cannot be done.
- Remove tight-fitting clothing from your left arm.
- Do not in any way twist the arm cuff.
Fig. 2
Fig. 3
- Do not inflate the monitor's cuff when it is not wrapped around the arm.
- Do not attempt to disassemble or change any parts of the monitor, including the cuff.
- Do not drop the product or subject it to strong impact. The device is not intended for use if your arm has any wound or injury.
Choosing the right cuff
For accurate measurement, it is important to choose the correct size cuff that best fits your upper arm. Choose the cuff size according to your arm circumference and make sure the bottom of the cuff is 2-3 cm above your elbow. - Small/Medium Cuff = 22-32 cm arm circumference • Large/XLarge Cuff = 32-42 cm arm circumference
Applying the arm cuff
- Slide the end of the arm cuff furthest from the tube through the metal ring to form a loop. The smooth cloth should be on the inside of the cuff.
Fig. 4
Fig. 5
Fig. 6
- Plug the air hose into the connector (Fig. 4).
- If the cuff is positioned correctly, the velcro will be on the outside of the cuff and the metal ring will not touch the skin (Fig. 5).
- Put your left arm through the cuff loop. The bottom of the cuff should be approximately 2-3 cm above the elbow. The tube should lie over the brachial artery on the inside of the arm (Fig. 6).
Fig. 7
Fig. 8
Fig. 9
- Pull the cuff so that the top and bottom edges are tightened around your arm (Fig. 7).
- When the cuff is positioned properly, press the Velcro firmly against the pile side of the cuff.
- This cuff is suitable for use if the < > mark falls within the < > marked by two arrows when the cuff is tightened around your arm (Fig. 8).
- Sit on a chair and place your arm on the table so that the cuff is at the same level as your heart (Fig. 9).
Display BP6000 / BP6100 and BP6200

* For BP6200 only Note: On BP6200, the backlight goes on when the unit is turned on and it will remain on until the device will be switched off.
Select mode
How to select user A /user B
• Make sure the Product is in power off mode. - Slide the user switch to user A or user B, the current user mode will flash on the LCD display.
The WHO/ESH indicator to evaluate blood pressure data

This device has a blood pressure level indicator established according to WHO and the European Hypertension Society Guidelines (ESH) in 2007. For every measurement displayed on the screen, the cursor will indicate the blood pressure level with the corresponding color code, from green to red. You can use this classification daily to guide you to understand your blood pressure level. If you are really concerned by the classification level, you should consult your doctor.
Setting month, date and time
a. Switch off the device for the date/time setting. b. User press set button ⏻ (4) to start the year setting, then the "year" will blink display, user can press adjust ⚠ to adjust year by increase step "1". c. User press set button ⏻ (4) to start the month setting, then the "month" will blink display, user can press adjust ⚠ to adjust month by increase step "1". d. User press set button Ⓤ (4) to start the day setting, then the "day" will blink display, user can press adjust ⬇3) to adjust day by increase step "1". e. User press set button ⏻ (4) to start the hour setting, then the "hour" will blink display, user can press adjust ⚠ to adjust hour by increase step "1". f. User press set button ⏻ (4) to start the minute setting, then the "minute" will blink display, user can press adjust ⚠3) to adjust minute by increase step "1". g. User press set button Ⓜ (4) to end all the date/time setting, all the blink are stopped. Note: Holding the adjust button will scroll the value.

Taking a measurement
Wrap the cuff around the arm (see "applying the arm cuff" section above).
- Sit upright on the chair to have a correct posture.
- Press and release the start button ⏻ (1); the date/time and current user will be displayed.
- Set the user A/B switch (6) to A for user A or B for user B; the LCD display will show the user A or B symbol.
- Press and release the start button ⏻ (1); all icons on the display will be shown for 2 seconds. The device will adjust to zero automatically. The measuring blood pressure symbol will then flash on the display, and the air pressure will automatically pump up to a certain pressure level and start measurement.
Do not move or talk during blood pressure measurement.
- After the air pressure has increased, the pulse is detected, and the heart rate symbol ♥ will start flashing.
- The LCD display will show the results and the WHO indicator arrow after measurement. After taking blood pressure measurement, turn off the device by pressing the start button ⏻ (1) or it will turn off automatically after 1 minute.
Memory function
Your blood pressure monitor can store the latest 40 readings for both users each for the BP6000, 50 readings for both users each for the BP6100, and 60 readings for both users each for the BP6200.
Storing measurement data
After each blood pressure measurement, the systolic pressure, diastolic pressure, pulse rate, and the time & date of the specific day will be automatically stored. Memory #01 is always the most recent one. Once the memory is full, the oldest values will be overwritten.
Press the memory button M (2) to review the stored data. The last memory data (sys/dia/pul) with measurement date/time, IHB (for BP6200 only), and WHO indicator will show on the LCD. Press the memory button M (2) again to show the previous data. Be aware that the correct user A or B is chosen.
Average function for BP6000
Press the average button L(B) to show the average of the last 3 readings on the LCD. Press the average button again to clear the LCD for 0.5 seconds, then the results will be shown again.
Average function for BP6100
Press the average button L(8) to show the full day average of the past 7 days on the LCD. Press the average button again to clear the LCD for 0.5 seconds, then the results will be shown again.

Average function for BP6200
Press the average button on the LCD to show the full day average of the past 7 days. Press the average button a second time to show the morning average of the past 7 days. If the result indicates morning hypertension, the morning hypertension icon will be shown. Press the average button a third time to show the evening average of the past 7 days. Press the average button a fourth time to show the full day average of the past 7 days again.

Erasing data
Press and hold the memory button M(2) for more than 5 seconds. The LCD will blink and display "dEL ALL" (if the slide switch is in User A side, the user A icon will show) or "dEL ALL" (if the slide switch is in User B side, the user B icon will show).

Press the memory button M(2) again. The LCD will display "---" to indicate that all stored data for the corresponding user has been deleted.
Irregular heart beat detector (for BP6200 only)
The appearance of this symbol signifies that a certain pulse irregularity was detected during the measurement. Talking, moving, shaking, or an irregular pulse during the measurement can result in the appearance of this icon. Usually this is not a cause for concern; however, if the symbol appears often, we recommend you seek medical advice. The device does not replace a cardiac examination but serves to detect pulse irregularities at an early stage.
Low battery indicator
When the low battery indicator appears on the display, it means the battery is low and the four batteries need to be replaced with alkaline LR6 (AA) batteries.
**After replacing batteries, the BPM will go into time-setting mode automatically and show the last measurement time on screen. Please set the current date/time before taking the next measurement to get correct average results.
Storage and cleaning
• Always keep the unit in the carrying case after use. - Do not put the item directly under sunlight, in high temperature, or in humid and dusty places. - Do not store in extremely low (less than -20°C) or high (more than 60°C) temperatures. - Use a piece of cloth with water or mild cleansing agent to clean the case, then use a dry cloth to wipe it dry. Use a dry cloth to wipe the cuff when it is dirty. - Do not use any strong cleansers to clean it. - When the unit is not to be used for a long time, remove the batteries. (Batteries may leak or cause harm). - Do not modify the device. NEVER open the device! This will make the manufacturer's warranty invalid.
Calibration
This product has been calibrated at the time of manufacture. If used according to the instructions for use, periodic recalibration is not required. If at any time you question the measuring accuracy, please contact our service representative (see last page for contact information) or visit www.hot-europe.com/support.
This device is not intended as a substitute for regular check-ups by your doctor, please continue to visit your doctor on a regular basis for a professional reading.
Production date is given by the LOT located in the back of the device. The first 3 numeric digits after the LOT No represents the day of the year of manufacture. The next 2 numeric digits represent the last two numbers of the calendar year of manufacture and the letters at the end designate the manufacturer of the product. E.g. LOT 15614VTN this product was made on the day 156, year 2014 at manufacturer Identifier VTN.
What to do if .....
| Problem Reason Solution | ||
| Heart rate symbol | Appears in the measurement condition and flashes when pulse is detected. | • Measurement in progress, remain quiet. |
| Low battery indicator | Appears when the battery voltage is excessively low or the positions of the batteries are incorrect. | • Replace all four batteries with new ones. Insert the batteries in the correct positions. Be aware of +/- positions. |
| Measuring error | Appears when the accurate blood pressure and pulse could not be obtained. | • Press "start/stop" button again and remeasure.• Check if cuff is wrapped according to instructions.• Check that there are no kinks in tube.• Check palm if exerting effort.• Check if talking or moving during measurement.• Check if posture is correct. |
| E1 shows The Error | Cuff is not secure • Refasten the cuff and then measure again. | |
| E2 shows The Error | Cuff is very tight • Refasten the cuff and then measure again. | |
| E 10 or E 11 shows | The monitor detected motion, talking or the pulse is too poor while measuring. | • Relax for a moment and then measure again. |
| E 20 shows The Error | The measurement process does not detect the pulse signal. | • Loosen the clothing on the arm and then measure again. |
| E 21 shows Measure | Incorrectly • Relax for a moment and then measure again. | |
| EE 3 - EE15 Error | or while measuring • Retake the measurement. If the problem persists, contact the retailer or our customer service department for further assistance. Refer to the warranty for contact information and return instructions. | |
Specifications
Method of measurement Oscillometric
Model number BP6000, BP6100, BP6200
Range of measurement Pressure 0\~300 mmHg
Pulse 40\~199 beats/minute
Accuracy Pressure +/- 3 mmHg
Pulse +/- 5 % Max.
Inflation Deluxe automatic
Display Liquid crystal display – systolic, diastolic, pulse rate
Backlight Display for BP6200
Sets of memory BP6000: 40 sets per user
BP6100: 50 sets per user
BP6200: 60 sets per user
Cuff size Small cuff = 22-32cm arm circumference
Large cuff = 32-42cm arm circumference
Operating temperature +10 °C -- + 40 °C, less than 85 % R.H.
Storage temperature -20 °C -- +60 °C, less than 85 % R.H.
Operating atmospheric pressure 860-1060 hPa
Unit weight
Approximately 500gr (without batteries)
Power supply
Alkaline battery: 4 x AA (LR6) 1.5V
Battery life
300 times measurement
Auto power off
Whenever not used for 1 minute
Accessories
4 batteries, 2 arm cuffs with tube, instruction manual, pouch,
Service life:
travel bag
5 years.
IMPORTANT
Read the operating instructions.
If device is not used within specified temperature, humidity and atmospheric pressure
ranges, the technical accuracy of the measurement cannot be guaranteed.
Classification:
- Internally powered equipment
- Type BF equipment • IP22: Protected against solid foreign objects of 12.5 mm diameter and greater. Protected against vertically falling water drops when the device is tilted up to 15°
- Not suitable for use in the presence of flammable anesthetic mixture with air, oxygen or nitrous oxide • Continuous operation with short-time loading
Operating temperature
Storage temperature
Storage humidity
Subject to change without notice.
This product conforms to the provisions of the EC directive 93/42/EEC (Medical Device Directive). This device conforms to the following standards:
- EN 60601-1: 2006 + AC:2010: - General requirements for basic safety and essential performance • EN 60601-1-2:2007 - Electromagnetic compatibility requirements and tests • EN 60601-1-11:2010 - Requirements for medical electrical equipment and medical electrical systems used in the home healthcare environment
- EN 1060-1:1995 + A2:2009 – Non-invasive sphygmomanometers - general requirements
- EN 1060-3:1997 + A2:2009 - Non-invasive sphygmomanometers - Supplementary requirements for electro-mechanical blood pressure measuring systems
- EN 1060-4:2004 - Non-invasive sphygmomanometers - Test procedures to determine the overall system accuracy of automated non-invasive sphygmomanometers.
MEDICAL ELECTRICAL EQUIPMENT needs special precautions regarding EMC.
For detailed description of EMC requirements please contact an authorized local Service Centre (see guarantee).
Portable and mobile RF communications equipment can affect medical electrical equipment.
Please do not dispose of the product in the household waste at the end of its useful life.
Disposal can take place at your local retailer or at appropriate collection points provided in your country.
Guarantee
Consumer Card available on our website at www.hot-europe.com/support
Please see the last page of this manual to find the support contact numbers for your country.
The LOT and SN of your device are printed on the rating label on the back of the product.
UK only:
This guarantee in no way affects your rights under statutory law.
| Guidance and manufacturer's declaration – electromagnetic emissions | ||
| The ME equipment is intended for use in the electromagnetic environment specified below. The customer or the user of the ME equipment should assure that it is used in such an environment. | ||
| Emissions Test Compliance Electromagnetic environment – guidance | ||
| RF Emissions CISPR 11 | Group 1 | The ME equipment uses RF energy only for its internal function. Therefore, its RF emissions are very low and are not likely to cause any interference in nearby electronic equipment. |
| RF Emissions CISPR 11 | Class B Complies | |
| Harmonic emissions IEC 61000-3-2 | Not Applicable | The ME equipment is solely battery powered. |
| Voltage fluctuations/flicker emissions | Not Applicable | |
| Non-Life Support Equipment Separation Distance Calculation(3Vrms / 3V/m compliance) | |||
| Rated maximum output power of transmitter (W) | Separation distance according to frequency of transmitter (m) | ||
| 150 kHz to 80 MHz in ISM bands d = 3,5/V1 | 80 MHz to 800 MHz d = 3,5/F1 | 800 MHz to 2.5 GHz d = 7/F1 | |
| 0.01 0.12 0.12 0.23 | |||
| 0.1 0.37 0.37 0.74 | |||
| 1 1.17 1.17 2.33 | |||
| 10 3.69 3.69 7.38 | |||
| 100 11.67 11.67 23.33 | |||
| Guidance and manufacturer's declaration - electromagnetic immunity | |||
| The ME is intended for use in the electromagnetic environment specified below.The customer or the user of the ME should assure that it is used in such an environment. | |||
| Immunity test | IEC60601 test level | Compliance level | Electromagnetic environment- guidance |
| Electrostatic discharge (ESD)IEC 61000-4-2 | ±6kV Contact ±8kV Air | Complies | Floors should be wood, concrete, or ceramic tile. If floors are covered with synthetic material, the relative humidity should be at least 30% |
| Radiated RFIEC 61000-4-3 | 3 V/m 80MHz to 2.5GHz | Complies | Field strengths outside the shielded location from fixed RF transmitters, as determined by an electromagnetic site survey, should be less than 3 V/m.Interference may occur in the vicinity of equipment marked with the following symbol:Separation distance calculation provided above. If a known transmitter is present the specific distance can be calculated using the equations. |
| Conducted RFIEC 61000-4-6 | 3Vrms 150kHz to 80MHz | Not Applicable(no electrical cabling) | |
| Electrical fast transientIEC 61000-4-4 | +2kV power line +1kV I/O lines | Not Applicable | The ME equipment is solely battery powered. |
| SurgeIEC 61000-4-5 | ±1kV differential ±2kV common | Not Applicable | |
| Power frequency magnetic fieldIEC 61000-4-8 | 3 A/m Complies | Power frequency magnetic fields should be at levels characteristic of a typical location in a typical commercial or hospital environment. | |
| Voltage dips, short interruptions and voltage variations on power supply input linesIEC 61000-4-11 | >95% dip 0.5 cycle 60% dip 5 cycles 70% dip 25 cycles 95% dip 5 sec. | Not Applicable | The ME equipment is solely battery powered. |

Intended use of Braun ExactFit 3 and ExactFit 5
www.hot-europe.com/support
• Small/Medium cuff = arm circumference 22-32 cm • Large/XLarge cuff = arm circumference 32-42 cm
Power supply (alkaline batteries): 4 x AA (LR6)
www.hot-europe.com/support
www.hot-europe.com/support
Support contact numbers
Austria
+43 (0)1 360 277 1225
Bahrain
+973 17582250
Belgium/Luxemburg
+32 (0) 2 620 01 01
Bosnia
+387 (33) 636 285
Bulgaria
+359 (2) 40 24 600
Croatia
+385 (01) 3444 856
Cyprus
+357 22575016
Cyprus Northern region
+0392 22 72 367
Czech Republic
+420 (0) 2 25 43 97 69
Denmark
+45 35 15 80 40
Finland
+358 (0)9 81 71 00 14
France
+33 (0) 1 85 14 80 95
Germany
Western Region - Jeddah
+966 (0) 22565555
Central Region - Riyadh
+966 (0) 12886808
Eastern Region - Al-Khobar
+966 (0) 38940555
South Region - Abha
+966 (0) 72376062
Slovakia
+421 2 5011 2115
Slovenia
+386 (01) 888 86 74
South Africa
+27 (0) 11 089 1200
Spain
+34 913 754 176
Sweden
+46 (0)8 5199 3097
Switzerland
+41 (0) 22 567 5200
Tunisia
+21671716880
Turkey
+90 216 337 22 55
UAE
+971 4 353 4506
United Kingdom/Ireland
+44 (0) 115 965 7449
www.hot-europe.com
This product is manufactured under license to the 'Braun' trademark. 'Braun' is a registered trademark of Braun GmbH, Kronberg, Germany.

Made and printed in China

Kaz Europe Sàrl Place Chauderon 18
CH-1003 Lausanne Switzerland


© 2016 All rights reserved.
P/N A001077R0 10AUG16
Helen of Troy
CREATIVE DEPARTMENT ARTWORK SPECIFICATIONS
Brand:
Braun
Category:
BPM
Model: BP6000 Series
Artwork Part #:
A001077R0
Die Line Part #:
N/A
Agile Desc: OWNER'S MANUAL, KAZ Artwork, Braun, BP6000 Series
Subject: Owner's Manual
Region:
EMEA
Flat Size:MM:W228.6 x H158.75
Folded Size:MM:W114.3 x H158.75
Scale:
1/1
Material: 50# matte text (inside pages)
Minimum 80# gloss or matte text (cover)
Page Count:
280
Revision:
2
Date:
10AUG16
Release Date: 09FEB15
Re-release Date: 28OCT15
Re-release Date: 26FEB16
Re-release Date:
Colors:
Dielines (Do not print) Spot Colors
Cyan
0%
Magenta
0%
Yellow
0%
Black
100%
PMS GOE
63-1-4C
PMS
XXXX


Special Instructions:
Quality Requirement of Artwork and Quality Clarification Process of Artwork Printing:
Meet Eng-QS-06&02
Kaz USA, Inc., a Helen of Troy Company
Creative Services
Marlborough, MA 01752, USA
+1 508 490 7000
- WHAT YOU SHOULD KNOW ABOUT BLOOD PRESSURE
- PRODUCT DESCRIPTION (SEE PAGE 2-3, FIG. 1)
- INSERTING BATTERIES (SEE FIG. 2-3)
- KEY RULES FOR ACCURATE BLOOD PRESSURE MEASUREMENT
- CHOOSING THE RIGHT CUFF
- APPLYING THE ARM CUFF
- DISPLAY BP6000 / BP6100 AND BP
- SELECT MODE
- HOW TO SELECT USER A /USER B
- THE WHO/ESH INDICATOR TO EVALUATE BLOOD PRESSURE DATA
- SETTING MONTH, DATE AND TIME
- TAKING A MEASUREMENT
- MEMORY FUNCTION
- STORING MEASUREMENT DATA
- AVERAGE FUNCTION FOR BP
- ERASING DATA
- IRREGULAR HEART BEAT DETECTOR (FOR BP6200 ONLY)
- LOW BATTERY INDICATOR
- STORAGE AND CLEANING
- CALIBRATION
- SPECIFICATIONS
- IMPORTANT
- CLASSIFICATION
- GUARANTEE
- INTENDED USE OF BRAUN EXACTFIT 3 AND EXACTFIT
- SUPPORT CONTACT NUMBERS
- AUSTRIA
- BAHRAIN
- BELGIUM/LUXEMBURG
- BOSNIA
- BULGARIA
- CROATIA
- CYPRUS
- CYPRUS NORTHERN REGION
- CZECH REPUBLIC
- DENMARK
- FINLAND
- FRANCE
- GERMANY
- SLOVAKIA
- SLOVENIA
- SOUTH AFRICA
- SPAIN
- SWEDEN
- SWITZERLAND
- TUNISIA
- TURKEY
- UAE
- HELEN OF TROY
- MODEL: BP6000 SERIES
- AUG
- COLORS
- SPECIAL INSTRUCTIONS
- QUALITY REQUIREMENT OF ARTWORK AND QUALITY CLARIFICATION PROCESS OF ARTWORK PRINTING
- MEET ENG-QS
Brand : BRAUN
Model : ExactFit 5 BP6200
Category : Sphygmomanometer