
BPW4300 VitalScan - Sphygmomanometer BRAUN - Free user manual and instructions
Find the device manual for free BPW4300 VitalScan BRAUN in PDF.
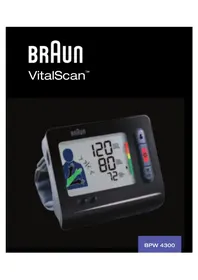


| Product Type | Upper Arm Blood Pressure Monitor |
| Model Number | BPW4300 VitalScan |
| Brand | Braun |
| Measurement Method | Oscillometric |
| Arm Circumference Range | 22 – 32 cm |
| Display Type | Large LCD Display |
| Memory Capacity | 90 readings for 1 user |
| Irregular Heartbeat Detection | Yes |
| WHO Classification Indicator | Yes |
| Battery Type | 4 x AA (1.5V) |
| AC Adapter Compatible | Yes (optional, 6V DC) |
| Automatic Shut-off | Yes, after 3 minutes of inactivity |
| Dimensions (W x H x D) | Approx. 15.0 x 10.0 x 7.0 cm |
| Weight (without batteries) | Approx. 300 g |
| Cuff Size | Standard adult cuff (22-32 cm) |
| Clinical Validation | Yes, according to international protocols |
| Warranty | 2 years |
| Maintenance and Cleaning | Wipe with a soft dry cloth; do not immerse in water |
| Safety Features | Auto-inflation with over-pressure protection |
| Spare Parts Available | Cuff and AC adapter available separately |
Frequently Asked Questions - BPW4300 VitalScan BRAUN
User questions about BPW4300 VitalScan BRAUN
0 question about this device. Answer the ones you know or ask your own.
Ask a new question about this device
Download the instructions for your Sphygmomanometer in PDF format for free! Find your manual BPW4300 VitalScan - BRAUN and take your electronic device back in hand. On this page are published all the documents necessary for the use of your device. BPW4300 VitalScan by BRAUN.
USER MANUAL BPW4300 VitalScan BRAUN
This product is manufactured by Kaz Europe SA under a license to the 'Braun' trademark. 'Braun' is a registered trademark of Braun GmbH, Kronberg, Germany.
Kaz Europe SA
Place Chauderon 18 CH-1003 Lausanne Switzerland

©2011 Kaz Europe SA


BPW4300-E
P/N: 31IM4300203
19SEP11

English
Intended use of Braun VitalScan 5
Braun VitalScan 5 is a blood pressure monitor that has been developed for easy and accurate blood pressure measurements from the wrist. The measuring accuracy of Braun VitalScan 5 was tested at the time of manufacture and was proven by clinical research.

Blood pressure readings from a healthy 31-year old male, measured at 5-minute intervals.
Blood pressure measured in a doctor's office only provides a momentary value. Repeated measurements at home better reflect one's actual blood pressure values under everyday conditions.
Moreover, many people have a different blood pressure when they measure at home, because they tend to be more relaxed than when in the doctor's office. Regular blood pressure measurements taken at home can provide your doctor with valuable information on your normal blood pressure values under actual «everyday» conditions.
The World Health Organisation (WHO) and the ESH have set up the following standard blood pressure values when measured at resting pulse.
| (mmHg) | !!! !!! - | √ | √ | ||
| Level types | Severe Moderate Mild High Normal Normal | ||||
| SYS(maximum value) | 180↑ | 160-179 140-159 130-139 120-129 | 120↓ | ||
| DIA(minimum value) | 110↑ | 100-109 90-99 85-89 80-84 | 80↓ | ||
| 2007 ESH- ESC Practice Guidelines for the Management of Arterial HypertensionGuidelines for management of hypertension: report of the fourth working party of the BHS, 2004—BHS IVESH: European Society of Hypertension + ESC: European Society of Cardiology + BHS: British Hypertension Society | |||||

What you should know about this blood pressure monitor
For accurate measurements, all wrist blood pressure monitors must be positioned at heart level. Example: if the monitor is positioned 20 cm below heart level as shown on the left (e.g. by putting the arm on a table), the reading you will obtain is approximately 15 mmHg too high.
Therefore, the Braun VitalScan 5 has an easy positioning system (A): it guides you to hold your measuring arm in the right position at heart level and gives you confirmation of correct arm position before measurement is taken.

Safety information and important precautions
• To ensure accurate measuring results, carefully read the complete use instructions.
- Operate the unit only as intended. Do not use for any other purposes.
- This product is intended for household use only. Keep product and batteries away from children. • People suffering from cardiac arrhythmia, vascular constriction, arteriosclerosis in extremities, diabetes or users of cardiac pacemakers should consult their doctor before measuring their blood pressure themselves, since deviations in blood pressure values may occur in such cases.
- If you are under medical treatment or taking any medication, please consult your doctor first.
- The use of this blood pressure monitor is not intended as a substitute for consultation with your doctor.
- Do not disassemble or attempt to repair the unit or components
- Do not use equipment where flammable gas (such as anesthetic gas, oxygen or hydrogen) or flammable liquid (such as alcohol) are present.
- When device is connected to the computer the device will not be able to perform any measurements, only data transfer.
- Equipment connected to the analog or digital interfaces must comply with the respective IEC standards (e.g. IEC 60950 for data processing equipment and IEC 60601-1 for medical equipment). Furthermore all configurations shall comply with the current version of the standard for SYSTEMS IEC 60601-1-1. Everybody who connects additional equipment to the signal input part or signal output part configures a medical system, and is therefore responsible that the system complies with current version of the requirements of the system standard IEC 60601-1-1.
If in doubt, consult the technical service department or your local representative for model BPW4300.
- The unit is intended to use in measuring blood pressure and pulse rate for adult only, not recommended for neonatal baby.
- Do not use a cellular phone near the unit. It may result in operational failure.
- Avoid using in high radiant areas to ensure accurate measurements.
- Substituting a cuff other than the one supplied may result in measurement errors. For more information regarding safety information and important precautions, contact your local Service Center.
Product description
A Easy positioning system L Diastolic pressure
B User button M WHO/ESH indicator
C On/off button N Pulse rate
D Memory/average function button
O Heart rate indicator
E Battery compartment P Low battery indicator
F Time and date setting button
Q Irregular heartbeat
G Adjust button R Time
H Cuff S Morning hypertension
I Velcro strap T Month and day
J User icon
U Mini-USB type B port
K Systolic pressure

Inserting batteries
- Use alkaline batteries, 2 type LR 03 (AAA) (e.g. Energizer) as supplied with this product.
- Warning: do not use rechargeable batteries.
- Remove the battery compartment cover and insert two batteries with correct polarity (see symbol in the battery compartment (E)).
- New batteries (Energizer) will provide approximately 300 measurements.

Only discard empty batteries. They should not be disposed of in the household waste, but at appropriate collection sites or at your dealer.

Key rules for accurate blood pressure measurements
Correct handling is key for obtaining accurate measuring results!
• Always take readings at the same time of day, ideally in the morning, under the same conditions. - Do not measure within 30 minutes after smoking, coffee or tea consumption. • Take off wrist watch and jewelry before fitting the appliance on the measuring arm. - While taking a measurement, sit down, relax, keep still, especially the hand and fingers of the measuring arm, do not move or speak. - Hold the appliance at heart level during the measurement. - Wait approximately 3 minutes before repeating a measurement.
Taking a measurement
For a reliable blood pressure measurement, please follow the instructions below. Apply the cuff on your left wrist, when taking a measurement. The device can also be used on your right wrist.

- Place the monitor housing on the slim side of your bare forearm with the monitor facing up. Keep the required 2 cm distance to your palm line.
- Fasten the cuff on your wrist. Make sure that the cuff fits tightly.
- Press the red on/off button (C).


- Place the hand with the device on the other upper arm as shown. Slowly move the hand upward along the upper arm. Watch the positioning system (A) and move your hand up or down according to the direction of the arrow shown.
- If your wrist position is accurate, the green arm icon on the device will appear with a black outline and the device will sound "BEEP BEEP BEEP BEEP". Directly following the four beeps, the device will automatically inflate and begin taking the user's reading. When the measurement is complete, the reading is displayed on the LCD and at the same time, the buzzer will sound a long beep to remind the user that the measurement is completed.
Top: systolic value
Middle: diastolic value
Bottom: pulse
If the measuring position is incorrect, the measurement cannot start, so there is no possibility of obtaining a wrong or inaccurate measurement.
The device will beep rapidly if the positioning system is incorrect. You have to move your arm up or down according to the arrow indication on the LCD screen.
If your wrist position is at the correct level with your heart, the LCD will display and the measurement will start.
Measuring arm: If your wrist position is lower than your heart, the LCD will display as shown and will beep as "BEEP BEEP BEEP BEEP".
If your wrist position is higher than your heart, the LCD will display as shown and will beep as "BEEP BEEP BEEP BEEP".
If the positioning system has been deactivated, you will have no indication before processing the measurement.

Please note:
- In case of system errors or handling mistakes, the display will show an error code, instead of giving you inaccurate results (for details, please see section «What to do if...»).
Turning off
Press the on/off button to turn the product off, otherwise the product will turn off automatically after 2 minutes.
Memory mode
Your blood pressure monitor can store the readings of 180 (2x90) measurements. Storing is done automatically after each completed measurement. The memory is non-volatile. This means that you will not lose stored data when changing batteries. Once the memory is full, the oldest values will be overwritten.
How to review the memory
• Make sure the product is in power off mode. - Press the memory/average function button. The LCD will display the past 7 days average of blood pressure first. - Press the Memory/average function button again and the latest reading will display. - Press it again and the next reading will display.
Average function: 7 day average
- Press the memory/average function button once, and the "7 day average" result will show on LCD.
- Make sure the date / time is correct when taking a measurement, so you will get the correct 7 day average result.
- If there is no data in memory within past 7 days, "" will show on LCD.
How to delete the memory data
• Make sure the product is in power off mode. - Press the memory/average function button for at least 10 seconds. - LCD will display "del no" as shown. - Press the memory/average function button again. LCD will display "del yes". - If you are sure all the data of corresponding user can be deleted, press "power" button, all the corresponding user's data will be deleted and the device will shut down.
![graph TD A["Person holding device"] --> B["Step 1: Down arrow"] B --> C["Step 2: Up arrow"]](/content/2026/06/1252535/images/241107d7b75819af446dadfa2ff4d2c66cc53bf9709014bcf1421245fc9dfca6.jpg)
Note: if you have set "delete yes", but do not press a button for 2 minutes, the product will shut off automatically, but the corresponding user's blood pressure data will not be deleted. The delete operation must be confirmed by user.
Select mode
How to select user1/user2
• Make sure the product is in power off mode.
- Press the "user" button, and the current user mode will flash on the LCD display.
- Press the "user" button again, it will change to another user mode.
- When you have set the correct user mode, press the "power" button to save the user mode and exit this setting.
- If you have selected the correct user mode and do not press a button for 2 minutes, the product will shut off and save the user mode you have selected automatically.
![graph TD A["Input"] --> B["Processing Step"] B --> C["Output"]](/content/2026/06/1252535/images/ad1e8e75bb1aaa8b3e816b9ff9de1530d00f51db4a04b97204fa6f417568a9a8.jpg)
How to set date and time
- First turn off the product. Press the "set" button, and the "month" will flash.
- Press the "adjust" button to change the current month. (It can only be increased.)
- When the month is correct, press the "set" button again.
- Next the "date" will flash.
- Follow the same operation process to adjust the "date", "hour" and "minute".
- When you finish the date/time setting, you can press the "power" button to shut off the product or if you do not press a button for 2 minutes, the product will shut off and save the user mode you have selected automatically.

How to set positioning system on/off
Should you wish to deactivate the positioning system proceed as follows:
- First turn off the product.
- Press the "user" button and hold it for 5 seconds.
- If the "position system" is turned on, the LCD will display "on". If the "position system" is turned off, the LCD will display "off".
- Press the "user" button again, the state of "position system" will be changed.
- When the "position system" has been set to your liking, you can press "power" button to shut off the product and the "position system" state will be saved.

The WHO/ESH indicator to evaluate blood pressure data
This device has a Blood Pressure Level Indicator (M) established according to WHO and the European Hypertension Society Guidelines (ESH) in 2007. For every measurement displayed on the screen, the cursor will indicate the blood pressure level with the corresponding color code, from green to red. You can use this classification daily to guide you to understand your blood pressure level. If you are really concerned by the classification level, you should consult your doctor.
Irregular heart beat detector
The appearance of this symbol signifies that a certain pulse irregularity was detected during the measurement. Talking, moving, shaking or an irregular pulse during the measurement can result in the appearance of this icon. Usually this is not a cause for concern, however if the symbol appears often, we recommend you seek medical advice. The device does not replace a cardiac examination, but service to detect pulse irregularities at an early stage.
Morning hypertension detector
Morning hypertension symbol will appear when morning average is 20% or more above evening average.
Calibration
This product has been calibrated at the time of manufacture. If used according to the Instructions of use, periodic recalibration is not required. If at any time, you question the measuring accuracy, please contact an authorized Service Centre (see package insert for a local Service Centre).
Manufacturing date is given by the LOT number on the back of the product. The three numbers after LOT represents the day of the year of manufacture. The two last digits of the year of manufacture. An example: LOT 25010KYD – this product has been manufactured on the 250th day of the year 2010.
Installation of BP Smart Manager™ software
For the installation of Braun BP Smart Manager™, please use the enclosed CD and consult the owner's manual and quick start guide available in the same pack. Your software must be installed on your PC before performing data transfer. Your computer must comply with some specific system requirements (Microsoft® Windows® with USB port type A and at least 65 MB of free hard drive space).

Welcome to the Braun BP Smart Manager Setup Wizard. This wizard will guide you through the installation of Braun BP Smart Manager. It is recommended that you close all other applications before starting Setup. This will make it possible to update relevant system files without having to reboot your computer. Click Next to continue.

License agreement:
Please review the license terms before installing Braun BP Smart Manager. Click the square frame to accept the terms of the License Agreement and click "Next" to continue.

Choose install location:
Choose the folder in which to install Braun BP Smart Manager™. Setup will install Braun BP Smart Manager™ in the following folder. To install in a different folder, click "Browse" and select another folder. Click "Next" to continue.

Choose a Start Menu folder for the Braun BP Smart Manager shortcuts. Select the Start Menu folder in which you would like to create the program's shortcuts. You can also enter a name to create a new folder. Click "Install" to continue.

Braun BP Smart Manager has been installed on your computer. Click "Finish" to close this wizard.
Connection to the PC and data transfer
To connect your PC to your Braun VitalScan 5, please use the USB cable enclosed in the pack and make sure that the device is turned off. When you see the "O" wheel and "PC" on the LCD display, it means that the device is ready to transfer data to your PC. You can transfer the data by clicking the "Transfer" menu/button on the top of the window in the BP Smart Manager software application. On the "Transfer" screen, you click the "Transfer" button. After transferring the data, please disconnect your device from the PC and turn the device off. To transfer data a second time, reconnect the USB cable and repeat the above steps.

Warning:
You cannot perform any measurement when your device is connected with the USB cable to the PC.
How to use the BP Smart Manager™
How to exit the BP Smart Manager
When you run the software, you enter the welcome page. You can either click the "Exit" button or the "X" button in the top right corner of the window to exit the software.
How to create a new user
Click the "User Profiles" menu/button at the top of the window. You can create a new user by clicking on "New"; a dialog box will appear with fields to fill.
Click "Save" in the dialog box to save the user information. The software will confirm that the data have been saved successfully.
Save data under a chosen user
All the data in the BPM will be transferred to the PC (see above 'Connection to the PC and data transfer'). User1's data and user2's data will be displayed on the "Transfer" screen.
If you want to save user1's data, select a user name from the list (list already created in the User Profiles menu). Click "Save User1" button to save a particular name under user1. Every time the data are saved in the software, they will be added to the last data stored.
How to use the "Data Analysis" function
Click the "Data Analysis" button. Select a user and select the "Analysis Mode". This software provides 2 analysis modes: table and line. Click the "Analyze" button. You will see a dialog window.
You can choose different analyzing modes:
- Analyze all data: all data will be analyzed individually.
- Analyze daily: take average for each day's data and then analyze averaged data.
- Analyze weekly: take average for each week's data and then analyze averaged data.
- Analyze monthly: take average for each month's data and then analyze averaged data.
You can either select a period to analyze or all data for analyzing. After all selections are made, you can click OK to initiate analysis or Cancel to give up analyzing.
a) Data analysis with line
Select line and click on "analyze". You will be able to choose the analyzing mode. Once chosen, it will display the evolution of systolic, diastolic and pulse over a period of time according to your analyzing mode selected.
b) Data analysis with table
Select table and click on "analyze", you will be able to choose the analyzing mode. Once chosen, it will display only the data recorded for the analyzing mode selected.
Storage and cleaning
Keep the unit in the storage case when not in use. Clean the product with a soft, slightly damp cloth. Do not wet the cuff or attempt to clean the cuff with water. Do not wash or dry clean the cuff. Do not store the product in a place exposed to direct sunlight or high humidity. Remove the batteries if the unit will not be used for 3 months or longer. Always replace all of the batteries with new ones at the same time.
Specifications
Model: BPW4300
Operation principle: Oscillometric method
Display: Liquid crystal display
Measuring range: 0-280mmHg (cuff pressure)
Blood pressure measurement: Systolic pressure: 60-280mmHg Diastolic pressure: 30-250mmHg
Pulse rate: 40-180/min
Laboratory accuracy: Cuff pressure: ±3mmHg Pulse rate: ±5%
Data transfer: To PC by USB port (type B to plug the blood pressure monitor and type A to plug the cable to the PC).
Inflation: Automatic, soft adapted to blood pressure
Power supply: 2 batteries, type LR03 (AAA)
Electric shock protection: Internal power supply appliance type BF Operating environment: Temperature +10 °C to +40 °C, Humidity 15 to 85% RH (noncondensing), Atmospheric pressure 105 kPa to 80 kPa
Transport and storage environment: Temperature -20 °C to +60 °C, Humidity 15 to 85% RH (noncondensing), Atmospheric pressure 105 kPa to 80 kPa
Cuff: Suitable for wrist circumference of 13.5 to 21.5 cm Accessories: Connective line, CD, batteries (2 x AAA)
If the device is not used within the specified temperature and humidity ranges, the technical accuracy cannot be ensured.
What to do if...
| Problem Reason Solution | ||
| Battery Icon is flashing • Batteries are flat. Memory readings can be called up, but measurements are not possible. | Insert new batteries. | |
| Err 1 | Cuff is not wrapped on the wrist well (too loose). | Rewrap the cuff tighter on the wrist. |
| Err 2 | Arm moved during inflation measurement.Systolic pressure is above 280mmHg | Please do not move arm or speak when you take a measurement. |
| Err 3 | Data transfer from device to PC error, data can not be successfully transferred. | Please pull out the USB cable from device, shut down the device and transfer again. |
| No display | No information on the display screen. | Check the battery installation for proper installation of the batteries' polarities |
| Measurements appear too high or too low | Blood pressure varies constantly during the day. Many factors such as stress, time of day, talking, coughing, laughing, moving etc. when measuring will influence the reading. | Please read "key rules for accurate blood pressure measurements" and "taking a measurement" |
| Prior to measurement, the positioning system (A) on the display does not work. | Positioning system (A) is deactivated. | Refer to the chapter «select mode» to activate the positioning system (A). |

Type BF equipment

Operating temperature


Storage temperature
IP4X: International Protection rating. TÜV SÜD Safety tests validated.
Subject to change without notice.

This product conforms to the provisions of the EC directive 93/42/EEC (Medical Device Directive).
MEDICAL ELECTRICAL EQUIPMENT needs special precautions regarding EMC. For detailed description of EMC requirements, please contact an authorized local Service Centre (see guarantee card).
Portable and mobile RF communications equipment can affect medical electrical equipment.

Please do not dispose of the product in the household waste at the end of useful life. Disposal can take place at your local retailer or at appropriate collection points provided in your country. Symbol for the marking of electrical and electronic devices according to directive 2002/96/EC.
Visit our website
Visit www.kaz-europe.com/braun and select Braun Blood Pressure Monitors / BPW4300. You will be able to:
- Find out more about the "BP Smart Manager Software™".
- Download the most recent version of the "BP Smart Manager Software™".
Guarantee
See warranty statement inside the Kaz Customer Service Centre booklet.

German
Memory check
Connection cable, CD, batteries (2 * AAA)
C On/off button N Pulse:
Selection mode


"BP Smart Manager Software™" -
(Data Analysis) "Analysis" ("analysis mode") "Analysis" ("Data Analysis") "Analysis" ("Analyze") "Analysis" ("Analyze")
(User's Profiles) "Allah"
.Braun BP Smart Manager "Braun BP Smart Manager" (Next) "Kan"

:
.Braun BP Smart Manager.

תְקַרָה בְּרָה
.Braun BP Smart Manager™ (Bloom) "Bloom" (Next)
"CD" is not a character, but it is not a character.
- 2007-2 (ESH) 2007-2 (M) 2007-2 (WHO) 2007-2 (K) 2007-2 (L) 2007-2 (N) 2007-2 (O) 2007-2 (P) 2007-2 (Q) 2007-2 (R) 2007-2 (S) 2007-2 (T) 2007-2 (U) 2007-2 (V) 2007-2 (W) 2007-2 (X) 2007-2 (Y) 2007-2 (Z) 2007-2 (W)
תְרָה בְּרָה בְּרָה
• Among successful nuclear reactor.
•
.LCD-n
'בְרָה
electric voltage: quick at 7.00
• Among successful nuclear energy
(Memory/Average)
10
.(Memory/Average) 1/100
.(del yes) "prinat p"
.הכלההוּרָהוּרָהוּרָהוּרָהוּרָהוּרָהוּרָהוּרָהוּרָהוּרָהוּרָהוּרָהוּרָהוּרָהוּרָה: (power)

,הכלההוּרָה,הכלההוּרָה,הכלההוּרָה,הכלההוּרָה,הכלההוּרָה,הכלההוּרָה,הכלההוּרָה,הכלההוּרָה,הכchia
Modo di selezione


Opmerking:
Modus selecteren


Kalibrering
Välja läge
EN 1060-1/A1 1995 Non-invasive sphygmomanometers — Part 1: general requirements.
EN 1060-3/A1 1997 Non-invasive sphygmomanometers —
Part 3: supplementary requirements for electro-mechanical blood pressure measuring systems. EN 1060-4/A1 2004 Non-invasive sphygmomanometers - part 4: test procedures to determine the overall system accuracy of automated noninvasive sphygmomanometers EN 60601-1/A2 1995 Medical electrical equipment – part 1: general requirements for basic safety and essential performance. EN 60601-1-2 2007 Medical electrical equipment – part 1-2: general requirements for basic safety and essential performance – collateral standard: electromagnetic compatibility – requirements and tests
EN ISO 14971:2007 Medical devices – Application of risk management to medical devices.
EN ISO 10993-1:2003 Biological evaluation of medical devices – Part 1: Evaluation and testing.
EN 1041:2008 Information supplied by the manufacturer of medical devices.
EN 62304:2006 Medical device software – Software life-cycle processes EN 980:2008 Symbols for use in labeling of medical devices
*Standard / Standard / Norma / Standardi / Norme / Prótopo / jpn / Normativa / Standaard / Standard / Padrão / Standard
** Ausgabe / Udgave / Edición / Versio / Edition / Ekδοση / ηητηση/ Edizione / Editie / Utgave / Edição / Utgáva
*** Verwels / Reference / Referencia / Vilittaus / Référence / Avaçopá / l'ɔnɪə/ Riferimento / Referentie / Henvisning / Referência / Referens


- ENGLISH
- INTENDED USE OF BRAUN VITALSCAN
- WHAT YOU SHOULD KNOW ABOUT THIS BLOOD PRESSURE MONITOR
- SAFETY INFORMATION AND IMPORTANT PRECAUTIONS
- PRODUCT DESCRIPTION
- INSERTING BATTERIES
- KEY RULES FOR ACCURATE BLOOD PRESSURE MEASUREMENTS
- TAKING A MEASUREMENT
- PLEASE NOTE
- TURNING OFF
- MEMORY MODE
- HOW TO REVIEW THE MEMORY
- AVERAGE FUNCTION: 7 DAY AVERAGE
- HOW TO DELETE THE MEMORY DATA
- SELECT MODE
- HOW TO SELECT USER1/USER
- HOW TO SET DATE AND TIME
- HOW TO SET POSITIONING SYSTEM ON/OFF
- THE WHO/ESH INDICATOR TO EVALUATE BLOOD PRESSURE DATA
- IRREGULAR HEART BEAT DETECTOR
- MORNING HYPERTENSION DETECTOR
- CALIBRATION
- INSTALLATION OF BP SMART MANAGER™ SOFTWARE
- CONNECTION TO THE PC AND DATA TRANSFER
- HOW TO USE THE BP SMART MANAGER™
- HOW TO EXIT THE BP SMART MANAGER
- HOW TO CREATE A NEW USER
- SAVE DATA UNDER A CHOSEN USER
- HOW TO USE THE "DATA ANALYSIS" FUNCTION
- DATA ANALYSIS WITH LINE
- DATA ANALYSIS WITH TABLE
- STORAGE AND CLEANING
- SPECIFICATIONS
- VISIT OUR WEBSITE
- GUARANTEE
- GERMAN
- MEMORY CHECK
- SELECTION MODE
- תְקַרָה בְּרָה
- תְרָה בְּרָה בְּרָה
- LCD-N
- בְרָה
- ELECTRIC VOLTAGE: QUICK AT
- MODO DI SELEZIONE
- OPMERKING
- MODUS SELECTEREN
- KALIBRERING
- VÄLJA LÄGE
Brand : BRAUN
Model : BPW4300 VitalScan
Category : Sphygmomanometer