
TM 9009 - Blender VOX - Free user manual and instructions
Find the device manual for free TM 9009 VOX in PDF.


| Product Type | Blender |
| Brand | VOX |
| Model | TM 9009 |
| Speed Settings | Continuous variable with Pulse (P) function |
| Pulse Function | Yes (P position, momentary operation) |
| Ice Crush Capability | Yes, up to 6 ice cubes |
| Maximum Continuous Operation Time | 3 minutes per cycle |
| Rest Time Between Cycles | At least 10 minutes |
| Dishwasher Safe Parts | Jar, lid, measuring cup, seal rings, blade assembly (max 65°C) |
| Motor Base Cleaning | Wipe with damp cloth; do not immerse |
| Blade Assembly Cleaning | Brush with warm soapy water; do not immerse |
| Lid Safety Feature | Measuring cup locks into lid |
| Applicable Voltage | Check product label (not specified in manual) |
| Power Consumption | Not specified in manual |
| Weight | Not specified in manual |
| Dimensions | Not specified in manual |
| Intended Use | Household use only |
| Bowl Material | Not specified (likely plastic or glass) |
| Blade Material | Not specified (likely stainless steel) |
Frequently Asked Questions - TM 9009 VOX
User questions about TM 9009 VOX
0 question about this device. Answer the ones you know or ask your own.
Ask a new question about this device
Download the instructions for your Blender in PDF format for free! Find your manual TM 9009 - VOX and take your electronic device back in hand. On this page are published all the documents necessary for the use of your device. TM 9009 by VOX.
USER MANUAL TM 9009 VOX
natural_image
Abstract black and white geometric pattern with diagonal stripes (no text or symbols)VOX
ELECTRONICS
TM - 9009
OPERATING INSTRUCTIONS BLENDER
natural_image
Abstract black and white geometric pattern with diagonal stripes (no text or symbols)VOX
ELECTRONICS
GBR
BLENDER
INSTRUCTION MANUAL
TM - 9009
IMPORTANT SAFEGUARDS
When using this electrical appliance, basic safety precautions should always be followed, including the following:
- Read all instructions.
-
Before using check that the voltage indicated on the product corresponds with the voltage of your electrical outlet.
-
Do not let cord hang on hot surface or over edge of table or counter.
-
Do not operate any appliance with a damaged cord or plug or after the appliance malfunction or has been damaged in any manner. Return the appliance to the nearest authorized service facility for examination, repair or adjustment.
-
If the supply cord is damaged, it must be replaced by the manufacturer or its service agent or a similarly qualified person in order to avoid a hazard.
-
Close supervision is necessary when any appliance is used by or near children.
-
Avoid contacting the moving parts.
-
Keep hands and utensils out of container while blending to reduce the risk of severe injury to persons or damage to the blender. A scraper may be used but must be used only when the blender is not running.
-
The use of attachments not recommended or sold by manufacturer may cause fire, electric shock or injury.
-
Unplug from outlet when not in use, before putting on or taking off parts, and before cleaning. To disconnect, turn any control to “off”, then remove plug from wall outlet by grasping the plug, not the cord.
-
To reduce the risk of injury, never place blade assembly on motor unit without the jar properly attached.
-
This appliance shall not be used by children. Keep the appliance and its cord out of reach of children.
Appliances can be used by persons with reduced physical, sensory or mental capabilities or lack of experience and knowledge if they have been given supervision or instruction concerning use of the appliance in a safe way and if they understand the hazards involved.
-
Children should be supervised to ensure that they do not play with the appliance.
-
Do not leave the machine on unattended.
-
When removing the blender from the motor unit, wait until the blades have completely stopped.
-
Always operate blender with cover in place.
-
Always use the appliance on a secure, dry level surface.
-
Never place this appliance on or near a hot gas or an electric burner or where it could touch a heated appliance.
-
Do not use outdoors.
-
Do not use appliance for other than its intended use.
-
Care shall be taken when handling the sharp cutting blades, emptying the bowl and during cleaning.
- Switch off the appliance and disconnect from supply before changing accessories or approaching parts that move in use.
- Always disconnect the appliance from the supply if it is left unattended and before assembling, disassembling or cleaning.
HOUSEHOLD USE ONLY
KNOW YOUR BLENDER
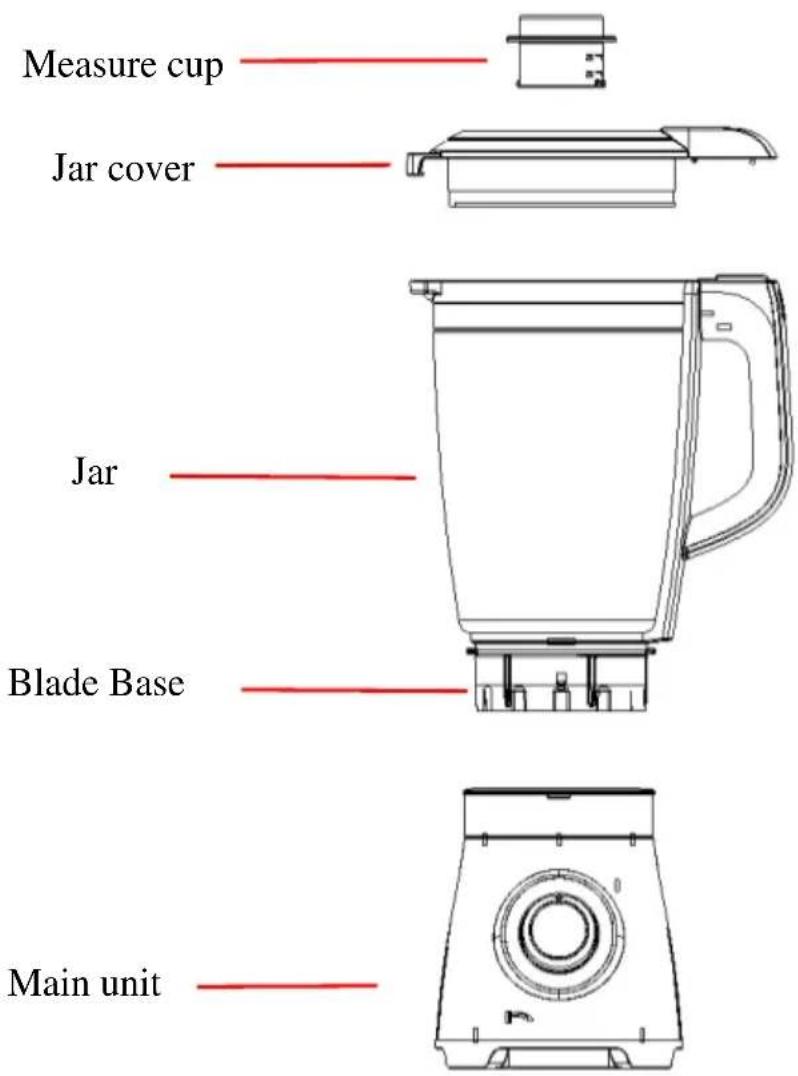
Fig.1
SPEED KNOB
Fig.2
HOW TO USE
Before initial use
- Before first use, unpack the appliance and place all parts on a horizontal surface.
-
The jar assembly (including the measuring cup, lid, seal ring 1, jar unit, seal ring 2, and blade assembly) has already been assembled into the motor unit. Disassemble to wash all detachable parts except the motor unit. Refer to the latter chapter CARE AND CLEANING.
-
Once all pieces have been cleaned and thoroughly dried, reassemble.
1) Invert the jar unit onto a level surface, holding the jar handle, put the seal ring 2 and blade assembly onto the jar base bottom and secure the blade assembly by turning it counter-clockwise until it is tight (See Fig.3.)
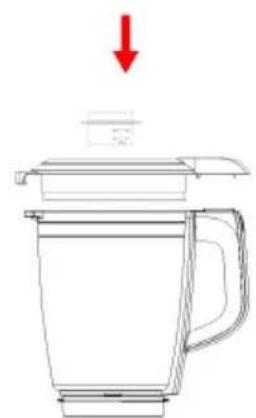
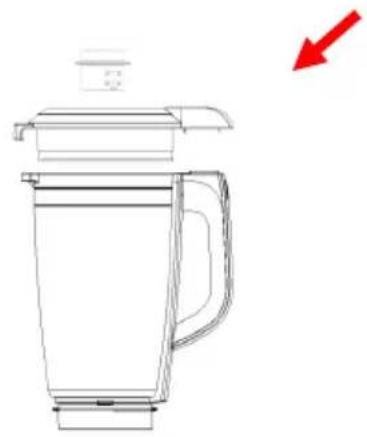
2) Reposition the jar assembly with its open end upwards. Wrap the seal ring 1 around the lid bottom and put the lid onto the jar assembly. Place the measuring cup exactly into the lid by fitting the small projection on both sides of the cup into the slots of the lid and turn the cup clockwise until tight. (See Fig.4)
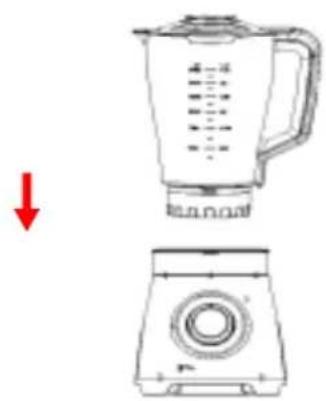
3) Finally, place the assembled jar onto the motor unit by aligning the strip on the assembled jar bottom. (See Fig.5)
CAUTION: Jar and jar base is now secure. Do not try to twist the jar and jar base onto motor unit
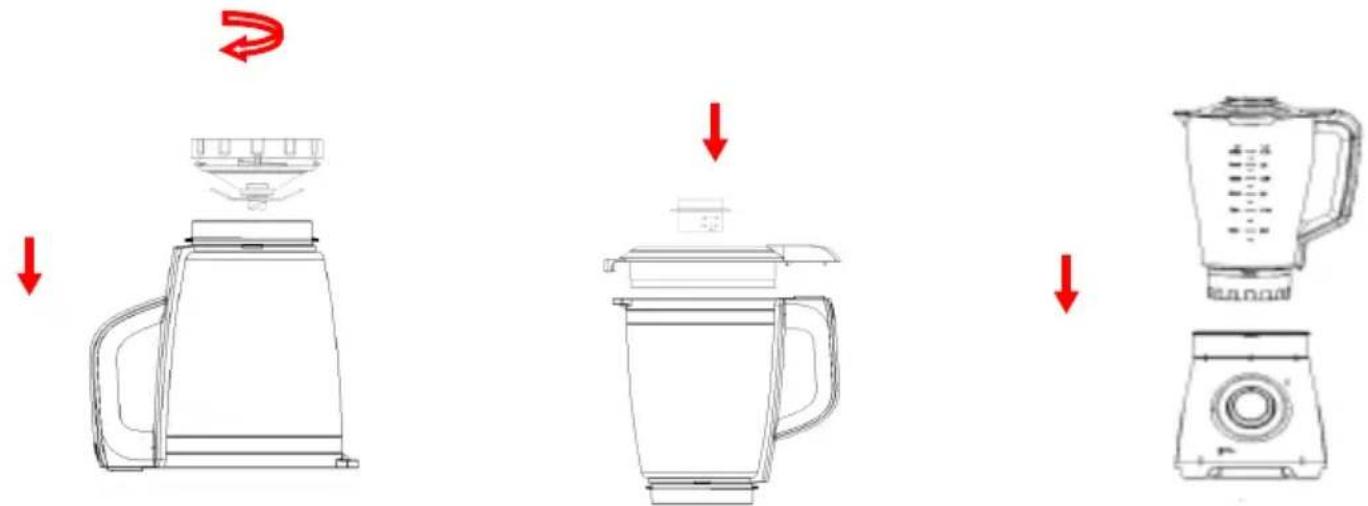
Fig.3 Fig.4 Fig.5
How to use
- Peel or core the fruit or vegetables and then cut them into small pieces.
- Place the food to be blended into the jar (See Fig.6). Usually, a certain amount of purified water has to be added to facilitate the smooth running of the appliance. The proportion of the food and water is 2:3. The amount of mixture should not exceed the max level as indicated on the jar.
RECIPE
| FOOD TYPE | SPEC | WEIGHT | SPEED |
| Carrot (apple, pear etc.) | Cut into 15mm*15mm*15mm m | Carrot: 700g Water: 1050g | High speed |
| Ice crush | 15mm*15mm*15mm | 10Pcs | P |
Note: never use boiling liquids or run the appliance empty.
- Put the lid on the jar. Be sure the measuring cup is in place.
- Plug the power cord into a standard wall outlet.
- Turn the speed knob to the appropriate speed setting for your task.
- For quick or delicate blending tasks, turn the speed knob to the P position and hold for a few seconds and then release. The knob will reset to the O position automatically. Operate several times until reaching the desired consistency.
- If you want to add ingredients while the blender is working, remove the measuring cup and place food through the lid opening. (See Fig.7)
- When crushing ice or hard food, keep one hand firmly on the lid.
- When the desired consistency is reached, turn the knob to the O position.
Note: 1) For each use, the consecutive operation time should not exceed 3 minutes. At least 10 minutes rest time must be maintained between two continuous cycles, let the unit cool to room temperature before performing the next operation cycle.
2) If you want to stop the machine during operation, turn the knob to the O position anytime.
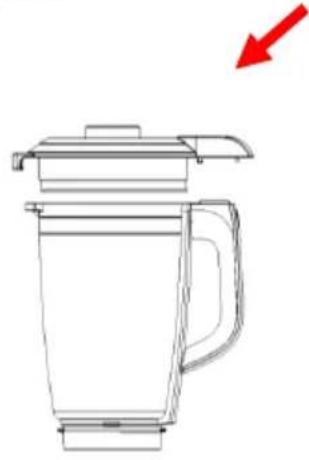
natural_image
Line drawing of a blender with a red arrow pointing to the top-left corner (no text or symbols)Fig.6
Before blending, add food to be blended into the jar.
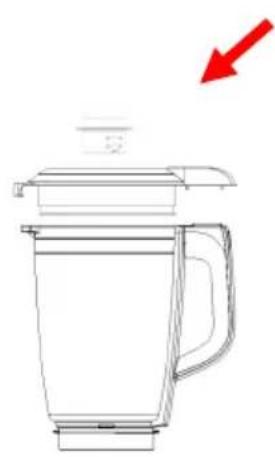
natural_image
Line drawing of a blender with a red arrow pointing to the top-left corner (no text or symbols)Fig.7
During blending, add the ingredient through the lid opening.
Important operating tips
- For best circulation of food to be blended with some liquid, pour the liquid into the jar first, then add solids.
- Some of the tasks that cannot be performed efficiently with a blender are: beating egg whites, whipping cream, mashing potatoes, grinding meat, mixing dough, and extracting juice from fruit and vegetables.
- The following items should never be placed in the unit as they may cause damage: bones, large pieces of solids, frozen food, or tough foods such as turnips.
- To crush ice, add up to 6 ice cubes. If more ice is needed, remove the cup and add cubes one by one through the lid opening.
3) Do not run the appliance for more than 3 minutes per time, and only wait until the unit is cooled to room temperature before performing the next operation cycles.
CARE AND CLEANING
This product contains no user serviceable parts. Refer service to qualified service personnel.
- Before cleaning, unplug the blender.
- Always wash immediately after use for easier cleaning. Don't let food dry on the jar assembly as this will make cleaning difficult.
- Pour a little warm soapy water into the jar and turn the knob to the P position for a few seconds. Then empty the jar.
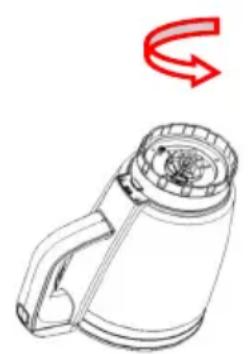
- Dismantle all detachable parts. Lift the jar assembly off the motor unit. To detach the blade assembly, turn it clockwise from the jar base bottom, and remove the seal ring 2 and blade assembly (see fig.8). In addition, detach the jar cover seal ring 1 from the jar cover.
natural_image
Line drawing of a portable blender with a red circular arrow indicating rotation (no text or symbols)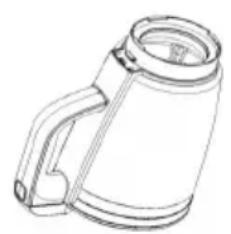
natural_image
Line drawing of a beer mug with handle and spout (no text or symbols)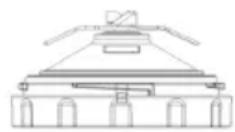
Fig.8
- Rinse the measuring cup, lid, seal ring 1, jar unit, seal ring 2 and blade assembly by hand or in a dishwasher and then dry. They are dishwasher safe components, but the temperature setting should not exceed 65°C.
- Brush the blade clean using warm soapy water, then rinse thoroughly under the tap. Don't touch the sharp blades, and handle carefully. Don't immerse the blade assembly in water. Leave to dry upside down away from children.
- Wipe the motor unit with a damp cloth and dry thoroughly. Remove the stubborn spots by rubbing with non-abrasive cleaner. If liquids spill into the motor unit; first unplug the unit, then wipe with a damp cloth and dry thoroughly.
CAUSION
1) Do not immerse the motor unit in liquid to prevent the risk of electric shock.
2) Do not use rough scouring pads or cleansers on parts or finish.
ENVIRONMENT FRIENDLY DISPOSAL

natural_image
Symbol of a trash bin crossed with diagonal lines and a horizontal bar below (no text or labels)You can help protect the environment! Please remember to respect the local regulations: hand in the non-working electrical equipments to an appropriate waste disposal centre.

natural_image
Abstract black-and-white geometric pattern with diagonal stripes (no text or symbols)VOX
ELECTRONICS
RUS
БЛЕНДЕР
natural_image
Line drawing of a kettle with a lid and a top handle, showing a red directional arrow indicating rotation (no text or symbols)Рис.3
natural_image
Line drawing of a blender with a red downward arrow indicating compression (no text or symbols)Рис.4 Рис.5
natural_image
Technical line drawing of a blender and its base (no text or symbols)Работа блендера
natural_image
Line drawing of a blender with lid and handle, no text or symbols presentРис. 6
natural_image
Line drawing of a blender with lid and handle, no text or symbols presentРис. 7
Важные рекомендации
natural_image
Line drawing of a hand-operated blender with a red curved arrow indicating rotation (no text or symbols)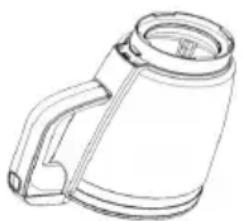
natural_image
Line drawing of a cylindrical beer mug with handle and lid (no text or symbols)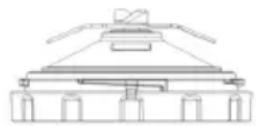
natural_image
Abstract black-and-white geometric pattern with diagonal stripes (no text or symbols)VOX
ELECTRONICS
SRB
BLENDER
KORISNIČKO UPUTSTVO
TM - 9009
VAŽNA BEZBEDNOSNA UPUTSTVA
natural_image
Line drawing of a portable kitchen blender with a red circular arrow indicating rotation (no text or symbols)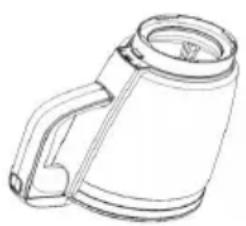
natural_image
Line drawing of a beer mug with handle and lid (no text or symbols)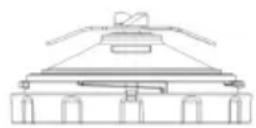
Sl.8
- Isperite solju za merenje, poklopac, zaptivni prsten 1, posudu, zaptivni prsten 2 i dodatak sa sečivima ručno ili u mašini za sudove, potom osušite. Ovo su delovi koji se mogu bezbedno prati u mašini za sudove, ali temperatura ne sme prelaziti 65°C.
- Očistiti sečivo koristeći toplu vodu sa sapunicom, zatim detaljno isprati pod mlazom vode. Ne dodirujte oštre noževe, i pažljivo rukujte. Ne potapajte dodatak sa sečivima u vodu.
- Obrišite bazu motora vlažnom krpom i detaljno osušite.
Uklonite tvrdokorne mrlje trljanjem sa neabrazivnim sredstvom za čišćenje. Ako tečnost uđe u bazu motora, najpre isključite uređaj, a zatim obrišite vlažnom krpom i potpuno osušite.
OPREZ
natural_image
Symbol of a trash bin crossed with no visible text or labelsEKOLOŠKO ODLAGANJE
natural_image
Abstract black-and-white geometric pattern with diagonal stripes inside a circle (no text or symbols)VOX
ELECTRONICS
PRT
LIQUIDIFICADOR
MANUAL DE INSTRUÇÕES
TM - 9009
INSTRUÇÕES IMPORTANTES
Como utilizar
natural_image
Line drawing of a mug with lid and handle (no text or symbols)Fig. 6
natural_image
Line drawing of a blender with lid and handle (no text or symbols)Fig. 7
natural_image
Symbol of a trash bin crossed with no text or numbers, representing environmental restriction (no text present)natural_image
Abstract black and white geometric pattern with diagonal stripes (no text or symbols)VOX
ELECTRONICS
GRC
МПАЕНТЕР
ΟΔΗΓΙΕΣ ΧΡΗΣΗΣ
TM - 9009
Euk.3 Euk.4 Euk.5
natural_image
Symbol of a trash bin crossed with two diagonal lines, no text or numbers presentnatural_image
Abstract black and white geometric pattern with diagonal stripes (no text or symbols)VOX
ELECTRONICS
SVN
BLENDER
NAVODILA ZA UPORABO
TM - 9009
POMEMBNI VARNOSTNI NAPOTKI
S1.3
S1.4 S1.5
Kako uporabljati
natural_image
Symbol of a trash bin with crossed lines indicating no waste or discharge, and a solid black rectangle below (no text or labels)natural_image
Abstract black and white geometric pattern with diagonal stripes (no text or symbols)VOX
ELECTRONICS
HRV
BLENDER
KORISNIČKE UPUTE
TM - 9009
VAŽNE BEZBJEDNOSNE UPUTE
natural_image
Line drawing of a hand-operated blender with a red circular arrow indicating rotation (no text or symbols)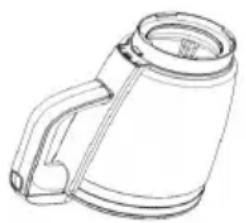
natural_image
Line drawing of a beer mug with handle and lid (no text or symbols)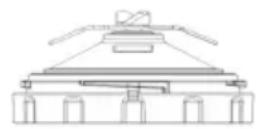
S1.8
- Isperite šalicu za mjerenje, poklopac, zaptivni prsten 1, posudu, zaptivni prsten 2 i dodatak sa sječivima ručno ili u perilici posuđa, potom osušite. Ovo su dijelovi koji se mogu sigurno prati u perilici posuđa, ali temperatura ne smije prelaziti 65°C.
- Očistiti sječivo koristeći toplu vodu sa sapunicom, zatim detaljno isprati pod mlazom vode. Ne dodirujte oštre noževe, i pozorno rukujte. Ne uranjajte dodatak sa sječivima u vodu.
- Obrišite bazu motora vlažnom krpom i detaljno osušite.
Uklonite tvrdokorne mrlje trljanjem sa neabrazivnim sredstvom za čišćenje. Ako tekućina uđe u bazu motora, najprije isključite uređaj, a zatim obrišite vlažnom krpom i potpuno osušite.
POZOR
Ne uranjajte bazu motora u tekućinu kako biste sprečili rizik od strujnog udara.
Ne koristite grube podloge za ribanje ili jaka sredstva za čišćenje dijelova ili samog uređaja.

natural_image
Symbol of a trash bin crossed out by two diagonal lines (no text or numbers present)
EKOLOŠKO ODLAGANJE
natural_image
Abstract black-and-white geometric pattern with diagonal stripes inside a circle (no text or symbols)VOX
ELECTRONICS
MKD
БЛЕНДЕР
КОРИСНИЧКО УПАТСТВО
TM - 9009
natural_image
Line drawing of a mug with lid and handle, no text or symbols present
Пред блендирање,
natural_image
Line drawing of a blender with lid and handle (no text or symbols)
отворот на капакот
Сл.6
Сл.7
natural_image
Line drawing of a mechanical device with a red curved arrow indicating rotation (no text or symbols)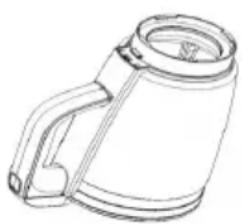
natural_image
Line drawing of a beer mug with handle and lid (no text or symbols)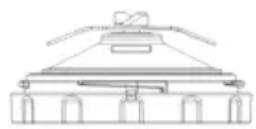
Сл.8
natural_image
Symbol of a trash bin crossed with no text or numbers, representing environmental restriction (no text present)natural_image
Abstract black and white geometric pattern with diagonal stripes (no text or symbols)VOX
ELECTRONICS
ALB
BLENDER
UDHËZIM PËR PËRDORIM
TM - 9009
UDHËZIME TË RËNDËSISHME TË SIGURISË
natural_image
Symbol of a trash bin crossed with two crossed lines, no text or numbers presentMBETURINAVE EKOLOGJIKE
- VOX
- ELECTRONICS
- IMPORTANT SAFEGUARDS
- HOUSEHOLD USE ONLY
- KNOW YOUR BLENDER
- SPEED KNOB
- HOW TO USE
- Before initial use
- Note: never use boiling liquids or run the appliance empty.
- Important operating tips
- CARE AND CLEANING
- CAUSION
- ENVIRONMENT FRIENDLY DISPOSAL
- Работа блендера
- Важные рекомендации
- VAŽNA BEZBEDNOSNA UPUTSTVA
- OPREZ
- EKOLOŠKO ODLAGANJE
- INSTRUÇÕES IMPORTANTES
- Como utilizar
- POMEMBNI VARNOSTNI NAPOTKI
- Kako uporabljati
- VAŽNE BEZBJEDNOSNE UPUTE
- POZOR
- UDHËZIME TË RËNDËSISHME TË SIGURISË
- MBETURINAVE EKOLOGJIKE
Brand : VOX
Model : TM 9009
Category : Blender