
WMR 500 - Weather Station OREGON SCIENTIFIC - Free user manual and instructions
Find the device manual for free WMR 500 OREGON SCIENTIFIC in PDF.


| Product type | Professional all-in-one weather station |
| Brand | Oregon Scientific |
| Model | WMR500 |
| Base station dimensions (L x W x H) | 180 x 90 x 160 mm |
| Base station weight | 427.5 g (without batteries) |
| All-in-one sensor dimensions (L x W x H) | 385 x 195 x 315 mm |
| All-in-one sensor weight | 1139 g (without batteries) |
| Base station power supply | DC 5V, 1000 mA AC adapter + 4 AA 1.5 V batteries (backup) |
| All-in-one sensor power supply | 4 AA 1.5 V batteries (included) + 4 optional AA batteries for particle sensor |
| Main functions | Indoor/outdoor temperature, humidity, heat index, dew point, wind speed and direction, wind chill, rainfall, UV index, atmospheric pressure, air quality (PM2.5/PM10), weather forecast, moon phase, clock, calendar |
| RF transmission range | Up to 300 m (in open field) |
| Number of sensor channels | 3 |
| Connectivity | Wi-Fi, Oregon Scientific Smart Living mobile app (iOS/Android) |
| Display | LCD screen with backlight, weather data display zones |
| Measurement units | Temperature: °C/°F; Wind: m/s, knots, km/h, mph; Rain: mm, inches; Pressure: hPa, mbar, mmHg, inHg |
| Data memory | Daily max/min for temperature, humidity, wind; last 24h rainfall; history on app |
| Maintenance and cleaning | Regularly clean the rain gauge debris collector and wind sensor cups with clean water. Do not use lubricant on the wind shaft. |
| Reset | Press the RESET button or hold ▲ and ▼ together for 5 seconds |
| Conformity countries | EU, Switzerland, Norway |
| Warranty | According to manufacturer's conditions; do not open the product or warranty becomes void |
Frequently Asked Questions - WMR 500 OREGON SCIENTIFIC
User questions about WMR 500 OREGON SCIENTIFIC
0 question about this device. Answer the ones you know or ask your own.
Ask a new question about this device
Download the instructions for your Weather Station in PDF format for free! Find your manual WMR 500 - OREGON SCIENTIFIC and take your electronic device back in hand. On this page are published all the documents necessary for the use of your device. WMR 500 by OREGON SCIENTIFIC.
USER MANUAL WMR 500 OREGON SCIENTIFIC
Professional all-in-one Weather Station
Model: WMR500
USER MANUAL
Professional all-in-one Weather Station Model: WMR500
USER MANUAL
CONTENTS
Introduction....1
Packaging Contents 1
All-in-one sensor .... 1
Accessories - sensors 2
Overview 2
Main unit....2
Real and bottom view....2
Lcd display 2
All-in-one sensor 3
Installation 3
Assemble the wind sensor 3
Remove The Tape On The Debris Collector....3
Power the base station....4
Power the all-in-one sensor 4
Mounting the all-in-one sensor....4
Pairing the sensor ....4
Pair your smart device with the weather station....4
Setting the clock time .... 4
Moon phase....4
Weather forecast 4
Temperature and humidity 5
Temperature and humidity trend....5
Wind chill / direction / speed ....5
Uv/rainfall/ barometer/pmi 5
Rainfall 5
Uv index (optional) 5
Barometer 5
Pmi (optional) 5
Backlight 5
Reset....5
Maintenance 5
Specifications 6
Main Unit....6
All-in-one sensor 6
Indoor barometer....6
Indoor temperature....6
Indoor relative humidity....6
Outdoor temperature....6
Outdoor relative humidity 6
Wind sensor 6
Rain gauge....6
Precautions 6
About Oregon Scientific 7
EU-Declaration Of Conformity 7
FCC Statement 7
Declaration of Conformity....7
Information for users 7
INTRODUCTION
Thank you for selecting the Oregon Scientific™ Weather Station (WMR500).
This product can provide you with weather information through an all-in-one sensor with high levels of accuracy. Download the dedicated app to set up your weather station and experience all of the features of the WMR500. The App remembers the data for a time range for you to monitor and analyze the weather status.
The base station is compatible with other weather sensors. To purchase additional sensors, please contact your local retailer.
NOTE
Please read this user manual before using your product and keep it for future reference. For the complete operation instructions, please visit http://global.oregonscientific.com/customerSupport.php.
PACKAGING CONTENTS
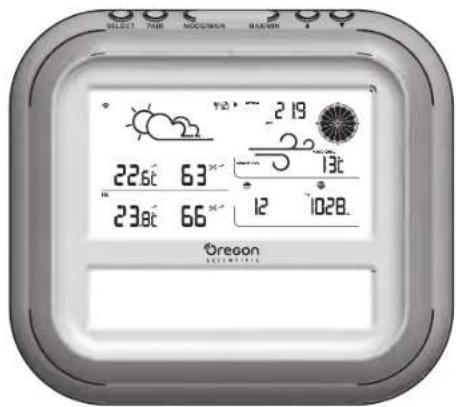
1 x Base Station
3 x AA UM-3 1.5V batteries
natural_image
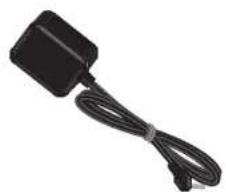
Black rectangular electronic device with a coiled cable, no visible text or symbols1x Power Adapter
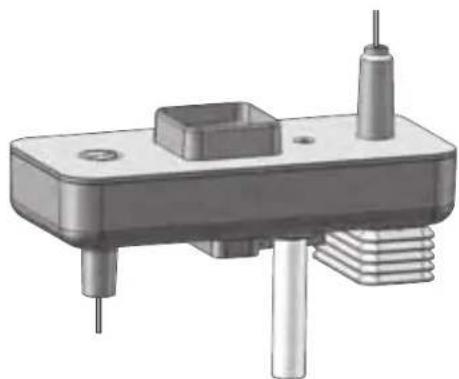
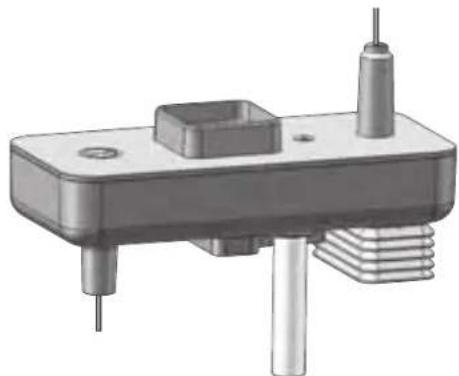
ALL-IN-ONE SENSOR
natural_image
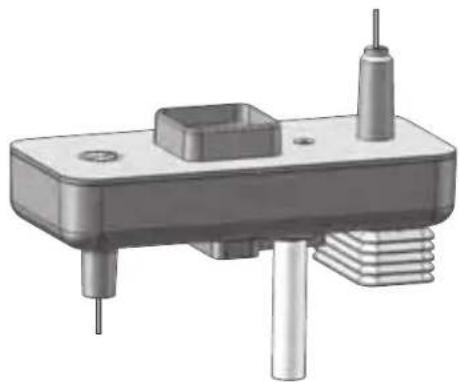
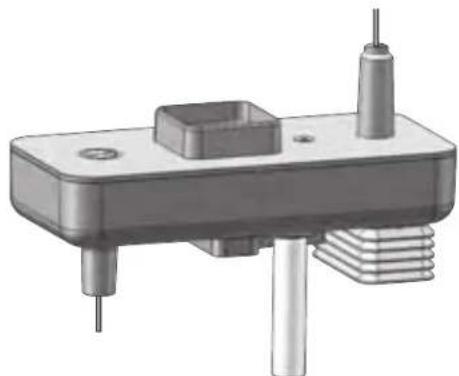
3D rendering of a mechanical component with cylindrical and rectangular features (no text or symbols visible)1x Main unit
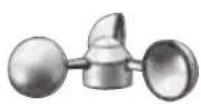
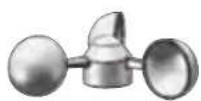
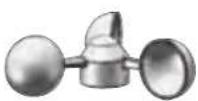
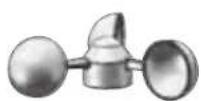
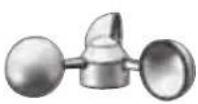
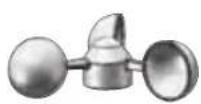
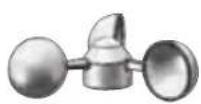
1x Wind cups
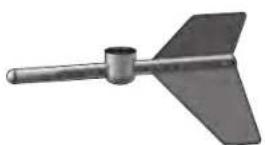
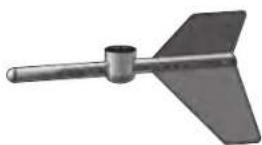
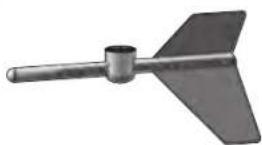
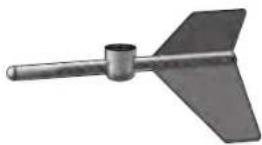
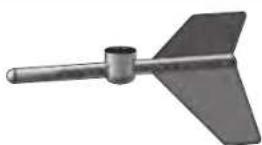
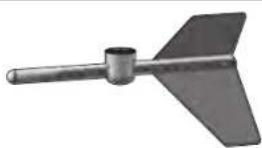
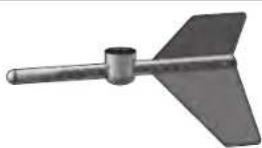
1x Wind vane
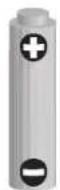
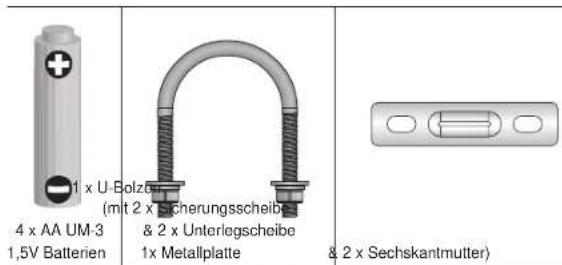
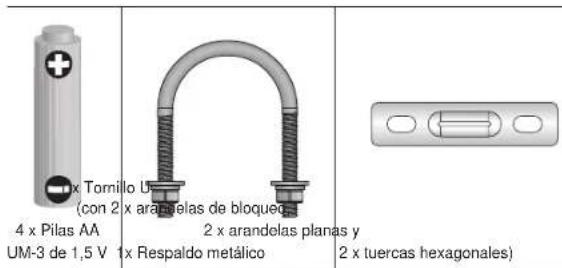
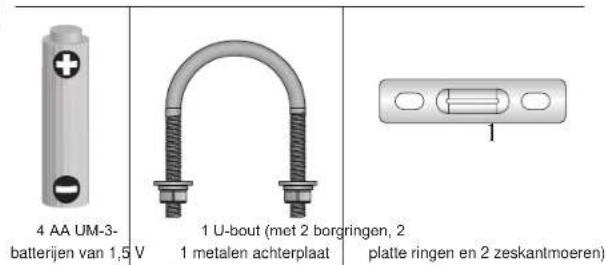
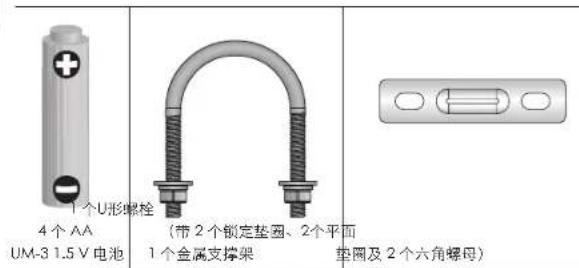
4 x AA UM-3
1.5V batteries
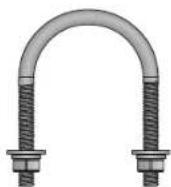
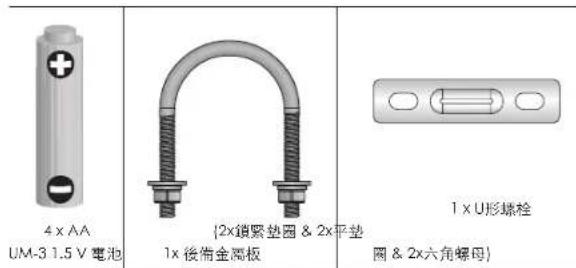
1x Backing metal plate

(with 2 x lock washer &
2 x flat washer & 2 x hex nut)
ACCESSORIES - SENSORS
This product can work with other sensors to maximize the performance of your weather station.
Optional wireless remote sensors (Oregon Scientific brand) such as those listed below can be purchased separately. For more information, please contact your local retailer.* Please visit our website at www.oregonscientific.com for more details about these sensors.
- Dust sensor
• UV sensor (UV index )
* Features and accessories will not be available in all countries.
OVERVIEW
MAIN UNIT
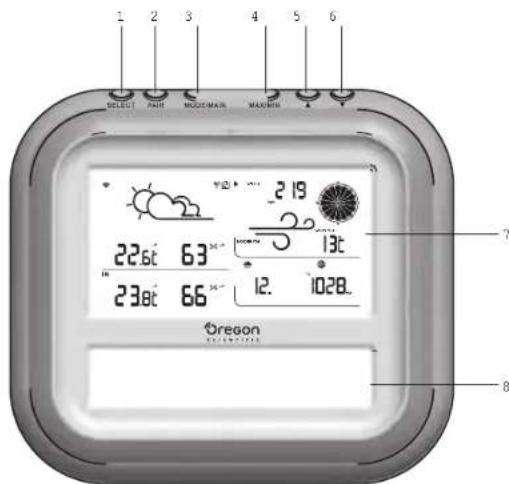
- SELECT: Switch among the different areas
- PAIR: Enter and confirm pairing mode
- MODE/MAIN: Toggle among the different display modes
- MAX/MIN: Read today max/min memory readings
- : Increase value; toggle to browse outdoor channels; select pairing mode
- ▼: Decrease value; toggle to browse outdoor channels; remove sensor; select pairing mode
- All weather information display area
- Dot matrix display area
REAL AND BOTTOM VIEW
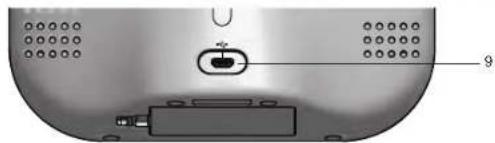
natural_image
Close-up of a device's internal components, including a small electronic device and a labeled part (9), with no visible text or symbols beyond the number.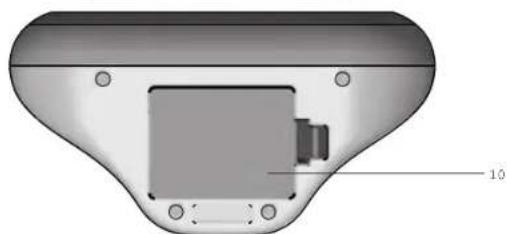
natural_image
3D rendering of a remote control panel with labeled component (no text or symbols beyond basic labels)- Micro USB power jack
- Battery compartment
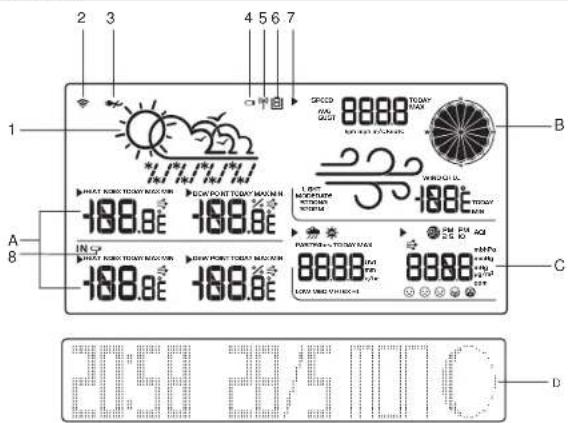
LCD DISPLAY
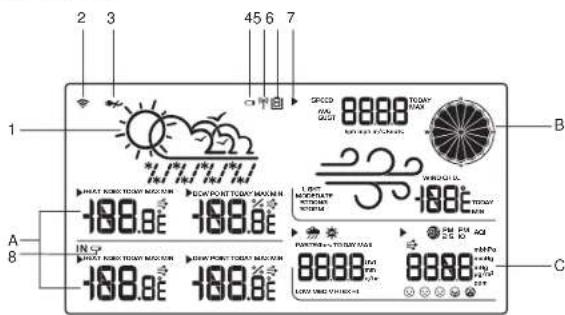

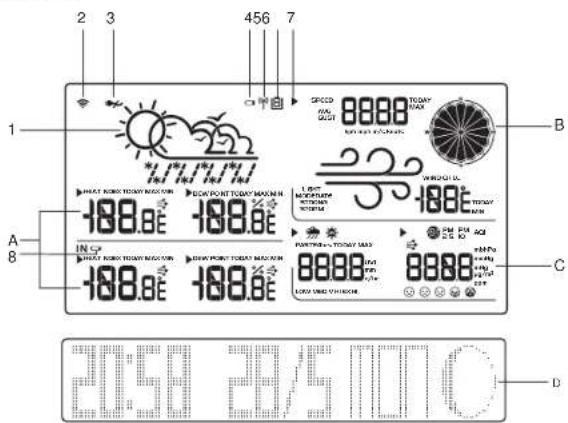
A. Temperature/Heat Index /Humidity/Dew-point area
B. Wind speed/Wind direction/Wind chill area
C. UVI/ Rainfall / Barometric pressure/Air quality area
D. Clock /Calendar/Weekday/Moon Phase area
1. Weather forecast
2. Wi-Fi connection indicator
3. No main power supply
4. Low battery indicator for the sensor
5. Sensor searching indicator
6. Sensor channel
7. Selected area icon
8. Low battery indicator for the base station
A Temperature/Heat Index /Humidity/Dew-point area
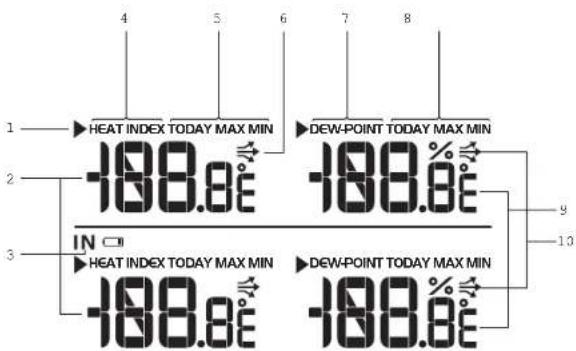
- Selected area icon
- Indoor/Outdoor temperature reading (°C for EU/°F for US)
- Indoor temperature/humidity indicator
- Heat index
- Today Max/Min temperature/heat index
- Temperature trend
- Dew-point
- Today Max/Min humidity/dew-point
- Humidity /dew-point reading
- Humidity trend
B Wind speed/Wind direction/Wind chill area
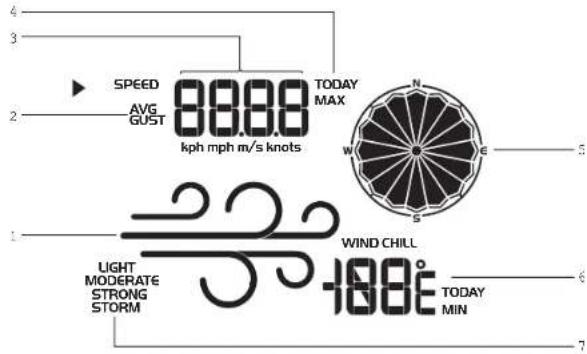
- Wind speed level indicator
- Wind speed indicator (AVG/GUST)
- Wind speed reading (m/s, knots, kph or mph)
- Today max wind speed memory
- Wind direction indicator
- Today minimum wind chill
- Wind speed level description
C UVI/ Rainfall area / Barometric pressure / Air quality area
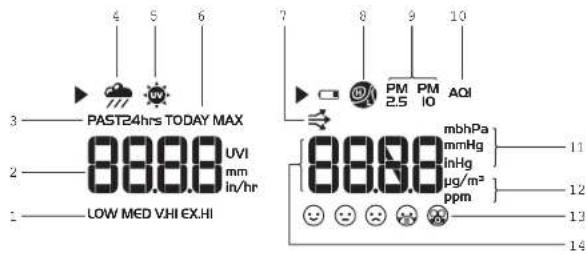
- UVI level indicator
- UVI/rainfall reading (UVI; mm; inch; mm/hr; in/hr)
- Today/Past 24 hours rainfall
- Rainfall/rain rate indicator
- UVI indicator
- Current/Max UVI or rain rate
- Barometric pressure trend
- Barometric pressure indicator
- PM (Particle Matter) reading indicator
- AQI (Air quality index)
- Barometric pressure unit (mb/hPa/mmHg/inHg)
- PM2.5/PM10 unit (μg/m³/ppm)
- AQI level indicator
- Barometric pressure /PM reading
D Clock /Calender/Weekday/Moon Phase area
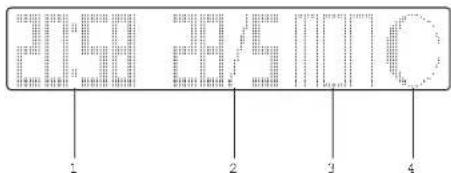
- Clock
- Date
- Weekday
- Moon phase
ALL-IN-ONE SENSOR
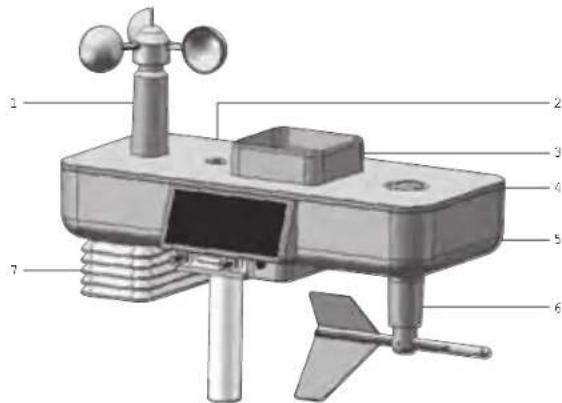
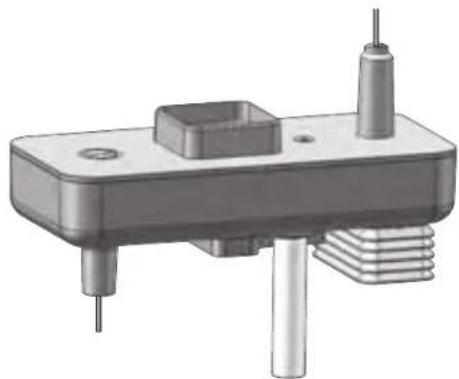
- Wind speed sensor: Measures wind speed
- Level indicator: Indicates whether the sensor is level or needs adjustment
- Rain gauge with collector: Takes rainfall readings/ Collects rain
- UV sensor (not included) location: Take UV readings
- Solar panel: Provide power to the sensor and prolongs battery life
- Wind direction vane: Takes wind direction
- Temperature/Humidity sensor: Measures temperature and humidity readings
- Dust sensor (not included): Take PM 2.5/PM 10 readings
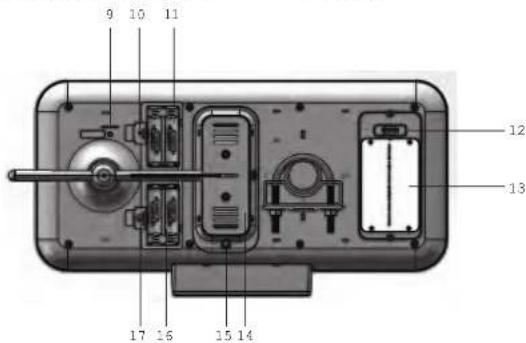
-
SET NORTH: Calibrate the direction of wind sensor
-
RESET: Returns unit to default settings
- Battery compartment for the all-in-one sensor
- Temperature/Humidity sensor location
- Dust sensor location (optional)
- Debris collector
- Screw to open/close the debris collector
- Battery compartment for dust sensor (optional)
- CHANNEL 1, 2, 3: Select sensor channel
INSTALLATION
ASSEMBLE THE WIND SENSOR
- Loosen the screws in the wind cups and wind vane.
- Insert the top of the wind sensor unit into the wind cups securely with some pressure and then twist the screw tightly.
- Insert the bottom of the wind sensor unit into the wind vane securely with some pressure and then twist the screw tightly.
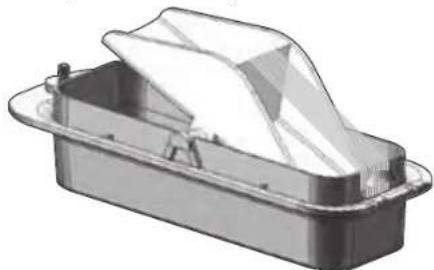
REMOVE THE TAPE ON THE DEBRIS COLLECTOR
A debris collector is located under the rain collector and fixed by fiber tape. Unscrew it and remove the tape before first time using.
natural_image
3D rendering of a transparent plastic container with lid and side supports (no text or symbols)云
POWER THE BASE STATION
- Insert the 3 AA batteries (included) to the battery compartment of the base station for back-up usage, matching the polarity symbols (+ and -) marked inside.
- Connect the supplied power adapter to the Micro USB power jack, then plug into a standard AC outlet.
NOTE
- The power adapter is intended to be correctly oriented in a vertical or floor mount position. The prongs are not designed to hold the plug in place if it is plugged into a ceiling, under-the-table or cabinet outlet. The socket-outlet shall be installed near the equipment and shall be easily accessible.
POWER THE ALL-IN-ONE SENSOR
Insert the 4 AA batteries (included) to the MAIN UNIT battery compartment, matching the polarity symbols (+ and -) marked inside.
(Optional) Install 4 AA batteries (not included) to the DUST SENSOR battery compartment for back-up usage, matching the polarity symbols (+ and -) marked inside.
NOTE
- If you will be connecting more than one all-in-on sensor, slide the channel switch CHANNEL 1, 2, 3 to select another channel before replace the battery compartment cover.
- For longer performance, recommend to use alkaline batteries and consumer grade lithium batteries in temperatures below freezing.
- Replace the batteries when □ displays on the base station. Press RESET after each battery replacement.
MOUNTING THE ALL-IN-ONE SENSOR
The sensor is capable of transmitting data to the base station wirelessly within an approximate operating range of 300 m (1000 feet). Ideal locations for the sensor would be in any location on the roof of a building that is in an open area away from trees or other obstructions preventing from the wind flow for an accurate reading. Additionally, locate the sensor in direct sunlight for optimal power supply to the solar panel.
natural_image
Technical line drawing of a mechanical component with two views: top shows circular housing and vertical supports, bottom shows rectangular bracket (no text or symbols)| Solar panel facing: | If you reside in the: |
| North | Southern Hemisphere |
| South | Northern Hemisphere |
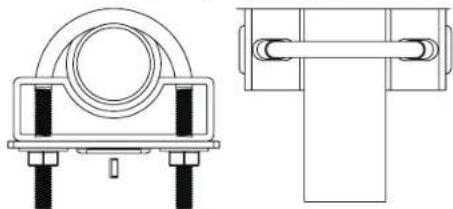
Secure the all-in-one sensor connector in the desired location:
- Align the back of the sensor connector to an existing pole.
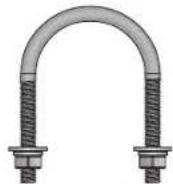
- Secure in place by inserting the ends of the U-bolt into the holes on the sensor connector and securing it with washers and bolts.
- Securely locate the pole in your desired outdoor area.
NOTE
- Make sure the water bubble in the level indicator on the top surface stays within the circle. Check the balance status regularly for an accurate rainfall rate reading.
- Ensure the wind sensor is pointing North to enable it be record accurate readings. Press SET NORTH at the bottom of the sensor to calibrate the direction. You can use a compass to look for an accurate direction of north if necessary.
- Press RESET button on the main unit to erase all testing data.
PAIRING THE SENSOR
- Press and hold PAIR for 3 seconds on the base station, two pairing options will display on the dot matrix display area.
(1) Wi-Fi network joining
(2) Sensor pairing
2. Press ▲ or ▼ to select "Sensor pairing", then press PAIR to confirm. A message "Pairing sensor" will display and the base station starts to search for the sensor. When successfully paired, select the sensor channel on the base station to view the weather contents of the paired sensor.
To select a sensor channel
- Press SELECT repeatedly to navigate ▶ icon to any area except the indoor temperature/heat index/dew-point area.
- Press ▲ or ▼ select a sensor channel.
To add a new sensor or replace the sensor
- Slide the channel switch to select a channel.
- Power up or press RESET on the new sensor.
- Follow the above pairing steps 1-2 to pair the new sensor.
To remove a sensor
- Press and hold SELECT for 3 seconds on the base station, two options will display on the dot matrix display area.
"Do you want to remove sensor x ?
[Yes]: Press DOWN, [No]: Press MODE/MAIN". - Press ▼ remove/disconnect the specific sensor (channel).
NOTE
- Complete the pairing within 30 minutes after you power up or reset the sensor. Otherwise, the base station will stop searching the sensor.
• To replace a specific sensor, remove it before replacing. - If the new sensor is successfully paired, the new channel number and weather contents will display. Otherwise, the base station will still display the data from the old sensor.
- If the base station cannot receive the weather data from the sensor, or * - * displays as the data value. Press and hold PAIR to search the sensor again.
"--" means lost link.
"NA" means data not available or data cannot be calculated.
PAIR YOUR SMART DEVICE WITH THE WEATHER STATION
You can view the weather contents and weather conditions, set the altitude, select the display units, and review the history data by monthly, weekly, daily and hourly from different sensor channel on the App.
Download the App
Scan the QR code or search "Smart Living WMR500" to find the App and download on your smart device. The App is available on both Apple App Store and Google Play.
Join the WI-FI network
- Make sure your Wi-Fi network is on and your smart device is Wi-Fi connected.
- Open the App, follow the screen instructions to register an account and log in.
- Press and hold PAIR for 3 seconds to enter pairing mode, select "Wi-Fi network joining", then press PAIR to confirm. The weather station starts to search the Wi-Fi network.
- A message "Joining WiFi network" displays on the dot matrix display area, then immediately tap Start on your smart device.
The following messages appear in steps until successfully paired,
"Joined Wi-Fi network" "Adding device to account" "Device added".
5 The current clock time/date/weekday/moon phase will be displayed. - Tap Add this device on your smart device to bind your account with the weather station.
NOTE Always keep Wi-Fi connected for the weather station to store data to the server.
SETTING THE CLOCK TIME
The main unit will automatically synchronize the clock time when connected with our server and App via Wi-Fi. You can also set the language (English, French, German, Italian, Spanish), time zone (-12 to 14) and hour format (12/24 hr) on the App.
MOON PHASE
Following icons illustrate how the moon will appear on the base station.
| New Moon | Full Moon | ||
| Waxing Crescent | Waning Gibbous | ||
| First quarter | Third quarter | ||
| Waxing Gibbous | Waning Crescent |
NOTE The moon phase displays in opposite orientation if you are in southern hemisphere.
WEATHER FORECAST
The WMR500 weather station display and WMR500 app shows the weather forecast within a 30-50 km (19-31 mile) radius. The forecast predicts 12 - 24 hours out.
| ICON | DESCRIPTION |
| Sunny | |
| Partly cloudy | |
| Cloudy | |
| Rainy | |
| Snowy |
4
TEMPERATURE AND HUMIDITY
You can view the current indoor/outdoor temperature/heat index, humidity, dew-point and the max/min memories on the base station.
Select the temperature unit on App: °C (for EU)/°F(for US).
To view current temperature, heat index and TODAY MAX/MIN readings on the device:
- Press SELECT repeatedly to navigate ▶ icon to the temperature/heat index area.
- Press MODE repeatedly to toggle between the temperature/heat index displays.
- Press MAX / MIN to toggle among current / MAX /MIN readings.
- Press ▲ or ▼ to change channel (outdoor temperature only).
To view humidity, TODAY MAX/MIN and dew-point readings on the device:
- Press SELECT repeatedly to navigate ▶ icon to the humidity/dew-point area.
- Press MODE repeatedly to toggle between the humidity/dew-point displays.
- Press MAX / MIN to toggle among current/MAX/MIN readings.
NOTE The heat index provides an indication on how hot it feels based on air temperature and relative humidity.
NOTE The dew point advises at what temperature condensation will form.
TEMPERATURE AND HUMIDITY TREND
The trend lines are shown next to the temperature and humidity readings. The trend is shown as follows:
You can view and set the numeric wind speed with maximum memory display on our dedicated App.
Select the wind units on the App.
• Kilometers per hour (kph)
• Miles per hour (mph)
• Meters per second (m/s)
- Knots (knots)
View on the device:
The base station provides wind speed and wind direction information.
To read the wind direction, find the compass point is pointing to.
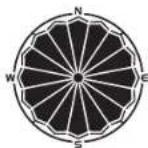
To select wind display mode:
Press MODE on wind area to toggle between:
GUST (Gust)
• AVG (Average)
The wind level is shown by a series of text icon:
| LIGHT | MODERATE | STRONG | STORM |
| 2 -8 mph(3-13 km/h) | 9-25 mph(14-41 km/h) | 26-54 mph(42-87 km/h) | >55 mph(>88 km/h) |
To read the wind direction:
| Status | Wind Direction Indicator | Meaning |
| GUST | Real-time wind direction | |
| AVG | Real-time average wind direction | |
| AVG | (Max 6 sets) | Wind direction of last hour |
To view today maximum wind speed and minimum wind chill readings:
- Press SELECT repeatedly to navigate ▶ icon to the wind speed/wind direction/wind chill area.
- Press MAX / MIN to toggle between current/MAX wind speed and current/MIN wind chill readings.
NOTE The wind chill factor is based on the combined effects of temperature and wind speed.
UV/RAINFALL/ BAROMETRIC PRESSURE/PM
The station is capable of displaying the UV index, the current or past 24 hours of rainfall, max rain rate, barometric pressure and air quality readings.
BAINFALL
To view the recorded rainfall/rain rate of the current hour or past 24 hours:
- Press SELECT repeatedly to navigate ▶ icon to the UV/Rainfall area.
- Press MODE repeatedly to select
- Press MAX / MIN repeatedly to toggle among current / today max rain rate, past 24 hours, or today accumulated rainfall readings.
Select the measurement unit for the rainfall/rain rate on the App:
• mm (millimeter); in (inch)
• mm/hr (millimeter per hour); In/hr (inch per hour)
UV INDEX (OPTIONAL)
To view the UV reading:
- Press SELECT repeatedly to navigate ▶ icon to the UV/rainfall area.
- Press MODE repeatedly to select
- Press MAX / MIN to toggle between current/MAX UV index display.
BAROMETRIC PRESSURE
To view the barometric pressure reading:
-
Press SELECT repeatedly to navigate ▶ icon to the barometric pressure/PM area.
-
Press MODE repeatedly to select
To view pressure trend:
The barometric pressure trend icons are based on recent sensor readings.
The trend lines are shown next to the pressure readings. The trend is shown as follows:
Select the measurement unit for the barometer on the App:
• Barometric pressure: mmHg (Millimeters of mercury)
• InHg (inches of mercury), mbar (millibars)
• hPa (hectopascal).
Set the altitude level compensation:
The altitude reflects the distance from sea level at your position. You can set the altitude level compensation for the barometric pressure readings on the App.
NOTE When altitude is set to 0 meter, the pressure reading is the local pressure. If the altitude is set to the current location, the new pressure reading is an offset pressure to the sea level.
PM (OPTIONAL)
To view the PM reading:
-
Press SELECT repeatedly to navigate ▶ icon to the Barometric pressure/PM area.
-
Press MODE repeatedly to select PM 2.5, PM10, AQI.
Select the measurement unit ppm or ug/m³ for the PM on the App.
BACKLIGHT
Press any button on the base station to activate the backlight.
RESET
Press and hold ▲ and ▼ together for 5 seconds to return the device to default settings.
*DO NOT RESET WITHOUT FIRST REMOVING YOUR DEVICE IN THE APP
MAINTAINANCE
Maintain the Rain Gauge
Clean the hole of the rain collector and the debris collector for maintaining accuracy is very important. Unscrew the debris collector and clean the dirt by water periodically.
Maintain the Wind Sensor
If the wind cup doesn't spin in the wind or does not spin as fast as they should.
Remove the wind cup and clear out all bugs, spider webs or debris.
NOTE Do not apply any fluid lubricant on the shaft and bearing. It probably breaks the inner electronic components.
SPECIFICATIONS
BASE STATION
| Dimension (L x W x H) 180 x 90 x 160 mm(7 x 3.54 x 6.3 inches) |
| Weight 427.5 g (0.94 lbs) without battery |
| Battery 4 x 1.5 V AA batteries |
| AC/DC Adapter Input: 100-240 V, 50-60 Hz 300 mAOutput: DC 5V, 1000 mA |
ALL-IN-ONE SENSOR
| Dimension (L x W x H) 385 x | 195 x 315 mm(15.16 x 7.68 x 12.4 inches) |
| Weight 1139 g (2.51 lbs) without battery | |
| RF transmission frequency EU: 868mhz, US: 915mhz | |
| No. of channel 3 | |
| RF transmission range | 250 - 300 m (internal antenna) |
| Transmission Cycle 15 seconds | |
| Battery 4 x 1.5 V AA + 4 x 1 | .5 V AA (optional for dust sensor) |
| Battery life with dust sensor: | 6 months (8 x 1.5 V AA)without dust sensor: 12 months (4 x 1.5 V AA) |
BAROMETRIC PRESSURE
| Unit mb, inHg, mmHg and hPa | |
| Measuring range 700 – 1050 | hPa |
| Accuracy +/- 7 hPa | |
| Altitude setting Sea level | User setting for offset pressure to sea level |
| Weather display | Sunny, Partly Cloudy, Cloudy, Rainy and Snowy |
INDOOR TEMPERATURE
| Temperature unit °C / °F (°C for EU, °F for US) | |
| Measuring Range | -5 to 50 °C (23 - 122 °F) |
| Accuracy 0 - 40 °C (32 - 104 °F): +/-1 °C (+/-2 °F)-5 to 0 °C (23 - 32.0 °F): +/-2 °C (+/-4 °F)40 - 50 °C (104 - 122 °F): +/-2 °C (+/-4 °F) | |
| Resolution | 0.1 °C (0.2 °F) |
| Memory | Current, Min. and Max. |
RELATIVE HUMIDITY
| Measuring Range | 25% - 90% RH |
| Accuracy 40% - 80% RH: +/- | 5% RH25% - 40% RH and 80%-90%RH: +/-7% RH |
| Resolution | 1% |
| Memory | Current, Min and Max |
OUTDOOR TEMPERATURE
| Temp. unit | °C / °F (°C for EU, °F for US) |
| Measuring Range | -30 to 60 °C (-22 to 140 °F) |
| Accuracy | -20 to 0 °C: +/-2.0 °C (+/- 4.0 °F)0 - 40 °C: +/-1.0 °C (+/- 2.0 °F)40 - 50 °C: +/-2.0 °C (+/- 4.0 °F)50 - 60 °C: +/- 3.0 °C (+/- 6.0 °F) |
| Temperature resolution | 0.1°C (0.2 °F) |
| Memory | Current, Min and Max |
WIND SENSOR
| Wind speed unit | m/s, knots, kph, mph |
| Speed accuracy | 2 - 10 m/s (+/-2 m/s)10 - 56 m/s (+/- 10%) |
| Direction resolution | 22.5 degree |
| Memory | Max wind speed |
RAIN GAUGE
| Rainfall unit | mm , inch (mm for EU, inch for US) |
| Rain rate unit | mm/hr and inch/hr |
| Measuring range for rainfall | 0 mm to 9999 mm (0-393.6 inches) |
| Measuring range for rain rate | 0. 0.04 in/hr (1mm/hr) to 40 in/hr (1016 mm/hr) |
| Accuracy | 0 - 15 mm (0 - 0.6")/hr : +/- 1 mm/hr (0.04") 15 - 991 mm/hr (0.6 - 39") : +/- 10 % |
| Memory | Past 24 hrs, hourly from last memory reset |
PRECAUTIONS
- Use only fresh batteries of the required size and type. Do not mix old and new batteries, different types of batteries.
- Do not dispose old batteries as unsorted municipal waste. Collection of such waste separately for special treatment is necessary.
• If you do not plan to use the product for a long time, remove the batteries. Batteries can leak chemicals that can damage electronic parts. - Do not subject the device to excessive force, shock, dust, temperature or humidity.
- Do not immerse the device in water. If you spill liquid over it, dry it immediately with a soft, lint-free cloth.
• Do not clean the device with abrasive or corrosive materials. - Do not tamper with the device's internal components. Doing so invalidates the warranty.
• Images shown in this manual may differ from the actual display. - When disposing of this product, ensure it is collected separately for special treatment.
- The contents of this manual may not be reproduced without the permission of the manufacturer.
NOTE The technical specifications for this product and the contents of the user manual are subject to change without notice.
NOTE Features and accessories will not be available in all countries. For more information, please contact your local retailer. To download an electronic version of the user manual, please visit http://global.oregonscientific.com/customerSupport.php.
ABOUT OREGON SCIENTIFIC
Visit our website www.oregonscientific.com to learn more about Oregon Scientific products.
For any inquiry, please contact our Customer Services at info@oregonscientific.com. Oregon Scientific Global Distribution Limited reserves the right to interpret and construe any contents, terms and provisions in this user manual and to amend it, at its sole discretion, at any time without prior notice. To the extent that there is any inconsistency between the English version and any other language versions, the English version shall prevail.
EU-DECLARATION OF CONFORMITY
Hereby, IDT Technology Limited, declares that Professional all-in-one Weather Station (model: WMR500) is in compliance with the essential requirements and other relevant provisions of Directive RED 2014/53/UE. A copy of the signed and dated Declaration of Conformity is available on request via our Oregon Scientific Customer Service.


COUNTRIES RED APPROVAL COMPLIED
All EU countries, Switzerland

and Norway

FCC STATEMENT
This device complies with Part 15 of the FCC Rules. Operation is subject to the following two conditions: (1) This device may not cause harmful interference, and (2) This device must accept any interference received, including interference
WARNING Changes or modifications not expressly approved by the party responsible for compliance could void the user's authority to operate the equipment.
NOTE This equipment has been tested and found to comply with the limits for a Class B digital device, pursuant to Part 15 of the FCC Rules. These limits are designed to provide reasonable protection against harmful interference in a residential installation.
This equipment generates, uses and can radiate radio frequency energy and, if not installed and used in accordance with the instructions, may cause harmful interference to radio communications. However, there is no guarantee that interference will not occur in a particular installation. If this equipment does cause harmful interference to radio or television reception, which can be determined by turning the equipment off and on, the user is encouraged to try to correct the interference by one or more of the following measures:
• Reorient or relocate the receiving antenna.
- Increase the separation between the equipment and receiver.
- Connect the equipment into an outlet on a circuit different from that to which the receiver is connected.
- Consult the dealer or an experienced radio / TV technician for help.
DECLARATION OF CONFORMITY
The following information is not to be used as contact for support or sales. Please call our customer service number (listed on our website at www.oregonscientific.com), or on the warranty card for this product) for all inquiries instead.
We
| Name: | Oregon Scientific, Inc. |
| Address: | Centerpointe CENTER5 Centerpointe DRIVE, SUITE 400LAKE OSWEGO, OREGON 97035 |
| Telephone No.: | 971-204-0378 |
declare that the product
Product No.: WMR500
Product Name: Professional all-in-one Weather Station
Manufacturer: IDT Technology Limited
Address: Block C, 9/F, Kaiser Estate,
Phase 1, 41 Man Yue St.,
Hung Hom, Kowloon.
Hong Kong
INFORMATION FOR USERS

Pursuant to and in accordance with Article 14 of the Directive 2012/19/EU of the European Parliament on waste electrical and electronic equipment (WEEE), and pursuant to and in accordance with Article 20 of the Directive 2006/66/EC of the European Parliament on batteries and accumulators and waste batteries.
The barred symbol of the rubbish bin shown on the equipment indicates that, at the end of its useful life, the product must be collected separately from other waste.
Please note that the batteries/rechargeable batteries must be removed from the equipment before it is given as waste. To remove the batteries/accumulators refer to the specific ions in the user manual. Therefore, any products that have reached the end of their useful life must be given to waste disposal centers specializing in separate collection of waste electrical and electronic equipment, or given back to
the dealer when purchasing a new WEEE, pursuant to and in accordance with Article 14 as implemented in the country.
The adequate separate collection for the subsequent start-up of the equipment sent to be recycled, treated and disposal of in an environmentally compatible way contributes to preventing possible negative effects on the environment and
health and optimizes the recycling and reuse of components making up the apparatus. Abusive disposal of the product by the user involves application of the administrative sanctions according to the laws in force.
natural_image
Black rectangular electronic device with a coiled cable, no visible text or symbolsnatural_image
3D rendering of a mechanical component with cylindrical pins and a central square feature (no text or symbols visible)1 Unità principale
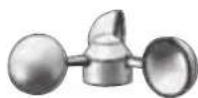
1 coppette vento
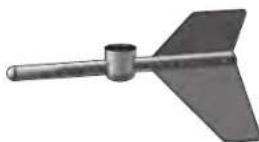
1 Banderuola vento

natural_image
3D rendering of a plastic container with a folded lid and side supports (no text or symbols)上
natural_image
Technical line drawing of a mechanical component with mounting holes and a side view (no text or symbols)To view today maximum wind speed and minimum wind chill readings:
Rmations aux usagers....7
INTRODUCTION
natural_image
Black rectangular electronic device with a coiled cable, no visible text or symbolsnatural_image
3D rendering of a mechanical component with cylindrical pins and a central square feature (no text or symbols visible)1x Unité principale
1x Coupe éolienne
1x Girouette
ER
4 x Batteries
AA UM-3 1,5 V
natural_image
Top-down view of a device component with labeled parts (no readable text or symbols)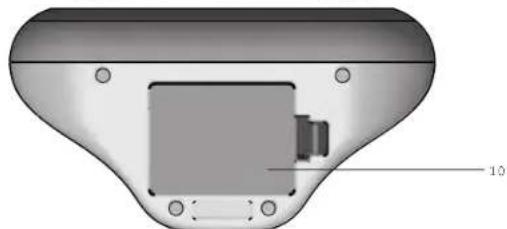
natural_image
3D rendering of a device component with labeled dimension (1.0), no readable text or symbols beyond the label
natural_image
3D rendering of a plastic container with a lid and side panel (no text or symbols)E
ALIMENTER LA STATION DE BASE
natural_image
Technical line drawing of a mechanical component with mounting holes and a side view (no text or symbols)INDICE UV (OPTIONNEL)
Professionelle All-in-one Wetterstation Model: WMR500
BEDIENUNGSANLEITUNG
INHALTE
Vorstellung....1
Packungsinhalt 1
All-in-one Sensor....1
All-in-one Sensor....3
Installation....3
Den Windsensor montieren....3
All-in-one Sensor....6
Innen-Barometer 6
Innentemperatur 6
natural_image
Black rectangular electronic device with a coiled cable, isolated on white background (no text or symbols)1 x Netzadapter
ALL-IN-ONE SENSOR
natural_image
3D rendering of a mechanical component with cylindrical pins and a central square feature (no text or symbols visible)1x Hauptgerät
1x Windschalen
1x Windfahne
natural_image
3D rendering of a rectangular plastic container with a folded lid (no text or symbols visible)DE
DIE BASISSTATION HOCHFAHREN
DEN ALL-IN-ONE SENSOR MONTIEREN
natural_image
Technical line drawing of a mechanical component with mounting holes and a separate view (no text or symbols)• mm (Millimeter); in (Zoll)
natural_image
Black rectangular electronic device with a coiled cable, isolated on white background (no text or symbols)natural_image
3D rendering of a mechanical component with cylindrical pins and a rectangular base (no text or symbols visible)1x Unidad principal
1x Cazoletas
1x Veleta
ES
natural_image
3D rendering of a rectangular plastic container with a folded lid (no text or symbols visible)5 回
natural_image
Technical line drawing of a mechanical component with two views: top shows circular housing and vertical supports, bottom shows rectangular bracket (no text or symbols)MANUAL DE INSTRUÇÕES
CONTEÚDO
Introdução....1
natural_image
Black rectangular electronic device with a coiled cable, isolated on white background (no text or symbols visible)natural_image
3D rendering of a mechanical component with cylindrical pins and a central square housing (no text or symbols visible)natural_image
Close-up of a metallic electronic device's rear panel showing a button and internal components (no text or symbols visible)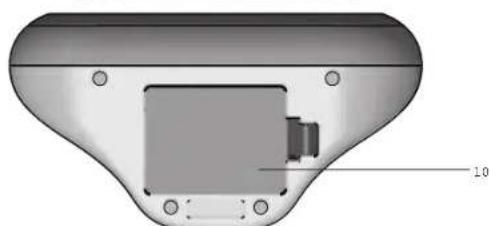
natural_image
3D rendered diagram of a remote control panel with labeled component (no text or symbols beyond label)natural_image
3D rendering of a rectangular plastic container with a folded lid (no text or symbols visible)POR
natural_image
Technical line drawing of a mechanical component with mounting holes and a side view (no text or symbols)- RAJADA (RAJADA)
• MD (Média)
natural_image
Black rectangular electronic device with a coiled cable, isolated on white background (no text or symbols)1 voedingsadapter
ALLES-IN-EEN-SENSOR
natural_image
3D rendering of a mechanical component with cylindrical pins and a square base (no text or symbols visible)1 hoofdeenheid
1 windschoepjes
1 windvaan
12
natural_image
3D rendered diagram of a remote control device with labeled component (no text or symbols beyond basic labels)natural_image
3D rendering of a rectangular plastic container with a folded lid (no text or symbols visible)12
HET BASISSTATION VAN VOEDING VOORZIEN
natural_image
Technical line drawing of a mechanical component with mounting holes and a separate view (no text or symbols)UV-INDEX (OPTIONEEL)
MANUAL DE INSTRUÇÕES
CONTEÚDO
Introdução....1
natural_image
Black rectangular electronic device with a coiled cable, isolated on white background (no text or symbols visible)natural_image
3D rendering of a mechanical component with cylindrical pins and a central square housing (no text or symbols visible)natural_image
Close-up of a metallic electronic device's rear panel showing a button and internal components (no text or symbols visible)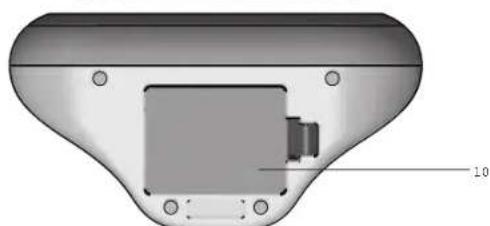
natural_image
3D rendered diagram of a device casing with internal components and mounting holes (no text or symbols)natural_image
3D rendering of a rectangular plastic container with a folded lid (no text or symbols visible)POR
natural_image
Technical line drawing of a mechanical component with two views: top shows circular housing and vertical supports, bottom shows rectangular bracket (no text or symbols)- RAJADA (RAJADA)
• MD (Média)
natural_image
Black rectangular electronic device with a coiled cable, isolated on white background (no text or symbols visible)1x電源適配器
多合一感應器
natural_image
3D rendering of a mechanical component with cylindrical pins and a square base (no text or symbols visible)1x主機
1×風杯
1×風向標
中文
附件 - 感應器
- Micro USB 电源插孔
- 電池匝
液晶顯示器
natural_image
3D rendering of a rectangular plastic container with a folded lid (no text or symbols)連接基站電源
natural_image
Technical line drawing of a mechanical component with two views: top shows circular housing and vertical supports, bottom shows rectangular bracket (no text or symbols)natural_image
Black rectangular electronic device with a coiled cable, isolated on white background (no text or symbols visible)个电源适配器
多合一传感器
natural_image
3D rendering of a mechanical component with cylindrical pins and a central square feature (no text or symbols visible)1 个多合一传感器
1个风速计 1个风向标
中
- Micro USB电源插孔
10.电池盒
P/N: 300103876-00001-1
65/70
WMR500_SC:Rs.indl-2
LCD显示屏
natural_image
3D rendering of a rectangular plastic container with a folded lid (no text or symbols visible)为显示器供电
natural_image
Technical line drawing of a mechanical component with mounting holes and a side view (no text or symbols)Oregon Scientific Inc.
Tualatin, Oregon USA
欧西亚中国授权制造商
展科电子(深圳)有限公司
制造地:中国深圳宝安臣田工业村
©2017 欧西亚保留所有权利

- Professional all-in-one Weather Station Model: WMR500
- USER MANUAL
- CONTENTS
- INTRODUCTION
- NOTE
- PACKAGING CONTENTS
- ALL-IN-ONE SENSOR
- ACCESSORIES - SENSORS
- OVERVIEW
- MAIN UNIT
- REAL AND BOTTOM VIEW
- INSTALLATION
- ASSEMBLE THE WIND SENSOR
- REMOVE THE TAPE ON THE DEBRIS COLLECTOR
- POWER THE BASE STATION
- POWER THE ALL-IN-ONE SENSOR
- MOUNTING THE ALL-IN-ONE SENSOR
- Secure the all-in-one sensor connector in the desired location:
- PAIRING THE SENSOR
- To select a sensor channel
- To add a new sensor or replace the sensor
- To remove a sensor
- PAIR YOUR SMART DEVICE WITH THE WEATHER STATION
- Download the App
- Join the WI-FI network
- SETTING THE CLOCK TIME
- MOON PHASE
- WEATHER FORECAST
- TEMPERATURE AND HUMIDITY
- TEMPERATURE AND HUMIDITY TREND
- UV/RAINFALL/ BAROMETRIC PRESSURE/PM
- BAINFALL
- UV INDEX (OPTIONAL)
- BAROMETRIC PRESSURE
- PM (OPTIONAL)
- BACKLIGHT
- RESET
- MAINTAINANCE
- SPECIFICATIONS
- PRECAUTIONS
- ABOUT OREGON SCIENTIFIC
- EU-DECLARATION OF CONFORMITY
- COUNTRIES RED APPROVAL COMPLIED
- FCC STATEMENT
- DECLARATION OF CONFORMITY
- INFORMATION FOR USERS
- ALIMENTER LA STATION DE BASE
- INDICE UV (OPTIONNEL)
- Professionelle All-in-one Wetterstation Model: WMR500
- BEDIENUNGSANLEITUNG
- INHALTE
- DIE BASISSTATION HOCHFAHREN
- DEN ALL-IN-ONE SENSOR MONTIEREN
- MANUAL DE INSTRUÇÕES
- CONTEÚDO
- HET BASISSTATION VAN VOEDING VOORZIEN
- UV-INDEX (OPTIONEEL)
- 多合一感應器
- 附件 - 感應器
- 連接基站電源
- 多合一传感器
- 为显示器供电
Brand : OREGON SCIENTIFIC
Model : WMR 500
Category : Weather Station