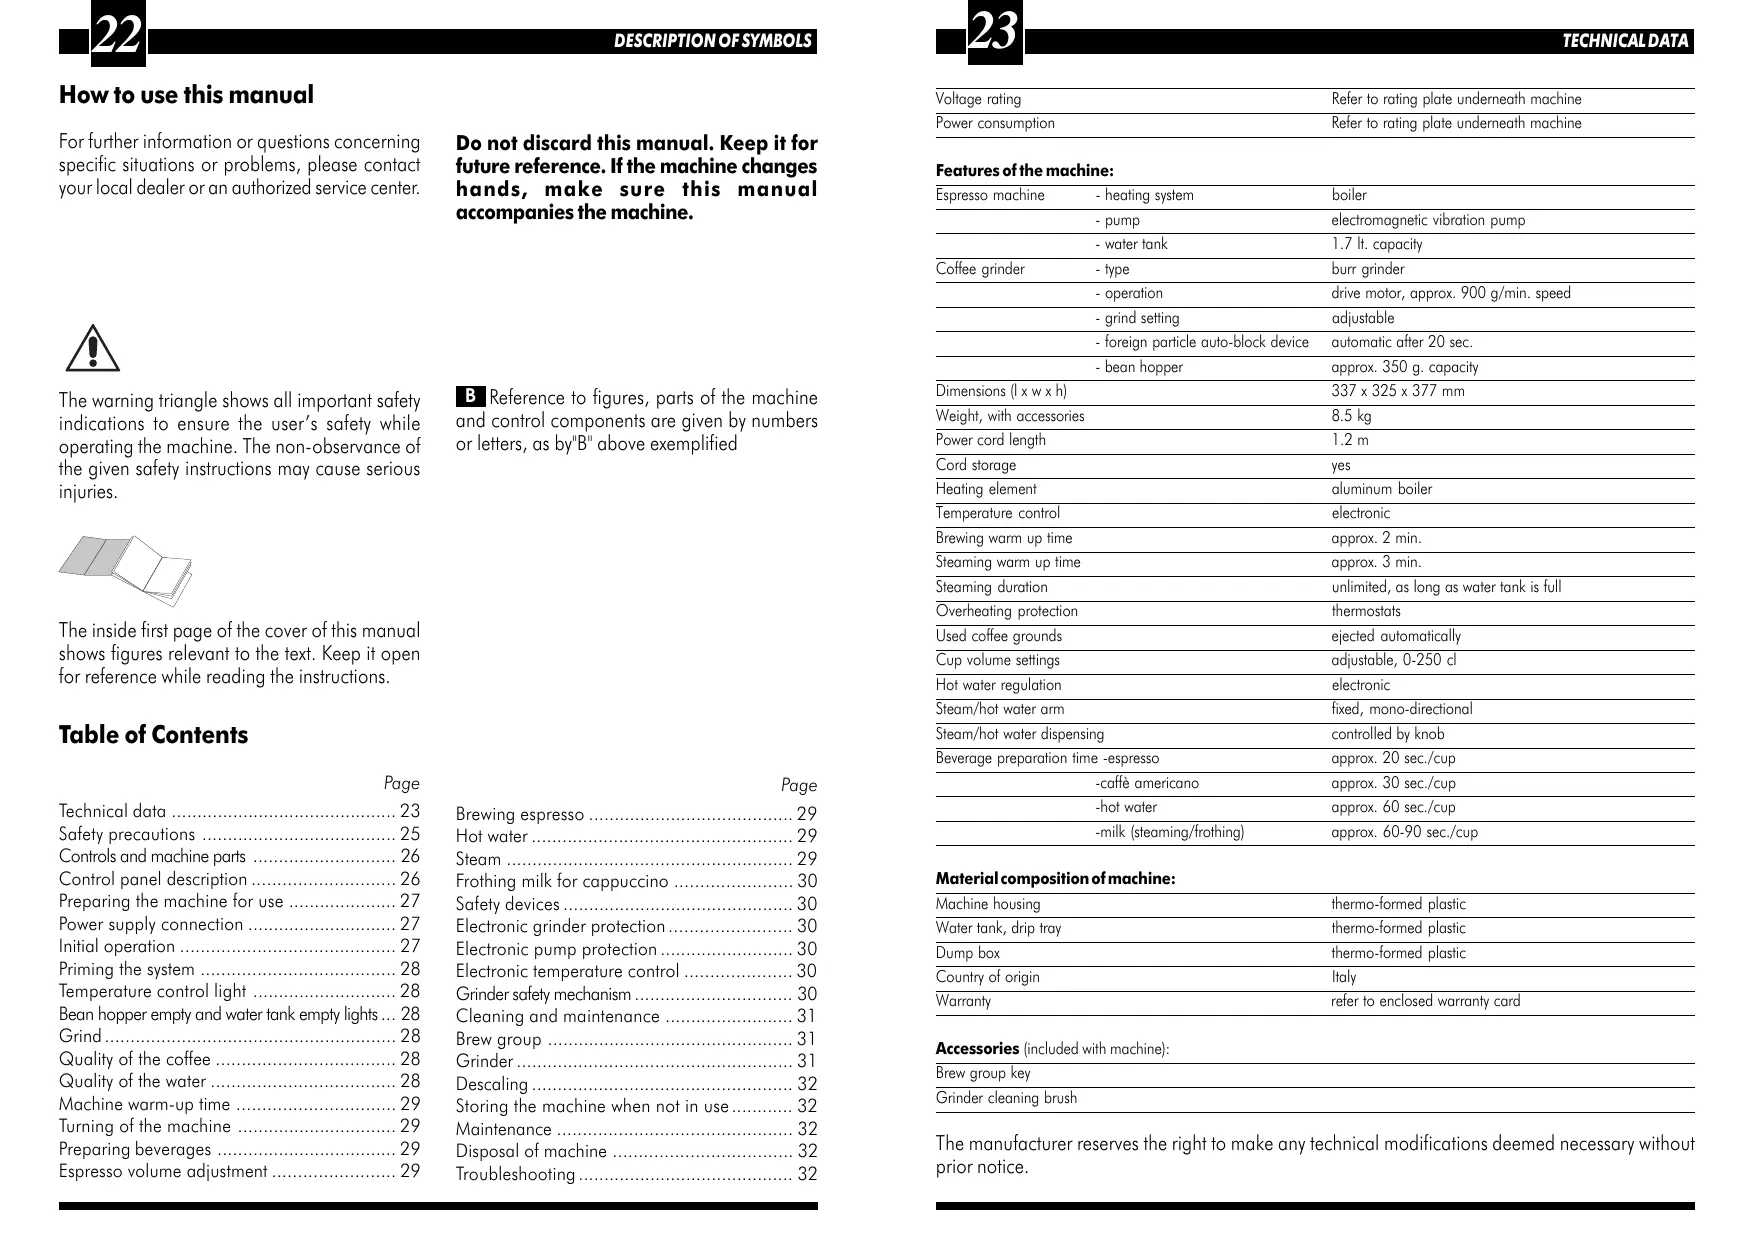
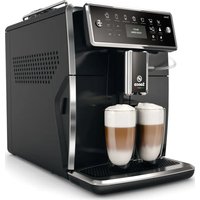
USER MANUAL VIENNA SAECO
66/10/82 73D20 'A'EA 00'84'869'9' L CO
ISTRUZIONI PER L'USO OPERATING INSTRUCTIONS INSTRUCTIONS D'EMPLOI DIENUNGSANLEITUNG INSTRUCCIONES DE USO INSTRUÇões PARA USO GEBRUÍKSAANWIJZING
PER LA VOSTRA SICUREZZA LEGGERE ATTENTAMENTE LE ISTRUZIONI PER L'USO. FOR YOUR SAFETY CAREFULLY READ THE OPERATING INSTRUCTIONS. POUR VOTRE SECURITE, LIZE SOIGNEUSEDMENT LES INSTRUCTIONS D'EMPLOI. FÜR IHRE SICHERHEIT LESEN SIE BITTE SORGFALTIG DIE BEDIENUNGSANLEITUNG, BEVOR SIE DAS GERÄT IN BETRIEB SETZEN. PARA SU SEGURIDAD, LÉALAS ATENTAMENTE. PARA A SUA SEGURANÇA DEVE LER ATENTAMENTE ESTAS INSTRUÇÖES. LEES DEZE GEBRUKSAANWIJZING ZORGVULDIG VOORDAT U DE MACHINE GEBRUIKT.
Congratulazioni!
Congratulations on choosing this top-quality espresso machine and many thanks you for your confidence in our products. Before operating the machine, we reccomend you read the following instructions thoroughly which explain how to use, clean and maintain the machine. For any other information, please contact the leader or our company directly. We will be glad to provide you with any explanations you may need.
Felicitations!
This superautomatic espresso machine offers you the possibility to brew espresso from either whole coffee beans.
As with all electrical appliances, special care and caution must be exercised when using this machine in order to prevent potential physical injury to persons or damage to the machine.
Before using the machine, thoroughly and carefully read the following instructions and always observe the safety precautions contained in this manual.
Do not use the machine prior to reading and understanding the instructions in this manual!
Warning
The manufacturer declines any responsibility for damages resulting from, but not limited to:
Improper use of the machine;
Unauthorized repairs or repairs carried out by unauthorized personnel;
Use of non-genuine spare parts and accessories.
The abovementioned cases void the warranty.
How to use this manual
For further information or questions concerning specific situations or problems, please contact your local dealer or an authorized service center.
Do not discard this manual. Keep it for future reference. If the machine changes hands, make sure this manual accompanies the machine.

The warning triangle shows all important safety indications to ensure the user's safety while operating the machine. The non-observation of the given safety instructions may cause serious injuries.
The inside first page of the cover of this manual shows figures relevant to the text. Keep it open for reference while reading the instructions.
Table of Contents
B Reference to figures, parts of the machine and control components are given by numbers or letters, as by "B" above exemplified
Brewingpresso 29
Hot water 29
Steam 29
Frothing milk for cappuccino 30
Safety devices 30
Electronicgrinder protection 30
Electronic pump protection 30
Electronic temperature control 30
Grinder safety mechanism 30
Cleaning and maintenance 31
Brew group 31
Grinder 31
Dscaling 32
Storing the machine when not in use 32
Maintenance 32
Disposal of machine 32
Troubleshooting 32
| Voltage rating | Refer to rating plate underneath machine |
| Power consumption | Refer to rating plate underneath machine |
Features of the machine:
| Espresso machine | - heating system | boiler |
| - pump | electromagnetic vibration pump |
| - water tank | 1.7 lt. capacity |
| Coffee grinder | - type | burr grinder |
| - operation | drive motor, approx. 900 g/min. speed |
| - grind setting | adjustable |
| - foreign particle auto-block device | automatic after 20 sec. |
| - bean hopper | approx. 350 g. capacity |
| Dimensions (I x w x h) | 337 x 325 x 377 mm |
| Weight, with accessories | 8.5 kg |
| Power cord length | 1.2 m |
| Cord storage | yes |
| Heating element | aluminum boiler |
| Temperature control | electronic |
| Brewing warm up time | approx. 2 min. |
| Steaming warm up time | approx. 3 min. |
| Steaming duration | unlimited, as long as water tank is full |
| Overheating protection | thermostats |
| Used coffee grounds | ejected automatically |
| Cup volume settings | adjustable, 0-250 cl |
| Hot water regulation | electronic |
| Steam/hot water arm | fixed, mono-directional |
| Steam/hot water dispensing | controlled by knob |
| Beverage preparation time -espresso | approx. 20 sec./cup |
| -caffè americano | approx. 30 sec./cup |
| -hot water | approx. 60 sec./cup |
| -milk (steaming/frothing) | approx. 60-90 sec./cup |
Material composition of machine:
| Machine housing | thermo-formed plastic |
| Water tank, drip tray | thermo-formed plastic |
| Dump box | thermo-formed plastic |
| Country of origin | Italy |
| Warranty | refer to enclosed warranty card |
Accessories (included with machine):
Brew group key
Grinder cleaning brush
The manufacturer reserves the right to make any technical modifications deemed necessary without prior notice.

A
B
C
D
E

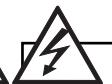
Never place electrical parts of the machine in or near water: danger of electrical shock! Never direct steam or hot water spray toward the body: danger of burns! Use caution when using the steam/hot water tube: very warm surface may be hot to the touch!
Use the machine only for the purpose for which it has been manufactured.
This espresso machine has been manufactured for household use only. Do not use the machine for any other purpose or attempt to carry out technical modifications to the machine.

Caution
This espresso machine should be used only by adults who have read this instruction manual.

Power supply
Never touch electrical parts: danger of shock!
Make sure the power of the electrical outlet corresponds to the power indicated on the rating plate of the machine.

Power cord
If the power cord is damaged, do not attempt to use the machine. Contact your local dealer or an authorized service center.
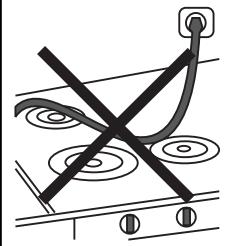
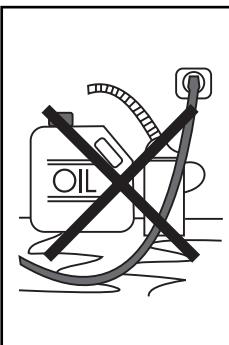
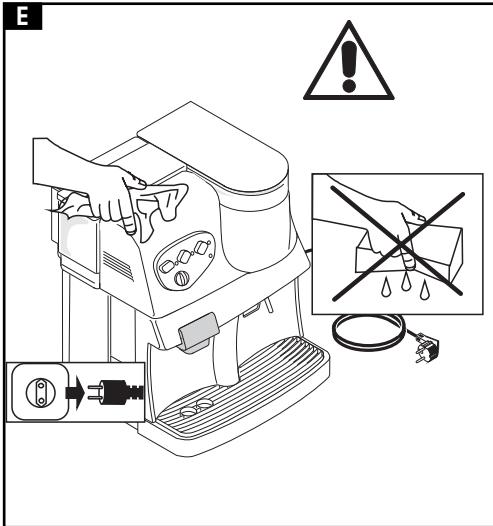
Make sure the power cord is not placed near hot or sharp surfaces. Do not allow the cord to hang freely and do not place the cord near oil. Do not pull on the cord to move the machine. Do not yank on the cord to unplug the machine. Never touch the power cord with wet hands.
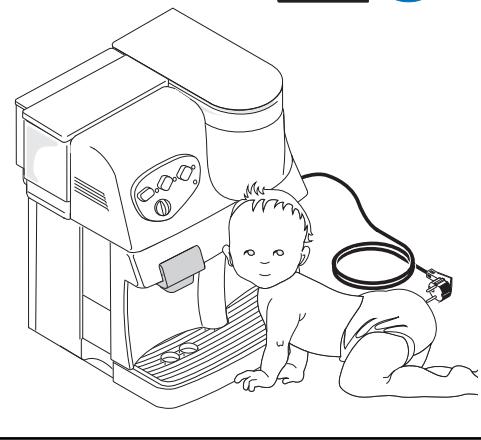
B Keep out of the reach of small children
Do not allow small children to play near the machine or with the machine.

Location of the machine
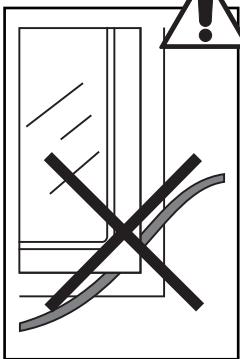
Place the machine on a stable, flat surface. Do not place the machine outside or near hot surfaces or flames.

Danger of burns
Avoid pointing the steam or hot water toward the body or hands. Use caution when touching machine parts that become hot when the machine is on or operating.

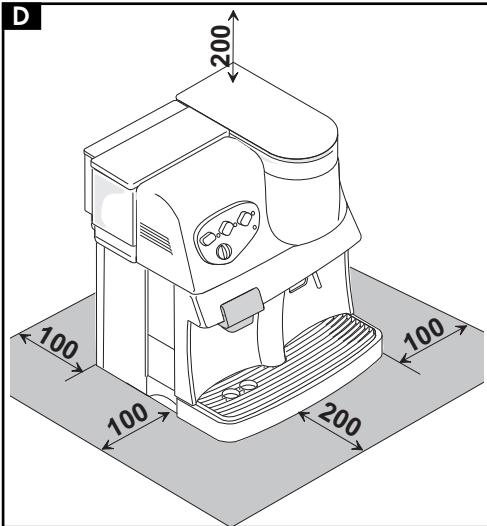
Area around the machine
For the proper functioning of the machine, it is recommended to place the machine on a stable, flat surface and in a well-lit, spacious area.

Cleaning
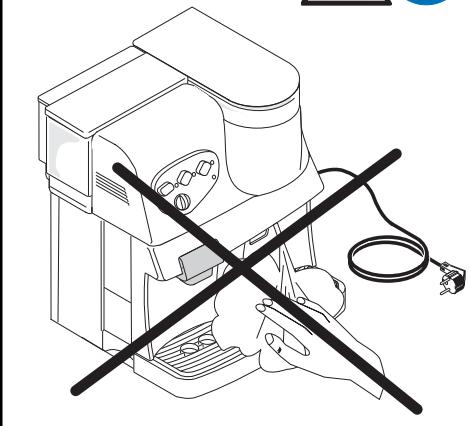
Before cleaning the machine, make sure that the machine is turned off and that the power cord is unplugged. Wait until the machine has cooled. Never immerse the machine in water. Do not attempt to disassemble or modify any internal components of the machine.

Repairs / Maintenance
In the case of suspected operational problems, defects or faults, unplug the machine immediately. Never attempt to use a defective machine. Repairs should be carried out only by authorized service centers. The manufacturer declines any responsibility for the machine and its components and accessories for repairs made by unauthorized personnel.

Fire
In the case of a fire, use a carbon dioxide (CO_2) based extinguisher. Do not use water or powder extinguishers.
1 Dump box
2 Drip tray
3 Grill
4 Adjustable dispensing head
5 Steam/hot water arm
6 Steam/hot water knob
Water tank
8 Water tank cover
9 Auto-valve for water tank
10 Bean hopper
11 Bean hopper cover
12Grinder adjustment
13 Service door
14 Brew group
15 Pre-ground coffee container
16 Brew group handle
17 Power cord
18 Control panel with LED indicators
19 Main switch
Control panel description
20 On/off light
21 Coffee selection button (1 or 2 cups)
22 Coffee temperature light Light on: correct temperature Light blinking: reaching correct temperatu
re If both the coffee temperature light (22) and the steam light (24) are blinking simultaneously, temperature is too high. Follow the procedure to prime the machine.
23 Steam selection button
24 Steam temperature control light Light on: correct temperature Light blinking: reaching correct temperatu
25 Coffee volume regulator knob
26 Lights indicating "water empty" and "bean hopper empty" Light on: water tank is empty or bean hopper is empty. Fill water tank or fill bean hopper. After refilling the water tank, follow the procedure to prime the machine. Light blinking: dump box, brew group, or drip tray not properly positioned or service door not closed.
Preparing the machine for use
The original box has been designed and manufactured to protect the machine during shipping. Keep it for future shipping or return shipping.
Before setting up the machine, follow the safety precautions previously outlined.
For your own safety and that of others, heed all safety precautions contained in this manual.

Do not turn the machine on or attempt to operate it if the water tank and/or hopper is empty.
Power supply connection

Warning: Electrical current can be dangerous! Always heed all safety signs and warnings.
The machine must be connected to an A/C socket. The socket voltage must correspond to the voltage specified on the rating plate located on the underside of the machine.

Never use the machine if the power cord is defective or damaged. A or damaged power cord should be only by authorized service personnel.

If an extension cord is used, make sure that it is not defective or damaged.
Place the cover of the coffee container (11) on the coffee container (10). Keep within reach both the brush for cleaning and the unit key.
27 The bean hopper (10) is attached to the machine with two screws. Remove the bean hopper cover (11), fill the hopper with coffee beans (approx. 350 g.). Replace the cover. If necessary, adjust the grind setting by moving the knob (12) to position "8" ( ± 2 or 4), depending on the type of beans).

The bean hopper should be filled only with coffee beans. Do not fill the bean with any other kind of product as damage machine may occur.
Initial operation
Danger!
Electrical current can be dangerous! Electrical parts should never be in contact with water: danger of short-circuit. Steam and hot water may cause burns! Do not direct steam or hot water jet toward any body parts. Be careful when handling the steam/hot water arm: it becomes hot and may cause burns.
Remove the water tank (7) from the machine, remove its cover (8), and fill the tank with cold, fresh water (approx. 1.7 l). A built-in valve on the underside of the tank prevents water from dripping.
Before replacing the water tank in the machine, make sure that the bean hopper cover is properly in place.
23 Replace the water tank into the machine, seating it in its position. Then place the water tank cover on, pressing lightly to activate the automatic valve.

Do not overfill the water tank with water.
Fill the water tank with cold, fresh water only. Hot water and other fluids may damage the machine. Do not use carbonated (sparkling) water.
Do not use the machine if the water tank is empty. Always make sure the water tank is full prior to turning on the machine.
Plug the power cord into the outlet and press the main switch of the machine. The green light will come on and the internal electronics will automatically perform a self-test. You will hear some sounds, which are normal during the self-test.
Priming the system
30 Place a cup or another suitable container under the steam/hot water arm (5) and turn the steam/hot water knob (6) counterclockwise. The pump will automatically begin to function. When a steady stream of water is dispensed, close the knob by turning it clockwise. The machine has now been primed.
Important: It is recommended to prime the system before the first use of the machine, after a prolonged unused period, or whenever the water tank has run completely dry. The priming procedure also should be carried out if the two temperature lights, for brewing (22) and for steaming (24), are blinking simultaneously. The machine is ready for use when the coffee temperature (22) light stops blinking and remains on.
Temperature control light
After turning the machine on, the coffee temperature light (22) will blink for approx. two minutes while the machine is reaching in the correct temperature. The light will stop blinking and remain on when the correct temperature has been reached.
Bean hopper empty and water tank empty lights
When the bean hopper is empty, the corresponding light will come on and the grinder will automatically stop. Fill the bean hopper and reactivate the cycle by pressing the button (21). Also when the water tank is empty, the corresponding light will come on. Fill the water tank and follow the procedure for priming the system before brewing any espresso.
Grind
If the espresso flows too quickly (grind too coarse) or too slowly (grind too fine), adjust the grinder.
Recommended grind setting: position "8"
Flows too quickly: adjust grinder to a finer setting (6 or 7)
Flows too slowly: adjust grinder to a coarser setting (9 or 10).

Adjust the grind setting only when the grinder is running. Avoid extreme
adjustments (for example, position 1). If espresso continues to flow at the improper speed, try a different coffee blend, as not all blends may be suitable for proper extraction with this machine. The modified grind setting can be detected only after brewing three or four espresso, since residual ground coffee remains in the grinder from the previous setting.
Quality of the coffee
Make sure the coffee beans you are using are fresh. It is recommended to use an espresso roast or another blend suitable for espresso. Store beans in an airtight container in a cool, dry place.
Quality of water.
To prepare an excellent espresso, besides the blend, the grinding, and the right water temperature, the quality of water is also determining. Hence, we suggest to use water with a low content of limestone, so that to obtain a better
taste of your coffee and protect the internal surfaces from the production of harmful calcareous deposits.
Drain the water tank every day, and fill it with fresh water.
Absolutely never use water with carbon dioxide (aerated water)
Machine warm-up time
The machine may be kept turned on all day. However, if the machine is not used for a prolonged period, it is advisable to turn it off. The machine needs less than two minutes to warm up.
Turning off the machine
Do not turn the machine off when it is in the process of brewing. Turn it off only upon completion of the entire brew cycle.
Preparing beverages
Adjustment of the dispensing head
The dispensing head (4) is adjustable for different cup heights. Depending on the height of the cup being used, move the dispensing head up or down.
Espresso volume adjustment
Adjust the volume of the espresso for each cup by turning the knob (25). For example:
Use appropriately sized cups.
Brewing espresso (1 or 2 cups)
Press the coffee selection button (21) to brew one cup of espresso. If the button is pressed twice consecutively, the machine will perform two brew cycles for either one double espresso or two cups of espresso.
Each espresso cycle is freshly ground, adding to a superior espresso pleasure.

Before turning the machine on, make sure the steam/hot water knob is
Adjust the grinder: see instructions above.

The grinder should be adjusted only when it is grinding. Making parts to the grinder while it is not running or use damage.
29 Place one or two cups on the grill (3) under the dispensing head (4). Press the coffee selection button (21). The machine will brew one cup of espresso. By pressing the button twice consecutively, two cups will be brewed. To interrupt the flow, press again the coffee selection button.
Hot water
The hot water has a separate water circuit from that of the espresso to prevent any cross-contamination. Hot water can be used to make tea, soup, infusions, etc.
30 Place a glass or cup under the steam/hot water arm (5) and slowly open the knob (6) counterclockwise.
Hot water will automatically be dispensed. To stop the flow of hot water, turn the knob clockwise.
Steam
To heat milk or other beverages.

Clean the steam arm with a damp, non-abrasive cloth after each use.
Residual milk which hardens is more difficult to remove.

Prime the machine after using the steam function to return the machine rect brewing temperature. The machine
will automatically be prevented from brewing coffee if the correct brewing temperature has not been reached.

The brewing function is automatically blocked if the machine is in the function (light 24 is on).
Press the steam button (23) and wait until the corresponding light comes on. The light will blink until the correct temperature has been reached. Slowly open the knob (6) counterclockwise. Allow the excess condensation to exit. When only steam is being produced, immerse the arm into the container holding the beverage to be heated.
31 Slowly open the steam knob completely and heat the beverage, using a circular movement from bottom to top. When the beverage has reached the desired temperature, close the knob and clean the arm with a damp cloth.
Warning: Use extreme caution when handling the steam arm: it may be very hot!
Upon completion of steaming, turn the function off by pressing the button (23). Open the steam knob again and prime the machine (the pump automatically starts) until water flows in a steady stream from the steam arm and the two lights (22 and 24) stop blinking. (See also the section above describing priming the system).
Close the steam knob. The machine is now ready to brew.
Frothing milk for cappuccino
Fill a container 1/3 full with cold milk. Immerse the steam arm (5) just below the milk surface. Turn the steam knob (6) open and begin moving the container in a circular motion to form a thick froth. Then immerse the arm further into the container to heat the milk.
Safety devices
If the service door is open, the machine is automatically deactivated and will not operate. It is not possible to brew espresso or produce steam if the brew group, dump box, or drip tray are not positioned in the machine.
Electronic grinder protection
The grinder will automatically stop after approx. 20 seconds when the bean hopper becomes empty. The corresponding light (26) comes on. Fill the bean hopper and press the button (21) to reactivate the espresso cycle.
Electronic pump protection
The machine will automatically stop if the water tank is empty in order to protect the pump. The light (26) will come on.
Electronic temperature control
Both the brewing and the steaming temperatures are controlled so as to assure the proper temperature for each function. Espresso brewing will be automatically interrupted if the temperature is too low or too high (safety thermostat and protection against overheating).
Grinder safety mechanism
Even premium beans may contain some impurities, i.e. a little pebble. The grinder has a built-in safety mechanism to prevent damage from such impurities. You will hear a strange sound if a little pebble is stuck in the grinder. Immediately turn off the machine. If the machine is not manually turned off, the grinder will automatically block itself after 20 seconds.
Important: In order to avoid damaging the motor, remove the foreign object from the grinder before turning on the machine again. You may need to contact an authorized service center for help.
Cleaning and maintenance
General cleaning
Always keep your machine clean to ensure brewing quality and a longer working life of your machine.

Before cleaning the machine, turn it off and unplug it.

Before cleaning the machine, allow it to cool.

Do not immerse the machine into water or any other fluids.

Do not wash any parts of the machine in the dishwasher.

Always air or hand-dry all parts of the machine; do not dry them in the oven
or microwave.
Water tank; drip tray; dump box; dispensing head; machine housing
32 It is recommended to empty the dump box (1) daily.
The water tank (7), drip tray (2), grill (3), and the dump box (1) should be cleaned with a neutral, non-abrasive detergent periodically. Dry these parts carefully.
33 The dispensing head (4) can be removed for easy cleaning. Pull it gently toward you and rinse the tubes thoroughly with hot water.
Wipe the external housing of the machine periodically with a clean, damp, non-abrasive cloth.
Brew group
The brew group (14) should be cleaned on a regular basis, or at least once a week. Turn the machine off and open the service door (13). Remove the dump box (1) and the drip tray (2).
34 Remove the brew group (14) by holding its handle and pressing on the part marked "PRESS". Wash the brew group with hot water only. Do not use detergents.
35 Check the two steel filters of the brew group for eventual clogging. The upper filter can be removed for more detailed cleaning by unscrewing counterclockwise the plastic pin. A special "key" is provided to unscrew the pin. Thoroughly dry all the parts of the brew group, replace the filter, and screw the pin on carefully with the special "key".
36 Remove the drip tray (2) to clean it thoroughly. Do not use abrasive detergents. Thoroughly dry the drip tray before replacing it.
37 Replace the brew group by holding it by its handle. It should easily but firmly click into place. Close the service door and replace the dump box.
When replacing the brew group into the machine, do not press the "PRESS" lever. Simply hold the brew group by its handle and click it gently into place.
Warning: If the brew group is not replaced or incorrectly positioned in the machine, the light (26) will blink and the machine will block itself. It will not brew espresso.
Grinder
Never pour water into the bean hopper: the machine could be damaged. Use only the grinder cleaning brush provided to clean the grinder. Do not clean with water or any other liquids.
The grinder does not need regular maintenance. For any problems relating to the proper functioning of the grinder, please contact an authorized service center.
Dscaling
Descaling is necessary if you have been using hard water or unfiltered water with your machine. Descaling removes potential limescale build-up in certain components of the machine, thus ensuring correct operation of these components in particular and your machine in general.
Depending on the water hardness in your area, it is advisable to descale the machine every 3-6 months; more frequently if necessary.
It is recommended to use bottled or filtered water for the longevity of your machine.
Note: If you wish to descale the appliance yourself, use a descaler especially made for coffee machines. Use a product normally available on the market, that is neither toxic nor harmful.

Do not use vinegar, which may damage internal components
of the machine.
Read the instructions for descending that are provided with the descending solution you have purchased.
Important : Periodic descending protects the machine from damage due to mineral accumulation and avoids costly repairs. Repairs and service work performed on a machine due to the lack of descending are not covered under warranty.
Storing the machine when not in use
When the machine is not in use, turn it off and unplug the power cord.
Store the machine in a cool, dry, level place out of the reach of children.
If the machine will be stored for a long period of time, protect it from dust by covering it up or placing it into its original box.
Maintenance
The machine should undergo a general cleaning and maintenance overview, as indicated in the preceding pages.
Disposal of machine
If the machine is to be disposed of for some reason, render it non-usable by cutting the power cord.

Before cutting the power cord, make sure it is no longer plugged in.
Bring your non-usable machine to an appropriate disposal center.
Troubleshooting

In case of machine failure, defects, or suspected damage, unplug the immediately.
You will find below a troubleshooting guide for basic problems. If the problem persists, or you deem the problem to be more serious, please contact an authorized service center for further assistance.
Only specially trained service personnel are authorized to perform repair work on the machine. The manufacturer declines any responsibility for the machine, its components and accessories if repair work has been performed by unauthorized personnel. No warranty coverage will be extended in such cases.
| Problem | Possible cause/causes | Resolution |
| The machine does not turn on | The machine is not getting power or the service door is open | Check the power cord and plug or close the service door |
| The brewing cycle does not start | If the light (26) is blinking: the brew group is not positioned properly or not in machine drip tray not positioned properly or not in machine | Make sure brew group is in machine and positioned properly makes sure drip tray is in machine and positioned properly |
| The control light (26) is turned on: - The coffee hopper is empty. - The water tank is empty. | - Fill the coffee hopper and restart the dispensing cycle. - Fill the water tank, load the circuit and restart the dispensing cycle. |
| Steam or hot water does not dispense | The steam/hot water arm is bloc-ked | Clean the tip of the steam/hot water arm with a little pin |
| Espresso dispenses too quickly | The grind setting is too coarse | Adjust the grind setting to a finer grind |
| Espresso dispenses too slowly | The grind setting is too fine | Adjust the grind setting to a coarser grind |
| Espresso is not hot enough | The temperature control light is blinking | Wait until the light stops blinking |
| The machine takes too long to warm up or very little hot water is dispensed when the hot water function is used | Mineral (limescale) has accumulated in the system | Descale the machine |
| The brew group is stuck and cannot be removed | The brew group is unaligned | Turn on the machine and close the service door; the brew group will automatically align itself |
3 = Espresso
6 = Café Crème