StrongVision BirdFeeder - Camera Evolveo - Free user manual and instructions
Find the device manual for free StrongVision BirdFeeder Evolveo in PDF.


| Product Type | Trail Camera with Bird Feeder |
| Brand | Evolveo |
| Model | StrongVision BirdFeeder |
| Dimensions (H x W x D) | 175 x 118 x 87 mm |
| Weight | Approximately 500 g (with batteries) |
| Display | 2.0" Color TFT |
| Motion Sensor | PIR with adjustable sensitivity (3 levels), max range 50 cm, detection angle 60° |
| Night Vision | IR LED 850 nm, 2x IR LEDs under front cover, range up to 20 cm |
| Photo Resolution | 24 / 20 / 16 / 12 MP |
| Video Resolution | VGA, 720p, 1080p at 30 fps |
| Video Length | 5 / 10 / 30 / 60 / 90 seconds |
| Trigger Speed | 0.5 seconds |
| Power Source | Integrated 3000 mAh Li-Ion battery or external DC 6V 2A |
| Connectivity | Wi-Fi IEEE 802.11b/g/n, Bluetooth |
| Memory Card | SD up to 256 GB (not included) |
| Waterproof Rating | IP65 |
| Operating Temperature | -10°C to +50°C |
| Storage Temperature | -15°C to +60°C |
| Security | 4-digit optional PIN code |
| File Format | JPEG for photos, MP4/H.264 for videos |
| Mounting Options | Wall bracket with strap, handrail holder (17-32 mm diameter) |
| Additional Features | Feeder container, water container, solar panel included |
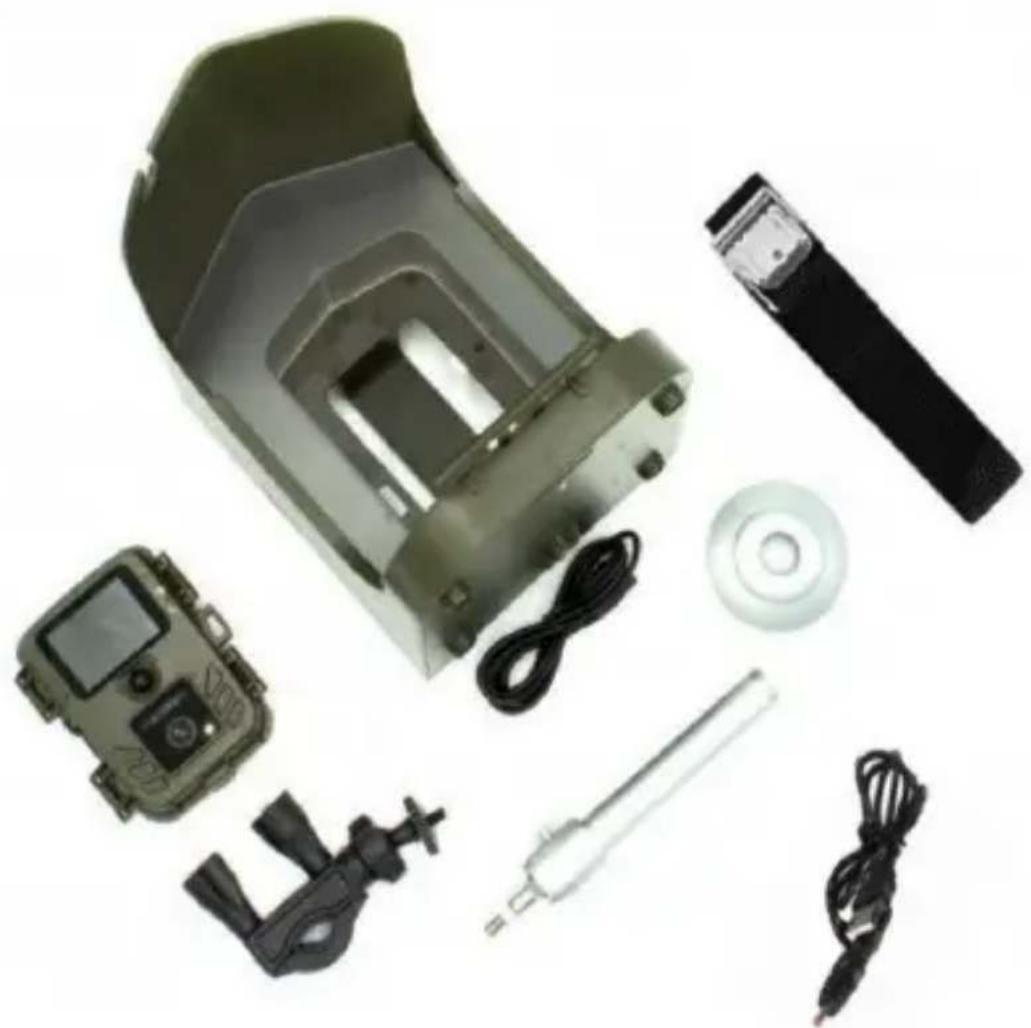
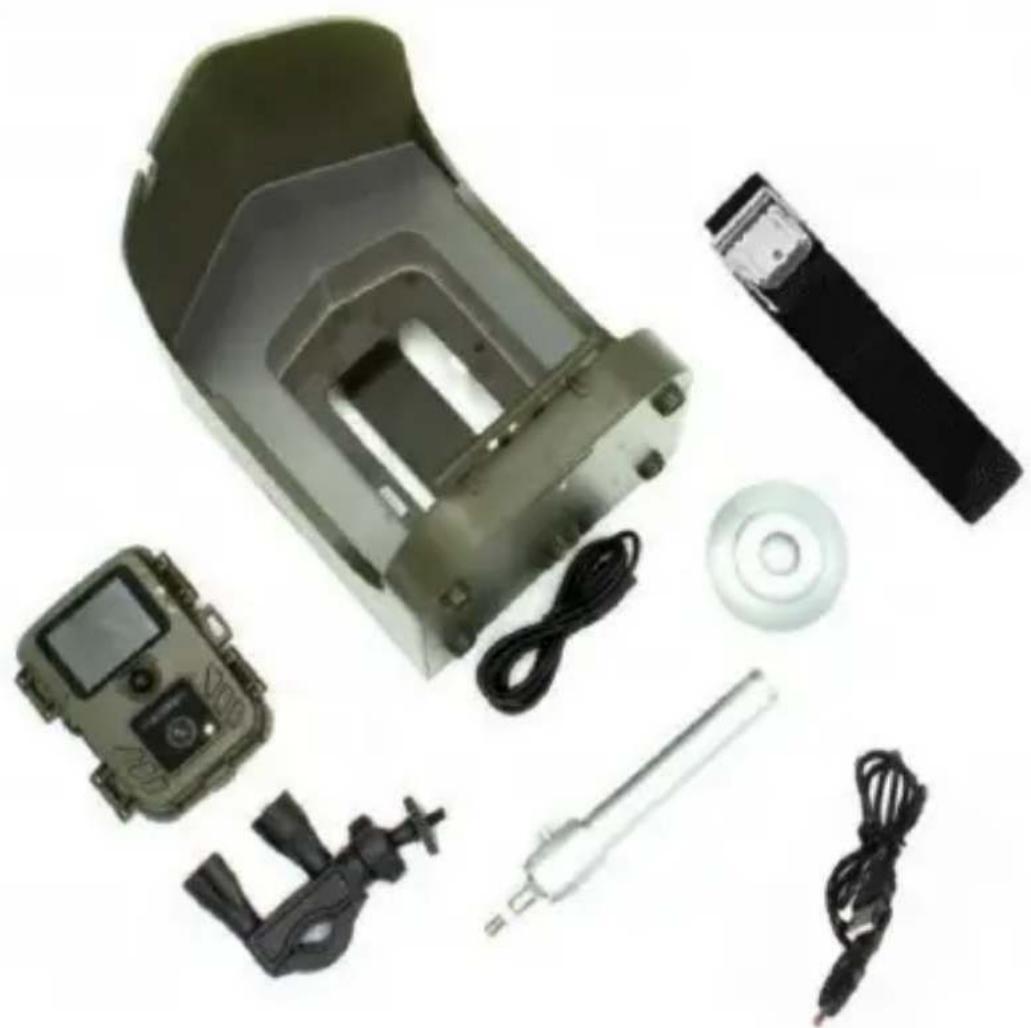
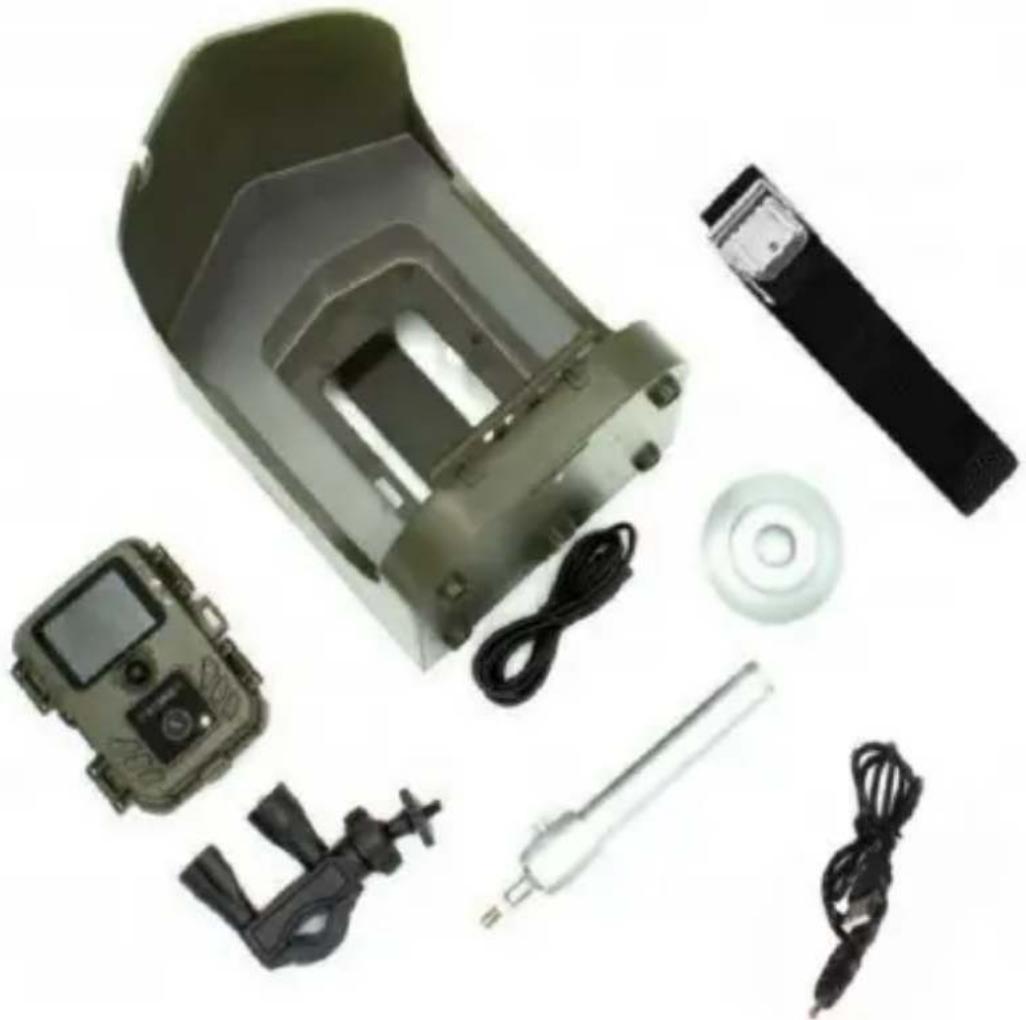
| Included Accessories | Feeder, camera, wall bracket, strap, handrail holder, power cable, rubber cap |
| Warranty | 6 months battery capacity guarantee; standard warranty per regulations |
Frequently Asked Questions - StrongVision BirdFeeder Evolveo
User questions about StrongVision BirdFeeder Evolveo
0 question about this device. Answer the ones you know or ask your own.
Ask a new question about this device
Download the instructions for your Camera in PDF format for free! Find your manual StrongVision BirdFeeder - Evolveo and take your electronic device back in hand. On this page are published all the documents necessary for the use of your device. StrongVision BirdFeeder by Evolveo.
USER MANUAL StrongVision BirdFeeder Evolveo
natural_image
Exterior view of a gray industrial enclosure with open lid and digital display (no visible text or symbols)CZ
SK
EN
HU
RO
DE
IT
HR
Obsah / Content / Inhalt / Tartalom / Indice / Conținut / Sadržaj
Česky 4
Slovensky 26
English 49
Magyar 71
Română 94
Deutsch.... 117
Italiano.... 145
Hrvatski.... 170
Obsah
natural_image
3D rendering of a brown mechanical component with internal parts, shown in three sequential stages (no text or symbols)1.3 Vložení Kamery
flowchart
graph LR
    A["Device with monitor icon"] --> B["Internal component with red arrow"]
    B --> C["Final output with device and screen icon"]
natural_image
Interior view of a military-style radar or communication device with a central display and control panel, mounted on a circular base (no visible text or symbols)1.5 Obsah balení
natural_image
Collection of various electronic devices including capacitors, relays, and batteries (no text or symbols visible)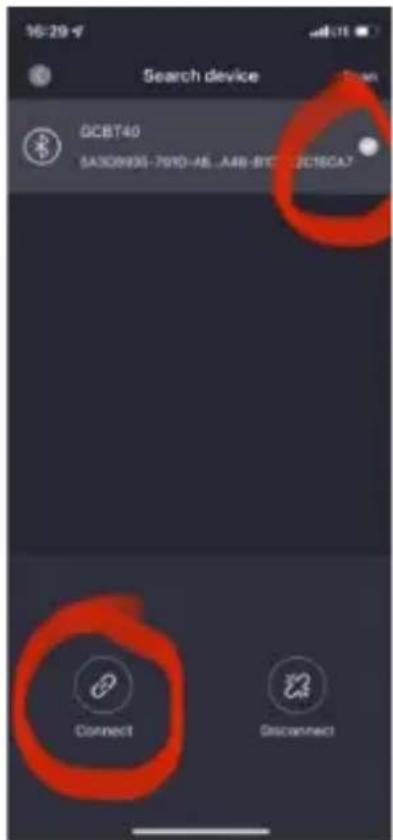
Copyright © Abacus Electric, s.r.o.
www.evolveo.com
www.facebook.com/EvolveoCZ
natural_image
3D rendering of a brown mechanical component with internal cavity, shown in three sequential stages (no text or symbols)1.3 Vloženie fotoaparátu
natural_image
Interior view of a military-style radar or communication device with a central display and control panel, mounted on a circular base (no visible text or symbols)1.5 Obsah balenia
natural_image
Collection of various electronic devices including capacitors, relays, and batteries (no text or symbols visible)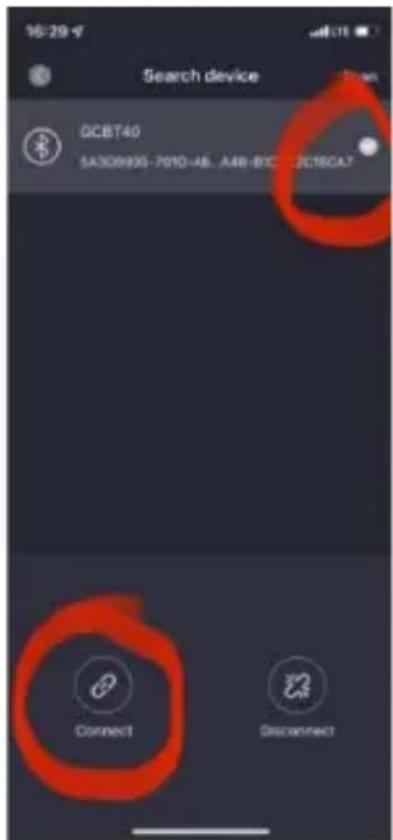
Copyright © Abacus Electric, s.r.o.
www.evolveo.com
www.facebook.com/EvolveoCZ
- Product assembly 49
- Quick start and setup 52
- Technical specifications.... 55
- Description of the device 58
- Quick start 60
- Menu 62
- Media Browser 65
- Shooting directly from the menu.... 66
- Troubleshooting 66
- Support and warranty 67
1. Product assembly
1.1. Feeder
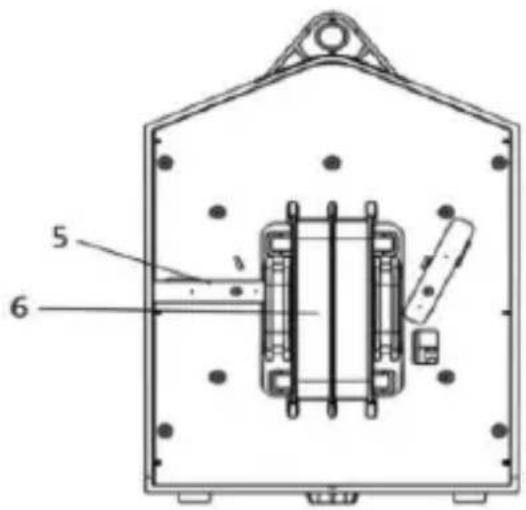
Front view Rear view
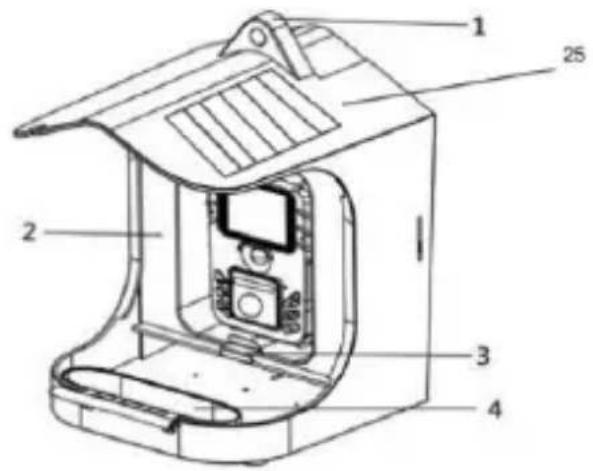
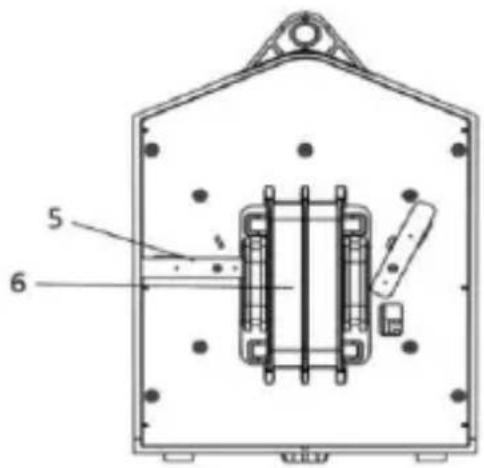
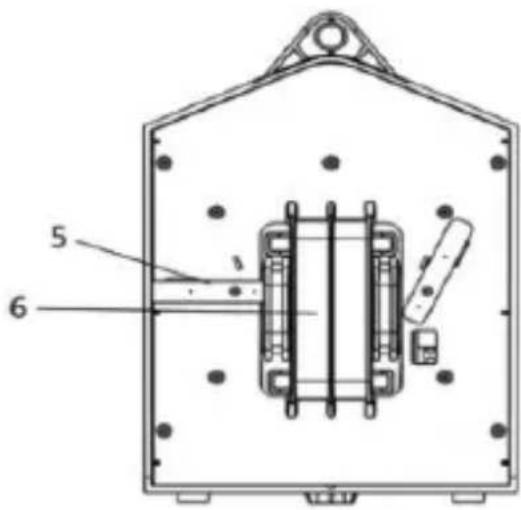
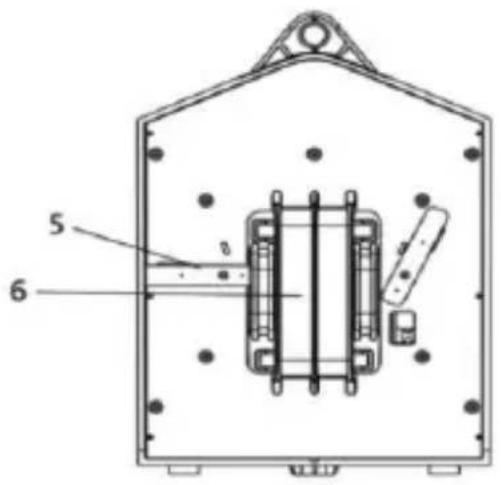
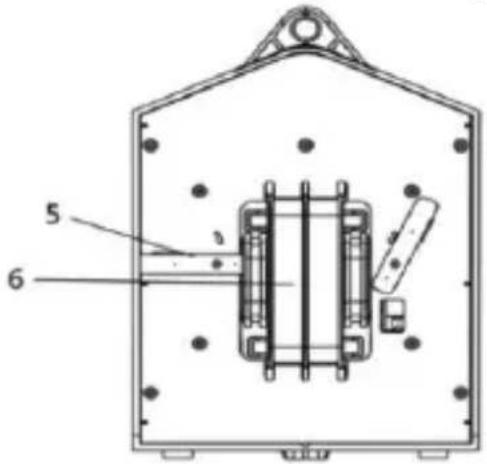
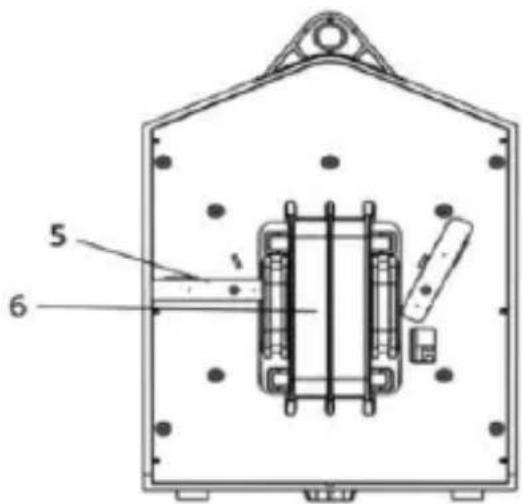
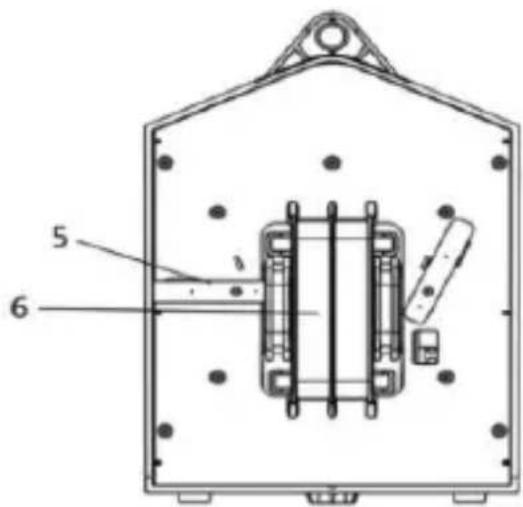
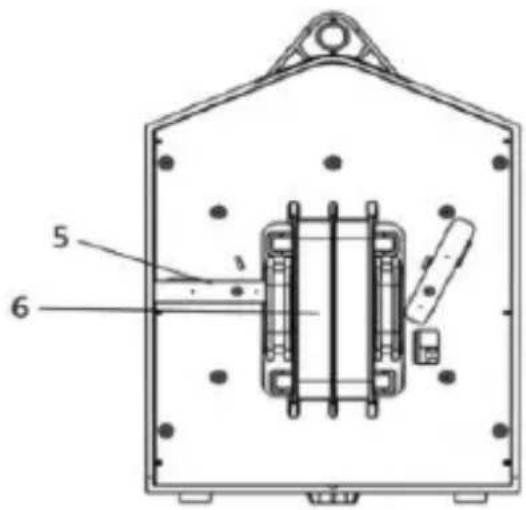
| 1. Grip | 5. Camera and feeder securing latch |
| 2. Feeder container | 6. Holder for removing the feeder |
| 3. Cap of the feeder container | 25. Solar panel |
| 4. Drinker - water container |
1.2. Setting up the feeder
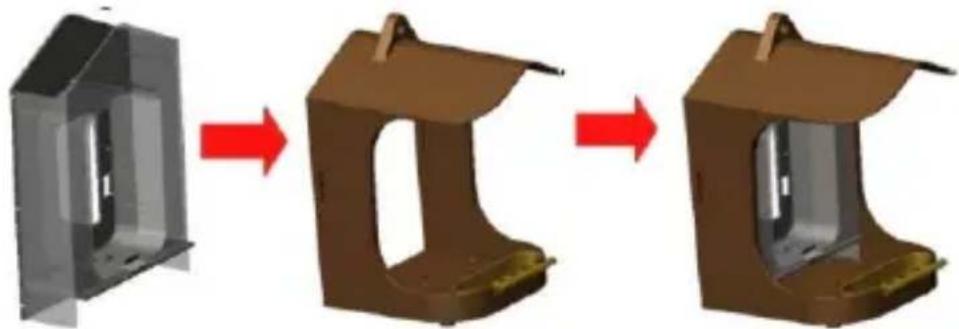
Fill the feeder container and insert it into the feeder (the latches must face upwards during insertion.
natural_image
3D rendering of a brown mechanical component with internal cavity, shown in three sequential stages (no text or symbols)1.3 Inserting the Camera
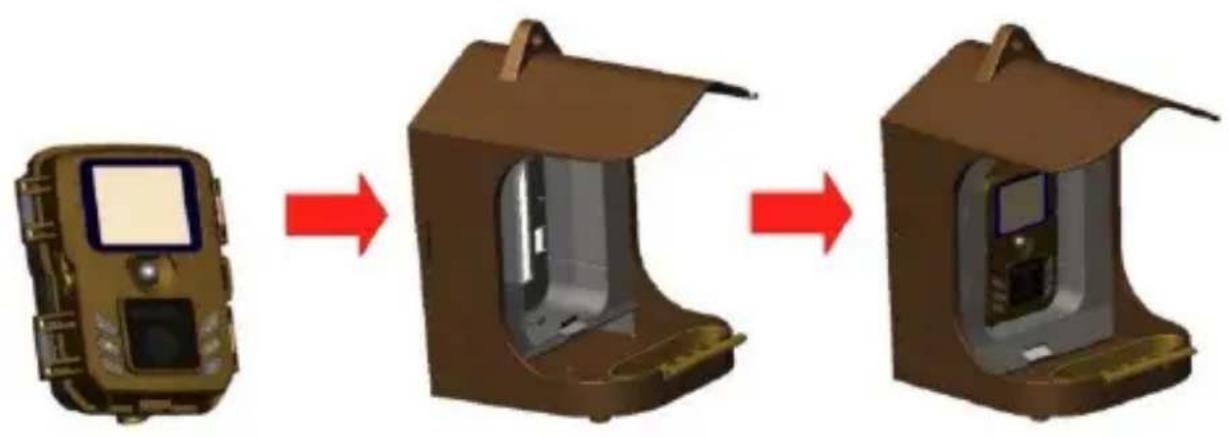
The camera is inserted in the already switched on state (switch in the ON position) with the SD card inserted and formatted. Insert the camera from the front. Plug the power cable from the side of the camera before placing it in position. If you are not going to use the solar panel power supply, you must close the connector with a rubber cap to prevent moisture from entering the device. Insert the connected camera into the feeder and secure at the back with two metal latches - these must fit into the feeder housing and the camera housing at the same time.
flowchart
graph LR
    A["Device with monitor"] --> B["Device inside container"]
    B --> C["Device inside container"]
1.4 Attachment methods
1.4.1 Wall bracket with fixing strap
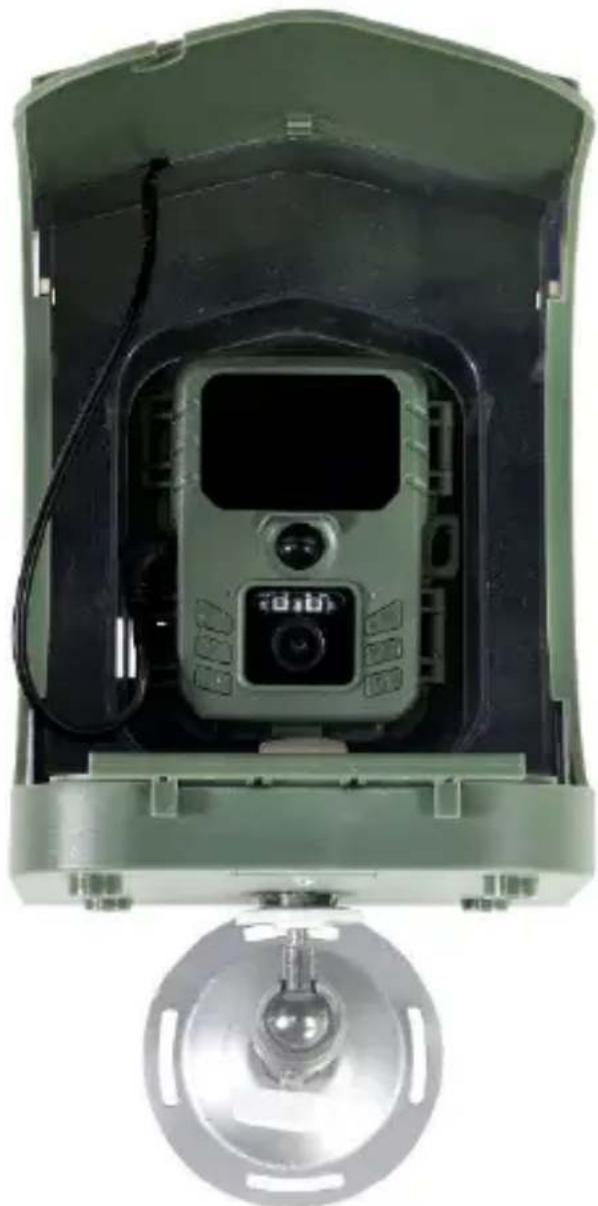
Use the mounting strap and wall bracket to attach the feeder to any object (e.g. a tree) around which you can wrap the strap. Thread the strap through the rectangular holes on the bottom of the wall bracket and pull the strap around the desired object. Now attach the belt and tighten it. Attach the feeder to the bracket using the tripod thread on the bottom of the feeder.
1.4.2. Handrail holder
Use the railing bracket to attach the booth to any round railing with a diameter of 17-32 mm. Loosen the nuts on the U-bolt. Place the U-clamp around the railing. Now retighten the tensioner. Attach the feeder to the bracket using the tripod thread on the bottom of the feeder, adjust and fix the position of the feeder.
Assembled feeder
natural_image
Interior view of a military-style radar or camera module with a central display and control panel, mounted on a circular base (no visible text or symbols)1.5 Package contents
natural_image
Collection of various electronic devices including capacitors, relays, and batteries (no text or symbols visible)2. Quick start and setup
2.1 To control the device, you need to download the EVOLVEO WiFi App from the respective Apple Appstore or Google Play. The app is only for Apple iOS(from version 13.1 and above) and Google Android(from version 9 and above!!!)
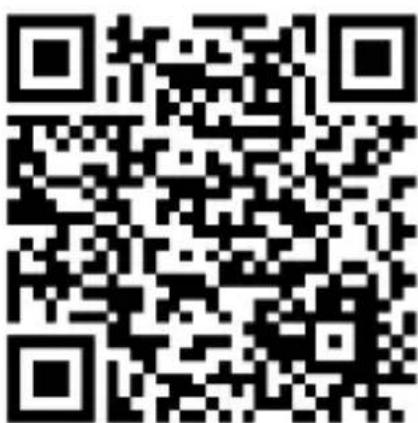
2.2. After installing the application, you need to start the camera
by selecting TEST mode on the main camera switch.
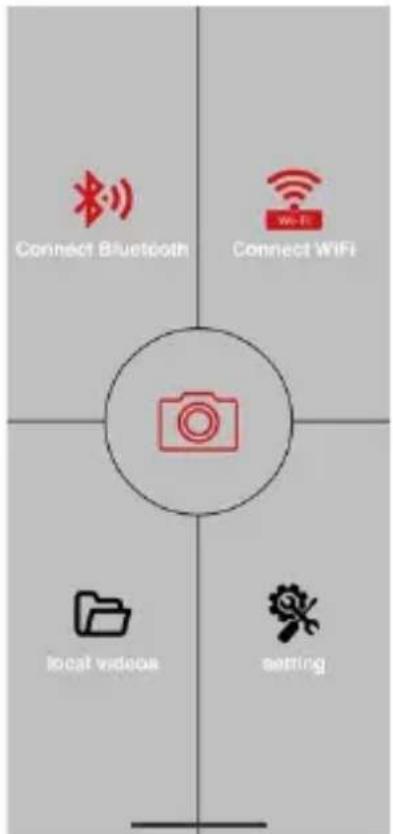
2.3. Open the EVOLVEO WiFi app on your phone, the main menu of the app consists of 5 main icons. The icons for Bluetooth, WiFi and camera also function as status icons. When the icon is red the function is inactive, when green it is active.
2.4. Bluetooth activation - to connect to the camera, you first need to activate the camera's WiFi module using Bluetooth. Click the Connect Bluetooth icon. In the Bluetooth menu, select Bluetooth cameras and select connect on the bottom left. Use the arrow in the top left corner to return to the home screen, if everything went well the Bluetooth icon is green.
WARNING: Bluetooth must be active on your phone to work properly!
2.5. WiFi connection - On the main screen, select the WiFi button (Bluetooth button must be green) This will open the WiFi settings on your phone. Select a WiFi network that has the same name as the one shown on the camera display (SSID: CAM XXXX) enter the
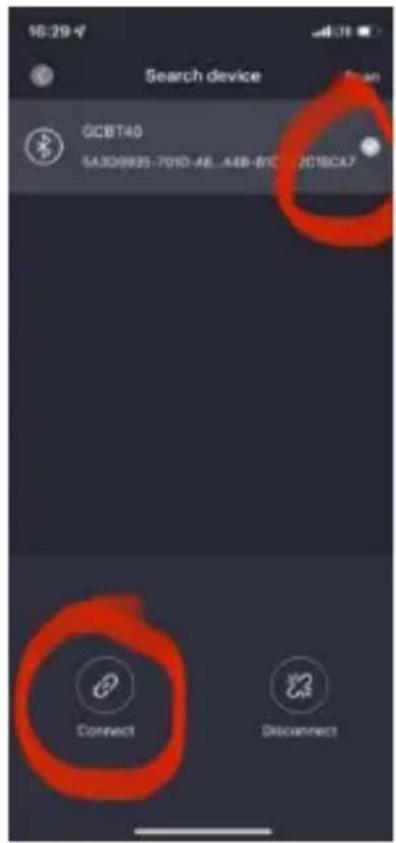
password, if it has not been changed yet the basic password is "12345678" and go back to the EVOLVEO WiFi application.
WARNING: The camera's WiFi network is not connected to the Internet, so you may be prompted by your device whether it should still be connected to this network - select keep connected!!! On older Android phones, you must turn off mobile data, otherwise the app will not connect to the camera!
Now the camera is connected to the app, you can select the middle camera icon, it is green when the connection is active, and feed back to the images stored in the camera, or to the live image from the camera.
This feature can also be used when mounting the camera, like a viewfinder, you know exactly where the camera is pointing.
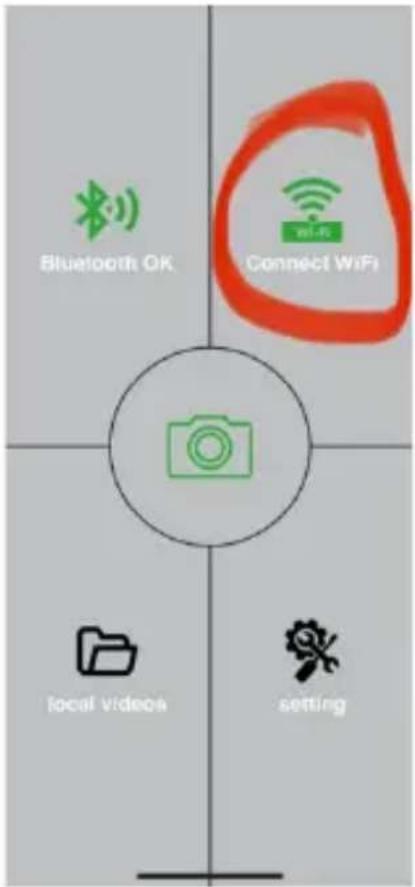
Press the settings button to adjust the camera properties, see the Settings chapter of this manual for more information on settings.
2.6. Camera Activation - To activate the camera, switch the main switch to ON, the camera will operate as set.
Now you don't have to take the camera off its stand to download images or adjust settings. You only need to be near the camera and connect to the camera using the procedure described above according to steps 2.4 and 2.5.
WARNING: The range of WiFi and Bluetooth is depending on the environment 20-30m in open space. The longer the distance from the camera, the slower the transmission.
- Technical specifications
| Display | Colour TFT 2.0" |
| Motion sensor | PIR - adjustable sensitivity (3 levels) max range 50cm |
| Motion sensor detection angle | 60° |
| Night light | IR LED 850nm, 2x IR LED under front cover |
| IR LED range - night | Up to 20 cm |
| Dimensions | V x Š x H. 175x118x87mm |
| Operating Temperature | -10 °C to +50 °C |
| Storage Temperature | -15 °C to +60 °C |
| Coverage | IP65 |
| Security | 4-digit optional password |
3.1. Photo
| Sensor | 5Mpix color CMOS (night photo black and white) |
| Lens | F=2.8; FOV=59° |
| Photo resolution | 24/20/16/12MP |
| Exposure (ISO) | Auto/100/200/400 |
| Timelapse mode (Timelapse) | 5 min/30 min 1/2/3/6/12/24h |
| Multi-frame mode (Burst) | 1/3/6 or 9 frames |
| Information on the photo | Time and Date, Temperature (°C, °F), Moon phase, optional name |
| Recording modes | Photography, Photography & Video, Timelapse |
| File format | .JPEG |
| Activation speed | 0,5 s * |
| Delay interval | The amount of time the device is inactive after the last motion-based start. Instant, 10 s, 1/3/5/10/15 or 30 min |
*The PIR sensor detects motion based on changes in surface temperatures. This figure is in an ideal environment, when the object in front of the camera has a sufficient surface temperature difference, and crosses perpendicularly the scanned area (passes from side to side) If the object will approach the camera frontally, it will take longer to recognize the motion.
3.2. Video
| Video resolution | VGA, 720 p, 1080 p 30fps |
| Record length | 5/10/30/60 or 90 seconds |
| File format | MP4/H.264 |
| Liveview (Liveview) | <180kBps ** |
3.3. Power
| Batteries * | 3000mAh Li-Ion integrated |
| Power source | DC 6V 2 A |
| Connector for external power supply | DC Jack 3.5x1.3 mm |
| External batteries | Can connect a 6 V battery to the external power connector using the SGV CAM-PWRC cable |
3.4. Connectivity
| WiFi | IEEE 802.11b/g/n |
| Memory card | SD up to 256 GB |
| Internal memory | The device has no internal memory |
| USB | Can be connected to a PC using a USB-C cable (not included) |
*Battery life decreases depending on the mode used and the number of videos and photos taken, 1 month of battery life is calculated using only photo recording in day mode and 20 photos per day. In the winter months with temperatures below 0°C, battery life drops significantly more than in normal summer temperatures, this is a characteristic of batteries.
4. Description of the device
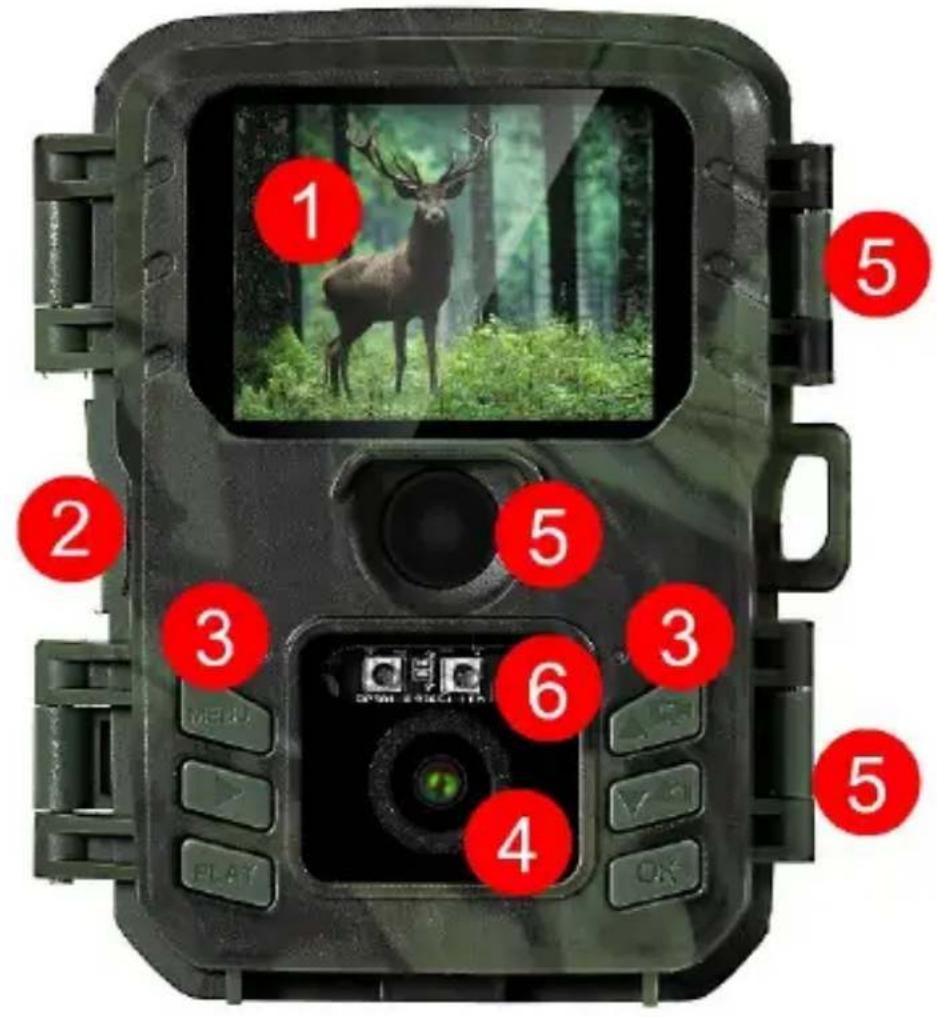
1) 2.0 Color LCD
2) DC 6V/2A power connector
3) Control buttons
4) Camera lens
5) Latches
6) IR LED + Status LED + illumination sensor
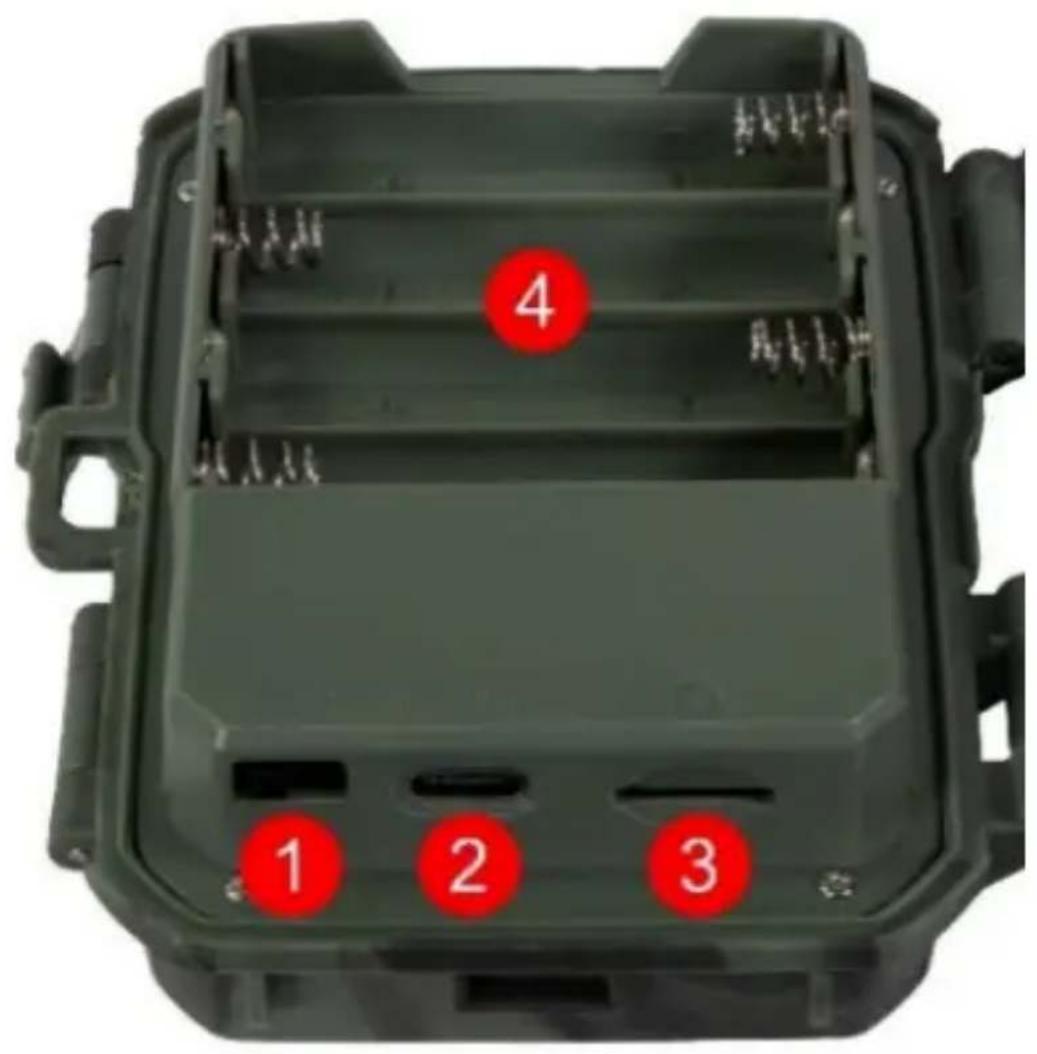
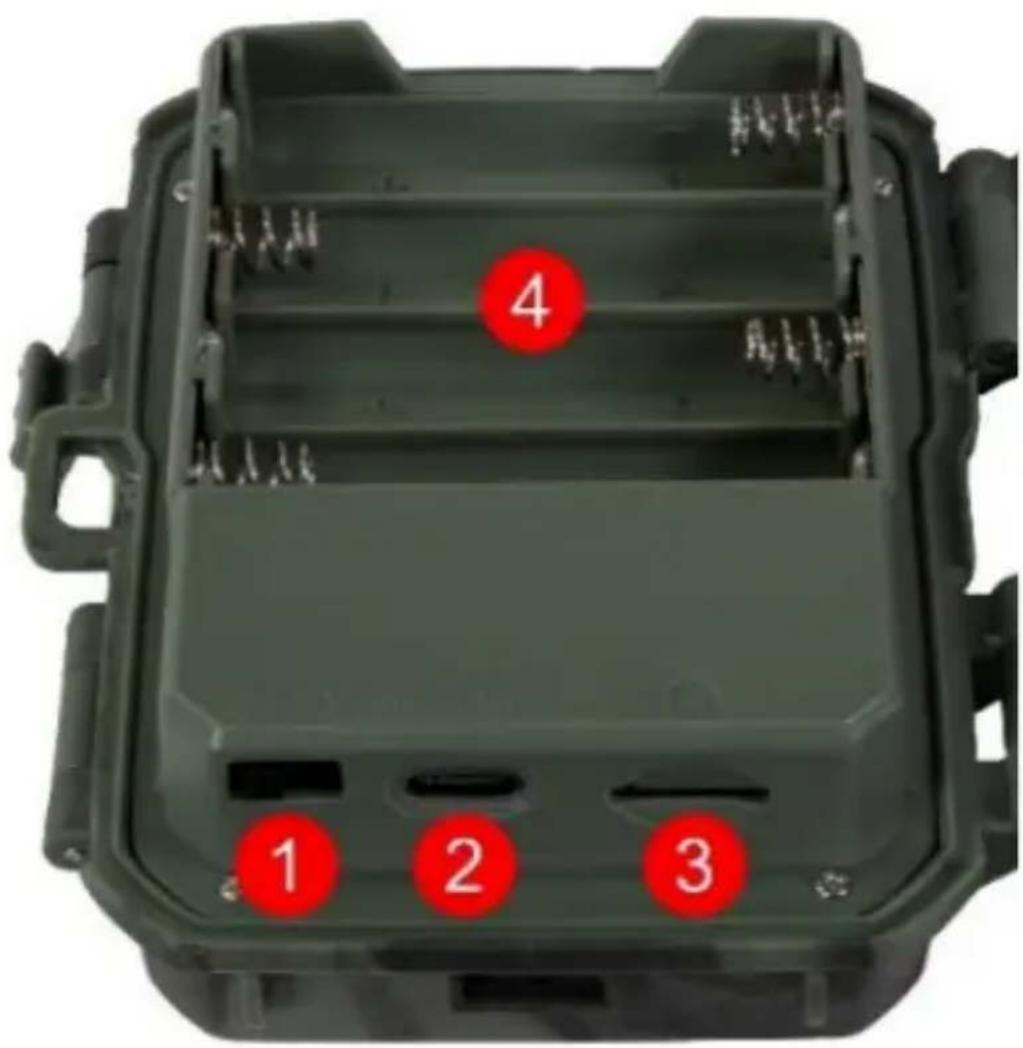
1) Main Switch OFF-TEST-ON
2) USB-C connector for data transfers - not for power!
3) Micro SD card slot up to 256GB
4) Space for 4x 1.5V AA alkaline batteries. Possibly built-in 3000mAh Li-Ion battery
5. Quick start
5.1 Switching on
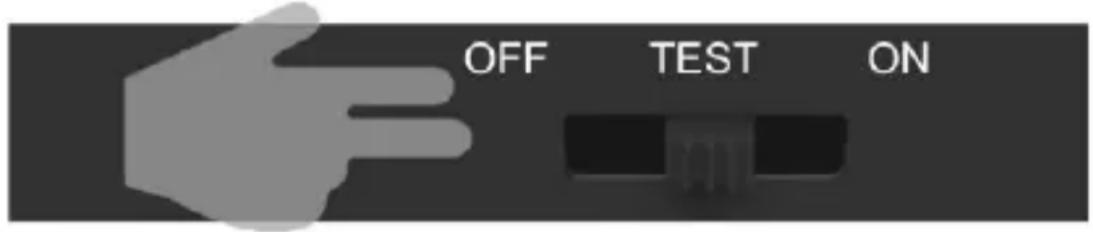
Slide the switch from the OFF position to the TEST position to put the device into setup mode, where the camera image preview will be displayed on the screen.
5.2. Settings
Press the MENU button to set up the device. When you press the button, you will see the individual setting items described in Chapter 6.
5.3. Change the Language in the Menu
The default language after switching on the camera is English, to change the language, use the arrows to select "Language", confirm with the OK button, select your language with the arrows and select OK.
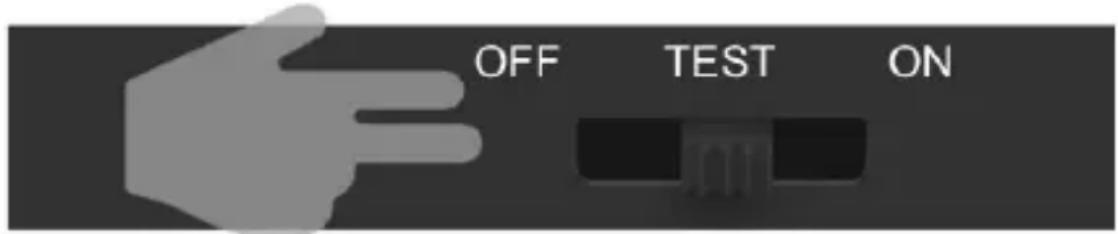
5.4. Once the setup is complete, you can switch the device to active mode by sliding the switch to the ON position.
Camera buttons:
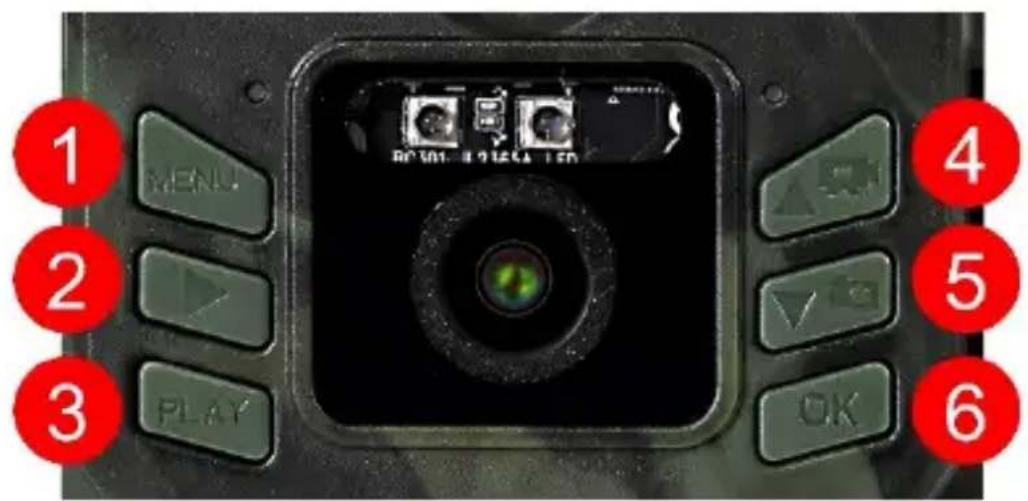
| 1. | MENU | Button to enter the main menu. Directly in the MENU, the device is also used to return to the previous section. |
| 2. | Recording (SHOT) | On the basic screen, it takes a photo or video when pressed, depending on the basic screen mode. |
| 3. | PLAY | Used to enter and exit the photo and video gallery on the SD card |
| 4. | UP | To move around the menu or gallery. On the basic preview screen, it is used to turn on Video mode |
| 5. | DOWN | To move around the menu or gallery. On the basic preview screen, it is used to turn on Photo mode. |
| 6. | OK | Confirm menu selection (Turns WiFi on/off) |
- Menu
| 1. Mode | Camera | In this mode, the camera will only take pictures |
| Video | In this mode, the camera will only capture video footage | |
| Camera & Video | The camera will capture both images and video. | |
| Time-lapse images | In this mode, the camera will take pictures according to the selected time interval. | |
| 2. Resolution | Resolution setting for Video recording: 1080p, or 720p or VGA. | |
| 3. Video length | Set the length of the video recording: 5s, 10s, 30s, 60s or 90s | |
| 4. Sound recording | If you select on, it will record sound when recording video. | |
| 5. Image size | Changes the resolution at which all images, you can choose between 24, 20, 16, 12, 8, 5, 3 MPX photos, the larger resolution, the larger the file will be stored on the SD card! | |
| 6. Interval | The interval is a time value that indicates the time of inactivity after a detected movement. When the camera is activated | |
| by the PIR sensor, the camera performs the desired action and waits for a specified time after the motion is over before taking another picture. Values: 1s, 10s, 1min, 3min, 5min,10min,15min or 30min. | ||
| 7. Timing interval | Set the shooting interval in Time Lapse mode. Images will be taken at the selected time interval. The following values can be set: 5min, 30min, 1h, 2h,3h,6h,12h or 24h. | |
| 8. Sequence | In Photo, Photo&Video and Time-lapse mode, sets how many pictures to take when the camera is activated. Can be set: 1,3,6 or 10 images | |
| 9. ISO | ISO sensitivity, simply put, the darker the environment the higher the value. If you are unsure of the setting, leave it in automatic mode. Can be set: Auto, ISO 100, ISO 200, ISO 400, ISO 800 and ISO 1600 | |
| 10. Rewrite | Zap. - When the SD card is full, the oldest files are overwritten. OFF - When the SD card is full, no more images are stored | |
| 11. PIR sensitivity | PIR sensor sensitivity setting. If unwanted activation by distant objects occurs, the sensitivity of the sensor can be reduced. Can be set: Low, Medium, High or Off | |
| 12. Language | It is used to set the language in the menu. | |
| 13. Frequency | Artificial light frequency filter. If the image flickers during video, you can change the settings to try to minimize this effect. Options 50 or 60 Hz | |
| 14. Camera ID | The name that appears in the stamp on the captured images. | |
| 15. Heslo/ PIN | Camera security with PIN, when you turn on the function, you enter a new PIN, which the device requests every time it starts up. | |
| 16. Timer | The device's operating time on the display sets the time range when the device should be active, the rest of the day the device will not take pictures. | |
| 17. Date/Time | Set the date, time and format. Move the arrow keys to select and set, confirm by pressing the OK button. | |
| 18. Formatting | Format SD memory | |
| cards inserted in the device | ||
| 19. Default settings | Deletes all settings made in camera. | |
| 20. View Full Version | Displays the current FW version |
5. Media Browser
It is possible to view the recorded footage directly on the camera display.
To view, switch to TEST mode, press the Record (PLAY) button on the home screen.
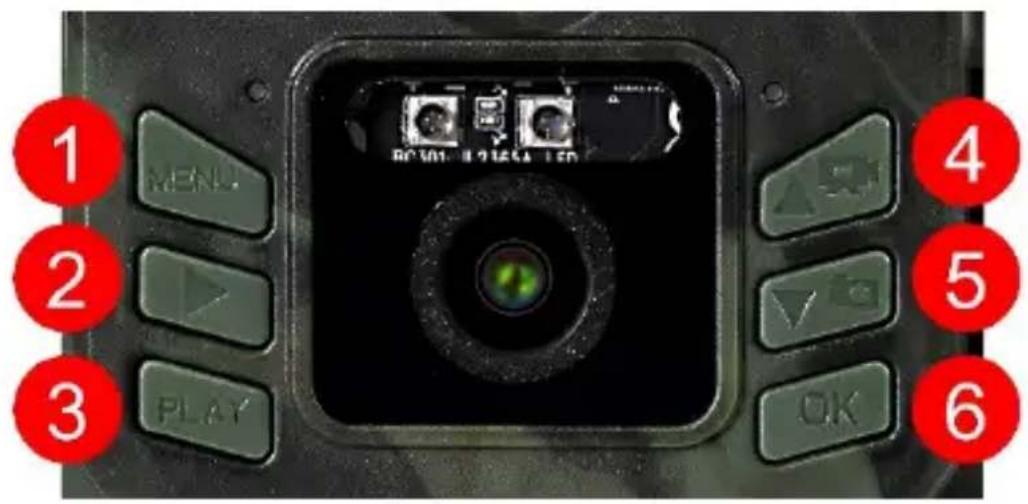
Control by arrow keys:
- Next picture: up arrow
• Previous picture: down arrow - Watch the video: OK
- Stop Video: OK
- Return to the main menu with the PLAY button.
7. Shooting directly from the menu
The camera can also be used to take photos or record video using only the buttons. Switch the camera to TEST mode. It is then serviced afterwards:
- The up or down arrow switches between Photo or Video mode
- Press the Record SHOT button to take a picture
8. Troubleshooting
8.1 The camera does not record photos/videos when moving
- Check the PIR sensor to see if it is damaged or blocked, for example by a leaf.
- Test the camera in places where there are no hot spots. The PIR sensor detects motion based on temperature difference, if the camera environment is overheated, the sensor is not activated.
- In some cases, the water level may cause the PIR sensor to activate unintentionally, in which case turn the camera away from the water level.
- Set the camera so that it is not pointing directly at the ground.
- Position the camera so that it does not move and large moving objects, such as a large tree, are not in the frame.
- At night, the device can detect movement outside the range of the IR night light, so no moving object will be detected in the photos.
- Sunset or sunrise may cause the recording to start unintentionally - change the camera position.
- If the animal/person in front of the camera is moving quickly, the camera may not record them - move the camera further away from the objects (e.g. further away from the path where the animals are moving)
8.2 The camera does not produce any images
- Make sure there is enough free space on the inserted SD card. If the old file overwrite function is disabled, the device no longer records after the SD card is full.
- Check that the batteries have enough power to operate the photo trap.
- Make sure the switch is in the ON position and not OFF.
- Format the card on your computer to EXFAT format before using it for the first time
8.3 Night light does not have sufficient range
- Make sure the battery in the device is charged, if the capacity is below 15%, the night light may not activate
- For good quality night shots, place the camera in a dark environment with no other light sources.
- Try to use the camera in locations where it will be surrounded by other objects that can reflect IR light. If you place the camera in an open area, the resulting photo will not be sufficiently illuminated. It's the same as shining a flashlight on the night sky, you won't see anything either, even if the flashlight is very powerful.
9. Support and warranty
First, read the "FAQ" at: https://eshop.evolveo.com/strongvision-wifi/ or contact EVOLVEO Technical Support at:
service@evolveo.com
The warranty does NOT cover:
- using the equipment for purposes other than those for which it is designed,
-
installing firmware other than that installed on the device
-
electrical or mechanical damage caused by improper use
- damage caused by natural influences such as water, fire, static electricity, power surges, etc.
- damage caused by repairs carried out by an unqualified person
- illegible serial number
- battery capacity decreases after 6 months of use (6 month battery life guarantee) *
*If the device is equipped with a Li-Ion battery from the factory.
Disposal: The crossed-out container symbol on the product, in the accompanying documentation or on the packaging reminds you that in EU countries, all electrical and electronic equipment, batteries and accumulators must be disposed of separately at the end of their useful life as part of sorted waste. Do not dispose of these products in unsorted municipal waste.
I ⒾCE
DECLARATION OF CONFORMITY
Abacus Electric, s.r.o. hereby declares that the EVOLVEO StrongVision BirdFeeder meets the requirements of the standards and regulations that are relevant for the type of equipment, including the 2014/53/EU RED Regulation for radio equipment.
The full text of the Declaration of Conformity can be found at http://ftp.evolveo.com/ce/
Importer / Manufacturer
Abacus Electric, s.r.o.
Planá 2, 370 01, Czech Republic
Email: helpdesk@evolveo.com
Made in China
Copyright © Abacus Electric, s.r.o.
www.evolveo.com
www.facebook.com/EvolveoCZ
All rights reserved.
The appearance and technical specifications of the product are subject to change without notice.
Tartalomjegyzék
natural_image
3D rendering of a brown mechanical component with internal cavity, shown in three sequential stages (no text or symbols)natural_image
Interior view of a military-style radar or communication device with a central display and control panel, mounted on a circular base (no visible text or symbols)natural_image
Collection of various electronic devices including capacitors, relays, and batteries (no text or symbols visible)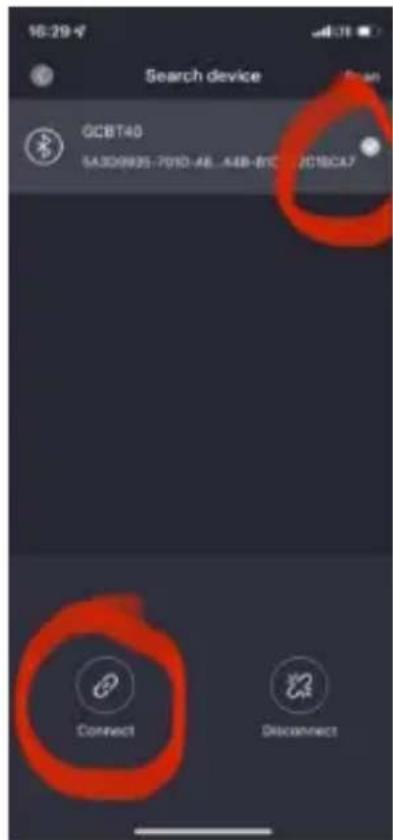
Copyright © Abacus Electric, s.r.o.
www.evolveo.com
www.facebook.com/EvolveoCZ
Minden jog fenntartva.
Vedere din spate
natural_image
3D model of a brown mechanical component with internal cavity, shown in three sequential stages (no text or symbols)1.3 Inserarea camerei
flowchart
graph LR
    A["Sensor Input"] --> B["Device with Sensor"]
    B --> C["Device with Internal Components"]
    C --> D["Device with External Components"]
1.4 Metode de ataşare
1.4.1 Suport de perete cu bandă de fixare
natural_image
Interior view of a military-style radar or camera module with a central display and control panel, mounted on a circular base (no visible text or symbols)natural_image
Collection of various electronic devices including capacitors, relays, and batteries (no text or symbols visible)| 1) 2.0 Color LCD2) Conector de alimentare DC 6V/2A3) Butoane de control4) Obiectivul camerei | 5) Zăvoare6) LED IR + LED de stare + senzor de iluminare |
Copyright © Abacus Electric, s.r.o.
www.evolveo.com
www.facebook.com/EvolveoCZ
natural_image
Three-step diagram showing a 3D mechanical component before and after assembly, with red arrows indicating transformation (no text or symbols present)flowchart
graph LR
    A["Device with monitor"] --> B["Device with open lid"]
    B --> C["Device with closed lid"]
natural_image
Interior view of a military-style radar or communication device with a central display and control panel, mounted on a circular base (no visible text or symbols)natural_image
Collection of various electronic devices including capacitors, relays, and batteries (no text or symbols visible)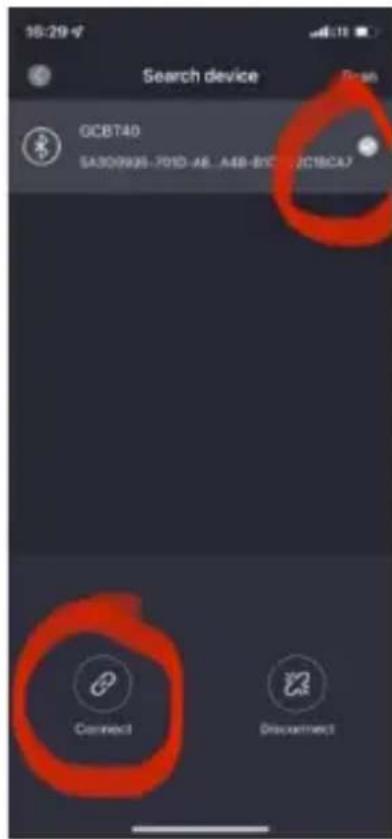
Copyright © Abacus Electric, s.r.o.
www.evolveo.com
www.facebook.com/EvolveoCZ
natural_image
3D model of a mechanical component before and after assembly, showing a red arrow indicating transformation (no text or symbols present)natural_image
Interior view of a military-style radar or communication device with a central display and control panel (no visible text or symbols)natural_image
Collection of various electronic devices including capacitors, relays, and batteries (no text or symbols visible)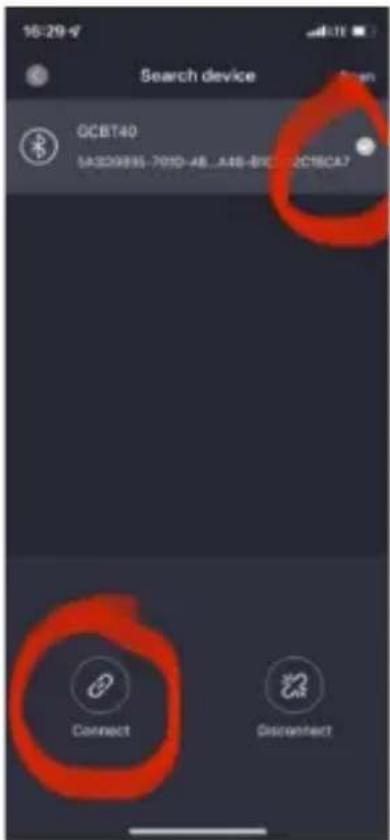
Copyright © Abacus Electric, s.r.o.
www.evolveo.com
www.facebook.com/EvolveoCZ
| 1. Hvatište | 5. Zasun za osiguranje kamere i hranilice |
| 2. Spremnik hranilice | 6. Držač za skidanje hranilice |
| 3. Zatvarač spremnika hranilice | 25. Solarni panel |
| 4. Pojilica – posuda za vodu |
natural_image
3D rendering of a brown mechanical component with internal cavity, shown in three sequential stages (no text or symbols)1.3 Umetanje kamere
flowchart
graph LR
    A["Device with monitor icon"] --> B["Transfer to container"]
    B --> C["Final device with monitor and control panel"]
natural_image
Interior view of a military-style radar or communication device with a central display and control panel, mounted on a circular base (no visible text or symbols)natural_image
Collection of various electronic devices including capacitors, relays, and batteries (no text or symbols visible)2. Brzo pokretanje i postavljanje
2.1 Za upravljanje uređajem trebate preuzeti aplikaciju EVOLVEO WiFi iz odgovarajuće trgovine Apple Appstore ili Google Play. Aplikacija je namijenjena isključivo uređajima s Apple iOS-om (od verzije 13.1 i novije) i Google Androidom (od verzije 9 i novije!!).
2.2. Nakon instaliranja aplikacije potrebno je pokrenuti kameru i odabrati način rada TEST na glavnom prekidaču kamere.
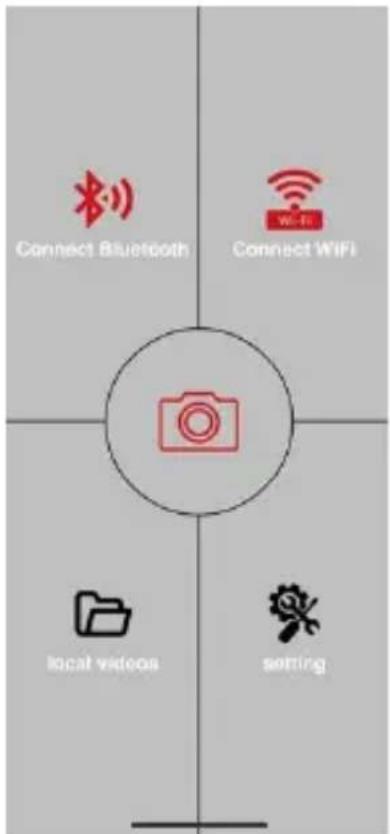
2.3. Otvorite aplikaciju EVOLVEO WiFi na svom telefonu, glavni izbornik aplikacije sastoji se od 5 glavnih ikona. Ikone za Bluetooth, WiFi i kameru također rade kao statusne ikone. Kada je ikona crvena, funkcija je neaktivna, a kada zelena, funkcija je aktivna.
2.4. Bluetooth aktivacija – za povezivanje s kamerom prvo morate aktivirati WiFi modul kamere koristeći Bluetooth. Pritisnite ikonu spojiti Bluetooth. U bluetooth izborniku odaberite Bluetooth kamere i odaberite povezivanje u donjem lijevom kutu. Strelica u gornjem lijevom kutu vratit će vas na početni zaslon, ako je sve prošlo u redu, Bluetooth ikona je zelena.
UPOZORENJE: Bluetooth mora biti aktivan na vašem telefonu da bi ispravno funkcionirao!
2.5. WiFi spajanje – Na glavnom ekranu odaberite gumb WiFi (gumb Bluetooth mora biti zelen). Otvorit će se WiFi postavke na vašem telefonu. Odaberite
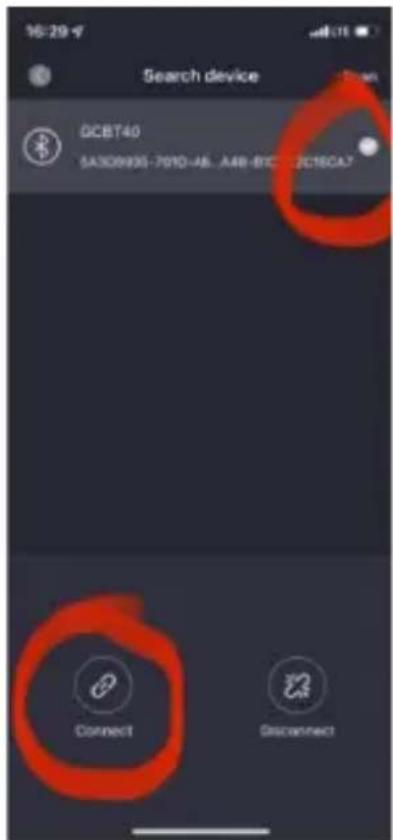
WiFi mrežu koja ima isti naziv kao onaj prikazan na zaslonu kamere (SSID: CAM XXXX), unesite lozinku, ako nije promijenjena, osnovna lozinka je "12345678" i vratite se na EVOLVEO WiFi aplikaciju.
Pritiskom na gumb postavki možete podesiti svojstva kamere, više o postavkama možete pronaći u poglavlju Postavke ovog priručnika.
2.6. Aktiviranje kamere – Za aktiviranje kamere, prebacite glavni prekidač u položaj ON, kamera će raditi prema postavkama. Sada više ne morate micati kameru s postolja kako biste preuzeli snimljene slike ili prilagodili postavke. Dovoljno je biti u njenoj blizini i spojiti se na kameru koristeći gore opisani postupak prema koracima 2.4 i 2.5.
1) Glavni prekidač OFF-TEST-ON
2) USB-C konektor za prijenos podataka – ne koristi se za napajanje!
3) Micro SD utor za kartice do 256 GB
4) dodatna ugrađena Li-Ion baterija od 3000 mAh
5. Brzo pokretanje
5.1 Aktivacija
natural_image
Symbol of a trash bin crossed with diagonal lines and a solid black rectangle below (no text or labels)
IZJAVA O SUKLADNOSTI
Ovime tvrtka ABACUS Electric, s.r.o. izjavljuje da proizvod EVOLVEO StrongVision BirdFeeder ispunjava zahtjeve normi i propisa koje su relevantne za određenu vrstu uređaja, uključujući Uredbu 2014/53/EU RED za radio opremu.
Copyright © Abacus Electric, s.r.o.
www.evolveo.com
www.facebook.com/EvolveoCZ
Sva prava pridržana.
Izgled i tehnička specifikacija proizvoda mogu se promijeniti bez prethodne napomene.
- Obsah / Content / Inhalt / Tartalom / Indice / Conținut / Sadržaj
- Obsah
- Vložení Kamery
- Obsah balení
- Vloženie fotoaparátu
- Obsah balenia
- Product assembly
- Feeder
- Setting up the feeder
- Inserting the Camera
- Attachment methods
- Wall bracket with fixing strap
- Handrail holder
- Assembled feeder
- Package contents
- Quick start and setup
- Video
- Power
- Connectivity
- Description of the device
- Quick start
- Switching on
- Settings
- Change the Language in the Menu
- Camera buttons:
- Media Browser
- Shooting directly from the menu
- Troubleshooting
- The camera does not produce any images
- Night light does not have sufficient range
- Support and warranty
- The warranty does NOT cover:
- I ⒾCE
- DECLARATION OF CONFORMITY
- Tartalomjegyzék
- Inserarea camerei
- Metode de ataşare
- Suport de perete cu bandă de fixare
- Umetanje kamere
- Brzo pokretanje i postavljanje
- Brzo pokretanje
- Aktivacija
- IZJAVA O SUKLADNOSTI
Brand : Evolveo
Model : StrongVision BirdFeeder
Category : Camera