
LO-7050 - Juicer Concept - Free user manual and instructions
Find the device manual for free LO-7050 Concept in PDF.


| Type of product | Juicer |
| Model | LO-7050 |
| Brand | Concept |
| Voltage | 220–240 V ~ 50 Hz |
| Power input | 700 W |
| Noise level | 85 dB(A) |
| Pulp bin capacity | 2 L (side) and 0.7 L (front) |
| Speed controller | Two speeds: low (soft fruits) and high (hard fruits/vegetables) |
| Foam separator | Integrated in juice jug to reduce foam |
| Safety features | Automatic shut-off when overloaded; lock clip ensures cover is secured before operation; sharp parts caution |
| Material | Stainless steel rotating sieve, plastic body, BPA-free plastic parts |
| Accessories included | Cleaning brush, stuffer, pulp bin (2 pcs), juice jug with foam separator |
| Dimensions (approx.) | 30 x 25 x 40 cm (estimated) |
| Weight (approx.) | 4 kg (estimated) |
| Cleaning | Removable parts washable in warm water; wipe unit with damp cloth; do not immerse |
| Maintenance | Clean rotating sieve after every 0.5 kg of processed food; sharp parts caution |
| Warranty | 24 months |
| Spare parts availability | Rotating sieve (part no. 42691285) and other accessories available from authorized service centers |
| Repair service | Contact authorized service center; do not attempt self-repair |
| Intended use | Household only; not for commercial use |
Frequently Asked Questions - LO-7050 Concept
User questions about LO-7050 Concept
0 question about this device. Answer the ones you know or ask your own.
Ask a new question about this device
Download the instructions for your Juicer in PDF format for free! Find your manual LO-7050 - Concept and take your electronic device back in hand. On this page are published all the documents necessary for the use of your device. LO-7050 by Concept.
USER MANUAL LO-7050 Concept
natural_image
Black and white photo of a concept juice maker with a handle and control panel (no visible text or symbols on the device itself)LO 7050
concept
PODĚKOVÁNÍ
UPOZORNĚNÍ:
natural_image
Close-up of a hand inserting a small component into a stainless steel electric juice<|im_start|> Greenland filter (no text or symbols visible)Obr. 1
natural_image
Close-up of hands operating a stainless steel coffee maker with a black arrow pointing to the lid (no visible text or symbols)Obr. 2
natural_image
Close-up of a black and white industrial machine with a downward arrow indicating compression or adjustment (no visible text or symbols)Obr. 3
natural_image
Exterior view of a stainless steel coffee maker with a side arm, no visible text or symbolsObr. 4
natural_image
Symbol of a trash bin crossed with no text or labels, accompanied by a black rectangular block below (no readable text or symbols)UPOZORNENIE
natural_image
Close-up of a hand inserting a black plastic brush into a stainless steel juicer (no text or symbols visible)Obr. 1
natural_image
Close-up of hands operating a stainless steel coffee maker with a black arrow pointing to the lid (no visible text or symbols)Obr. 2
natural_image
Close-up of a kitchen brush with a downward arrow indicating compression or suction (no text or symbols visible)Obr. 3
natural_image
Exterior view of a stainless steel portable water heater with metal handles (no text or symbols visible)Obr. 4
RIEŠENIE ŤAŽKOSTÍ
natural_image
Symbol of a trash bin crossed with no text or labels, accompanied by a black rectangular block below (no text or symbols present)UWAGI
natural_image
Close-up of a hand inserting a black liquid into a stainless steel electric juice<|im_start|> Greenland filter (no text or symbols visible)Rys. 1
natural_image
Close-up of hands operating a stainless steel coffee maker with a black arrow pointing to the handle (no visible text or symbols)Rys. 2
natural_image
Close-up of a mechanical brush or lever mechanism with a black arrow indicating direction (no text or symbols visible)Rys. 3
natural_image
Exterior view of a stainless steel portable water heater with adjustable arm (no text or symbols visible)Rys. 4
CZYSZCZENIE I KONSERWACJA
natural_image
Symbol of a trash bin crossed out by two crossed lines, with a solid black rectangle below (no text or labels)FIGYELMEZTETÉS:
natural_image
Close-up of a hand inserting a small object into a stainless steel-colored food blender (no text or symbols visible)- ábra
natural_image
Close-up of hands operating a stainless steel coffee maker with a black arrow pointing to the lid (no visible text or symbols)- ábra
natural_image
Close-up of a black and white industrial machine with a downward arrow indicating compression or adjustment (no visible text or symbols)- ábra
natural_image
Exterior view of a stainless steel coffee maker with a side arm, no visible text or symbolsnatural_image
Symbol of a trash bin with no visible text or labelsnatural_image
Close-up of a hand inserting a black cylindrical component into a stainless steel electric juice<|im_start|> Greenland filter (no text or symbols visible)Fig. 1
natural_image
Close-up of hands operating a stainless steel coffee maker with a black arrow pointing to the lid (no visible text or symbols)Fig. 2
natural_image
Close-up of a kitchen brush with a vertical stack and handle, showing no text or symbolsFig. 3
natural_image
Exterior view of a stainless steel portable water heater with metal handles (no text or symbols visible)Fig. 4
BOJĀJUMU NOVĒRŠANA
natural_image
Symbol of a trash bin crossed with no text or numbers, representing waste sorting or restriction (no text present)Thank you for purchasing a Concept product. We hope you will be satisfied with our product throughout its service life.
Please study the entire Operating Manual carefully before you start using the product. Keep the manual in a safe place for future reference. Make sure other people using the product are familiar with these instructions.
| Technical parameters | |
| Voltage 220–240 | V ~ 50 Hz |
| Power input 700 | W |
| Noise level 85 dB(A) | |
IMPORTANT SAFETY PRECAUTIONS:
• Make sure the mains voltage corresponds to the values on the rating plate.
- Do not leave the unit unattended while it is turned on or even only plugged into the wall outlet.
• Before plugging in or unplugging the unit from the wall outlet, make sure the switch is OFF.
- When disconnecting the unit from the wall outlet, never pull the power cord. Grasp the plug and disconnect it by pulling.
- Do not allow children or unskilled people to handle the unit. Use the unit out of the reach of these individuals.
• Take extra care when using the unit near children.
- Turn the unit off, unplug the power cord from the wall outlet, and let the unit cool down before cleaning and after use.
- Do not let the power cord hang loosely over the edge of a table. Make sure the power cord does not touch hot surfaces.
• Do not let the unit hang loose on the power cord.
• Do not use the unit if the rotating sieve is damaged.
• The unit contains sharp parts. Extra care should be taken while cleaning the unit.
• Never remove the upper cover until the rotating sieve stops completely.
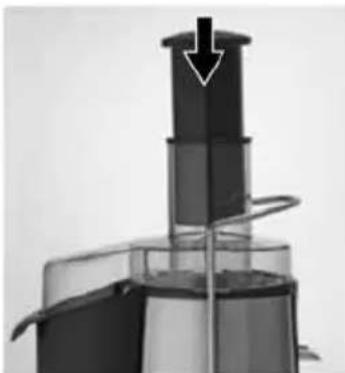
- Always use the stuffer to push food through the stuffing opening. Never push in food using your fingers, a fork, spoon, knife or any other object.
• Do not use abrasive or chemically aggressive substances for cleaning the unit.
- Do not use the unit if it does not operate properly, or if it has been dropped, damaged or exposed to any liquids. Refer the unit to an authorized service center for testing and repair.
- Never use an appliance with a damaged power cord or plug. Contact an authorized service center immediately to have the defective components repaired or replaced.
• The unit is not designed for outdoor use.
• The unit is suitable for domestic use only. It is not designed for commercial operation.
• Use the product only for the intended purpose specified in the Operating Manual.
- Do not immerse the power cord, plug, or appliance into water or any other liquid.
• Use only accessories recommended by the manufacturer.
• Put the appliance on a flat, steady surface.
• Do not repair the appliance yourself. Contact an authorized service center.
Failure to follow the manufacturer's instructions may lead to refusal of warranty repair.
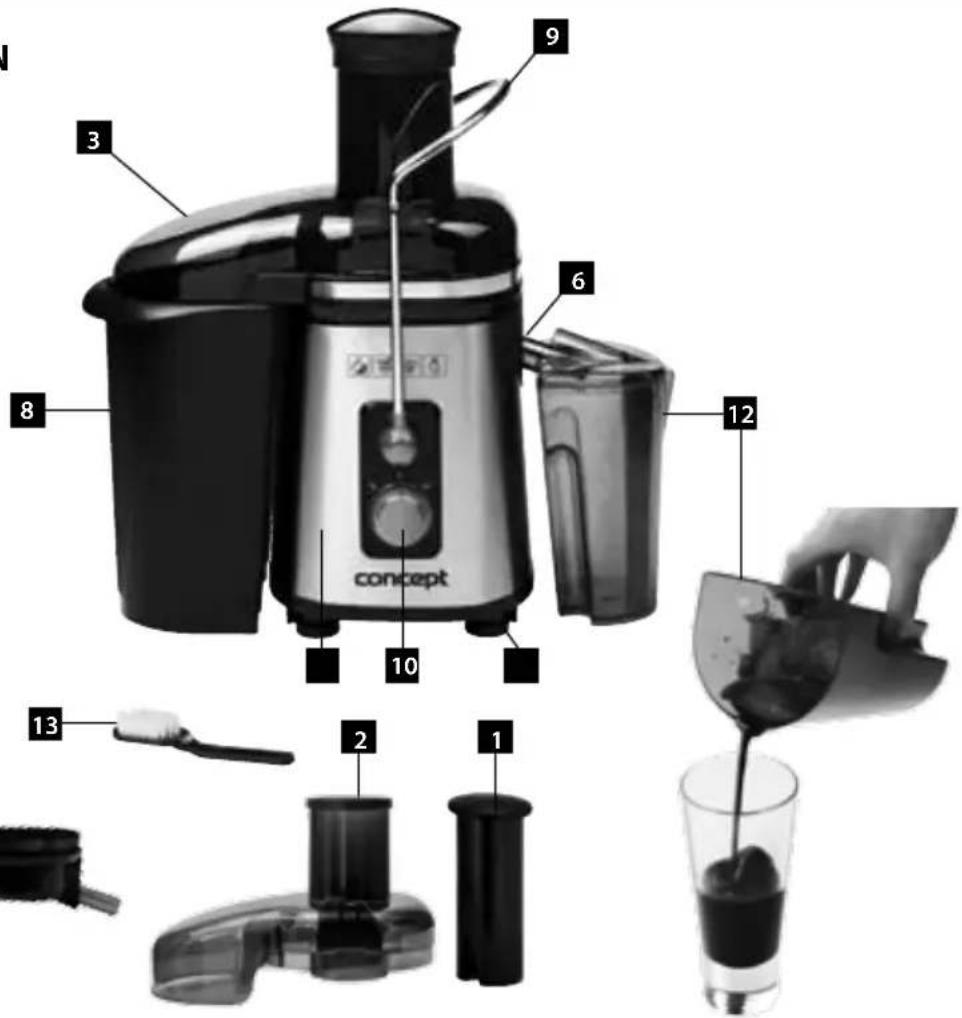
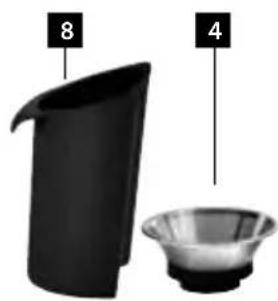
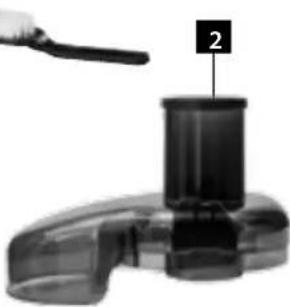
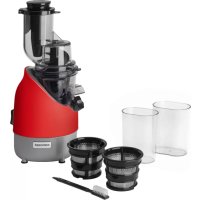
PRODUCT DESCRIPTION
- Stuffer
- Feeder
- Upper cover
- Rotating sieve
- Juice drain cover
- Juice drain
- Body of the unit
- Pulp bin 2 l
- Lid locking clip
- Speed controller
- Anti-slip feet
- Pulp bin 0,7 l
- Cleaning brush
natural_image
Two objects: a black pitcher and a metallic bowl, both with numbered labels (8 and 4) pointing to their respective parts.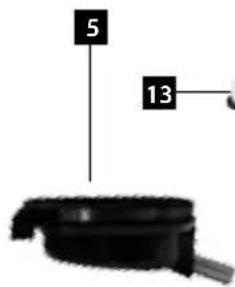
natural_image
Close-up of a black plastic mechanical component with a handle and labeled part '2' (no text or symbols on the object itself)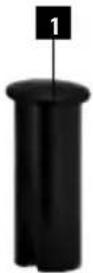
natural_image
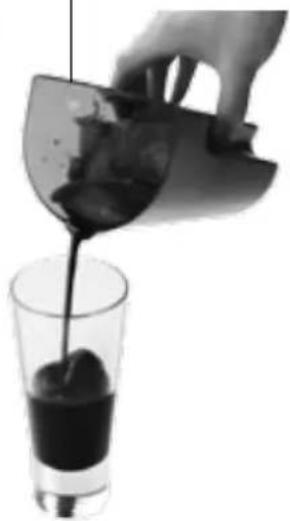
Hand pouring dark liquid into a glass of dark beverage (no text or symbols visible)NOTE
Prior to using a new unit, wipe the surface with a wet cloth and wash the removable accessories in warm water for hygienic reasons.
The unit contains sharp parts. Extra care should be taken while cleaning the unit.
OPERATING INSTRUCTIONS
Note: The unit can be turned on only if the upper cover and locking clip are assembled correctly.
Juice making tips
• Buy only the freshest fruits and vegetables
- Fruits and vegetables contain valuable vitamins and minerals that degrade when exposed to oxygen and light.
Drink the juice immediately after extraction.
If the juice must be stored for several hours, put it in a fridge in crockery or glass kitchenware. You may improve the conservation features by adding lemon juice.
• You can use the pulp for preparation of other food (jam, fruit salad, etc.).
- If the fruit is very watery (melons, etc.), insert it slowly in order to extract as much juice as possible.
- If you use very ripe fruits, there can be very little juice. In such case it is necessary to process the fruit very slowly, so that the juice drains easily, and the rotating sieve does not clog.
• It is usual that when processing apples and bananas no juice is extracted.
- To achieve maximum effectiveness of the unit, clean the rotating sieve after every half kilogram of processed food.
Extraction
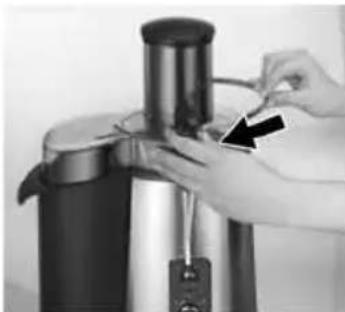
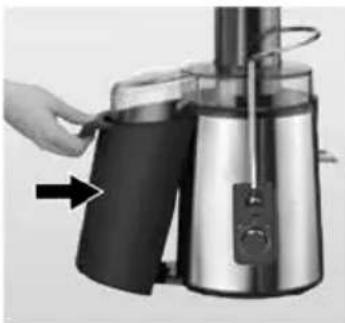
- Fix the pulp bin to the side of the unit (Fig. 1).
- Fix the juice drain cover to the upper part of the body.
- Apply the rotating sieve to the juice drain cover by pressing on the upper edge of the sieve downwards.
-
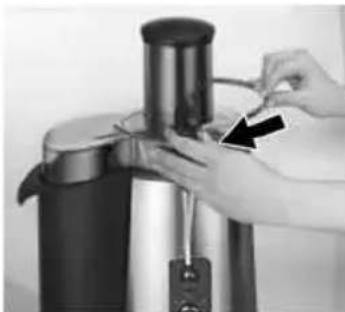
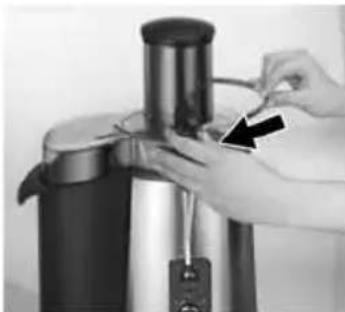
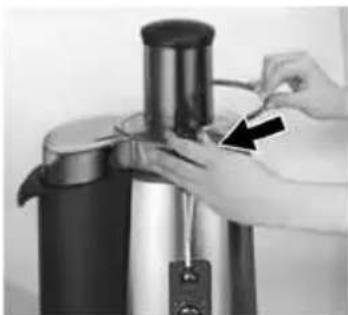
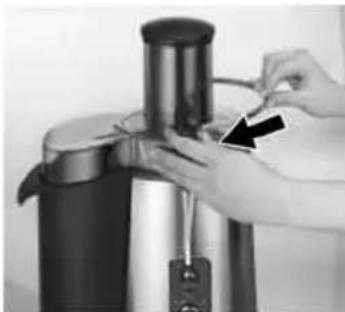
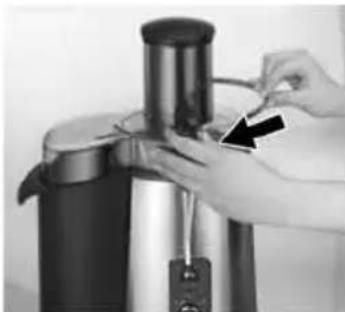
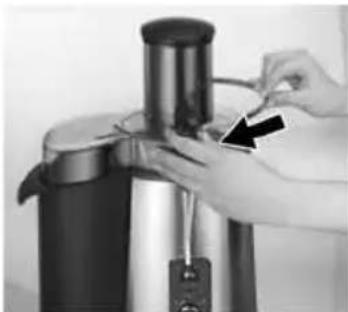
Put on the upper lid, and fix it with the locking clip (Fig. 2).
-
Select the required speed according to the processed food using the speed switch. The higher speed is suitable for food with low juice content (apples, carrots, etc.). The lower speed is suitable for food with high juice content (pears, oranges, peaches, etc.).
-
Insert washed pieces of food in the feeder slowly.
You can feed in whole apples and pears, or you may cut them into pieces. You don't have to peel them or remove the cores. Peel oranges first, feed in only individual grapes. It is difficult to extract juice from bananas, avocados, blackberries, figs, strawberries, etc.
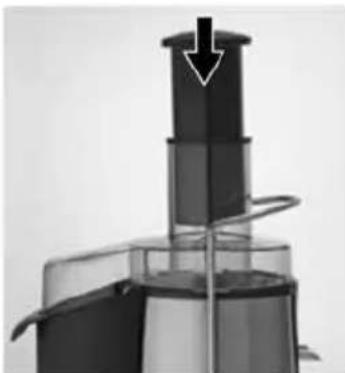
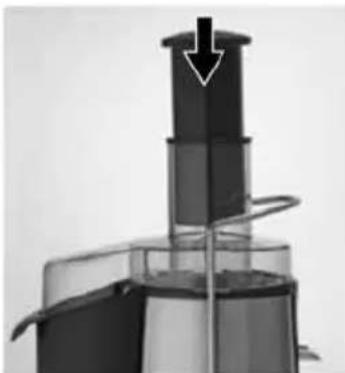
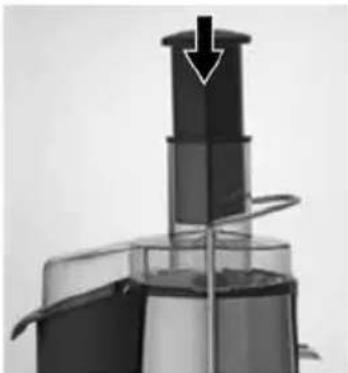
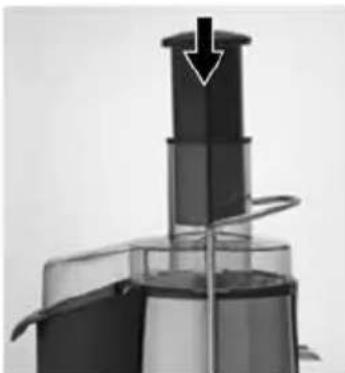
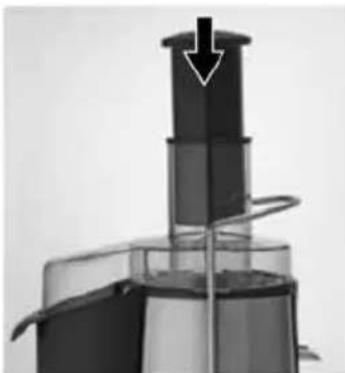
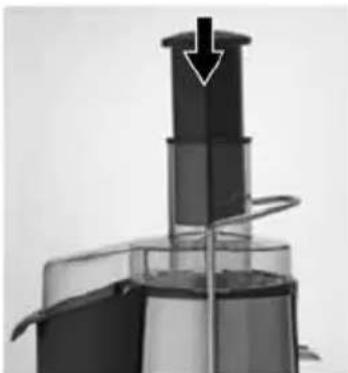
NOTE: Always use the stuffer to push food through the stuffing opening. Never push in food using your fingers, a fork, spoon, knife or any other object (Fig. 3).
-
Continuously check the volume of pulp in the bin, or stuck to the upper lid. If the pulp needs to be removed, turn the unit off and wait until the rotating sieve stops. Close the juice drain upwards. Release the upper lid using the closing lock, clean it, empty the pulp bin and clean the rotating sieve.
-
After use turn off the product and unplug from the mains outlet.
NOTE: Extracted juice is designed for immediate consumption, as it oxidizes very fast in the open air, which can make its taste worse, change its color and, most importantly, decrease its nutritional value. Apple or pear juice turns brown fast; you can slow down this process by adding a few drops of lemon juice.
Juice jug with foam separator
During juicing you cannot avoid formation of a foam, so we have redesigned the juice container and the foam remains in the juice container now.
CLEANING AND MAINTENANCE
Before cleaning the unit, always disconnect the power cord from the wall outlet! The surface of the unit may only be cleaned using a wet cloth. Do not use any detergents or hard objects as they may damage the unit's surface! Wash the removable parts in warm water.
Never clean the unit under running water, do not rinse it, and do not submerge it in water!
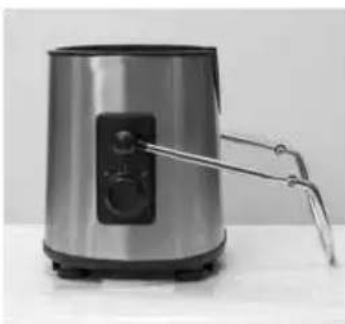
- Open the closing clip.
- Open the upper cover.
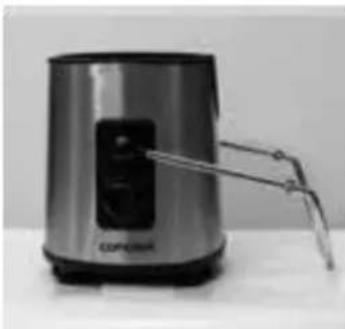
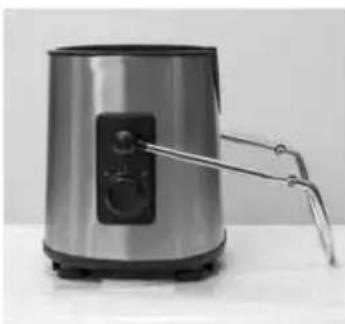
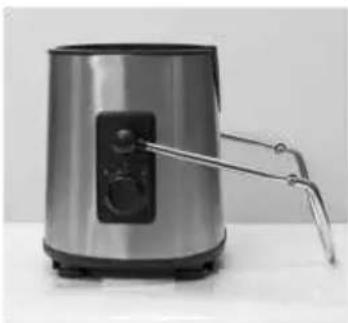
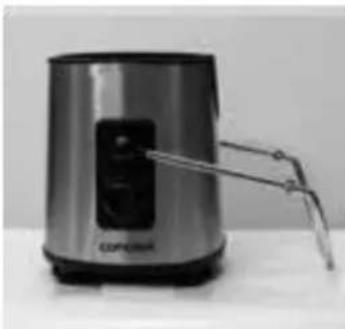
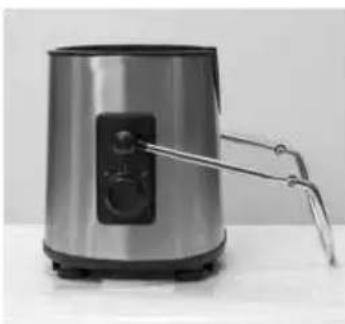
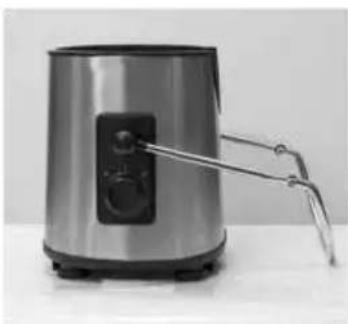
- Release the juice drain cover upwards together with the rotating sieve (Fig. 4).
- Remove and clean the pulp bin.
- After you finish cleaning the removable parts, follow the reverse steps to re-assemble the unit.
natural_image
Close-up of a hand inserting a black plastic brush into a stainless steel juicer (no text or symbols visible)Fig. 1
natural_image
Close-up of hands operating a stainless steel coffee maker with a black arrow pointing to the lid (no visible text or symbols)Fig. 2
natural_image
Close-up of a kitchen brush with a vertical stack and handle, showing a white arrow pointing to the top layer (no text or symbols visible)Fig. 3
natural_image
Exterior view of a stainless steel portable water heater with metal handles (no text or symbols visible)Fig. 4
TROUBLESHOOTING
| Problem Cause | Solution | |
| Motor does not run. | Plug inserted into the mains outlet incorrectly or insufficiently. | Check the plug connection. |
| The mains outlet is not live. | Check for voltage, e.g. by connecting another appliance. | |
| Wrongly assembled upper cover or closing clip. | Check assembly of the unit. | |
| Supply cable is damaged. | Refer the unit to an authorized service center for testing and repair. | |
| Motor is noisy. Wrongly mounted rotating sieve. Check assembly of the unit. | ||
| Motor has stopped operating. | Motor is overloaded, heat fuse reacted. | Disconnect the cable from the socket. Let the unit cool down. Release the upper lid, empty the pulp bin and clean the rotating sieve. Process a smaller amount of food. |
ACCESSORIES
The following accessories can be bought with the unit: Rotatingsieve42691285, Ord. No. Price: See price list
REPAIR & MAINTENANCE
Any extensive maintenance or repair that requires access to the inner parts of the product must be performed by an expert service centre.
ENVIRONMENTAL PROTECTION
• Packaging materials and obsolete appliances should be recycled.
• The transport box may be disposed of as sorted waste.
• Polyethylene bags shall be handed over for recycling.
Appliance recycling at the end of its service life:
natural_image
Symbol of a trash bin crossed with no text or numbers, representing waste sorting or disposal (no text present)A symbol on the product or its packaging indicates that this product should not go into household waste. It must be taken to the collection point of an electric and electronic equipment recycling facility. By making sure this product is disposed of properly, you will help prevent the negative effects on the environment and human health that would otherwise result from inappropriate disposal of this product. You can learn more about recycling this product from your local authorities, a household waste disposal service or in the shop where you bought this product.
DANKE FÜR IHR VERTRAUEN
natural_image
Close-up of a hand inserting a black plastic brush into a stainless steel juicer (no text or symbols visible)Fig. 1
natural_image
Close-up of hands operating a stainless steel coffee maker with a black arrow pointing to the lid (no visible text or symbols)Fig. 2
natural_image
Close-up of a mechanical device with a black arrow pointing to a cylindrical component (no visible text or symbols)Fig. 3
natural_image
Exterior view of a stainless steel water heater with metal handles (no text or symbols visible)Fig. 4
The manufacturer (or importer) is responsible for ensuring the product complies with the requirements of applicable legal regulations as well as those of the relevant technical standards. Moreover, they are responsible for ensuring the product has the properties the manufacturer described in documents related to the goods or those reasonably expected by the customer with regard to the nature of the goods or based on advertising produced by the manufacturer, and further they are responsible for ensuring the product is fit for the purpose proposed by the manufacturer or that a product of the same type is normally used for.
The quality warranty term is 24 months from product takeover by the customer.
The warranty does not apply to wear and tear caused by regular use. The customer shall not be entitled to any warranty claims if, prior to taking the product over, they knew the product contained a defect or if the defect is attributable to the customer.
The warranty specifically does not apply:
- if the product installation, operation and service conditions stipulated in the product operating manual have not been adhered to,
- to malfunctions caused due to mechanical, heat or chemical damage, short circuit, over voltage or incorrect installation,
• to malfunctions caused by an inexpert third-party intervention,
• to malfunctions caused by natural disaster, - to malfunctions caused by insufficient or inappropriate maintenance in violation of the operating manual, including malfunctions caused by water and other sediments,
- to changes in colour of the heating surface or to scratching of the surface caused as a result of using the products in an unusual manner,
• to appearance and functional changes caused by exposure to sunlight, thermal radiation of water and other sediments, - if the service life of certain product parts expires, e.g. for accumulators, bulbs, etc.
The warranty does not apply to any products and services provided along with the product (gifts, promotional articles, etc.).
Filing a complaint
A complaint against a product defect must be fi led as soon as identifi ed, yet no later than before the end of the warranty term.
The customer must file a product complaint with the dealer from which they have purchased the product, or with any authorised service centre, a list of which is included in the product package, or available at www.my-concept.com.
While fi ling a product complaint, the product must be duly cleaned and securely packed so as to prevent any damage during its transport to an authorised service centre, where relevant, unless the product is delivered in person.
The customer must submit proof of having concluded a purchase contract for the product by producing the receipt.
While fi ling their complaint, the customer must indicate the noted defect and identify the preferred complaint application method.
Complaints processing
As long as the noted defect may be removed, the user has the right to have the defect duly removed free of charge on a timely basis.
Where such a procedure is not reasonable with regard to the nature of the defect, the user may require to be supplied a new defect-free product (replacement), or, where the defect applies to a part of the product only, replacement of the part concerned. However, if replacement of the product or any part thereof is not proportionate with regard to the nature of the defect, especially if the defect can be removed without undue delay, the customer has the right to have the defect removed free of charge.
If the noted defect is not removable, or if the customer becomes entitled to replacement of the product or a part thereof, yet the replacement is not possible, for example due to the product having been sold out, the customer has the right to return the product (withdrawal from the contract).
The customer shall have the right to a new product (replacement) or to replacement of a part of the product even if the defect can be removed, provided they cannot properly use the product due to repeated occurrence of the defect or due to a high number of such defects. In such a case, the customer also has the right to return the product (by withdrawing from the contract).
If the product is not returned (the customer does not withdraw from the contract), or if the customer does not apply the right to a new defect-free product (replacement), to replacement of a part thereof or to repair of the product, they may request a reasonable discount. The customer also has a right to a reasonable discount if a new defect-free product cannot be supplied to them, or if a product part cannot be replaced or the product repaired unless the situation is remedied within a reasonable time limit, or if remedying the situation would create major discomfort on the part of the customer.
The seller, authorised service centre or a staff member authorised by them must decide about each complaint immediately or within three business days in complicated cases. This term does not include a reasonable period of time, depending on the type of product concerned, required for the defect to be assessed by an expert. A complaint, including defect removal, must be dealt with without any undue delay, yet no later than within 30 calendar days of the complaint fi ling date, unless the seller and the customer agree on a later deadline.
On returning the product (withdrawing from the contract) the customer must return any accessories and documents supplied along with the product.
The customer does not have the right to keep the defective parts and components of the product replaced as part of a repair of the product.
This shall be without prejudice to any other rights the customer may have in relation to the purchase of the product.
Remark: Complaints against products damaged in transport are governed by the carrier's complaints procedure.
Manufacturer
Jindřich Valenta - ELKO Valenta
Vysokomýtská 1800, 565 01 Choceň
Czech Republic
tel.: +420 465 471 433
fax +420 465 473 304
Company ID No. 13216660
email: servis@my-concept.cz
www: www.my-concept.com
Product data
| Model: | |
| Production number: | |
| Date of purchase: Seal and signature of vendor: | |
concept
Jindřich Valenta – ELKO Valenta Czech Republic
Vysokomýtská 1800, 565 01 Choceň
Tel. +420 465 322 895, Fax: +420 465 473 304
www.my-concept.cz
SK
ELKO Valenta – Slovakia, s.r.o.
Hurbanova 1563/23, 911 01 Trenčín
Tel.: +421 326 583 465, Fax: +421 326 583 466
www.my-concept.sk
PL
Elko Valenta Polska Sp. Z. o. o.


- PODĚKOVÁNÍ
- UPOZORNĚNÍ:
- UPOZORNENIE
- RIEŠENIE ŤAŽKOSTÍ
- UWAGI
- CZYSZCZENIE I KONSERWACJA
- FIGYELMEZTETÉS:
- IMPORTANT SAFETY PRECAUTIONS:
- PRODUCT DESCRIPTION
- NOTE
- OPERATING INSTRUCTIONS
- Juice making tips
- Extraction
- Juice jug with foam separator
- CLEANING AND MAINTENANCE
- Never clean the unit under running water, do not rinse it, and do not submerge it in water!
- TROUBLESHOOTING
- ACCESSORIES
- REPAIR & MAINTENANCE
- ENVIRONMENTAL PROTECTION
- Appliance recycling at the end of its service life:
- DANKE FÜR IHR VERTRAUEN
- Filing a complaint
- Complaints processing
- Manufacturer
- concept
- Jindřich Valenta – ELKO Valenta Czech Republic
- ELKO Valenta – Slovakia, s.r.o.
- Elko Valenta Polska Sp. Z. o. o.
Brand : Concept
Model : LO-7050
Category : Juicer