
MS 004 L - Weather Station ECG - Free user manual and instructions
Find the device manual for free MS 004 L ECG in PDF.


| Product Type | Weather Station with Wireless Outdoor Sensor |
| Brand | ECG |
| Model | MS 004 L |
| Display | Large LCD with soft blue backlight, 60° viewing angle |
| Power Supply (Station) | 3 × AA alkaline batteries (not included) |
| Power Supply (Outdoor Sensor) | 3 × AAA alkaline batteries (not included) |
| Indoor Temperature Range | -10°C to +50°C (14°F to 122°F) |
| Outdoor Temperature Range | -50°C to +70°C (-58°F to 158°F) |
| Indoor Humidity Range | 20% to 95% |
| Outdoor Humidity Range | 20% to 95% |
| Temperature Resolution | 0.1°C / 0.2°F |
| Humidity Resolution | 1% |
| Measurement Interval | Every 30 seconds |
| Pressure Range | 850 hPa to 1050 hPa |
| Radio Time Signal | DCF-77 (automatic reception at 01:00, 02:00, 03:00, 04:00) |
| Wireless Transmission Frequency | 433 MHz |
| Maximum Transmission Range | Approx. 30 meters in open area |
| Number of Supportable Outdoor Sensors | Up to 3 (one included) |
| Alarm Duration | 2 minutes |
| Snooze Duration | 5 minutes |
| Functions | Indoor/outdoor temperature & humidity, max/min records, air pressure & tendency, weather forecast, frost warning, DCF radio clock, dual alarm, snooze, 12/24h format, dual time, pressure history chart |
| Maintenance | Keep dry, avoid extreme temperatures, direct sunlight and corrosive agents; do not open device |
| Disposal | Recycle according to local regulations for electronic equipment |
Frequently Asked Questions - MS 004 L ECG
User questions about MS 004 L ECG
0 question about this device. Answer the ones you know or ask your own.
Ask a new question about this device
Download the instructions for your Weather Station in PDF format for free! Find your manual MS 004 L - ECG and take your electronic device back in hand. On this page are published all the documents necessary for the use of your device. MS 004 L by ECG.
USER MANUAL MS 004 L ECG
natural_image
White rectangular electronic device with a red dot on the top (no visible text or symbols)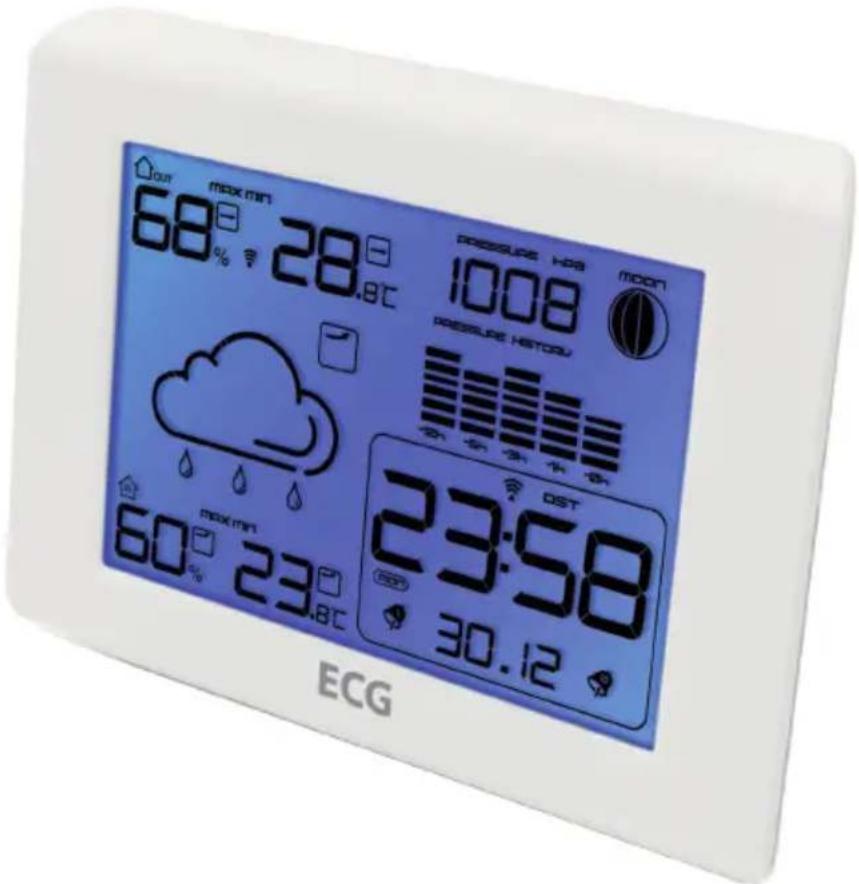
MS 004 L
METEOROLOGICKÁ STANICE S BEZDRÁTOVÝM ČIDLEM
NÁVOD K OBSLUZE
METEOROLOGICKÁ STANICA S BEZDRÔTOVÝM SNÍMAČOM
NÁVOD NA OBSLUHU
STACJA METEOROLOGICZNA Z CZUJNIKIEM BEZPRZEWODOWYM
INSTRUKCJA OBSŁUGI
natural_image
Technical line drawing of a handheld device with a 60-degree angle标注 (no text or symbols beyond the angle marker)Zpředu
RYCHLÉ NASTAVENÍ
Krok 1:
natural_image
Technical diagram showing a mechanical component with an arrow indicating direction, alongside a separate view of a wall-mounted bracket (no text or symbols present)natural_image
Technical diagram showing a mechanical component with an arrow indicating direction, next to a separate view of a wall and a bracket (no text or symbols present)natural_image
Technical diagram showing a mechanical component with an arrow indicating direction, next to a separate view of a wall and a bracket (no text or symbols present)oDBiÓR sYGNAŁU GoDZiNY DCF
natural_image
Technical diagram showing a mechanical component with an arrow indicating direction, alongside a close-up of its side view (no text or symbols present)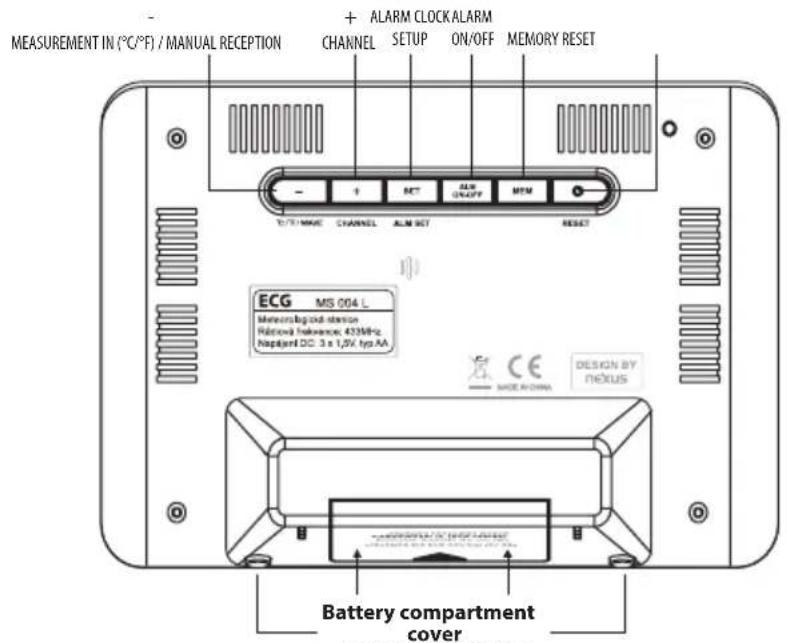
DELAYED ALARM / DISPLAY BRIGHTNESS
OUTDOOR TEMPERATURE AND HUMIDITY SENSOR
FEATUREs oVERVIEW
• Large and easy readable display
- Soft blue backlit
- Outdoor and indoor temperature and humidity measurement
• Temperature maximum and minimum, humidity and air pressure monitoring
- Weather forecast tendency indication
- Outdoor and indoor temperature and humidity tendency indication
• Air pressure measurement (hPa)
• Pressure changes history for last 12 hours
- Dual time
- Alarm clock 1 and 2
• Alarm clock setup for working days and weekends
• Daily and monthly diaries
• Temperature value in C/F degrees
• 12/24 time format
- Alarm clock with snooze function
- 443Mhz wireless signal transmission from outdoor sensors (one sensor in delivery)
• Temperature and humidity data transmission up to 30m
• Outdoor sensor battery discharge indication
- Cable for outdoor sensors (for temperature measurement only)
- Batteries: 3 × AA alkaline for weather forecast station (not in delivery)
3 × AAA alkaline for outdoor sensor (not in delivery)
CoNDiTioNs AFFECTING WiRELEss TRANsMission
This device integrates an exact radio-controlled clock (henceforth DCF). Alike in case of other wireless equipment, reception capability is affected among others by following conditions:
• Distance from signal source
- Terrain unevenness
• High buildings in vicinity
• Railways, high-voltage power lines, etc.
• Highways, airports vicinity, etc.
• Large building sites in vicinity
- Ferro-concrete constructions
- Power consumers
• Computers and TV receivers in vicinity
• Inside means of transport
• Metal constructions and objects
Install the device to a place with optimal transmission conditions, close to windows, out of electronic devices and metal objects.
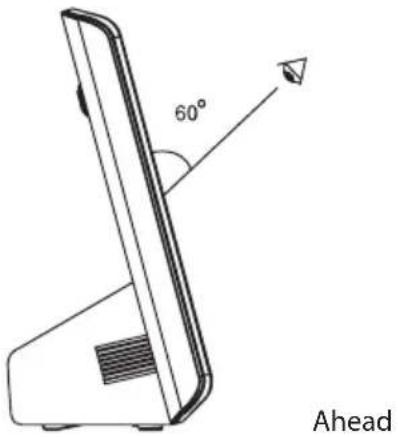
Display watching angle
The LCD display is designed so that it is well readable only from certain angle range. In this case, view angle is approx. 60^ .
QUICK SETUP
Step 1:
By sliding remove the battery compartment cover in the back of the device and insert three AA alkaline batteries. Carefully observe +/- polarity. Put on the battery compartment cover back.
Step 2:
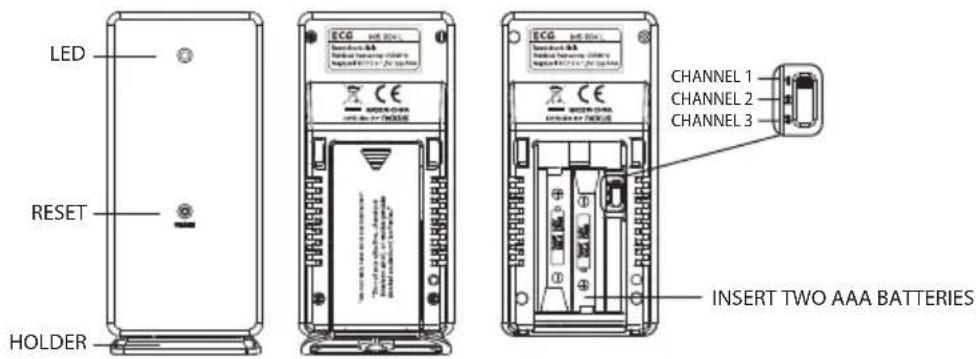
Stand the device and wireless sensor closely. By sliding remove the battery compartment cover in the back of the wireless sensor and insert two alkaline batteries into the battery compartment. Put on the battery compartment cover back.
Check if CH1 (channel 1) is shown above outdoor temperature indicator. If not, select Channel 1 by pressing + / CHANNEL button.
The device receives signal from the wireless sensor within several seconds.
Then you can locate the outdoor temperature sensor on a dry and shady place in outer environment.
ANOTHER OUTDOOR SENSORS CONNECTION TO STATION
-
Press +/CHANNEL button on rear side, CH2 icon is shown above outdoor temperature figures.
-
While 📋 icon begins to flash, hold +/CHANNEL button; the weather forecast station searches other sensors' signals on Channel 2.
-
Open the second sensor's battery compartment cover, slide the switch into the middle position marked 2 and insert two AAA batteries according to +/- signs inside the battery compartment. Put on the battery compartment cover back.
-
Outdoor temperature and humidity are shown on the LCD display together with CH2 icon within several seconds. If no data are shown, press RESET button on the second sensor's front side.
-
To connect the station with the third wireless sensor, repeat these steps by CH3 selection on the station and switching the third sensor's channel selector into position 3.
Notes:
Wireless data transmission range from the sensor is approx. 30m in free area without obstacles. Real transmission distance depends on obstructions in signal path.
Every obstruction (roof, wall, ceiling, big tree, etc.) reduces effective transmission distance by one half.
natural_image
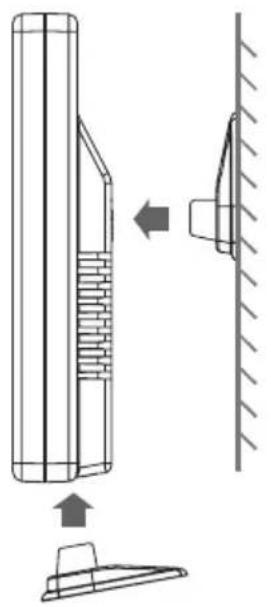
Technical diagram showing a mechanical component with an arrow indicating direction, next to a separate view of a wall and a bracket (no text or symbols present)To install the outdoor sensor on appropriate surface, set the hanger from bellow or from rear in case of hanging on the wall.
DCF siGNAL RECEPTioN AND iNDiCATioN
After turning on, the device begins to receive DCF signal. Iron flashes.
Poor or no DCF signal (only
Power DCF signal reception (
Sufficient reception (
Poor reception (
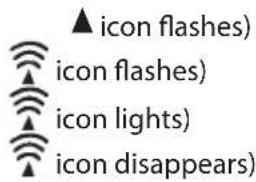
Remark: While time signal is received, no buttons on the device operate excepting snooze and lighting buttons.
DCF TiME siGNAL RECEPTioN
After DCF time code reception, the device automatically sets clock at exact time. The clock attempts to receive DCF signal every night at 01:00, 02:00, 03:00, and 04:00 or possibly further. After DCF signal reception till 03:00, reception is interrupted till 01:00 next day.
To begin manual DCF reception, hold WAVE / - (°C/°F) for 2 seconds. To stop manual DCF reception, hold WAVE / - (°C/°F) for 2 seconds.
EN
DiARY, sECoND TiME ZoNE, 12/24 TiME FoRMAT sETUP
- Hold sET/ALM sET button for 2 seconds; year figure format changes into 2011 and Yr indicator flashes. To set year, press +/- button.
- By next pressing sET/ALM sET button, month figures begin to flash. To set month, press +/- button.
- After next pressing sET/ALM sET button, date figures flash. To set date, press +/- button. By next pressing sET button, time figures change into flashing 00. To select time zone, press +/- button:
$$ " 0 0" = G M T + 1 \text { hour (i.e. Czech Republic) } $$
$$ " 0 1" = G M T + 2 \text { hours (i.e. Finland) } $$
$$ ^ {\prime \prime} - 0 1 ^ {\prime \prime} = G M T 0 0 (i. e. G r e a t B r i t a i n) $$
- By next pressing sET/ALM sET button, time figures change into 24Hr and flash. To select 12/24 time format, press +/- button. While 12Hr option is selected, AM/PM indicator is shown.
-
After next pressing sET/ALM sET button, hour figures flash. To set hours, press +/- button.
-
After next pressing sET / ALM sET button, minute figures flash. To set minutes, press +/-
- To return to operating mode, press sET/ALM sET button; if you do not press any button within 15 seconds, the device returns to operating mode automatically.
ALARM CLoCK sETUP
- By pressing sET/ALM sET button, time figures change into alarm clock setup 6:00 and A1. By holding sET/ALM sET button for 2 seconds, alarm clock figures start to flash. To set desired alarm time, press +/- button.
- After next pressing sET/ALM sET button, alarm minute figures flash. To set desired alarm time, press +/- button.
- By next pressing sET/ALM sET button, day in week icon flashes in range from MoN to sUN. By help of +/- select one of values:
| MON, TUE, WED, THU, FRI, SAT, SUN Daily alarm for all days in week. |
| MON, TUE, WED, THU, FRI Daily alarm for working days. |
| SAT, SUN Daily alarm for free days. |
- The device returns to operating mode; if you do not press any button within 15 minutes, the device returns to normal mode automatically.
- To set alarm 2 clock, hold sET / ALM sET button till time figures change into alarm clock figures 6:00 and A2 indicator appears. Carry out setup as in case of the alarm clock 1.
ALARM CLoCK TURN oN AND oFF
To turn on/off alarm clock 1 or 2, press ALM on-off button.
While alarm clock 1 is turned on, ⚙1 indicator is shown. While alarm clock 2 is turned on, ⚙2 indicator is shown.
sNooZE FUNCTioN UsE
Once the set alarm time is reached, the device generates alarm sound. Appropriate sign ⚠1 or ⚠2 flashes.
1) To temporarily stop alarm sound, press sNooZE/LiGHT button; 📄 or 🌐2 indicator still flashes. Alarm clock begins to sound after 5 minutes.
2) To completely stop alarm sound, press ALM on/off button; sound ends and 1 or 2 indicator stops to flash; alarm clock begins to sound at the same time next day.
Alarm duration: 2 minutes

To UsE BACKLiGHT
By pressing sNooZE / LiGHT button, LCD display lights for duration of approx. 5 seconds, then lighting turns off.
TEMPERATURE DisPLAY iN °C oR °F
To view temperature in °C or °F, press WAVE / - (°C/°F) button.
WEATHER FORECAST, AIR PRESSURE TENDENCY INDICATOR ICONS
The device integrates the air pressure sensor monitoring continual pressure changes. The weather forecast station needs approx. 24 hours for collecting sufficiency of data for forecast calculation for next 12-24 hours.
WEATHER FORECAST ICON
It shows five different weather icons.
| CLEAR WEATHER |  |
| PARTLY CLOUDY(PARTLY CLEAR WEATHER) |  |
| OVERCAST |  |
| RAINY | 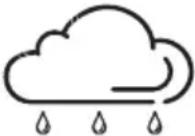 |
| STORMS | 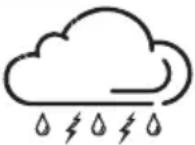 |
| FROST WARNING |  Frost icon appears at outdoor temperature decrease bellow +3°C. Frost icon appears at outdoor temperature decrease bellow +3°C. |
AIR PRESSURE TENDENCY INDICATOR
If arrow appears, air pressure increases and weather improvement may be awaited.
If arrow appears, air pressure decreases and weather deterioration may be awaited.
If appears, air pressure is stable.
AIR PRESSURE HISTORY CHART
- The chart shows air pressure changes history during recent 12 hours in 6 steps: 0h, -1h, -2h, -3h, -6h, and -12h.
- Value in "0h" indicator represents the pressure record within last hour.
- Columns represent press in hPa at appointed time.
- If columns increase it means that, based on increasing pressure, weather should improve.
- If columns decrease it means that weather deterioration is awaited since actual time "0h".
Remarks: Relocation of the station from one floor to other naturally affects exactness of air pressure measurement, therefore let the device in the same altitude. After relocation, data stabilization takes another 12-24 hours.
The station provides weather forecast for next 12-24 hours. Data need not comport with current weather conditions.
TEMPERATURE AND HUMiDiTY TENDENCY iNDiCAToRs
It is shown if last temperature measurement is higher by 1^ C or humidity measurement is higher by 5% since last recording.
It is shown if last temperature measurement is lower by 1^ C or humidity measurement is lower by 5% since last recording.
It is shown if measurement during last hour does not differ by more than +/- 1°C for temperature and by more than 5% for humidity.
iNDooR AND oUTDooR TEMPERATURE, HUMiDiTY AND PREssURE MAXiMUM AND MiNiMUM DisPLAY
To show maximum indoor and outdoor temperature, humidity, and air pressure, press MEM button; MAX icon is shown. To show minimum indoor and outdoor temperature, humidity, and air pressure, press MiN button.
To reset records and extreme values recording recover, hold MEM button while displaying maximum and minimum values.
oUTER TEMPERATURE AND HUMIDITY ARE NoT sHoWN
If outdoor temperature and humidity show “--”, wireless connection with sensors was lost. To search outdoor sensor signal, hold +/CHANNEL button on the device. If outdoor temperature and humidity are not still shown (it may occur during extremely cold weather) try to relocate the sensor on a place where you can achieve undisturbed data transmission.
WEATHER FoRECAst sTATioN MAINTENANCE
- Do not expose the device to extreme temperatures, solar radiation, or liquids.
- Avoid contact with agents causing rusting.
- Do not expose the device to mechanic powers, dust, or high humidity.
- Do not open the device or handle with its parts.
- Do not connect any other power supply working with incorrect characteristics.
TROUBLE SHOOTING
If the weather forecast station shows improper values or characters it may be interfered by electrostatic discharge or other activity of another device. Press RESET button by help of some sharp tool. The device resets itself to default values and you have to set time, diary, and alarms again.
| Problem Solution | |
| LCD display is empty. 1. Press RESET button on the device.2. Replace batteries in the device. | |
| Outdoor temperature and humidity are not shown. | Hold MEM button on the weather forecast station.Hold MEM button and then press RESET button on the outdoor sensor.Check if the correct channel is selected on the station (default value is “CH1” for Channel 1).Check if discharged battery icon is not shown on left of the outdoor temperature figures. If yes replace batteries in the outdoor sensor for new alkaline ones.Check if no jamming electronic apparatus (computer monitor, TV, headphones, speakers) stands in signal path. Signal is transmitted by the shortest path and a jamming source close to this path may cause problems. |
| Temperature, humidity and pressure are incorrect. | Press RESET button on the device.Check if the outdoor temperature sensor is protected from direct sunshine or is not located close to sources of hot or cold. |
TECHNICAL DATA
Temperature range
Indoor -10^ to +50^ (+14°F to +122°F) (out of this range HH.H / LL.L is shown)
Outdoor -50°C to +70°C (-58°F to +158°F) (out of this range HH.H / LL.L is shown)
Humidity range
Indoor 20%-95%
Outdoor 20%-95%
Temperature resolution 0.2°F / 0.1°C
Humidity resolution 1%
Temperature and humidity measurement every 30 seconds
Pressure range 850hPa to 1050hPa
Alarm duration
2 minutes
Snooze duration
5 minutes
USE AND DISPOSAL OF WASTE
Wrapping paper and corrugated paperboard – deliver to scrapyard. Packing foil, PE bags, plastic elements – throw into plastic recycling containers.
DISPOSAL OF PRODUCTS AT THE END OF LIFETIME
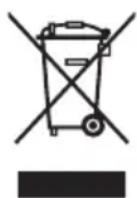
Disposal of electric and electronic equipment (valid in EU member countries and other European countries with an implemented recycling system)
The represented symbol on the product or package means the product shall not be treated as domestic waste. Hand over the product to the specified location for recycling electric and electronic equipment. Prevent negative impacts on human health and the environment by properly recycling your product.
Recycling contributes to preserving natural resources. For more information on the recycling of this product, refer to your local authority, domestic waste processing organization or store, where you purchased the product.
08/05
www.ecg.cz



- MS 004 L
- METEOROLOGICKÁ STANICE S BEZDRÁTOVÝM ČIDLEM
- METEOROLOGICKÁ STANICA S BEZDRÔTOVÝM SNÍMAČOM
- STACJA METEOROLOGICZNA Z CZUJNIKIEM BEZPRZEWODOWYM
- RYCHLÉ NASTAVENÍ
- Krok 1:
- oDBiÓR sYGNAŁU GoDZiNY DCF
- FEATUREs oVERVIEW
- CoNDiTioNs AFFECTING WiRELEss TRANsMission
- Display watching angle
- QUICK SETUP
- Step 1:
- Step 2:
- ANOTHER OUTDOOR SENSORS CONNECTION TO STATION
- Notes:
- DCF siGNAL RECEPTioN AND iNDiCATioN
- DCF TiME siGNAL RECEPTioN
- DiARY, sECoND TiME ZoNE, 12/24 TiME FoRMAT sETUP
- ALARM CLoCK sETUP
- ALARM CLoCK TURN oN AND oFF
- sNooZE FUNCTioN UsE
- To UsE BACKLiGHT
- TEMPERATURE DisPLAY iN °C oR °F
- WEATHER FORECAST, AIR PRESSURE TENDENCY INDICATOR ICONS
- WEATHER FORECAST ICON
- AIR PRESSURE TENDENCY INDICATOR
- AIR PRESSURE HISTORY CHART
- TEMPERATURE AND HUMiDiTY TENDENCY iNDiCAToRs
- iNDooR AND oUTDooR TEMPERATURE, HUMiDiTY AND PREssURE MAXiMUM AND MiNiMUM DisPLAY
- oUTER TEMPERATURE AND HUMIDITY ARE NoT sHoWN
- WEATHER FoRECAst sTATioN MAINTENANCE
- TROUBLE SHOOTING
- TECHNICAL DATA
- Temperature range
- Humidity range
- USE AND DISPOSAL OF WASTE
- DISPOSAL OF PRODUCTS AT THE END OF LIFETIME
- www.ecg.cz
Brand : ECG
Model : MS 004 L
Category : Weather Station