
MS 002 - Weather Station ECG - Free user manual and instructions
Find the device manual for free MS 002 ECG in PDF.


| Product Type | Wireless Weather Forecast Station with Outdoor Sensor |
| Brand / Model | ECG MS 002 |
| Power Supply (Main Unit) | 2 x AA batteries (not included) |
| Power Supply (Wireless Sensor) | 2 x AAA batteries per sensor (not included) |
| Indoor Temperature Range | -10°C to +50°C (14.2°F to 122°F) |
| Outdoor Temperature Range | -50°C to 70°C (-58°F to 158°F) |
| Indoor Humidity Range | 20% – 95% (out of range displays 20% or 95%) |
| Temperature Resolution | 0.1°C |
| Weather Forecast Icons | Clear, Partly Cloudy, Overcast, Rainy (6-12 hour forecast) |
| Comfort Level Indication | DRY (<40% RH), COMFORT (40-70% RH), WET (>70% RH) when indoor temp 20-28°C |
| Wireless Transmission Frequency | 433 MHz |
| Maximum Transmission Distance | Up to 30 m (open space, no obstructions) |
| Number of Supportable Outdoor Sensors | Up to 3 (including included sensor) |
| DCF Radio Time Sync | Automatic daily at 01:00, 02:00, 03:00, 04:00, 05:00; manual via WAVE/▼ button |
| Alarm Function | Daily alarm with snooze (adjustable 1-20 min, default 5 min), duration 2 min |
| Display | LCD with time, date, indoor/outdoor temperature, humidity, weather icons, comfort icons |
| Time Format | 12-hour (AM/PM) or 24-hour selectable |
| Temperature Unit | °C or °F selectable |
| Timezone Offset | Adjustable from GMT -1 to GMT +2 (e.g., +1 for CET) |
| Cleaning & Maintenance | Wipe with dry cloth; avoid exposure to extreme temperatures, solar radiation, liquids, rusting agents, dust, high humidity, mechanical shock |
| Safety Precautions | Do not open device or handle internal parts; keep away from children; follow battery polarity |
| Regulatory Compliance | EU directives on electromagnetic compatibility and electrical safety |
| Disposal | Electronic waste – do not dispose with household waste; recycle at designated collection points |
Frequently Asked Questions - MS 002 ECG
User questions about MS 002 ECG
0 question about this device. Answer the ones you know or ask your own.
Ask a new question about this device
Download the instructions for your Weather Station in PDF format for free! Find your manual MS 002 - ECG and take your electronic device back in hand. On this page are published all the documents necessary for the use of your device. MS 002 by ECG.
USER MANUAL MS 002 ECG
natural_image
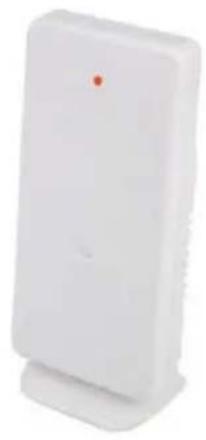
White rectangular electronic device with a red dot on the top (no visible text or symbols)MS 002
METEOROLOGICKÁ STANICE S BEZDRÁTOVÝM ČIDLEM
NÁVOD K OBSLUZE
METEOROLOGICKÁ STANICA S BEZDRÔTOVÝM SNÍMAČOM
NÁVOD NA OBSLUHU
STACJA METEOROLOGICZNA Z CZUJNIKIEM BEZPRZEWODOWYM
INSTRUKCJA OBSŁUGI
METEOROLOGISCHE STATION MIT DRAHTLOSEM SENSOR
BEDIENUNGSANLEITUNG
WEATHER FORECAST STATION WITH WIRELESS SENSOR
INSTRUCTION MANUAL
METEOROLOŠKA STANICA S BEŽIČNIM SENZOROM
UPUTE ZA UPORABU
METEOROLOGISKÄ STACIJA AR BEZVADU SENSORU
ROKASGRÃMATA
ORŲ PROGNOZĖS STOTELĖ SU BELAIDŽIU JUTIKLIU
INSTRUKCIJŲ VADOVAS
- Před uvedením výrobku do provozu si důkladně pročtěte tento návod a bezpečnostní pokyny, které jsou v tomto návodu obsaženy. Návod musí být vždy přiložen k přístroji.
- Pred uvedením výrobku do prevádzky si dókladne prečítajte tento návod a bezpečnostné pokyny, ktoré sú v tomto návode obsiahnuté. Návod musí být vždy priložený k prístroju.
- Przed pierwszym użyciem urządzenia prosimy o uważne zapoznanie się z instrukcjami dotyczącymi bezpieczeństwa i użytkowania. Instrukcja obsługi musi być zawsze dołączona.
- Bitte lesen Sie vor der Inbetriebnahme des Produktes diese Anleitung und die darín enthaltenen Sicherheitshinweise aufmerksam durch. Die Bedienungsanleitung muss dem Gerät immer beigelegt sein.
- Always read the safety&use instructions carefully before using your appliance for the first time. The user's manual must be always included.
- Uvijek pročitajte sigurnosne upute i upute za uporabu prije prvog korištenja vašeg uređaja. Upute moraju uvijek biti priložene.
- Pirms ieríces pirmás lietošanas reizes vienměr růpígi izlasiet drošibas un lietošanas norádíjumus. Rokasgrámata vienměr jąpievieno ierícei.
- Prieš naudodamiesi prietaisu pirmajj kartą, visuomet atidžiai perskaitykite saugos ir naudojimo instrukcijas. Kartu su gaminiu visada privalo būti jo naudotojo vadovas.
METEOROLOGICKÁ STANICE S BEZDRÁTOVÝM ČIDLEM
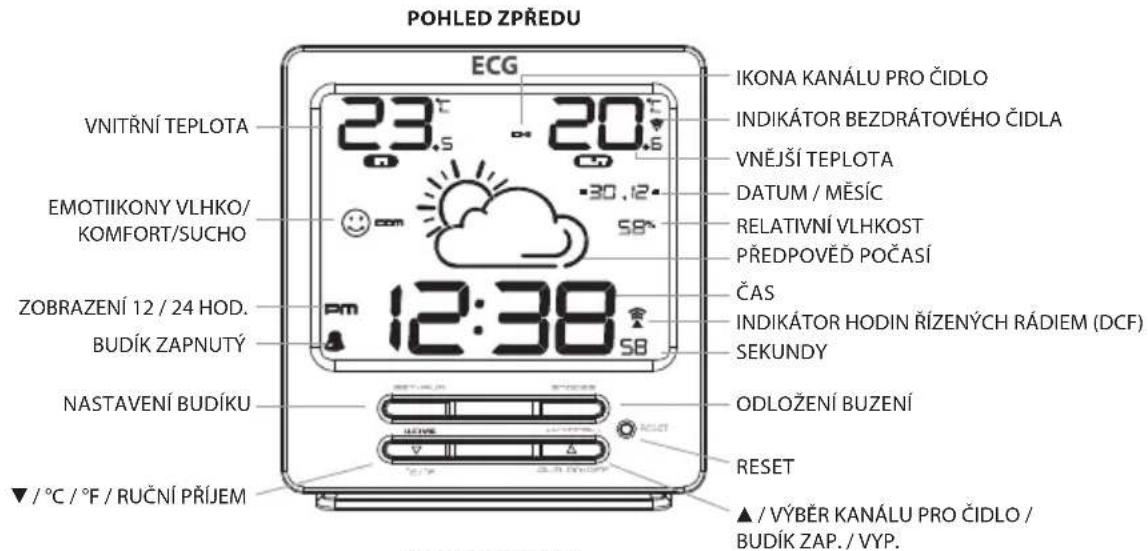
POPIS
![POHLED ZEZADU VLOŽTE 2 BATERIE AA ECG MS 002 Mewornágiček částnice Rádlové frecceros 433K Hz Napšení DC: 2 x 1.5V, 9 x AA DRŽÁK "Do not rečenere and old batteries" "Do not rečené ošťa, shredanet [sovben 21k], or ciechka ginszne (zeřed održním) batteries" Please help in preservation of the environment and return used batteries to an authorized shape DESIGN BY NČÍKUS KRYT BATERIÍ BEZDRÁTOVÉ ČIDLO LED RESET DRŽÁK ECG MD.OCY (W.V. 2016) EDC 2.1x 1.0K CE ECA VLOŽTE 2 BATERIE AAA ECG EDC 2.1x 1.0K CE VLOŽTE 2 BATERIE AAA KANÁL 1 KANÁL 2 KANÁL 3](/content/2026/05/759580/images/ada90dab2202e77a61f678598cb56ded84dda394b68935f891b70cc5538c98a0.jpg)
RYCHLÉ NASTAVENÍ

RÝCHLE NASTAVENIE
QUICK SETUP
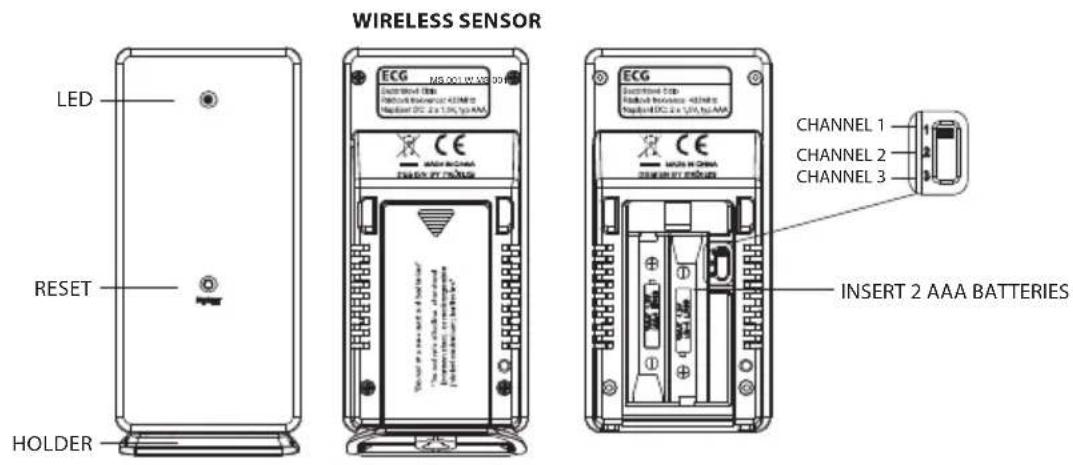
Step 1: By sliding remove the battery compartment cover in the back of the device and insert two AA batteries. Carefully observe +/- polarity. Put on the battery compartment cover back. Now the device is ready to operate.
Step 2: The device begins to search wireless outdoor temperature sensor's signal within first 3 minutes before DCF signal searching. If the device did not find any DCF signal in day, set the clock manually.
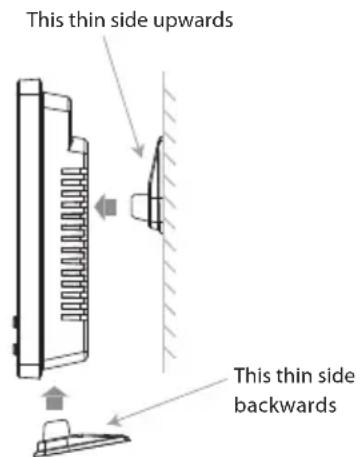
DEVICE LOCATING OR HANGING
To install the device on a table, set the holder on the device's back; to install it on a wall, set the holder on the device's rear. The longer and thinner holder's side should be set on its rear or upper face.
Humidity level can significantly change according to the device's location. Therefore install it in such a way as to work under appropriate conditions.

DCF SIGNAL RECEPTION AND INDICATION
After turn on the device begins to receive DCF signal. 📋 icon flashes.
DCF signal reception ( icon fl ashes)
Suffi cient reception ( icon lights)
Poor reception ( icon disappears)
If the clock does not receive any DCF signal it begins to reach it later.
If DCF signal failure occurs the device selects the same frequency during next reception.
Automatic and manual reception
The clock begins to receive a signal every day at 01:00, 02:00, and 03:00. If no DCF time signal is received at 03:00 reception is run also at 04:00. If this attempt fails new reception is run at 05:00. If no signal is received automatic information reception begins at 01:00 next day again.
Manual reception: By holding WAVE/▼ button, manual reception is run. To stop DCF signal reception, hold WAVE/▼ button for 2 seconds.
While receiving RCC SET, ALM SET, UP, DOWN, ALM ON-OFF buttons are not available and no temperature and humidity measurement is active. Temperature and humidity values settle down and stay precise after approx. 30 minutes since turning on.
SET UP DIARY, 12/24 H TIME INDICATION
- Hold SET/ALM SET button for 2 seconds, time figures change into "2008 YR" and flash. To set year, press ▲/▼ button.
- Then press SET/ALM SET button again; month figures flash. To set month, press ▲/▼ button.
-
After next pressing SET/ALM SET button, date figures flash. To set day, press ▲/▼ button.
-
To change clock format to "24 Hr", press SET/ALM SET button; to switch between "12 Hr" and "24 Hr" time format, press ▲/▼ button. After "12 Hr" selection, AM/PM icon is shown.
- After next pressing SET/ALM SET button, time figure "00" flashes on clock; to select time zone, press ▲/▼ button:
$$ " 0 0" = \text { GMT } + 1 \text { hour (i.e. Czech Republic) } $$
$$ " 0 1" = G M T + 2 \text { hours (i.e. Finland) } $$
$$ ^ {\prime \prime} - 0 1 ^ {\prime \prime} = G M T 0 0 (i. e. G r e a t B r i t a i n) $$
- After next pressing SET/ALM SET button, time figures are shown and hours figures flash. To set hour, press ▲/▼ button.
- After next pressing SET/ALM SET button, hour figures flash. To set minutes, press ▲/▼ button.
- To return to normal mode, press SET/ALM SET button; if you do not press any button within 8 seconds, the device returns to normal mode automatically.
ALARM CLOCK SETUP
By pressing SET/ALM SET button, time figures on alarm clock change into "7:00 AL". By holding SET/ALM SET button for 2 second, hour figures start to flash. To set desires alarm hour, press ▲/▼ button.
After next pressing SET/ALM SET button, minute figures flash. To set desires alarm minutes, press ▲/▼ button.
After next pressing SET/ALM SET button, minute figures change into flashing "05". To set snooze time between 1 and 20 minutes, press ▲/▼ button.
To return to operating mode, press SET/ALM SET button; if you do not press any button within 8 seconds, the device returns to operating mode automatically.
ALARM CLOCK TURN ON AND OFF
To view alarm clock setup, press SET/ALM SET button. To turn on/off daily alarm hours, press ▲ button. While alarm is turned on, 🔊 icon is shown between hour and minute figures.
SNOOZE FUNCTION USE
Once the set alarm time is reached, the device generates alarm sound. 🔊 icon flashes.
1) To turn off alarm temporarily, press SNOOZE button; icon ⚠ still flashes. Alarm clock begins to sound after 5 minutes.
2) To stop alarm sound, press ▲/CHANNEL (ALM On-Off) button; "bell" icon stops to flash and alarm clock will sound at the same time next day.
Alarm duration: 2 minutes
TEMPERATURE DISPLAY IN °C OR °F
To show temperature in C or F, press ▼ (°C/°F) button.
WET / COMFORT / DRY ICON
The weather forecast station shows comfort conditions only under following temperature and humidity combinations.
If indoor temperature ranges between 20^ C and 28^ C:
 (DRY) (DRY) | RELATIVE HUMIDITY BELOW 40% |
 (COMFORT) (COMFORT) | RELATIVE HUMIDITY BETWEEN 40%-70% |
 (WET) (WET) | RELATIVE HUMIDITY OVER 70% |
WEATHER FORECAST STATION USE
The device shows four weather types.
 | CLEAR WEATHER |
 | PARTLY CLOUDY |
 | OVERCAST |
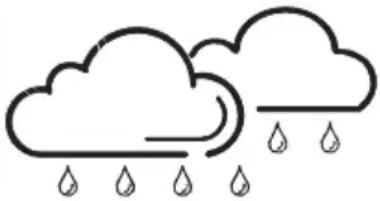 | RAINY |
Remarks: Install the weather forecast station at locations with fresh air access, i.e. at open window. Installing the device within closed space aff ects data accuracy.
After the weather forecast station is turned on, data settle down after approx. 24 hours. Displayed weather icons provide forecast for next 6-12 hours. Data need not comport with current weather conditions.
MULTIPLE OUTDOOR WIRELESS SENSORS CONNECTION
The device is equipped with the outdoor temperature sensor. You can buy the second and third sensor that work with the weather forecast station concurrently.
-
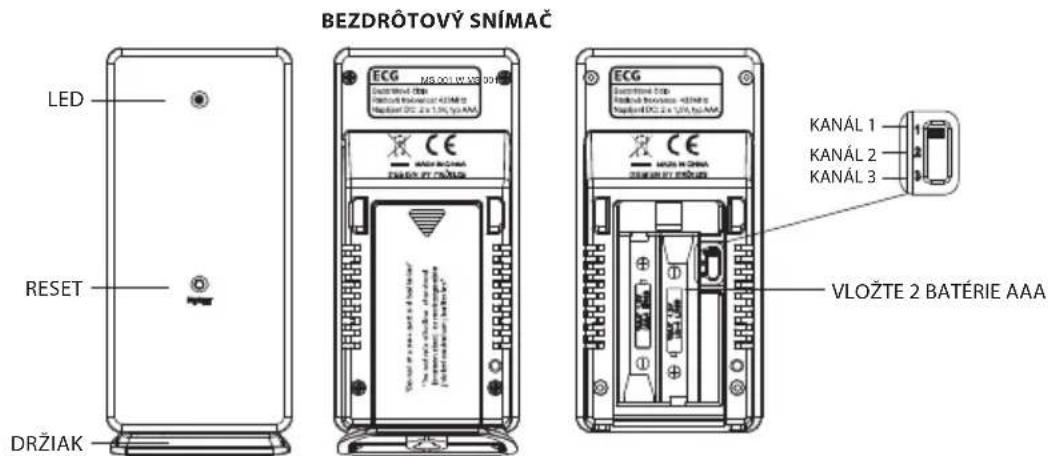
To display "CH2" indicator and "--" value on lower LCD line, press ▲/CHANNEL (ALM On-Off) button. Then hold +/CHANNEL/ALM On-Off button for 2 seconds. Insert 2 AAA batteries into the second outdoor temperature sensor. Actual temperature of the second sensor is shown on the LCD lower line.
-
In case of the third temperature sensor "CH3" connection, carry out the same procedure.
TROUBLE SHOOTING
- If the weather forecast station shows improper values or characters it may be interfered by electrostatic discharge or other activity of another device. Press RESET button in the device's back. The device resets itself to default values and time and diary must be set again.
- Outdoor temperature is shown as "--".
1) To show correct channel, press ▲/CHANNEL (ALM On-Off) button again, "CH1" is default channel.
2) If outdoor temperature shows "CH1", hold ▲/CHANNEL (ALM ON-OFF) button for 2 seconds. Outdoor temperature should be shown within 1 minute.
3) If previous step failed, repeat step 2). Take the outdoor temperature sensor and press its RESET button.
Remark: If discharged battery icon is shown at left lower LCD corner, a battery in the sensor is discharged. Replace it by a new one in the wireless sensor.
GB
- Do not expose the device to extreme temperatures, solar radiation, or liquids.
- Avoid contact with agents causing rusting.
- Do not expose the device to mechanic powers, dust, or high humidity.
- Do not open the device or handle with its parts.
TECHNICAL DATA
Indoor temperature range: -10^ to +50^ ( +14.2^ to +122^ )
Outdoor temperature range: -50°C to 70°C (-58°F to +158°F)
Out of range display Temperature: HH.H / LL.L
Outdoor temperature record period every minute
Indoor temperature range (operates in temperature ranging from 0^ C to +45^ C)
20%-95% (out of this range, values 20% / 95% are shown)
Temperature resolution 0.1°C
Alarm duration 2 minutes
Transmission Frequency 433MHz
Transmission distance up to 30m (open space without obstructions)
USE AND DISPOSAL OF WASTE
Wrapping paper and corrugated paperboard – deliver to scrapyard. Packing foil, PE bags, plastic elements – throw into plastic recycling containers.
DISPOSAL OF PRODUCTS AT THE END OF LIFETIME
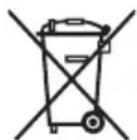
Disposal of electric and electronic equipment (valid in EU member countries and other European countries with an implemented recycling system)
The represented symbol on the product or package means the product shall not be treated as domestic waste. Hand over the product to the specified location for recycling electric and electronic equipment. Prevent negative impacts on human health and the environment by properly recycling your product.
Recycling contributes to preserving natural resources. For more information on the recycling of this product, refer to your local authority, domestic waste processing organization or store, where you purchased the product.
This product complies with EU directive requirements on electromagnetic compatibility and electrical safety.

08/05

The instruction manual is available at website www.ecg.cz.
Changes in text and technical parameters reserved.
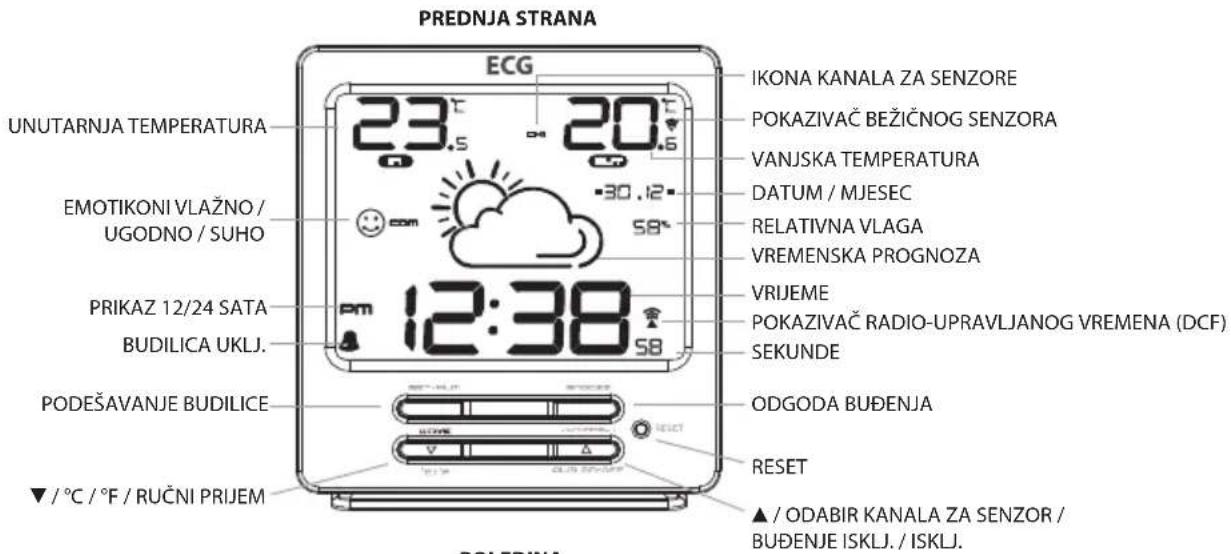
METEOROLOŠKA STANICA S BEŽIČNIM SENZOROM
OPIS
HR
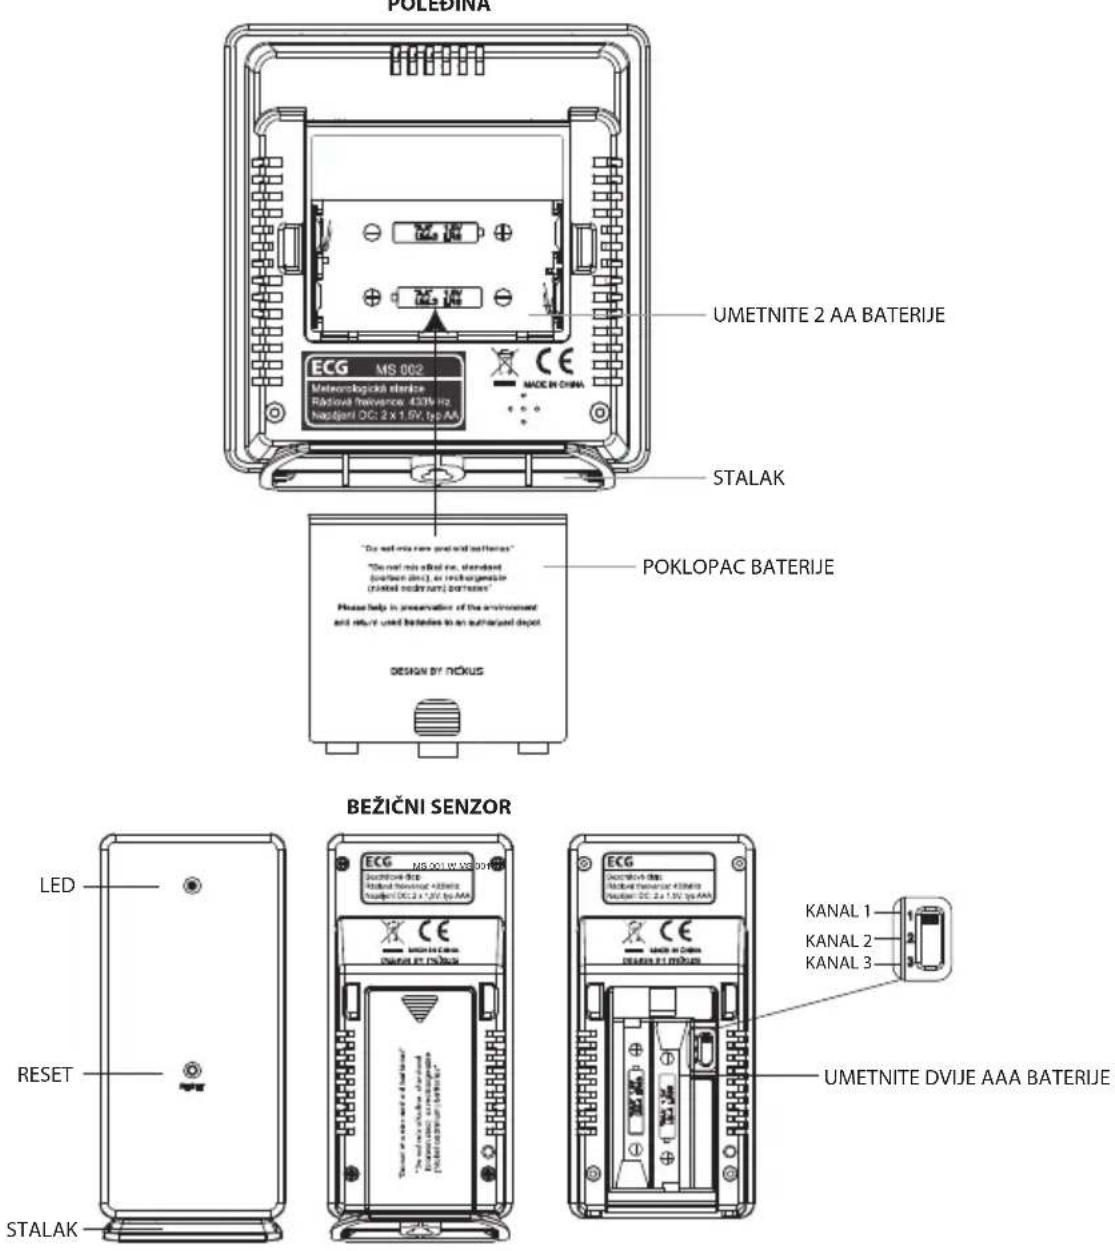
BRZO PODEŠAVANJE
Korak 1: Pomicanjem u stranu otvorite klizni poklopac pretinca za baterije na stražnjoj strani uređaja i umetnite dvije baterije veličine AA vodeći računa o tome da polaritet bude ispravan. Vratite poklopac pretinca za baterije. Uređaj je spreman za uporabu.
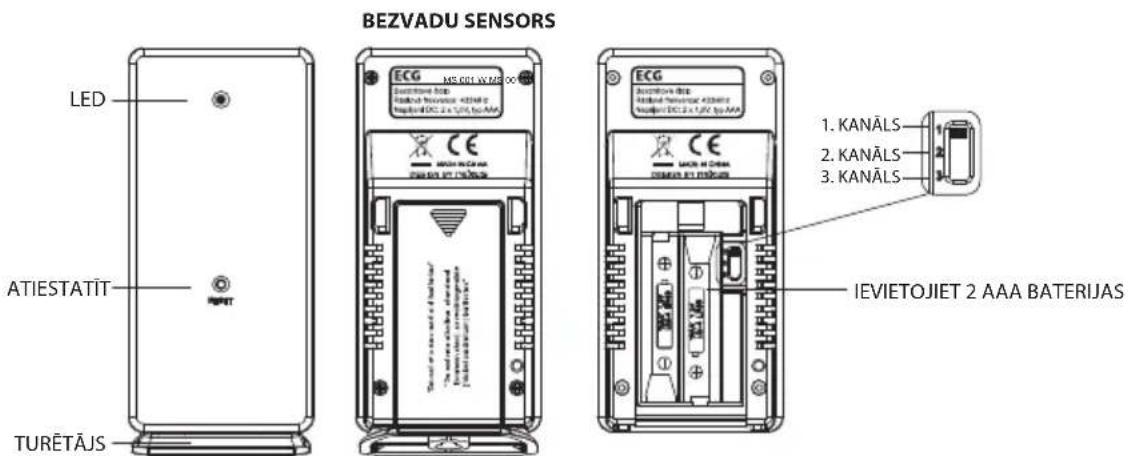
ĀTRĀ IESTATĪŠANA
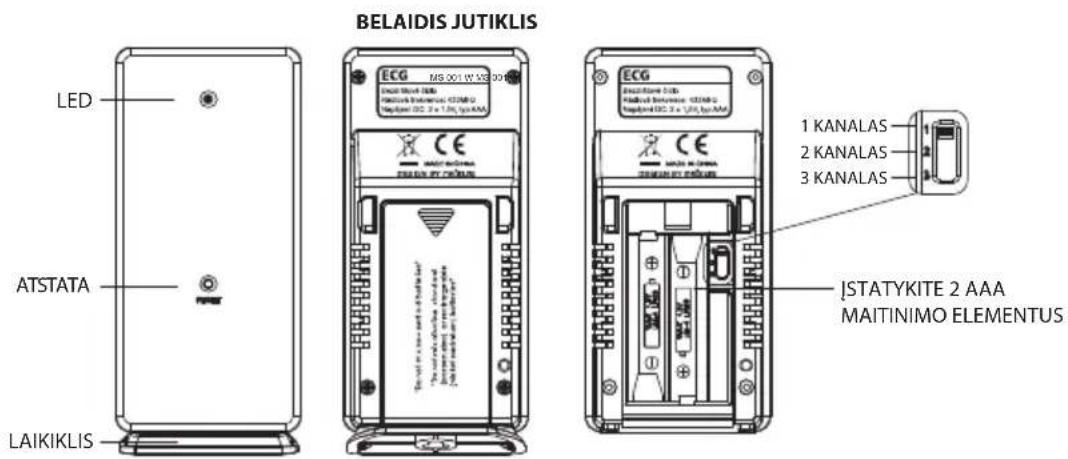
SPARČIOJI SĄRANKA
PEČAT I POTPIS PRODAVATELJA
www.ecg.cz
250 69 Klíčany, Czech Rep. el. paštas: ECG@kbexpert.cz
■ Dovozce neručí za tiskové chyby obsažené v návodu k použití výrobku. ■ Dovozca neručí za tlačové chyby obsiahnuté v návode na použitie výrobku. ■ Importer nie ponosi odpowiedzialności za błędy drukarskie w instrukcji obsługi do produktu. ■ Der Importeur haftet nicht für Druckfehler in der Bedienungsanleitung des Produkts. ■ The importer takes no responsibility for printing errors contained in the product's user's manual. ■ Uvoznik ne snosi odgovornost za tiskarske greške u uputama. ■ Ražotájs neuznemas atbildíbu par drukas klůdám ieríces rokasgrāmatā. ■ Importuotojas neapsiima atsakomybės dėl spausdinimo klaidų, pasitaikančių gaminio naudotojo vadove.



- MS 002
- METEOROLOGICKÁ STANICE S BEZDRÁTOVÝM ČIDLEM
- METEOROLOGICKÁ STANICA S BEZDRÔTOVÝM SNÍMAČOM
- STACJA METEOROLOGICZNA Z CZUJNIKIEM BEZPRZEWODOWYM
- METEOROLOGISCHE STATION MIT DRAHTLOSEM SENSOR
- WEATHER FORECAST STATION WITH WIRELESS SENSOR
- METEOROLOŠKA STANICA S BEŽIČNIM SENZOROM
- METEOROLOGISKÄ STACIJA AR BEZVADU SENSORU
- ORŲ PROGNOZĖS STOTELĖ SU BELAIDŽIU JUTIKLIU
- RYCHLÉ NASTAVENÍ
- RÝCHLE NASTAVENIE
- QUICK SETUP
- DEVICE LOCATING OR HANGING
- DCF SIGNAL RECEPTION AND INDICATION
- Automatic and manual reception
- SET UP DIARY, 12/24 H TIME INDICATION
- ALARM CLOCK SETUP
- ALARM CLOCK TURN ON AND OFF
- SNOOZE FUNCTION USE
- TEMPERATURE DISPLAY IN °C OR °F
- WET / COMFORT / DRY ICON
- WEATHER FORECAST STATION USE
- MULTIPLE OUTDOOR WIRELESS SENSORS CONNECTION
- TROUBLE SHOOTING
- TECHNICAL DATA
- USE AND DISPOSAL OF WASTE
- DISPOSAL OF PRODUCTS AT THE END OF LIFETIME
- Disposal of electric and electronic equipment (valid in EU member countries and other European countries with an implemented recycling system)
- BRZO PODEŠAVANJE
- ĀTRĀ IESTATĪŠANA
- SPARČIOJI SĄRANKA
- www.ecg.cz
Brand : ECG
Model : MS 002
Category : Weather Station