
Nerro Plus 13Z016 - Coffee maker Zelmer - Free user manual and instructions
Find the device manual for free Nerro Plus 13Z016 Zelmer in PDF.

| Product Type | Espresso machine with steam and hot water functions |
| Brand | Zelmer |
| Model | Nerro Plus 13Z016 |
| Power Consumption | 1130-1350 W |
| Voltage | 220-240 V |
| Water Tank Capacity | 1.5 L |
| Brewing Systems | Perfect Brewing System, SmartPress System |
| Coffee Modes | Ground coffee and espresso instant bags |
| Programmable Memory | 2 custom programs (P1 and P2) for coffee amount, temperature, cup size |
| Adjustable Coffee Amount | 30 ml, 40 ml, 50 ml, 60 ml |
| Adjustable Temperature | Low, high, extremely high (3 levels) |
| Cup Selector | Single or double cup |
| Steam Function | For milk frothing (cappuccino) and heating beverages |
| Hot Water Function | For tea or other hot drinks |
| Automatic Shutdown | After 1 hour of inactivity |
| Descaling Indicator | Flashing symbol alerts when descaling is needed |
| Descaling Program | Automated descaling cycle with citric acid solution |
| Water Hardness Adjustment | Low (LO), medium (MI), high (HI) levels |
| Drip Tray | Removable with red emptiness gauge |
| Cup Warming Plate | Top heating plate for pre-warming cups |
| Accessories Included | Measuring cup with whip, 500 ml jug, filter handle, water hardness test strip |
Frequently Asked Questions - Nerro Plus 13Z016 Zelmer
User questions about Nerro Plus 13Z016 Zelmer
0 question about this device. Answer the ones you know or ask your own.
Ask a new question about this device
Download the instructions for your Coffee maker in PDF format for free! Find your manual Nerro Plus 13Z016 - Zelmer and take your electronic device back in hand. On this page are published all the documents necessary for the use of your device. Nerro Plus 13Z016 by Zelmer.
USER MANUAL Nerro Plus 13Z016 Zelmer
natural_image
Exterior view of a modern espresso machine (no signage or text visible on the device itself)
2-9

natural_image
Line drawing of a hand using a coffee machine with a digital display and keyboard (no text or symbols)natural_image
Line drawing of a hand operating a coffee machine with an upward arrow indicating motion (no text or symbols)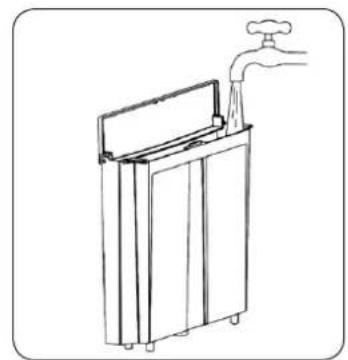
natural_image
Line drawing of a water tap with a handle and adjacent storage unit (no text or symbols)Rys. 1 Rys. 2
natural_image
Line drawing of a hand using a digital espresso machine with a control panel and indicator lights (no text or symbols)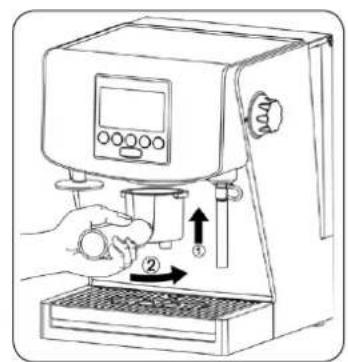
natural_image
Line drawing of a hand using a digital espresso machine to press or adjust a coffee machine (no text or symbols present)Rys. 3
natural_image
Line drawing of a coffee machine with a hand inserting a cup into the base (no text or symbols)Rys. 4

natural_image
Line drawing of a hand using a digital espresso machine with a control panel and lever (no text or symbols)Rys. 5

natural_image
Hand holding a small electronic device with a black circular component nearby (no text or symbols visible)Rys. 6

natural_image
Line drawing of a hand holding a faucet with a handle, no text or symbols presentRys. 7
natural_image
Line drawing of a hand using a coffee machine with a potted cup (no text or symbols)Rys. 8

natural_image
Line drawing of a hand using a espresso machine with control panel and buttons (no text or symbols)Rys. 9
natural_image
Technical line drawing of a mechanical clamp or bracket assembly mounted on a base (no text or symbols)Rys. 10
18. Odkamienianie
natural_image
Line drawing of a coffee maker with hands operating it, showing control panel and upward arrow (no text or symbols)
natural_image
Line drawing of a hand using a coffee machine with a keyboard and control panel (no text or symbols)Rys. 11
natural_image
Diagram of a hand operating a circular device with a pointer, showing rotational motion (no text or symbols)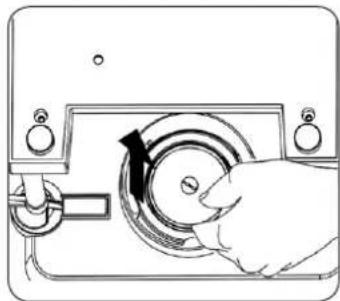
natural_image
Line drawing of a hand operating a rotary switch mechanism (no text or symbols)Rys. 12

natural_image
Line drawing of a hand using a coffee machine with a control panel and keyboard (no text or symbols)
natural_image
Line drawing of a coffee machine with hands operating it, showing no text or symbolsRys. 13
natural_image
Diagram of a hand operating a rotary dial with a black arrow indicating clockwise motion (no text or symbols)
natural_image
Diagram of a hand using a tool to interact with a circular mechanical device (no text or symbols present)Rys. 14


natural_image
Line drawing of a hand using a digital espresso machine (no text or symbols present)natural_image
Line drawing of a hand operating a coffee machine with an upward arrow indicating motion (no text or symbols)Obr. 1
natural_image
Line drawing of a water tap with a handle and adjacent storage unit (no text or symbols)Obr. 2
natural_image
Line drawing of a hand using a digital espresso machine with a control panel and indicator lights (no text or symbols)
Obr. 3
natural_image
Line drawing of a coffee machine with a hand inserting a cup into the base (no text or symbols)Obr. 4

natural_image
Line drawing of a hand operating a coffee machine with a control panel and directional arrow (no text or symbols)Obr. 5

natural_image
Illustration of a hand holding a small device with an eye and a circular object below (no text or symbols)Obr. 6

natural_image
Line drawing of a hand holding a faucet with a water droplet inserted (no text or symbols)Obr. 7
natural_image
Line drawing of a coffee machine with a hand holding a potted cup (no text or symbols)Obr. 8
natural_image
Line drawing of a hand using a standard espresso machine (no text or symbols present)Obr. 9
natural_image
Technical line drawing of a mechanical clamp or bracket mounted on a base (no text or symbols)Obr. 10
natural_image
Line drawing of a hand operating a coffee machine with an upward arrow indicating motion (no text or symbols)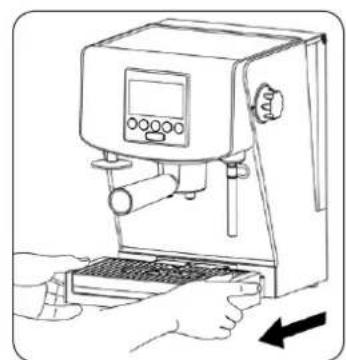
natural_image
Line drawing of a hand using a digital espresso machine (no text or symbols present)Obr. 11
natural_image
Illustration of a hand using a tool to interact with a circular device (no text or symbols visible)Obr. 12

natural_image
Line drawing of a hand operating a circular device with a knob, no text or symbols present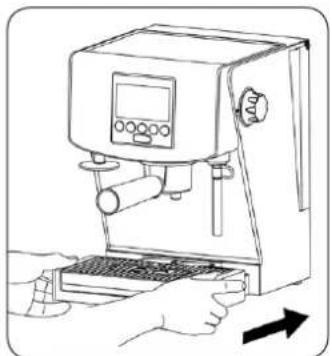
natural_image
Line drawing of a hand using a coffee machine with a control panel and keyboard (no text or symbols)Obr. 13

natural_image
Line drawing of a coffee machine with hands operating it, showing control panel and buttons (no text or symbols)
natural_image
Diagram of a hand operating a rotary switch mechanism (no text or symbols visible)Obr. 14
natural_image
Diagram of a hand using a tool to rotate or rotate a circular component, no text or symbols present

natural_image
Line drawing of a hand using a coffee machine with a digital display and keyboard (no text or symbols)natural_image
Line drawing of a hand operating a coffee machine with an upward arrow indicating motion (no text or symbols)Obr. 1
natural_image
Line drawing of a water tap with a rectangular tank and handle (no text or symbols)Obr. 2
natural_image
Line drawing of a hand using a digital espresso machine with a control panel and speaker grille (no text or symbols)
natural_image
Line drawing of a hand using a digital espresso machine to press or install a coffee cup (no text or symbols present)Obr. 3
natural_image
Line drawing of a coffee maker with a hand operating the cup and a digital display (no text or symbols)Obr. 4
natural_image
Line drawing of a hand using a digital espresso machine with a control panel and lever (no text or symbols)Obr. 5

natural_image
Illustration of a hand holding a small object with a dark circular object below (no text or symbols)Obr. 6
natural_image
Line drawing of a hand using a handheld water tap to lift a faucet (no text or symbols)Obr. 7
natural_image
Line drawing of a hand using a digital coffee machine with a potted cup (no text or symbols)Obr. 8
natural_image
Line drawing of a hand operating a coffee machine with control panel and side arm (no text or symbols)Obr. 9
natural_image
Technical line drawing of a mechanical clamp or bracket mounted on a base (no text or symbols)Obr. 10
natural_image
Line drawing of a hand operating a coffee machine with an upward arrow indicating motion (no text or symbols)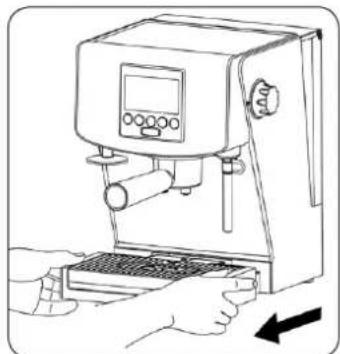
natural_image
Line drawing of a hand using a coffee machine with a control panel and keyboard (no text or symbols)Obr. 11
natural_image
Line drawing of a hand operating a circular device with a pointer, no text or symbols present
natural_image
Hand operating a rotary switch mechanism with a black arrow indicating clockwise motion (no text or symbols)Obr. 12
natural_image
Line drawing of a hand using a espresso machine with control panel and keyboard (no text or symbols)
natural_image
Line drawing of a coffee machine with hands operating it, showing no text or symbolsObr. 13
natural_image
Diagram of a hand operating a rotary switch mechanism (no text or symbols visible)
natural_image
Line drawing of a hand using a tool to interact with a circular device (no text or symbols)Obr. 14

natural_image
Line drawing of a hand using a coffee machine with a digital display and keyboard (no text or symbols)natural_image
Line drawing of a coffee machine with hands operating it, showing no text or symbols- ábra
natural_image
Line drawing of a water tap with a handle and adjacent storage unit (no text or symbols)- ábra
natural_image
Line drawing of a hand using a digital espresso machine with a control panel and speaker grille (no text or symbols)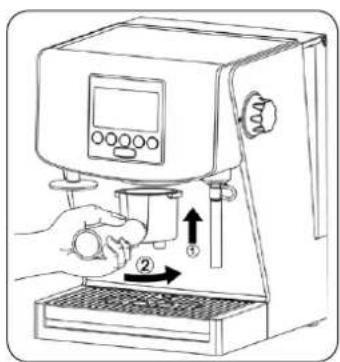
- ábra
natural_image
Line drawing of a coffee machine with a hand operating the cup and a digital display on top (no text or symbols)- ábra
natural_image
Line drawing of a hand operating a digital coffee machine with a control panel and directional arrow (no text or symbols)- ábra
natural_image
Illustration of a hand holding a small eye with a magnifying glass, next to a circular object (no text or symbols)- ábra

natural_image
Line drawing of a hand holding a faucet with a handle, no text or symbols present- ábra
natural_image
Line drawing of a coffee machine with a hand holding a potted cup (no text or symbols)- ábra

natural_image
Line drawing of a hand using a espresso machine (no text or symbols present)- ábra
natural_image
Technical line drawing of a mechanical clamp or bracket mounted on a base (no text or symbols)- ábra
natural_image
Line drawing of a hand operating a coffee machine with an upward arrow indicating motion (no text or symbols)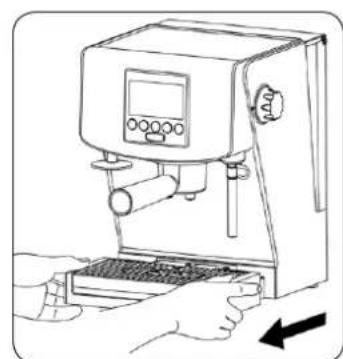
natural_image
Line drawing of a hand using a digital espresso machine to press or install a keyboard (no text or symbols present)- ábra

natural_image
Line drawing of a hand using a tool to interact with a circular device (no text or symbols present)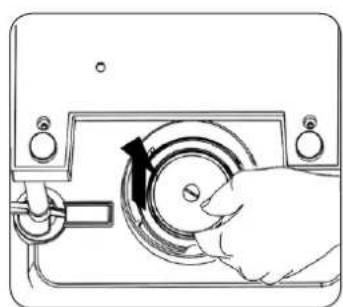
natural_image
Line drawing of a hand operating a circular device with a knob, no text or symbols present- ábra
natural_image
Line drawing of a hand using a digital espresso machine to press or install a tray (no text or symbols visible)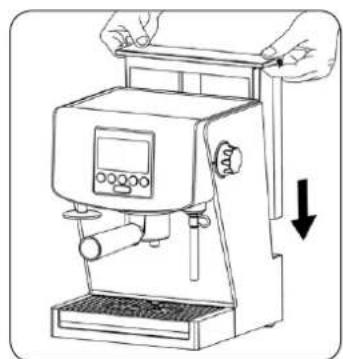
natural_image
Line drawing of a coffee machine with hands operating it, showing no text or symbols- ábra

natural_image
Hand operating a rotary dial with a black arrow indicating clockwise motion (no text or symbols)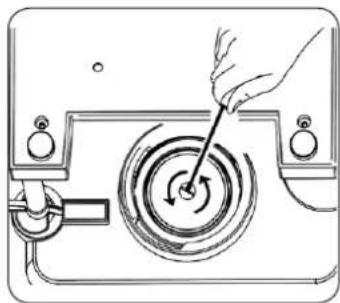
natural_image
Diagram of a hand using a tool to rotate or rotate a circular component, no text or symbols present- ábra
natural_image
Line drawing of a hand using a digital espresso machine with control panel and keyboard (no text or symbols)natural_image
Line drawing of a coffee machine with hands adjusting its lid and control panel (no text or symbols)Desen 1

natural_image
Line drawing of a water tap with a handle and adjacent storage unit (no text or symbols)Desen 2
natural_image
Line drawing of a hand using a digital espresso machine with a control panel and a tray (no text or symbols)
Desen 3
natural_image
Line drawing of a coffee machine with a hand inserting a cup into the base (no text or symbols)Desen 4
natural_image
Line drawing of a hand using a digital espresso machine to press or install a button (no text or symbols present)Desen 5

natural_image
Illustration of a hand holding a small device with a circular lens and a textured circular object below (no text or symbols)Desen 6

natural_image
Line drawing of a hand holding a faucet with a hose inserted, no text or symbols presentDesen 7
natural_image
Line drawing of a hand using a portable coffee machine with a digital display and spool (no text or symbols)Desen 8

natural_image
Line drawing of a hand using a espresso machine (no text or symbols present)Desen 9
natural_image
Technical line drawing of a mechanical clamp or bracket mounted on a base (no text or symbols)Desen 10
18. Decalcifierea
natural_image
Line drawing of a coffee maker with hands operating the top panel and an upward arrow indicating motion (no text or symbols)
natural_image
Line drawing of a hand using a coffee machine to press or install a tray (no text or symbols visible)Desen 11
natural_image
Diagram of a hand operating a circular device with a pointer, showing no text or symbols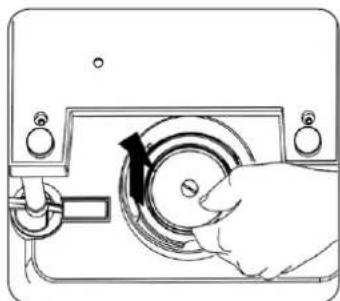
natural_image
Illustration of a hand operating a circular device with a knob, showing mechanical components and a scroll wheel (no text or symbols)Desen 12
natural_image
Line drawing of a hand using a coffee machine with a control panel and keyboard (no text or symbols)
natural_image
Line drawing of a coffee machine with hands operating it, showing no text or symbolsDesen 13

natural_image
Diagram of a hand operating a rotary switch mechanism with a black arrow indicating clockwise motion (no text or symbols present)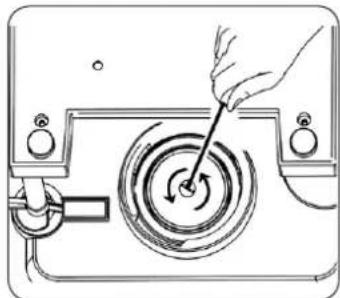
natural_image
Line drawing of a hand using a tool to interact with a circular mechanical device (no text or symbols)Desen 14

natural_image
Line drawing of a hand using a coffee machine with a keyboard and control panel (no text or symbols)natural_image
Line drawing of a coffee machine with hands operating it, showing no text or symbolsPuc. 1
natural_image
Line drawing of a water tap with a rectangular basin and handle (no text or symbols)Puc. 2
natural_image
Line drawing of a hand using a digital espresso machine with a control panel and indicator lights (no text or symbols)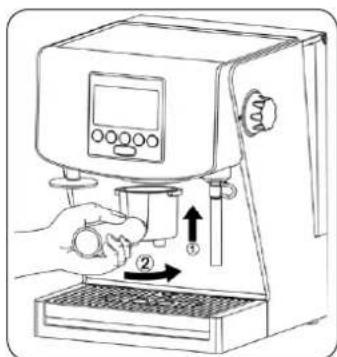
Puc. 3
natural_image
Line drawing of a coffee machine with a hand inserting a cup into the cup (no text or symbols)Puc. 4
natural_image
Line drawing of a hand using a digital espresso machine with a control panel and lever (no text or symbols)Puc. 5
natural_image
Illustration of a hand holding a small mechanical component with a circular base, next to a textured circular object (no text or symbols)Puc. 6
natural_image
Line drawing of a hand holding a faucet with a hose inserted (no text or symbols)Puc. 7
natural_image
Line drawing of a laboratory setup with a digital instrument and a potted plant (no text or symbols)Puc. 8
natural_image
Line drawing of a hand operating a espresso machine with control panel and buttons (no text or symbols)Puc. 9
natural_image
Technical line drawing of a mechanical clamp or bracket mounted on a base, with no visible text or symbols.Puc. 10
18. Удаление накипи
natural_image
Line drawing of a hand operating a coffee machine with an upward arrow indicating motion (no text or symbols)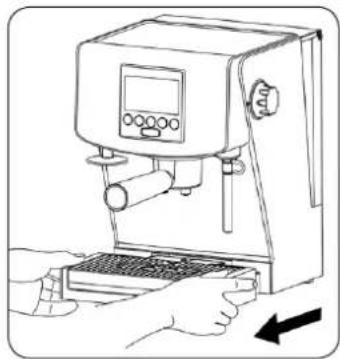
natural_image
Line drawing of a hand using a digital espresso machine to press or adjust a keyboard (no text or symbols present)Puc. 11

natural_image
Line drawing of a hand using a tool to interact with a circular device (no text or symbols)
natural_image
Hand operating a rotary switch mechanism with a black arrow indicating clockwise motion (no text or symbols)Puc. 12
natural_image
Line drawing of a hand using a coffee machine with a digital display and keyboard (no text or symbols)
natural_image
Line drawing of a coffee maker with hands operating it, showing control panel and base (no text or symbols)Puc. 13

natural_image
Diagram of a hand operating a circular device with a black arrow indicating rotation (no text or symbols present)
natural_image
Diagram of a hand operating a circular device with a pointer, showing no text or symbolsPuc. 14
19. Очистка и уход


natural_image
Line drawing of a hand using a coffee machine with a digital display and keyboard (no text or symbols)natural_image
Line drawing of a coffee machine with hands adjusting its lid and base, showing no text or symbols.Puc. 1
natural_image
Line drawing of a water tap with a handle and adjacent storage unit (no text or symbols)Puc. 2
natural_image
Line drawing of a hand using a digital espresso machine with a control panel and indicator lights (no text or symbols)
Puc. 3
natural_image
Line drawing of a coffee machine with a hand pressing a cup (no text or symbols)Puc. 4
natural_image
Line drawing of a hand using a digital espresso machine with a control panel and scroll (no text or symbols)Puc. 5
natural_image
Illustration of a hand holding a small object with a dark circular base, no text or symbols presentPuc. 6
natural_image
Line drawing of a hand using a handheld tool to lift a faucet (no text or symbols)Puc. 7
natural_image
Line drawing of a coffee machine with a hand holding a cup (no text or symbols)Puc. 8
natural_image
Line drawing of a hand operating a coffee machine with control panel and side arm (no text or symbols)Puc. 9
natural_image
Technical line drawing of a mechanical clamp or bracket mounted on a base, with no visible text or symbols.Puc. 10
natural_image
Line drawing of a coffee maker with hands operating it, showing control panel and upward arrow (no text or symbols)
natural_image
Line drawing of a hand using a digital espresso machine to press or install a keyboard (no text or symbols present)Puc. 11
natural_image
Line drawing of a hand using a tool to interact with a circular device (no text or symbols)
natural_image
Line drawing of a hand operating a circular device with a knob, no text or symbols presentPuc. 12

natural_image
Line drawing of a coffee machine with hands operating it (no text or symbols)
natural_image
Line drawing of a coffee machine with hands operating it, showing no text or symbolsPuc. 13

natural_image
Diagram of a hand operating a circular device with a black arrow indicating rotation (no text or symbols present)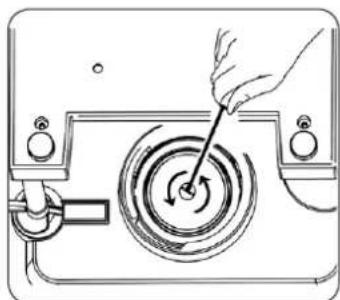
natural_image
Diagram of a hand using a tool to interact with a circular mechanical device (no text or symbols visible)Puc. 14

natural_image
Line drawing of a hand using a coffee machine with a keyboard and control panel (no text or symbols)natural_image
Line drawing of a hand using a coffee machine with an upward arrow indicating motion (no text or symbols)Мал. 1

natural_image
Line drawing of a water tap with a handle and adjacent storage unit (no text or symbols)Мал. 2
natural_image
Line drawing of a hand using a digital espresso machine (no text or symbols)
natural_image
Line drawing of a hand using a digital espresso machine to press or<|rotate_right|> (no text or symbols present)Мал. 3
natural_image
Line drawing of a coffee machine with a hand inserting a cup into the tray (no text or symbols)Мал. 4
natural_image
Line drawing of a hand using a digital espresso machine with a control panel and scroll (no text or symbols)Мал. 5
natural_image
Hand holding a small mechanical component with a circular base, next to a dark circular object (no text or symbols visible)Мал. 6
natural_image
Line drawing of a hand using a handheld tool to lift a faucet (no text or symbols)Мал. 7
natural_image
Line drawing of a coffee machine with a hand holding a potted cup (no text or symbols)Мал. 8
natural_image
Line drawing of a hand using a espresso machine (no text or symbols present)Мал. 9
natural_image
Technical line drawing of a mechanical clamp or bracket mounted on a base (no text or symbols)Мал. 10
18. Усування каменю
natural_image
Line drawing of a hand operating a coffee machine with an upward arrow indicating motion (no text or symbols)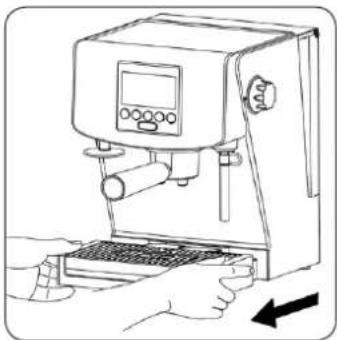
natural_image
Line drawing of a hand using a coffee machine with a keyboard and control panel (no text or symbols)Мал. 11
natural_image
Diagram of a hand using a tool to interact with a circular device (no text or symbols present)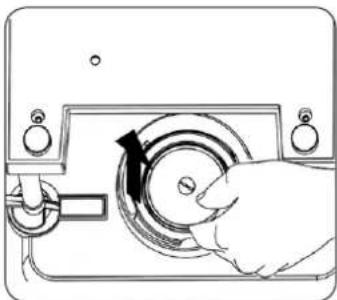
natural_image
Line drawing of a hand operating a circular device with a knob, no text or symbols presentМал. 12

natural_image
Line drawing of a hand using a coffee machine with a keyboard and control panel (no text or symbols)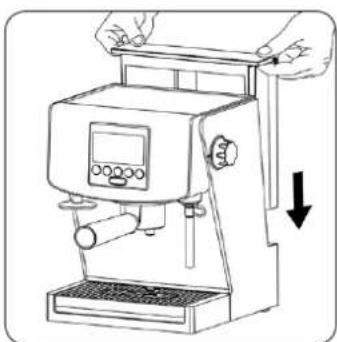
natural_image
Line drawing of a hand operating a coffee machine with a downward arrow indicating compression (no text or symbols present)Мал. 13

natural_image
Diagram of a hand operating a rotary switch mechanism (no text or symbols visible)
natural_image
Line drawing of a hand operating a circular device with a pointer, no text or symbols presentМал. 14
-
Machine specifications....67
-
Machine design....67
-
Control panel....67
-
Filling the water tank 68
-
Warming up the cups 68
-
Before first use (rinsing the machine) 68
6.1. Rinsing the machine for the espresso function 68
6.2. Rinsing the machine for the steam function 68
-
Adjusting water hardness....68
-
Selecting a programmed amount of brewed coffee 69
-
Selecting temperature for the brewed coffee 69
-
Selecting espresso instant bags mode or ground coffee mode ..... 69
-
Making espresso....69
-
Programming the memory function (P1 and P2) 69
-
Making espresso using the memory function 70
-
Making hot water....70
-
Making steam (foaming milk) 71
-
Automatic shutdown function 71
-
Emptying the drip tray 71
-
Removing limescale 71
-
Cleaning and care....72
-
Troubleshooting 73
ECOLOGY – ENVIRONMENT PROTECTION 73
Dear Customers,
Congratulations on your choice of our appliance, and welcome among the users of Zelmer products.
In order to achieve best possible results we recommend using exclusively original Zelmer accessories. They have been specially designed for this product.
We encourage you to read the following instruction manual carefully, especially paying great attention to the safety instructions. The instruction manual should be retained for future use of the espresso machine.
SAFETY INSTRUCTIONS
- Do not use the machine, if it has visible damage, a damaged cord, after it has fallen down or has been damaged in any other way. If you suspect that the machine is damaged, its testing, repair, adjustments should be carried out only by a member of a qualified service staff.
If the non-detachable part of the cord is damaged, it should be replaced by the producer or at a proper service point or by a qualified person in order to avoid any hazards.
The appliance can only be repaired by qualified service personnel. Improper servicing may cause a serious hazard to the user. In case of defects please contact a qualified service center.
- Read carefully and retain the following instruction manual delivered to you along with the machine.
The machine is for home indoor usage only. ●
- Do not use the machine outdoors or for commercial purposes.
- Make sure that the voltage on the rating plate corresponds to the voltage in the socket.
● Always place the machine on a flat, even surface.
- Do not use the espresso machine without any water in the water tank. Fill the tank only with cold, filtered, clean and fresh water. Using warm or hot water or other liquids may result in damage of the machine or pose a threat. Refill the tank with no more than 1.5 liters.
- If the machine is not used for a longer period, empty the water tank.
- Never remove the filter handle during brewing coffee or hot water, as the machine is under pressure. Removing the filter handle may end in scalds or other injuries.
- The steam nozzle becomes extremely hot during milk foaming and water flow. It may cause scalds, therefore it is vital to avoid any direct contact with it.
- When cleaning the espresso machine or in case of any problems during brewing, it is necessary to turn the machine off and pull the plug out.
- Do not let the cord to come into contact with hot parts of the espresso machine, including the cup-warming plate and steam nozzle.
- Do not touch the hot surfaces of the machine.
- Do not place hands directly under a jet of steam, hot water or poured coffee, as it may result in scalds or other injuries.
- Using any additional equipment not recommended by the producer of the machine, may pose threat.
- While the machine is operating do not press any mobile elements against the machine.
- Before brewing coffee make sure the filter handle has been installed correctly.
- Do not move the machine when it is on or working. Before moving the espresso machine, turn it off and pull the plug out.
- Always turn the machine off before plugging or unplugging it. The plug should not be removed by the cord – grab the plug itself.
● Always turn the power off and remove the plug when the machine is cleaned or will not be used for a longer time.
- Do not use the machine with an extension cord, unless it was checked by a qualified technician or a service worker.
- The machine should only be plugged to an AC electric grid of a voltage in accordance with the requirements on the rating plate of the machine through a grounded socket.
- This appliance is not intended for use by persons (including children) with reduced physical, sensory or mental capabilities, or lack of experience and knowledge, unless they have been given supervision or instruction concerning use of the appliance by a person responsible for their safety.
- Children should be supervised to ensure that they do not play with the appliance.
- The appliance is not intended to be operated by means of an external timer or separate remote-control system.
- Turn off the device and unplug it from an outlet before replacing the equipment or approaching moving parts during use.
- Before cleaning the machine or its assembly/disassembly it is always advisable to plug the cord out of the socket and let the machine cool off.
- Do not use the espresso machine for purposes other than intended described in the instruction manual.
- Do not place the machine near sources of heat, flame, electric heaters or on a hot oven. Do not place it on any other device.
- Do not let the cord hang over a table or shelf or touch a hot surface.
- Do not place the machine on a wet or hot surface.
- Do not use the machine, if the drip tray or its grid are not properly installed.
- Do not leave the machine in the vicinity of a hot electric/gas cooker nor inside an oven.
- Do not submerge the machine in water or any other liquid.
- CAUTION: In order to minimize fire, electrocution or injury hazard, do not try to disassemble the machine on your own. The inner parts of the machine are not meant to be operated by the user. Any repairs should be carried out only by an authorized staff.
- Do not try to grease the machine. There are no additional maintenance works to be carried out for this espresso machine.
- The producer does not allow to use any additional equipment, as it may pose threat to the user.
- CAUTION: The water tank should not be open during use.
- CAUTION: Make sure every time you want to use the machine there is water in the tank.
Please make sure that the above instructions were comprehended.
TECHNICAL DATA
The technical data are given on the rating plate of the machine.
Power rating: 1130-1350 W at 220-240 V.
Water tank capacity: max. 1.5 l.
The espresso machine is a 1st class device equipped with a cord with a protective wire and a plug with a protective contact.
The espresso machine complies with the requirements of the current standards.
The machine meets the requirements of the following directives:
- The Low Voltage Directive (LVD) – 2006/95/EC.
- The Electromagnetic Compatibility (EMC) Directive – 2004/108/EC.
The product has the CE Mark on its rating plate.
1. Machine specifications
The espresso machine brews coffee of rich taste and aroma of high quality, as the water used for the process is at perfect temperature. The machine was designed to observe its readiness for brewing and percolation of coffee, as well as steam production for foaming milk.
The espresso machine has two unique and innovative systems: Perfect Brewing System and SmartPress System.
Perfect Brewing System by choosing the optimum brewing temperature and an adequate degree of coffee pressing provides you with the best quality of beverage.
SmartPress System is an integrated filtering system with automatic before-brewing coffee compression, which results in a beverage of unique taste and aroma with a delicious creamy froth.
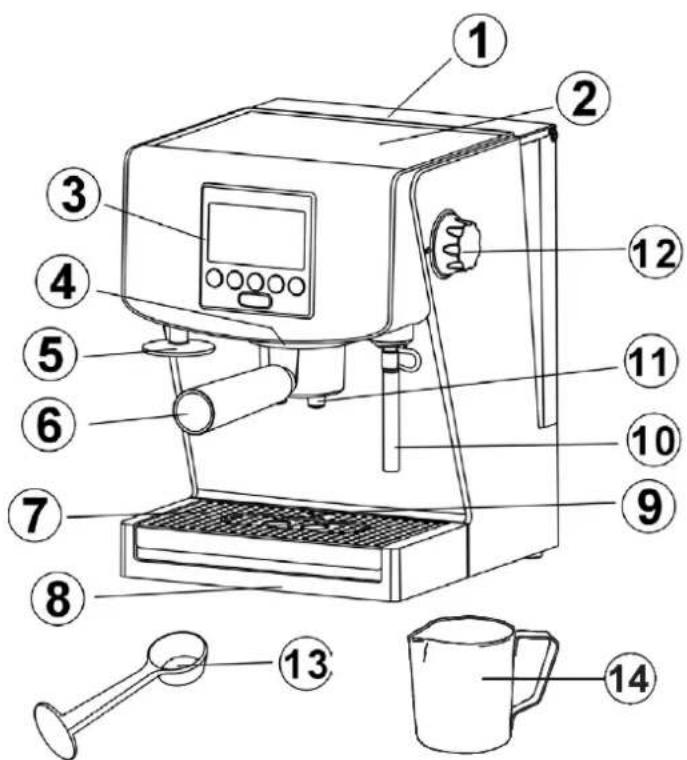
2. Machine design
1 Removable covered water tank
2 Cup-warming plate
3 Control panel
4 Brew head
5 Coffee compressor
6 Filter handle
7 Drip tray grid
8 Drip tray
9 Drip tray emptiness gauge
10 Steam nozzle/cappuccino attachment
11 Coffee outflow
12 Steam/hot water control
13 Measuring cup with a whip
14 500 ml jug
natural_image
Line drawing of a hand using a digital espresso machine (no text or symbols present)Before start to use the appliance first time, remove the water release hole protective label from the drip tray plate.
- Control panel

A Power on/off button
B Single/double cup select button/ espresso instant bags mode/ground coffee mode
C Coffee amount select button
D Temperature select button
E Steam/hot water select button
F Brew coffee button
G Water hardness indicator
H Coffee amount indicator
I Wait mode indicator
J Single/double cup indicator
K Steam indicator
L Hot water indicator
M Limescale removal indicator
N Temperature level indicator
- Low water level indicator
P Ground coffee mode indicator
Q Espresso instant bags mode indicator
R Power on/off indicator
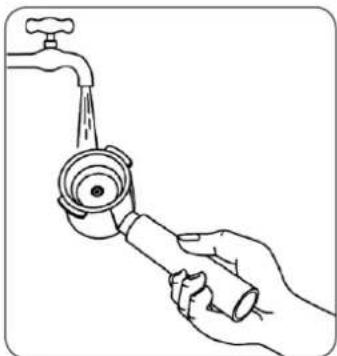
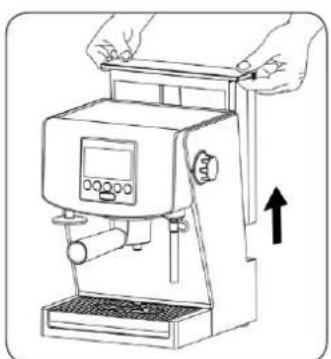
4. Filling the water tank
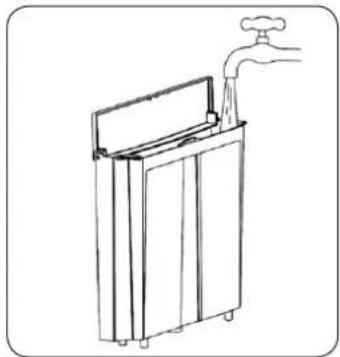
CAUTION! Pour the water into the tank (1) only when the cord is unplugged from the socket. The valve at the bottom part of the tank prevents the water from leakage.
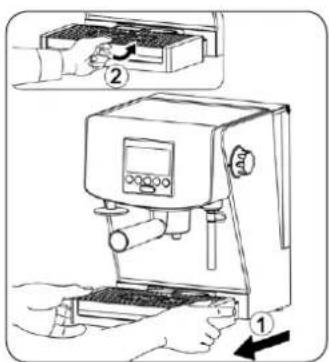
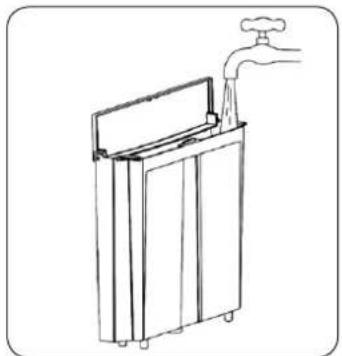
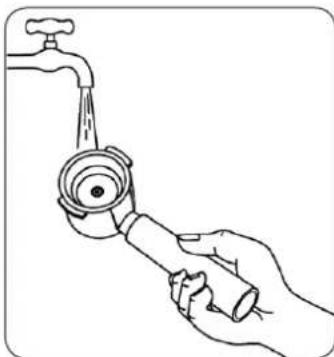
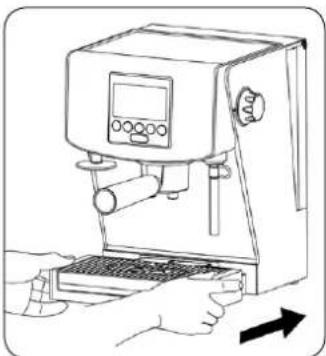
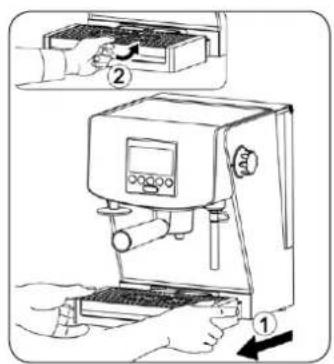
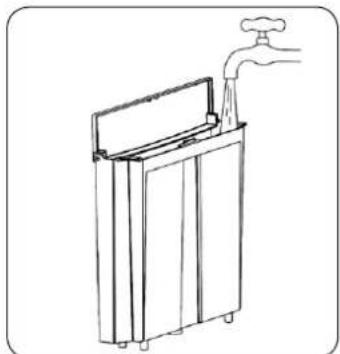
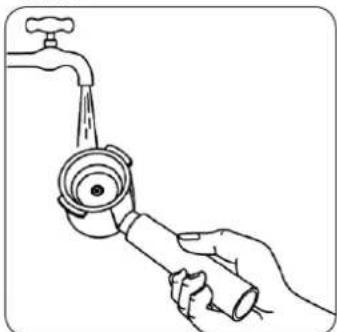
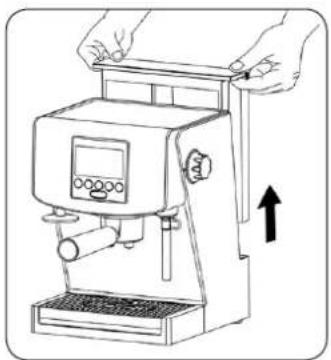
- Remove the water tank (1) by pulling it upward (Fig. 1).
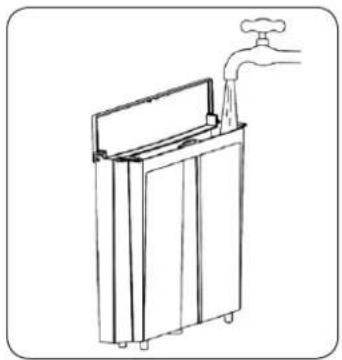
- Open the cover of the water tank (1) and fill it up with fresh, cool water (Fig. 2). Do not exceed the maximum (MAX) level.
- Place the tank (1) in its place and press it.
- Close the cover of the tank (1).
- The tank may be filled without removing it from the machine, e.g. by pouring the water out of a pitcher.
natural_image
Line drawing of a hand operating a coffee machine with an upward arrow indicating motion (no text or symbols)Fig. 1

natural_image
Line drawing of a water tap with a handle and adjacent storage unit (no text or symbols)Fig. 2
CAUTION! Do not use the espresso machine, when the tank (1) is empty. Before brewing coffee it is vital to check whether there is any water in the tank (1). Do not fill the tank (1) with hot water. Due to hygienic reasons do not leave any water in the tank for longer periods.
CAUTION! Remember to avoid low levels of water level in the tank (1). In such a case the machine will stop working, give out a sound signal, which will end only if the tank is filled (1), furthermore the no-water indicator will flash on the display panel.
5. Warming up the cups
Using a cup warmed up to a certain temperature before brewing coffee increases the taste of the coffee itself and creates a thick froth on its surface.
The machines gives you two ways of warming up a cup. The first one is to warm it by means of hot water coming out of the steam/hot water nozzle (10) acting accordingly to paragraph 14.
The second way is to place the cups before the coffee brewing process on the cup-warming plate (2) situated at the top of the espresso machine.
CAUTION! The coffee maker was designed with a power consumption protection device, and after one hour of standing-by (with no coffee making or other processes active), it automatically turns itself off. This means that it is impossible for the heating panel to heat up for more than one hour.
6. Before first use (rinsing the machine)
Before using the machine for the first time or if it has not been used for a longer period, it is necessary to rinse it.
6.1. Rinsing the machine for the espresso function
6.1.1. Unplug the machine.
6.1.2. Fill the water tank (1) according to paragraph 4.
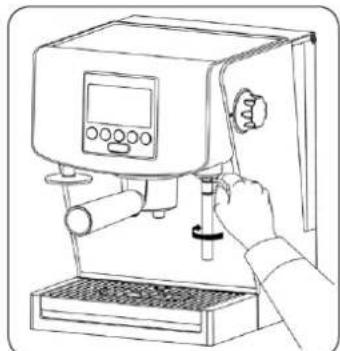
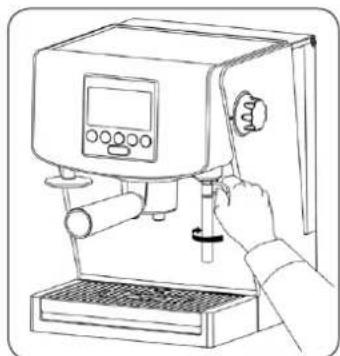
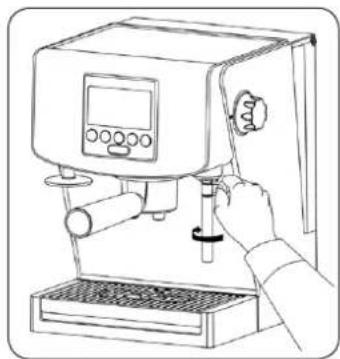
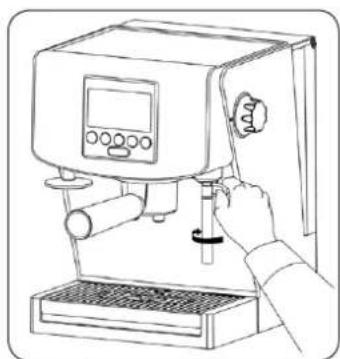
6.1.3. Attach the empty filter handle (6) to the brew head (4), by turning it with a firm motion to the right (Fig. 3).
natural_image
Line drawing of a hand using a digital espresso machine with a control panel and speaker grille (no text or symbols)
natural_image
Line drawing of a coffee machine with a hand operating the cup and a paper feeding into it (no text or symbols)Fig. 3
6.1.4. Place a container on the drip tray grid (7), directly under the brew head (4).
6.1.5. Plug the cord into the socket. The espresso machine will turn on, the display panel and the power on/off button ⏻(A) will flash, and the power on/off indicator ⏻ on the display panel will be lit.
6.1.6. Push the power on/off button ⏻(A), you will hear a sound signal.
6.1.7. The ⚙ indicator on the display panel will begin to whirl, signaling that the espresso machine is heating up.
6.1.8. When the ⚙ indicator stops whirling, you will hear a sound signal informing you that the machine is ready for use (has reached the right temperature).
6.1.9. Choose the maximum amount of coffee (60 ml in our case) by pressing the coffee amount select button 📊(C). After each push you will hear a sound signal and the display panel will show the following numbers in turn: 30, 40, 50, 60, P1, P2, etc. Push the button as many times as it is necessary the indicator to show 60.
6.1.10. Choose double cup of coffee pressing the single/double cup select button 🎨 (B). After each push you will hear a sound signal. If you have chosen to select a double cup, the display panel will indicate 🎨. In case of a single cup the display panel will indicate 🎨.
6.1.11. Press the brew coffee button 📄 (F). You will hear a sound signal.
6.1.12. Hot water will come out of the machine and the display panel will indicate 🎨 (after choosing a double cup) or 🎨 after choosing a single cup).
6.1.13. Brewing will be automatically stopped after a given amount of water. You will hear two sound signals, and the display panel will indicate 📄 in case of choosing a double cup or 📄 in case of a single cup.
6.1.14. Repeat step 6.1.11. three times.
6.2. Rinsing the machine for the steam mode
6.2.1. Check if there is water in the water tank (1). If there is no water, fill the water tank (1) according to paragraph 4.
6.2.2. Press the steam button (E). You will hear a sound signal. The display panel will lit the ____ indicator, signaling that the espresso machine is now in steam mode.
6.2.3. The ⚙ indicator on the display panel will begin to whirl, signaling that the espresso machine is heating up.
6.2.4. When the Ⓐ indicator stops whirling, you will hear a sound signal informing you that the machine is ready for use (has reached the right temperature).
6.2.5. Put a container under the steam nozzle (10) and turn the steam control (12) to position ⚡ | ↓, i.e. turn it counterclockwise, so the sign ⚡ | ↓ will cover the casing of the espresso machine. Let the machine work with the mode on for ca. 1 minute. Then turn the steam control (12) to OFF, position, i.e. turn it clockwise, so the sign OFF will cover the marker on the casing of the espresso machine. Empty the container.
6.2.6. Repeat step 6.2.5. three times.
CAUTION! Push the power on/off button ⏻(A), you will hear a sound signal. The indicator ____ will go off on the display panel, signaling that the espresso machine has returned to the coffee brewing mode.
7. Adjusting water hardness
The espresso machine has been programmed with three levels of water hardness: low (LO indicator), medium (MI indicator) and high (HI indicator). The default level is set to MI medium. If you want to change water hardness, press and hold the coffee amount select button J(C) for 2 seconds. You will hear a sound signal and the water hardness indicator on the display panel will start to flash. Each time you push the coffee amount select button J(C) , which action is accompanied by a sound signal water hardness level changes in the following order: medium MI → high HI → low LO → medium MI → high HI, etc. If you choose to select e.g. high HI level, do not push the button again. Wait 2 seconds and the setting will be automatically saved and you will hear a sound signal.
To establish the current water hardness level, the user should to carry out a test with a test apparatus supplied together with the espresso machine. Put the test apparatus in the water for one second. After removing it from the water shake the excess of water off and see the results after waiting ca. 15 seconds. A dry test apparatus should have a green square space.
After getting it wet, the space should change its color. Compare the color of the square space on the wet test apparatus with the color legend on the packaging. A green color means that the water is soft, a brown color means the water is hard (medium level) and an orange color means that the water is extremely hard (high level). On the basis of your results adjust water hardness in the espresso machine according to the above instructions.
8. Selecting a programmed amount of coffee
The espresso machine has 4 preprogrammed amounts of coffee: 30 ml, 40 ml, 50 ml and 60 ml. The amount of coffee may be selected by pressing the coffee amount select button (C). After each push you will hear a sound signal. The amount of coffee changes in the following order: 30 ml → 40 ml → 50 ml 60ml P1→P2 30ml, etc.
CAUTION! P1 and P2 (Program 1 and 2) are special memory functions, which enable you to save your custom settings. The method of setting the memory programs (P1 and P2) is shown in paragraph 12.
9. Selecting temperature for the brewed coffee
The espresso machine has 3 temperature settings for brewing coffee: low temperature (indicator), high temperature (indicator) and extremely high temperature (indicator). The temperature setting by the temperature select button (D). After each push of the button you will hear a sound signal. The temperature changes in the following order: high (indicator) → extremely high (indicator) low (indicator) high (indicator), etc.
10. Selecting espresso instant bags mode or ground coffee mode
The espresso machine has two modes for making coffee:
- the espresso instant bags mode,
- the ground coffee mode.
To active a mode press and hold the single/double cup select button (B) for 2 seconds.
Depending on its previous setting the machine will change from the espresso instant bags mode ( Indicator) into the ground coffee mode
(indicator) or the other way around. Each change will accompanied by a sound signal.
11. Making espresso
11.1. Unplug the espresso machine from the power supply.
11.2. Fill the water tank (1) according to paragraph 4
11.3. Plug the espresso machine by putting the cord into the socket. The machine will turn on. The display panel and the power on/off button ⏻(A) will flash. The display panel will indicate power is on ⏻.
11.4. Push the power on/off button ⏻(A), You will hear a sound signal.
11.5. The ⚙ indicator on the display panel will begin to whirl, signaling that the espresso machine is heating up.
11.6. When the ⚙ indicator stops whirling, you will hear a sound signal informing you that the machine is ready for use (has reached the right temperature).
11.7. Choose espresso instant bags mode or ground coffee mode by pressing single/double cup select button 📄 (B) for 2 seconds. After each push you will hear a sound signal.
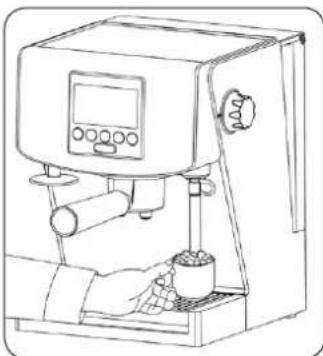
11.8. Pour ground coffee by means of a measuring cup (13) or insert espresso instant bags into the filter handle container (6).
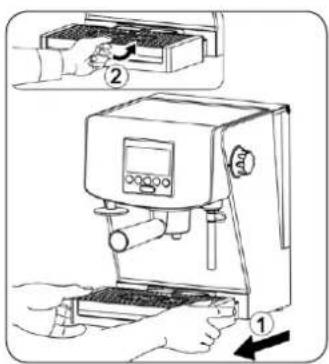
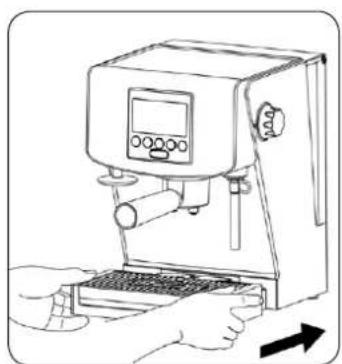
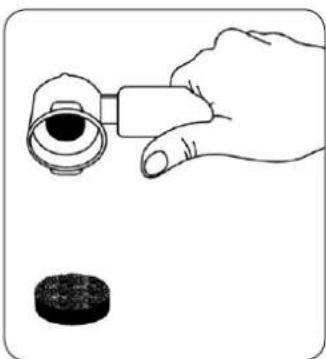
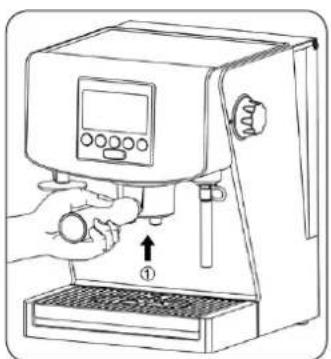
11.9. Remove the excess of coffee from the edge of the filter and compress the coffee by the permanent coffee compressor (5) or the whip of the measuring cup (13) (Fig. 4).
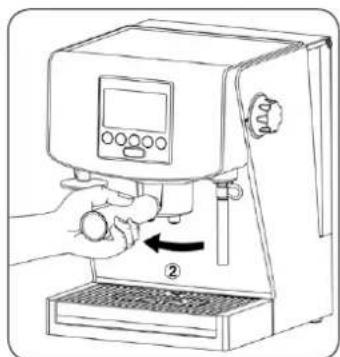
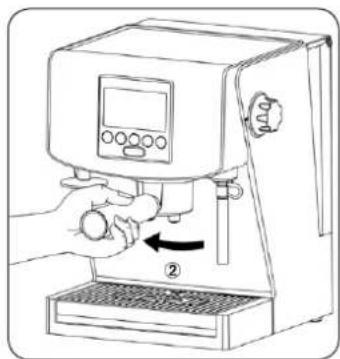
11.10. Attach filter handle (6) to the brew head (4), by turning it with a firm motion to the right (Fig. 3).
11.11. Place a cup or cups on the drip tray grid (7), directly under the brew head (4).
11.12. Choose a double cup of coffee pressing the single/double cup select button 📌 (B). After each push you will hear a sound signal.
11.13. If you have chosen to take a double cup, the display panel will indicate 📄. In case of a single cup the display panel will indicate 📄.
11.14. Select the amount of coffee by pressing the coffee amount select button (C) - see paragraph 8.
11.15. Select temperature setting by pressing the temperature select button (D) – see paragraph 9.
11.16. Push the brew coffee button 🎨 (F) and espresso will come out of the machine. The display panel will indicate 🎨 (after choosing a double cup) or 🎨 (after choosing a single cup).
11.17. Brewing will automatically stop after the selected amount of coffee is prepared. You will hear two sound signals and the display panel will indicate 📁 or 📁 (depending on the last selection between a single or a double cup).
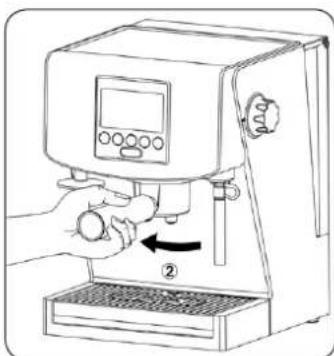
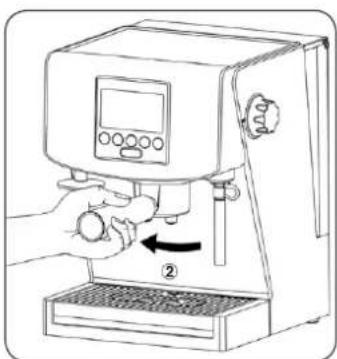
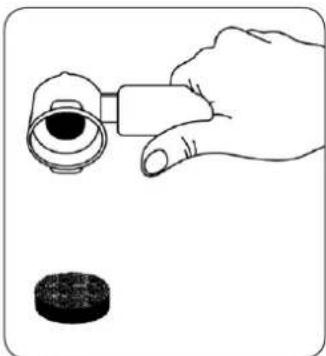
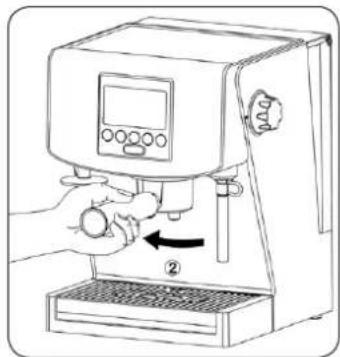
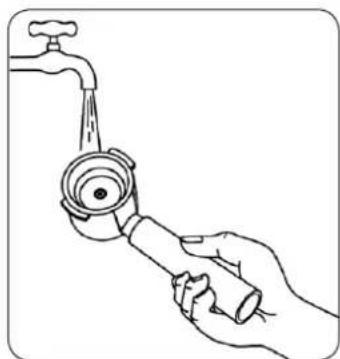
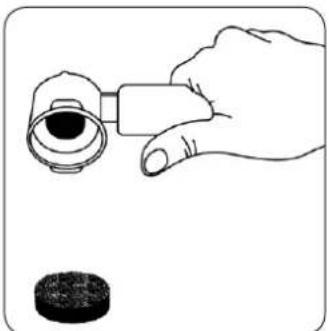
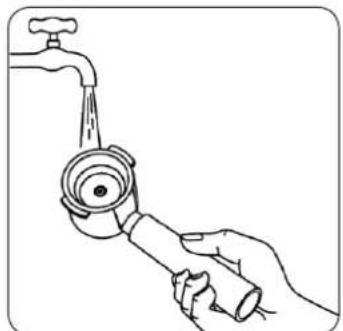
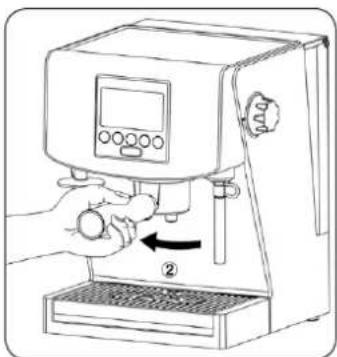
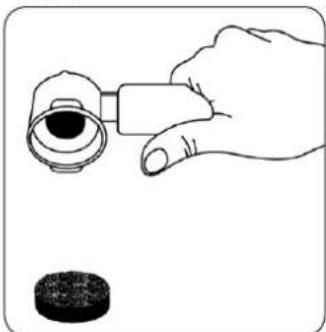
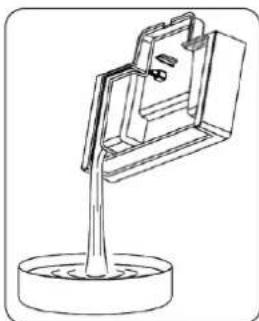
11.18. Remove the filter handle by turning it to the left (Fig. 5) and throw out the used bag or coffee grounds (Fig. 6). Clean the filter with water (Fig. 7).
natural_image
Line drawing of a coffee machine with a hand inserting a cup into the base (no text or symbols)Fig. 4

natural_image
Line drawing of a coffee machine with a hand operating the valve and a control panel, showing no text or symbols.Fig. 5

natural_image
Illustration of a hand holding a small object with a magnifying glass, next to a circular object (no text or symbols)Fig. 6
natural_image
Line drawing of a hand holding a faucet with liquid pouring from the side (no text or symbols)Fig. 7
CAUTION! If the water in the water tank (1) runs out of water during the coffee brewing process, the espresso machine will stop working. The indicator will flash on the display panel and you will hear a repeating sound signal informing you about the necessity to fill in water. Open the water tank cover (1) and pour in the water. After replenishing water, the sound signal will stop and the espresso machine will automatically finish the coffee brewing process.
CAUTION! It is possible to stop the coffee brewing process at any given moment. It is enough to push the Power on/off button ⏻(A).
12. Programming the memory function (P1 and P2)
The espresso machine has two memory modes letting you program your custom settings including temperature, espresso instant bags mode or ground coffee mode, selecting 1 or 2 cups and a given amount of coffee. The programming process includes the following steps:
12.1. Unplug the espresso machine from the power supply.
12.2. Fill the water tank (1) according to paragraph 4.
12.3. Plug the espresso machine by putting the cord into the socket. The machine will turn on. The display panel and the power on/off button ⏻(A) will flash. The display panel will indicate power is on ⏻.
12.4. Push the power on/off button ⏻(A). You will hear a sound signal.
12.5. The Indicator on the display panel will begin to whirl, signaling that the espresso machine is heating up.
12.6. When the ⚙ indicator stops whirling, you will hear a sound signal informing you that the machine is ready for use (has reached the right temperature).
12.7. Choose espresso instant bags mode or ground coffee mode by pressing single/double cup select button 📌 (B) for 2 seconds. After each push you will hear a sound signal.
12.8. Pour ground coffee by means of a measuring cup (13) or insert espresso instant bags into the filter handle container (6).
12.9. Remove the excess of coffee from the edge of the filter and compress the coffee by the permanent coffee compressor (5) or the whip of the measuring cup (13) (Fig. 4).
12.10. Attach filter handle (6) to the brew head (4), by turning it with a firm motion to the right (Fig. 3).
12.11. Place a cup or cups on the drip tray grid (7), directly under the brew head (4).
12.12. Select program P1 or P2 by pressing the coffee amount select button (C). After each push you will hear a sound signal.
12.13. Press and hold the single/double cup select button temperature select button (D) for 2 seconds. P1 or P2 indicator will flash on the display panel.
12.14. Select temperature setting (see paragraph 9), choose espresso instant bags mode or ground coffee mode (see paragraph 10) and the single cup (indicator) or double cup (indicator) select button
12.15. Push the brew coffee button 📄 (F). and espresso will come out of the machine. The display panel will indicate (heep) choosing a double cup) or (after choosing a single cup). After getting the coffee release the brew coffee button 📄 (F). You will hear two sound signals and the display panel will indicate (heep).
12.16. After saving the settings P1 or P2 indicator will stop flashing and you will hear a sound signal.
12.17. Remove the filter handle by turning it to the left (Fig. 5) and throw out the used bag or coffee grounds (Fig. 6). Clean the filter with water (Fig. 7).
CAUTION! While holding the brew coffee button 📄 (F) remember that after when a single cup is filled to the maximum (ca. 240 ml), the machine will automatically stop the brewing process (you will hear two sound signals) and save the settings.
CAUTION! During programming pay attention if the P1 or P2 indicator are flashing. If they stop flashing for any reason the P1 or P2 stops flashing, start programming mode again by pressing and holding both the single/double cup select button (P2)
temperature select button (D) for 2 seconds and follow the steps up to paragraph 11.16.
CAUTION! In order to delete the program P1 or P2 settings press and hold both the temperature select button ⏻ (D) and the steam select button ⏻ (E).
13. Making espresso using the memory function
13.1. Unplug the espresso machine from the power supply.
13.2. Fill the water tank (1) according to paragraph 4.
13.3. Plug the espresso machine by putting the cord into the socket. The machine will turn on. The display panel and the power on/off button ⏻(A) will flash. The display panel will indicate power is on ⏻.
13.4. Push the power on/off button ⏻(A), You will hear a sound signal.
13.5. The ⚙ indicator on the display panel will begin to whirl, signaling that the espresso machine is heating up.
13.6. When the Ⓐ indicator stops whirling, you will hear a sound signal informing you that the machine is ready for use (has reached the right temperature).
13.7. Select program P1 or P2 by pressing the coffee amount select button ∪(C) – see paragraph 8.
13.8. Depending on which coffee mode (ground or instant bags) has been programmed for P1 or P2, pour ground coffee by means of a measuring cup (13) or insert espresso instant bags into the filter handle container (6).
13.9. Remove the excess of coffee from the edge of the filter and compress the coffee by the permanent coffee compressor (5) or the whip of the measuring cup (13) (Fig. 4).
13.10. Attach filter handle (6) to the brew head (4), by turning it with a firm motion to the right (Fig. 3).
13.11. Place a cup or cups on the drip tray grid (7), directly under the brew head (4).
13.12. Push the brew coffee button 📂 (F) and espresso will come out of the machine. The display panel will indicate 🐃 (after choosing a double cup) or 🍸 (after choosing a single cup).
13.13. The brewing process will be automatically stopped at the desired amount of coffee. You will hear two sound signals and the display panel will indicate 📄 or 🌐 depending on the settings of program P1 or P2).
13.14. Remove the filter handle by turning it to the left (Fig. 5) and throw out the used bag or coffee grounds (Fig. 6). Clean the filter with water (Fig. 7).
14. Making hot water
Hot water mode is perfect for making e.g. hot chocolate, filling up a piston coffee pot or a teapot.
14.1. Unplug the espresso machine from the power supply.
14.2. Fill the water tank (1) according to paragraph 4.
14.3. Plug the espresso machine by putting the cord into the socket. The machine will turn on. The display panel and the power on/off button ⏻(A) will flash. The display panel will indicate power is on ⏻.
14.4. Push the power on/off button ⏻(A), You will hear a sound signal.
14.5. The ⚙ indicator on the display panel will begin to whirl, signaling that the espresso machine is heating up.
14.6. When the Ⓧ indicator stops whirling, you will hear a sound signal informing you that the machine is ready for use (has reached the right temperature).
14.7. Push the steam select button (E). You will hear a sound signal. The display panel will indicate ____ informing that the steam mode has been turned on. Push the steam select button (E) again. You will hear a sound signal and the display panel will indicate HOT WATER.
14.8. The ⚙ indicator on the display panel will begin to whirl, signaling that the espresso machine is heating up.
14.9. When the ⚙ indicator stops whirling, you will hear a sound signal informing you that the machine is ready for use (has reached the right temperature).
14.10. Put a container under the steam nozzle (10) and turn the steam control (12) to position i.e. turn it counterclockwise, so the sign will cover the casing of the espresso machine. Hot water will come out of the nozzle (10).
14.11. To turn the water off turn the steam control (12) to OFF, position, i.e. turn it clockwise, so the sign OFF will cover the marker on the casing of the espresso machine.
14.12. To end working with the hot water mode on, press power on/off button ⏻(A). You will hear a sound signal. The HOT WATER indicator will go off from the display panel, informing that the espresso machine is back to the coffee brew mode.
CAUTION! If there is not enough water in the water tank (1), the nozzle (10) will not produce hot water. The indicator will flash on the display panel and you will hear a repeating sound signal informing you about the necessity to fill in water. Make sure to turn the water off turn the steam control (12) to OFF position, i.e. turn it clockwise, so the sign OFF will cover the marker on the casing of the espresso machine. Open the water tank cover (1) and pour in the water. After replenishing water, the sound signal will stop. To continue with the hot water mode turn the steam control (12) to position F H, i.e. turn it counterclockwise, so the sign F H will cover the casing of the espresso machine.
CAUTION! Moving the steam/hot water nozzle (10) is possible only by means of a special attachment (Fig. 9). The steam/hot water nozzle (10) is extremely hot.
15. Making steam (foaming milk)
In order to foam milk you have to use the steam mode. The function of the steam is twofold. The steam heats up and mixes the milk with air, giving it a smooth, velvet look. Similarly as in coffee brewing, foaming milk needs some experience and you will achieve better results in time.
Tip: Remember that coffee is the basis for all coffee-based beverages and milk is only an addition.
Remark: It is advisable to make coffee first, then start foaming milk.
The steam mode may be used for heating up beverages.
15.1. Make espresso according to paragraph 11 or paragraph 13.
15.2. Estimate the amount of milk needed on the base of the number of cups of coffee or the size of a pot for milk.
- Tip: Remember that the amount of milk increases during foaming.
- Pour in cool milk into a stainless pot, filling it up to 1/3 or 1/2 of its capacity.
- Tip: Keep the stainless pot with milk in a refrigerator for it to be cool. Remember not to rinse the pot with hot water before use.
15.3. Press the steam mode select button (E). You will hear a sound signal. The display panel will indicate ____ informing you that it is now in steam mode.
15.4. The ⚙ indicator on the display panel will begin to whirl, signaling that the espresso machine is heating up.
15.5. When the ⚙ indicator stops whirling, you will hear a sound signal informing you that the machine is ready for use (has reached the right temperature).
15.6. Rinse the steam/hot water nozzle (10) by placing an other container apart from the pot with milk and acting according to paragraph 6.2.5. The steam nozzle will be rinsed.
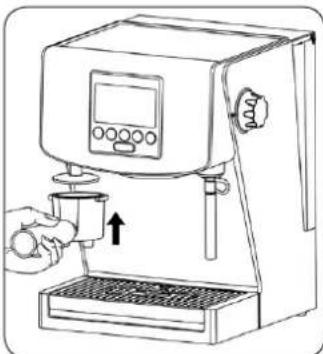
15.7. Place the steam nozzle (10) in the milk pot (Fig. 8) in such a way that the nozzle is about 1/2 ~cm below the level of milk and activate the steam trigger turn the steam control (12) to position | , i.e. turn it counterclockwise, so the sign | will cover the casing of the espresso machine.
- Tilt the pot in such a way that the steam nozzle is placed in the pot and gradually lower the pot until the nozzle is below the level of milk. This will result in foaming milk.
- Important: Do not allow for steam to go out unevenly, as milk in such a case will not be foamed appropriately. To avoid such a situation pick up the pot in such a way that the nozzle is placed deeper in the milk. Remember that a foam should be ideally light and soft.
- When the milk is heated and foamed, its level will rise. When it happens, lower the pot keeping the end of the nozzle under the level of milk.
- When the foam is done lift the pot in such a way that the nozzle is placed in the middle of milk.
- Tip: The amount of foam differs depending on the type of prepared beverage. For example, cappuccino needs more foam than an espresso-based coffee beverage served with foamed milk.
- Close off steam as soon as milk is heated up to 60–65°C turn the steam control (12) to OFF position, i.e. turn it clockwise, so the sign OFF will cover the marker on the casing of the espresso machine.
- Tip: If you have not got a thermometer, a good way to measure the temperature is to touch the side of the pot. If the milk is hot enough, you will not be able to hold your hand for more than 3 seconds..
- Important: Do not boil the milk up.
- Remove the pot. Immediately wipe the steam nozzle (10) and its ending with a clean, wet cloth, as well as rinse it with a small amount of steam as before the process of milk foaming.
- Holding the pot in hand tap it on the table to release air bubbles and then move it in circles till the milk is shiny and there are no air bubbles visible. This will help to get a uniform consistency of milk and foam.
15.8. Add the foamed milk to the espresso prepared earlier. Your cappuccino is now ready.
15.9. To end working with the hot water mode on, press power on/off button ⏻(A). You will hear a sound signal. The ____ indicator will go off from the display panel, informing that the espresso machine is back to the coffee brew mode.
CAUTION! If there is not enough water in the water tank (1), the nozzle (10) will not produce hot water. The indicator will flash on the display panel and you will hear a repeating sound signal informing you about the necessity to fill in water. Make sure to turn the water off turn the steam control (12) to OFF, position, i.e. turn it clockwise, so the sign OFF will cover the marker on the casing of the espresso machine. Open the water tank cover (1) and pour in the water. After replenishing water, the sound signal will stop. To continue with the hot water mode turn the steam control (12) to position turn it counterclockwise, so the sign will cover the casing of the espresso machine.
CAUTION! Moving the steam/hot water nozzle (10) is possible only by means of a special attachment (Fig. 9). The steam/hot water nozzle (10) is extremely hot.
natural_image
Line drawing of a coffee maker with digital display and control panel (no text or symbols)Fig. 8

natural_image
Line drawing of a hand operating a espresso machine with control panel and buttons (no text or symbols)Fig. 9
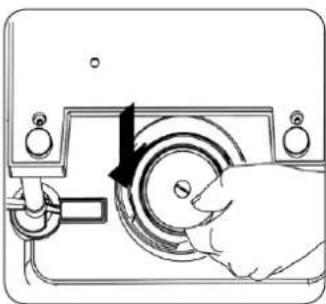
16. Automatic shutdown function
The machine will turn itself off automatically, if it is not used for over an hour. To turn it on again press the power on/off button ⏻(A) – you should hear a sound signal afterwards.
17. Emptying the drip tray
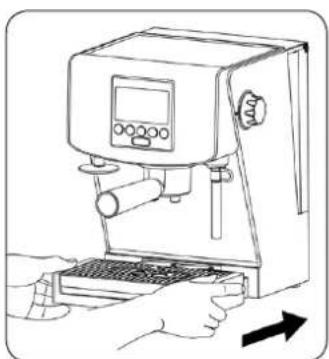
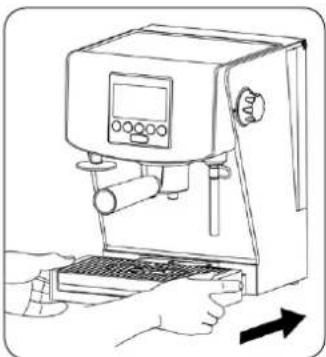
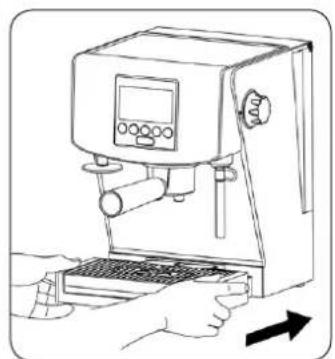
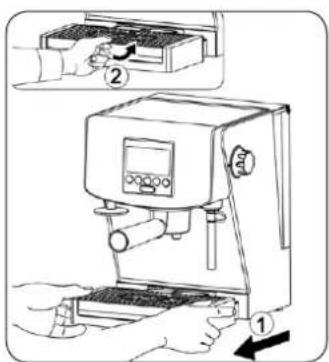
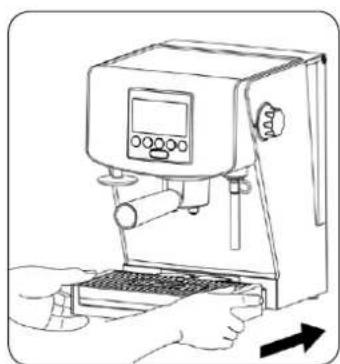
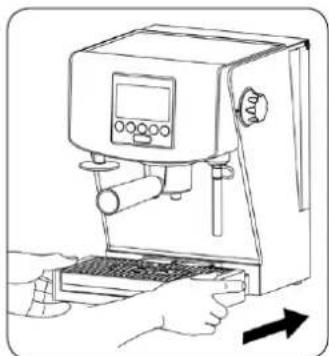
When the drip tray (8) is filled with water, its red emptiness gauge (9) will rise above the drip tray grid (7). Pull out the drip tray (8) with the grid (7) out of the espresso machine and pour the water out (Fig. 10). Place the accessories back in the machine.
natural_image
Technical line drawing of a mechanical clamp or bracket mounted on a base, with no visible text or symbols.Fig. 10
18. Removing limescale
Limescale is a mineral residue, which forms a natural deposit on all devices responsible for heating up water. This is why limescale needs to be removed from the espresso periodically. When a certain amount of water is used by the machine (this amount depends on its hardness level
set in the machine) the display panel should indicate a flashing ☑ If you see this highlighted on the control panel, you have to descale the device.
ATTENTION! Descale your coffee maker at least every 3 months. The damages which are caused by failure to descale the appliance are not subject to warranty repairs.
Descaling solutions
Traditionally, the following agents are used for removal of scale from coffee makers:
Citric acid solution
Dissolve 2 spoonful (ca. 30 g) of citric acid in 1 l of water.
- Specially designated liquids or tablets.
Hint: For liquids and tablets, follow the instructions shown on the packaging of these products.
18.1. Unplug the espresso machine from the power supply.
18.2. Make sure that the espresso machine has cooled off.
18.3. Remove the water tank (1) and the drip tray (8) together with its grid (7) from the espresso machine (Fig. 11).
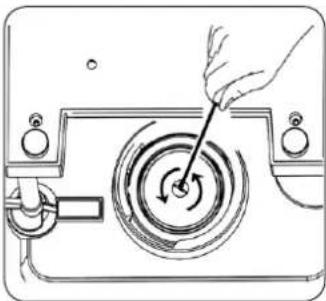
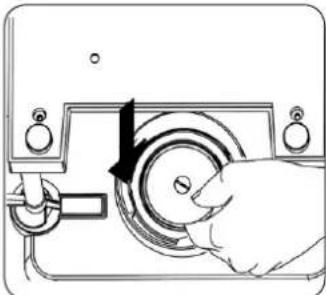
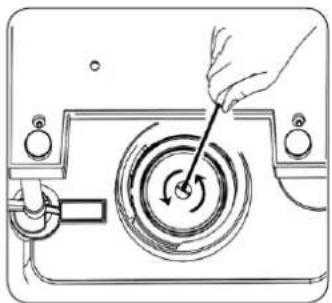
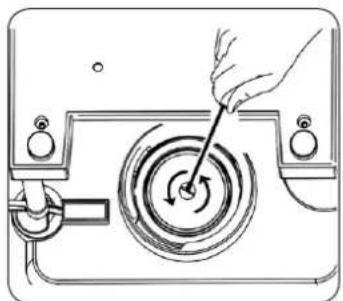
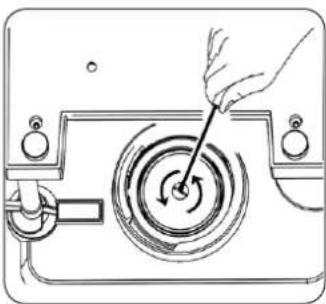
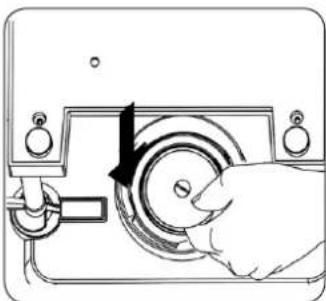
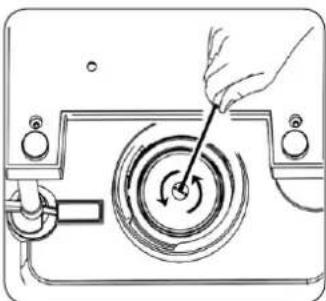
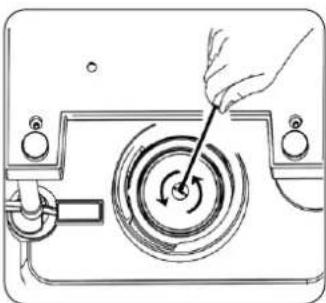
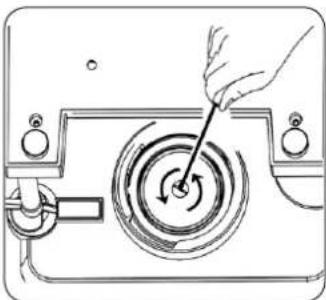
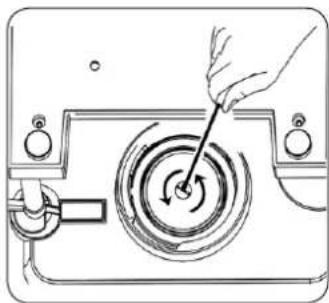
18.4. Place the espresso machine upside-down and undo the grid from the filter head (4) by means of an appropriate screwdriver (Fig. 12).
18.5. Clean the filter grid and filter head (4), remove limescale and coffee remains.
18.6. Place the espresso machine in the upright, working position.
18.7. Fill the water tank (1) with the prepared solution based on citric acid.
18.8. Close the cover of the water tank (1), and then install the tank (1) and the drip tray (8) with its grid (7) back into the espresso machine (Fig. 13).
18.9. Plug the espresso machine by putting the cord into the socket. The machine will turn on. The display panel and the power on/off button (A) will flash. The display panel will indicate power is on
18.10. Push the power on/off button ⏻(A), You will hear a sound signal.
18.11. The Indicator on the display panel will begin to whirl, signaling that the espresso machine is heating up.
18.12. When the indicator stops whirling, you will hear a sound signal informing you that the machine is ready for use (has reached the right temperature).
18.13. Press and hold both the coffee amount select button (C) and the steam/hot water select button (E) for 2 seconds. The remove
limescale indicator will stop flashing while the indicator will start whirling informing that the process of removing limescale has begun.
18.14. Hot water with removed limescale will pour out of the brew head (4).
18.15. Wait before all the liquid comes out of the brew head (4). Then remove and rinse the tank (1) with clean water.
18.16. Place an empty container under the brew head (4), so to let the hot water flow into it.
18.17. To continue with the clearing process, fill the tank (1) with clean water up to the maximum (MAX) level indicated on the water tank (1). Close the cover of the water tank (1) and install it back in the espresso machine.
18.18. Hot water will pour out of the brew head (4) (the espresso machine rinses itself).
18.19. After the process of removing limescale hot water will stop pouring our of the brew head (4) and the espresso machine will automatically turn off.
18.20. Power on/off button ⏻(A) will light up and the power indicator ⏻ will flash on the display panel.
18.21. Unplug the espresso machine from the power supply.
18.22. Make sure that the espresso machine has cooled off.
18.23. Remove the water tank (1) and the drip tray (8) together with its grid (7) from the espresso machine (Fig. 11).
18.24. Place the espresso machine upside-down and screw down the grid to the filter head (4) by means of a fitting screwdriver (Fig. 14).
18.25. Close the cover of the water tank (1), and then install the tank (1) and the drip tray (8) with its grid (7) back into the espresso machine (Fig. 13).
CAUTION! During the process of removing limescale all functions of the espresso machine are disabled.
natural_image
Line drawing of a coffee machine with hands operating it, showing no text or symbols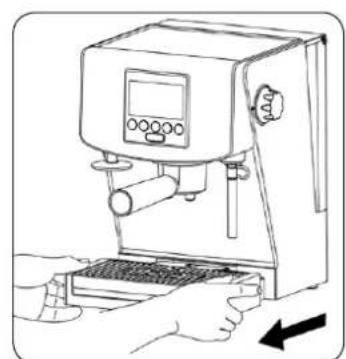
natural_image
Line drawing of a hand operating a digital coffee machine with a keyboard and control panel (no text or symbols)Fig. 11
natural_image
Line drawing of a hand using a tool to interact with a circular device (no text or symbols)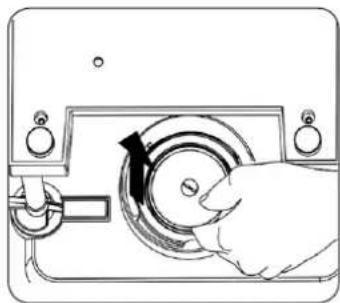
natural_image
Line drawing of a hand operating a circular device with a knob, no text or symbols presentFig. 12
natural_image
Line drawing of a hand using a coffee machine with a digital display and keyboard (no text or symbols)
natural_image
Line drawing of a coffee machine with hands holding a tray and a downward arrow indicating compression (no text or symbols)Fig. 13
natural_image
Hand operating a rotary dial with a black arrow indicating clockwise motion (no text or symbols)
natural_image
Line drawing of a hand using a tool to interact with a circular mechanical device (no text or symbols)Fig. 14
19. Cleaning and care
Always keep the espresso machine clean in order to provide high quality of brewed coffee and extend the life-span of the machine.
- Before you start cleaning, turn the espresso machine off and unplug it from the power supply.
- Make sure that the espresso machine has cooled off.
- Do not immerse the espresso machine in water or any other liquids.
- Do not wash any part of the espresso machine in a dishwasher.
- Wipe the casing of the machine with a wet cloth or sponge.
- Remove the filter handle (6) from the coffee machine and then remove coffee grounds. Clean the filter handle (6) and the filter with a wet cloth or sponge.
- Dry the cleaned part on air or with the use of a cloth – do not dry them in an oven or a microwave.
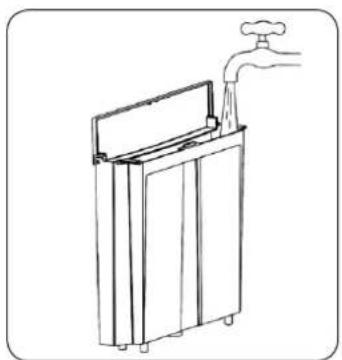
- Remove the drip tray grid (7) and the drip tray (8) from the espresso machine and pour water out of them. Then clean them with a wet cloth or sponge.
-
Remove the cappuccino attachment by unscrewing it and pulling it downwards.
-
Troubleshooting
| ISSUE POSSIBLE | CAUSE POSSIBLE SOLUTION | |
| Coffee flows out from the back of the filter handle | The filter handle (6) is not attached properly or not tightened enough. | Make sure that the filter handle (6) is properly placed in the brew head (4) and is maximally tightened. |
| There are coffee grains on the edge of the filter handle (6). | Clean the upper edge of the filter handle (6) from coffee and wipe the brew head (4) clean. | |
| The brew head (4) is dirty. Wipe the brew head (4) with a wet cloth. | ||
| The brew head (4) is damaged. Contact an authorized service center. | ||
| Coffee does not flow out | No water in the water tank (1). | Fill the tank (1) with water. |
| The water tank (1) is not properly installed. | Push the water tank (1) in making sure it is placed correctly. | |
| The control (12) is set to some other position, e.g. | Make sure that the control (12) is set to the OFF position. | |
| The filter on the brew head (4) may be blocked. | See paragraph 18 – Removing limescale. | |
| The sieve in the filter (6) is blocked. Coffee is too finely ground or too compressed. | Empty the sieve in the filter (6) and rinse it in running water. Wipe the brew head (4) with a cloth. | |
| Coffee is poured in drops | Coffee is too finely ground or too compressed. | If you use extremely fine ground coffee do not compress it too much. |
| The machine is blocked by calcareous residues. | See paragraph 18 – Removing limescale. | |
| Espresso is without the characteristic foam | Coffee is stale or dry. | Use fresh coffee. After opening a package of coffee be sure it is stored in an airtight container. |
| Coffee is not compressed enough. Compress the coffee harder. | ||
| Coffee is too coarsely ground. Use properly ground coffee or change your coffee brand. | ||
| Not enough coffee in the sieve of the filter (6). | See paragraph 10 – Making espresso. | |
| The handle is loose during the brewing process | The coffee is compressed too much. Compress the coffee more gently. | |
| Coffee is too finely ground. Change your coffee to a more coarsely ground. | ||
| The filter handle (6) does not fit tightly, as it was not screwed hard enough. | Make sure that the filter handle (6) is properly placed in the brew head (4) and is maximally tightened. | |
| There are coffee grains on the edge of the filter handle (6). | Clean the upper edge of the filter handle (6) from coffee and wipe the brew head (4) clean. | |
| The brew head (4) is dirty. Wipe the brew head (4) with a wet cloth. | ||
| The brew head (4) is damaged. Contact an authorized service center. | ||
| No steam doming out of the nozzle | The steam nozzle (10) is blocked. | Clean and rinse the steam nozzle (10). |
| Not enough foamed milk | The milk is not fresh. | Make sure that the milk is fresh. |
| The temperature of milk is too high. | Make sure that the milk is properly cooled off before being used. | |
| The pot. | To achieve the best results in foaming use the stainless steel pot delivered with the machine and as far as possible try to cool it off and rinse it with cold water before use. | |
| The steam nozzle (10) is blocked. | Clean and rinse the steam nozzle (10). | |
| The milk is boiled. | Try to use some fresh, cool milk. | |
| The machine is not working | The filter on the brew head (4) may be blocked. | See paragraph 18 – Removing limescale. |
| The machine is blocked with limescale. | See paragraph 18 – Removing limescale. | |
Remember that in case of any other damages or issues removing them on one's own is forbidden. Instead contact a qualified member of a service center.
ECOLOGY – ENVIRONMENT PROTECTION
Each user can protect the natural environment. It is neither difficult nor expensive.
In order to do it: put the cardboard packing into recycling paper container; put the polyethylene (PE) bags into container for plastic.
When worn out, dispose the appliance to particular disposal centre, because of the dangerous elements of this appliance, which can be hazardous for natural environment.
Do not dispose into the domestic waste disposal!!!

The manufacturer/importer does not accept any liability for any damages resulting from unintended use or improper handling.
The manufacturer/importer reserves his rights to modify the product any time in order to adjust it to law regulations, norms, directives, or due to construction, trade, aesthetic or other reasons, without notifying in advance.

- Odkamienianie
- Decalcifierea
- Удаление накипи
- Очистка и уход
- Усування каменю
- Dear Customers,
- SAFETY INSTRUCTIONS
- TECHNICAL DATA
- Machine specifications
- Machine design
- Filling the water tank
- Warming up the cups
- Before first use (rinsing the machine)
- Rinsing the machine for the espresso function
- Rinsing the machine for the steam mode
- Adjusting water hardness
- Selecting a programmed amount of coffee
- Selecting temperature for the brewed coffee
- Selecting espresso instant bags mode or ground coffee mode
- Making espresso
- Programming the memory function (P1 and P2)
- Making espresso using the memory function
- Making hot water
- Making steam (foaming milk)
- Automatic shutdown function
- Emptying the drip tray
- Removing limescale
- Descaling solutions
- Cleaning and care
- ECOLOGY – ENVIRONMENT PROTECTION
Brand : Zelmer
Model : Nerro Plus 13Z016
Category : Coffee maker