
BVSTDC3401013 - Coffee maker OSTER - Free user manual and instructions
Find the device manual for free BVSTDC3401013 OSTER in PDF.


| Product Type | Drip Coffee Maker |
| Brand | Oster |
| Model | BVSTDC3401 |
| Capacity | 5 cups (25 oz / 750 ml) |
| Dimensions (approx.) | 10 x 7 x 11 inches (25.4 x 17.8 x 27.9 cm) |
| Weight (approx.) | 3.5 lbs (1.6 kg) |
| Power Rating (estimated) | 800 W |
| Voltage (estimated) | 120 V, 60 Hz |
| Cord Length | Short power cord (approx. 2 ft) with cord storage |
| Material | Plastic body, glass decanter, non-stick warming plate |
| Filter Type | Permanent filter included; also compatible with basket-style paper filters |
| Brew Features | Pause 'n Serve (30 sec pour during brew), showerhead for even extraction |
| Warming Plate | Non-stick surface |
| Indicator Light | ON/OFF indicator shows when machine is on |
| Decanter | Drip-free, ergonomic handle, 5-cup glass carafe |
| Removable Parts | Filter basket, filter insert, decanter lid |
| Safety Features | Automatic shut-off (when turned off), short cord to prevent tripping |
| Cleaning | Decanter and brew basket dishwasher safe (top rack); machine cleaning recommended with vinegar |
| Warranty | One year limited warranty |
Frequently Asked Questions - BVSTDC3401013 OSTER
User questions about BVSTDC3401013 OSTER
0 question about this device. Answer the ones you know or ask your own.
Ask a new question about this device
Download the instructions for your Coffee maker in PDF format for free! Find your manual BVSTDC3401013 - OSTER and take your electronic device back in hand. On this page are published all the documents necessary for the use of your device. BVSTDC3401013 by OSTER.
USER MANUAL BVSTDC3401013 OSTER
natural_image
Illustration of an Oster brand water heater with black body and gray handle, no visible text or symbols on the device itself.MODEL MODELO
BVSTDC3401
INSTRUCTION MANUAL
5 CUP COFFEE MAKER
PLEASE READ ALL INSTRUCTIONS BEFORE USING
MANUAL DE INSTRUÇÕES
CAFETEIRA COM CAPACIDADE PARA 15 XÍCARAS
LEIA TODAS AS INSTRUÇÕES ANTES DE USAR ESTE APARELHO
IMPORTANT SAFEGUARDS
When using electrical appliances, basic safety precautions should always be followed to reduce the risk of fire, electric shock and/or injury to persons, including the following:
- READ ALL INSTRUCTIONS BEFORE USING THE COFFEEMAKER.
- DO NOT touch hot surfaces Use handles or knobs.
- To protect against fire or electrical shock, do not put cord, plug or appliance in water or any other liquid.
- Close supervision is necessary when the unit is used by or near children or incapacitated persons.
- This appliance is not intended for use by persons (including children) with reduced physical, sensory or mental capabilities, or lack of experience and knowledge, unless they have been given supervision or instruction concerning use of the appliance by a person responsible for their safety. Children should be supervised to ensure that they DO NOT play with the appliance.
- Turn the coffeemaker off and unplug the power cord from the power source when the coffeemaker or clock are not in use and before cleaning. Allow the coffeemaker parts to cool before putting on or taking off parts and before cleaning the appliance.
- DO NOT operate any appliance with a damaged cord or plug or operate it after the appliance malfunctions, or has been damaged in any manner. Return this appliance only to the nearest Oster® Authorized Service Center for examination, repair or adjustment.
- The use of accessory attachments not recommended or sold by the manufacturer may cause fire, electrical shock or injury.
- DO NOT use outdoors.
- DO NOT let the power cord hang over the edge of a table or counter or allow it to come in contact with hot surfaces.
- DO NOT place this appliance on or near a hot gas or electric burner, or in a heated oven.
- To disconnect, turn the coffeemaker OFF, then remove the power plug from wall outlet.
- Place the coffeemaker on a hard, flat level surface to avoid interruption of air flow underneath the appliance.
- DO NOT use appliance for other than intended use.
- This appliance is not intended to be operated by means of an external timer or separate remote-control system.
- This appliance is intended to be used in household and similar applications such as: staff kitchen areas in shops, offices and other working environments farm houses by clients in hotels, motels and other residential type environments bed and breakfast type environments.
DO NOT touch the heating plate while using your coffee maker or when you finish using it. After it is turned off or unplugged, the heating plate may still be hot. Allow it to cool before touching.
WARNING: To reduce the risk of fire, electric shock and personal injury, do not misuse your coffee maker and follow the instructions in this manual.
THIS UNIT IS FOR HOUSEHOLD USE ONLY.
SAVE THESE INSTRUCTIONS
DECANTER USE AND CARE
Follow the instruction below to reduce or eliminate the chance of breaking the decanter:
a. This decanter is designed for use with your Oster® coffeemaker and therefore must never be used on a range top or in any oven, INCLUDING A MICROWAVE OVEN.
b. DO NOT set a hot decanter on a wet or cold surface.
c. DO NOT use a cracked decanter or a decanter having a loose or weakened handle.
d. DO NOT clean the decanter with abrasive cleansers, steel wool pads or other abrasive materials.
e. Discard the decanter immediately if it is ever boiled dry.
f. Protect the decanter from sharp blows, scratches or rough handling.
WARNING:
To reduce the risk of fire or electric shock, do not remove any service covers. There are no user serviceable parts inside the coffeemaker. Only authorized personnel should repair the coffeemaker.
SAVE THESE INSTRUCTIONS
SPECIAL CORD SET INSTRUCTIONS
- A short power-supply cord is provided to reduce the risk resulting from becoming entangled in or tripping over a long cord.
- Extension cords are available and may be used if care is exercised in their use.
- If an extension cord is used, the marked electrical rating of the extension cord must be the same as the product. The resulting extended cord must be arranged so that it will not drape over the counter top or table top where it can be pulled on by children or tripped over accidentally.
DESCRIPTION OF THE APPLIANCE
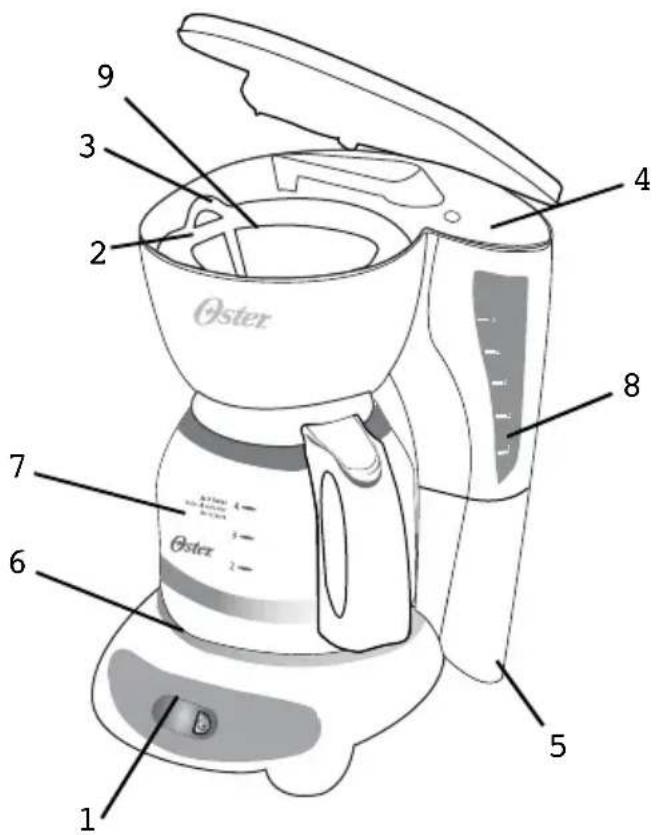
- ON/OFF Switch
- Removable Filter Insert
- Brew Basket
- Water Reservoir
- Power Cord
- Warming Plate
- Decanter
- Water Level Indicator
- Permanent Filter
Congratulations on the purchase of your new OSTER® coffeemaker! Please read these instructions carefully before using your new coffeemaker. Proper use, care and maintenance will ensure trouble-free operation and the long life of this appliance. Save these instructions for cleaning and, if necessary, replacement parts information.
COFFEEMAKER FEATURES
Your new coffeemaker has the following features:
- 5-Cup brewing capacity.
- Cord storage – Allows you to store extra cord length for a tidy countertop.
- Drip free decanter – Designed to help prevent drips after pouring.
- Ergonomically Designed Handle – Provides comfort, control and confidence when pouring.
- Removable filter basket – The filter basket will lift out of socket to allow you to remove a filter and ground coffee before returning back to its socket.
- ON/OFF indicator light – This safety feature reminds you that your coffeemaker is on.
- Non-stick warming plate – This feature prevents the decanter from sticking to the surface of the warming plate.
- Pause'n Serve – Can't wait for the coffee to finish brewing? The Pause'n Serve feature allows you up to 30 seconds to pour a cup of coffee while the coffee is still brewing.
BREWING COFFEE
Cleaning the coffeemaker before first use
Follow the steps below under "Adding Water and Ground Coffee" and "Brewing Coffee Now", but do not add coffee grounds.
Selecting and Measuring Ground Coffee
For best results, use coffee ground for use with automatic drip coffeemakers. The amounts shown below are suggested amounts.
Number of Cups Tablespoons
| 5 | 3 | |
| 4 | 3 | |
| 2 | 1 |
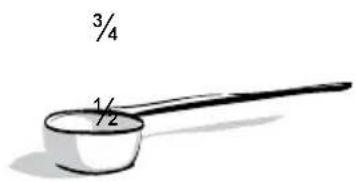
One cup = Five ounces of brewed coffee
Adding Water and Ground Coffee
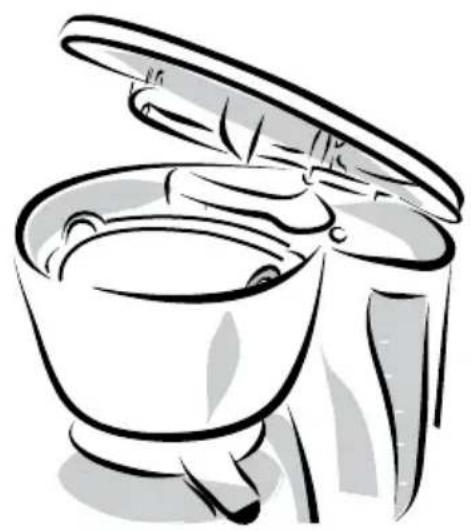
1) Open brew basket lid, turn showerhead to the back and lift out the removable filter insert. If using paper filters, it is important that the sides of the filter fit flush against the sides of the filter insert. If filter collapse occurs, for best results, dampen the filter before placing it in the brew basket and adding ground coffee.
natural_image
Line drawing of a bowl with open lid, no text or symbols present2) Place the permanent filter or a basket-style paper filter.
3) Add the desired amount of ground coffee to the filter. Gently shake the filter insert to level the ground coffee.
4) Be certain that the filter is centered in the middle of the removable filter basket insert. Close the brew basket.
natural_image
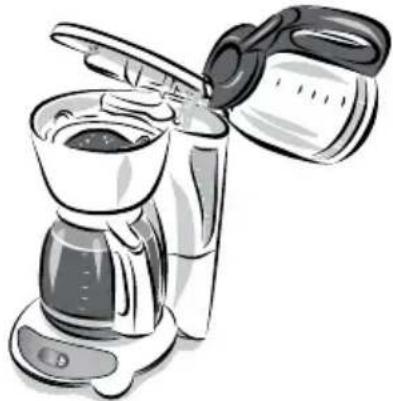
Illustration of a coffee maker pouring liquid from a stand mixer (no text or symbols)Do not exceed 5 cup line indicated on the water tank see through window.
5) Fill the water reservoir with the desired amount of tap water.
6) Close the brew basket lid.
7) Place the decanter on the warming plate.
If the brew basket overflows or fails to empty into the decanter, do not open the brew basket lid. An overflow may cause personal injury or damage to property.
To reduce the risk of damaging the decanter and/or the risk of personal injury, do not add cold water to the decanter if the decanter is already hot. Allow the decanter to cool before using.
Do not brew coffee while the brew basket lid is open.
BREWING COFFEE NOW
natural_image
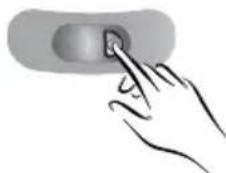
Hand pressing a button on a rounded rectangular object (no text or symbols visible)Push the switch so the light illuminates.
This light indicates that the coffeemaker is on and the brew cycle will begin. When the coffee stops flowing, the brew cycle is complete.
While the coffee is brewing, the Pause 'n Serve feature allow you to sneak a cup of coffee from the decanter. REPLACE THE DECANTER ON THE WARMING PLATE WITHIN 30 SECONDS TO PREVENT OVERFLOW AND POSSIBLE INJURY.
To turn Off the coffeemaker, push the switch so the light is no longer illuminated.
If the brew basket overflows or fails to empty into the decanter, do not open the brew basket. Turn off the coffeemaker. Unplug the coffeemaker and wait for the contents to cool before handling.
CLEANING INSTRUCTIONS
Turn off the appliance, unplug from the outlet and wait for it to cool before cleaning.
Your Coffeemaker must be cleaned when you begin to notice excessive steaming or the brewing time increases considerably. This condition is caused by a build-up of lime and mineral deposits from your water. If the pumping action stops before all the water has been pumped out of the machine, the appliance requires cleaning.
The frequency of cleaning depends on the hardness of water used. The following table gives a suggested cleaning schedule.
Suggested Cleaning Interval
Type of Water
Cleaning Frequency
Soft Water
Every 80 Brew Cycles
Hard Water
Every 40 Brew Cycles
Your Coffeemaker may be cleaned using vinegar.
Cleaning the Decanter
Hard water can leave a whitish stain on the decanter. Coffee may then turn this stain brown.
To remove decanter stains:
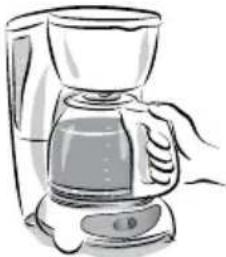
1) Fill the decanter with a solution of equal parts tap water and vinegar and let the solution stand in the decanter for approximately 20 minutes.
natural_image
Line drawing of a hand using a squeegee to consume liquid (no text or symbols)2) Discard the solution and wash and rinse the decanter.
Do not use harsh abrasive cleansers that may scratch the decanter; scratches may cause the decanter to break.
natural_image
Illustration of a coffee maker and a bottle (no text or symbols present)CLEANING YOUR COFFEE MAKER DAILY
Always unplug the coffee maker and allow it to cool before cleaning.
Remove the filter basket, carafe and carafe lid and wash them in a solution of warm water and mild liquid detergent.
Never use cleaning powders, metal fibers or other abrasive material. Glass carafe, lid and brew basket may be washed in the upper dish rack of the dishwasher.
WARNING: Never immerse the coffee maker in water or other liquids. Do not place in the dishwasher.
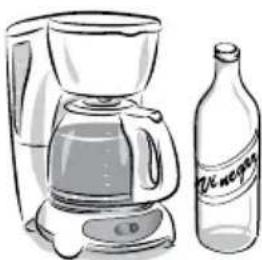
You can clean your coffee maker using vinegar.
WARNING: Use 4 cups or 20 fluid ounces of undiluted white household vinegar.
- Place the permanent filter or paper filter basket inside the unit. Pour vinegar into the filter basket and close the cover.
- Place the empty decanter back in the unit, centered on the warming plate.
- Strain three cups of vinegar through the coffee maker.
- Turn off the coffee maker and let stand for 30 minutes.
- Circulate the remaining vinegar through the coffee maker.
- Discard the vinegar and rinse thoroughly with clean water.
- Fill the water tank with fresh, clean water.
- Place the empty decanter back on the coffee maker, centered on the warming plate.
- Remove the permanent filter and rinse well before putting it back in the filter basket. If you used a paper filter, remove and discard.
- Start straining and allow for completion of the full cycle strain.
- Repeat Steps 7 to 10 as necessary.
Your coffee maker is now clean and ready to brew the next pot of delicious hot coffee!
TROUBLESHOOTING
Potential Problems
Probable Cause
"On" light does not illuminate
- Unplugged.
- Power outage.
Coffee is not brewing • Unplugged.
- Power outage.
• The water reservoir is empty; check
water window.
- The filter basket is not properly inserted.
- Carafe is not placed all the way on the warming plate.
Coffeemaker only brews water
- No grounds in filter basket.
Coffeemaker brews slowly
• Coffeemaker needs cleaning.
Filter basket overflows
- The filter basket is not properly inserted.
- Carafe is not placed all the way on the warming plate.
- Carafe lid not on carafe.
- Too many grounds placed in filter.
- Carafe was removed from warming plate for longer than 30 seconds.
Burning coffee smell
• Empty carafe was left on hot warming plate.
- Coffee was spilled on a warming plate.
Coffee is not hot
- Power outage.
Coffee tastes bad
• Coffee ground other than for
used.
• Ground coffee-to-water ratio was unbalanced.
Grounds are in coffee
• Paper filter not properly seated in basket.
- Filter overflowed.
PRECAUCIONES IMPORTANTES
natural_image
Line drawing of a bowl with open lid, no text or symbols presentnatural_image
Illustration of a coffee maker pouring liquid from a stand mixer (no text or symbols)natural_image
Line drawing of a hand holding a coffee maker with a digital control panel (no text or symbols)natural_image
Illustration of a coffee maker and a bottle (no text or symbols)LIMPIEZA DIARIA DE SU CAFETERA
natural_image
Line drawing of a steaming cup with lid open, no text or symbols presentnatural_image
Illustration of a coffee maker pouring liquid from a glass container (no text or symbols)Para remover as manchas da jarra:
natural_image
Line drawing of a hand holding a coffee maker with a side panel (no text or symbols)natural_image
Illustration of a coffee maker with a side view of a bottle (no text or symbols)PROBLEMAS E SOLUÇÕES
© 2016 Sunbeam Products, Inc. All rights reserved. Distributed by Sunbeam Latin America, LLC, 5200 Blue Lagoon Drive, Suite 470, Miami, FL 33126. One year limited warranty – please see insert for details.

- IMPORTANT SAFEGUARDS
- DECANTER USE AND CARE
- WARNING:
- SAVE THESE INSTRUCTIONS
- SPECIAL CORD SET INSTRUCTIONS
- DESCRIPTION OF THE APPLIANCE
- COFFEEMAKER FEATURES
- BREWING COFFEE
- Cleaning the coffeemaker before first use
- Selecting and Measuring Ground Coffee
- Adding Water and Ground Coffee
- BREWING COFFEE NOW
- CLEANING INSTRUCTIONS
- Suggested Cleaning Interval
- Cleaning the Decanter
- To remove decanter stains:
- CLEANING YOUR COFFEE MAKER DAILY
- TROUBLESHOOTING
- Potential Problems
- Probable Cause
- "On" light does not illuminate
- Coffee is not brewing • Unplugged.
- Coffeemaker only brews water
- Coffeemaker brews slowly
- Filter basket overflows
- Burning coffee smell
- Coffee is not hot
- Coffee tastes bad
- Grounds are in coffee
- PRECAUCIONES IMPORTANTES
- LIMPIEZA DIARIA DE SU CAFETERA
- Para remover as manchas da jarra:
- PROBLEMAS E SOLUÇÕES
Brand : OSTER
Model : BVSTDC3401013
Category : Coffee maker