
BVSTDCP12B - Coffee maker OSTER - Free user manual and instructions
Find the device manual for free BVSTDCP12B OSTER in PDF.


| Product Type | Coffee Maker |
| Brand | Oster |
| Model | BVSTDCP12B (also available in red and green) |
| Capacity | 12 cups (60 fl oz / 1.77 L) |
| Cup Size | 5 fl oz (150 mL) |
| Voltage | 127 V (60 Hz) or 220 V (50/60 Hz) depending on region |
| Power | 900 W |
| Brewing System | Drip coffee maker |
| Carafe Material | Glass |
| Programmable | Yes (Brew Later feature) |
| Clock | Digital display with hour and minute buttons |
| Auto Shut-Off | After 4 hours |
| Warming Plate | Yes, keeps coffee hot for up to 4 hours |
| Water Filtration | Yes, removable water filter included |
| Reusable Filter | Included (gold tone or plastic) |
| Paper Filter | Standard basket-style (sold separately) |
| Cleaning | Daily: wash carafe, lid, brew basket in warm soapy water or dishwasher top rack; Decalcify every 30 days with vinegar |
| Safety Features | Automatic shut-off, cool-touch handles, lid must be closed during brew |
| Dimensions (Approx.) | 11.8 x 9.1 x 14.2 inches (30 x 23 x 36 cm) |
| Weight (Approx.) | 4.5 lbs (2 kg) |
| Color Options | Black (B), Red (R), Green (G) |
| Warranty | 1-year limited |
| Country of Origin | China |
| Dishwasher Safe Parts | Carafe and brew basket (top rack only) |
Frequently Asked Questions - BVSTDCP12B OSTER
User questions about BVSTDCP12B OSTER
0 question about this device. Answer the ones you know or ask your own.
Ask a new question about this device
Download the instructions for your Coffee maker in PDF format for free! Find your manual BVSTDCP12B - OSTER and take your electronic device back in hand. On this page are published all the documents necessary for the use of your device. BVSTDCP12B by OSTER.
USER MANUAL BVSTDCP12B OSTER
natural_image
Black and white photo of a Oster brand coffee maker with clear glass and control panel (no visible text or symbols)MODELOS MODELS
BVSTDCP12B/R/G
READ ALL INSTRUCTIONS BEFORE USING THIS APPLIANCE
ESPAÑOL-4
CÓMO HACER SU PRIMERA JARRA DE CAFÉ
natural_image
Clear glass coffee maker with black handle and label 'Coca-Cola' on the base (no other text or symbols visible)Figura 1
PREPARAR AHORA

ESPAÑOL-5
PREPARAR MÁS TARDE
When using electrical appliances, basic safety precautions should always be followed to reduce the risk of fire, electric shock, and/or injury to persons including the following:
- Read all instructions.
- Do not touch hot surfaces. Use handles or knobs.
- To protect against electric shock, do not place or immerse cord, plugs, or appliance in water or other liquid.
- This appliance is not intended for use by children or by persons with reduced physical, sensory, or mental capabilities, or lack of experience and knowledge. Close supervision is necessary when any appliance is used near children. Children should be supervised to ensure that they do not play with the appliance. Keep the appliance and its cord out of reach of children.
- Unplug from outlet when either the appliance or display clock (if provided) is not in use, and before cleaning. Allow to cool before putting on or taking off parts, and before cleaning the appliance.
- Do not operate any appliance with a damaged cord or plug or after the appliance malfunctions, or has been damaged in any manner. Return appliance to an Authorized Service Center for examination, repair or adjustment. Do not attempt to replace or splice a damaged cord.
- The use of an accessory not recommended by the appliance manufacturer for use with this appliance may result in fire, electric shock or injury to persons.
- Do not use outdoors.
- Do not let cord hang over edge of table or counter, or touch hot surfaces.
- Do not place on or near a hot gas or electric burner, or in a heated oven.
- Always attach plug to appliance first, then plug cord into the wall outlet (for appliances with detachable cords). To disconnect, turn any control to the off position, then remove plug from wall outlet.
- Do not use appliance for other than intended use.
- All lids should be closed during use.
- Scalding may occur if the lid is removed or brew basket door is opened during or immediately after the brewing cycles. Contents may be hot. Allow to cool before opening the lid.
For appliances with glass containers:
- The container is designed for use with this appliance. It must never be used on a range top.
- Do not set a hot container on a wet or cold surface.
- Avoid sudden temperature changes, such as rinsing, washing, filling, or immersing a hot container with cold liquids.
- Do not use a cracked or chipped container or a container having a loose or weakened handle.
- Do not clean container with cleansers, steel wool pads, or other abrasive material.
For appliances with service panels:
- WARNING: TO REDUCE THE RISK OF FIRE OR ELECTRIC SHOCK, DO NOT REMOVE THIS COVER. NO USER-SERVICEABLE PARTS INSIDE. REPAIR SHOULD BE DONE BY AUTHORIZED SERVICE PERSONNEL ONLY.
ENGLISH-1
SAVE THESE INSTRUCTIONS
HOUSEHOLD USE ONLY
PRODUCT NOTICES
- Place the appliance on a hard, flat, level surface to avoid interruption of airflow underneath the coffeemaker.
- Glass decanters only: Discard the decanter immediately if it is ever boiled dry.
- Glass decanters only: Protect the decanter from sharp blows, scratches or rough handling.
- Do not operate the appliance with an empty water tank.
- Keep the area above the appliance clear during use, as hot steam will escape the appliance.
- Brew Basket
- Water Reservoir
- Brew Later Button
- Brew Now Button
- Clock Display
- Hour/Minute Buttons
- Carafe
- Shower Head
- Warming Plate
- Reusable filter
A. Clock Display
B. PM Indicator
C. Brew Now Indicator
D. Brew Now Button
E. Minute Button
F. Hour Button
G. Brew Later Button
H. Brew Later Indicator
ENGLISH-3
GETTING STARTED
- Unpack your coffeemaker and remove plastic bags, cartons and any tape on the unit. WARNING: KEEP PLASTIC BAGS AWAY FROM CHILDREN.
CLEAN COFFEEMAKER BEFORE USE
Just follow these simple steps:
- Wash the carafe lid and the brew basket in a mixture of mild detergent and water. Rinse each thoroughly.
- Replace all the parts and close the lid. Then, run a brew cycle by adding only water to the coffeemaker. After adding water, press Brew Now.
-
When brewing is complete, turn your coffeemaker off. Turn your coffeemaker off by pressing the Brew Now button again.
-
Discard the water in the carafe and rinse the carafe, carafe lid, and brew basket. NOTE: Carafe and brew basket are top rack dishwasher safe. Water Filtration System is NOT!
SETTING THE CLOCK
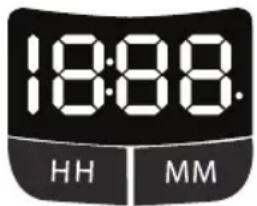
Plug in the coffee maker and set the current time using the hour and minute buttons. 5 Seconds of inactivity will set clock at time selected.
ENGLISH-4
HOW TO MAKE YOUR FIRST POT OF COFFEE
SUGGESTED COFFEE MEASUREMENT CHART:
For best results, brew 4 or more cups of coffee.
| Water To Brew Ground | Coffee |
| 12 cups = 60 oz. 12 tbs. | |
| 10 cups = 50 oz. 10 tbs. | |
| 8 cups = 40 oz. 8 tbs. | |
| 6 cups = 30 oz. 6 tbs. | |
| 4 cups = 20 oz. 4 tbs. |
*Using fine coffee or decaf may cause overflow.
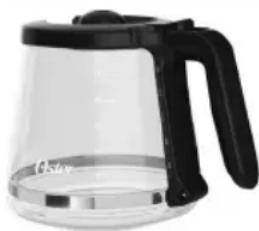
- Fill the carafe with fresh cold water to the desired level. (Figure 1) 1 "cup" is equivalent to 5 fluid ounces. Pour into Water Reservoir.
NOTE: Some water will be absorbed into the coffee grounds and water filter during the brewing process. - Insert and line the brew basket with a standard basket-style paper filter (sold separately) or reusable filter.
- Referencing the chart above, scoop the equivalent amount of coffee grounds into the filter using a tablespoon.
- You are ready to Brew Now!
- Enjoy fresh coffee every time!
Bonus: For a BOLDER CUP, use heaping TBS
natural_image
Clear glass coffee maker with black handle and label 'Coca-Cola' (no other text or symbols visible)Figure 1
BREW NOW
- After filling the coffeemaker with water and grounds, press the Brew Now button to brew instantly.
- Brew Now light will illuminate to indicate brewing.
- The coffeemaker warming plate will keep the coffee hot for up to 4 hours and then will

automatically shut off. The brew now button will remain illuminated while the warming plate is ON.
NOTE: Push Brew Now button prior to 4 hours to turn the coffeemaker off early.
ENGLISH-5
BREW LATER
IMPORTANT: You must set the clock before using this feature.
-
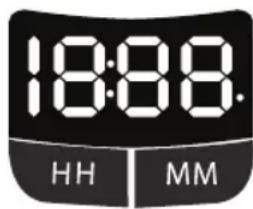
Press Brew Later. The display flashes "12:00". To set desired brew time, press the Hour and Minute buttons. Press Brew Later to set clock at time selected.
-
The Brew Later indicator will light up, showing that the coffeemaker is pre-set to brew at a later time.
If you change your mind and wish to turn off the Brew Later feature, simply press the Brew Later button again and it will turn off. Once the Brew Later time is set, the coffeemaker will automatically remember it until you change it or unplug the machine.

NOTE: As a reminder, if you want to continue to use the Brew Later feature, you will have to press Brew Later each time. Your coffeemaker will not automatically start again the next day.
HOW TO BREW THE PERFECT CUP
PAPER FILTERS VS. REUSABLE FILTERS
PAPER FILTERS: To achieve a smoother, less bitter cup of coffee, use a paper filter. It will be most effective in trapping bitter sediments.
REUSABLE FILTERS: For a more robust and full taste, use a reusable filter. It will allow the coffee's full flavor to fill your cup. Reusable filters have tiny holes that allow rich coffee oils to brew through.
WATER
While it may not seem like an important ingredient, coffee is 98 percent water. The type of water that you brew with greatly affects the final taste. Always use clean, fresh water that is filtered and free of impurities – avoid soft water or well water. Please refer to the “Water Filtration” section to learn more about how your coffeemaker reduces impurities in water.
CLEANLINESS
A clean coffeemaker is essential to brewing great tasting coffee each and every time.
ROUTINE CLEANING
DAILY CLEANING
- CAUTION: Make sure your coffeemaker is unplugged and has cooled completely before cleaning.
- Remove the brew basket, filter, carafe, carafe lid, and wash them in a solution of hot water and mild liquid soap, and dry thoroughly. You can also place in the dishwasher; top-rack only.
ENGLISH-6
DECALCIFYING YOUR OSTER® COFFEEMAKER
Minerals (calcium/limestone) found in water will leave deposits in your coffeemaker and affect its performance. It's recommended that you regularly remove these deposits using vinegar.
- IMPORTANT: Remove the water filtration system from the coffeemaker.
- Prepare 4 cups or 20 fl. oz. / 592ml of undiluted, white household vinegar. Pour the vinegar into the water reservoir.
- Place an empty 10-12 cup basket-style paper filter or Oster ^® reusable filter into the brew basket and close the coffeemaker's lid.
- Place the empty carafe back in the unit, centered on the warming plate.
- Brew prepared cleaning solution through the coffeemaker.
- Discard the cleaning solution and rinse the carafe thoroughly with clean water.
- Fill the water reservoir with 12 cups of clean, fresh water.
- Place the empty carafe back on the coffeemaker, centered on the warming plate.
- Remove and discard the paper filter used during the cleaning cycle. If an Öster ^® reusable filter was used during cleaning, remove it and rinse it thoroughly before replacing it in the brew basket.
- Press Brew Now and allow the full brew cycle to complete, rinsing the coffeemaker with hot water.
- Discard the water and rinse the carafe thoroughly with clean water.
- Repeat steps 7 through 11 one more time, to ensure it is fully rinsed.
Your coffeemaker is now clean and ready to brew the next pot of delicious, hot coffee!
NOTE: It is recommended that you decalcify your coffeemaker every 30 days.

CLEANING FREQUENCY
| TYPE OF WATER CLEANING FREQUENCY | |
| Soft Water Every | 80 Brew Cycles |
| Hard Water Every | 40 Brew Cycles |

CARAFE USE AND CARE
Follow the instructions below to reduce or eliminate the chance of breaking the glass carafe:
• Discard the carafe immediately if it is ever cracked.
- Protect the carafe from sharp blows, scratches or rough handling. Do not use harsh abrasive cleaners that may scratch the carafe. Scratches may cause the carafe to break.
USER MAINTENANCE
This appliance has no user serviceable parts. Any servicing beyond that described in the Cleaning Section should be performed by an Authorized Service Representative only. See warranty available online.
Oster®
| Características eléctricas de los modelos de la serie: Electric characteristics of series models: BVSTDCP12B-XXX, BVSTDCP12R-XXX, BVSTDCP12G-XXX | ||
| Voltaje/Voltage Frecuencia/Frequency Potencia/Power | ||
| 127 V 60 Hz 900 W | ||
| 220 V 50/60 Hz 900 W | ||
| 220 V 50 Hz 900 W | ||
| 220 V 60 Hz 900 W | ||
© 2019 Sunbeam Products, Inc. All rights reserved. Distributed by Sunbeam Latin America, LLC, 5200 Blue Lagoon Drive, Suite 860, Miami FL 33126. One year limited warranty - please see insert for details.
www.oster.com
OSTERLATINO / OSTERBRASIL

YouTube


ImpresoenChina Printed in China
P.N. 200625
GCDS-OST861271-JC
- CÓMO HACER SU PRIMERA JARRA DE CAFÉ
- PREPARAR AHORA
- PREPARAR MÁS TARDE
- For appliances with glass containers:
- For appliances with service panels:
- SAVE THESE INSTRUCTIONS
- HOUSEHOLD USE ONLY
- PRODUCT NOTICES
- ENGLISH-3
- GETTING STARTED
- CLEAN COFFEEMAKER BEFORE USE
- SETTING THE CLOCK
- HOW TO MAKE YOUR FIRST POT OF COFFEE
- SUGGESTED COFFEE MEASUREMENT CHART:
- BREW NOW
- BREW LATER
- HOW TO BREW THE PERFECT CUP
- PAPER FILTERS VS. REUSABLE FILTERS
- WATER
- CLEANLINESS
- ROUTINE CLEANING
- DAILY CLEANING
- DECALCIFYING YOUR OSTER® COFFEEMAKER
- CARAFE USE AND CARE
- USER MAINTENANCE
- Oster®
Brand : OSTER
Model : BVSTDCP12B
Category : Coffee maker