
HL10-ST - Laser pointer Cocraft - Free user manual and instructions
Find the device manual for free HL10-ST Cocraft in PDF.


| Product Type | Laser Pointer |
| Brand | Cocraft |
| Model | HL10-ST |
| Laser Class | Class 2 (typical) |
| Wavelength | 650 nm (red) |
| Output Power | < 1 mW |
| Operating Range | Up to 100 meters (estimated) |
| Power Source | 2 x AAA batteries |
| Battery Life | Approximately 10 hours continuous use |
| Material | Aluminum or plastic body |
| Dimensions | Approx. 140 x 15 mm (length x diameter) |
| Weight | Approx. 30 g (with batteries) |
| Color | Black or silver (typical) |
| Switch Type | Push button |
| Safety Features | Automatic shut-off (common) |
| Usage | Indoor presentations, pointing |
| Included Accessories | Batteries (may vary) |
| Certifications | CE, RoHS |
| Warranty | Typically 1 year |
| Maintenance | Clean lens with soft cloth; avoid water |
| Repair | Non-user serviceable; contact support |
Frequently Asked Questions - HL10-ST Cocraft
User questions about HL10-ST Cocraft
0 question about this device. Answer the ones you know or ask your own.
Ask a new question about this device
Download the instructions for your Laser pointer in PDF format for free! Find your manual HL10-ST - Cocraft and take your electronic device back in hand. On this page are published all the documents necessary for the use of your device. HL10-ST by Cocraft.
USER MANUAL HL10-ST Cocraft
Read the entire instruction manual carefully and make sure that you fully understand it before you use the equipment. Keep the manual for future reference.
Viktig information:
natural_image
Blue and black tripod-mounted camera with three white legs, set against a textured gray background (no text or symbols visible)Art.no Model
41-1747
NLC06+LA01
Ver. 20190424
Original instructions
Bruksanvisning i original
Originalbruksanvisning
Cross-Line Laser Level
Art.no 41-1747 Model NLC06
Please read the entire instruction manual before using the product and then save it for future reference. We reserve the right for any errors in text or images and any necessary changes made to technical data. In the event of technical problems or other queries, please contact our Customer Services (see address details on the back).
Safety

Warning
- Never point the laser beam towards people or animals and never look into the laser yourself even if you are not standing close to the laser level.
- Warning: Never look into the laser beam through optical instruments such as binoculars or telescopes. Doing so could result in serious eye damage.
- Do not use the laser level on or near highly reflective surfaces since the laser beam can be reflected back into your own or someone else's eyes.
- Never leave the laser level switched on unattended. Always switch it off after use. There is always a risk that someone could be blinded by the laser beam.
- If the laser is directed towards your eyes, close your eyes and avert your gaze away from the beam.

This product is intended for indoor use only.
Laser classification
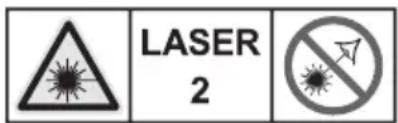
Laser class 2
Laser class 2 products

Warning: Do not stare into the laser beam or direct it towards other people or animals. Risk of serious damage to eyes.

Warning: Do not look directly into the beam through optical instruments such as binoculars or telescopes. Risk of serious damage to eyes.
- Make sure not to remove or damage the safety symbols and warnings found on the laser level.
- Never try to open the housing, repair or modify the product in any way.
- Repairs must only be carried out by qualified service technicians and only using identical replacement parts. Failure to follow this procedure could lead to serious personal injury.
- Only use accessories that are recommended by the manufacturer or retailer.
- Never use the product where explosive substances are used or stored.
- Protect the product from becoming wet and exposure to direct sunlight.
- Store the product out of children's reach.
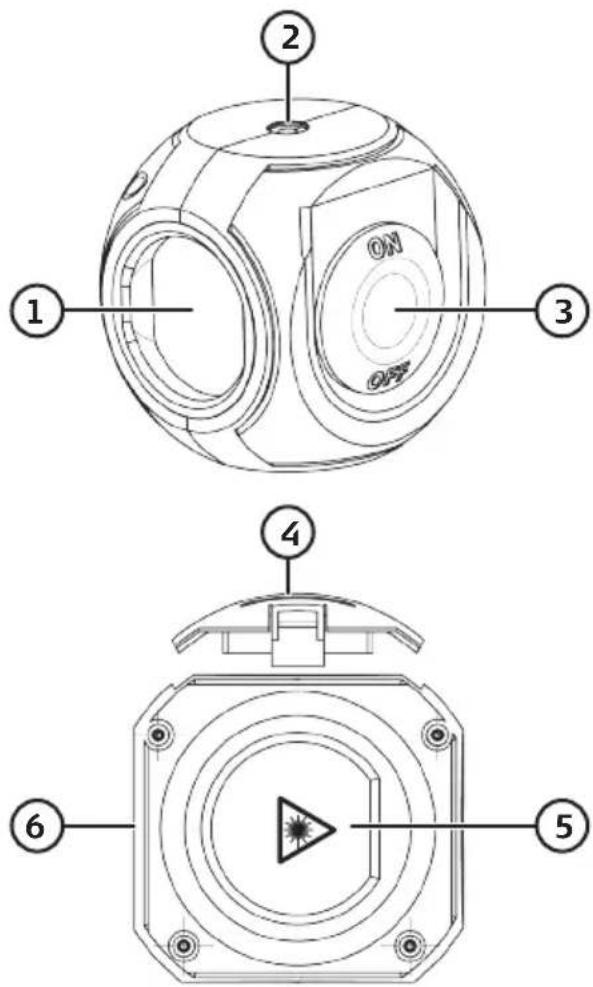
Product description Cross-line laser level
- Laser window
- Levelling warning light
- [ON/OFF] Power on/off switch
- Battery cover
- Laser warning sticker
- 14 " tripod thread
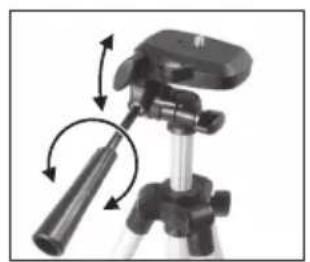
Tripod
natural_image
Close-up of a tripod-mounted camera mount with adjustable lever and motion arrows (no text or symbols)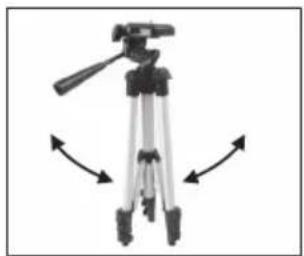
natural_image
tripod-mounted camera with tripod-mounted stand and three legs, shown with bidirectional arrows indicating rotation (no text or symbols)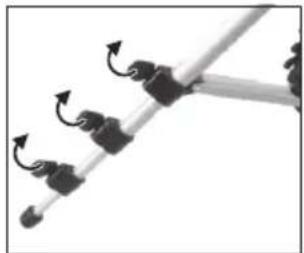
natural_image
Close-up of a mechanical component with three curved arrows indicating motion or force direction (no text or symbols)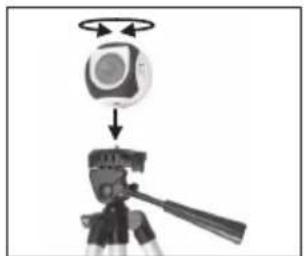
natural_image
Diagram showing a camera setup with an antenna and a tripod-mounted device (no text or symbols)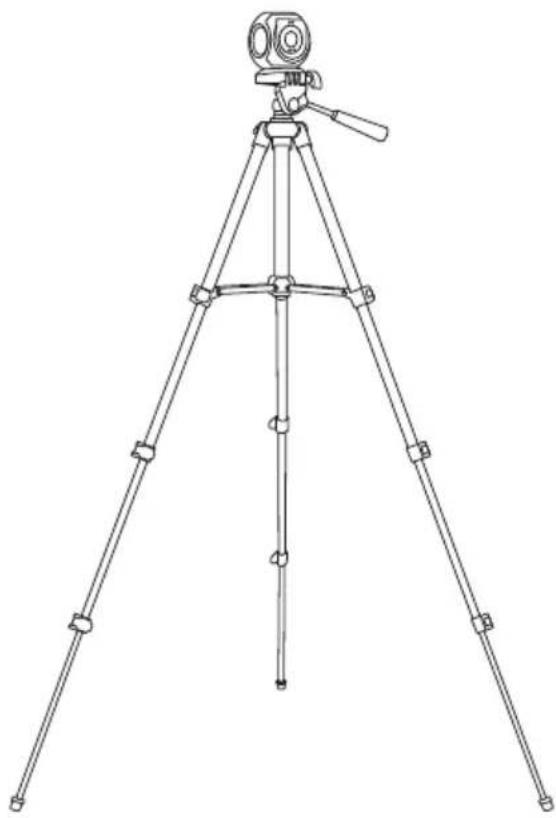
natural_image
Line drawing of a tripod-mounted surveying instrument with tripod legs and base (no text or symbols)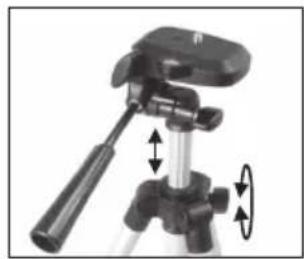
natural_image
Close-up of a tripod-mounted camera mount with adjustable arm and motion arrows (no text or symbols)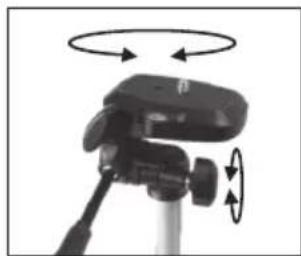
natural_image
Close-up of a tripod-mounted camera with a circular motion indicator and two directional arrows indicating rotation (no text or symbols)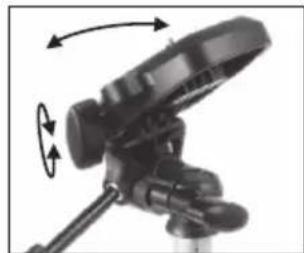
natural_image
Close-up of a black mechanical device with rotating arms and adjustment knobs (no visible text or symbols)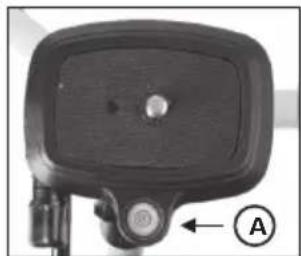
natural_image
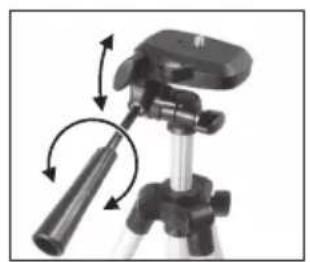
Close-up of a black rectangular electronic device with a circular button and labeled component (A), no readable text or symbols beyond the label.- The tripod mounting plate has a disc bubble spirit level (A). When the bubble is in the centre of the circle, the tripod is level.
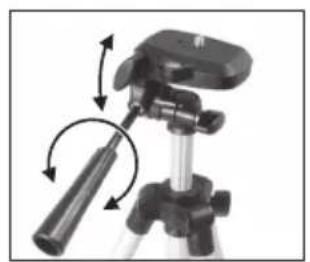
- Make sure that the locking knobs and cam lever locks are tight once the tripod has been adjusted.
Instructions for use Batteries

Warning
Make sure that the laser level is switched off before inserting batteries.
- Never mix old and new batteries. Never mix rechargeable and non-rechargeable batteries.
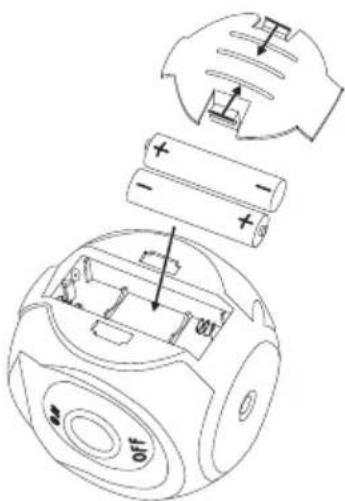
- Remove the battery cover (4) and insert 2 × AAA/LR03 batteries. Refer to the markings in the battery compartment to ensure correct polarity.
- Refit the battery cover.
natural_image
Exploded view diagram of a battery pack showing internal components and casing (no text or labels)Using the laser level
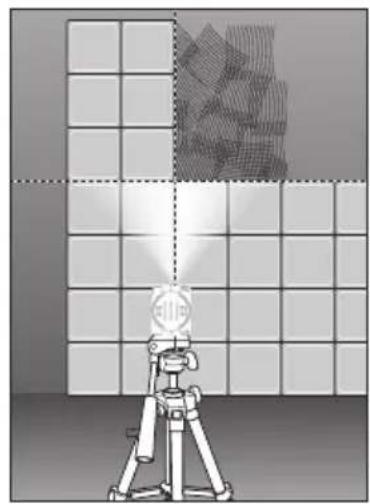
When the laser level is switched on, the automatic self-levelling system compensates for inclines up to 3^ .
The laser lines will switch off and the levelling warning light (2) will shine red if the laser level is inclined more than 3^ in any direction.
When the levelling warning light shines green and the projected laser lines have stopped moving, the laser level is horizontal and ready to be used.
natural_image
Illustration of a camera setup with a tripod-mounted sensor and a grid-patterned panel, no text or symbols present.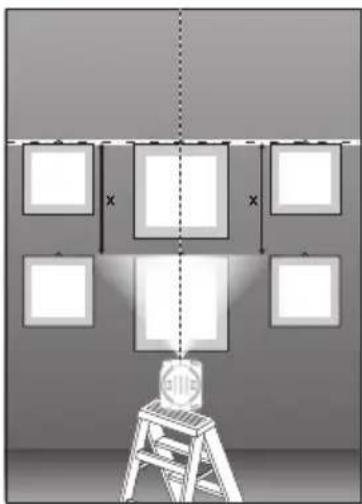
natural_image
Diagram showing a ladder with multiple framed boxes and a central object, no text or symbols present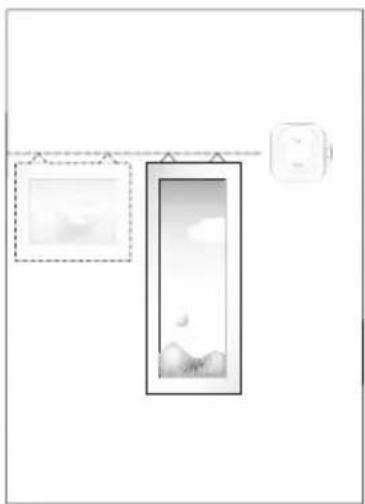
natural_image
Simple line drawing of a framed picture frame with cloud and sun motifs, no text or symbols present- The laser level can be mounted onto a tripod, placed on a firm flat surface, or held against a stationary vertical surface for stability.
- When the laser level is switched on using the power switch (3), a green cross line laser beam will be projected.
- Always switch the laser off using the power switch after you have finished levelling or when moving to a different location.

Important
- In the event of vibrations and changes of position during use the instrument will automatically self-level. Each time the laser level has been levelled, the accuracy of the horizontal and vertical lines should be checked against a known reference in order to avoid errors.
- Switch the laser level off before transporting it. This will lock the levelling system and help protect it from damage during transport.
- Avoid subjecting the laser level to impacts or shocks. Damage to the laser level could affect its accuracy. The accuracy of the laser level should be tested against known horizontal and vertical references following any heavy impact or shock.
- Do not leave the laser level in a vehicle for a long time. Extreme temperatures or sudden changes in temperature can affect the precision of the laser level.
Care and maintenance
• Always switch the product off before cleaning it.
- Clean the product using a damp cloth. Use only mild cleaning agents, never solvents or corrosive chemicals.
- Remove the batteries and store the laser level in a dry, dust-free environment, out children's reach whenever it is not to be used for an extended period.
Troubleshooting guide
| The laser will not switch on. Check the capacity of the batteries and make sure that they are inserted correctly. Follow the markings on the bottom of the battery compartment. | |
| The laser line flashes or doesn’t shine during self-levelling. | The laser level is at too much of an angle (more than 3°), place it on a level surface. |
| The laser line is not very visible. | Check the batteries and replace if necessary.Check the laser window, clean it with a soft cloth if necessary.Ambient light level too high. |
Responsible disposal
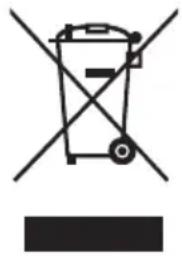
This symbol indicates that the product should not be disposed of with general household waste. This applies throughout the entire EU. In order to prevent any harm to the environment or health hazards caused by incorrect waste disposal, the product must be handed in for recycling so that the material can be disposed of in a responsible manner. When recycling your product, take it to your local collection facility or contact the place of purchase. They will ensure that the product is disposed of in an environmentally sound manner.
natural_image
Symbol of a trash bin crossed with no visible text or labelsSpecifications
Cross-line laser level
Working range 10 m
Laser line Cross
Laser line width 100 lux, 3 mm at 5 m
Accuracy ± 0.5 mm/m
Self-levelling within 3°
Normal levelling time 5 s
Laser type 635 nm
Laser class Class 2, P < 1 mW
Operating temperature 0–40 °C
Power supply 2 × AAA/LR03 batteries (sold separately).
Operating time Approx. 15 h
Operating temperature 0–40 °C
Material Soft TPE
Tripod thread 14 "
Dimensions 71 × 57 × 69 mm
Weight (incl. batteries) 197 g
Tripod
Height 35–110 cm
Weight 528 g
Krysslaser
Art.nr 41-1747 Modell NLC06
Stativ
natural_image
Close-up of a tripod-mounted camera mount with adjustable lever and motion arrows (no text or symbols)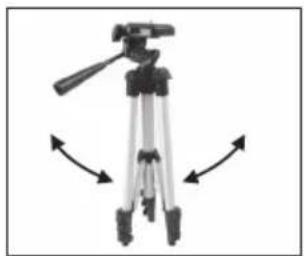
natural_image
tripod-mounted camera with tripod-mounted stand and three legs, shown with bidirectional arrows indicating rotation (no text or symbols)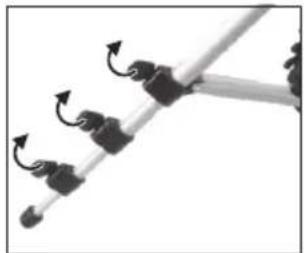
natural_image
Close-up of a mechanical component with three curved arrows indicating motion or force direction (no text or symbols)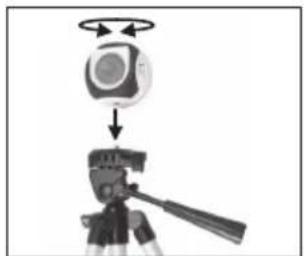
natural_image
Diagram showing a camera setup with an antenna above a tripod-mounted camera (no text or symbols present)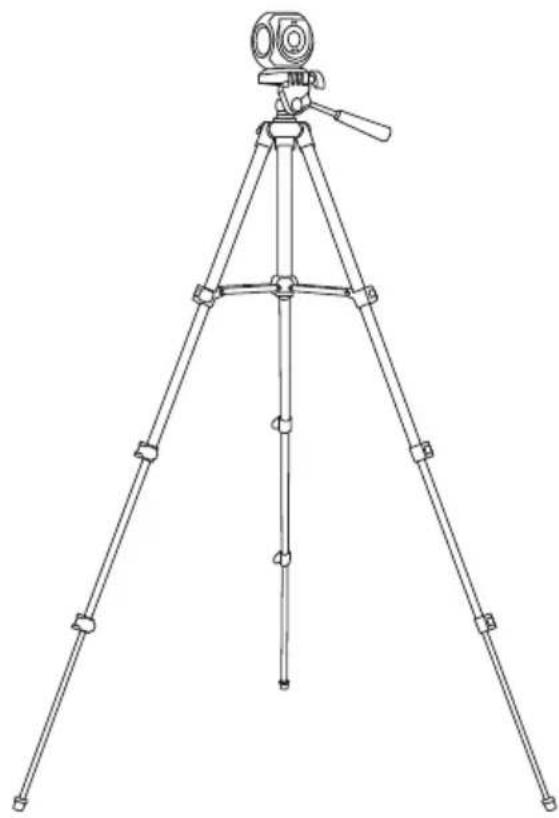
natural_image
Line drawing of a tripod-mounted surveying instrument with tripod legs and base (no text or symbols)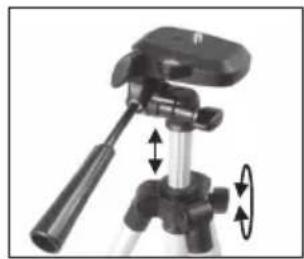
natural_image
Close-up of a tripod-mounted camera mount with adjustable arm and motion arrows (no text or symbols)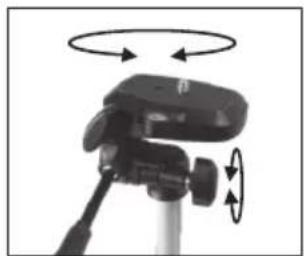
natural_image
Close-up of a tripod-mounted camera with a circular head and two rotating arms (no text or symbols visible)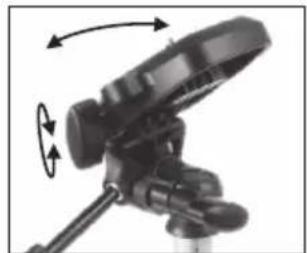
natural_image
Close-up of a black mechanical device with rotating arms and adjustment knobs (no visible text or symbols)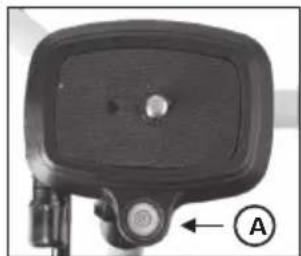
natural_image
Close-up of a black rectangular electronic device with a circular button and labeled point A (no text or symbols on the device itself)natural_image
Exploded view diagram of a battery pack showing internal components and casing (no text or labels)natural_image
Illustration of a camera setup with a tripod-mounted device and a grid-patterned panel, no text or symbols present.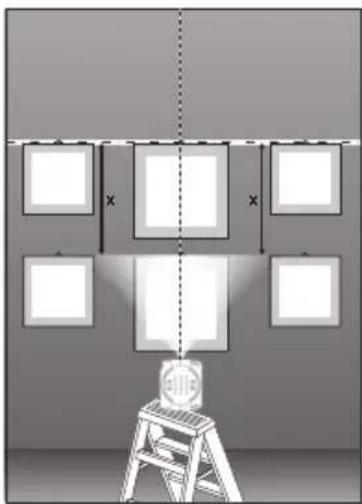
natural_image
Diagram showing a ladder with multiple square frames and a central object, no text or symbols present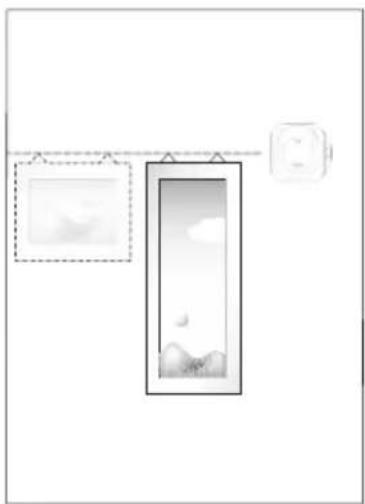
natural_image
Simple line drawing of a framed picture frame with cloud and moon motifs, no text or symbols presentnatural_image
Symbol of a trash bin crossed with no visible text or labelsSpecifikationer
Krysslaserpass
Stativ
natural_image
Close-up of a tripod-mounted camera mount with adjustable lever and motion arrows (no text or symbols)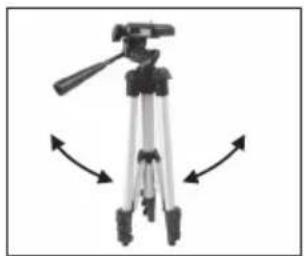
natural_image
tripod-mounted camera with tripod-mounted stand and three legs, shown with bidirectional arrows indicating rotation (no text or symbols)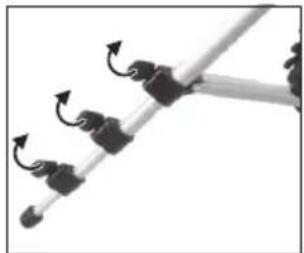
natural_image
Close-up of a mechanical component with three curved arrows indicating motion or force direction (no text or symbols)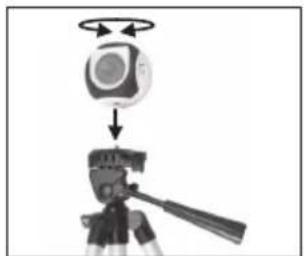
natural_image
Diagram showing a camera setup with an antenna above a tripod and a camera mounted on a tripod (no text or symbols present)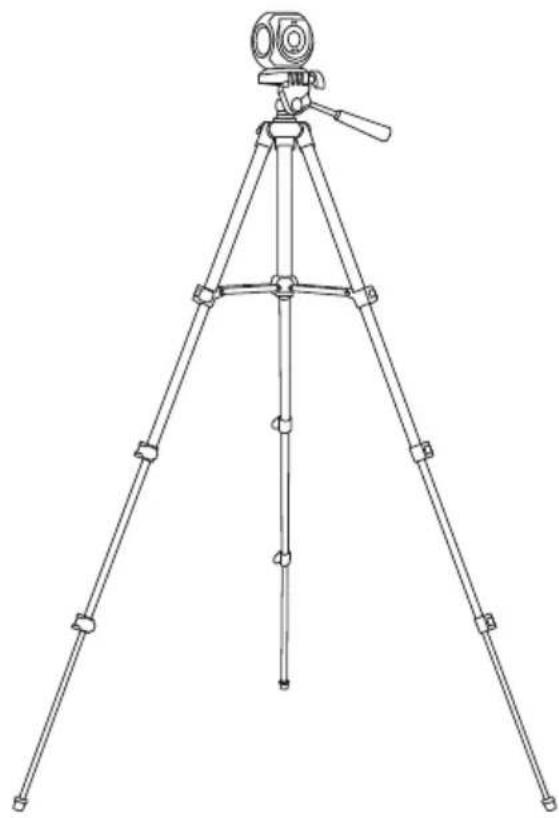
natural_image
Line drawing of a tripod-mounted surveying instrument with tripod legs and base (no text or symbols)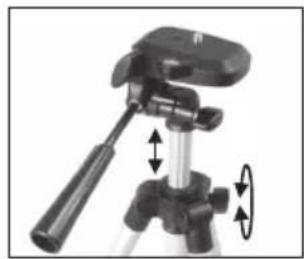
natural_image
Close-up of a tripod-mounted camera mount with adjustable arm and motion arrows (no text or symbols)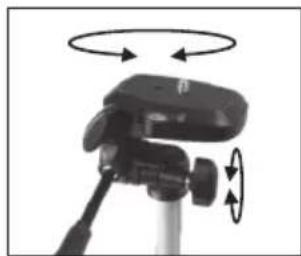
natural_image
Close-up of a tripod-mounted camera with a circular motion indicator and two directional arrows indicating rotation (no text or symbols)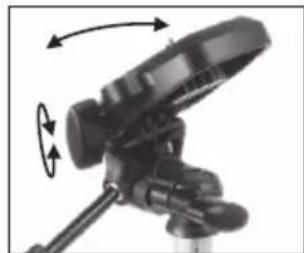
natural_image
Close-up of a black handheld device with rotating arrows indicating motion (no text or symbols visible)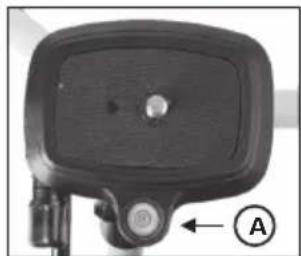
natural_image
Close-up of a black rectangular electronic device with a circular button and labeled point A (no text or symbols on the device itself)natural_image
Exploded view diagram of a device showing internal components and battery structure (no text or labels)natural_image
Illustration of a camera setup with a tripod-mounted device and a grid-patterned wall, no text or symbols present.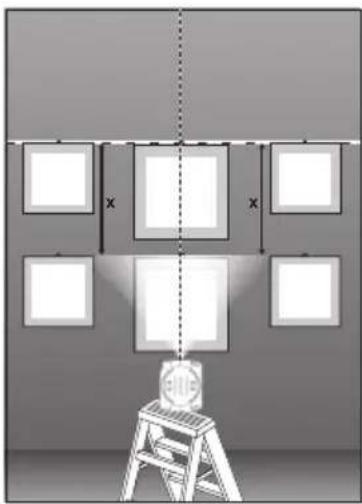
natural_image
Diagram showing a lamp mounted on a ladder with multiple framed picture frames, no text or symbols present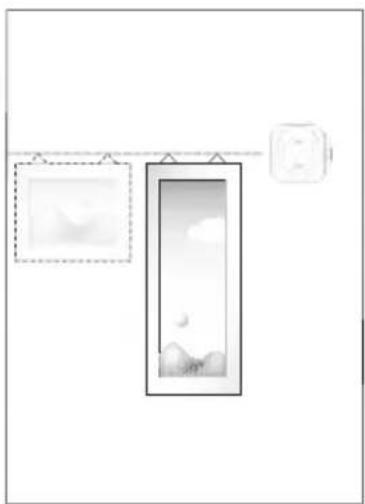
natural_image
Simple line drawing of a framed picture frame with cloud and moon motifs, no text or symbols present- Krysslaseren kan monteres på et stativ, plasseres på et plant og stabilt underlag, eller for rask kontroll holdes inntil en vertikal flate.
- Slå på krysslasen med strømbryteren (3), krysslaserlinjen vises og indikatorpæren lyser grønt.
- Skru alltid av krysslaseren etter avsluttet nivellering og når den skal flyttes på.

Viktig
natural_image
Symbol of a trash bin crossed with no visible text or labelsSpesifikasjoner
Krysslaser
natural_image
Close-up of a tripod-mounted camera mount with adjustable lever and motion arrows (no text or symbols)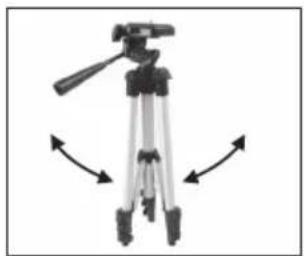
natural_image
tripod-mounted camera with tripod-mounted stand and three legs, shown with bidirectional arrows indicating rotation (no text or symbols)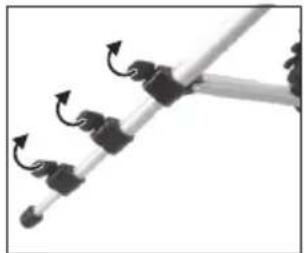
natural_image
Close-up of a mechanical component with three curved arrows indicating motion or force direction (no text or symbols)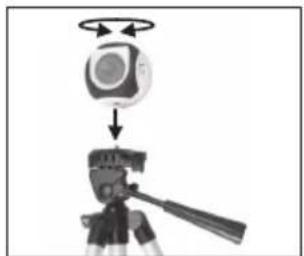
natural_image
Diagram showing a camera setup with an antenna above a tripod and a camera mounted on a tripod (no text or symbols present)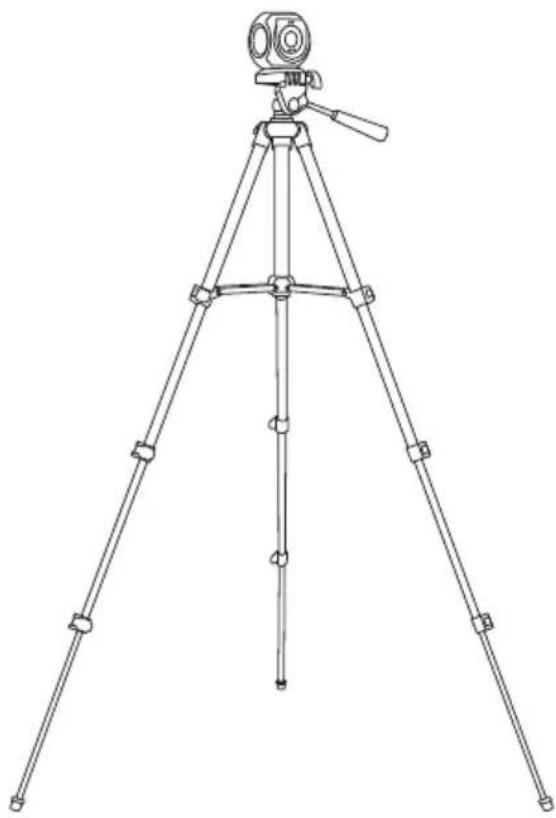
natural_image
Line drawing of a tripod-mounted surveying instrument with tripod legs and base (no text or symbols)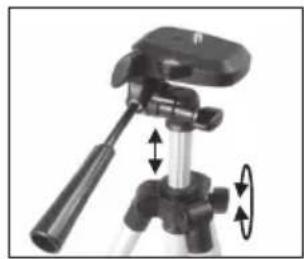
natural_image
Close-up of a tripod-mounted camera mount with adjustable arm and motion arrows (no text or symbols)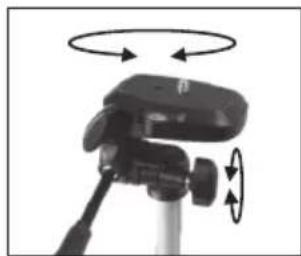
natural_image
Close-up of a tripod-mounted camera with a circular motion indicator and two directional arrows indicating rotation (no text or symbols)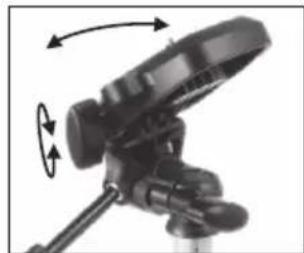
natural_image
Close-up of a black handheld device with rotating arrows indicating motion (no text or symbols visible)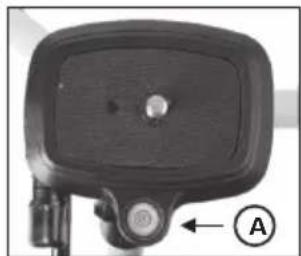
natural_image
Close-up of a black rectangular electronic device with a circular button and labeled component A (no text or symbols on the device itself)natural_image
Exploded view diagram of a battery pack showing internal components and casing (no text or labels)natural_image
Illustration of a camera setup with a tripod-mounted device and a grid-patterned panel, no text or symbols present.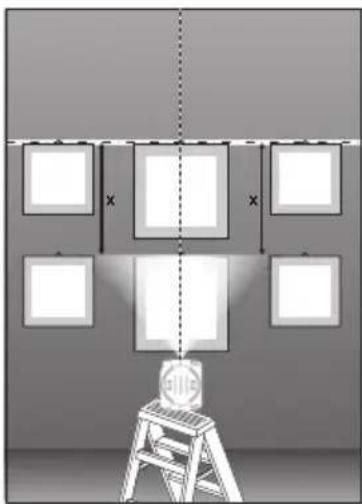
natural_image
Diagram showing a ladder with multiple framed boxes and a central object, no text or symbols present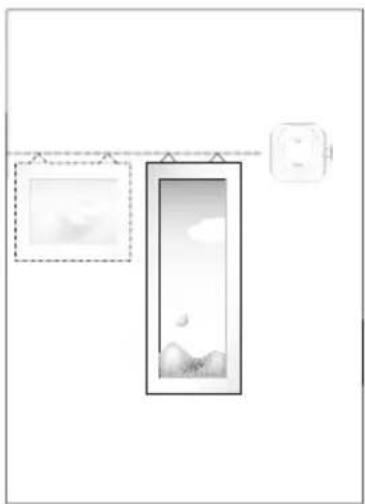
natural_image
Simple line drawing of a framed picture frame and a wall-mounted device, no text or symbols presentnatural_image
Close-up of a tripod-mounted camera setup with a lever and adjustment arrows (no text or symbols visible)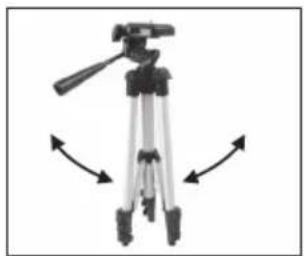
natural_image
tripod-mounted camera with tripod-mounted stand and three legs, shown with bidirectional arrows indicating rotation (no text or symbols)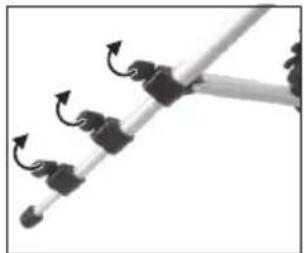
natural_image
Close-up of a mechanical component with three curved arrows indicating motion or force direction (no text or symbols)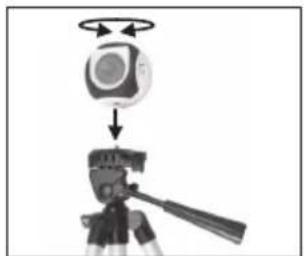
natural_image
Diagram showing a camera setup with an antenna above a tripod and a camera mounted on a tripod (no text or symbols present)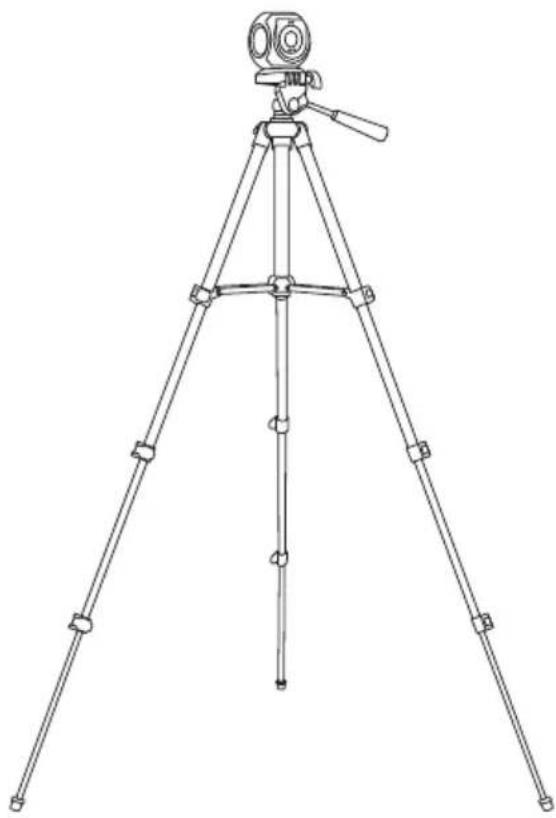
natural_image
Line drawing of a tripod-mounted surveying instrument with tripod legs and base (no text or symbols)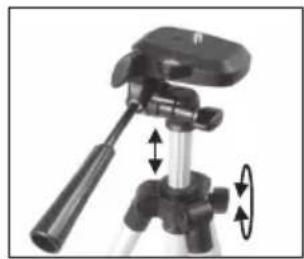
natural_image
Close-up of a tripod-mounted camera mount with adjustable arm and motion arrows (no text or symbols)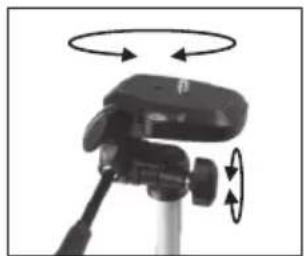
natural_image
Close-up of a tripod-mounted camera with a circular motion indicator and two curved arrows indicating rotational motion (no text or symbols)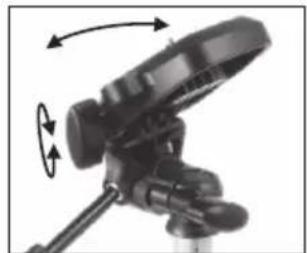
natural_image
Close-up of a black mechanical device with rotating arms and adjustment knobs (no visible text or symbols)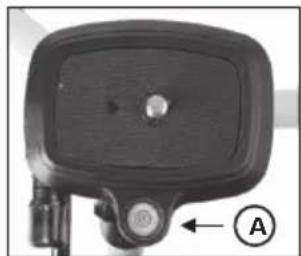
natural_image
Close-up of a black rectangular electronic device with a circular button and labeled component (A), no readable text or symbols beyond the label.natural_image
Exploded view diagram of a battery pack showing internal components and casing (no text or labels)natural_image
Diagram showing a camera setup with a tripod-mounted sensor and a grid-patterned panel above it (no text or symbols)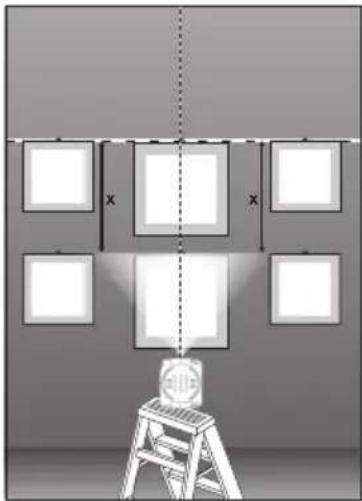
natural_image
Diagram showing a lamp mounted on a chair with multiple framed frames, no text or symbols present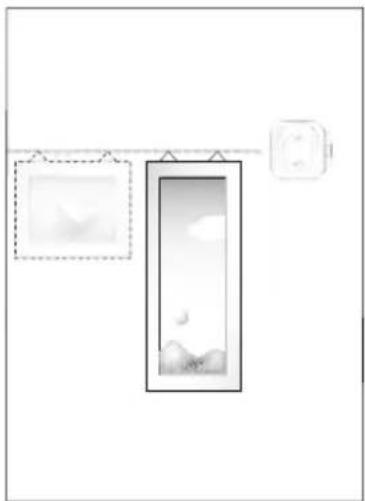
natural_image
Simple line drawing of a framed picture frame with cloud motifs and a wall-mounted device (no text or symbols)natural_image
Symbol of a trash bin crossed with no visible text or labelsTechnische Daten
Kreuzlinienlaser
Arbeitsbereich 10 m
Laserlinie Kreuz
Declaration of Conformity
Cross-Line Laser Level
41-1747 NLC06+LA01
| Machinery Directive2006/42/EC | EMC Directive2014/30/EU | Low Voltage Directive2014/35/EU |
| EN 61000-6-1:2007EN 61000-6-3:2007+A1:2011 |
Chiner Widushim
Ellinor Wickström Product Compliance Manager
Insjön, Sweden, 2019-04-24
CLAS OHLSON AB, SE-793 85 INSJÖN, SWEDEN
Sverige
Postal 10 - 13 Market Place
Kingston upon Thames
Surrey
KT1 1JZ
Deutschland
Kundenservice Hotline: 040 2999 78111
E-Mail: kundenservice@clasohlson.de
Homepage
www.clasohlson.de


- Viktig information:
- Cross-Line Laser Level
- Safety
- Warning
- Laser classification
- Laser class 2 products
- Product description Cross-line laser level
- Tripod
- Instructions for use Batteries
- Using the laser level
- Important
- Care and maintenance
- Troubleshooting guide
- Responsible disposal
- Specifications
- Krysslaser
- Stativ
- Specifikationer
- Krysslaserpass
- Viktig
- Spesifikasjoner
- Technische Daten
- Kreuzlinienlaser
- Declaration of Conformity
- 41-1747 NLC06+LA01
- Sverige
- Deutschland
Brand : Cocraft
Model : HL10-ST
Category : Laser pointer