
HL 20-SG - Laser pointer Cocraft - Free user manual and instructions
Find the device manual for free HL 20-SG Cocraft in PDF.


| Brand | Cocraft |
| Model | HL 20-SG |
| Product Type | Laser Pointer |
| Laser Class | Class 2 (IEC 60825-1) |
| Output Power | < 1 mW |
| Wavelength | 650 nm (Red) |
| Construction Material | Aluminum alloy body |
| Dimensions (Length) | 15 cm (5.9 in) |
| Dimensions (Diameter) | 2 cm (0.79 in) |
| Weight (without batteries) | 50 g (1.76 oz) |
| Power Source | 2 x AAA batteries (not included) |
| Maximum Range | Up to 500 m (in darkness) |
| Operation Mode | Momentary (press and hold) / Continuous (twist lock) |
| Key Features | Pocket clip, keyring loop, on/off button |
| Cleaning Instructions | Wipe lens gently with dry, soft cloth. Do not use solvents. |
| Safety Precautions | Do not point at eyes or reflective surfaces. Keep away from children. |
| Spare Parts Availability | Batteries are replaceable. Other parts not user-serviceable. |
| Warranty | Standard 1-year manufacturer warranty |
Frequently Asked Questions - HL 20-SG Cocraft
User questions about HL 20-SG Cocraft
0 question about this device. Answer the ones you know or ask your own.
Ask a new question about this device
Download the instructions for your Laser pointer in PDF format for free! Find your manual HL 20-SG - Cocraft and take your electronic device back in hand. On this page are published all the documents necessary for the use of your device. HL 20-SG by Cocraft.
USER MANUAL HL 20-SG Cocraft
Read the entire instruction manual carefully and make sure that you fully understand it before you use the equipment. Keep the manual for future reference.
Viktig information:
Original instructions
Bruksanvisning i original
Originalbruksanvisning
Cross-Line Laser Level
Art.no 41-1267 Model NLC07
Please read the entire instruction manual before using the product and then save it for future reference. We reserve the right for any errors in text or images and any necessary changes made to technical data. In the event of technical problems or other queries, please contact our Customer Services (see address details on the back).
Saftey
Laser classification
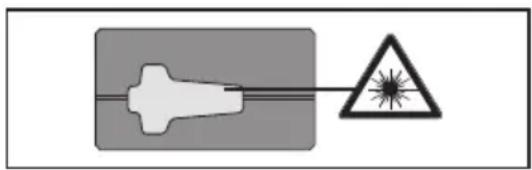
This meter produces a visible laser beam from the front of the instrument: it is a Class 2 laser in accordance with: IEC60825-1: 2014 Safety of laser products.
natural_image
Warning symbol with a warning triangle and a cross-shaped object, no text or labels presentLaser class 2 products

Do not stare into the laser beam or direct it towards other people or animals. Risk of serious damage to eyes.

Warning! Do not look directly into the beam with optical aids such as binoculars or telescopes. Risk of serious damage to eyes.
Product safety symbols

Read the entire instruction manual.
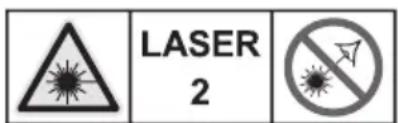
Laser class 2
Make sure not to remove or damage the safety symbols and warnings found on the distance meter.
- Never try to open the housing, repair or modify the distance meter in any way.
- Only use accessories that are recommended by the manufacturer or retailer.
- Never use the distance meter where flammable or explosive substances are used or stored.
- Do not use the distance meter on or near highly reflective surfaces since the laser beam can be reflected back into your own or someone else's eyes.
- Keep the laser distance meter out of children's reach.
Product description
natural_image
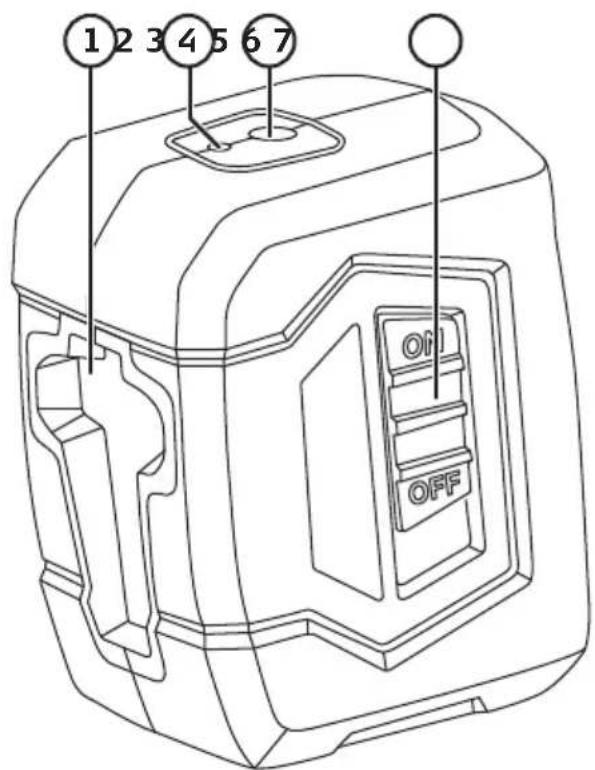
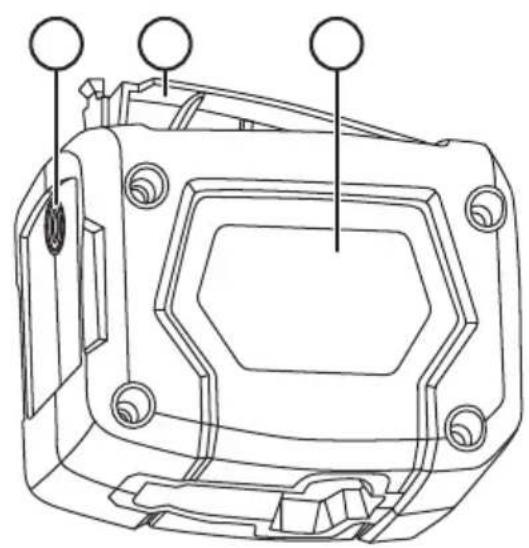
Technical line drawing of a mechanical component with mounting holes and a hexagonal base (no text or symbols)- Laser window
- Auto-level indicator
- [ ⏻ ] Mode button
- [ON/OFF] Auto-level switch
- 1/4" tripod screw thread
- Battery cover
- Rating plate
Operating instructions
Batteries
- Remove the battery cover and insert 2 × AA/LR6 batteries (sold separately). Refer to the markings in the battery compartment to ensure correct polarity.
- Refit the battery cover.
Switching the laser level on
Note:
- Never leave the product switched on unattended. Always switch it off after use. There is always a risk that someone could be blinded by the laser beam.
- Never point the laser towards people or animals and never look into the laser yourself even if you are not standing close to the laser level.
-
Protect the laser level from wetness and persistent sunlight.
-
Do not expose the laser level to extreme temperatures or rapid changes in temperature. Do not leave the laser level in your car for a long period. Extreme temperatures or rapid changes in temperature can affect the precision of the laser level.
- Avoid subjecting the laser level to heavy impacts or shocks. Damage to the laser level could affect its accuracy. The accuracy of the laser level should be tested against known references following any heavy impact or shock.
- Switch the laser level off before transporting it. When the laser level is switched off the levelling system locks to prevent it becoming damaged.
Automatic Self-Levelling
- Position the laser level in a suitable place (free-standing or on a tripod/stand).
- Set the [ON/OFF] switch (4) to the ON position. The laser beam will appear on the surface that the laser window is pointed towards and the auto-level indicator (2) will be green. Note: If the laser level is inclined more than 4^ form horizontal the auto-level indicator will shine red, the laser beam will flash and the self-levelling function will deactivate. Right the level by hand to within 4^ of horizontal and the automatic self-levelling function will reactivate.
- Press [⏻] the required number of times to select the desired laser projection mode: horizontal, vertical or cross.
- Slide the [ON/OFF] switch] to OFF to turn the laser level off.
Note:
- Always switch the laser level off after you have finished working or before moving it to a different location. When the laser level is switched off, a built-in lock mechanism is engaged to protect the levelling mechanism.
- In the event of vibrations and changes of position during use the laser level will automatically self-level. Each time the laser level has been levelled, the accuracy of the horizontal and vertical lines should be checked against a known reference in order to avoid errors.
Locked line mode
The projected laser line can be locked (self-levelling switched off) and the laser level tilted manually to any desired angle.
- Slide the [ON/OFF] switch to OFF.
- Press [⏻] to switch the laser level on. The auto-level indicator will now shine red.
- Press [⏻] the required number of times to select the desired laser projection mode: horizontal, vertical, cross or no line at all.
Care and maintenance
• Always switch the laser level off before cleaning it, moving it, and after you have finished working.
- Clean the exterior of the laser level by wiping it with a damp cloth. Use only mild cleaning agents, never solvents or corrosive chemicals.
• Always treat the laser level with the care deserving of the precision optical instrument that it is.
- Do not subject the laser level to impacts, vibrations, extremely high or low temperatures.
- Remove the batteries and store the laser level in a dry, dust-free environment, out children's reach whenever it is not to be used for an extended period.
Troubleshooting guide
| The laser level will not switch on. | Check the capacity of the batteries and make sure that they are inserted correctly. Follow the markings on the bottom of the battery compartment. |
| The laser line flashes during self-levelling. | The incline angle has been exceeded (4°).Right the laser level. |
| The laser level shuts down after a few seconds use. | The batteries are flat. Change the batteries. |
| The laser line is not clear. • | Check the batteries and replace if necessary.• Check the laser window; clean it with a soft cloth if necessary.• Ambient light level too high. |
Responsible disposal
This symbol indicates that this product should not be disposed of with general household waste. This applies throughout the entire EU. In order to prevent any harm to the environment or health hazards caused by incorrect waste disposal, the product must be handed in for recycling so that the material can be disposed of in a responsible manner. When recycling your product, take it to your local collection facility or contact the place of purchase. They will ensure that the product is disposed of in an environmentally sound manner.

natural_image
Symbol of a trash bin crossed with no visible text or labelsSpecifications
Batteries 2 × AA/LR6
Battery life > 3 hours
Range Up to 20 m
Laser type 510 nm
Laser Class Class 2, P < 1 mW
Accuracy ± 0.5 mm/m
Self-levelling Up to ±4^
Normal levelling time < 5 s
Operating temperature 0–40 °C
Tripod thread 1/4"
Size 85 × 55 × 71 mm
Weight (incl. batteries) 290 g
Krysslaser
Art.nr 41-1267 Modell NLC07
natural_image
Warning symbol with a warning triangle and a cross-shaped object, no text or labels presentLaserklass 2-produkter

natural_image
Technical line drawing of a mechanical housing component with mounting holes and a central hexagonal opening (no text or symbols)natural_image
Symbol of a trash bin crossed with no text or numbers, representing waste sorting or disposal (no text present)Specifikationer
Batterier 2 × AA/LR06
Batteritid >3 tim
natural_image
Warning symbol with a warning triangle and a cross-shaped object, no text or labels presentLaserklasse 2-produkter

natural_image
Technical line drawing of a mechanical component with mounting holes and hexagonal base (no text or symbols)- Laservindu
- Indikator for automatisk nivellering
- [ ⏻ ] Velg vising av laserlinje, slå på fast laserlinje
- [ON/OFF] Slå på automatisk nivellering
- Stativfeste 1/4"
- Batterilokk
- Merkeplate
Bruk
Batterier
natural_image
Symbol of a trash bin crossed with a diagonal line and a horizontal bar below (no text or labels)Spesifikasjoner
Batterier 2 × AA/LR06
Batteritid > 3 tim
Rekkevidde Opptil 20 m
Lasertype 510 nm
Laserklasse Klasse 2, P < 1 mW
natural_image
Warning symbol with a warning triangle and a cross-shaped object, no text or labels presentnatural_image
Technical line drawing of a mechanical component with mounting holes and hexagonal base (no text or symbols)natural_image
Symbol of a discarded trash bin with crossed lines indicating no waste or plastic (no text or labels)Tekniset tiedot
Akut 2 kpl AA/LR06
Akun kesto > 3 tuntia
natural_image
Warning symbol with a cross and triangular warning triangle (no text or labels)natural_image
Technical line drawing of a mechanical component with mounting holes and a hexagonal base (no text or symbols)Declaration of Conformity
Declares that this product complies with the requirements of the following directives and standards
Machinery Directive EMC Directive Low Voltage Directive
2014/30/EU
EN: 60825-1: 2014
EN: 61000-6-1: 2007
EN: 61000-6-3 2007
+A1:2011
Henrik Alfredsson
Manager Technique & Quality
Insjön, Sweden, 2017-02-14
CLAS OHLSON AB, SE-793 85 INSJÖN, SWEDEN
Sverige
Postal 10 - 13 Market Place
Kingston Upon Thames
Surrey
KT1 1JZ
Deutschland
Kundenservice Hotline: 040 2999 78111
E-Mail: kundenservice@clasohlson.de
Homepage
www.clasohlson.de


- Viktig information:
- Cross-Line Laser Level
- Saftey
- Laser classification
- Laser class 2 products
- Product safety symbols
- Product description
- Operating instructions
- Batteries
- Switching the laser level on
- Note:
- Automatic Self-Levelling
- Locked line mode
- Care and maintenance
- Troubleshooting guide
- Responsible disposal
- Specifications
- Krysslaser
- Laserklass 2-produkter
- Specifikationer
- Laserklasse 2-produkter
- Bruk
- Batterier
- Spesifikasjoner
- Tekniset tiedot
- Declaration of Conformity
- Sverige
- Deutschland
Brand : Cocraft
Model : HL 20-SG
Category : Laser pointer