
LM33 - Lawn mower Cocraft - Free user manual and instructions
Find the device manual for free LM33 Cocraft in PDF.


| Brand | Cocraft |
| Model | LM33 (M2E1233M) |
| Product Type | Electric Lawn Mower |
| Power Supply | 220–240 V ~ 50 Hz |
| Power Output | 1200 W |
| Motor Speed | 3350 rpm |
| Cutting Width | 33 cm |
| Cutting Height Settings | 20 mm, 40 mm, 60 mm |
| Grass Collector Capacity | 33 L |
| Weight | 7 kg |
| Sound Pressure Level (LpA) | 85 dB(A), K=3 dB |
| Sound Power Level (LwA) | 96 dB(A), K=3 dB |
| Vibration Level (handle) | 1.3 m/s², K=1.5 m/s² |
| Safety Features | Double insulation, RCD recommended, power lever lock button, blade brake |
| Blade Type | Sharp steel blade, replaceable |
| Cutting Height Adjustment | Manual, spring-loaded wheel axle (3 positions) |
| Handle Type | Foldable upper handle for storage |
| Maintenance | Clean with damp cloth; no water spray; keep ventilation ports clear |
| Disposal | Recycle per local regulations (WEEE symbol) |
| Included Components | Lawn mower, grass collector, extension lead coupling, cable strain relief |
| Certifications | CE marking |
Frequently Asked Questions - LM33 Cocraft
User questions about LM33 Cocraft
0 question about this device. Answer the ones you know or ask your own.
Ask a new question about this device
Download the instructions for your Lawn mower in PDF format for free! Find your manual LM33 - Cocraft and take your electronic device back in hand. On this page are published all the documents necessary for the use of your device. LM33 by Cocraft.
USER MANUAL LM33 Cocraft
Read the entire instruction manual carefully and make sure that you fully understand it before you use the equipment. Keep the manual for future reference.
Viktig information:
natural_image
Side view of a blue lawn mower with black handlebars and front-mounted device (no visible text or symbols)Art.no Model
18-4661
31-8738
M2E1233M
M2E1233M
Ver. 20200911
Original instructions
Bruksanvisning i original
Originalbruksanvisning
Please read the entire instruction manual before using the product and then save it for future reference. We reserve the right for any errors in text or images and any necessary changes made to technical data. In the event of technical problems or other queries, please contact our Customer Services (see address details on the back).
Safety
Product safety symbols

Warning!
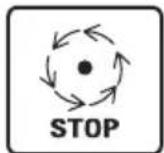
The blades will continue to rotate after the motor has been turned off.

Read the instruction manual before operating this machine.

To avoid electric shock avoid cutting the grass after it has rained. Do not leave the lawn-mower outdoors during rain.
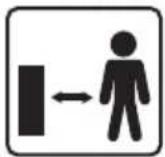
Keep bystanders at a safe distance.
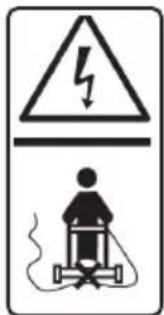
Keep the mains lead away from the rotating cutting blade.

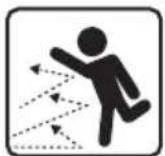
Extremely sharp cutting blades.
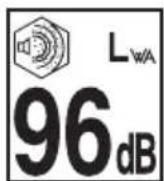
Sound power level.
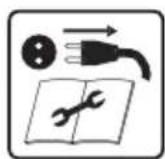
Unplug the mains lead before carrying out any maintenance, repairs or service.

Double insulation.

CE marking.
General safety instructions
- The instruction manual must always accompany the lawnmower. Anyone intending to use the lawnmower must first read the entire instruction manual before starting any work.
- The lawnmower is only intended for domestic use and only in the manner described in this instruction manual.
- The lawnmower must be assembled in the manner described in this instruction manual, be undamaged and in normal operating condition before use.
- The lawnmower should be connected to a mains outlet protected by a 30 mA RCD.
- Use only extension leads and connections approved for outdoor use.
- Do not use the lawnmower if any of the used extension leads or connections are damaged in any way. This includes any leads or connections on the lawnmower itself.
- Never allow children or persons with reduced physical, sensory or mental capabilities or lack of experience and knowledge or people unfamiliar with these instructions to use the machine. Local regulations may restrict the age of the operator.
- Never let children play with the lawnmower.
Pre-work safety precautions
- Ensure that you have read and understood the entire instruction manual before starting work.
- Make sure that the mower is completely assembled and that all parts are intact and functioning normally before beginning work.
- Make sure that all screws and bolts are properly tightened and that all safety devices are in place before commencing work.
- Make sure that the grass collector is undamaged and is functioning normally before starting any work.
- Inspect the blade, fastening bolt and the entire cutting apparatus before starting work. Damaged or worn parts must first be replaced in order to prevent imbalance or abnormal vibrations during use.
- All repairs must only be carried out by qualified service technicians and only using genuine spare parts.
- All electrical work must only be carried out by a qualified electrician.
- Follow all relevant instructions and use protective gloves when replacing the blade.
- Users are responsible for all injuries caused to any third parties present within the work area at the time that the lawnmower is in use.
- Only perform work during daylight hours or work appropriately under adequate lighting conditions.
-
Never use the lawnmower when you are tired, sick, under the influence of alcohol or medicine.
-
Never start the lawnmower in poorly ventilated areas or where flammable or explosive substances are stored or used.
- Make sure the mower is disconnected from the mains before cleaning the discharge chute or other maintenance performed during operation.
- Always inspect the area to be cut before mowing. Remove any objects from the mowing area that can be thrown by the mower. Pay close attention to the location of the extension lead and keep it away from the mower.
- Never work in areas where there is a possibility that the extension lead could become trapped or otherwise damaged.
- Never lift the mower while it is switched on.
- Before lifting the mower in order to move it, check that it is turned off, disconnected from the mains and that the blade is completely stopped.
- Never use your hands or feet to reach towards any rotating parts. Keep away from the discharge chute.
- Make sure that the mower is off and that the blade has completely stopped before attaching or detaching the grass collector.
Operating safety precautions
- Always wear appropriate footwear with anti-slip soles and long trousers. Never use the lawnmower while barefoot or wearing open-toed sandals.
- Avoid cutting wet grass. Never let the mower stand out in the rain.
- Never run with the mower. Walk at a normal pace.
- Be extra careful when cutting on slopes. Always cut across slopes. Never up or down.
• Always be extra careful when changing directions on a slope.
- Never cut on steep slopes.
• Always be extra careful when backing or pulling the mower towards yourself.
- Make sure that no persons, especially children, or pets are in the vicinity of the mower when it is on. Make sure that everyone is at least 10 m from the mower while it is being used.
- Turn off the mower and disconnect it from the mains, whenever the blade strikes any foreign object. Always inspect the mower and its blade and repair any damage before starting work.
- If any abnormal vibration or noise is detected, turn off the mower and disconnect it from the mains. Check the blade, tighten any loose screws and repair any possible damage before re-commencing work.
- Always turn off the mower and disconnect if from the mains whenever crossing over surfaces other than lawns, such as gravel or asphalt.
- Always turn off the lawn mower and disconnect it from the mains before touching the blade.
- Turn off the mower and disconnect it from the mains, whenever leaving the mower unattended.
- Never use the mower if any part of the body has been damaged. Never use the mower without having the collector attached.
- Make sure that the mower stands steady on all four wheels before starting. Keep hands and feet away from the rotating blades at all times.
Note: Always disconnect the mower from the mains whenever:
- Leaving the mower unattended.
- Cleaning or performing any type of maintenance.
- The blade has struck a foreign object.
- You notice any abnormal vibration or noise during use.
Vibration
- The measurement of the vibration emission level declared in this instruction manual has been carried out in accordance with a standardised test method described in EN 60745 and can be used for comparing one power tool with another.
- The measurement method may also be used for a preliminary assessment of vibration exposure.
- The declared vibration emission level applies when the power tool is used in accordance with this instruction manual. If however, the power tool is used for other purposes and with other accessories or has not been properly maintained, the vibration emission level could increase significantly over the total working period.
- For an exact assessment of the vibration exposure, the times when the tool is switched off or running idle should also be taken into account. This significantly reduces the vibration exposure over the total working period. Decide upon safety measures to protect the operator from the effects of vibration during all types of use.
Product description
- Power lever
- Cable strain relief
- Power lever lock button
- Extension lead coupling
- Cable clip
- Discharge chute inspection hatch
- Carrying handle
- Housing
- Upper handle
- Handle bolts and wing nut fasteners
- Lower handle
- Grass collector
- Lower handle retaining screws (one on each side)
- Motor ventilation ports (one on each side)
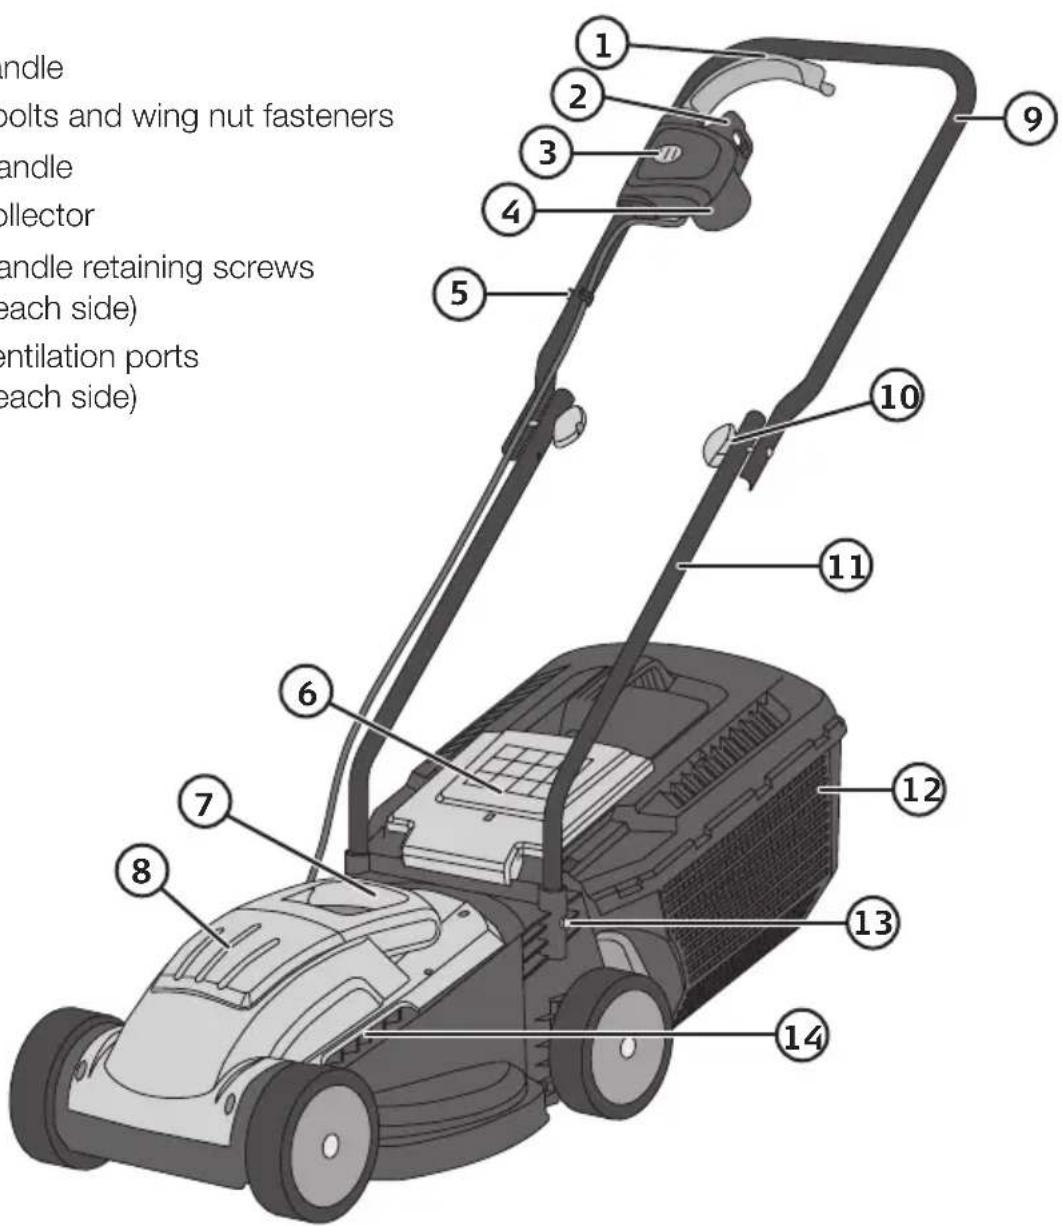
Assembly
Handle
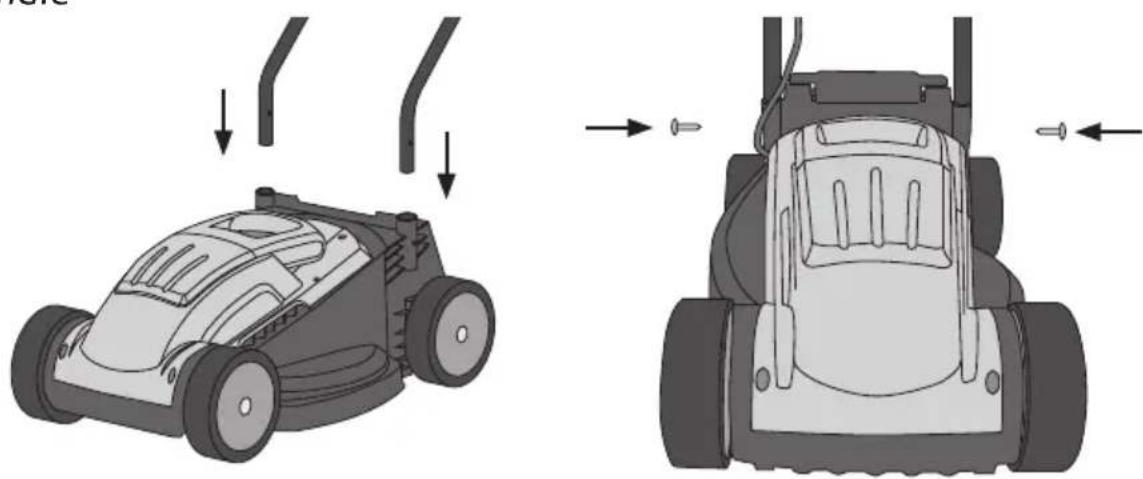
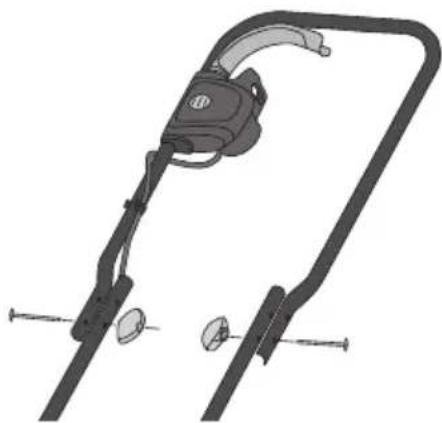
- Slot the lower handle (11) into the attachment holes on the mower and screw in the retaining screws (13) to attach the lower handle securely.
- Attach the upper handle (9) to the lower handle with the bolts and wing nut fasteners.
- Loosen the wing nut fasteners to fold the upper handle forward for storage.
Note: Be careful not to pinch the cable when folding the handle forwards.
natural_image
Mechanical device with attached lever and mounting bracket (no text or symbols visible)Grass collector
natural_image
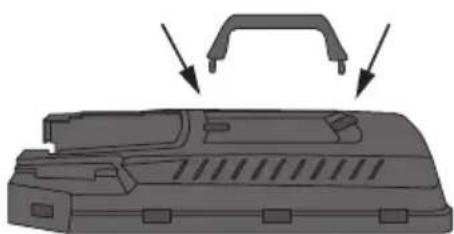
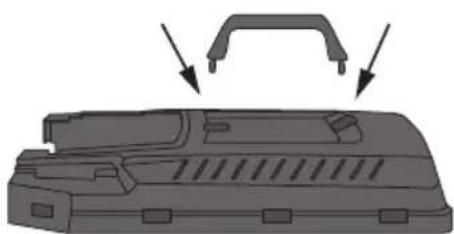
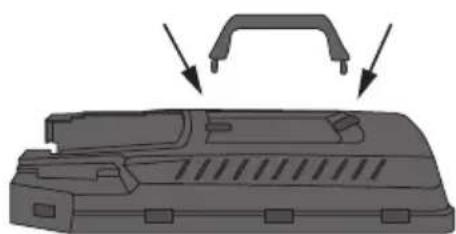
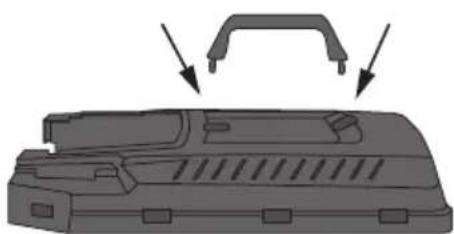
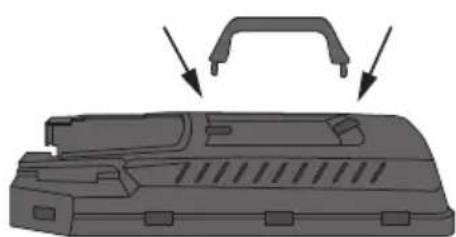
Diagram of a mechanical component with two arrows indicating direction (no text or symbols)- Insert the handle lugs securely into the holes on the grass collector lid.
natural_image
Illustration of a two-part mechanical device with internal components and a close-up view of the interior (no text or symbols)-
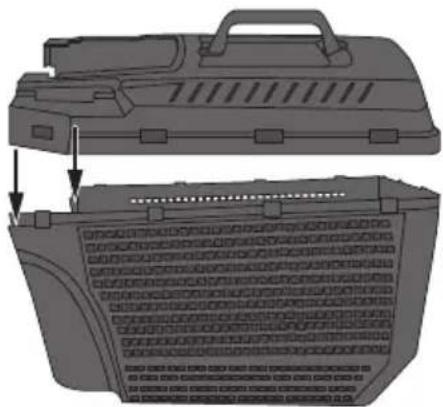
Line the holes in the lid up with the lugs on the grass collector.
-
Press the lid down firmly until all lugs clip securely into place.
natural_image
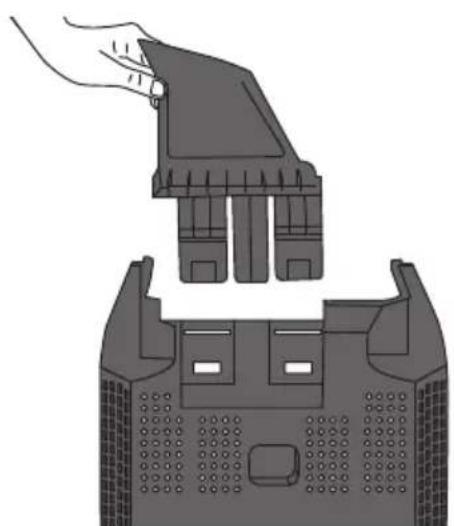
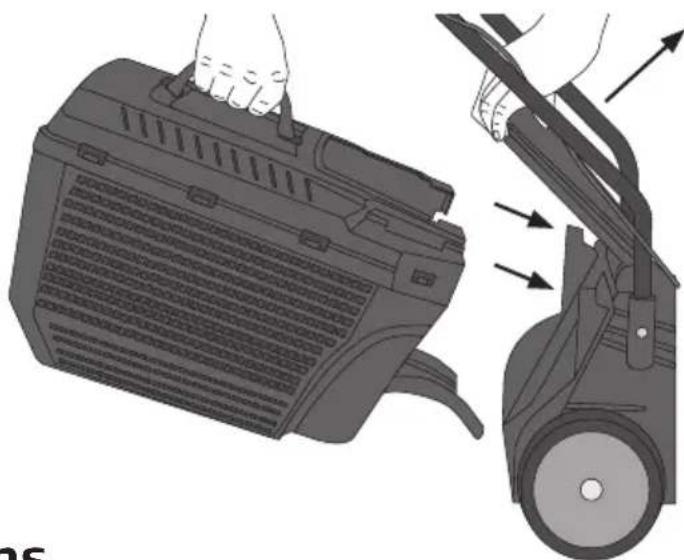
Illustration of a hand inserting a component into a device housing (no text or symbols)- Fit the collector onto the mower by first lifting up the inspection hatch, hooking it on to its fasteners and closing the lid again.
- Disconnect the mower from the mains, lift the inspection hatch and remove the grass collector from the mower to empty it.
Operating instructions Adjusting the cutting height
Note: Make sure that the mower is disconnected from the mains before adjusting the cutting height.
- Lay the mower onto its side.
- Set the spring loaded wheel axle into the desired cutting height position. Refer to the table.
natural_image
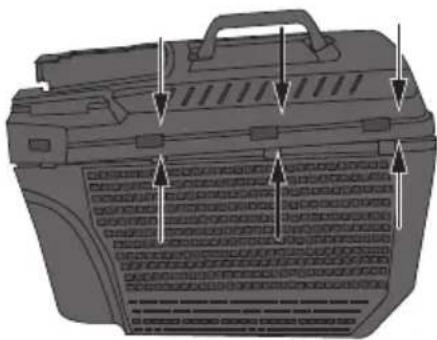
Illustration of a portable electronic device with internal components and mounting holes (no text or symbols)- Fit the discharge chute guide onto the grass collector. The guide helps to direct the inflow of grass into the collector.
natural_image
Illustration of a hand holding a portable device next to a mechanical device with arrows indicating motion (no text or symbols)| Position Cutting height | |
| 1 20 mm | |
| 2 40 mm | |
| 3 60 mm | |
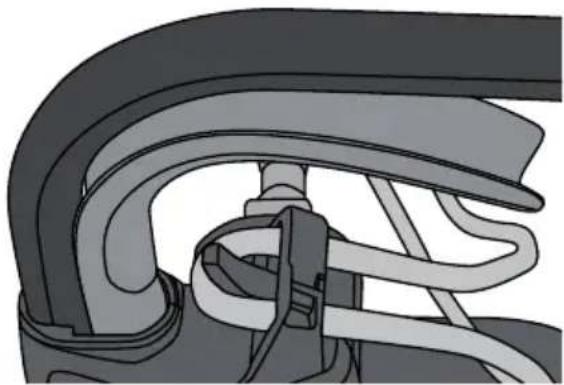
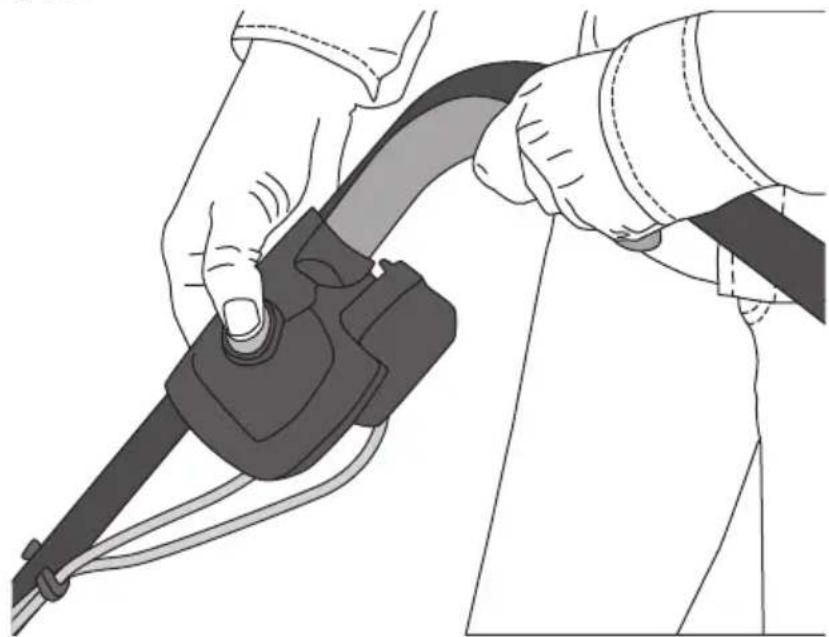
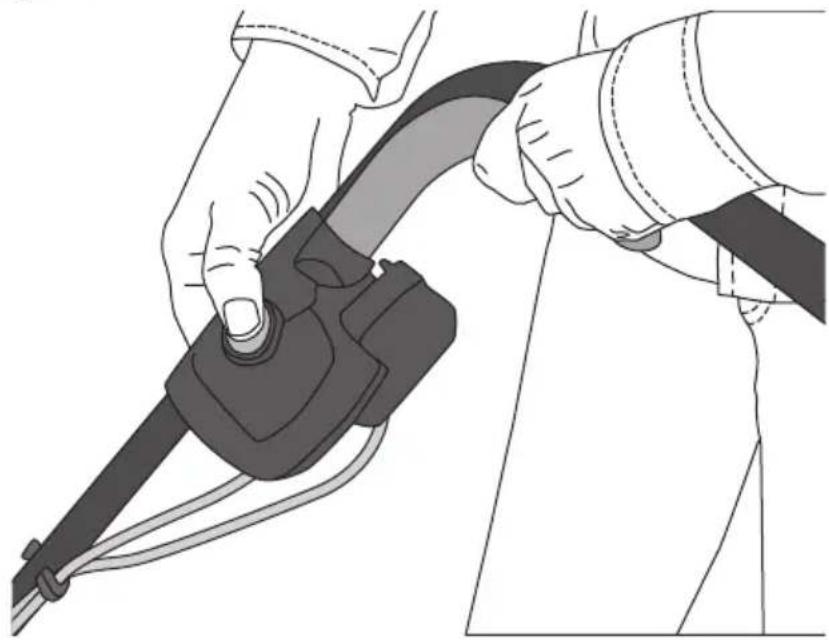
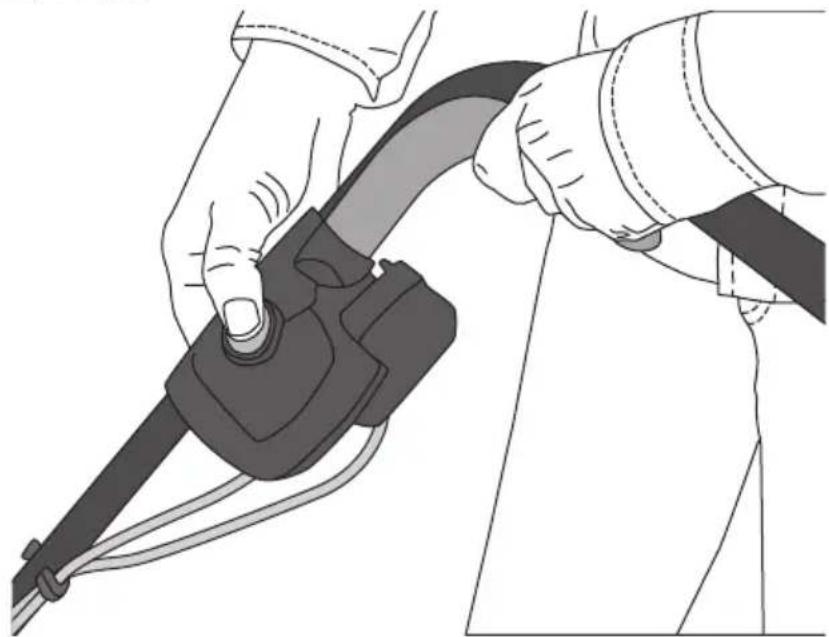
Hook the extension lead onto the cable strain relief
natural_image
Mechanical assembly diagram showing curved components and tubing (no text or symbols)On/off
natural_image
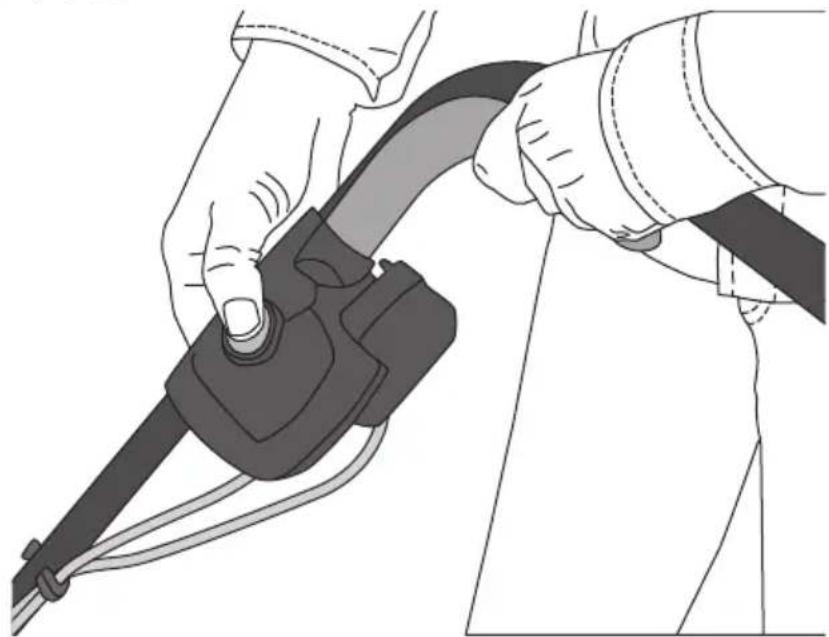
Illustration of a person using a cable clamp to lift a vehicle (no text or symbols present)- Connect the mower to the mains.
- Hold the power lock button down while pulling the power lever against the handle.
- Release the power lock button.
- Release the power lever to switch the mower off.
Warning:
- Do not use the lawnmower if the power lock button or power lever are damaged in any way.
- Never open the inspection hatch while the mower is turned on.
- Do not cut on areas that slope more than 15^ .
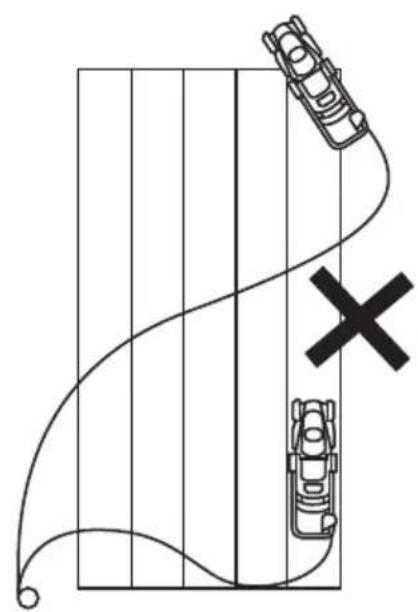
Protecting the extension lead while mowing:
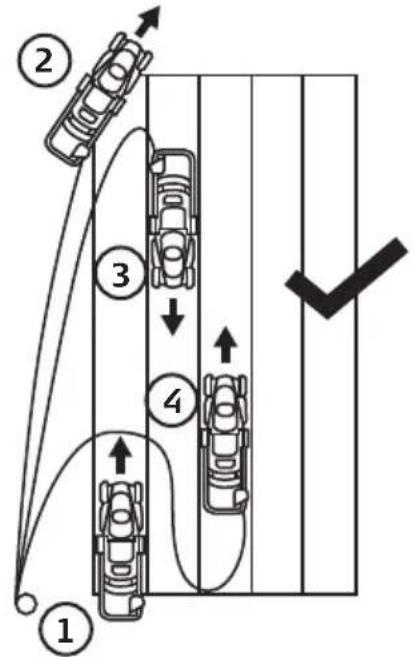
flowchart
graph TD
    A["1"] --> B["2"]
    B --> C["3"]
    C --> D["4"]
    D --> E["✓"]
    style A fill:#f9f,stroke:#333
    style B fill:#ccf,stroke:#333
    style C fill:#cfc,stroke:#333
    style D fill:#fcc,stroke:#333
    style E fill:#ffc,stroke:#333
natural_image
Diagram showing a car on a curved path with a cross symbol, no text or labels presentCare and maintenance
- Ensure that the mower is disconnected from the mains before servicing or cleaning.
- Clean the mower using a damp cloth. Use only mild cleaning agents, never solvents or corrosive chemicals.
- Never spray the mower with water to clean it.
- Keep the motor ventilation openings (14) free from contaminants.
- Disconnect the mower from the mains and store it in a dry area and out of the reach of children whenever it is not to be used for an extended period.
Changing the blade
The blade can be sharpened by a qualified service technician. Replace the blade if it is damaged or causes an imbalance during use.
Warning: Make sure that the mower is disconnected from the mains before starting work.
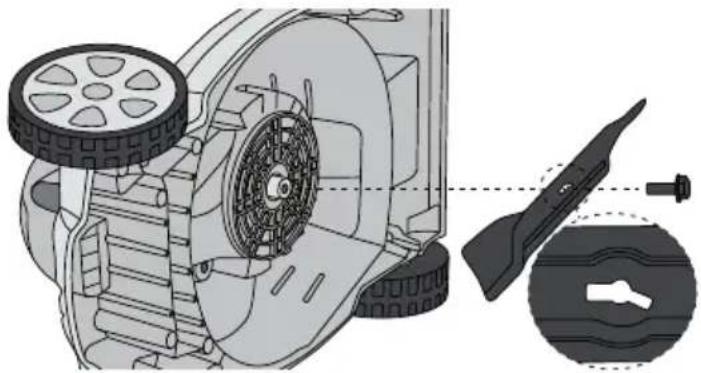
- Lay the mower onto its side.
- Use protective gloves and hold the blade in a firm grip.
- Loosen the blade bolt by turning it anti-clockwise.
- Remove the bolt and blade.
- Attach a new or sharpened blade by assembling in reverse order. Use a torque wrench set at 25 Nm to tighten the fastening bolt.
natural_image
Technical illustration of a lawn mower assembly with close-up details (no text or symbols)Troubleshooting guide
| The mower doesn’t start. | Is the extension lead undamaged and securely connected to both the mower and electrical socket?Make sure that the wall socket is live.The grass is too long to cut. Start the mower on a previously mowed area or an area that has short grass.Unplug the mower and make sure that the blade, blade housing and discharge chute is free and clear of grass and debris. |
| The motor loses power. | Check the cutting height. If the height is too low the motor may lose power because the amount of grass to cut is excessive.Unplug the mower and check that the blade can rotate freely and is not hindered by cut grass and/or contaminants in the blade housing or discharge chute.Check the blade and sharpen or replace if necessary. |
| Abnormal vibrations occur. | Check the blade and sharpen or replace if necessary.Unplug the mower and check that the blade can rotate freely and is not hindered by cut grass and/or contaminants in the blade housing or discharge chute. |
Responsible disposal
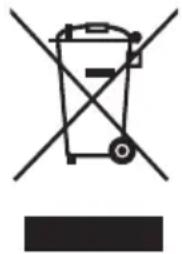
This symbol indicates that this product should not be disposed of with general household waste. This applies throughout the entire EU. In order to prevent any harm to the environment or health hazards caused by incorrect waste disposal, the product must be handed in for recycling so that the material can be disposed of in a responsible manner. When recycling your product, take it to your local collection facility or contact the place of purchase. They will ensure that the product is disposed of in an environmentally sound manner.
natural_image
Symbol of a trash bin crossed with no visible text or labelsSpecifications
Supply voltage 220–240 V, 50 Hz
Power output 1200 W
Speed 3350 rpm
Cutting width 33 cm
Cutting height 20, 40 or 60 mm
Grass collector
capacity 33 |
Noise levels LpA 85 dB(A), KpA: 3 dB LwA 96 dB(A), KwA: 3 dB
Vibration value, handle 1.3 m/s ^2 , K: 1.5 m/s ^2
Weight 7 kg
Elgräsklippare
Art.nr 18-4661 Modell M2E1233M
31-8738
M2E1233M
natural_image
Mechanical device with attached grip and mounting base (no visible text or symbols)Gräsuppsamlare
natural_image
Diagram of a mechanical component with two arrows indicating direction (no text or symbols)natural_image
Illustration of a mechanical device with two views of its internal structure (no text or symbols visible)natural_image
Technical line drawing of a toolbox with internal compartments and mounting holes (no text or symbols)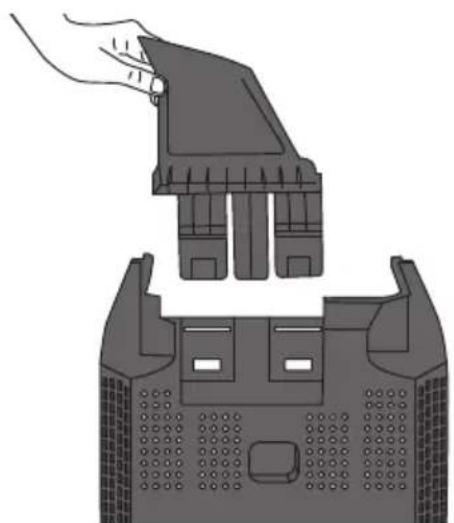
natural_image
Illustration of a hand inserting a component into a device (no text or symbols visible)natural_image
Illustration of a hand holding a portable device next to a mechanical component with arrows indicating motion (no text or symbols)Användning
natural_image
Mechanical assembly diagram showing curved and straight components with no visible text or symbolsPå/av
natural_image
Illustration of a person using a cable clamp to lift a device (no text or symbols visible)natural_image
Diagram showing a car on a curved path with a cross symbol, no text or labels presentnatural_image
Technical illustration of a lawn mower assembly with gear and tool components (no text or symbols)Felsökningsschema
natural_image
Symbol of a trash bin with no text or labels, crossed by two diagonal lines and a solid black rectangle below (no text or symbols present)Specifikationer
Nätanslutning 220–240 V, 50 Hz
Effekt 1200 W
Varvtal 3350/min
Klippbredd 33 cm
Inställbara
natural_image
Mechanical device with attached lever and mounting base (no text or symbols visible)Gressoppsamler
natural_image
Diagram of a mechanical component with two arrows indicating direction (no text or symbols)natural_image
Diagram of a mechanical device with internal components and a base panel (no text or symbols)natural_image
Illustration of a hand inserting a component into a device housing (no text or symbols)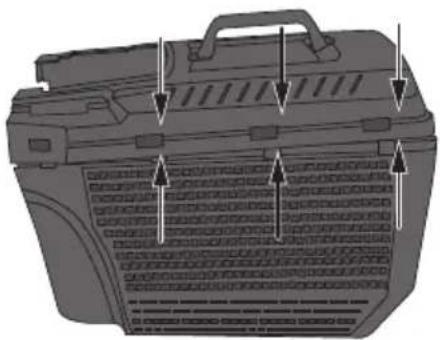
natural_image
Illustration of a toolbox with internal compartments and arrows indicating parts (no text or symbols)natural_image
Illustration of a device with a lid and blade assembly, showing mechanical components without any text or symbols.Bruk
natural_image
Mechanical assembly diagram showing curved and straight components with no visible text or symbolsPå/Av
natural_image
Illustration of hands using a cable to lift a plug (no text or symbols present)natural_image
Diagram showing a car on a curved path with a cross symbol, no text or labels presentnatural_image
Technical illustration of a lawn mower assembly with close-up details (no text or symbols)Feilsøking
natural_image
Mechanical device with attached lever and screw base (no text or symbols visible)Ruohonkerääjä
natural_image
Diagram of a mechanical component with two arrows indicating direction (no text or symbols)natural_image
Technical illustration of a mechanical device with a top view showing internal components and a side view of the lower portion (no text or symbols present)natural_image
Illustration of a hand inserting a component into a device housing (no text or symbols)natural_image
Illustration of a portable cargo container with internal compartments and handle (no text or symbols)natural_image
Illustration of a hand holding a portable device next to a mechanical component with arrows indicating motion (no text or symbols)natural_image
Mechanical assembly diagram showing a curved mechanical component with internal tubing (no text or symbols)natural_image
Illustration of hands adjusting a cable or connector component (no text or symbols visible)natural_image
Top-down diagram of a car on a curved road with a cross symbol (no text or labels)Huolto ja ylläpito
natural_image
Technical illustration of a lawn mower assembly with tool and component details (no text or symbols)Vianhakutaulukko
natural_image
Illustration of a lawn mower with two downward arrows indicating motion or pressure (no text or symbols)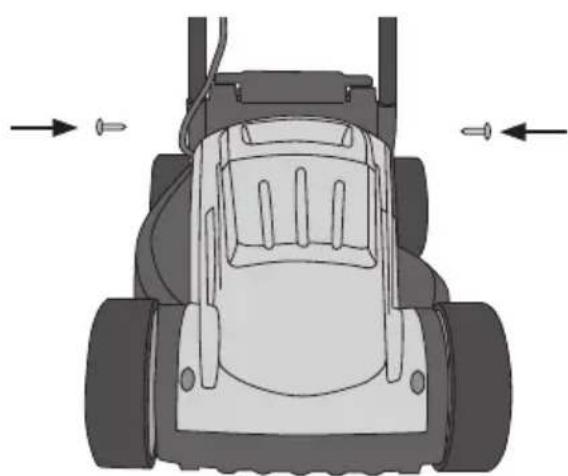
natural_image
Top-down diagram of a grass lawn tractor showing front wheel, rear wheel, and side-mounted sensors (no text or labels)natural_image
Mechanical device with attached cable and adjustment knob (no text or symbols visible)Auffangbehälter
natural_image
Diagram of a mechanical component with two arrows indicating direction (no text or symbols)natural_image
Illustration of a two-part container with internal compartments and arrows indicating assembly or inspection (no text or symbols)natural_image
Illustration of a hand inserting a component into a device housing (no text or symbols)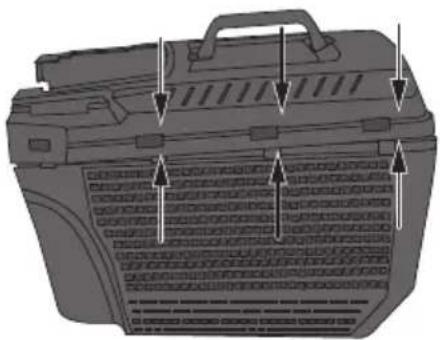
natural_image
Illustration of a toolbox with internal compartments and arrows indicating parts (no text or symbols)natural_image
Illustration of a hand holding a portable device next to a mechanical device with arrows indicating motion (no text or symbols)natural_image
Mechanical assembly diagram showing curved components and tubing (no text or symbols)Ein/Aus
natural_image
Illustration of a person using a cable clamp to lift a device (no text or symbols visible)natural_image
Diagram showing a car on a curved road with a cross symbol, no text or labels presentPflege und Wartung
natural_image
Technical illustration of a lawn mower assembly with gear and tool components (no text or symbols)Fehlersuche
natural_image
Symbol of a trash bin with crossed lines indicating no waste or restriction, and a solid black rectangle below (no text or labels)Technische Daten
Declaration of Conformity
Declares that this product complies with the requirements of the following directives and standards
Manager Technique & Quality
Insjön, Sweden, 2020-09-11
Sverige
Postal 10 - 13 Market Place
Kingston Upon Thames
Surrey
KT1 1JZ
Deutschland
Kundenservice Hotline: 040 2999 78111
E-Mail: kundenservice@clasohlson.de
Homepage
www.clasohlson.de


- Viktig information:
- Safety
- Product safety symbols
- General safety instructions
- Pre-work safety precautions
- Operating safety precautions
- Vibration
- Product description
- Assembly
- Operating instructions Adjusting the cutting height
- Hook the extension lead onto the cable strain relief
- On/off
- Warning:
- Care and maintenance
- Changing the blade
- Troubleshooting guide
- Responsible disposal
- Specifications
- Elgräsklippare
- Användning
- På/av
- Felsökningsschema
- Specifikationer
- Gressoppsamler
- Bruk
- Huolto ja ylläpito
- Vianhakutaulukko
- Auffangbehälter
- Ein/Aus
- Pflege und Wartung
- Technische Daten
- Declaration of Conformity
- Sverige
- Deutschland
Brand : Cocraft
Model : LM33
Category : Lawn mower