
LC100W - Camcorder HP - Free user manual and instructions
Find the device manual for free LC100W HP in PDF.

| Product Type | Digital Camcorder |
| Brand | HP |
| Model | LC100W |
| Dimensions (L x H x D) | 110 mm x 60 mm x 45 mm |
| Weight | 200 g (with battery) |
| Power Supply | Lithium-ion battery 3.7 V / 1200 mAh |
| Maximum Video Resolution | Full HD 1080p (30 fps) |
| Photo Resolution | 16 megapixels |
| Storage | SD/SDHC memory card up to 32 GB |
| Screen | 2.7-inch rotatable LCD |
| Optical Zoom | 5x |
| Image Stabilization | Electronic |
| Connectivity | USB 2.0, HDMI mini |
| Main Functions | Video recording, photo, slow motion, time-lapse, face detection |
| Maintenance and Cleaning | Clean the lens with a soft, dry cloth; avoid moisture |
| Safety | Do not expose to extreme temperatures; use the supplied charger |
| Spare Parts and Repairability | Battery and charger replaceable; repair by HP authorized center |
| General Information | Made in China; 2-year warranty |
Frequently Asked Questions - LC100W HP
User questions about LC100W HP
0 question about this device. Answer the ones you know or ask your own.
Ask a new question about this device
Download the instructions for your Camcorder in PDF format for free! Find your manual LC100W - HP and take your electronic device back in hand. On this page are published all the documents necessary for the use of your device. LC100W by HP.
USER MANUAL LC100W HP
natural_image
HP logo in white on black circular background, no additional text or symbolslc100w
Mini WiFi Cam
Mini Cam WiFi
Minicámara WiFi
Mini-WLAN-Camcorder
Mini videocamera Wi-Fi
Mini WiFi Cam
Mini WiFi Cam
Quick Start Guide
Thanks for purchasing the camera. Please read the instruction manual on the supplied CD ROM to ensure correct use of the product. The warranty does not cover any damage that may occur during a sport activity.
Battery warning
The battery for this mini WiFi cam is sealed internally. DO NOT attempt to disassemble the camcorder and remove the battery.
◆ Follow the charging instructions in this User Manual. Improper charging of the battery may result in explosion.
The battery is designed for this camcorder and is not customer replaceable.
The battery may explode if exposed to naked fire. Never expose the mini WiFi cam in a fire.
◆ Recycle the camcorder observing local regulations.
For more operation details, please refer to CD-ROM.
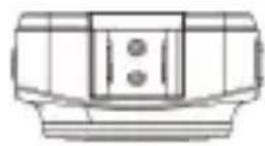
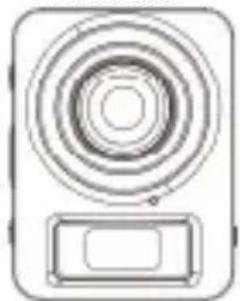
1. Overall Introduction 1.1 Button operation
Top and bottom views
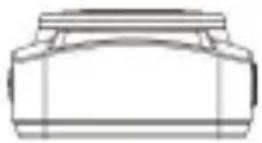
Side (left and right) views
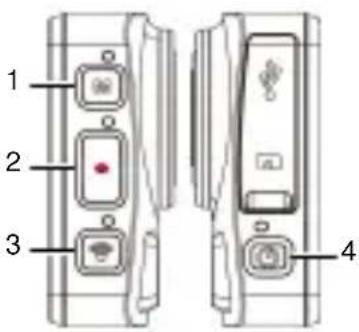
Front view
natural_image
Simple line drawing of a speaker or radio button with concentric rings and a base (no text or symbols)Rear view
natural_image
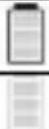
Blank rectangular outline with rounded corners and a small rectangular cutout in the bottom left corner (no text or symbols)| No. | Item |
| 1 Bracket socket | |
| 2 Mode indicator light | |
| 3 Mode button | |
| 4 | Timelapse / Capture / Recording indicator light |
| 5 Record Button 11 Lens | |
| 6 Wi-Fi indicator light 12 Microph | |
| 7 Wi-Fi button 13 LCM screen | |
one
| No. | Item |
| 8 | Waterproof cover of the USB / Memory card slot |
| 9 Power indicator light | |
| 10 Power button | |
2. Getting started
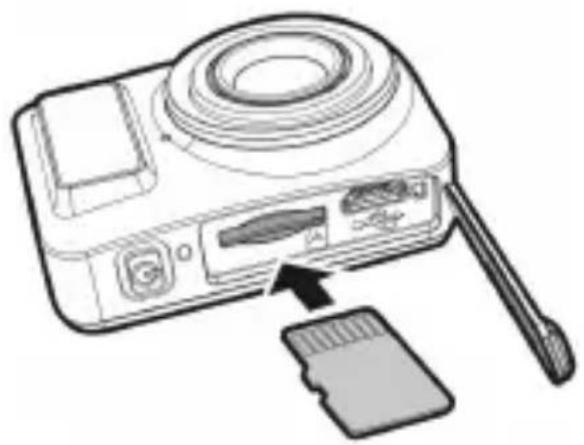
2.1 Inserting the memory card
-
Open the waterproof cover of the USB / Memory card slot.
-
Insert the memory card with the gold contacts facing the front of the camcorder. Push the memory card until it clicks into place.
-
Make sure the waterproof cover of the USB / Memory card slot is sealed tightly, to achieve water resistant.
-
To remove the memory card, push to eject the memory card out of the slot.
natural_image
Diagram of a digital camera with an attached card showing internal components (no text or symbols)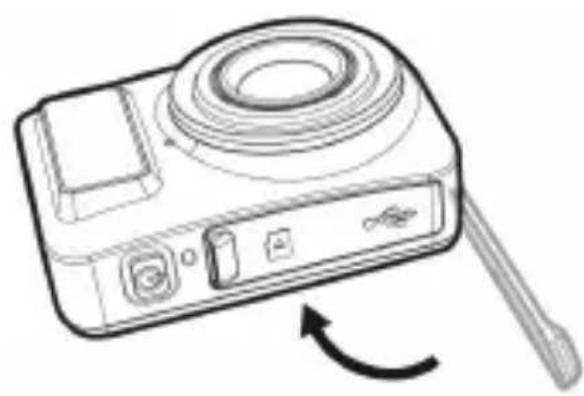
natural_image
Line drawing of a digital camera with a scroll wheel and control panel (no text or symbols)Note:
- Do not remove or insert the memory card when the camcorder is turned on. This may damage the camcorder and memory card.
- Please use a Class 10 or higher rating Micro SD card, max up to 32GB.
- Please format the micro SD card before initial use.
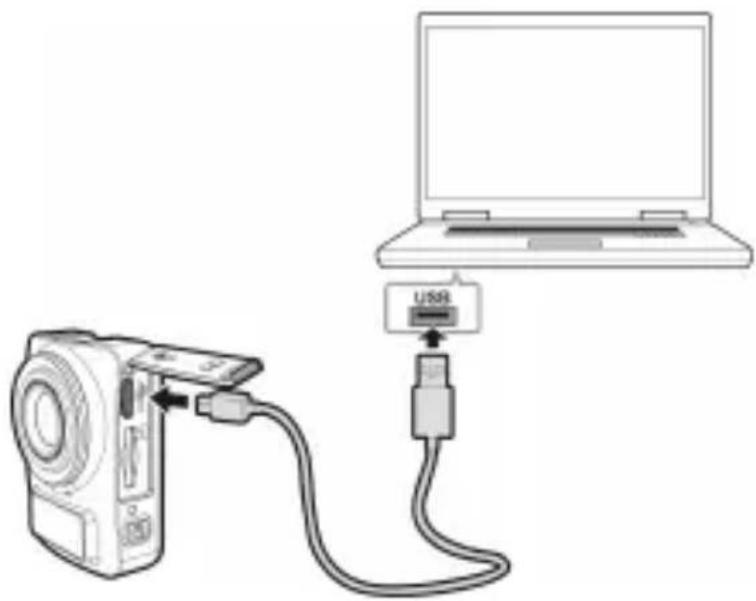
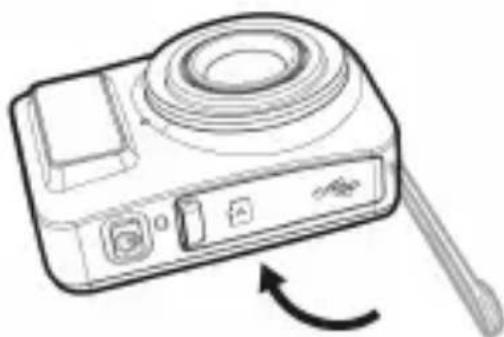
2.2 Charging the camcorder
- Open the waterproof cover of the USB / Memory card slot.
-
Connect the micro USB cable into the port on the camcorder.
-
Connect the other end of the micro USB cable to an available USB port on your computer.
natural_image
Diagram showing a computer connected to a laptop via USB cable (no text or symbols present)- Once the charging is complete, make sure the waterproof cover of the USB / Memory card slot is sealed tightly, to achieve water resistant.
natural_image
Line drawing of a digital camera with a scroll wheel and scroll wheel handle (no text or symbols)2.3 Information in LCM screen

| No. | Item Icon | Description | |
| 1 | Battery status | Full battery power | |
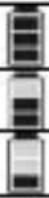 | 2/3 battery power | ||
| 1/3 battery power | |||
 | Out of battery power | ||
| Charging | |||
| 2 | Wi-Fi status | Wi-Fi on | |
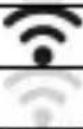 | Wi-Fi off | ||
| 3 Status | Timelapse mode | ||
 | Capture mode | ||
| Recording mode | |||
 | Memory card error (damaged, locked or no card inside) | ||
| Memory card full | |||
| Connect with mobile | |||
 | Enter USB mode when connected with a computer | ||
| Power will soon run out | |||
3. Initial set up
Install a micro SD card (class 10 or higher rating, max up to 32GB) into the camcorder.
3.1 Camcorder application installation
The camera allows you to connect to the mobile devices via the App. When using for the first time, install the [Pixi Cam] App for your mobile device.

- Download Pixi Cam App Store.
from Google Play or App
- Install the App.
3.2 Wi-Fi connecting
-
Press the Power button to switch on the camcorder.
-
Press the Wi-Fi button to activate the wireless network.
-
Using the Wi-Fi function of the mobile device, search for the camcorder ID from the list. Each camcorder has a unique ID no.: hplc100wXXXXXX (The last 2 digits of the ID will be as same as the last 2 digits that displayed on the LCM screen.).
-
Select and enter Wi-Fi password (enter the 4 numeral/letter on your LCM display twice will be your Wi-Fi password. E.g., if LCM
display shows “ ”, your Wi-Fi password will be 12341234).
For iOS / Android Users:
Using the mobile device [Settings] → [Wi-Fi] → [Select camcorder ID no.: hplc100wXXXXXXX] → [Enter the password] → [Connecting].
- When connected to the Pixi Cam App, camcorder LCM display will show APP, indicates the Wi-Fi is connected.

4. Using the Pixi Cam application
Video Recording
Timelapse Recording
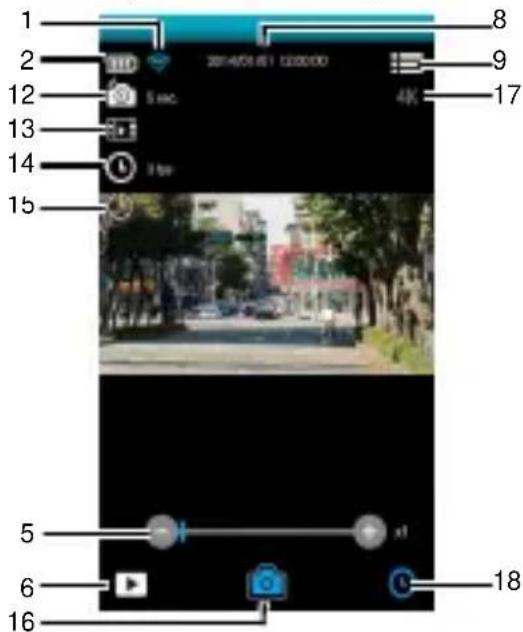
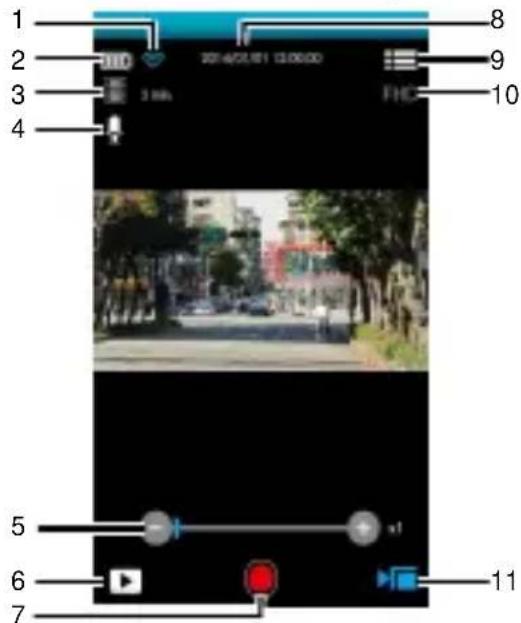
| No. | Icon Item Description | ||
| 1 |  | Wi-Fi status Indicates the Wi-Fi signal status. | |
| 2 |  | Battery status | Indicates the estimated remaining battery power. |
| 3 |  | Video duration | The camcorder will record the video according to the duration and store them as individual files.Touch to select the required video duration.Available options: 3 min. / 5 min. / 10 min. / 30 min. |
| 4 |  | Voice record | Touch to enable or disable the voice record function.Available options: On / Off |
| 5 |  | Zoom indicator | Indicates the zoom status. Touch / to adjust the digital zoom.Available options: x1.0~x2.4 |
| 6 |  | Playback Touch to enter Playback mode. | |
| 7 |  | Recording | Touch to start recording, andtouch again to stop. |
| 8 | 2014/01/01 12:00:00 | Date and time | Indicates the current recording date and time. |
| 9 |  | Menu Touch to enter the menu. | |
| 10 |  | Video resolution | Indicates the current video resolution. |
| 11 |  | Recording mode | Indicates the current Recording mode.Touch to switch to Timelapse or Shooting mode. |
| 12 |  | Timelapse | Touch to select a suitable capture Interval.Available options: 5 sec. / 10 sec. / 30 sec. / 1 min. / 5 min. / 10 min. / 30 min. |
| 13 |  | Store type | Touch to select the required storage type.Available options: Picture / Video / Picture & Video |
| 14 |  | Frame rate | Touch to select the required frame rate.Available options: 3 fps / 5 fps / 10 fps |
| 15 |  | Power saving mode | Touch to select the power saving mode.Available options: On / Off |
| 16 |  | Shooting | Touch to start shooting photos, and touch again to stop. |
| 17 |  | Photo resolution | Indicates the current photo resolution. |
| 18 |  | Timelapse mode | Indicates the current Timelapse mode.Touch to switch to Shooting photos or Recording video mode. |
natural_image
Technical line drawing of a mechanical component with two views (top and side), no text or symbols present.natural_image
Blank rectangular object with rounded corners and a small rectangular cutout on the bottom (no text or symbols)natural_image
Line drawing of a digital camera with an attached card and cable (no text or symbols)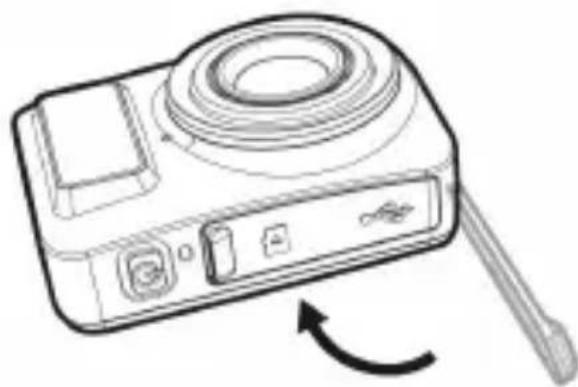
natural_image
Line drawing of a digital camera with a scroll wheel and control buttons, showing a rotary button (no text or symbols)Remarque :
natural_image
Diagram showing a computer connected to a laptop via USB cable, with no visible text or symbols.natural_image
Line drawing of a digital camera with a scroll wheel and a button, showing no text or symbols.natural_image
Line drawing of a digital camera with an attached card and cable, showing internal components without any text or symbols.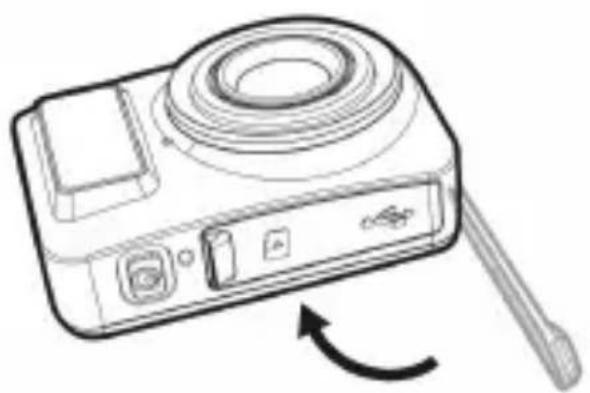
natural_image
Line drawing of a digital camera with a scroll wheel and scroll wheel (no text or symbols)Nota:
natural_image
Diagram showing a computer connected to a laptop via USB cable, with a separate monitor attached (no text or symbols present)natural_image
Line drawing of a digital camera with a screwdriver and scroll wheel (no text or symbols)natural_image
Technical line drawing of a mechanical component with two views (top and side), no text or symbols present.natural_image
Blank rectangular object with rounded corners and a small rectangular cutout at the bottom (no text or symbols)natural_image
Line drawing of a digital camera with an attached card showing internal components (no text or symbols)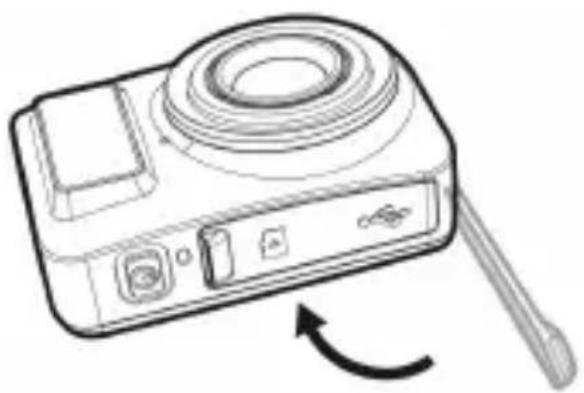
natural_image
Line drawing of a digital camera with a scroll wheel and button, showing no text or symbolsHinweis:
natural_image
Diagram showing a computer connected to a laptop via USB cable (no text or symbols present)natural_image
Line drawing of a digital camera with a scroll wheel and rotary button (no text or symbols)natural_image
Blank rectangular outline with rounded corners and a small rectangular cutout at the bottom (no text or symbols)natural_image
Line drawing of a digital camera with an attached card and cable, showing no text or symbols.
natural_image
Line drawing of a digital camera with a scroll wheel and USB port, showing a rotary button and scroll wheel (no text or symbols)Nota:
natural_image
Diagram showing a computer connected to a laptop via USB cable (no text or symbols present)natural_image
Line drawing of a digital camera with a screwdriver and scroll wheel (no text or symbols)→ →ID videocamera: hplc100w
[Connessione].
natural_image
Blank white clipboard with a small rectangular area at the bottom (no text or symbols)natural_image
Line drawing of a digital camera with an attached flash drive and card (no text or symbols)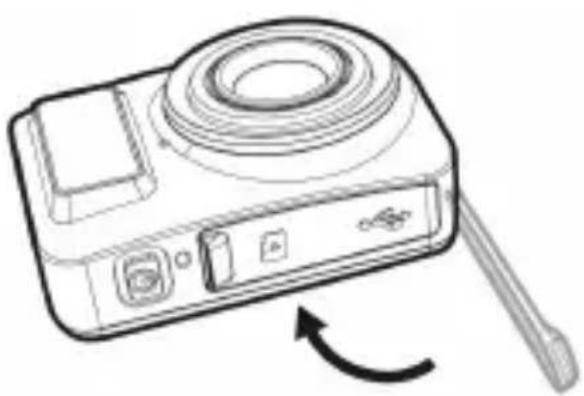
natural_image
Line drawing of a digital camera with a scroll wheel and directional arrow (no text or symbols)Observação:
natural_image
Diagram showing a laptop connected to a camera via USB cable, with no visible text or symbolsnatural_image
Line drawing of a digital camera with a screwdriver and scroll wheel (no text or symbols)natural_image
Line drawing of a digital camera with an attached card and cable, showing internal components without any text or symbols.