KOM0558 - Sports camera Quer - Free user manual and instructions
Find the device manual for free KOM0558 Quer in PDF.


User questions about KOM0558 Quer
0 question about this device. Answer the ones you know or ask your own.
Ask a new question about this device
Download the instructions for your Sports camera in PDF format for free! Find your manual KOM0558 - Quer and take your electronic device back in hand. On this page are published all the documents necessary for the use of your device. KOM0558 by Quer.
USER MANUAL KOM0558 Quer
text_image
7 8 6 5 R1 R2natural_image
Close-up of a black mechanical clip with textured grip, partially covered by red and white stripes (no visible text or symbols)Abb. 1

natural_image
Close-up of a white and black electric shaver with red buttons, resting on a pink patterned surface (no text or symbols visible)Abb. 2
natural_image
Close-up of a black athletic belt buckle with textured strap and clasp (no text or symbols visible)Abb. 3
natural_image
Close-up of a black and silver robotic helmet with visible mechanical components (no text or symbols)Abb. 4
natural_image
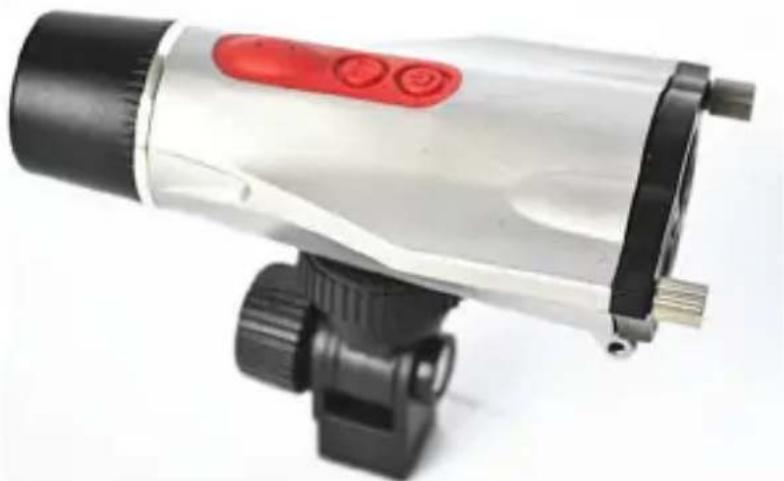
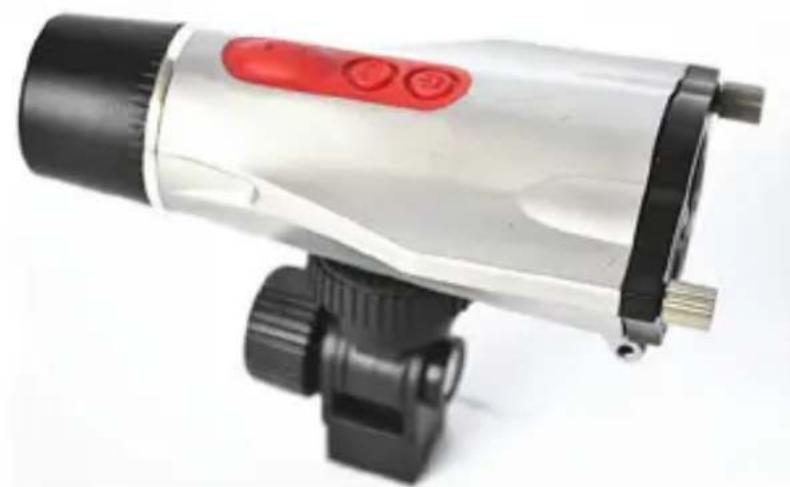
White and black handheld device with red buttons and a small plug, isolated on white background (no text or symbols visible)Abb. 5
natural_image
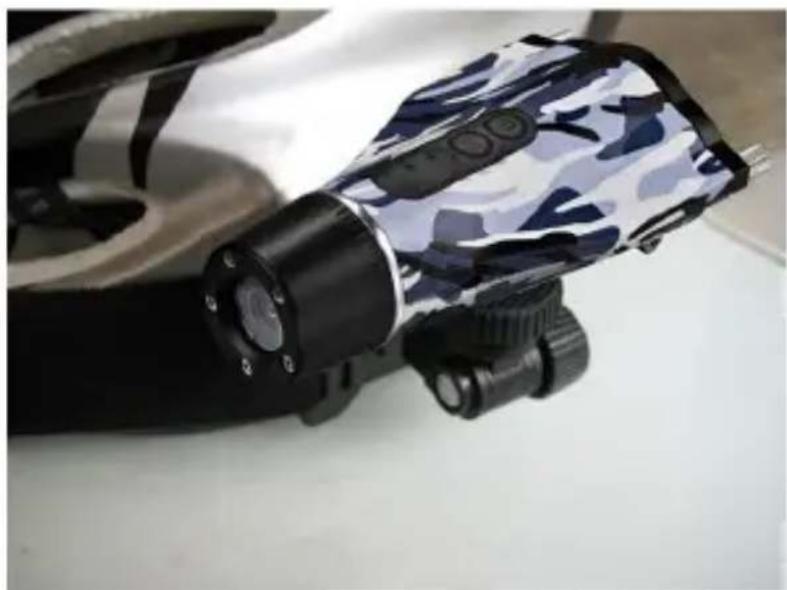
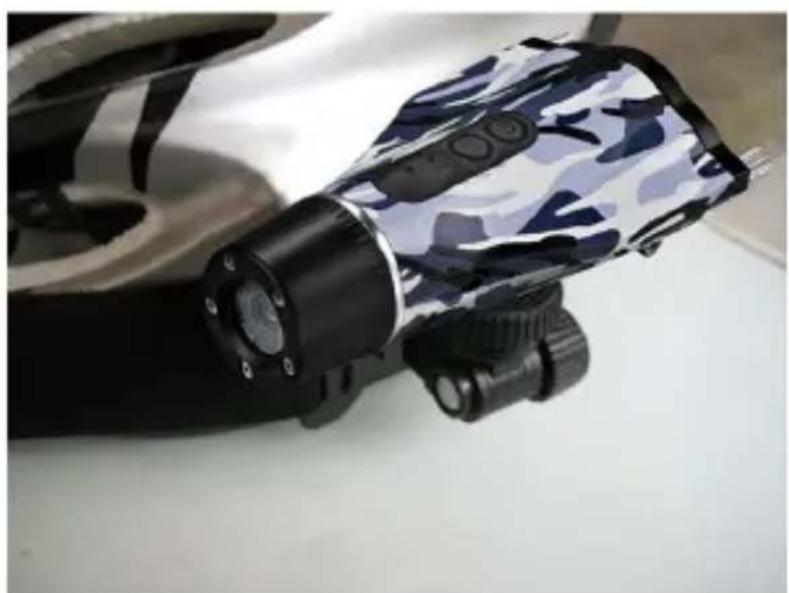
Close-up of a black and white optical device with camouflage pattern, mounted on a flat surface (no visible text or symbols)Abb. 6
DE
natural_image
Close-up of a bicycle-mounted device with black handle and blue handle, no visible text or symbolsAbb. 7
- PIs be well noted with the following guidelines before you use this camera.
- PIs refer to manual instruction and operate the camera correctly. Illegal operation may cause damage to camera internal components.
- Do not fall or hit the camera, it may damage the internal components.
- For your safety, please keep the camera from the children and animals, in order to avoid accident
- Do not place the camera in a damp or dusty location for extended periods of time. This may cause a fire or an electrical shock.
- Do not leave the camera in places exposed to extremely high temperatures, such as under direct sunlight for extended periods of time. This may affect the camera housing and internal components
- We recommend using the camera in temperatures between 0^ to 40^ .
- Turn off the camera before removing the memory card. The card and the data may be damaged if the memory card is inserted or removed while the camera is still on.
- Do not alter or dismantle the camera, to avoid the damage to the camera and electric shock.
- The temperature rise is normal when the camera in use for a long time
- Do not touch the lens when use the camera, so as not to influence the photography effect
- Please use the air blower (special lens blowing equipment) to clean lens or use special lens-cleaning cloth to clean fingerprint or dust on the surface.
EN
Camera accessories
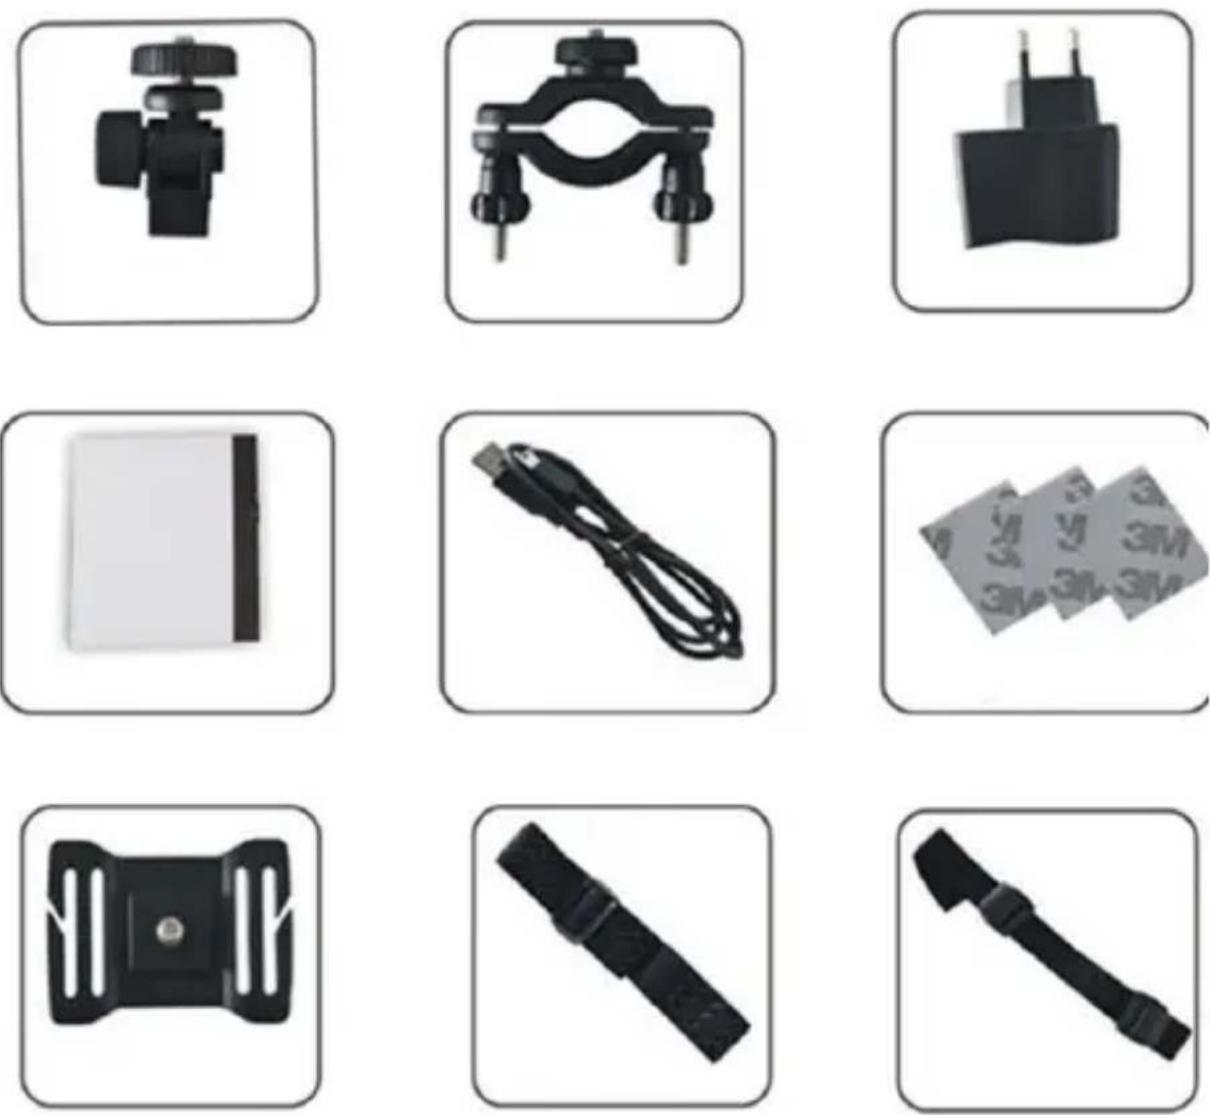
- User manual
- USB cable
- Helmet grip
• Universal bracket - Bicycle bracket
- 3M pads
- Elastic strap
- Velcro strap
- AC Charger
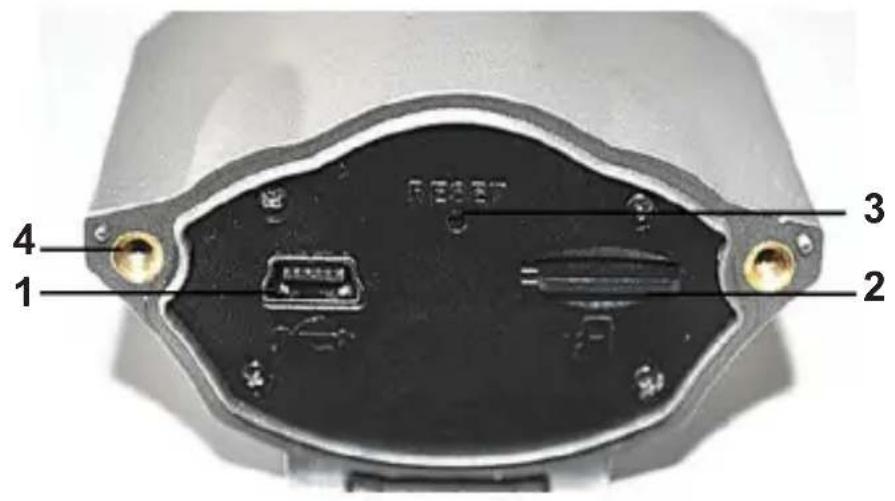
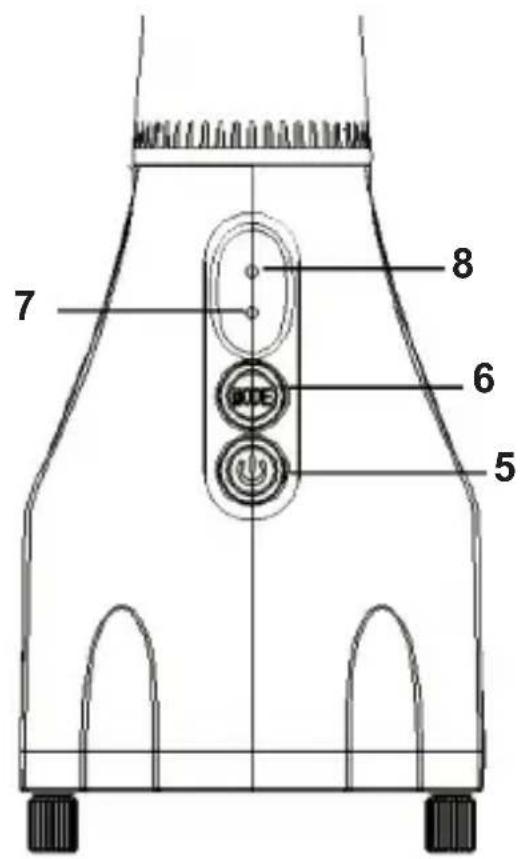
Camera interface
text_image
1 2 3 4- MiniUSB port
- Micro SD port
- Reset key
- Screw port
- Power key
- Mode key
- Working indicator
- Charging indicator
text_image
7 8 6 5EN
Camera mounting description
The camera can be mounted in a number of ways. PIs follow below methods of mounting as suggested.
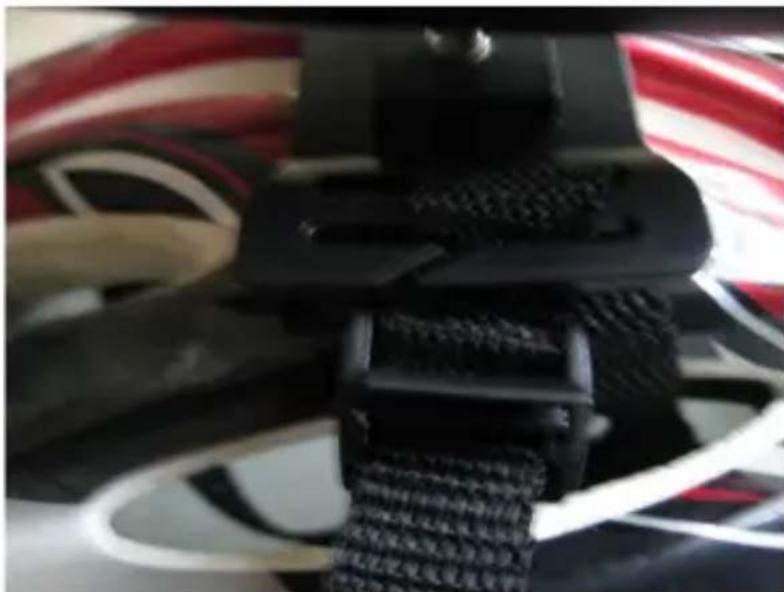
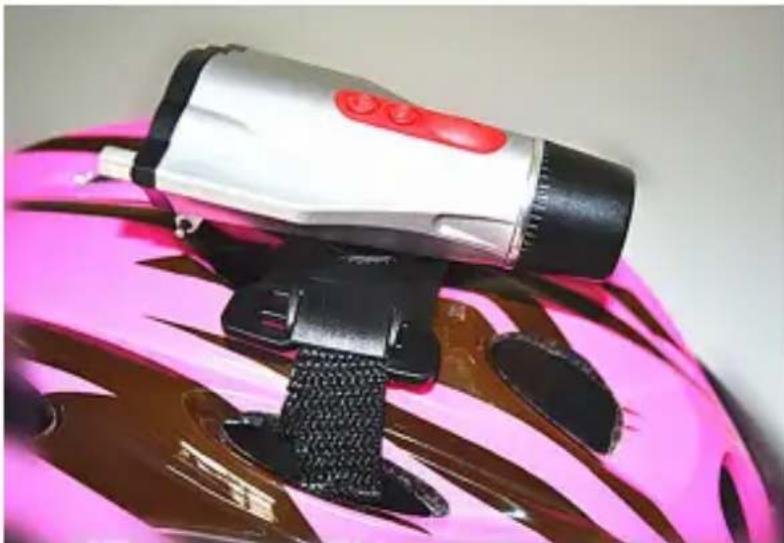
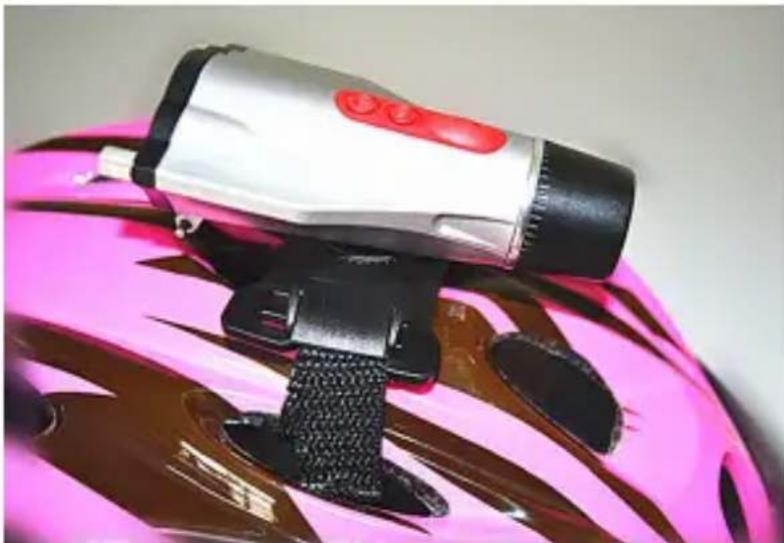
1. Mounting the camera on the top of the helmet:
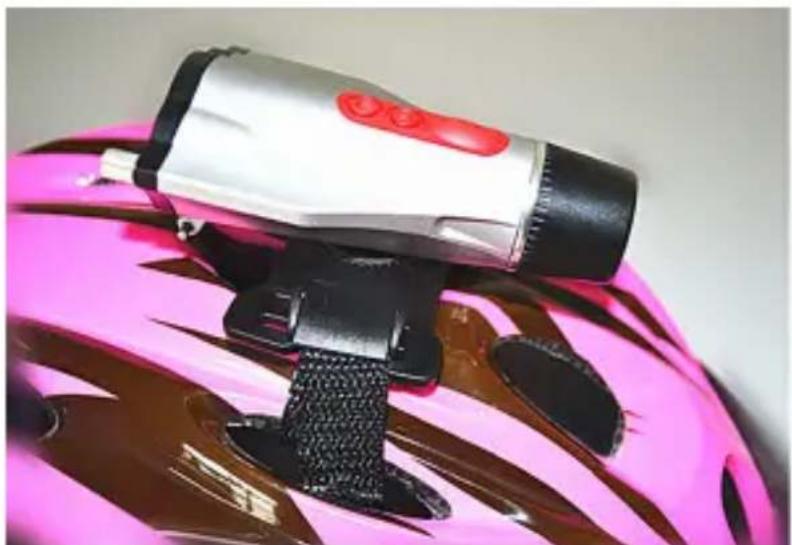
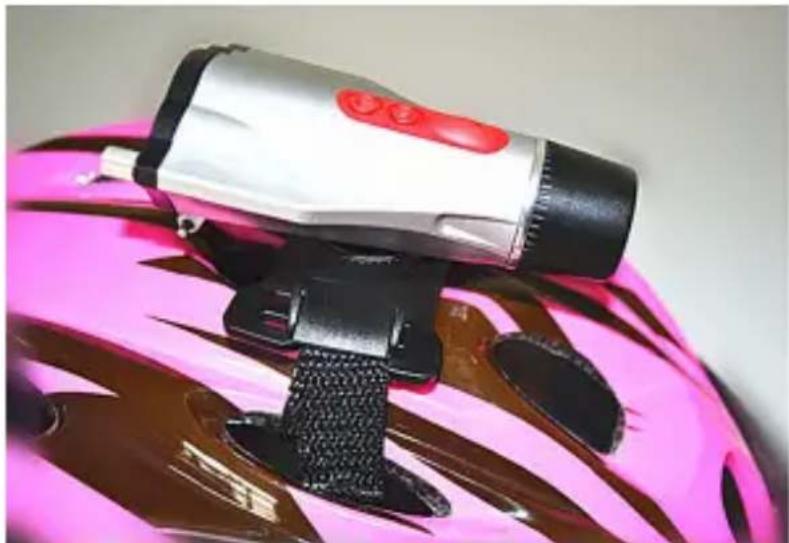
Thread the Velcro strap through the helmet grip, and place the camera on the top of the helmet; secure the Velcro strap by fastening it through the helmet vents; then tighten the strap to lock it. (refer to pic. 1-2)
natural_image
Close-up of a black plastic buckle with mesh texture, partially covered by red and white striped fabric (no text or symbols visible)Pic. 1
natural_image
Close-up of a white electric shaver with red buttons mounted on a black strap, placed on a pink bicycle helmet (no text or symbols visible)Pic. 2
EN
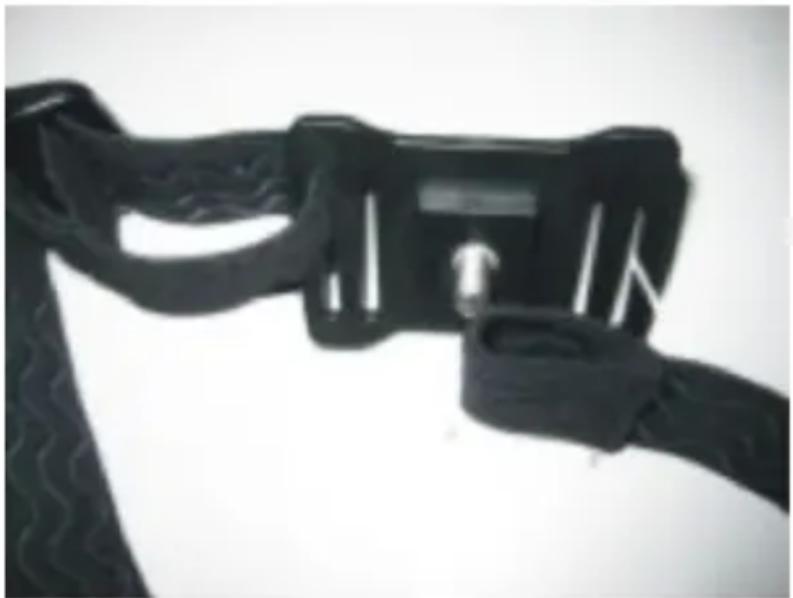
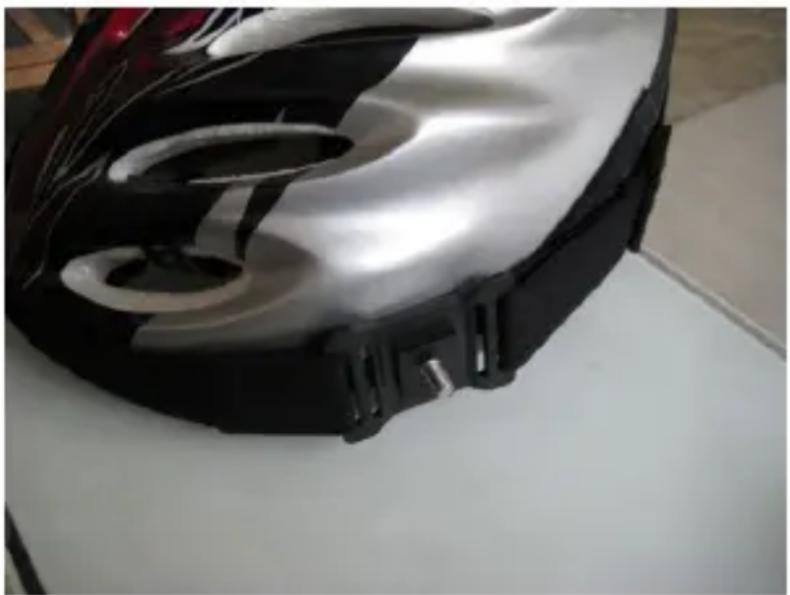
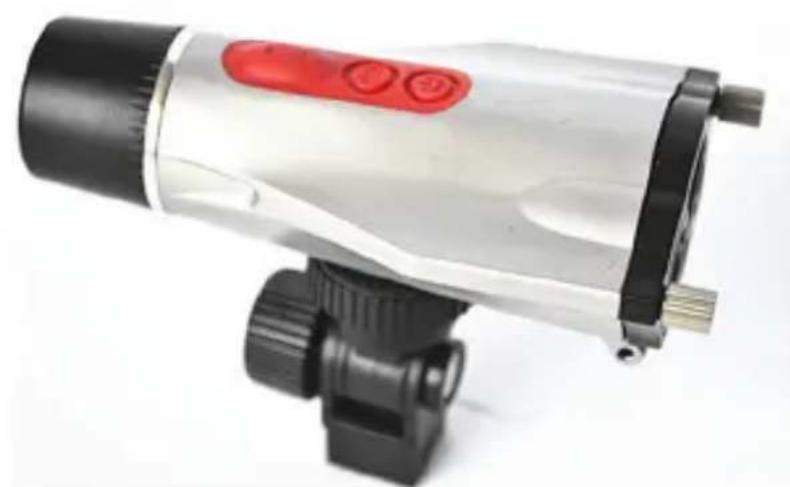
2. Mounting the camera on the helmet side:
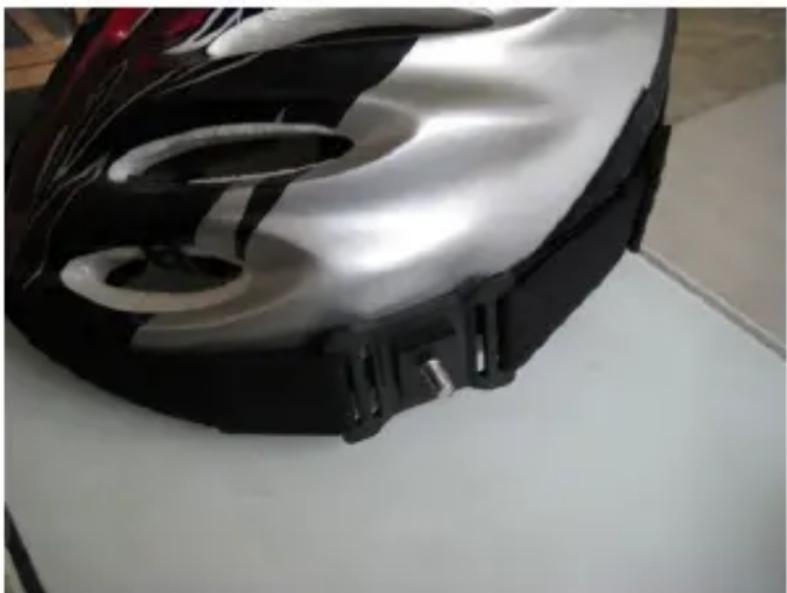
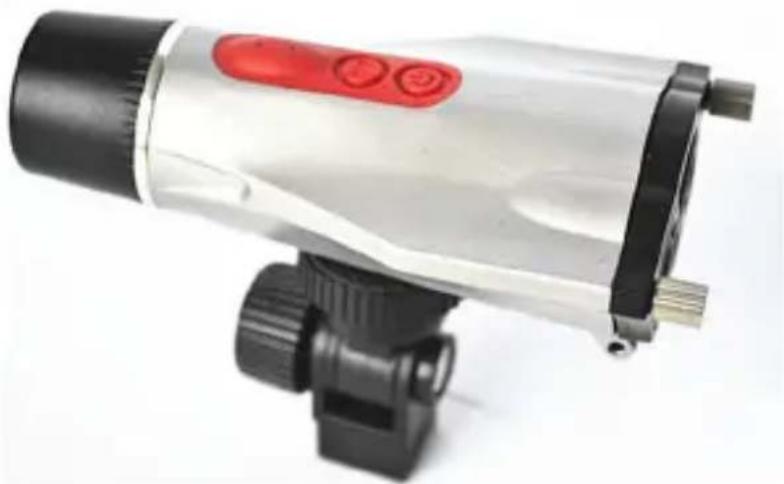
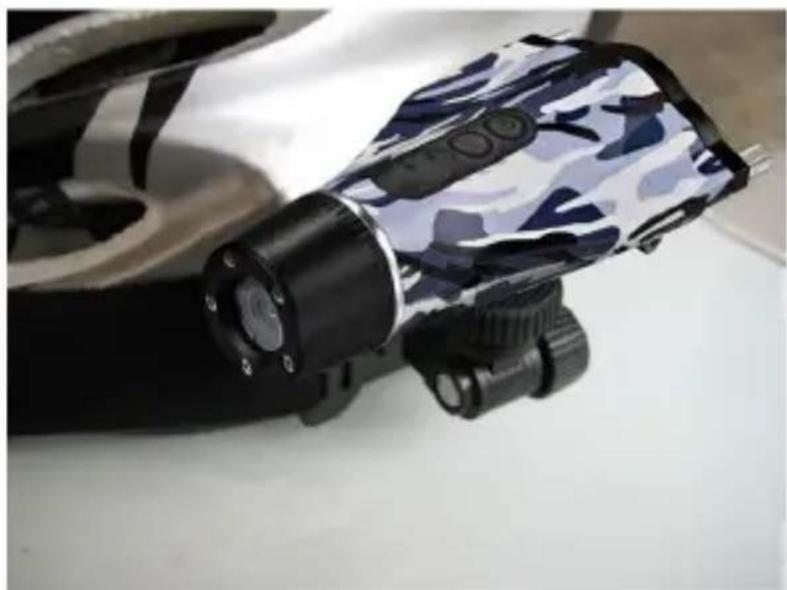
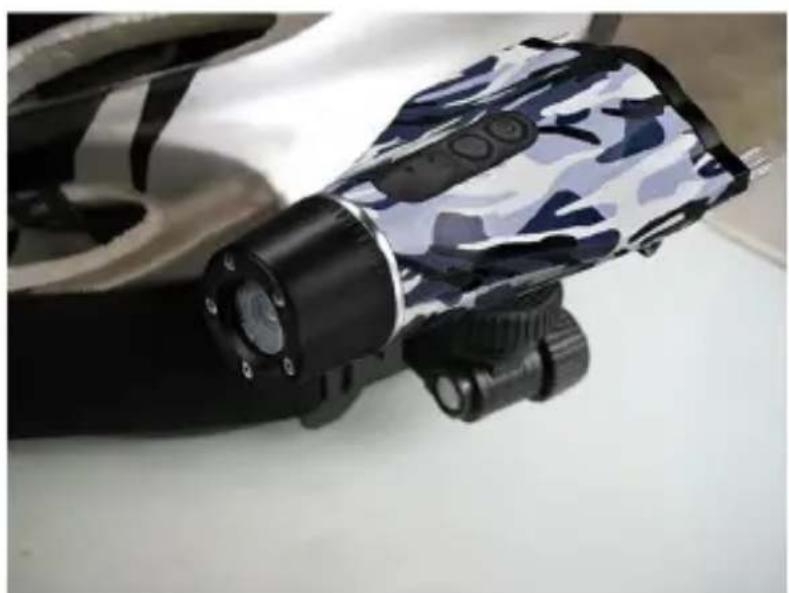
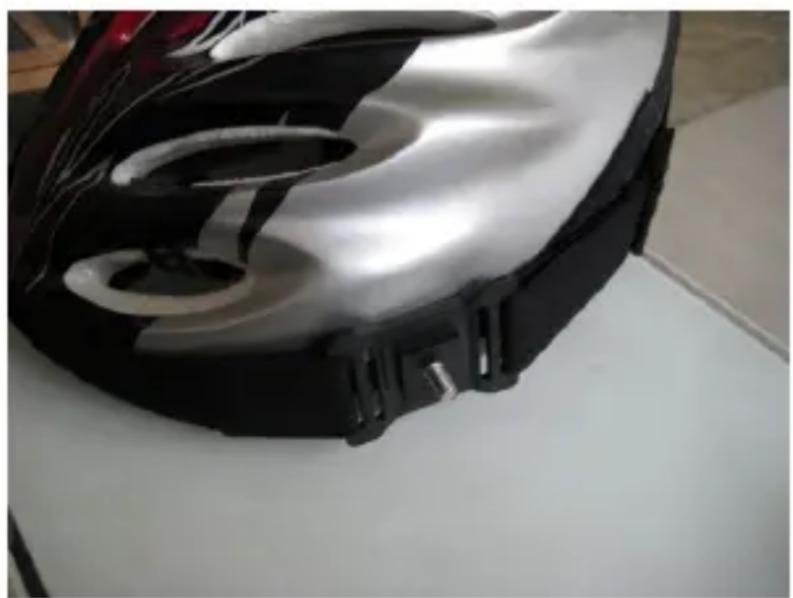
Thread the elastic strap through the helmet grip, and mount it to the helmet using elastic strap; mount the camera to the universal bracket; then slide it into the helmet grip. (refer to pic.3-6)
natural_image
Close-up of a black athletic belt buckle with textured strap and clasp (no text or symbols visible)Pic. 3
natural_image
Close-up of a black and silver robotic helmet with circular cutouts, resting on a white surface (no text or symbols visible)Pic. 4
EN
natural_image
White and black handheld device with red and black buttons, no visible text or symbolsPic. 5
natural_image
Close-up of a black and white handheld device with camouflage pattern, mounted on a plain surface (no visible text or symbols)Pic. 6
3. Mounting the camera on the bicycle / motorcycle:
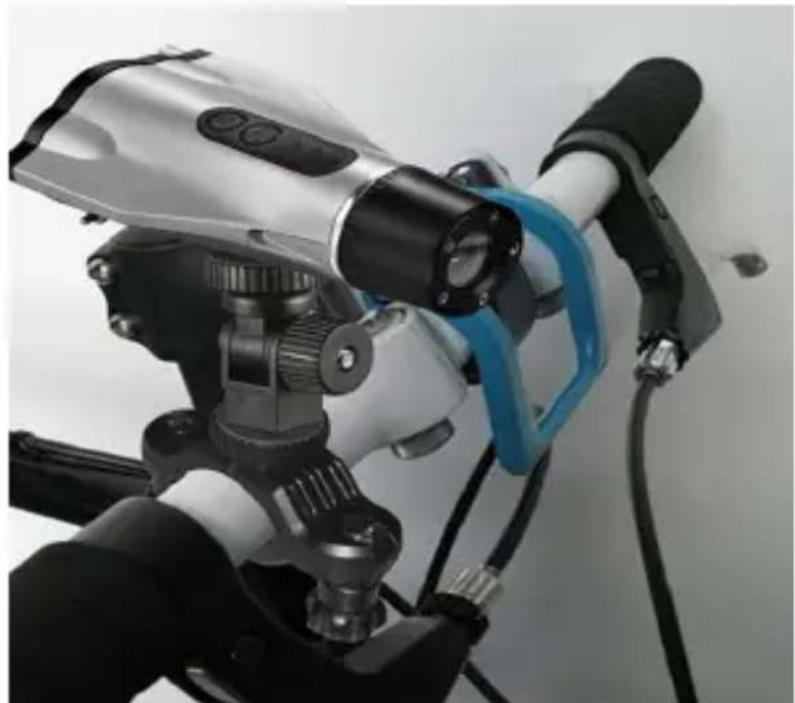
Place the camera on the universal bracket, and connect it to the bicycle bracket, then mount them onto the handlebar (refer to the picture 7).
EN
natural_image
Close-up of a bicycle-mounted device with black handle and blue lever, no visible text or symbolsPic. 7
Insert and take out memory card
- Insert memory card
Insert Micro SD card according to the direction as show. - Take out memory card
Press the end of Micro SD card slightly, it will automatically eject.
Notice
Please confirm the inserting direction of Micro SD card because reversed inserting may cause damage to the camera and card.
EN
Battery Charging
Connect the charger to the USB port and plug in the power. During charging, the red indicator on, when fully charged, the indicator off.
Notice:
- In order to improve the charging efficiency, please charge the camera under the shutdown status.
- Please make sure the AC power is turned on when the charger plug in.
Key Functions
Power key: Turn on/off the camera; taking video or stop; taking photos
MODE key: To switch to video mode and camera mode
Reset key: If the camera system is dead, pls press it to turn to normal.
Basic Operation
1. Turning On/Off the Camera
Turn On the Camera
Press and hold power key, working indicator light up (you will hear beep sound), the camera will turn on.
Turn Off the Camera
Press and hold the power key, you will hear beep sound and the working indicator off, then it will turn off.
Note: Under standby mode, If no any operations for long period of time, the camera will turn off automatically.
EN
2. Taking Video Footage
The camera has 720P and 1080P mode (default and recommended is 720P). Under 720P mode, the working indicator is orange, Under 1080P, the indicator is bi-color(orange and blue).
Normal Recording (when not connect to AC power)
When the camera is on, press once Power key to start recording (you will hear beep sound). The working indicator flickers. Every other three-minute footage saved as one section. Press Power key again to stop recording, the indicator off.
Loop Recording (when connect to AC power)
When camera connected to AC power, it will turn on automatically, you will hear lasting beep sound and indicator flicking. When the orange indicator flickers, the camera starts to record automatically (default 720P),
it will save the footage of recording every other 3 minutes. When Micro SD card is FULL, it will overwrite the early videos footage by time sequence and continue recording.
Press Power key again (you will hear beep sound) to stop recording, the indicator off, the camera shuts off.
3. Taking photos
Press MODE key to switch to Camera mode(the indicator is blue) Under camera mode, aim at the object you want to shoot and press Power key, it will save the photo automatically.
4. Time Stamp Setting
720P video is with time stamp (default), 1080p is without. If you want to set the time you want, pls follow below steps:
(1) Create one "txt" file, rename to "TIMERSET.TXT".
(2) Open the "txt" file, input the YEAR/MONTH/DATE/TIME, and save it, like: 20130319084456Y.
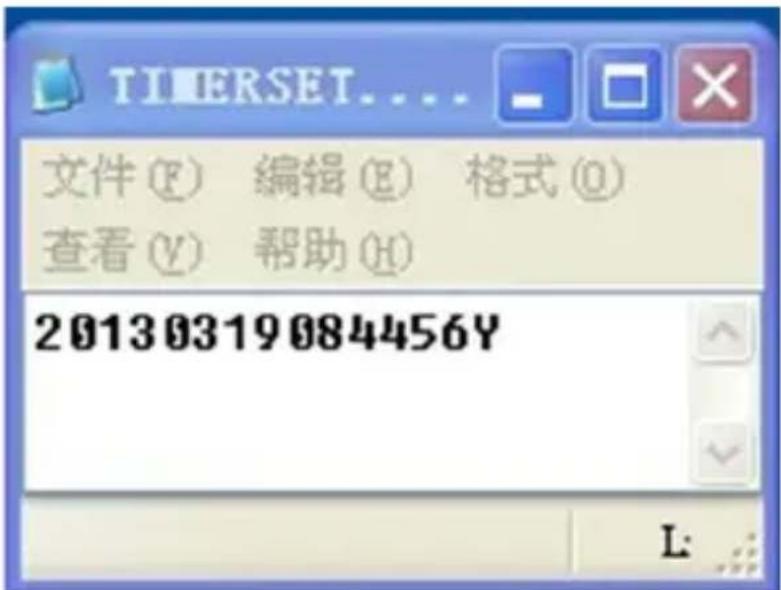
If want to remove the time stamp, pls input "N" to replace "Y"(like 20130319084456N), the cameras will shut off the time stamp. (3) Copy the "TIMERSET.TXT" file to the root directory of Micro SD card. Then power on the camera, the video footage you recorded will be with time stamp.
File Format
Under standby mode, press and hold MODE key for 5 seconds, loose MODE key when you hear beep sound, then the camera starts to format files, when the beep sound disappear, formatting finish.
Playing back video footage on PC
(1) Turn the camera on. Connect the camera to PC via the USB cable.
Open "My computer", check a new disk on your computer, open it you will see the video footages you recorded.
(2) Close the disk and plug out USB cable, the camera will turn off automatically.
Technical specification
Sensor 1.3 Mega CMOS sensor
Lens 115 degree under 720P
Resolution 1080P (1920*1080) / 720P(1280*720)
Image size 5 Mega 2560*1920
File Format .H264/JPG
Storage Micro SD card, support up to 32G
(not included)
Audio Built-in MIC
USB port USB2.0
Loop recording Supported
Battery Rechargeable lithium battery 3.7V 700mAh,
working about 2 hrs under 1080P
Waterproof Waterproof to 10 meters
Specifications are subject to change without notice.
English

Correct Disposal of This Product (Waste Electrical & Electronic Equipment)
(Applicable in the European Union and other European countries with separate collection systems)
This marking shown on the product or its literature, indicates that it should not be disposed with other household wastes at the end of its working life. To prevent possible harm to the environment or human health from uncontrolled waste disposal, please separate this from other types of wastes and recycle it responsibly to promote the sustainable reuse of material resources.
Household users should contact either the retailer where they purchased this product, or their local government office, for details of where and how they can take this item for environmentally safe recycling. Business users should contact their supplier and check the terms and conditions of the purchase contract. This product should not be mixed with other commercial wastes for disposal
Made in China for LECHPOL Zbigniew Leszek, Miętne, 1 Garwolińska Street 08-400 Garwolin.
EN


natural_image
Close-up of a black plastic buckle strap with red and white stripes, no visible text or symbolsRys. 1
natural_image
Close-up of a white and black electric hair headlamp with red buttons, resting on a pink bicycle (no text or symbols visible)Rys. 2

natural_image
Close-up of a black athletic belt buckle with textured strap and clasp (no text or symbols visible)Rys. 3

natural_image
Close-up of a black and white plastic helmet with circular cutouts, placed on a white surface (no text or symbols visible)Rys. 4

natural_image
White and black handheld device with red buttons and black handle, isolated on white background (no text or symbols visible)Rys. 5
natural_image
Close-up of a black and white handheld device with blue camouflage pattern, mounted on a flat surface (no visible text or symbols)Rys. 6
natural_image
Close-up of a bicycle-mounted device with black handle and blue grip, mounted on a white background (no visible text or symbols)Rys. 7
Karta pamięci
Akumulator: 3.7 V / 700 mAh
natural_image
Close-up of a black plastic buckle with mesh texture, partially covered by red and white striped fabric (no text or symbols visible)Pic. 1
natural_image
Close-up of a white electric shaver with red buttons mounted on a black strap, placed on a pink bicycle helmet (no text or symbols visible)Pic. 2

natural_image
Close-up of a black athletic belt buckle with textured strap and clasp (no text or symbols visible)Pic. 3
natural_image
Close-up of a black and white plastic helmet with visible internal components (no text or symbols)Pic. 4
RO
natural_image
White and black handheld device with red indicator lights, no visible text or symbolsPic. 5
natural_image
Close-up of a black and white handheld device with camouflage pattern, mounted on a plain surface (no visible text or symbols)Pic. 6
3. Montarea camerei pe bicicleta/motocicleta
natural_image
Close-up of a mechanical device with blue handle and black lever, no visible text or symbolsPic. 7