X920BT - Gps WayteQ - Free user manual and instructions
Find the device manual for free X920BT WayteQ in PDF.


| Product Type | Portable GPS Navigation Device |
| Brand | WayteQ |
| Model | X920BT |
| Dimensions | 135 x 85.9 x 14.3 mm |
| Processor | SiRF Atlas IV dual core, ARM11 CPU 500MHz |
| Operating System | Windows CE 6.0 |
| RAM | 128MB (64MB optional) |
| Internal Flash Memory | 2GB |
| External Memory | Micro SD card up to 8GB |
| Display | 5 inch TFT LCD, 480x272, 65k colors, resistive touch, 250 nits |
| GPS Chip | SiRF GPS, up to 40 channels |
| Antenna | Embedded |
| Battery | Lithium-ion, 1800mAh |
| Bluetooth | Hands-free calling, phonebook sync |
| FM Transmitter | Yes, 76-108 MHz (adjustable) |
| Media Playback | Music (WMA), Video, Photo (JPG/GIF/BMP/PNG), E-book (TXT), Flash (SWF) |
| Games | Othello, Russia Block |
| Tools | Calculator, Unit Converter, GPS Info |
| USB Interface | USB 2.0 high speed, ActiveSync or Mass Storage |
| Audio Output | 3.5mm stereo headphone jack |
| External TMC Support | Yes (requires optional receiver) |
| Light Sensor | Yes, for auto backlight adjustment |
| Safety Warning | Do not operate while driving; avoid direct sunlight |
Frequently Asked Questions - X920BT WayteQ
User questions about X920BT WayteQ
0 question about this device. Answer the ones you know or ask your own.
Ask a new question about this device
Download the instructions for your Gps in PDF format for free! Find your manual X920BT - WayteQ and take your electronic device back in hand. On this page are published all the documents necessary for the use of your device. X920BT by WayteQ.
USER MANUAL X920BT WayteQ
3.1 Zene (Music)
3.2 Fotó
natural_image
Close-up of chocolate and strawberry-shaped pastries on a red background, no visible text or symbolsH G F E D C B A
5. Eszközök
6. GPS Info
7.4 Dátum és idő
7.7 Rendszer Info
Érintse meg a "

Hangerő beállítás
Érintse meg a "

•SDRAM: 128MB (64MB Optional)
-Flash memória: 2GB
•Külső memória: Micro SD kártya, akár 8GB
3.1 Muzică
Apăsați pe iconul "


natural_image
Close-up of colorful pastries and desserts on a red background, with no visible text or symbols.A. Return to the Media menu
B. Bookmark list
C. Bookmark
D. Theme and font
E. Down
F. Up
G. Select EBook files
3.4 Video
5. Instrumente
6. Info GPS
7.4 Data și ora
Apăsați pe iconul "

Adjust volume
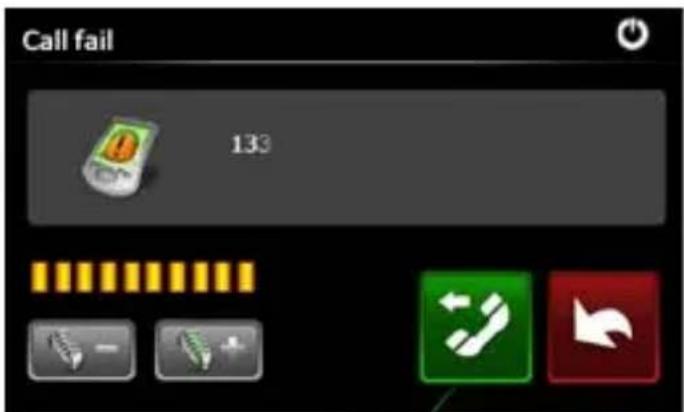
Re-Dial last number
Open the small keypad
Turn on or off the MIC Switch call to phone
Apăsați pe iconul " 10000000000000000000000000000000000000000000000000"
-Memorie externă : Micro SD card support up to 8GB
3.1 Музика

natural_image
Close-up of colorful dessert cakes with berries and chocolate topping on red background (no visible text or symbols)H G F E D C B A
6. GPS Информация
7.4 Дата и време
Tap the icon "USB" to set the USB working mode.
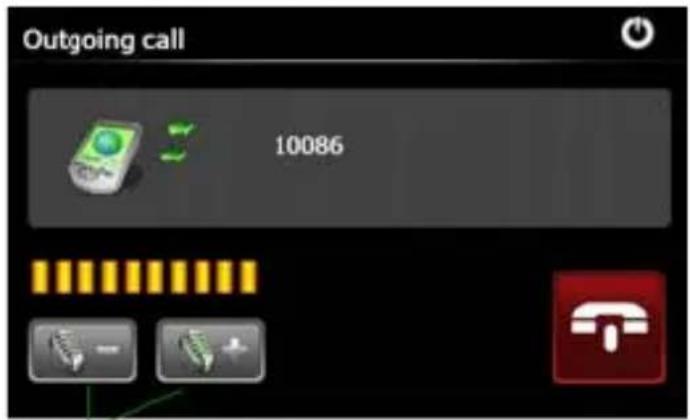
Adjust volume
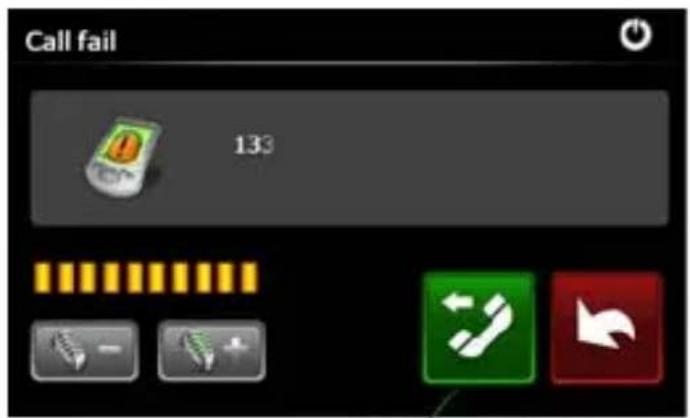
Re-Dial last number
Open the small keypad
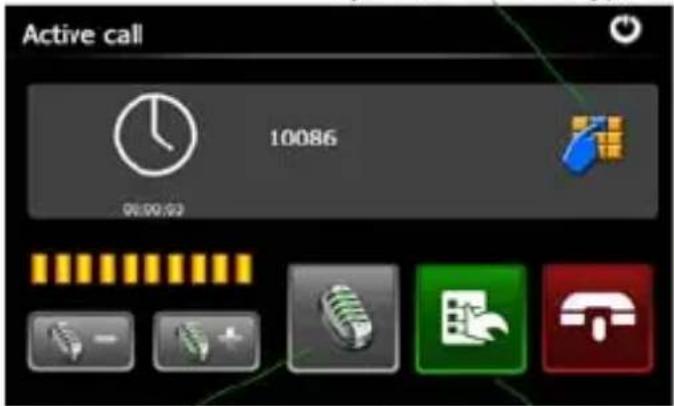
Turn on or off the MIC Switch call to phone
Technical Specification
- 135 * 85.9 * 14.3 mm (reference)
•SiRF Atlas IV dual core, ARM11 CPU 500MHz Processor
- WinCE 6.0 system
•SDRAM : 128MB (64MB Optional)
-Flash Memory: 2GB
•External Memory : Micro SD card support up to 8GB
•SiRF GPS up to 40 channels
- USB2.0 high speed, support Active Sync. Or Mass Storage Modes
- 5 inch, 480 * 272, 65,536 possible colors, Digital TFT LCD with 4-wire resistive touch panel, 250 lumen,16:9
- Embedded Antenna
•Light Sensor
•Li Battery, 1800mAh
•External TMC receiver support
•3.5mm Stereo headphone jack
- Animation Menu Style
•Photo Viewer : JPG, GIF, BMP, PNG
•E-book : TXT
-Flash Player: SWF
•Games : Othello, Russia block
-Tools: Calculator, Unit Converter, GPS Info
- Bluetooth Hands Free
•FM Transmitter
WayteQ GPS Navigation
X920BT
Bedienungsanleitung
3.1 Musik
natural_image
Close-up of colorful pastries including chocolate, strawberries, and waffles on a red background (no visible text or symbols)H G F E D C B A
5. Werkzeug
6. GPS Info
7.4 Datum und Zeit
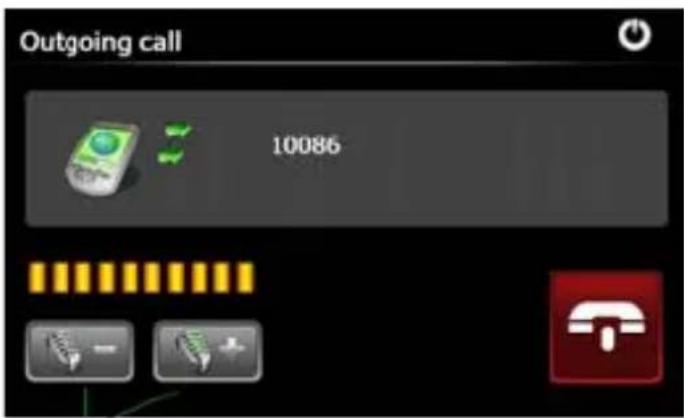
Adjust volume
Re-Dial last number
Open the small keypad
Turn on or off the MIC Switch call to phone
- USB2.0 high speed, support Active Sync. Or Mass Storage Modes
•External TMC receiver support
•3.5mm Stereo headpho ne jack
- Animation Menu Style
•Photo Viewer : JPG, GIF, BMP, PNG
•E-book : TXT
- Flash Player : SWF
A. kontrolka nabíjania
B. reproduktor
C. vypínač
D. konektor na sluchátka
E. šachta pre pamāťovú kartu
F. mini USB
G. dotyková ceruza
H. Reset
I. MIC
J. Svetelné čidlo
3.1 Hudba (Music)
A. spät' do menu
3.2 Fotó
Dotknite sa Photo ikony na zobrazenie tohto obrazca a dotknite sa sa " ikony pre výber obrázku
natural_image
Close-up of colorful pastries with chocolate and berry toppings on a red background (no visible text or symbols)H G F E D C B A
5. Nástroje
6. GPS Info
Návrh: Ak zmenite nastavenia, kliknite na " " ikonu na uloženie zmien.
7.1 Hlasitost'
7.4 Čas a dátum
Poklepaním na ikonu DateTime. V nasledujúcom obrázku uvidíte. Tu môžete nastavit požadovaný čas, dátum a časové pásmo.
7.5 Kalibrácia
"+" / "-" Tlačidlá pre nastavenie požadovanej frekvencie.
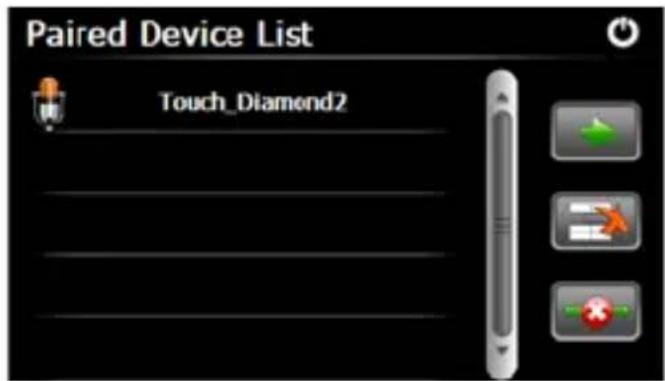
Kliknite na "Device List" ikonu a uvidíte nasledujúcu obrazovku
Kliknite na a "silony v menu nastavenia Bluetooth a prejdite na rozhranie vytáčania:
Adjust volume
Re-Dial last number
Open the small keypad
Turn on or off the MIC Switch call to phone
Kliknite na " [Image] u a vstupte do menu nastavenia:
kliknite na "i" ikonu na kopírovanie tf. Zoznamu z telefónu, číslo v zozname sa dá volat' priamo.
Precaution and Notice
- The PND is used only as a navigation aid. It is not for precise measurement of direction, distance, location or topography. The user must follow all traffic signs and local regulations along the roads.
- GPS satellite signals cannot pass through solid materials (except glass). When you are inside a tunnel or building, GPS position is not available.
- A minimum of 4 GPS satellite signals are needed to determine current location. Signal reception can be affected by situations such as bad weather or dense overhead obstacles (e.g. tall buildings).
- Other wireless devices in the vehicle might interfere with the reception of satellite signals and cause the reception to be unstable.
- When you get out of the car, do not leave your PND on the dashboard or subject to direct sunlight. The overheating of the battery may cause malfunctions and/or dangerous conditions.
- For your own safety, do not operate the controls of the PND while driving. Do not mount where the driver's field of vision is blocked.
Basic Introduction
1.1 Overview
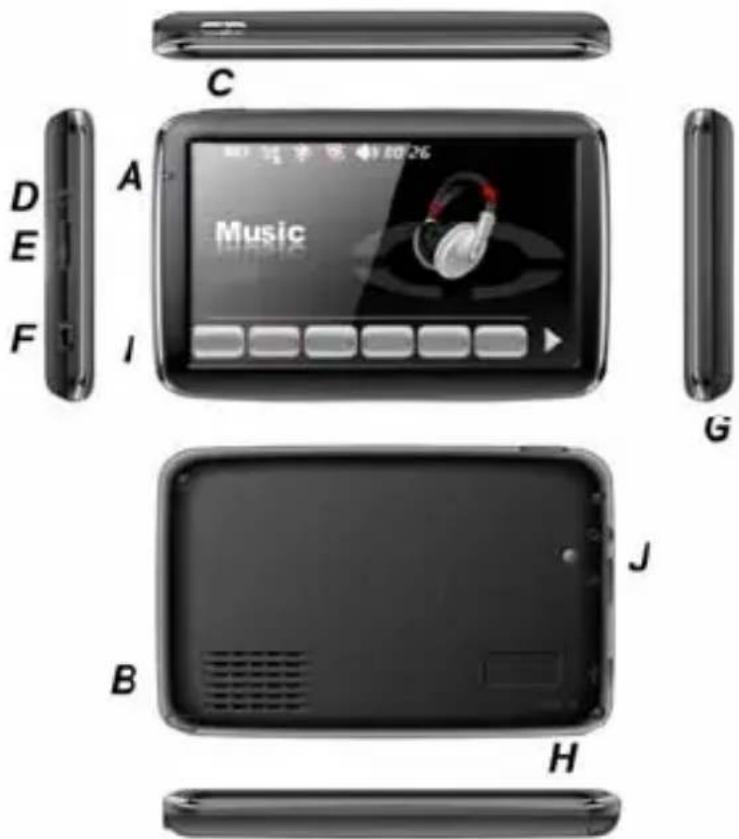
A. Charging Indication
B. Speaker
C. Power
D. 3.5mm Earphone Socket
E. Memory Card Slot
F. Mini USB
G. Stylus Pen Slot
H. Reset
I. MIC
J. Light Sensor
Once the card is installed, it cannot be removed during the operation of the device.
If you need to remove the card, switch the unit off first, push the card in and it will eject from the slot.
1.2 Charging by Car Charger
Caution: To protect your device against suddenness, please connect the car charger only after the car engine has been started.
1.3 USB Cable
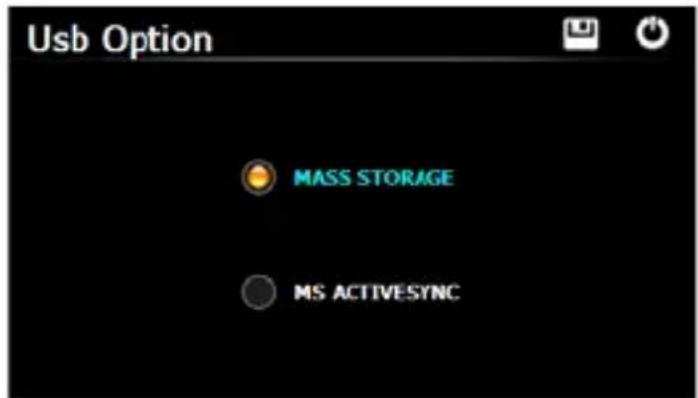
The USB cable is provided for system upgrades and battery charging. This USB cable will work on the PC either with Microsoft Active Sync® or as a mess storage media. You can select the mode in the "Setting-USB" menu.
1.4 Install the Car Cradle and Bracket
Take off the protection film on the bottom of the suction. Then put the bracket onto a suitable location of your windscreen or side window and make sure the suction or windscreen is clean without water or any dirty things. Never place the stand where the driver's field of vision is blocked.
Install the device bracket into the car cradle, after adjust of the angle and direction of the PND, rotate the screw to lock onto windscreen.
1.5 AC-DC Charger optional
Main Functions Introduction
1. Starting Up and Power Off
Long press the "Power" button to power the equipment on and you can see the main interface as below :
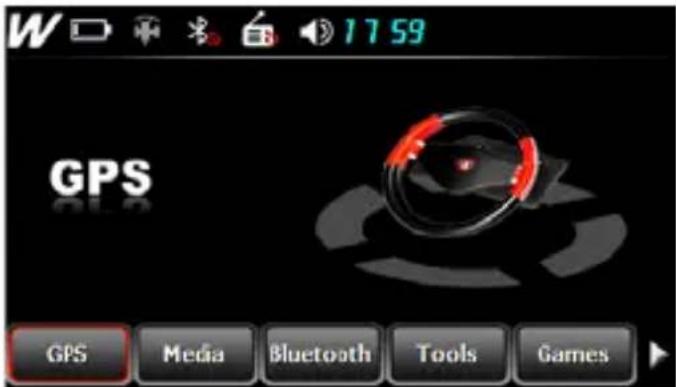
Long press the "Power" button again to enter into the below interface :
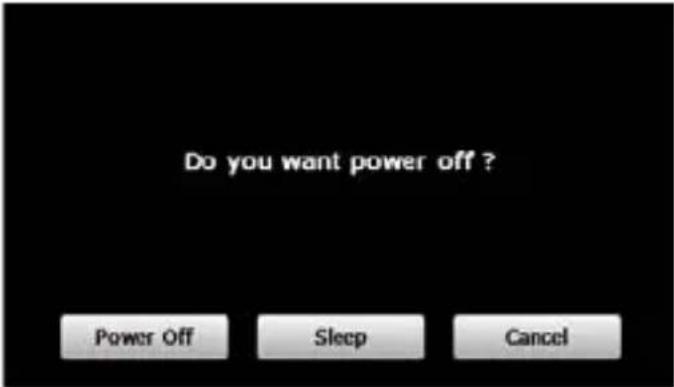
Tap the "Power off" button to turn the unit off.
Tap the "Sleep" button to enter a suspend state and the system stops operation.
Tap the "Cancel" button to turn back to the screen.
2. GPS Navigation
Double tap the "GPS" icon to start navigation program.
3. Media
Tap the icon "Media" on the main menu and enter into the below interface :
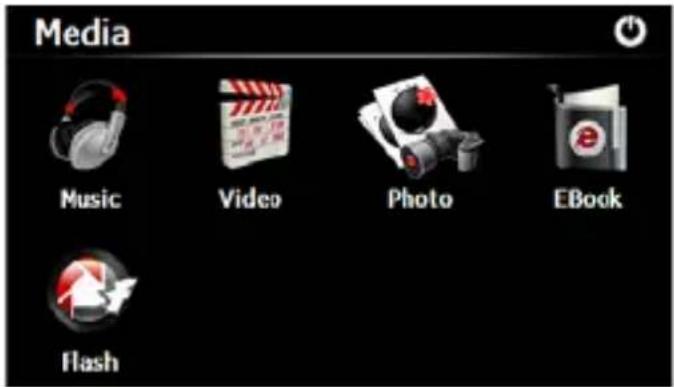
3.1 Music
Tap the icon "Music" on the media menu and enter into the following interface.
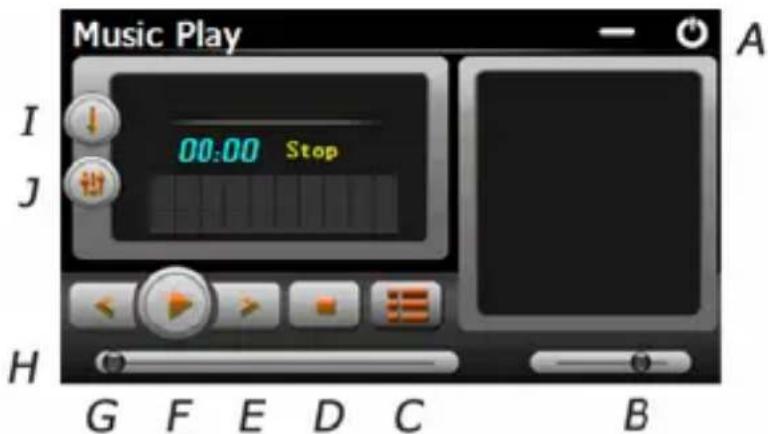
A. Return to the Media menu
B. Volume control
C. Select desired music file
D. Stop
E. Next
F. Pause / Play
G. Previous
H. Speed Bar
I. Play mode
J. Equalizer
Double tap icon "

" to choose music file .
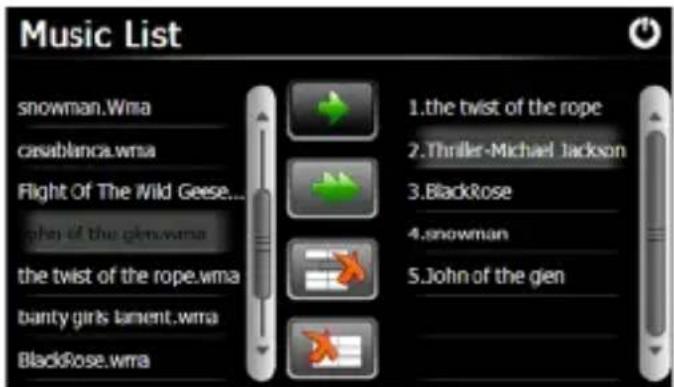
Tap the icon " " for single selection, tap the icon " " to select all, tap the icon " " for single delete, tap the icon " " to delete all.
3.2 Photo
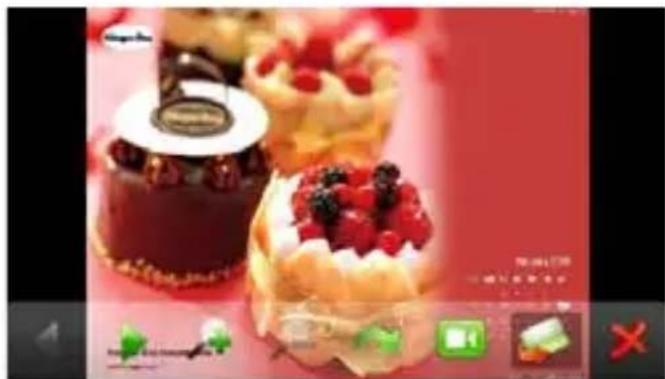
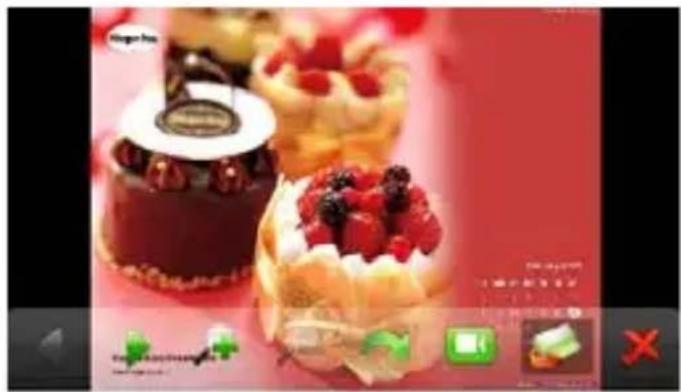
Tap the "Photo" icon on the media menu and tap the icon "to select photo files, double tap the photo file to see the following interface.
natural_image
Close-up of chocolate pastries and fruit toppings on a red background (no visible text or symbols)H G F E D C B A
A. Return to the Media menu
B. Select photo file
C. Slide mode
D. Rotate
E. Zoom in
F. Zoom out
G. Next
H. Previous
3.3 E-book
Tap the "EBook" icon on the media menu, then tap the " " icon to choose Ebook files, double tap the file and enter into the following interface.
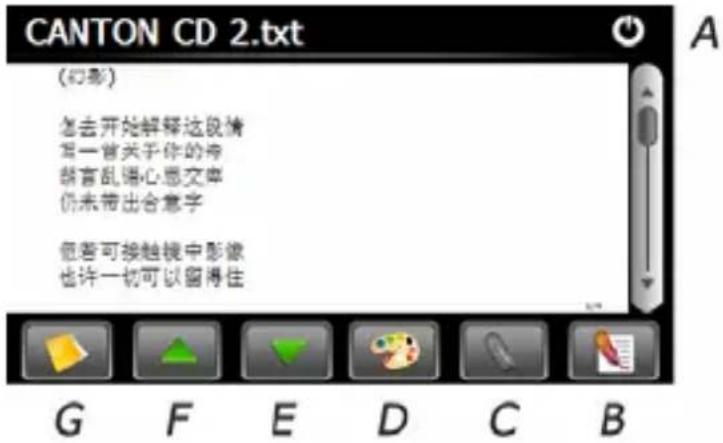
A. Return to the Media menu
B. Bookmark list
C. Bookmark
D. Theme and font
E. Down
F. Up
G. Select EBook files
3.4 Video
Tap the icon "Video" on the media menu, then tap the "icon to choose video files, and double tap the file and enter into following interface.
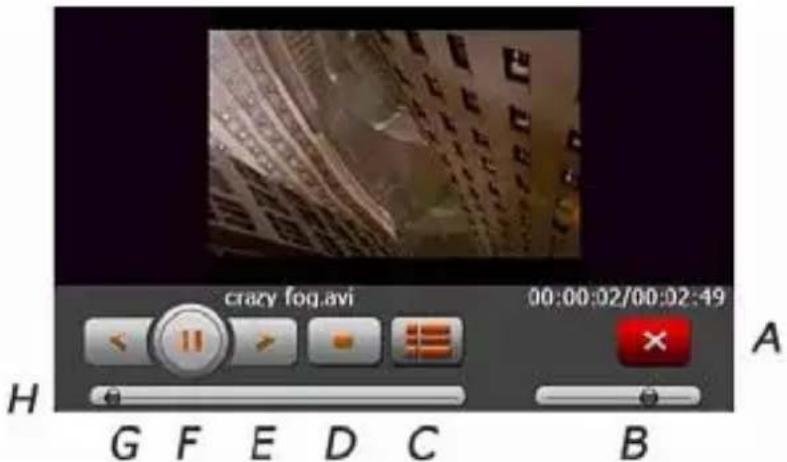
A. Return to the Media menu
B. Volume
C. Select video file
D. Stop
E. Next
F. Pause/play
G. Previous
H. Speed bar
Tips:
Tap NEXT button to recycle the movie.
Double tap the screen, it will display in full screen, double tap the screen again, it will return to original playing size.
3.5 Flash
Tap the icon "Flash" on the media menu and enter into the following interface.
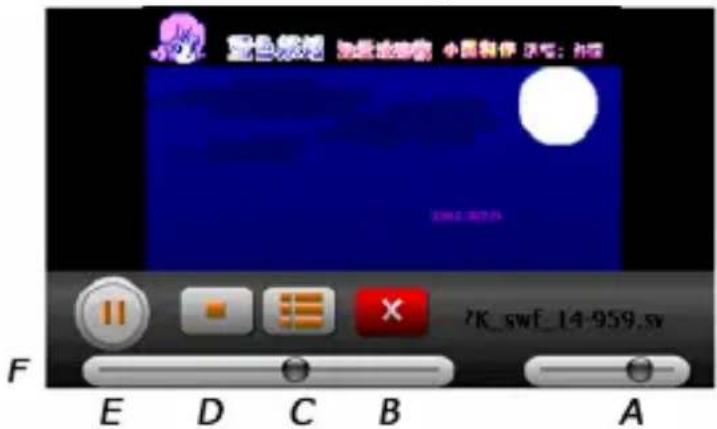
A. Volume
B. Return to the Media menu
C. Select flash file
D. Stop
E. Play / Pause
F. Speed Bar
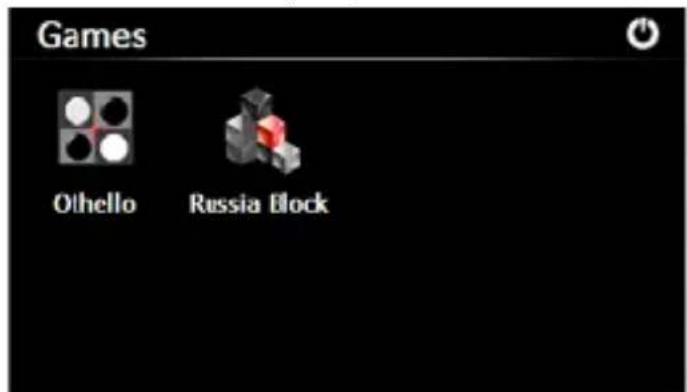
4. Games
Tap the icon "Games" on the main menu and double tap the game to run it.
5. Tools
Tap the icon "Tools" on the main menu and double tap the tool program to run it.
![Tools [Calculator] Unit](/content/2026/05/779205/images/1b42260ce4b9758a8cf01afc8432ae295c88b62e32c1e053bf70d123e16fb56c.jpg)
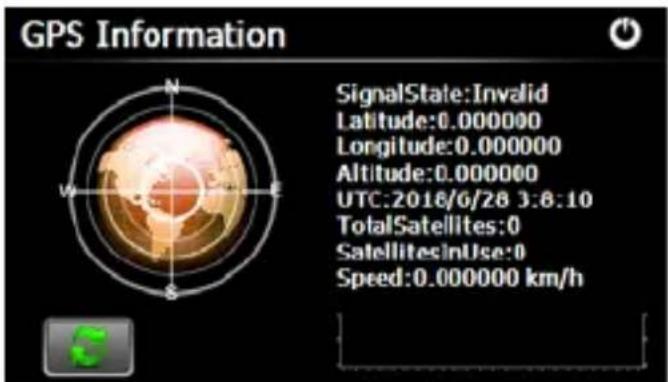
6. GPS Info
Tap the "GPS Info" icon and the unit will show the detail information of GPS satellites.
7. Setting
Tap the icon "Setting" on the main menu and enter into the following interface.
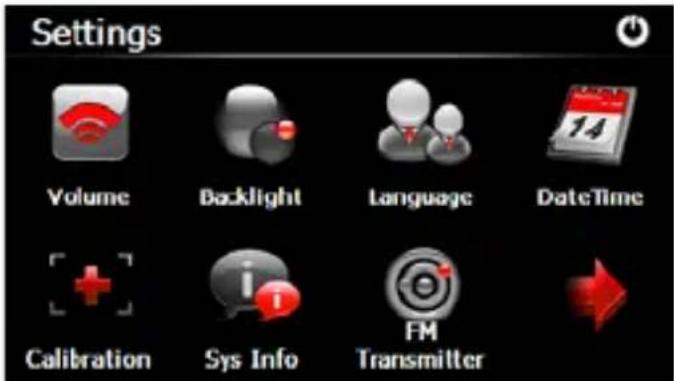
Tips : after make any changes of setting, tap " " to save the change.
7.1 Volume
Tap the icon "Volume" on the menu and enter into the following interface.
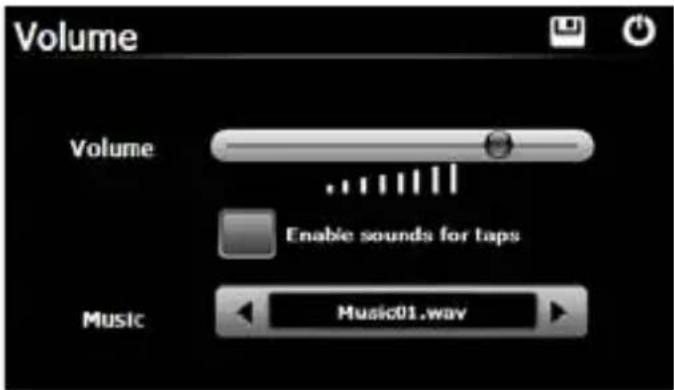
Choose "Music" files to be background sound when unit is power on.
7.2 Backlight
Tap the "Backlight" icon and enter into the following interface.
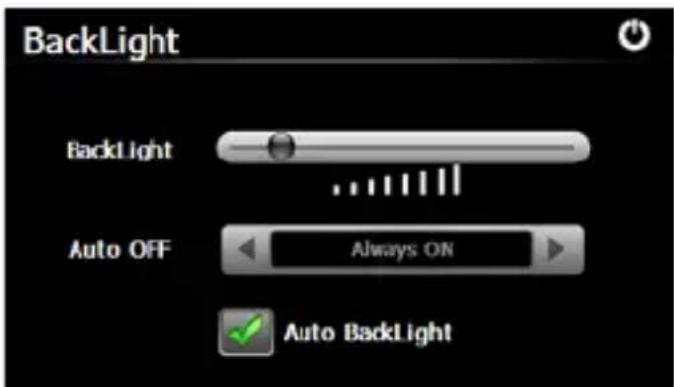
Tap "Left-side" or "Right-side" button to select the duration of automatically powering off the backlight. Choose "Auto Backlight" to adjust backlight through the light sensor.
7.3 Language
Tap the "Language" icon and choose the language.
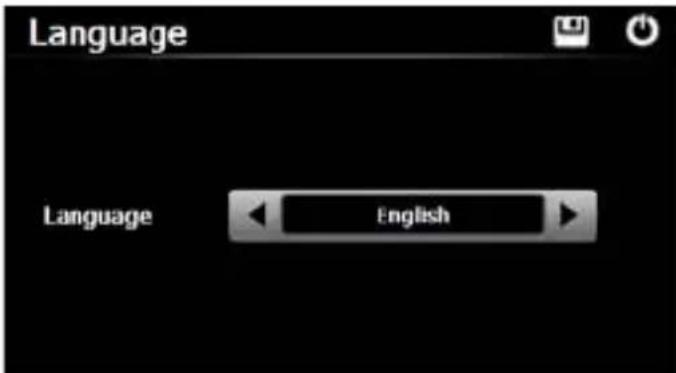
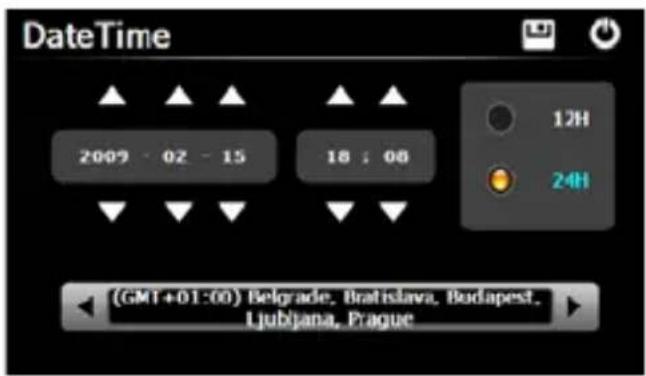
7.4 Date and Time
Tap the icon "Date Time" and enter into the following interface to set date, time and time zone.
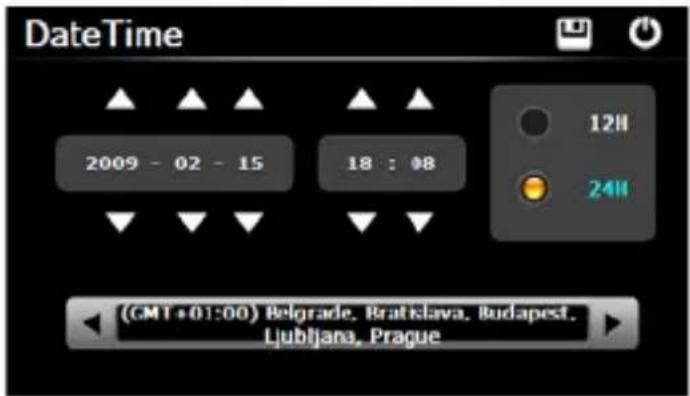
7.5 Calibration
Tap the " Calibration " icon and enter into the following interface .
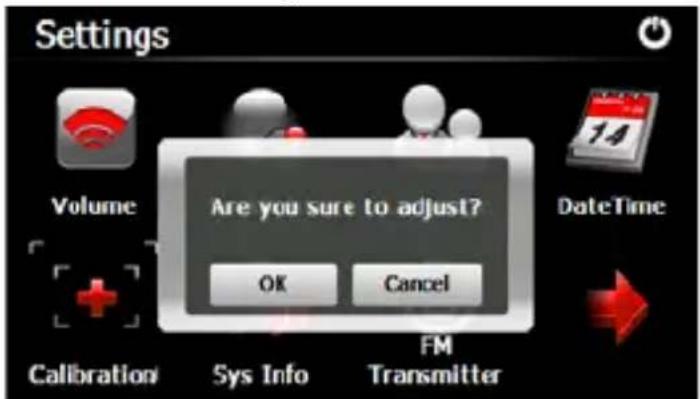
Tap the icon "OK" to adjust the touch screen.
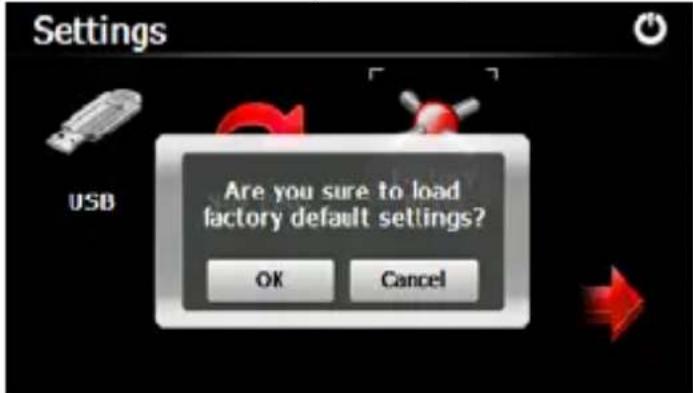
7.6 Factory Reset
Tap the " Factory Reset " icon and enter into the following interface . Tap the icon " OK " to load factory default setting .
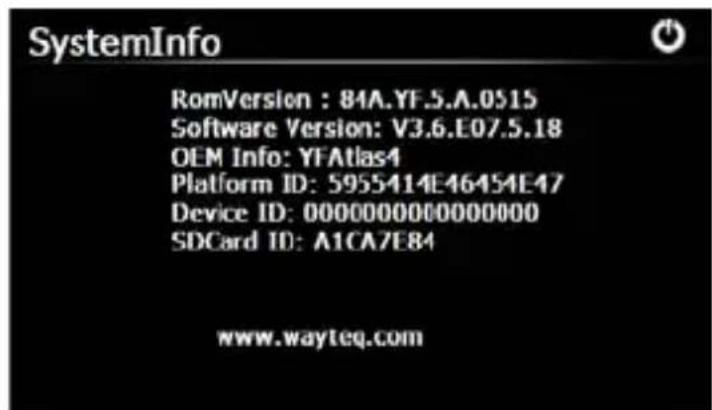
7.7 System Info
Tap the "Sys Info" icon and enter into the following display interface.
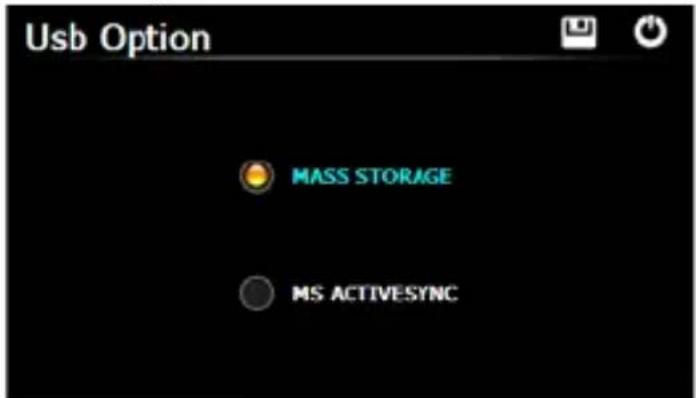
7.8 USB
Tap the icon "USB" to set the USB working mode.
7.9 Nav Path
Tap the "Nav Path" icon and enter into the following display interface.
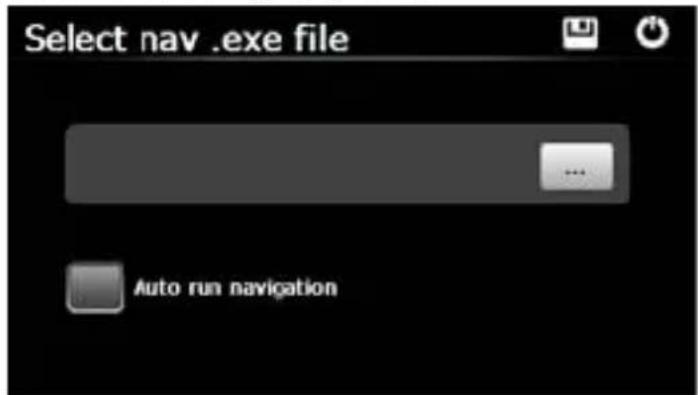
When you have several Navigation maps in the device, if you choose the "Navigation" icon, you can set up one of Navigation maps ( navigation program files ), and select the Auto Run Navigation , next time when tapping the "GPS" icon on the main menu, the device will run the selected Navigation software automatically .
7.10 FM Setting
Tap the "FM Transmitter" icon and enter into the following display interface.
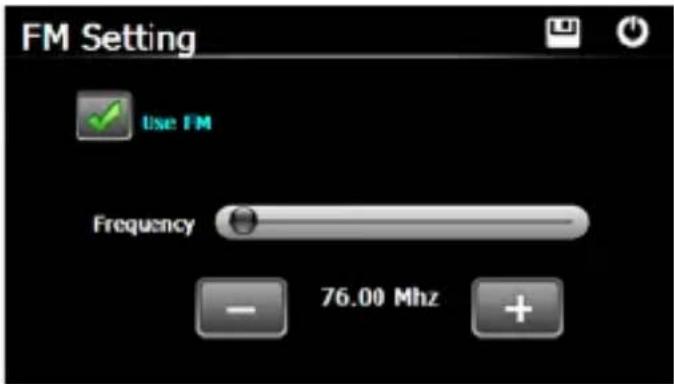
Tap "+"or "-" icon to increase or decrease the emissive frequency of FM.
8. Bluetooth
Tap one of the "Bluetooth" icons on the main menu, enter into Bluetooth interface as follow, The bottom is the connection status bar:
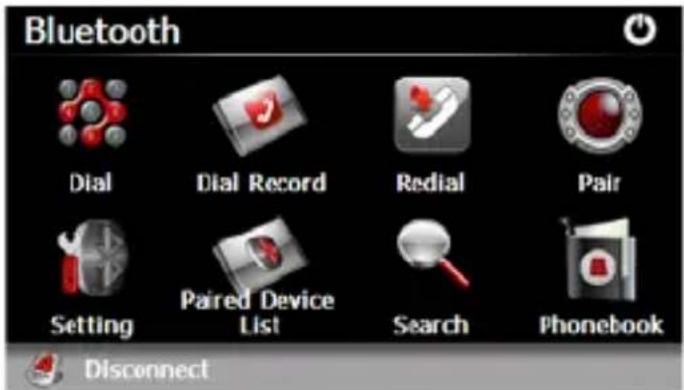
Tap the "Device list" icon and enter into the following interface:
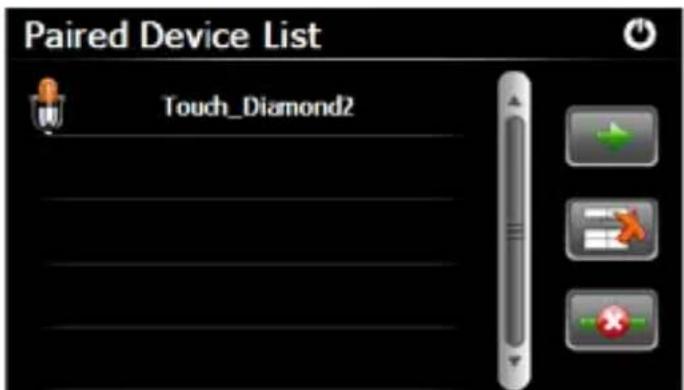
Tap the " " icon to connect the chosen device, tap the " " to disconnect, tap the " " to delete pair info.
If paired mobile phone not in the device list, please tap the " ” icon and enter into searching interface and pair with mobile phone ( mobile phone's Bluetooth should be power on and near the PND ). The interface as below:
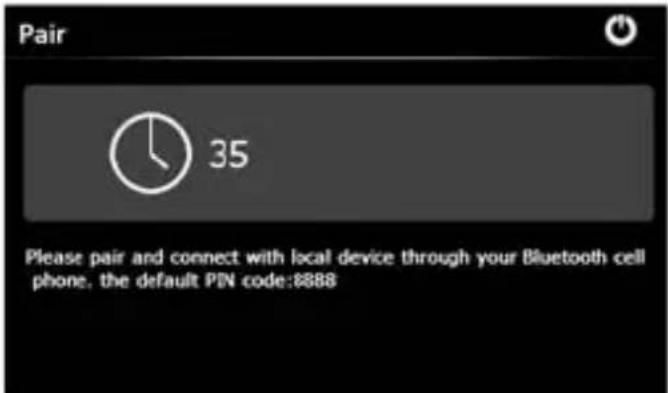
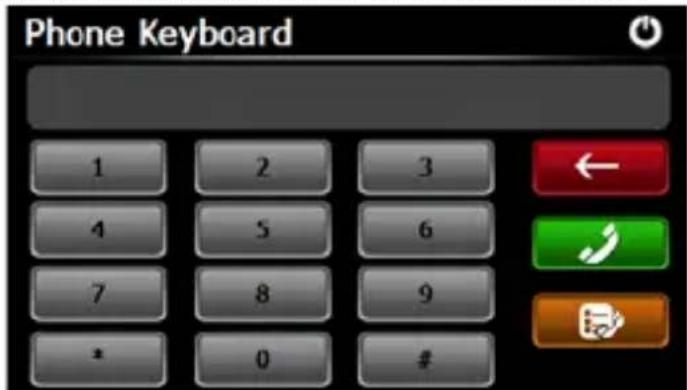
Tap the "

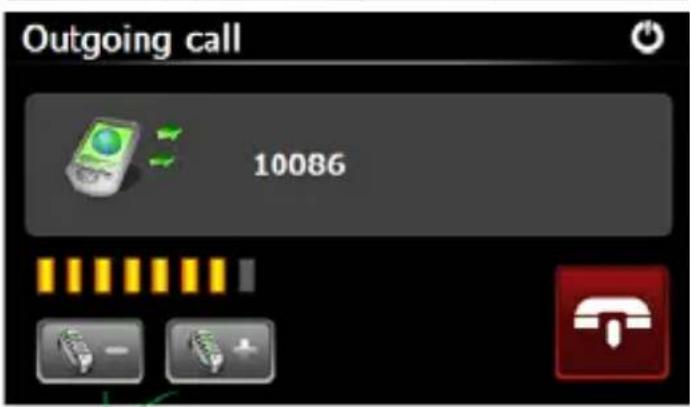
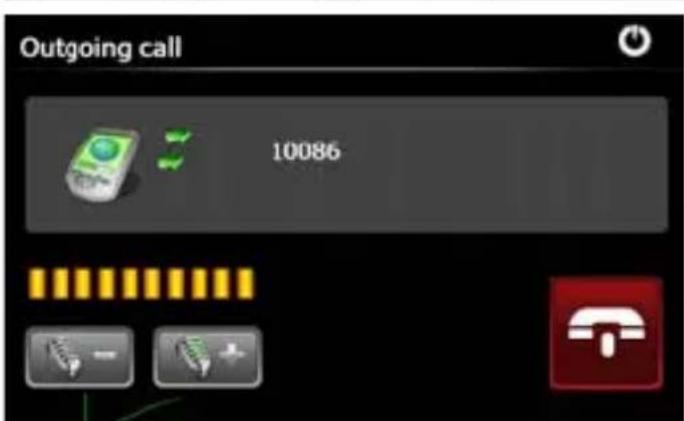
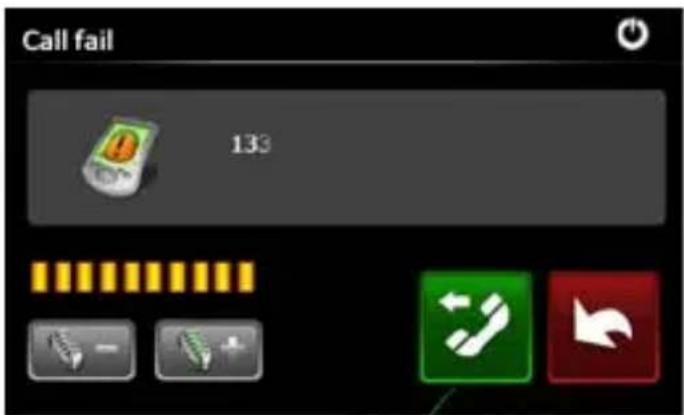
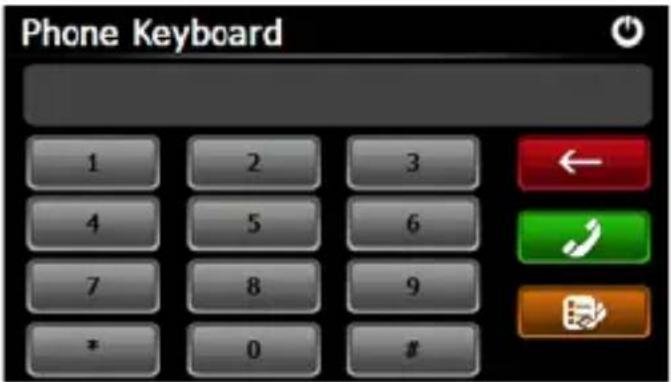
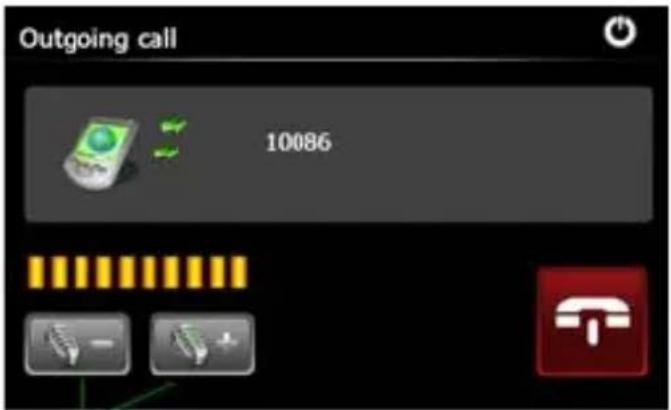
"icon on the Bluetooth menu and enter into dial-up interface as below :
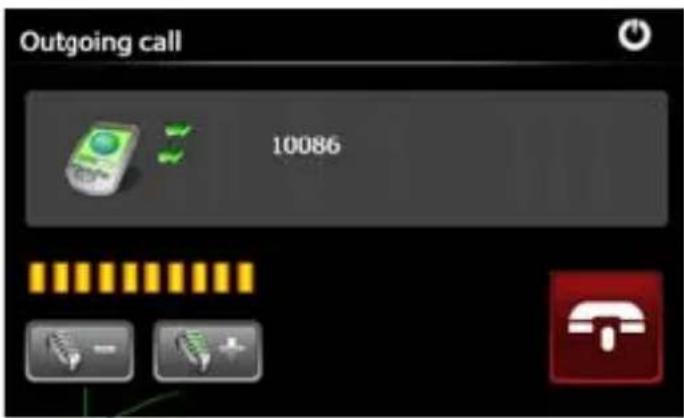
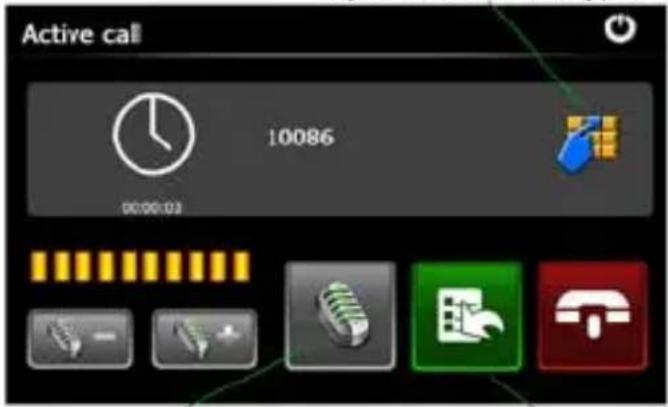
Adjust volume
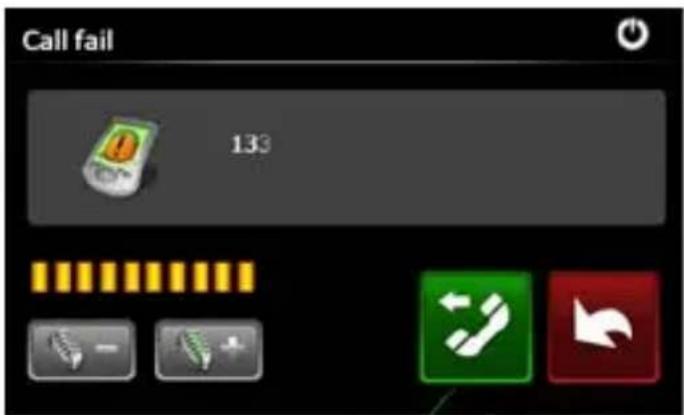
Re-Dial last number
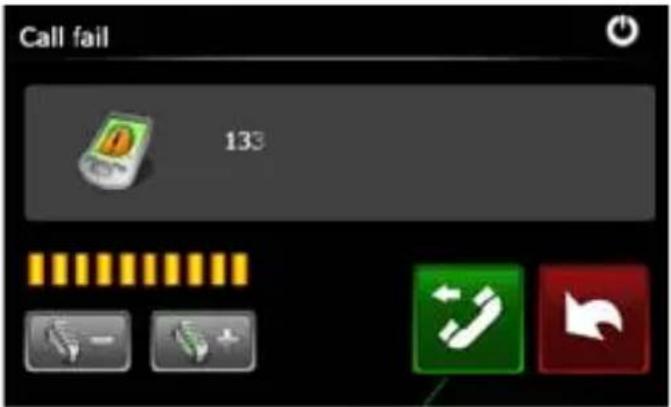
If incoming call, the interface as below.
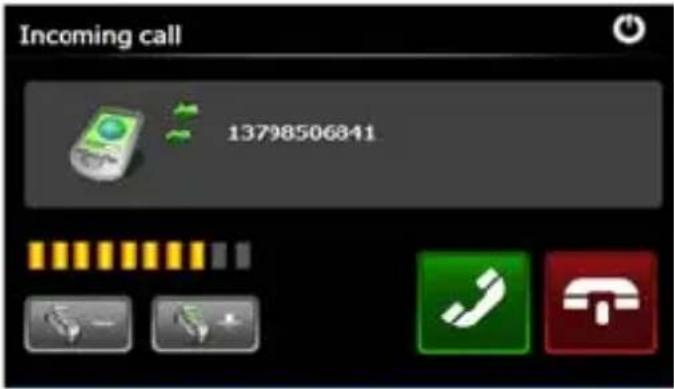
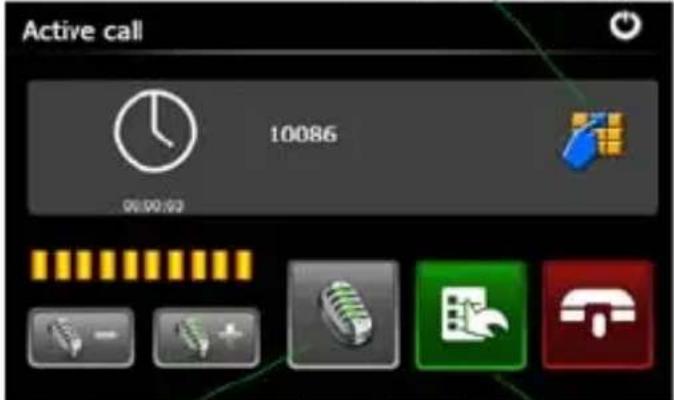
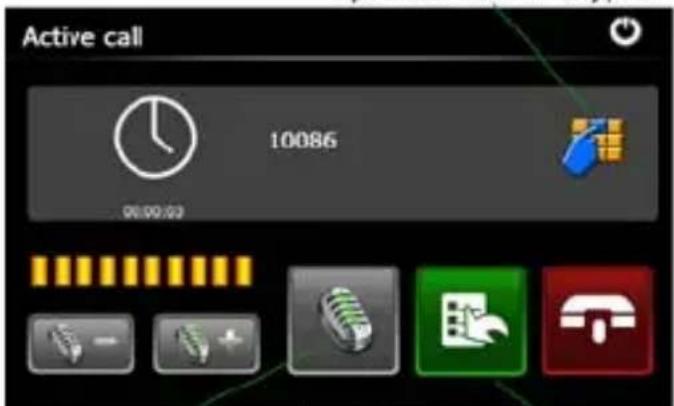
Active the call, and interface as below:
Open the small keypad
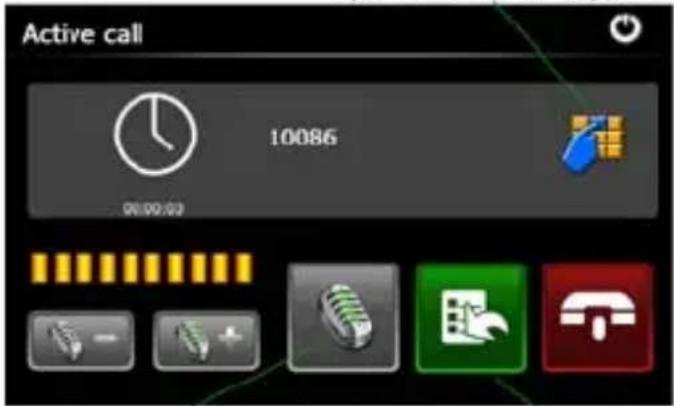
Turn on or off the MIC Switch call to phone
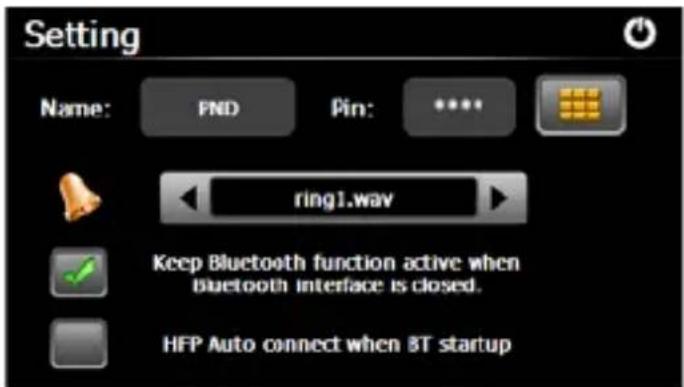
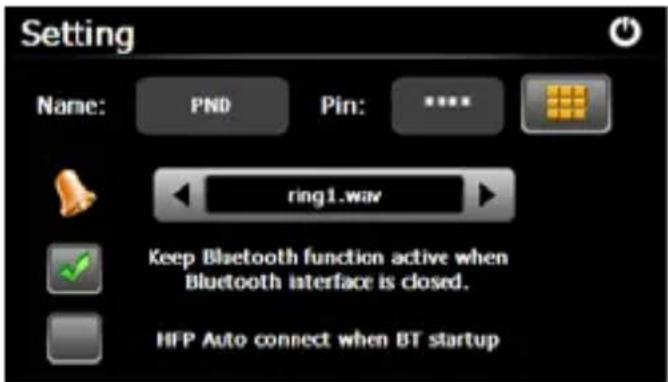
Tap the "I can and enter into Bluetooth setting interface as below.

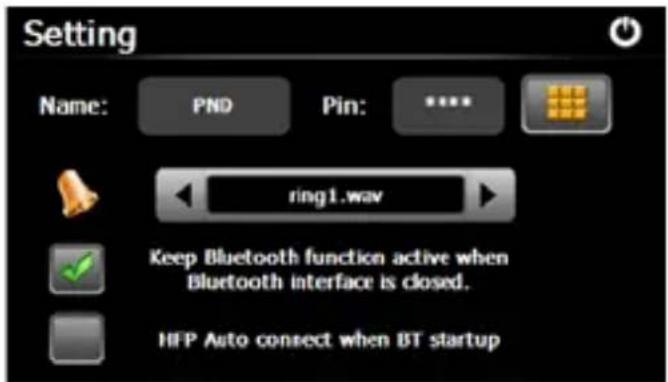
Name : display name of the device in the process of the Bluetooth transmission.
Pin: Tap the icon " and enter into pin code interface .
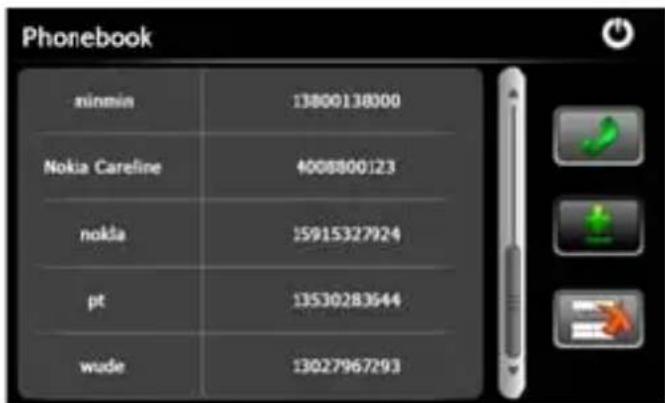
Tap the "Icon" and enter into the phonebook interface as below:


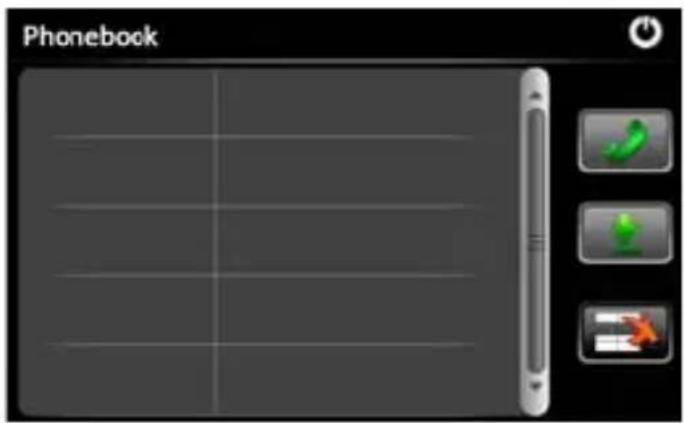
Tap the "Wright" icon to download and save the phone number to the navigator from the paired mobile phone, also you can dial the number through phonebook interface.
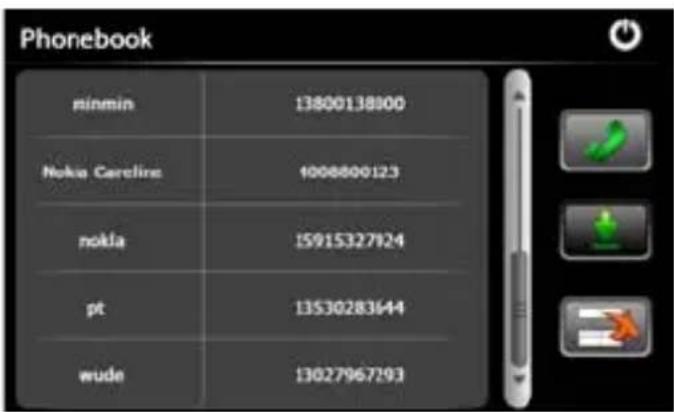
Select phone number, and tap " " to call the number. tap the " " to delete the selected number.
This document is for guidance only and does not form part of any contract, and may be subject to change without notice
Technical Specification
•135 * 85.9 * 14.3 mm (reference)
•SiRF Atlas IV dual core, ARM11 CPU 500MHz Processor
- WinCE 6.0 system
•SDRAM : 128MB (64MB Optional)
-Flash Memory:2GB
•External Memory : Micro SD card support up to 8GB
•SiRF GPS up to 40 channels
•USB2.0 high speed, support Active Sync. Or Mass Storage Modes
- 5 inch , 480 * 272, 65,536 possible colors, Digital TFT LCD with 4-wire resistive touch panel , 250 lumen,16:9
•Embedded Antenna
•Light Sensor
•Li Battery, 1800mAh
•External TMC receiver support
•3.5mm Stereo headphone jack
•Animation Menu Style
•Photo Viewer : JPG, GIF, BMP, PNG
•E-book : TXT
-Flash Player: SWF
•Games : Othello, Russia block
-Tools: Calculator, Unit Converter, GPS Info
- Bluetooth Hands Free
•FM Transmitter
This specification is for reference only and does not form part of any contract, and may be subject to change without notice.
© 2009 WayteQ Technology Co., Ltd. All rights reserved.
Print in China
- Zene (Music)
- Fotó
- Eszközök
- GPS Info
- Dátum és idő
- Rendszer Info
- Muzică
- Video
- Instrumente
- Info GPS
- Data și ora
- Музика
- GPS Информация
- Дата и време
- Technical Specification
- WayteQ GPS Navigation
- X920BT
- Bedienungsanleitung
- Musik
- Werkzeug
- Datum und Zeit
- Hudba (Music)
- Nástroje
- Hlasitost'
- Čas a dátum
- Kalibrácia
- Precaution and Notice
- Basic Introduction
- Overview
- Charging by Car Charger
- USB Cable
- Install the Car Cradle and Bracket
- AC-DC Charger optional
- Main Functions Introduction
- Starting Up and Power Off
- GPS Navigation
- Media
- Music
- Photo
- E-book
- Tips:
- Flash
- Games
- Tools
- Setting
- Volume
- Backlight
- Language
- Date and Time
- Calibration
- Factory Reset
- System Info
- USB
- Nav Path
- FM Setting
- Bluetooth
- #
Brand : WayteQ
Model : X920BT
Category : Gps