X820 - Gps WayteQ - Free user manual and instructions
Find the device manual for free X820 WayteQ in PDF.


| Product Type | Portable GPS Navigator |
| Brand | WayteQ |
| Model | X820 |
| Display | 5.0 inch TFT LCD touchscreen |
| Resolution | 480 x 272 pixels |
| Battery | Rechargeable Lithium-ion (approx. 3.7V, 1000mAh) |
| Battery Life | Up to 2 hours continuous use |
| Power Supply | 12/24V vehicle charger, USB cable |
| Dimensions | Approx. 12.5 x 8.0 x 1.5 cm |
| Weight | Approx. 150 g |
| GPS Receiver | SiRFstar III high sensitivity |
| Maps | Preinstalled regional maps (Europe/America depending on version) |
| Memory | Internal flash (2GB), microSD slot for expansion |
| Audio | Built-in speaker for voice guidance |
| Interface | Mini USB 2.0, 3.5mm headphone jack |
| Functions | Turn-by-turn navigation, POI search, route planning, speed camera alerts, lane guidance |
| Languages | Multilingual interface (English, French, German, Spanish, etc.) |
| Mounting | Windshield suction cup mount |
| Maintenance | Clean with a soft, dry cloth. Keep away from moisture. |
| Safety Warning | Do not use while driving. Mount in a location that does not obstruct view. |
| Spare Parts | Not user-serviceable. Contact manufacturer for repairs. |
Frequently Asked Questions - X820 WayteQ
User questions about X820 WayteQ
0 question about this device. Answer the ones you know or ask your own.
Ask a new question about this device
Download the instructions for your Gps in PDF format for free! Find your manual X820 - WayteQ and take your electronic device back in hand. On this page are published all the documents necessary for the use of your device. X820 by WayteQ.
USER MANUAL X820 WayteQ
WayteQ GPS Navigation X820
User Manual
Version 1.0
Precaution and Notice
The PND is used only as a navigation aid. It is not for precise measurement of direction, distance, location or topography. The user must follow all traffic signs and local regulations along the roads.
GPS satellite signals cannot pass through solid materials (except glass). When you are inside a tunnel or building, GPS position is not available.
A minimum of 4 GPS satellite signals are needed to determine current location. Signal reception can be affected by situations such as bad weather or dense overhead obstacles (e.g. tall buildings).
Other wireless devices in the vehicle might interfere with the reception of satellite signals and cause the reception to be unstable.
When you get out of the car, do not leave your PND on the dashboard or subject to direct sunlight. The overheating of the battery may cause malfunctions and/or dangerous conditions.
For your own safety, do not operate the controls of the PND while driving. Do not mount where the driver's field of vision is blocked.
Basic Introduction
1.1 Overview
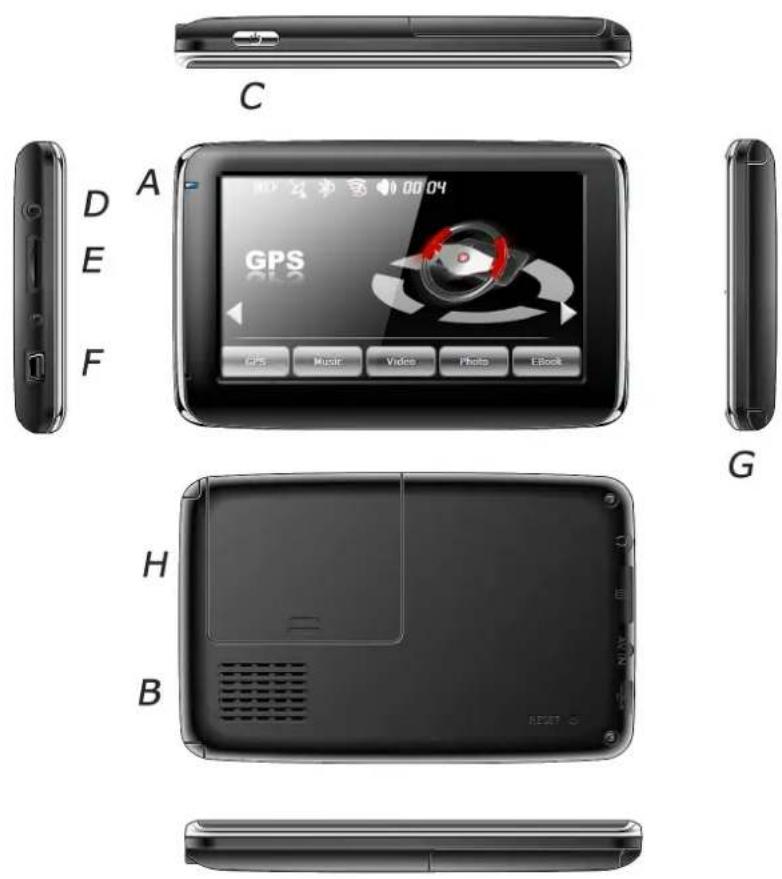
A. Charging Indication
B. Speaker
C. Power
D. 2.5mm Earphone Socket
E. Memory Card Slot
F. Mini USB
G. Stylus Pen Slot
H. Battery
Once the card is installed, it cannot be removed during the operation of the device.
If you need to remove the card, switch the unit off first, push the card in and it will eject from the slot.
1.2 Charging by Car Charger
Caution: To protect your device against suddenness, please connect the car charger only after the car engine has been started.
1.3 USB Cable
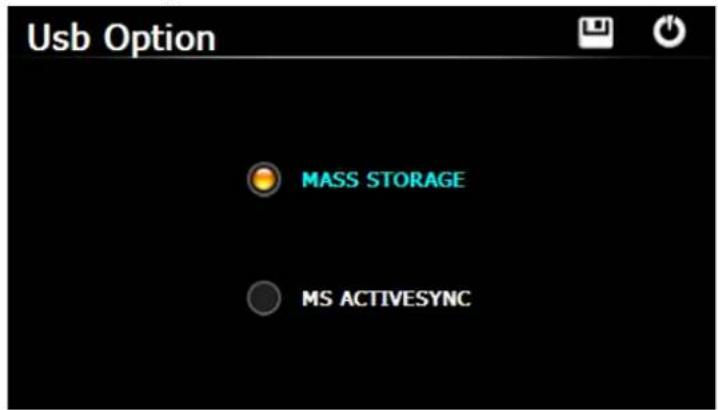
The USB cable is provided for system upgrades and battery charging. This USB cable will work on the PC either with Microsoft Active Sync® or as a mess storage media. You can select the mode in the "Setting-USB" menu.
1.4 Install the Car Cradle and Bracket
Take off the protection film on the bottom of the suction. Then put the bracket onto a suitable location of your windscreen or side window and make sure the suction or windscreen is clean without water or any dirty things. Never
place the stand where the driver's field of vision is blocked.
Install the device bracket into the car cradle, after adjust of the angle and direction of the PND, rotate the screw to lock onto windscreen.
1.5 AC-DC Charger optional
Main Functions Introduction
1. Starting Up and Power Off
Long press the "Power" button to power the equipment on and you can see the main interface as below :
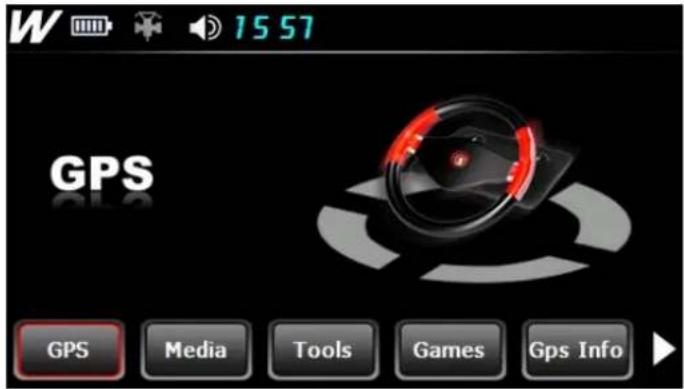
Long press the "Power" button again to enter into the below interface :
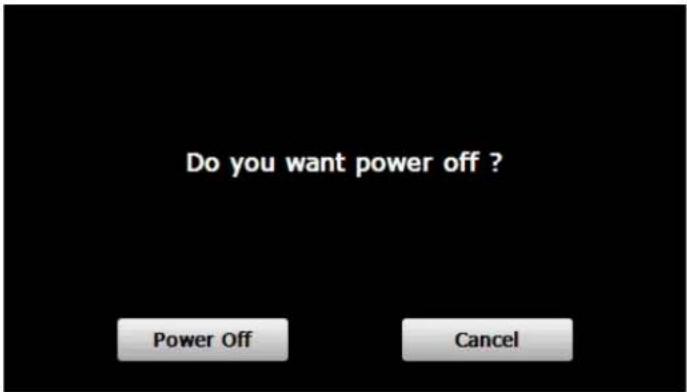
Tap the "Power off" button to turn the unit off.
Tap the "Sleep" button to enter a suspend state and the system stops operation.
Tap the "Cancel" button to turn back to the screen.
2. GPS Navigation
Double tap the "GPS" icon to start navigation program.
3. Media
Tap the icon "Media" on the main menu and enter into the below interface :
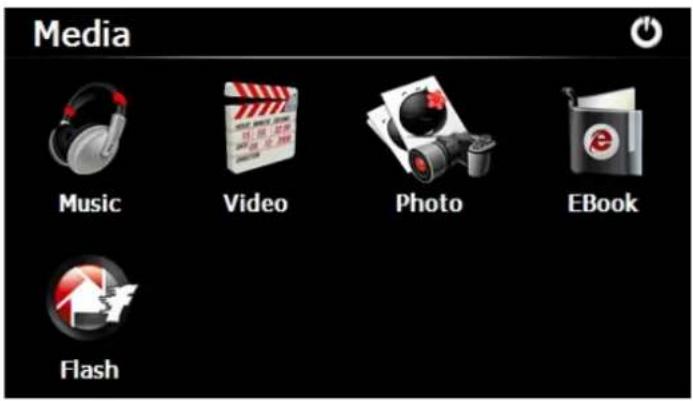
3.1 Music
Tap the icon "Music" on the media menu and enter into the following interface.
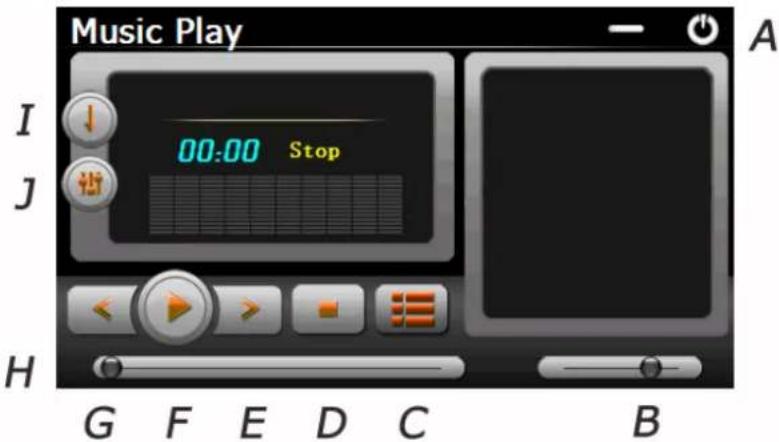
A. Return to the Media menu
B. Volume control
C. Select desired music file
D. Stop
E. Next
F. Pause / Play
G. Previous
H. Speed Bar
I. Play mode
J. Equalizer
Double tap icon "
ose music file .
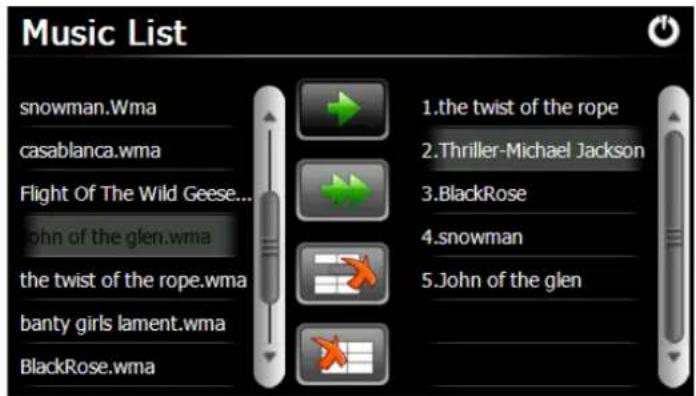
Tap the icon " " for single selection , tap the icon " " to select all , tap the icon "


" for single
delete, tap the icon " " to delete all.
3.2 Photo
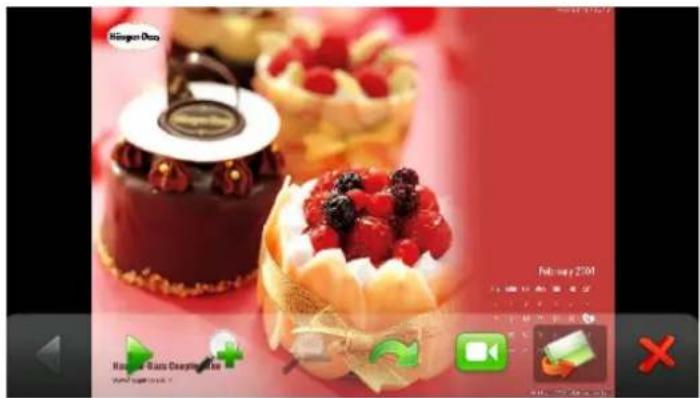
Tap the "Photo" icon on the media menu and tap the icon " [icon] " to select photo files, double tap the photo file to see the following interface.
natural_image
Close-up of chocolate and berry dessert cakes with red berries, served on a pink background (no visible text or symbols)H G F E D C B A
A. Return to the Media menu
B. Select photo file
C. Slide mode
D. Rotate
E. Zoom in
F. Zoom out
G. Next
H. Previous
3.3 E-book
Tap the "EBook" icon on the media menu, then tap the " " icon to choose Ebook files, double tap the file and enter into the following interface.

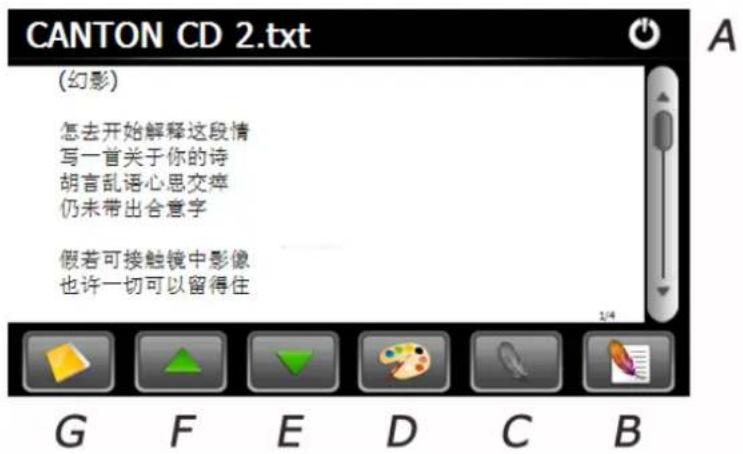
A. Return to the Media menu
B. Bookmark list
C. Bookmark
D. Theme and font
E. Down
F. Up
G. Select EBook files
3.4 Video
Tap the icon "Video" on the media menu, then tap the " ” icon to choose video files, and double tap the file and enter into following interface.
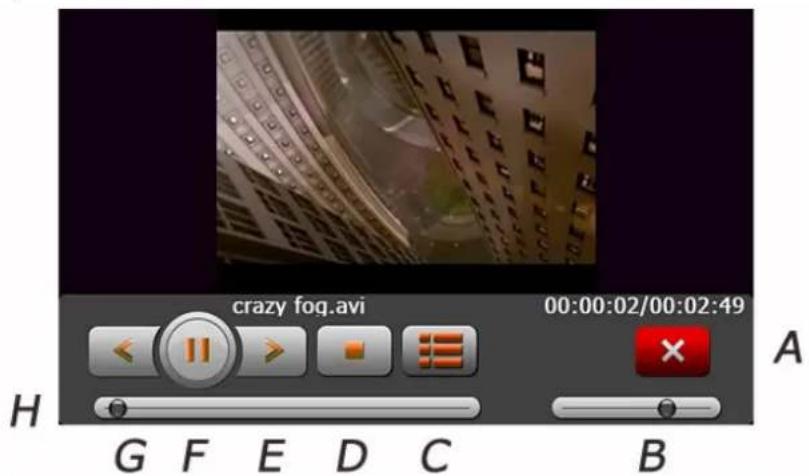
A. Return to the Media menu
B. Volume
C. Select video file
D. Stop
E. Next
F. Pause/play
G. Previous
H. Speed bar
Tips:
Tap NEXT button to recycle the movie.
Double tap the screen, it will display in full screen, double tap the screen again, it will return to original playing size.
3.5 Flash
Tap the icon "Flash" on the media menu and enter into the following interface.
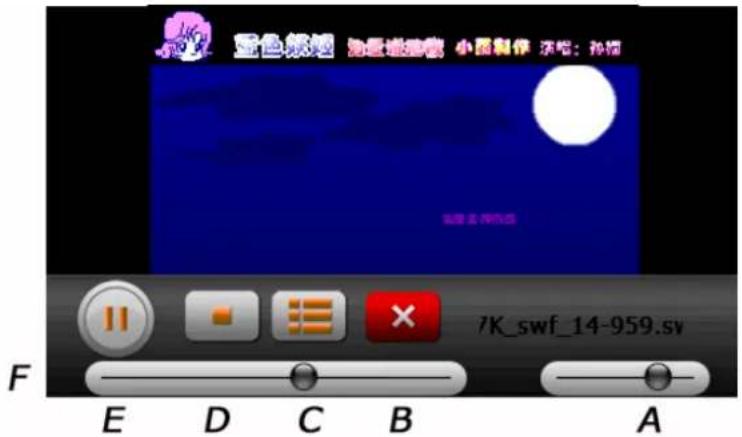
A. Volume
B. Return to the Media menu
C. Select flash file
D. Stop
E. Play / Pause
F. Speed Bar
4. Games
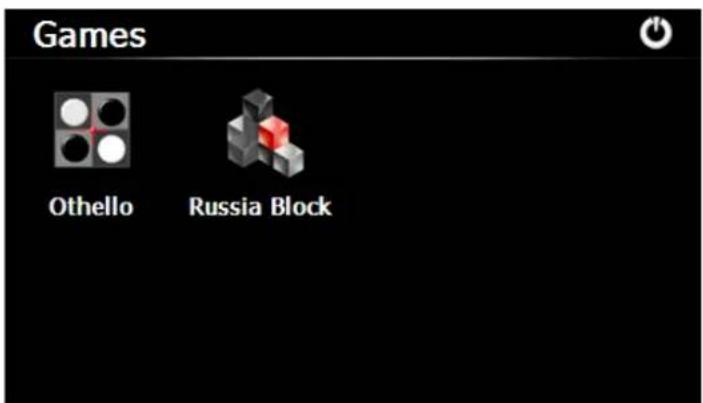
Tap the icon "Games" on the main menu and double tap the game to run it.
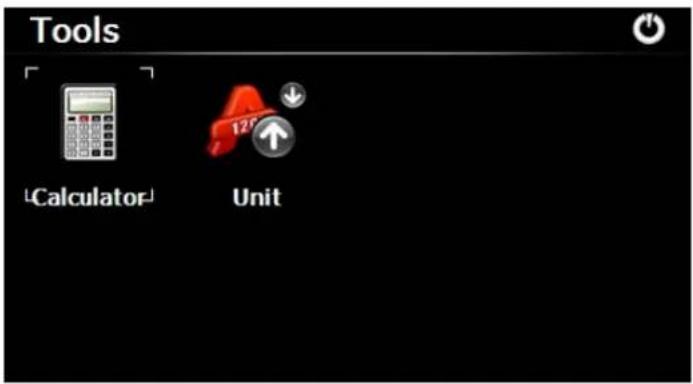
5. Tools
Tap the icon "Tools" on the main menu and double tap the tool program to run it.
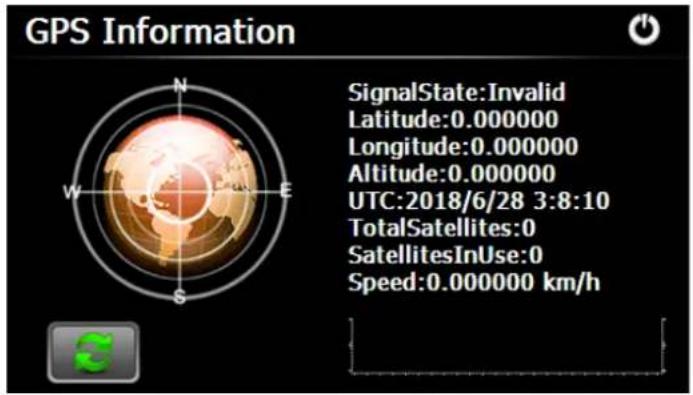
6. GPS Info
Tap the "GPS Info" icon and the unit will show the detail information of GPS satellites.
7. Setting
Tap the icon "Setting" on the main menu and enter into the following interface.
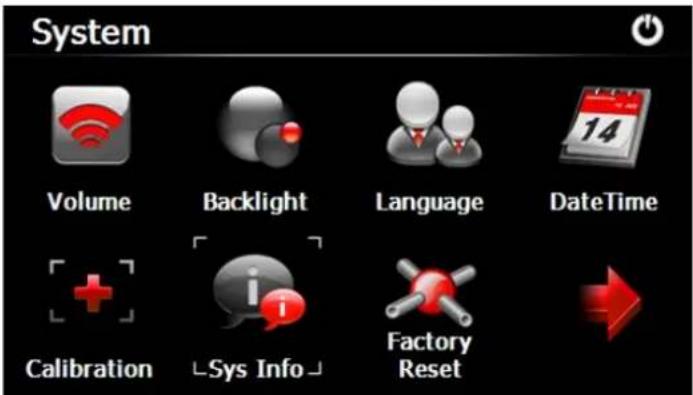
Tips: after make any changes of setting, tap "to save the change.
7.1 Volume
Tap the icon "Music" on the media menu and enter into the following interface.
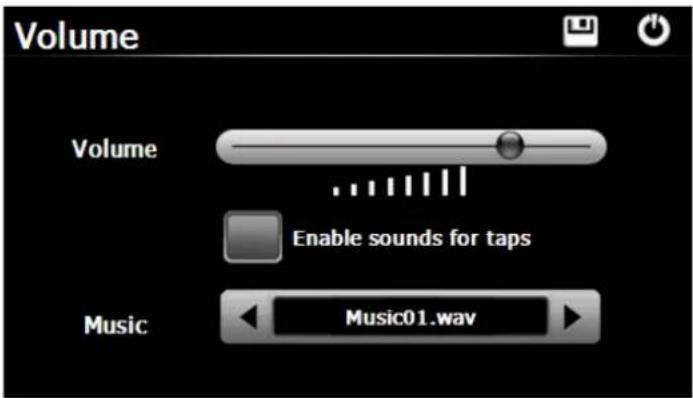
Choose "Music" files to be background sound when unit is power on.
7.2 Backlight
Tap the "Backlight" icon and enter into the following interface.
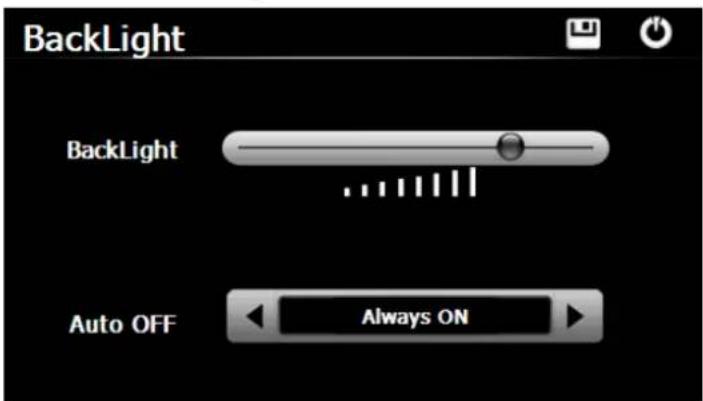
Tap "Left-side" or "Right-side" button to select the duration of automatically powering off the backlight.
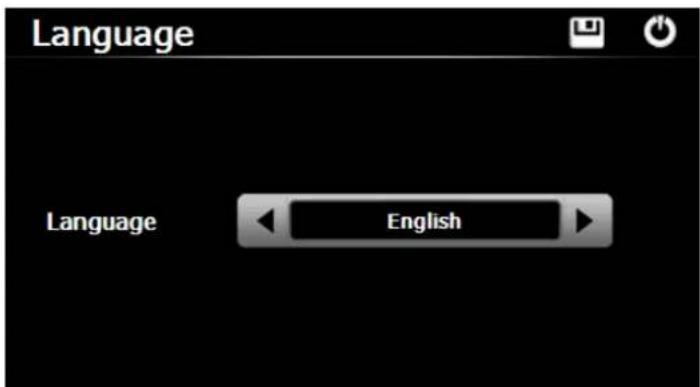
7.3 Language
Tap the "Language" icon and choose the language.
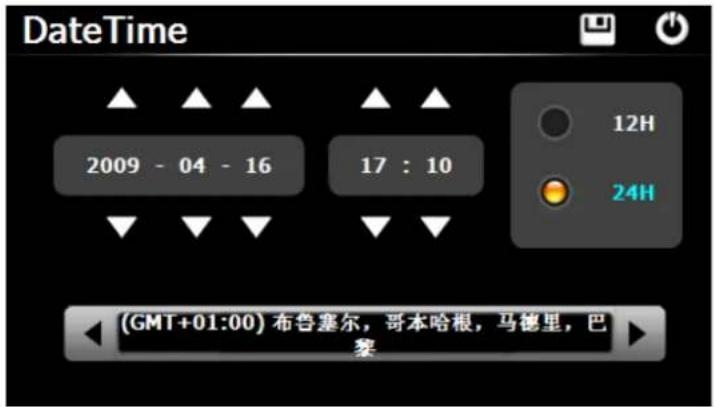
7.4 Date and Time
Tap the icon "Date Time" and enter into the following interface to set date, time and time zone.
7.5 Calibration
Tap the " Calibration " icon and enter into the following interface .
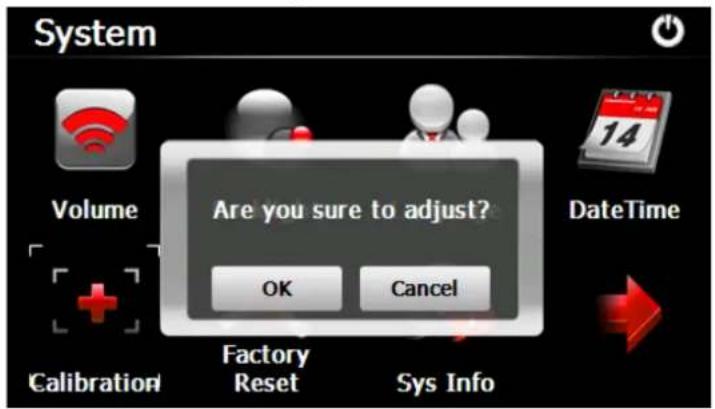
Tap the icon "OK" to adjust the touch screen.
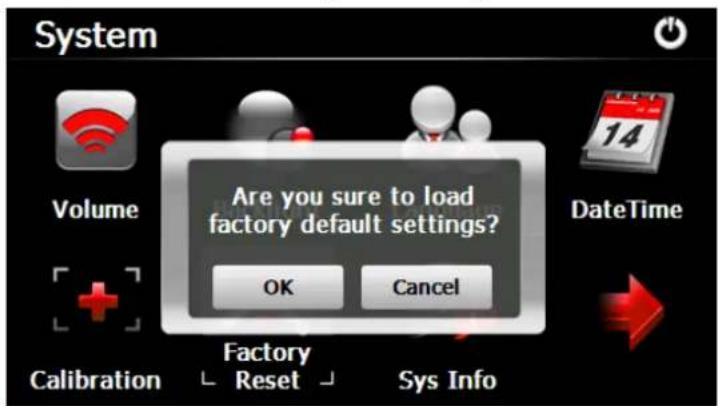
7.6 Factory Reset
Tap the " Factory Reset " icon and enter into the following interface . Tap the icon " OK " to load factory default setting .
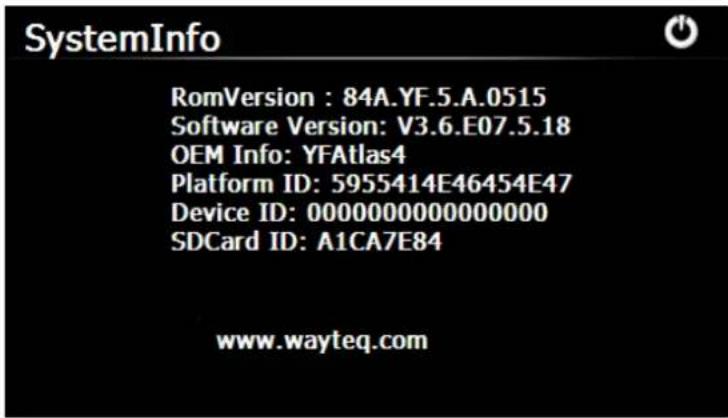
7.7 System Info
Tap the "Sys Info" icon and enter into the following display interface.
7.8 USB
Tap the icon "USB" to set the USB working mode.
7.9 Nav Path
Tap the "Nav Path" icon and enter into the following display interface.
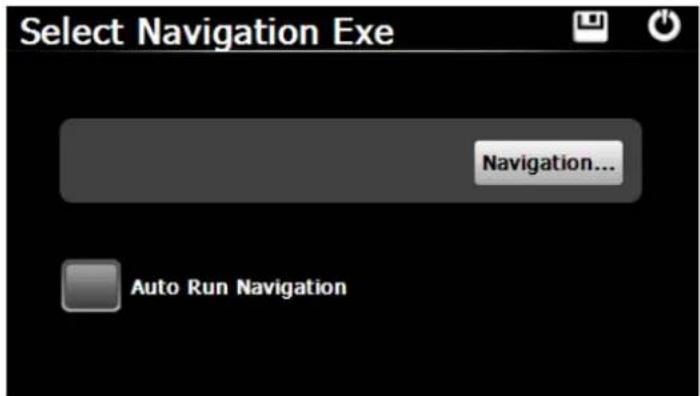
When you have several Navigation maps in the device, if you choose the "Navigation" icon, you can set up one of Navigation maps ( navigation program files ), and select the Auto Run Navigation , next time when tapping the "GPS" icon on the main menu, the device will run the selected Navigation software automatically .
This document is for guidance only and does not form part of any contract, and may be subject to change without notice
- WayteQ GPS Navigation X820
- User Manual
- Precaution and Notice
- Basic Introduction
- Overview
- Charging by Car Charger
- USB Cable
- Install the Car Cradle and Bracket
- AC-DC Charger optional
- Main Functions Introduction
- Starting Up and Power Off
- GPS Navigation
- Media
- Music
- Photo
- E-book
- Video
- Tips:
- Flash
- Games
- Tools
- GPS Info
- Setting
- Volume
- Backlight
- Language
- Date and Time
- Calibration
- Factory Reset
- System Info
- USB
- Nav Path
Brand : WayteQ
Model : X820
Category : Gps