
IAN 64955 - Uncategorized Livarno Lux - Free user manual and instructions
Find the device manual for free IAN 64955 Livarno Lux in PDF.


| Product Type | Energy-Saving Spotlight with Motion Sensor |
| Brand | Livarno Lux |
| Model | LLES B2 / IAN 64955 |
| Dimensions (W x H x D) | Approx. 217 × 138.5 × 103 mm |
| Weight (without bulb) | Approx. 1,035 g |
| Operating Voltage | 220 - 240 V ~, 50 Hz |
| Protection Class | I (with earth conductor) |
| Protection Rating | IP44 (splashing water protection) |
| Light Source | Energy-saving spiral bulb E27, max. 23 W (not dimmable) |
| Luminous Flux | 1300 lm ±5% |
| Colour Temperature | 6400 K ±10% |
| Energy Efficiency Class | A |
| Bulb Lifetime | Approx. 8,000 hours / 8,000 switching cycles |
| Motion Sensor Detection Angle | 180° max. |
| Motion Sensor Detection Range | Up to 12 m (adjustable via SENS dial) |
| Light Time Setting (TIME) | Approx. 1 min (±15 sec) to 15 min (±1.5 min) |
| Light Sensitivity Setting (LUX) | Adjustable via dial (responds to brighter or darker conditions) |
| Sensor Swivel Range | Approx. 150° horizontal / 180° vertical (with locking screw) |
| Installation | Wall-mounted with bracket (requires authorised electrician) |
| Supplied Items | Spotlight, wall bracket, installation materials (2 screws & 2 plugs) |
| Intended Use | Indoor and outdoor, private use only, not for commercial application |
| Warranty | 3 years from date of purchase (conditions apply) |
| Disposal | Separate collection for electrical/electronic devices and bulbs per WEEE Directive |
Frequently Asked Questions - IAN 64955 Livarno Lux
User questions about IAN 64955 Livarno Lux
0 question about this device. Answer the ones you know or ask your own.
Ask a new question about this device
Download the instructions for your Uncategorized in PDF format for free! Find your manual IAN 64955 - Livarno Lux and take your electronic device back in hand. On this page are published all the documents necessary for the use of your device. IAN 64955 by Livarno Lux.
USER MANUAL IAN 64955 Livarno Lux
natural_image
Exterior view of a black rectangular electronic device with a white cylindrical component and a coiled cable, no visible text or symbols on the device itself.ENERGY-SAVING SPOTLIGHT LLES B2
TARGA GMBH
Coelarwing AS 59494 SOFET
GERMANY
Last Information Update - Outstia aktučnoca - Legutšbi osarifistius
User manual and service information
(1)
Supplied items.... 3
Technical data 4
Safety instructions....5
Copyright 6
Prior to use....6
The correct installation location....6
Required tools....7
Prior to installation....7
Installation....8
First use 9
Aligning the motion sensor 9
Setting light time (TIME)....9
Adjusting sensor sensitivity (SENS) 9
Adjusting light sensitivity (LUX) 9
Cleaning / maintenance.... 10
Troubleshooting 10
Environmental and disposal information.... 11
Conformity 11
Warranty and servicing advice.... 12
Introduction
Thank you for purchasing a LIVARNO LUX product.
Intended use
This energy-saving outdoor spotlight is not designed for commercial application. It is suitable for indoor and outdoor use. The 23 watt energy-saving light bulb (10) provides good illumination. The motion sensor detects movements and the energy-saving outdoor spotlight automatically switches itself on and off as a result. This device meets all relevant norms and standards in conjunction with CE conformity. In the event of any modification to the energy-saving outdoor spotlight that was not approved by the manufacturer, compliance with these standards is no longer guaranteed.
Supplied items
• Energy-saving outdoor spotlight LLES B2
• Installation materials (2 screws and 2 plugs)
- Operating instructions and safety instructions
These operating instructions have a fold-out cover. The energy-saving outdoor spotlight is illustrated with numbers on the inside cover. The numbers indicate the following:
1 Screw (front pane)
2 Screw (wall bracket)
3 Cable junction box
4 Cable bushing
5 Screw connection (cable bushing)
6 Wall bracket
7 Locking screw
8 Motion sensor
9 Front pane
10 Energy-saving light bulb (not dimmable)
11 Cable (power)
12 Screw terminal
13 LUX control
14 SENS control
15 TIME control
Technical data
Spotlight:
| Brand: LIVARNO LUX | |
| Model designation: LLES B2 | |
| Operating voltage: 220 - 240V | ~, 50Hz |
| Protection class: I (with earth conductor) | |
| Protection rating: IP44 (splashing water protection category) | |
| Dimensions (W x H x D): approx. 217 x 138.5 x 103 mm | |
| Weight: approx. 1,035g (without light bulb) | |
| Safety tested by: |  |
Energy-saving light bulb:
| Light bulb: Energy-saving light bulb E27 (only spiral bulb) | |
| Energy efficiency class: A | |
| Service life: approx. 8000 hours / approx. 8000 switching cycles | |
| Luminous flux: 1300lm +/-5% | |
| Power: 23 watts | |
| Colour temperature: 6400K +/-10% | |
Motion sensor:
| Sensor detection angle: 180° max. | |
| Detection range: max. 12m (can be set via control dial) | |
| Light sensitivity: | can be set via control dial |
| Mechanical swivelling: | approx. 150° horizontal / approx. 180° vertical |
| Light time: | approx. 1 min +/- 15 sec to 15 min +/- 1.5 min |
The technical data and design may be changed without notification.
4 - English
Safety instructions
Before using this device for the first time, please read the following instructions carefully and take note of the safety warnings, even if you are familiar with the use of electronic devices. Store these operating instructions in a safe place for future reference. If you sell or pass on the device to someone else, be sure to always include these operating instructions as they are an integral part of the device.

WARNING! This symbol indicates important information for safe operation of the energy-saving outdoor spotlight and the safety of the user. Disregarding this information can lead to material damage and/or health hazards and even death.
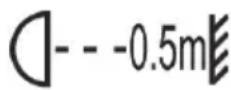
Fire hazard: Attach the energy-saving outdoor spotlight at a distance of at least 0.5m from illuminated materials. Excessive heat generation can cause a fire.
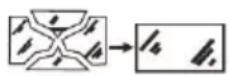
Any cracked protective cover must be replaced.

The energy-saving outdoor spotlight has an earth conductor. The earth conductor (yellow/green) must be connected to the indicated terminal.

Electrical devices do not belong in the hands of children. Never allow children to use electrical devices unsupervised. Children may not recognise potential risks. Always keep plastic packaging away from children. It poses a suffocation risk.

If smoke is produced, or there are any unusual sounds or smells, turn the device off immediately. In such cases, the device should not be used until it has been inspected by authorised service personnel. Never inhale smoke from a potential device fire. If you have inhaled smoke, however, consult a doctor. The inhalation of smoke can be harmful.

The housing of the energy-saving outdoor spotlight must not be damaged. There is a risk of an electric shock if the housing is damaged.

Do not use the energy-saving outdoor spotlight in potentially explosive environments which contain flammable gases, vapours or dust. It poses a risk of explosion.

Never open the housing of the energy-saving outdoor spotlight except to change the energy-saving bulb. The circuit must be disconnected during all work on the energy-saving outdoor spotlight, even when changing the light bulb! There is a risk of an electric shock if the housing is open.
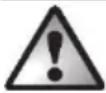
You must not hang any objects on the energy-saving outdoor spotlight. The housing is not designed to carry loads. Otherwise, the energy-saving outdoor spotlight could be damaged.
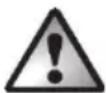
Never use such optical instruments as a magnifying glass to look directly into the light beam. This can lead to eye injuries. In the event of a suspected eye injury, consult a doctor immediately.
Copyright
All information contained in these instructions is subject to copyright and is provided for information purposes only. It is only permitted to copy or duplicate data and information with the express and written consent of the author. This also includes commercial use of the content and data. The text and illustrations are based on the state of the art at the time of printing. Subject to change without notice.
Prior to use
Remove the energy-saving outdoor spotlight and the installation materials from the packaging.
Check the energy-saving outdoor spotlight for signs of damage. If damaged, the energy-saving outdoor spotlight must not be used.

Only use energy-saving spiral light bulbs with E27 base and a maximum power of 23 watts!
Please note:
The supplied energy-saving light bulb is not dimmable. Do not use the energy-saving outdoor spotlight with the supplied light bulb in circuits with dimmers.
The energy-saving light bulb (10) is stored within the spotlight so that it can be transported safely. Loosen the 2 screws (1) with a Phillips screwdriver and carefully tilt the front pane (9) upwards. Remove the packaging with the energy-saving light bulb (10). Open the packaging, remove the energy-saving light bulb (10) and screw it into the socket in a clockwise direction. When doing so, handle the energy-saving light bulb (10) by its base and not by its glass body. The bulb should only ever be handled with a cloth. Close the front pane (9) downwards now and tighten the 2 screws (1) again.
The correct installation location
Select the installation location carefully and prepare well for the installation.
➢ Place all individual parts, required tools and installation material so they are well arranged and ready to hand.
The energy-saving outdoor spotlight may be mounted only on stable substrates, for example, brickwork.
6 - English
Do not install the energy-saving outdoor spotlight above a heat source or in the immediate vicinity of other light sources. When selecting the installation location, also pay attention to the illustration [D] on the inside cover.
➢ Select the installation location so that the energy-saving outdoor spotlight is protected against wind, rain and dirt.
➢ Find out in advance which installation material is suitable for the installation location you selected. Suitable installation material for concrete is included with the energy-saving outdoor spotlight.
Required tools
The following tools are not supplied. This list can be used for orientation. The exact nature of the required tools depends on the individual on-site conditions.
Ladder
▶ Voltage tester
▶ Spirit level, folding ruler, pencil
Drill with drill bits
➢ Phillips screwdriver, flat-bladed screwdriver
➢ Spanner, combination pliers, side cutter
Prior to installation

The installation must be performed only by an authorised electrician!

The circuit must be disconnected during the installation!

When drilling the holes, make sure that no cables or pipes in the wall are damaged.
Before installation, familiarise yourself with the individual parts of the energy-saving outdoor spotlight as well as the text and illustrations of these operating instructions and comply with them.
Make sure that the cable to which the energy-saving outdoor spotlight is to be connected is not live. To ensure that this is the case, remove the appropriate circuit fuse from your fuse box or switch the fuse to the "0" position.
Make sure that the cable is not live using a voltage tester!
Installation
➢ Detach the wall bracket (6) from the energy-saving outdoor spotlight by removing the 2 screws (2) with a Phillips screwdriver. Note that the wall bracket (6) is attached on both sides with a screw (2), a spring washer and 2 other washers. Keep these parts safe until you are ready to assemble them.
➢ Use the wall bracket (6) as a template to mark the two holes.
Then drill the two holes and attach the wall bracket (6) using the supplied wall plugs and screws or, depending on the installation location, using other suitable plugs and screws.
Open the cable junction box (3) by loosening the four screws using a Phillips screwdriver and removing the cover.
Loosen the 2 screws on the strain relief within the cable junction box (3) with a Phillips screwdriver only to the extent that the cable (11) can be subsequently fed through it.
➢ Loosen the screw connection (5) of the cable bushing (4), but do not completely unscrew it.
Remove approx. 5 to 8cm of the sheath of the cable (11).
First, route the cable (11) through the screw connection (5) and the cable bushing (4), and then through the strain relief in the cable junction box (3). When routing the cable (11) through the cable bushing (4), an internal rubber seal must be penetrated. A slight resistance may thus be felt.
➢ Fix the cable (11) by tightening the 2 screws on the strain relief within the cable junction box (3). The end of the cable sheath must be in the strain relief for this purpose. Do not clamp the individual wires!
➢ Then tighten the previously loosened screw connection (5) of the cable bushing (4) in a clockwise direction. This ensures the sealing of the cable (11).
Connect the stripped wire ends of the cable (11) using the screw terminal (12). Make sure that the individual wires of the cable (11) are connected correctly. Also pay attention in this context to the illustration [B] on the inside cover.
| Wire | Symbol | Designation |
| Black or brown L Phase | ||
| Blue | N | Neutral |
| Yellow/green |  | Earth conductor |
➢ Close the cable junction box (3) by screwing the cover again tightly with the four screws that you previously removed. A rubber seal which is integrated in the cover ensures the sealing of the cable junction box (3). Ensure that the rubber seal lies correctly in the groove provided in the cover.
➢ Then attach the energy-saving outdoor spotlight to the wall bracket (6). To do so, use the previously removed screws (2) and washers.
Switch on the circuit.
First use
Aligning the motion sensor
Make sure that no movements that should not be detected (for example, on the pavements or streets) occur in the detection range of the motion sensor (8).
It is best if you set the light sensitivity of the motion sensor (8) during the lighting conditions when the energy-saving outdoor spotlight is supposed to be active.
- Align the motion sensor (8) so that it can capture the desired range as well as possible. The view must not be obstructed by objects or anything else.
- You can align the motion sensor (8) horizontally by turning it.
- To align the motion sensor (8) vertically, you must first loosen the locking screw (7). If the motion sensor (8) is located in the desired position, you must tighten the locking screw (7) again.
Setting light time (TIME)
You use the TIME control (15) at the bottom of the motion sensor (8) to set the light time (approx. 1 min to 15 min). Turn the TIME control (15) clockwise (+ direction) to increase the light time or anti-clockwise (- direction) to reduce the light time.
Adjusting sensor sensitivity (SENS)
You use the SENS control (14) at the bottom of the motion sensor (8) to adjust the sensor sensitivity. Turn the SENS control (14) clockwise (+ direction) to increase the sensitivity or anti-clockwise (- direction) to reduce the sensitivity. The higher the sensitivity, the greater the detection range (12 metres at the most).
Adjusting light sensitivity (LUX)
You use the LUX control (13) at the bottom of the motion sensor (8) to adjust the light sensitivity. Here, you set the lighting conditions to which the twilight sensor responds and thus the energy-saving outdoor spotlight is switched on or off.
Turn the LUX control (13) clockwise ( ^* direction) so that the motion sensor (8) responds to brighter lighting conditions.
Turn the LUX control (13) anti-clockwise (C direction) so that the motion sensor (8) responds to darker lighting conditions.
Cleaning / maintenance
Maintenance
The energy-saving outdoor spotlight does not contain any parts that require maintenance.
Replacing the light bulb

The circuit must be disconnected during all work on the energy-saving outdoor spotlight, even when changing the light bulb! There is a risk of an electric shock!

Only use energy-saving spiral light bulbs with E27 base and a maximum power of 23 watts!
Loosen the 2 screws (1) with a Phillips screwdriver and carefully tilt the front pane (9) downwards. Unscrew the old/defective energy-saving light bulb (10) anti-clockwise out of the socket. Then screw a new energy-saving light bulb of the same design (see "Technical data" section) clockwise into the socket. When doing so, handle the energy-saving light bulb (10) by its base and not by its glass body. The bulb should only ever be handled with a cloth. Close the front pane (9) upwards now and tighten the 2 screws (1) again.
Switch on the circuit again.
Cleaning
The circuit must be disconnected during all work on the energy-saving outdoor spotlight, even when cleaning it! There is a risk of an electric shock!
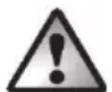
Ensure that no liquid can penetrate the housing of the energy-saving outdoor spotlight. There is a risk of an electric shock.
To clean the energy-saving outdoor spotlight, use a soft, dry cloth and never use any solvent or cleaner that would corrode the plastic materials. Use a slightly damp cloth for more stubborn dirt.
Troubleshooting
The light does not switch itself on
The motion sensor (8) is not aligned correctly. Correct the alignment.
The energy-saving light bulb (10) is faulty. Replace it.
The electrical connection is faulty. Get an authorised electrician to check the electrical connection.
The light switches on and off quickly
The sensor is disturbed by extraneous light or bright reflective surfaces. Remove the extraneous light source or the disturbing surfaces.
The light does not switch off
➢ Persons or objects are within the detection range of the motion sensor (8). Remove them.
The energy-saving outdoor spotlight moves in the wind, which continually triggers the motion sensor (8). Attach the energy-saving outdoor spotlight only to a stable installation location.
Environmental and disposal information
natural_image
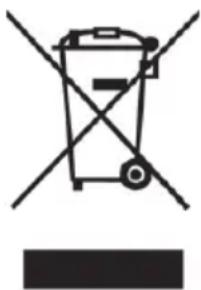
Symbol of a trash bin crossed with two crossed lines, no text or labels presentWhen the crossed out wheelie bin symbol appears on a product, this indicates that the product is subject to the European Directive 2012/19/EU. All old electrical and electronic devices must be separated from normal household waste and disposed of at designated state facilities. The light bulb must also be disposed of properly.
The device must not be disposed of with the household waste or bulky waste. You can obtain information regarding collection points or collection times via your local administration or local disposal services.
The device is operated with a compact fluorescent bulb. This contains complex electronic components and must not be disposed of in normal household waste. You can obtain information regarding collection points or collection times via your local administration or local disposal services.
Dispose of the packaging in an environmentally compatible manner. Cardboard can be put out for municipal paper collections or brought to public collection points for recycling. Films and plastic used for packaging the device are collected by your local disposal services and disposed of in an environmentally compatible manner.
Conformity

This device meets the basic requirements and other relevant regulations of the EMC Directive 2004/108/EC, the Low Voltage Directive 2006/95/EC, the ErP Directive 2009/125/EC and the RoHS Directive 2011/65/EU. The Declaration of Conformity can be found at the end of these operating instructions.
Warranty and servicing advice
Warranty of TARGA GmbH
Dear Customer,
This device is sold with three years warranty from the date of purchase. In the event of product defects, you have legal rights towards the seller. These statutory rights are not restricted by our warranty as described below.
Warranty conditions
The warranty period commences upon the date of purchase. Please keep the original receipt in a safe place as it is required as proof of purchase. If any material or manufacturing faults occur within three years of purchase of this product, we will repair or replace the product free of charge as we deem appropriate.
Warranty period and legal warranty rights
The warranty period is not extended in the event of a warranty claim. This also applies to replaced and repaired parts. Any damage or defects discovered upon purchase must be reported immediately when the product has been unpacked. Any repairs required after the warranty period will be subject to charge.
Scope of warranty
The device was carefully manufactured in compliance with stringent quality guidelines and subjected to thorough testing before it left the works. The warranty applies to material and manufacturing faults. This warranty does not cover product components which are subject to normal wear and which can therefore be regarded as wearing parts, or damage to fragile components such as switches, rechargeable batteries or components made of glass. This warranty is void if the product is damaged, incorrectly used or serviced. To ensure correct use of the product, always comply fully with all instructions contained in the user manual. The warnings and recommendations in the user manual regarding correct and incorrect use and handling of the product must always be observed and complied with. The product is solely designed for private use and is not suitable for commercial applications. The warranty is rendered void in the event of incorrect handling and misuse, if it is subjected to force, and also if any person other than our authorised service technicians interfere with the device. No new warranty period commences if the product is repaired or replaced.
Submitting warranty claims
To ensure speedy handling of your complaint, please note the following:
Before using your product for the first time, please read the enclosed documentation carefully. Should any problems arise which cannot be solved in this way, please call our hotline.
- Always have your receipt, the product article number as well as the serial number (if available) to hand as proof of purchase.
- If it is not possible to solve the problem on the phone, our hotline support staff will initiate further servicing procedures depending on the fault.
12 - English

Service

Phone: 0207 - 36 50 744
E-Mail: service.GB@targa-online.com

Phone: 01 - 242 15 83
E-Mail: service.IE@targa-online.com

Phone: 800 - 62 175
E-Mail: service.MT@targa-online.com
Phone: 800 - 92 496
E-Mail: service.CY@targa-online.com
IAN: 64955

Manufacturer
Please note that the following address is not a service address. First contact the service point stated above.
TARGA
GmbH
Coesterweg 45
59494 SOEST
GERMANY
Spis treści
Wstep....15
natural_image
Symbol of a trash bin crossed out by two diagonal lines (no text or numbers present)natural_image
Symbol of a trash bin crossed with two crossed lines and a solid rectangle below (no text or labels)natural_image
Symbol of a trash bin crossed out by two diagonal lines (no text or numbers present)natural_image
Symbol of a trash bin crossed with a diagonal line and a horizontal bar below (no text or labels)natural_image
Symbol of a trash bin crossed with no text or labels, accompanied by a black rectangular block below (no readable text or symbols)natural_image
Symbol of a waste bin with crossed lines indicating no waste, and a solid rectangle below (no text or labels)EU Declaration of Conformity
Address:
Targa GmbH
Coesterweg 45
59494 Soest, Germany
Product:
Energy-Saving Spotlight
Model:
LivarnoLux LLES B2 (incl. CFL ES-10-23 W-E27)
Identification number:
IAN 64955
The product complies with the requirements of the following European directives:
2004/108/EC
Electromagnetic Compatibility
2006/95/EC
Low Voltage
2009/125/EC
Energy Related Products
This declaration of conformity is issued under the sole responsibility of the manufacturer
The object of the declaration described above is in conformity with Directive 2011/65/EU of the European Parliament and of the Council of 8 June 2011 on the restriction of the use of certain hazardous substances in electrical and electronic equipment
Compliance was proved by the application of the following standards:
EMC:
EN 55015: 2006 + A1: 2007 + A2: 2009
EN 61000-3-2: 2006 + A1:2009 + A2:2009
EN 61000-3-3: 2008
EN 61547: 2009
Safety:
EN 60598-2-5: 1998
EN 60968: 1990 A1:1993 + A2:1999
EN 62493: 2010
ErP:
Regulation 244/2009
RoHS:
EN 62321:2009
Year of CE marking:
2014
Soest, 20th of April 2014
natural_image
Abstract curved line drawing with no text or symbolsMatthias Klauke, Managing Director


- ENERGY-SAVING SPOTLIGHT LLES B2
- Introduction
- Intended use
- Supplied items
- Technical data
- - English
- Safety instructions
- Copyright
- Prior to use
- The correct installation location
- - English
- Required tools
- Prior to installation
- Installation
- First use
- Aligning the motion sensor
- Setting light time (TIME)
- Adjusting sensor sensitivity (SENS)
- Adjusting light sensitivity (LUX)
- Cleaning / maintenance
- Maintenance
- Replacing the light bulb
- Cleaning
- Troubleshooting
- The light does not switch itself on
- The light switches on and off quickly
- The light does not switch off
- Environmental and disposal information
- Conformity
- Warranty and servicing advice
- Warranty of TARGA GmbH
- Warranty conditions
- Warranty period and legal warranty rights
- Scope of warranty
- Submitting warranty claims
- - English
- Service
- Manufacturer
- Spis treści
- EU Declaration of Conformity
- Address:
- Product:
- Model:
- Identification number:
- 2004/108/EC
- 2006/95/EC
- 2009/125/EC
- EMC:
- Safety:
- ErP:
- RoHS:
- Year of CE marking:
Brand : Livarno Lux
Model : IAN 64955
Category : Uncategorized