
IAN 79093 - Uncategorized CRIVIT - Free user manual and instructions
Find the device manual for free IAN 79093 CRIVIT in PDF.

| Product Type | Bicycle Saddle (City Gel Saddle) |
| Brand/Model | Crivit IAN 79093 |
| Intended Use | Private use, not for commercial applications |
| Material | Gel comfort padding, black synthetic cover, metallic seat post clamp |
| Weight | Approx. 300 g (estimated) |
| Dimensions | Approx. 270 x 170 mm (estimated) |
| Maximum Load Capacity | Approx. 100 kg (estimated) |
| Assembly Requirements | 13 mm open-end wrench; fastening screws torque 24 Nm |
| Adjustability | Height and tilt adjustable via graduated scale; do not exceed max marks |
| Quick Release | Must be closed and engaged in dropouts; check resistance at 90° position |
| Safety Features | Inspect for damage before each use; replace if tears or scratches in high-stress areas |
| Care Instructions | Clean with damp cloth; wipe dry; store clean and dry at room temperature |
| Warranty | 3 years from date of purchase (material and workmanship) |
| Disposal | Environmentally friendly disposal; sort materials for recycling |
| Spare Parts Availability | Through delta-sport.com (Lidl Spare Parts Service) |
| Compatibility | For plug seat posts and patent saddle posts; check seat post diameter |
Frequently Asked Questions - IAN 79093 CRIVIT
User questions about IAN 79093 CRIVIT
0 question about this device. Answer the ones you know or ask your own.
Ask a new question about this device
Download the instructions for your Uncategorized in PDF format for free! Find your manual IAN 79093 - CRIVIT and take your electronic device back in hand. On this page are published all the documents necessary for the use of your device. IAN 79093 by CRIVIT.
USER MANUAL IAN 79093 CRIVIT
Assembly instructions
Safety instructions 6 - 7
Risk of injury 6 - 7
Avoidance of material damage ..... 7
Assembly 8 - 11
Care, storage 11
Disposal instructions 12
3 years warranty 12 - 13
PL
Zawartość 14
Congratulations! With your purchase you decided on a high-quality product.
Get to know the product before you start to use it. Carefully read the following operating instructions. Use the product only as described and only for the given areas of application.
Keep these instructions safe. When passing the product on to a third party, always make sure that the documentation is included.
Items delivered
1 x City Gel Saddle
1 x Block
1 x Assembly instructions
Intended use
The item is a seat for bicycles for private use and is not intended for commercial use.
Safety instructions
Risk of injury!
- Assemble the item correctly and ensure that it cannot slip when riding. Do not adjust the item while riding.
- Quick releases must lie on the dropouts in a closed state. Adjust the quick release so that you feel some resistance when it is in a 90° position and pull it tight. If necessary, consult your specialist dealer.
- Check the item before each use for damage and wear-and-tear. Check that all screws are tight before each use and if necessary, tighten screw connections again. The item may only be used if it is in flawless condition!
- If using a child seat, ensure that all spring washers under the saddle are covered in order to prevent the pinching of fingers.
- Every type of tear or scratch in the areas of the saddle subject to high stress (screw connections) is an indication that the life-span of that part has expired and the part must be replaced.
Avoidance of material damage
Ensure that the item does not come in contact with sharp objects. Protect the item from extreme weather influences such as cold, wetness and direct exposure to the sun.
assembly adjusting the sitting position
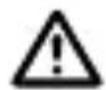
Once it is installed in position, sit on the saddle and hold on to something, a lamppost, for instance, with one hand, to prevent yourself from falling. To adjust the height of the saddle, bring the pedals into the vertical position. The saddle is at the correct height when, with the leg slightly bent, the heel sits just flat on the lower pedal.
(Fig. A)
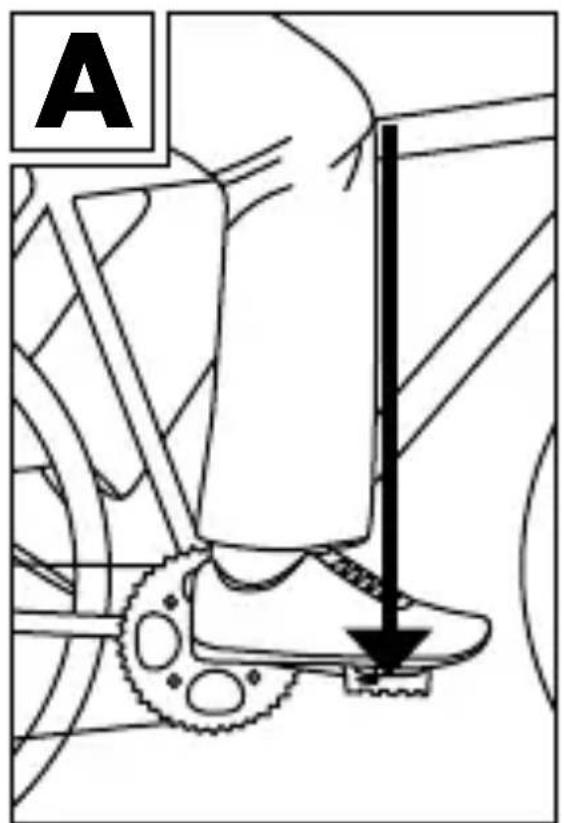
To adjust the saddle horizontally bring the pedals into a horizontal position. Put your foot on the pedal in front. Slide the saddle horizontally until your right kneecap is exactly above the pedal spindle.
(Fig. B)
To help you in adjusting the saddle, there is a graduated scale on the saddle. On no account exceed the maximum saddle adjustment limits, which are marked with max.
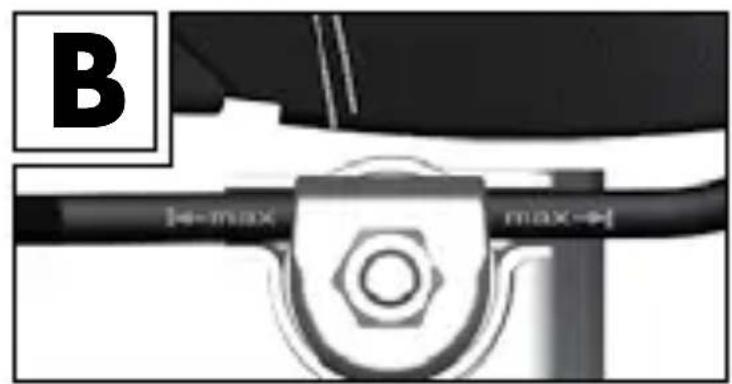
Always adjust the saddle to the appropriate height for you. Observe the marking on the seat post, which marks the minimum insertion depth. The item's fastening screw must be tightened with 24 Newton metres on both sides in order to be securely fastened to the plug seat post.
(Fig. C)
Adjust the item horizontally.
natural_image
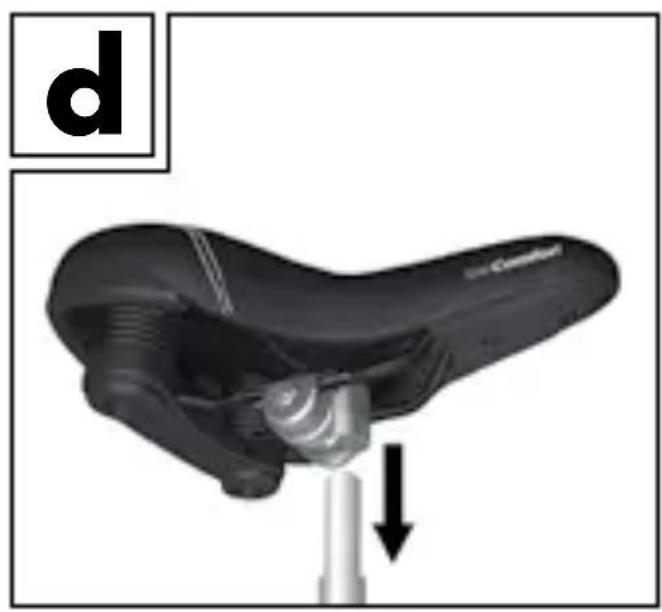
Skeleton device with a black body and metallic shaft, showing a mechanical assembly (no text or symbols visible)(Fig. D)
For plug seat posts: Fasten the saddle with the pre-mounted block to the plug seat post.
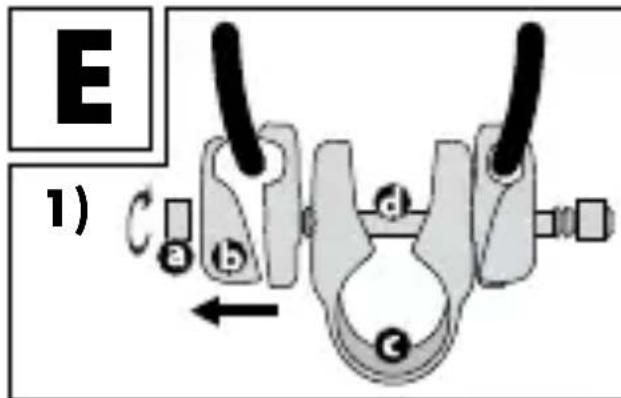
(Fig. E)
- Remove the fastening screws (a) on both sides with 13' open-end wrench. Remove the distance piece (b), the screw (d), as well as the block (c).
- Subsequently, mount the saddle directly to the patent saddle post.
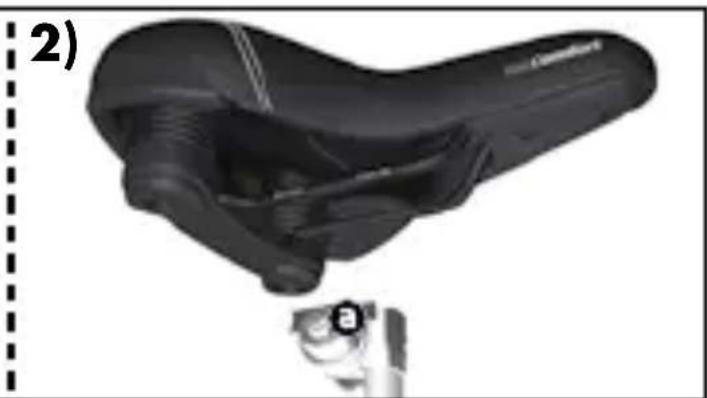
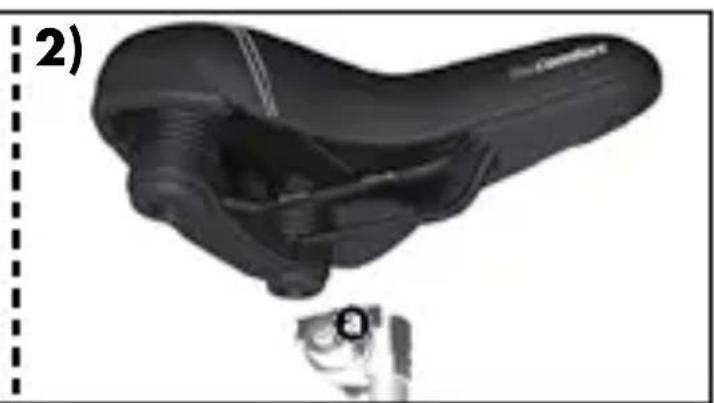
natural_image
Close-up of a black mechanical device with a small inset showing a sensor or sensor device (no visible text or symbols)a - Fastening screw b - Distance piece
c - Block d - Screw
Care, storage
Also, store the item in a clean dry place at room temperature.
Important! Only clean with a damp cleaning cloth and thereafter, wipe dry.
disposal instructions
Please dispose of the packaging and the product in an environmentally acceptable way, taking care to sort the materials for recycling. Dispose of the product using an approved waste disposal firm or your community's municipal administration. Please observe the regulations which are currently in force.
3 years warranty
The product was produced with great care and under constant supervision. You receive a three-year warranty for this product from the date of purchase. Please retain your receipt.
The warranty applies only to material and workmanship and does not apply to misuse or improper handling. Your statutory rights, especially the warranty rights, are not affected by this warranty.
With regard to complaints, please contact the following service hotline or contact us by e-mail.
Our service employees will advise as to the subsequent procedure as quickly as possible. We will be personally available to discuss the situation with you.
Any repairs under the warranty, statutory guarantees or through goodwill do not extend the warranty period. This also applies to replaced and repaired parts. Repairs after the warranty are subject to a charge.
IAN: 79093

Service Great Britain
Tel.: 0871 5000 720 (£ 0.10/Min.)
E-Mail: deltasport@lidl.co.uk
You can also find spare parts for your product at: www.delta-sport.com, category Service - Lidl Spare Parts Service

natural_image
Skeleton device with a black body and metallic shaft, showing a mechanical assembly (no text or symbols visible)(Ilustracja D)
natural_image
Close-up of a black car seatbelt device with attached sensor and connector (no visible text or symbols)natural_image
Skeleton assembly with a pull rod and arrow indicating movement (no text or symbols)(D ábra)
natural_image
Close-up of a black car wheel with attached sensor and sensor device (no visible text or symbols)natural_image
Close-up of a mechanical component with a hexagonal nut and labeled 'b' (no readable text or symbols beyond basic markings)
natural_image
Skeleton device with a black body and metallic shaft, showing mechanical components and a downward arrow indicating motion (no text or symbols)(slika D)
natural_image
Close-up of a black car seatbelt device with a small inset showing a sensor or sensor device (no visible text or symbols)
natural_image
Skeleton device with a black body and metallic shaft, showing mechanical components and a downward arrow indicating motion (no text or symbols)(obr. D)
natural_image
Schematic view of a black car wheel assembly with a dashed line and label '2)' (no text or symbols on the diagram itself)natural_image
Skeleton assembly with a pull rod and arrow indicating movement (no text or symbols)(obr. D)
Stípik sedadla: Sedadlo upevnite pomocou už namontovanej čel'uste na stípik.
(obr. E)
natural_image
Close-up of a black car seatbelt device with a dashed line and label '2)' indicating part 2 (no text or symbols on the device itself)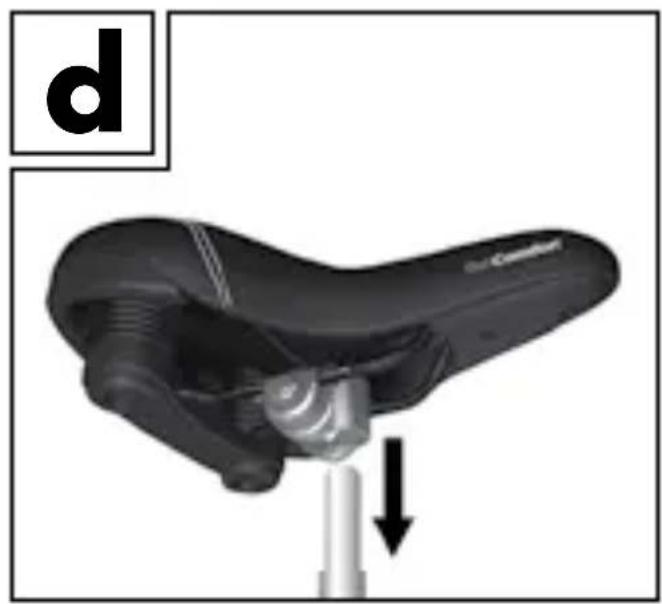
natural_image
Skeleton device with a black body and metallic shaft, showing a mechanical assembly (no text or symbols visible)(Abb. D)


Brand : CRIVIT
Model : IAN 79093
Category : Uncategorized