
SP-136V - Uncategorized CRIVIT - Free user manual and instructions
Find the device manual for free SP-136V CRIVIT in PDF.

| Product Type | Children's Ski and Snowboard Helmet |
| Brand | Crivit |
| Model | SP-136V |
| Size | S/M (52-55 cm head circumference) |
| Weight | Approx. 300 g |
| Inner Padding | Removable and washable |
| Ear Padding | Removable and washable |
| Visor | Integrated, medium-tinted (filter category S2) |
| Ventilation | Yes, with ventilation system |
| Safety Certification | GS, TÜV SÜD, Class B (ski/snowboard) |
| Fastening | Multi-level safety snap-in fastener |
| Size Adjustment | One-handed turning knob at back of head |
| Intended Use | Alpine skiing and snowboarding |
| Lifespan | 5 years from date of manufacture (05/2022) |
| Cleaning | Hand wash with mild soap and water; air dry |
| Storage | In provided ski helmet bag, away from heat sources |
| Included Accessories | Ski helmet bag, instruction manual |
| Warranty | 3 years |
Frequently Asked Questions - SP-136V CRIVIT
User questions about SP-136V CRIVIT
0 question about this device. Answer the ones you know or ask your own.
Ask a new question about this device
Download the instructions for your Uncategorized in PDF format for free! Find your manual SP-136V - CRIVIT and take your electronic device back in hand. On this page are published all the documents necessary for the use of your device. SP-136V by CRIVIT.
USER MANUAL SP-136V CRIVIT
natural_image
Diagram of a mechanical or fluidic component with a central circular feature and curved arrows indicating motion (no text or symbols)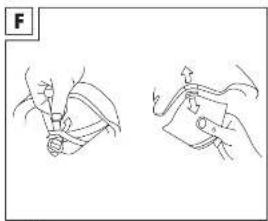
natural_image
Illustration of two hands holding a tool, one with a handle and the other with a clip (no text or symbols)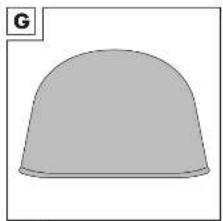
natural_image
Simple 3D-rendered dome-shaped object with no text or symbols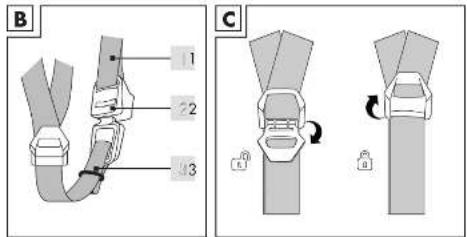
natural_image
Diagram of a helmet with motion arrows indicating movement (no text or symbols)Table of contents
Intended use 12
Explanation of symbols 12
Scope of delivery / accessories 13
Parts description / parts list 13
Technical information 14
Safety instructions 14
User information 16
Opening/closing the chinstrap 16
Adjusting the chinstrap 16
Adjusting the strap divider 16
Removing/attaching the ear padding 16
Operating the one-handed size adjustment system 17
The correct helmet position 17
Attaching the visor/ski goggles 17
Maintenance / cleaning / storage 18
Cleaning 18
Removing/inserting the inner padding 18
Cleaning the helmet 18
Storage 18
Notes on disposal 19
Declaration of conformity 19
Notes on warranty and service handling 20
Tartalomjegyzék
Read the instructions for use carefully
Dear customer!
We are pleased that you have chosen our high-quality products, which are strictly produced and certified according to current valid safety standards.
Familiarise yourself with the product before use. Read the instruction manual and the safety information carefully. Only use this product as described and for the indicated areas of use. Please store this manual safely. Please hand over all the documentation when passing this product to third parties.
Intended use
This product has been manufactured for alpine skiers and snowboarders. It is not suitable for other sport types or motorcyclists.
Explanation of symbols
The following symbols and signal words are used in these operating instructions, on the product or on the packaging.

Declaration of conformity (see "Declaration of conformity" chapter): Products marked with this symbol comply with all applicable Community regulations for the European Economic Area.

Observe operating instructions

Date of manufacture (month/year)

Expiry date (month/year)

Helmet weight

The "Tested Safety" seal (GS mark) certifies that a tested product meets the requirements of the German Product Safety Act. The GS mark indicates that the safety and health of persons are not endangered when used as intended or in a foreseeable manner.
Wash by hand
Do not bleach
Do not tumble dry
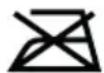
Do not iron
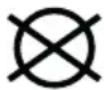
Do not dry clean
Class B Class A and class B helmets are for skiers, snowboarders and similar groups. Class A helmets offer proportionately greater protection. Class B helmets can offer more ventilation and make it easier to hear, but protect a smaller area of the head and provide a lower degree of penetration resistance.
Scope of delivery / accessories
1x Children's ski- and snowboard helmet
1x Ski helmet bag
1x Instruction manual
Parts description / parts list (Fig. A)
- Ventilation system
- Visor
- Chinstrap
- Multi-level safety snap-in fastener
- Strap divider
- Size adjustment system
- Neck padding
- Ear padding
Technical information
Model: SP-136V
Article number: 393081
Size: S/M (52 - 55 cm)
Date of manufacture (month/year): 05/2022
Expiry date (month/year) 05/2027
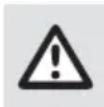
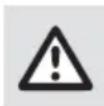
Safety instructions

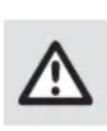
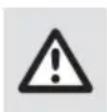
Risk of injury!
Important: Carefully read the instructions for use and be sure to keep them in a safe place! You may be injured if the product is handled improperly.
- ATTENTION! A helmet cannot protect the wearer from all accidents.
- ATTENTION! Only use a helmet that fits you correctly and sits firmly. If the helmet does not fit, it can slip during an accident and lose its protective effect.
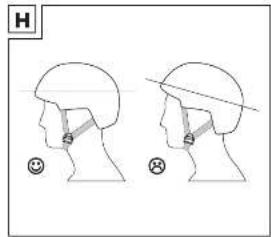
- Use the helmet in the intended position (Fig. H)
- Close the fastener at the chinstrap before every trip (Fig. D).
- Do not wear a hat or other head covering underneath the helmet.
- Replace and dispose of the helmet after an impact. This also applies if the impact was minor and you cannot see any damage.
- The helmet must also be replaced if it no longer fits or 5 years after the date of manufacture at the latest, even if no damage can be observed.
- Changing or removing original parts of the helmet can drastically affect its protective function. The helmet may not be changed to make any additions which are not recommended by the manufacturer.
- Try to turn the helmet to the left and right using both hands. If the helmet is sitting correctly, the skin on your temples will also move.
- Using both hands, try to pull the helmet back and forward as far as you can. The helmet is not sitting correctly if you can pull it forward enough for your field of vision to be affected, or back enough to leave your forehead exposed.
- Before each use, check that the helmet is sitting correctly, the chin-strap is firm, adjusted correctly and fastened.
- If you cannot adjust the helmet so that it can only be pulled forward or backward by an insignificant degree with the fastener closed, do not use the helmet. Replace it with a model in a different size. Make sure to try different sizes when buying it.
- Test the integrated visor before use.
Serious head injuries or even death may be caused during very severe impacts as well as during impacts at low speed or intensity. It may be the case that the helmet does not effectively protect the wearer from head injuries. For this reason, you should always be careful.
Danger to life!
- This helmet should not be used by children while climbing or doing other activities when there is a risk of strangulation/hanging if the child gets trapped with the helmet.
Danger of choking!
ATTENTION! Children may choke on the film packaging.
- Do not let children play with the film packaging. The packaging is not a toy.

Risk of damage!
ATTENTION! Improper handling of the helmet may lead to damage to the helmet.
- The helmet must be checked periodically for visible defects.
- Do not paint the helmet or affix stickers to it.
User information
Opening/closing the chinstrap (Fig. D)
To open the chinstrap, press on the multi-level safety snap-in fastener (1) and pull out the bar (2). To close the chinstrap, insert the bar into the multi-level safety snap-in fastener and allow this to click into place at a width that feels comfortable.
If you are in an accident with the strap divider and chinstrap open or incorrectly adjusted, the helmet may slip and lose its protective effect!
Before each trip, check that the chinstrap is correctly adjusted and fastened!
Adjusting the chinstrap (Fig. B)
Before each trip, check that the chinstrap is correctly adjusted.
- The chinstrap (1) is adjusted correctly when it is comfortable and secure and you feel a light pressure when you open your mouth. The fastener (2) should not be on the chin or jaw.
- If the chinstrap (1) is too loose, it must be tightened with the buckle (3) on the fastener (2).
- If the chinstrap (1) is too tight, it must be loosened with the buckle (3) on the fastener (2).

Before each trip, check that the strap divider is correctly adjusted and fastened!
Adjusting the strap divider (Fig. C)
- Open the strap divider.
- The strap divider must be positioned in such a way that the straps are tight but comfortable. The strap divider must be placed under the ears, the straps should not cover the ears.
- Close the strap divider.
Removing/attaching the ear padding (Fig. F)
- First, pull the chinstrap out of the loops on the ear padding.
- Carefully pull the ear padding straight out of the snap lock grooves.
-
Attach the ear padding by carefully pressing the tab at the base of the ear padding into the groove on the side of the helmet. The soft side of the ear padding should face inward.
-
Thread the chinstrap back through the loops on the ear padding.
Operating the one-handed size adjustment system (Fig. E)
The integrated size adjustment system can be adjusted freely with a turning knob on the back of the head:
- Smaller = turn clockwise - Larger = turn anticlockwise
The correct helmet position (Fig. H)
- The helmet must always sit horizontally on your head.
- If the helmet is too far forward, this can impair your vision.
- If the helmet is too far forward, this can impair your vision.
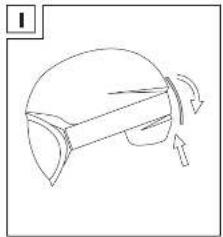
Attaching the ski goggles (Fig. I)
- To attach the ski goggles, open the flap at the back of the helmet.
- Put the ski goggles in place and pull the band around the helmet.
- Put the ski goggles in place and pull the band around the helmet.
Visor
The medium-tinted glass is suitable for normal light and cloudy weather conditions (filter category S2). Check the visor (Fig. A, 2) regularly for defects. If the visor has become loose, you can tighten this again by using a suitable tool on the screws at the side. You can request the transmission curve by calling the service hotline.
| Cat. Area | of use | Light transmissionDescription | |
| 0 | Colourless/slightly tinted |  | 80 - 100 |
| 1 | Slightly tinted |  | 43 - 80 |
| 2 | Moderately tinted |  | 18 - 43 |
| 3 | Darkly tinted |  | 8 - 18 |
| 4 | Very dark tint (not suitable for driving and road use)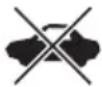 |  | 3 - 8 |
Maintenance / cleaning / storage
NOTE: Improper handling of the helmet may lead to damage to the helmet.
Cleaning:
WARNING!
- The helmet must not come into contact with solvents or cleaning agents which contain hydrocarbons.
- The helmet must not come into contact with solvents or cleaning agents which contain hydrocarbons.
- When cleaning, use only water and mild soap.
Removing/inserting the inner padding
- Loosen the Velcro and remove the inner padding from the helmet.
- Wash the inner padding with lukewarm water and mild soap and then leave to air dry.
- Re-insert the inner padding.
Cleaning the helmet
- Wash your helmet only with lukewarm water, mild soap and a soft cloth.
- Remove the ear padding for cleaning as described.
- Wash the ear padding with lukewarm water and mild soap and then leave to air dry.
Storage
- Leave your helmet to air dry after every use.
- Do not store the helmet near sources of heat (e.g. behind panes of glass in a car). High temperatures from 60°C can seriously damage the helmet. Uneven helmet surfaces and air bubbles are signs of this kind of damage.
- Store your helmet in the ski helmet bag supplied (Fig. G).
Notes on disposal

Danger of choking
ATTENTION! Children may choke on the film packaging. Do not let children play with the film packaging. The packaging is not a toy.
Disposing of the packaging
Sort and dispose of the packaging according to type. Put cardboard and boxes with the waste paper, plastic films with the recyclables collection.
Disposing of the product
- The product must be disposed of through an authorised waste disposal company or a municipal waste disposal facility in accordance with the laws and regulations in force in your country. (Applicable in the European Union and other European states with systems for the separate collection of recyclables).
- Take the product to a recycling centre. The plastic and metal parts used can be recycled separately. Consult your local waste disposal company or our service centre.
- We can dispose of the defective products you send to us free of charge.
Declaration of conformity
The EU declaration of conformity can be requested from the following address: SPEQ GmbH, Tannbachstraße 10, 73635 Steinenberg/GERMANY
Testing institute
TÜV SÜD Product Service GmbH, Ridlerstr. 65, 80339 München, GERMANY
You can find the complete declaration of conformity at www.speq.de/konformitaetserklaerung
Notes on warranty and service handling
Dear customer,
This appliance has a 3-year warranty valid from the date of purchase. If this product has any faults, you, the buyer, have certain statutory rights. Your statutory rights are not restricted in any way by the warranty described below.
Warranty conditions
The warranty period starts on the date of purchase. Please keep your receipt in a safe place. This will be required as proof of purchase. If any material or manufacturing fault occurs within three years of the date of purchase of the product, we will either repair or replace the product for you or refund the purchase price (at our discretion). This warranty service requires that you present the defective appliance and the proof of purchase (receipt) within the three-year warranty period, along with a brief written description of the fault and of when it occurred.
If the defect is covered by the warranty, your product will either be repaired or replaced by us. The repair or replacement of a product does not signify the beginning of a new warranty period.
Warranty period and statutory claims for defects
The warranty period is not prolonged by repairs effected under the warranty. This also applies to replaced and repaired components. Any damage and defects present at the time of purchase must be reported immediately after unpacking. Repairs carried out after expiry of the warranty period shall be subject to a fee.
Scope of the warranty
This appliance has been manufactured in accordance with strict quality guidelines and inspected meticulously prior to delivery. The warranty covers material faults or production faults. The warranty does not extend to product parts subject to normal wear and tear or to fragile parts which could be considered as consumable parts such as switches, batteries or parts made of glass. The warranty does not apply if the product has been damaged, improperly used or improperly maintained. The directions in the operating instructions for the product regarding proper use of the product are to be strictly followed. Uses and actions that are discouraged in the operating instructions or which are warned against must be avoided. This product is intended solely for private use and not for commercial purposes. The warranty shall be deemed void in cases of misuse or improper handling, use of force and modifications / repairs which have not been carried out by one of our authorised Service centres.
Warranty claim procedure
To ensure quick processing of your case, please observe the following instructions:
- Please have the till receipt and the item number (IAN 393081_2201) available as proof of purchase.
- You will find the item number on the type plate on the product, an engraving on the product, on the front page of the operating instructions (below left) or on the sticker on the rear or bottom of the product.
- If functional or other defects occur, please contact the service department listed either by telephone or by e-mail.
- You can return a defective product to us free of charge to the service address that will be provided to you. Ensure that you enclose the proof of purchase (till receipt) and information about what the defect is and when it occurred.
You can download these instructions along with many other manuals, product videos and installation software at www.lidl-service.com. This QR code will take you directly to the Lidl service page (www.lidl-service.com) where you can open your operating instructions by entering the item number (IAN) 393081_2201.

Service address:
SPEQ GmbH
Tannbachstr. 10
73635 Steinenberg/GERMANY
Email: service@speq.de
Service-Hotline: 00800 30 777 999
(toll free)
Please call us before sending the product
8:00 h - 17:00 h
Children's ski- and snow-board helmet
Model: SP-136V
Brand: Crivit