
Marvel Mirror - Heating Klarstein - Free user manual and instructions
Find the device manual for free Marvel Mirror Klarstein in PDF.

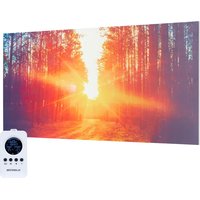
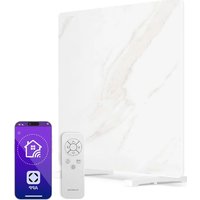
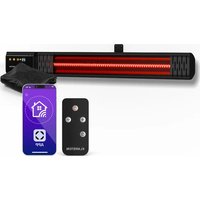
| Product Type | Electric radiant panel heater |
| Brand | Klarstein |
| Model | Marvel Mirror |
| Power | 600 W (ref. 10045431) / 720 W (ref. 10045432) |
| Power supply | 220-240 V ~ 50 Hz |
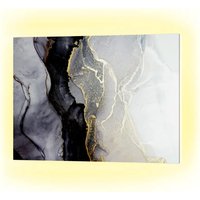
| Dimensions | 55 x 100 cm (ref. 10045431) / 60 x 120 cm (ref. 10045432) |
| Weight | Approx. 6 kg |
| Installation type | Wall-mounted or freestanding (feet included) |
| Thermostat | Electronic, adjustable from 5 °C to 50 °C |
| Timer | Weekly with 4 periods (P1-P4) per day |
| Open window detection | Yes, automatic shutdown if temperature drops by 5 °C in 5 min |
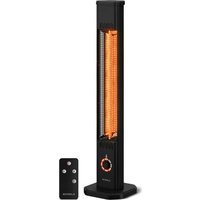
| Remote control | Yes, included |
| Standby consumption | 0.26 W |
| Protection rating | IP20 (indoor use) |
| Safety | Do not cover, keep 1 m away from flammable materials, out of reach of children, do not use directly under a socket |
| Cleaning | Vacuum ventilation slots, damp cloth on external surfaces, do not immerse |
| Repairability | Reserved for qualified specialist, do not open |
| Recommended use | Well-insulated rooms or occasional use |
| Warranty | Consult the manufacturer (Chal-Tec GmbH) |
Frequently Asked Questions - Marvel Mirror Klarstein
User questions about Marvel Mirror Klarstein
0 question about this device. Answer the ones you know or ask your own.
Ask a new question about this device
Download the instructions for your Heating in PDF format for free! Find your manual Marvel Mirror - Klarstein and take your electronic device back in hand. On this page are published all the documents necessary for the use of your device. Marvel Mirror by Klarstein.
USER MANUAL Marvel Mirror Klarstein
Note: This product is only suitable for well insulated spaces or occasional use.
INHALTSVERZEICHNIS
Technische Daten 3
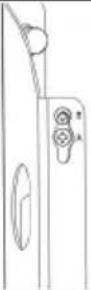
natural_image
Technical line drawing of a mechanical assembly with two vertical supports and a mounting bracket (no text or symbols)PRODUKTDATENBLATT 10045431
PRODUKTDATENBLATT 10045432
natural_image
Symbol of a trash bin crossed with a diagonal line, no text or labels presentBerlin Brands Group UK Limited
PO Box 42
272 Kensington High Street
London, W8 6ND
United Kingdom
Dear customer,
Congratulations on your purchase. Please read the following instructions carefully and follow them to prevent potential damage. We accept no liability for damage caused by disregarding the instructions and improper use. Please scan the QR code to access the latest operating instructions and further information about the product.

CONTENTS
Safety Instructions 18
Installation 19
Control panel and remote control 20
Display indications 21
Operation 21
Troubleshooting 24
Cleaning and Care 24
Product data sheet 10045431 25
Product data sheet 10045432 26
Disposal Considerations 27
Manufacturer & importer (UK) 27
TECHNICAL DATA
| Article number 10045431 1 | 10045432 | |
| Power supply 220-240 V ~ | 50 Hz | |
| Power 600 W 720 W | ||
| Dimensions: 55 x 100 cm 6 | 60 x 120 cm | |
SAFETY INSTRUCTIONS
- Before use, check the voltage specified on the device label and only connect the device to outlets that match the voltage of the device.
- If the power cord is damaged, have it replaced by a trained professional.
- Do not place the heater directly under a power socket.
- Ensure the appliance is kept one metre away from combustible materials such as furniture, curtains or similar.
- Use the device out of the reach of children. Children may only operate the device under supervision.
- The appliance is intended for use in the home and similar environments only. It is not intended for commercial use.
- Do not use the device if it malfunctions or has been damaged in any way.
• Repairs may only be carried out by trained specialists. - Incorrectly or independently performed repairs pose a risk of injury.
- Do not run the power cord under carpets or rugs.
- Make sure that the power cord does not come into contact with sharp edges or hot surfaces.
- To prevent it from overheating, do not cover the heater.
- Do not use the appliance with an external timer, a remote-controlled socket or any other device that automatically switches the heating on and off.
- Do not immerse the device in water or other liquids.
- Do not use the device near bathtubs, showers or swimming pools.
- Do not use the device outdoors.
- Do not use the device with wet hands.
- Do not use the appliance on or near hot surfaces.
- Do not use the device with a damaged power cord.
- Before cleaning, unplug the device from the wall outlet and allow it to cool completely.
- Do not use abrasive cleaners for cleaning.
- Only use accessories that are expressly approved for this purpose by the manufacturer.
- Children over 8 years as well as mentally, sensory and physically impaired persons may only use the device if they have been informed in detail about the functions and safety precautions by a supervisor responsible for them beforehand and understand the associated risks.
- Make sure that children do not play with the appliance.
CAUTION
Risk of burns! Some parts of the device can become very hot. Be careful not to burn yourself or your children with it.
INSTALLATION
Installation on the wall
 1 1 | 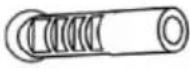 2 2 | |
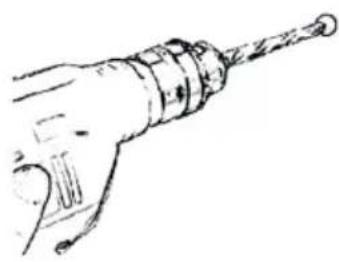
| Mark the positions of the four holes to be drilled on the wall and use a drill to drill the holes. Make sure that the distance between each hole matches the round hole on the wall bracket. | Insert the plastic dowels into the holes. | |
 3 3 | 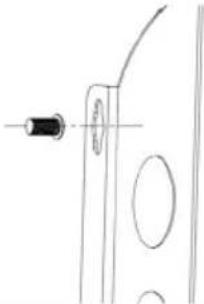 4 4 | |
| Insert the 4 metal screws for wall mounting into the plastic dowels. | Lift the heater and align the 4 holes on the brackets on the back of the heater with the 4 screws on the wall. | |
 5 5 | ||
| Slide the screw from position A to position B by slightly moving the heater. | ||
Free-standing installation
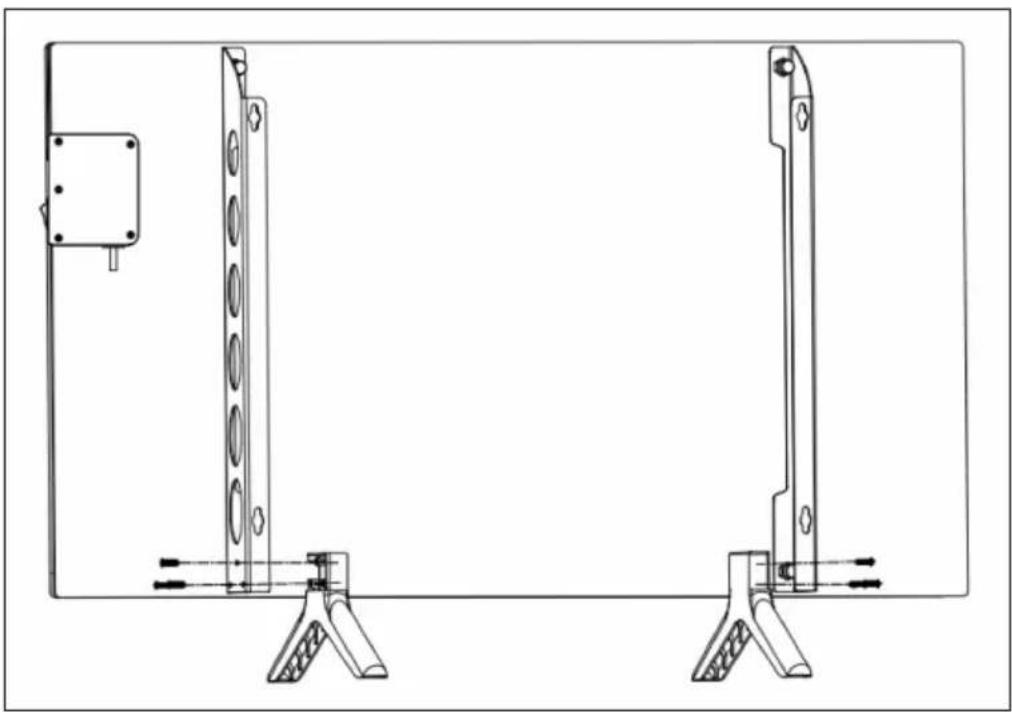
natural_image
Technical line drawing of a mechanical assembly with two vertical supports and a mounting bracket (no text or symbols)- Place the feet on the floor.
- Insert the stands into the recess at the bottom of the brackets. Then use the 6 small black screws to tighten the stands.
CONTROL PANEL AND REMOTE CONTROL

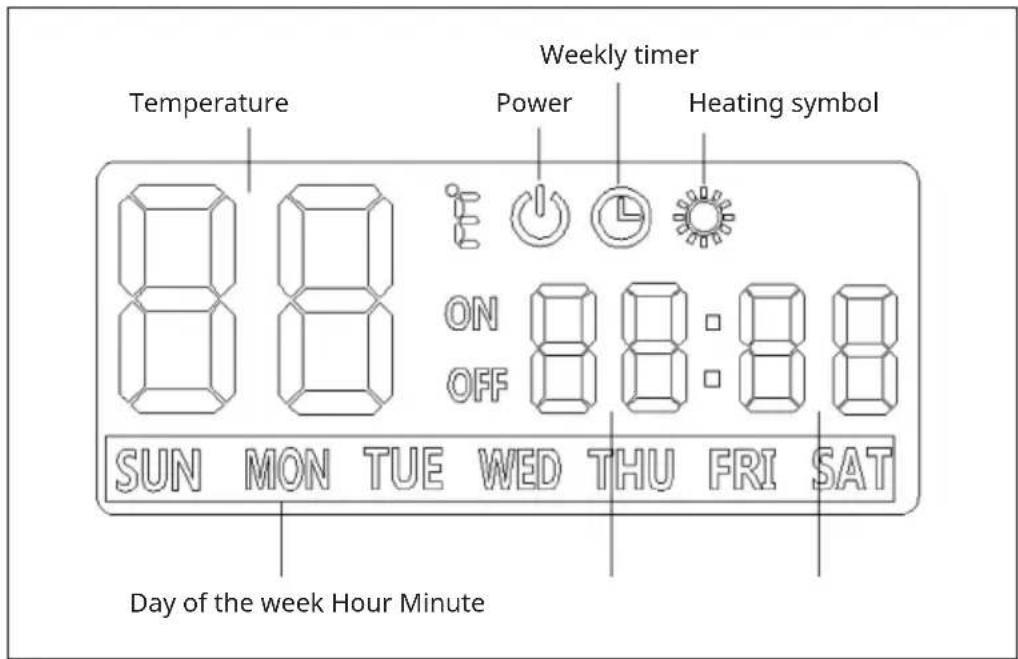
DISPLAY INDICATIONS
OPERATION
To start up the heater, proceed as follows:
- Check the heater to make sure it is not damaged.
- Plug in the heater and turn on the illuminated on/off switch on the side of the heater.
There are two ways to use the heater:
(1) Switch the device on and off manually
- When the device is turned on, the buzzer will sound once and the device will be in standby mode.
- Press the power button on the remote control. The power symbol will light up on the display.
- If the set temperature is higher than the room temperature of 2 °C, the device will heat up automatically. The symbol lights up in the display and the heating indicator also lights up on the heater.
(2) Set weekly timer
To start the weekly timer mode, press the on/off button. When the power symbol disappears from the display, press the timer button The timer and calendar symbols flash.
To program the weekly timer:
-
Press the arrow buttons on to set the day of the week. Then press the gear button to confirm.
-
[P1] flashes in the display. Press the gear button again to confirm.
-
Set the switch-on time. The hour flashes in the display. Press the arrow buttons or to set the hour. Then press the gear button to confirm. The minutes flash on the display. Press the arrow buttons or to set the minutes. Then press the gear button to confirm.
-
Set the switch-off time in the same way as the switch-on time.
-
Set the daily on and off time for P2, P3 and P4 using the same method as for P1.
Note: The heating periods P1, P2, P3 and P4 can be set to turn the heating on or off at different times each day.
- After setting the weekly timer, wait for the display to return to standby mode after about 10 seconds. Press the gear button once and then press the power button .Make sure that the two symbols on the display light up at the same time, then the device will work in weekly timer mode. If you want to switch back to normal mode, directly press the power button again. The device then switches to standby mode and you can operate it manually again.
Setting the current time
The weekly timer only works if you have set the current time. To set the current time, do the following:
- Press the "On/Off" button. When the power symbol is lit on the display, press the timer button once.
- The hour flashes in the display. Press the arrow buttons ▲ or ▼ to set the hour. Then press the gear button to confirm. The minutes flash on the display. Press the arrow buttons ▲ or to set the minutes. Then press the gear button to confirm.
- Then the day of the week flashes. Press the arrow buttons OK to set the day of the week. Then press the gear button to confirm.
Setting the temperature
Press the arrow buttons ☑ to set the temperature. The temperature can be set between 5-50 °C. The two digits will flash for a few seconds without any operation, then return to displaying the room temperature. If the room temperature is lower than the set temperature of 2 °C, the heating will start automatically. When the room temperature reaches or exceeds the set temperature, the heater will turn off automatically.
Open window detection
This heater detects open windows. When the heater is on (whether in manual mode or weekly timer mode), the heater will stop automatically if the detected temperature drops 5 °C (or more) within 5 minutes.
TROUBLESHOOTING
If your heater is not working, follow these instructions:
- Make sure your circuit breaker or fuse is working properly.
- Make sure the heater is plugged in and that the mains outlet is working properly.
- If the power button does not light up in the "on" position, the device may be defective. In this case, please contact customer service.
Note: If there is a problem with your heater, do not attempt to open or repair the heater yourself. This can void the warranty and may cause damage or injury. If the problem persists, please contact the retailer.
CLEANING AND CARE
Note: Switch off the appliance and remove the plug from the socket. Wait until the appliance has cooled down completely before cleaning it.
- Use a vacuum cleaner to clean the ventilation slots and grilles.
- Remove dust from the exterior surfaces with a damp (not wet) cloth.
- Do not use harsh cleaning agents or abrasive cleaners.
- Do not spray or immerse the device in water or any other liquid.
- Never open the heater housing.
PRODUCT DATA SHEET 10045431
| Model identifier(s) 10045431 | ||||||
| Specification Symbol Value Unit Specification Unit | ||||||
| Heat output Only for electric storage room heaters: Type of heat supply control | ||||||
| Nominal heat output P | nom | 0.60 kW | Manual control of the heat supply with integrated thermostat | N/A | ||
| Minimum heat output (guide value) | Pmin | 0.60 kW | Manual control of the heat supply with feedback of the room and/or outside temperature | N/A | ||
| Maximum continuous heat output | Pmaxc | 0.60 kW | Electronic control of the heat supply with feedback of the room and/or outside temperature | N/A | ||
| Auxiliary power consumption Heat output with fan support N/A | ||||||
| Nominal heat output el | max | N/A kW | Type of heat output/room temperature control | |||
| With minimum heat output el | min | N/A kW | Single stage heat output, no room temperature control | no | ||
| Standby mode | elSB | 0.26 W | Two or more manually adjustable levels, no room temperature control | no | ||
| Room temperature control with mechanical thermostat | no | |||||
| With electronic room temperature control | no | |||||
| With electronic room temperature control and time of day control | no | |||||
| With electronic room temperature control and day of week control | yes | |||||
| Other regulatory options | ||||||
| Room temperature control with presence detection | no | |||||
| Room temperature control with open window detection | yes | |||||
| With remote control option | no | |||||
| With adaptive control of the heating start | no | |||||
| Operating time limit | yes | |||||
| With black ball sensor | no | |||||
| Contact details | Chal-Tec GmbH, Wallstraße 16, 10179 Berlin, Germany. | |||||
PRODUCT DATA SHEET 10045432
| Model Identifier(s) | 10045432 | |||||
| Specification Symbol Value Unit Specification Unit | ||||||
| Heat output Only for electric storage room heaters: Type of heat supply control | ||||||
| Nominal heat output P | nom | 0.72 kW | Manual control of the heat supply with integrated thermostat | N/A | ||
| Minimum heat output (guide value) | Pmin | 0.72 kW | Manual control of the heat supply with feedback of the room and/or outside temperature | N/A | ||
| Maximum continuous heat output | Pmaxc | 0.72 kW | Electronic control of the heat supply with feedback of the room and/or outside temperature | N/A | ||
| Auxiliary power consumption Heat output with fan support N/A | ||||||
| Nominal heat output el | max | N/A kW | Type of heat output/room temperature control | |||
| With minimum heat output el | min | N/A kW | Single stage heat output, no room temperature control | no | ||
| Standby mode el | SB | 0.26 W | Two or more manually adjustable levels, no room temperature control | no | ||
| Room temperature control with mechanical thermostat | no | |||||
| With electronic room temperature control | no | |||||
| With electronic room temperature control and time of day control | no | |||||
| With electronic room temperature control and day of week control | yes | |||||
| Other regulatory options | ||||||
| Room temperature control with presence detection | no | |||||
| Room temperature control with open window detection | yes | |||||
| With remote control option | no | |||||
| With adaptive control of the heating start | no | |||||
| Operating time limit | yes | |||||
| With black ball sensor | no | |||||
| Contact details | Chal-Tec GmbH, Wallstraße 16, 10179 Berlin, Germany. | |||||
DISPOSAL CONSIDERATIONS
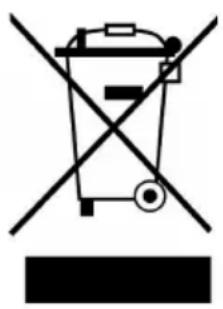
natural_image
Symbol of a trash bin crossed with a diagonal line, no text or labels presentIf there is a legal regulation in your country regarding the disposal of electrical and electronic equipment, this symbol on the product or on the packaging indicates that this product must not be disposed of with household waste. Instead, it must be taken to a collection point for the recycling of electrical and electronic equipment. By disposing of this product in accordance with the regulations, you protect the environment and the health of those around you from negative consequences. For information on recycling and disposal of this product, contact your local government or household waste disposal service.
MANUFACTURER & IMPORTER (UK)
Manufacturer:
Chal-Tec GmbH, Wallstrasse 16, 10179 Berlin, Germany.
Importer for Great Britain:
Berlin Brands Group UK Limited
PO Box 42
272 Kensington High Street
London, W8 6ND
United Kingdom
Estimado cliente:
ÍNDICE
natural_image
Technical line drawing of a mechanical assembly with two vertical supports and a mounting bracket (no text or symbols)natural_image
Symbol of a trash bin crossed with a diagonal line, no text or labels presentBerlin Brands Group UK Limited
PO Box 42
272 Kensington High Street
London, W8 6ND
Reino Unido
Cher client, chère cliente,
SOMMAIRE
natural_image
Technical line drawing of a mechanical assembly with two vertical supports and a mounting bracket (no text or symbols)FICHE DE DONNÉES PRODUIT 10045431
FICHE DE DONNÉES PRODUIT 10045432
natural_image
Symbol of a trash bin crossed with a diagonal line, no text or labels presentBerlin Brands Group UK Ltd
PO Box 42
272 Kensington High Street
London, W8 6ND
United Kingdom
Gentile cliente,
INDICE
natural_image
Technical line drawing of a mechanical assembly with two vertical supports and mounting brackets (no text or symbols)natural_image
Symbol of a trash bin crossed with a diagonal line, no text or labels presentPRODUTTORE E IMPORTATORE (UK)
Produttore:
Chal-Tec GmbH, Wallstraße 16, 10179 Berlino, Germania.
Berlin Brands Group UK Limited
PO Box 42
272 Kensington High Street
London, W8 6ND
United Kingdom
KLARSTEIN
- INHALTSVERZEICHNIS
- PRODUKTDATENBLATT 10045431
- Dear customer,
- CONTENTS
- TECHNICAL DATA
- SAFETY INSTRUCTIONS
- CAUTION
- INSTALLATION
- Installation on the wall
- CONTROL PANEL AND REMOTE CONTROL
- DISPLAY INDICATIONS
- OPERATION
- Switch the device on and off manually
- Set weekly timer
- Setting the current time
- Setting the temperature
- Open window detection
- TROUBLESHOOTING
- CLEANING AND CARE
- PRODUCT DATA SHEET 10045431
- DISPOSAL CONSIDERATIONS
- MANUFACTURER & IMPORTER (UK)
- Manufacturer:
- Importer for Great Britain:
- Estimado cliente:
- ÍNDICE
- SOMMAIRE
- FICHE DE DONNÉES PRODUIT 10045431
- Gentile cliente,
- INDICE
- PRODUTTORE E IMPORTATORE (UK)
- Produttore:
- KLARSTEIN
Brand : Klarstein
Model : Marvel Mirror
Category : Heating