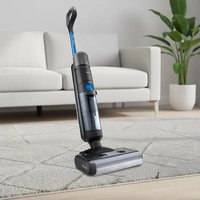
1691FL - Vacuum Cleaner Flama - Free user manual and instructions
Find the device manual for free 1691FL Flama in PDF.


| Product Type | Cordless stick vacuum with washing function |
| Model | 1691FL |
| Brand | Flama |
| Operating Voltage | 21.6 V |
| Rated Power | 125 W |
| Battery Capacity | 2500 mAh |
| Runtime | Up to 28 min (normal), 18 min (Boost) |
| Charging Time | Approximately 4 hours |
| Clean Water Tank Capacity | 650 ml |
| Dirty Water Tank Capacity | 550 ml |
| Filter Type | HEPA filter |
| Operating Modes | Normal, Boost, Dry vacuuming (Drain Mode) |
| Brush Self-Cleaning | Yes, via Mode/Auto-cleaning button |
| Included Accessories | Charging base, charger, cleaning brush |
| Compatible Surfaces | Indoor hard floors (vinyl, stone, marble, wood, tile, etc.) |
| Recommended Maintenance | Regularly clean tank, filter and motorized brush |
| Safety | Do not immerse, use near heat sources or flammable materials |
| Warranty | 36 months |
Frequently Asked Questions - 1691FL Flama
User questions about 1691FL Flama
0 question about this device. Answer the ones you know or ask your own.
Ask a new question about this device
Download the instructions for your Vacuum Cleaner in PDF format for free! Find your manual 1691FL - Flama and take your electronic device back in hand. On this page are published all the documents necessary for the use of your device. 1691FL by Flama.
USER MANUAL 1691FL Flama
natural_image
Black vacuum cleaner with handle and control panel, isolated on white background (no text or symbols visible)1691FL
PT ASPIRADOR VERTICAL SEM FIOS 1
ES ASPIRADOR VERTICAL SIN CABLE 13
EN CORDLESS UPRIGHT VACUUM CLEANER 25
FR ASPIRATEUR VERTICAL SANS FIL 37
ASPIRADOR VERTICAL SEM FIOS
INSTRUÇÕES DE SEGURANÇA
natural_image
Line drawing of a hand holding a tool over a mechanical component (no text or symbols)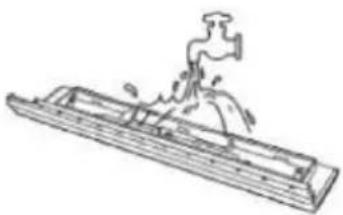
natural_image
Line drawing of a boat with a person standing on it, no text or symbols present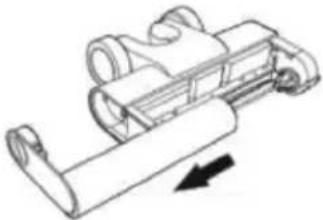
natural_image
Mechanical component diagram showing a roller or guide mechanism with directional arrow (no text or symbols)natural_image
Four technical line drawings showing mechanical assembly or assembly process, with arrows indicating movement or force direction (no text or symbols present)natural_image
Technical line drawing of a mechanical device with a magnified inset showing internal components (no text or symbols)natural_image
Line drawings of a vacuum cleaner's internal components and water drop mechanism (no text or symbols)MANTENIMIENTO
natural_image
Line drawing of a hand holding a tool over a mechanical component (no text or symbols)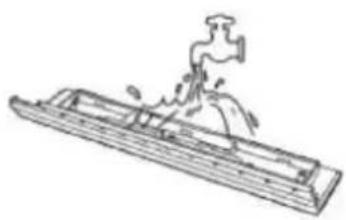
natural_image
Line drawing of a person standing on a wooden boat with a smoke or vapor rising from the side (no text or symbols)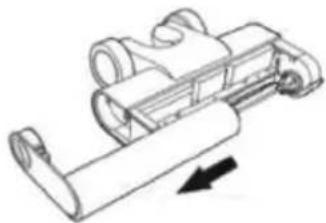
natural_image
Mechanical component diagram showing a lever mechanism with directional arrow (no text or symbols)natural_image
Technical line drawing of a mechanical component with an arrow indicating direction (no text or symbols)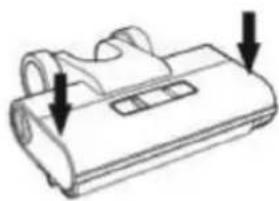
natural_image
Line drawing of a device with two downward arrows indicating force or movement (no text or symbols)natural_image
Technical line drawing of a mechanical device with a magnified inset showing internal components (no text or symbols)natural_image
Symbol of a trash bin with crossed lines indicating no waste or discharge (no text or labels)Before using this appliance for the first time, please read this instruction manual carefully and keep it for future reference. Failure to use the appliance in accordance with these instructions releases FLAMA from all liability.
If you pass the appliance on to a third party, ensure this manual is included. Any use not in line with the instructions provided may result in damage to the appliance or personal injury.
This appliance is intended exclusively for domestic use and is not suitable for industrial or outdoor environments.
Persons with reduced physical, sensory or mental capabilities, or lacking experience and knowledge (including children), must not use this appliance without supervision or instruction from a responsible person to ensure safe and correct operation.
Do not touch the plug or any live parts of the appliance with wet hands to avoid the risk of electric shock.
Do not use damaged chargers or plugs. Contact an authorised customer service centre for support or replacement. (Unauthorised repairs are prohibited.)
Keep ventilation openings and moving parts away from long hair, loose clothing, fingers and other body parts. Do not point the suction tube or accessories towards eyes or ears, and do not insert them into the mouth.
In case of electrical leakage, overheating, or abnormal noises or smells (such as low suction power), immediately switch off the appliance and contact authorised after-sales service.
Only use the charger supplied with the appliance. Using other chargers may result in battery failure or dangerous overheating. If the appliance will not be used for a long period, disconnect it and unplug it from the socket.
After each use, empty the dirty water tank and ensure the suction tubes are clear. Blockages may cause motor overheating and reduce the appliance's lifespan.
Store the appliance in a dry place. Moisture may compromise insulation and shorten the life of electrical components.
Do not immerse the cable, main body, brush or charger in water or wash them directly, as they contain electrical components.
Regularly check that the suction nozzle is free from blockages. Debris build-up may reduce cleaning efficiency.
Ensure the appliance is turned off before replacing the motorised brush.
Do not attempt to repair the appliance yourself. Always contact authorised technical support.
All technical data and information in this manual are the property of our company or a certifying body and are subject to our final interpretation.
SCOPE OF USE
This appliance is suitable for hard indoor flooring, including: vinyl, stone, rubber, marble, granite, terrazzo, solid wood, laminates, bamboo, and flat surfaces such as glossy or ceramic tiles. Effectiveness may be reduced on uneven floors.
Do not use the appliance near or on flammable or explosive materials. Risk of fire or explosion.
Do not use the appliance near open fireplaces or heaters to avoid deformation of the appliance's structure.
Do not vacuum substances at high temperature (e.g. lit cigarettes, matches or hot ashes), very fine materials (lime, cement, sawdust, plaster, ashes, coal), hazardous substances (solvents, detergents), chemical compounds (acids or alkalis), or substances of uncertain physical properties.
Do not use the vacuum to collect unauthorised detergents, kerosene, petrol, alcohol, paint or perfumes, as this may cause short circuits, fires or explosions.
Do not vacuum printer or photocopier toner — risk of fire or explosion.
Avoid vacuuming sharp or solid objects such as broken glass, small toys, pins, clips, stones, plaster or large paper pieces, as they may block or damage the appliance.
Stains with high viscosity or strong colouring agents (e.g. bitumen, paint or pigments) are not covered by this appliance's scope of use.
USE OF CLEANING DETERGENTS
Excessive amounts of cleaning solution in contact with the motor may present a hazard.
Only use cleaning detergents in accordance with the instructions. We recommend using cleaning products provided by our company or an authorised supplier, free from acidic or alkaline substances and environmentally harmful ingredients.
Keep cleaning products out of reach of children. In case of contact with eyes, rinse thoroughly with clean water. In case of accidental ingestion, seek medical attention immediately.
Observe local environmental protection regulations when disposing of dirty water and cleaning agents.
ABOUT THE APPLIANCE
Do not dismantle or modify the appliance without authorisation. No components are user-serviceable. Any attempt to modify may result in an accident.
Using a charger with specifications different from those stated may damage the battery and cause injury.
The correct rated voltage is indicated on the label located on the back of the appliance.
If the dirty water tank is full, avoid shaking or tipping the appliance, as water may seep into the motor or internal components.
Take extra care when cleaning stairs to avoid falls.
While operating, avoid lifting or excessively tilting the appliance. If moving the appliance without using it, switch it off.
After use, rest the appliance against a wall to prevent falls or tripping hazards.
Ensure both clean and dirty water tanks are correctly fitted before switching on the appliance.
Do not block the air outlet or insert foreign objects, as this may cause overheating.
Do not wet the main body of the appliance. Risk of short circuit, fire or electric shock.
Safe disposal of used battery:
- If the battery contains hazardous materials, it must be removed before disposing of the appliance.
- Ensure the appliance is switched off before removing the battery.
- Never dispose of batteries in fire, water or soil.
- In case of contact with battery fluid, rinse the affected area with clean water and seek medical attention if necessary.
This product complies with the Electromagnetic Compatibility and Low Voltage Directives.
This instruction manual is also available in PDF format at www.flama.pt.
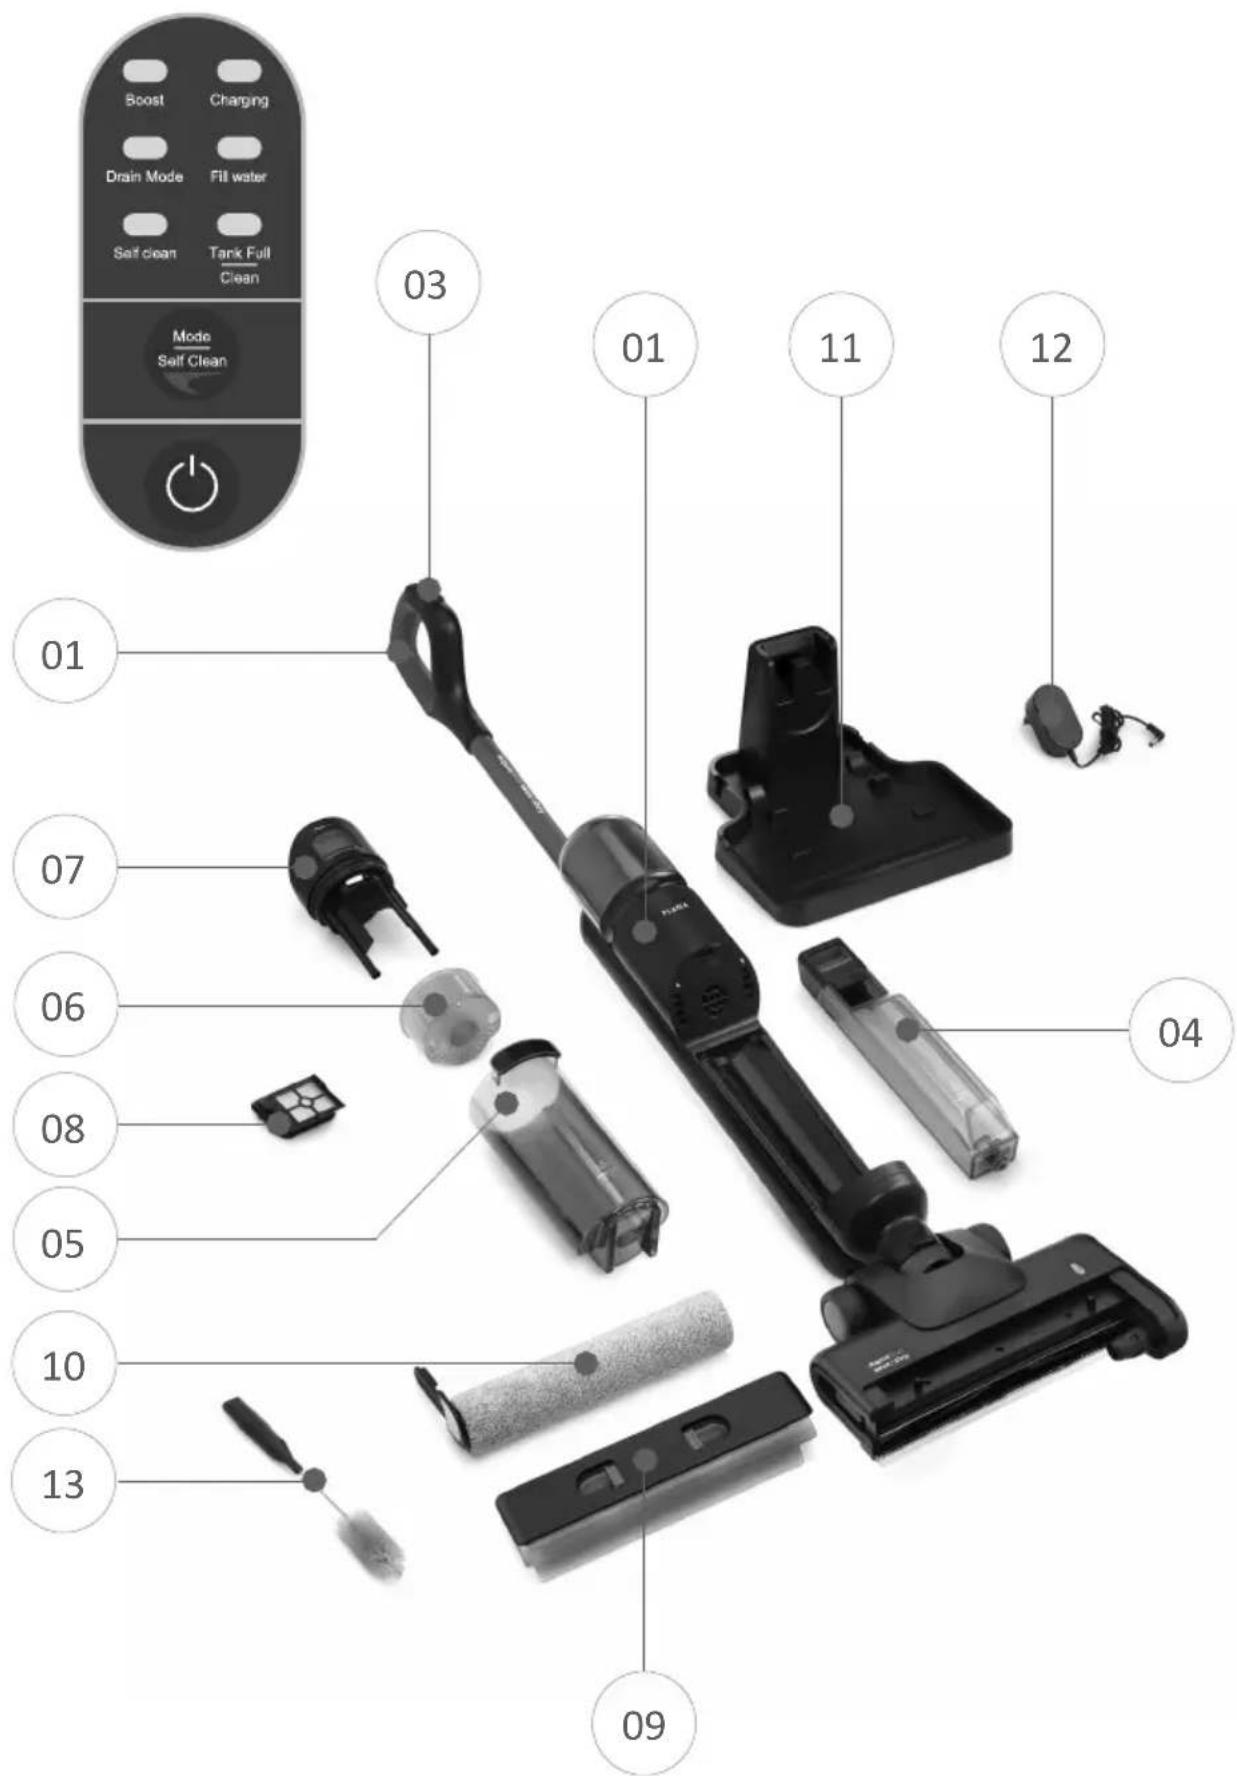
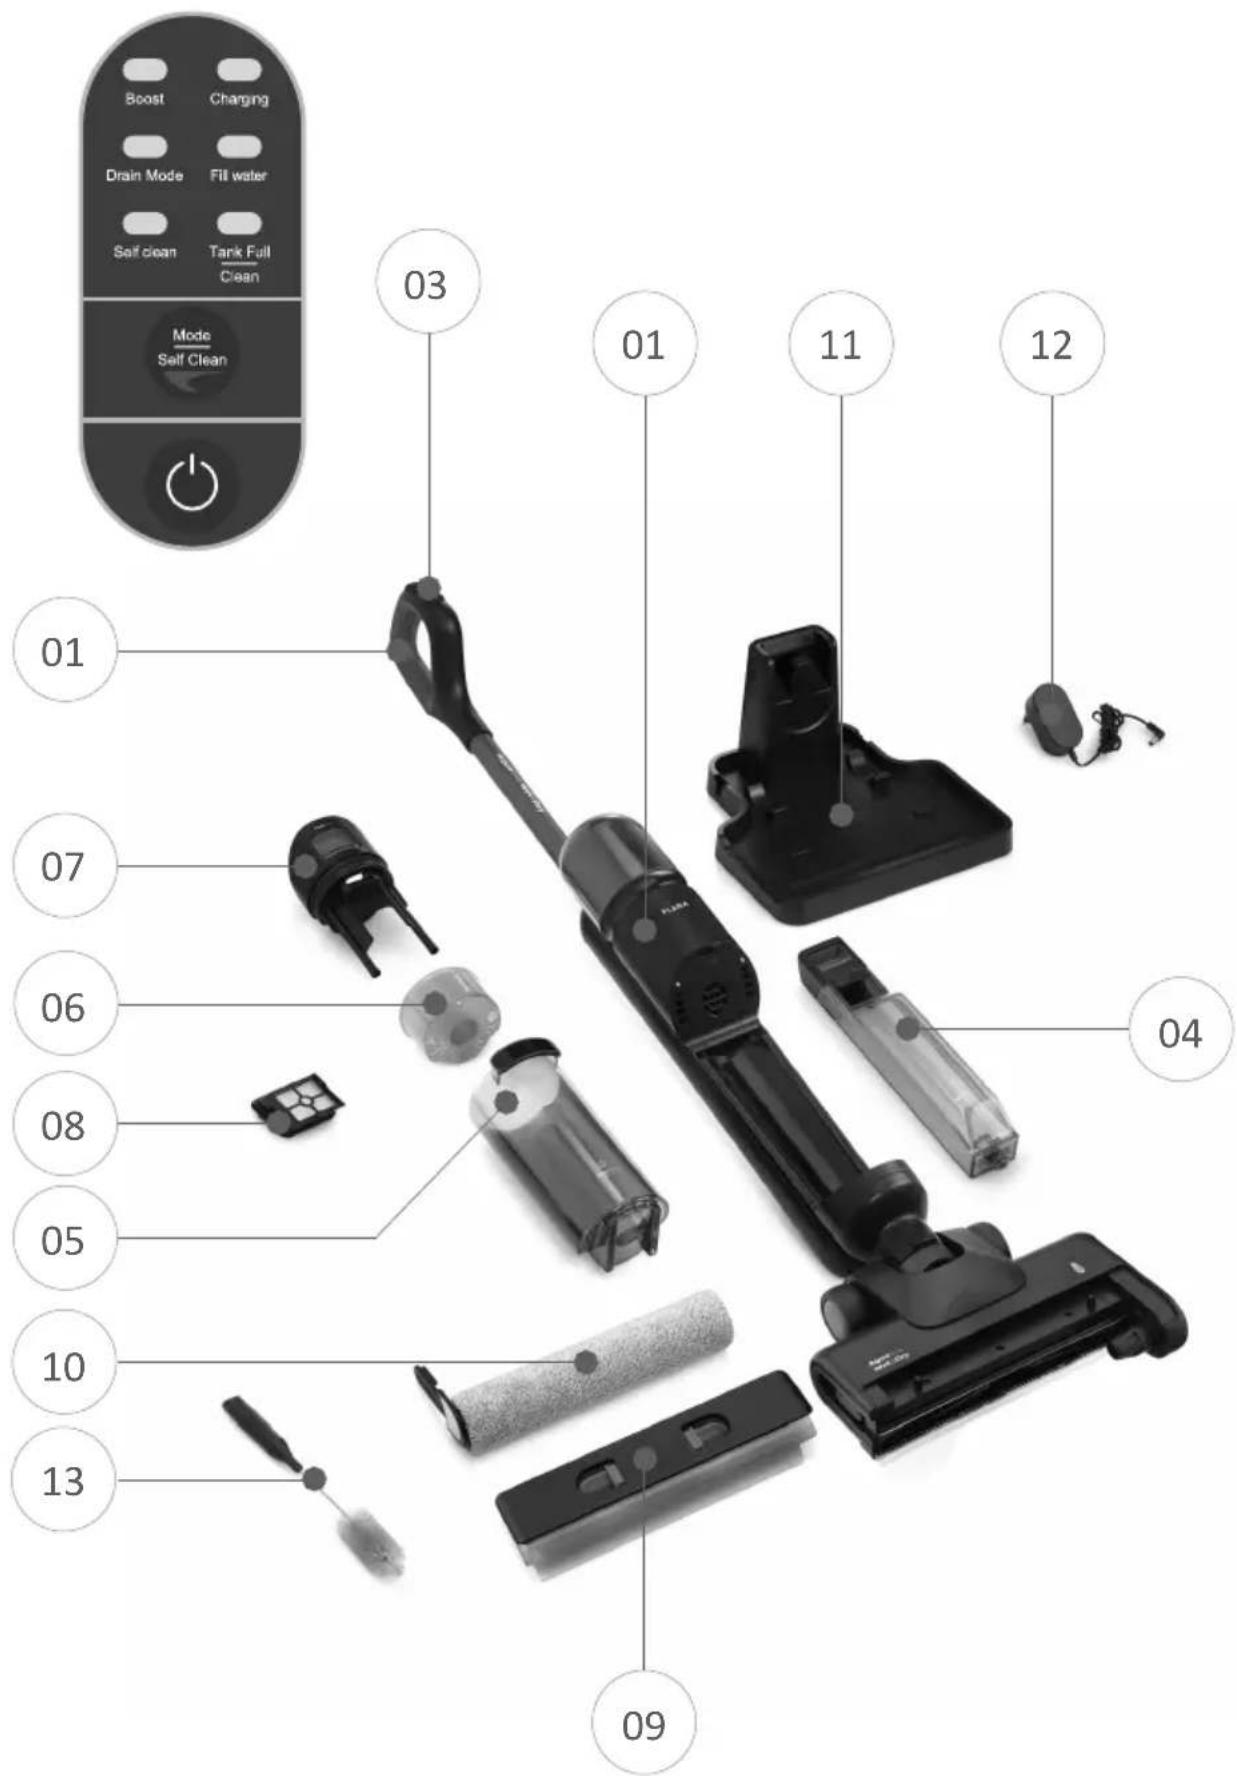
DESCRIPTION
- Main body
- Handle
- Display
- Clean water tank
- Waste water tank
- Solid waste trap
- Waste tank lid
- HEPA filter
- Motorised brush cover
- Motorised brush
- Charging base
- Charger
- Cleaning brush
ASSEMBLY
Attaching the handle
Insert the end of the handle vertically into the slot on the main body until you hear a click. Ensure the handle is firmly secured to confirm successful installation.
Removing the handle
To remove the handle, insert a long, thin, rigid object into the hole on the rear of the main body and press while pulling the handle upwards.
USAGE
Before use
Check if the battery is sufficiently charged. If not, charge the appliance in good time. Do not use it until it is fully charged.
Charging method
Place the appliance on the Charging base.
Connect one end of the charger to the base socket and the other end to a wall socket.
While Charging, keep the appliance upright and placed against a corner of the wall to prevent accidents such as tripping.
The display shows the real-time Charging status and turns off when Charging is complete. Store the charger when not in use.
Tip: If the appliance remains unused for a long time, charge it at least once every three months. Always use the supplied base. Charging time is approximately 4 hours (full charge is not manda-tory).
Filling the clean water tank
Remove the tank from the appliance body.
Remove the silicone cap from the tank.
Fill with water up to the maximum level indicated.
Replace the silicone cap.
Reinsert the clean water tank into the appliance and ensure it is securely in place.
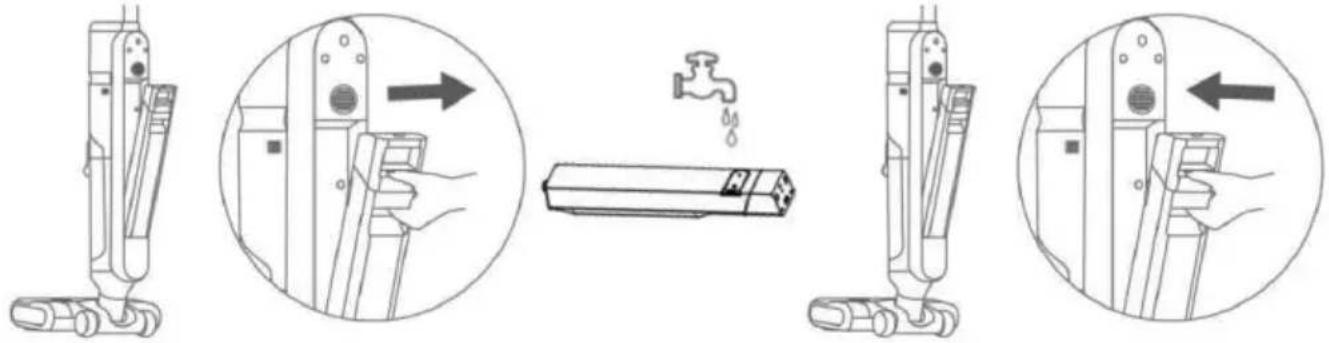
Tip: Do not add cleaning solutions unless recommended by FLAMA to avoid damaging the appliance or flooring.
OPERATION
Display panel
 | On/Off button – Press to switch the appliance on or off. |
 | Mode/Self Clean button – Press to select the operating mode:1 press – maximum speed (Boost).2 presses – dry vacuum mode (Drain Mode).3 presses – returns to the default mode.With the appliance on the Charging base, press Mode/Self Clean to activate self-cleaning of the motorised brush. |
 | Boost mode selected - Boost indicator lights up. |
 Drain Mode Drain Mode | Dry vacuum mode selected - Drain Mode indicator lights up. |
 Charging Charging | Low battery - Charging indicator flashes. |
 Fill water Fill water | No water in clean water tank - Fill water indicator flashes. |
 Self clean Self clean | Self-cleaning in progress - Self Clean indicator lights up. |
 Tank FullClean Tank FullClean | Waste tank full or brush obstructed - Tank full/Clean indicator flashes. |
Using the appliance
Once fully charged, remove the appliance from the Charging base.
Step on the brush base and tilt the main body towards you to assume a comfortable operating angle.
NOTE – For safety reasons, the appliance does not operate in upright position.
Press the On/Off button to begin operation.
During use, make slow and steady back-and-forth movements to ensure effective cleaning. Avoid vacuuming foamy liquids as this may affect performance.
Keep the handle at least 30 cm above the floor when tilted; otherwise, residual water from the waste tank may enter the tubing.
Press On/Off again to switch off – the appliance will run for a few seconds to rinse the motorised brush.
The appliance includes a pause switch and vertical lock mechanism; placing the main body in upright (rest) position will stop operation.
After use, place the appliance back on the Charging base.
SELF-CLEANING
After use, place the appliance on the Charging base and press Mode/Self Clean to activate the self-cleaning mode.
The appliance will clean the tubing and motorised brush – the process takes about 1 minute.
For a deeper clean, use the included cleaning brush to remove debris from the appliance tubes and brush.
Tips:
Ensure the clean water tank is at least 30% full before starting self-cleaning.
After self-cleaning, empty and rinse the waste tank, and clean any debris from the Charging base if necessary.
WASTE TANK CLEANING
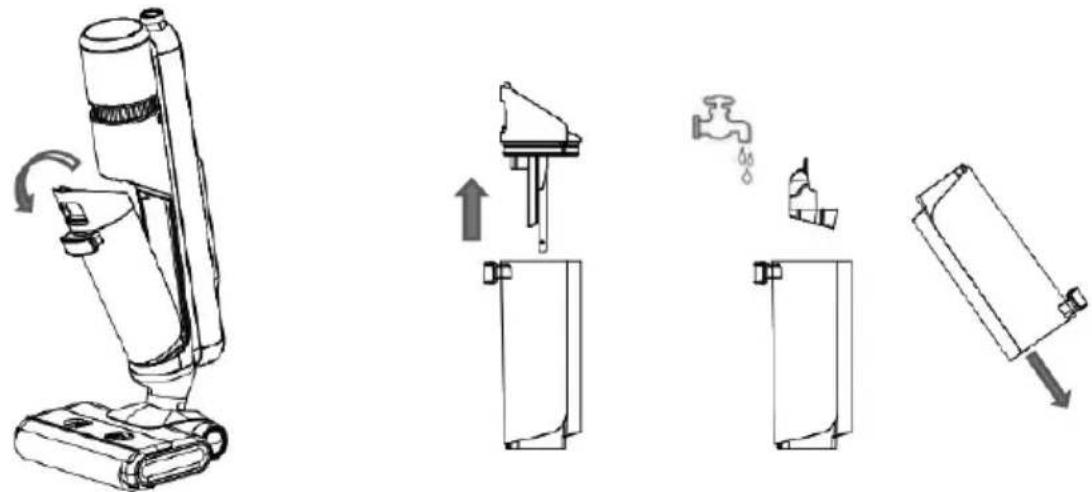
Remove the waste tank from the appliance.
Open the lid and empty both liquid and solid contents.
Rinse the tank and solid waste trap with clean water.
Rinse the lid and HEPA filter, and dry completely before reinstalling.
Do not operate the appliance with a wet HEPA filter – this may cause damage.
MAINTENANCE
To ensure optimal performance, clean the appliance body, motorised brush, suction tube and waste tank regularly.
Before cleaning, switch off the appliance. Wipe the body with a slightly damp cloth or one soaked in neutral detergent. Do not allow water to enter the appliance.
Cleaning the water spray nozzle and motorised brush
Clean the water spray nozzle (on the motorised brush cover) regularly to prevent residue build-up that may affect water flow.
Remove the motorised brush for cleaning and drying to prevent odours.
Remove the brush cover.
Rinse the cover with clean water.
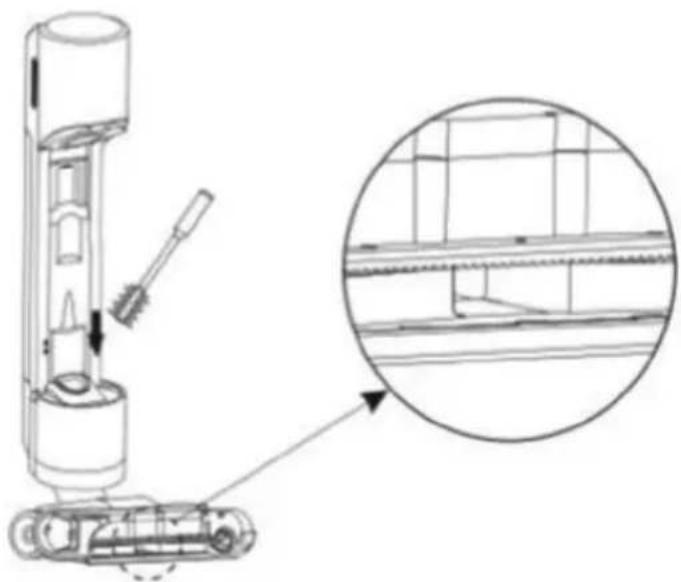
Remove the brush and clear hair or debris using the cleaning brush.

Rinse the brush and allow it to dry completely before reinstalling.
Reinstall the brush and its cover.

Cleaning the dirt sensor
Remove the waste tank and clean the dirt sensor (located at the suction inlet) with a damp cloth or the cleaning brush.
natural_image
Technical line drawing of a mechanical device with a magnified inset showing internal structure (no text or symbols)TROUBLESHOOTING
| Problem Possible Cause Solution | ||
| Appliance won't start or emits an alarm. | Motorised brush is blocked by hair or de-bris. | Turn off and clean the motor-ised brush. |
| Waste tank is full. Empty the waste tank. | tank. | |
| Battery is depleted. Charge the appliance. | ||
| Reduced suction power. | Brush, brush cover or waste tank are not properly fitted. | Reinstall all components cor-rectly. |
| Motorised brush is blocked. Clean the brush. | ||
| Suction tube is clogged. Remove obstructions. | ||
| Waste tank filter is dirty or missing. | Clean or reinstall the filter be-fore use. | |
| Unusual noise during operation. | Suction tube is blocked. | Remove any objects blocking the tube. |
| Waste tank water level has reached the lim-it. | Empty and reinstall the tank properly. | |
| No water comes out of the motor-ised brush. | Clean water tank is empty. Fill with clean water. | clean water. |
| Clean water tank is not fitted correctly. | Reinstall the tank properly. | |
| Water leakage at bottom of the appliance. | Waste tank or filter not installed. Install both correctly. | |
| Appliance does not charge. | Incompatible charger in use. Use only the supplied charger. | Plug the Charging base into the mains. |
| Charging base not connected to power. | ||
ANOMALIES AND REPAIRS
In the event of a malfunction, take the appliance to an authorised Technical Assistance Service.
Do not attempt to dismantle or repair the appliance yourself, as this may pose safety risks.
ENVIRONMENTAL PROTECTION
natural_image
Symbol of a trash bin crossed with a diagonal line and a horizontal bar below (no text or numbers present)This symbol indicates the separate collection of electrical and electronic equipment.
The primary objective of separate waste collection is to reduce the amount sent to landfill, promote reuse, recycling and other forms of recovery, in order to minimise the negative impact on the environment.
When no longer in use, this appliance must not be disposed of with general unsorted household waste.
The user is responsible for delivering it free of charge to appropriate selective collection points designated for this purpose.
Retailers may also accept end-of-life equipment when purchasing a new product of equivalent type and function.
For more detailed information on collection points, please contact your local authority or the point of sale for such equipment.
TECHNICAL SPECIFICATIONS
- Operating voltage: 21.6 V
- Rated power: 125 W
- Adapter input: 100–240 V \~ 50/60 Hz
- Adapter output: 27 V
- Battery capacity: 2500 mAh
- Clean water tank capacity: 650 ml
- Waste water tank capacity: 550 ml
- Runtime: up to 28 minutes (normal mode) / 18 minutes (Boost mode)
ASPIRATEUR VERTICAL SANS FIL
INSTRUCTIONS DE SÉCURITÉ
Astuce :
natural_image
Line drawings of a vacuum cleaner's internal components and their assembly, showing lever, valve, and handle (no text or symbols)ENTRETIEN
natural_image
Line drawing of a hand holding a tool over a mechanical component (no text or symbols)
natural_image
Line drawing of a boat with a person standing on top, emitting smoke or steam (no text or symbols)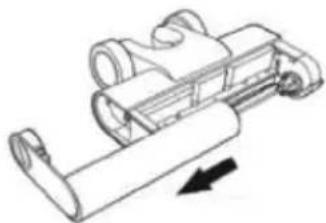
natural_image
Mechanical component diagram showing a lever mechanism with directional arrow (no text or symbols)natural_image
Four technical line drawings showing mechanical assembly or assembly process, with arrows indicating movement or force direction (no text or symbols present)natural_image
Technical line drawing of a mechanical device with a magnified inset showing internal components (no text or symbols)RÉSOLUTION DE PROBLÈMES
DYSFONCTIONNEMENTS ET RÉPARATIONS
- Keep the proof of purchase (receipt) for this product carefully. When a repair is made under these conditions, the technician will require proof of purchase. This assistance can only be provided once you have proven, with the proof of purchase, that your appliance is within the warranty period.
- The warranty period for this appliance is defined by the respective EU Directive in force on the date of purchase/delivery.
- Within the guarantee period, we will repair or replace, free of charge, any parts which, during the normal use of the appliance, have deteriorated as a result of a proven material or manufacturing defect.
- This warranty does not cover consumable items, light bulbs, easily breakable parts made of glass or plastic, or any other defects that do not impair its proper functioning.
- We accept no liability for damage caused by incorrect or careless use of the appliance, by its connection to an electrical current other than that indicated on the appliance's rating plate, by faulty electrical installation, or by atmospheric, chemical or electrochemical causes. Other claims or demands for compensation relating to objects which are not an integral part of the appliance will be denied.
- The provision of assistance under warranty does not extend the warranty period. Only within this period will assistance be provided under warranty. The right to assistance is only granted to the first purchaser of the device and cannot be transferred to a third party.
- The warranty expires when unauthorized persons have attempted to repair, modify or replace parts of the appliance.
- All expenses and risks of transportation to our factory or vice versa will always be borne by the buyer.
WARRANTY CONDITIONS
To benefit from the Technical Assistance service during the 36-month warranty period after the date of purchase, you will need to:
Present the Invoice/Proof of Purchase, stating the model and the manufacturing number of the product (whenever possible).
Note: Failure to present the aforementioned documents will be grounds for not providing services under warranty.
CONDITIONS DE GARANTIE
CONDITIONS DE GARANTIE

- ASPIRADOR VERTICAL SEM FIOS
- INSTRUÇÕES DE SEGURANÇA
- MANTENIMIENTO
- SCOPE OF USE
- USE OF CLEANING DETERGENTS
- ABOUT THE APPLIANCE
- DESCRIPTION
- ASSEMBLY
- Attaching the handle
- Removing the handle
- USAGE
- Before use
- Charging method
- Filling the clean water tank
- OPERATION
- Using the appliance
- SELF-CLEANING
- Tips:
- WASTE TANK CLEANING
- MAINTENANCE
- Cleaning the water spray nozzle and motorised brush
- Cleaning the dirt sensor
- ANOMALIES AND REPAIRS
- ENVIRONMENTAL PROTECTION
- TECHNICAL SPECIFICATIONS
- ASPIRATEUR VERTICAL SANS FIL
- INSTRUCTIONS DE SÉCURITÉ
- Astuce :
- ENTRETIEN
- DYSFONCTIONNEMENTS ET RÉPARATIONS
- WARRANTY CONDITIONS
- CONDITIONS DE GARANTIE
Brand : Flama
Model : 1691FL
Category : Vacuum Cleaner