
1647FL - Vacuum Cleaner Flama - Free user manual and instructions
Find the device manual for free 1647FL Flama in PDF.


| Product type | Cordless handheld vacuum cleaner |
| Brand | Flama |
| Model | 1647FL |
| Power supply | Lithium-ion battery 28.8 V, 3000 mAh |
| Charger | 36 V, 800 mA |
| Charging time | 3h30 to 4h (first charge: 5h) |
| Runtime | Up to 75 min (eco mode), 40 min (standard mode), 23 min (max mode) |
| Motor power | 450 W |
| Suction | 33 kPa (max), 16 kPa (medium), 9 kPa (low) |
| Airflow | 16 dm³/s |
| Filtration | Rear HEPA filter, intermediate HEPA filter, metal filter |
| Included accessories | Main motorized brush with LED, special pet mini brush, crevice tool, multi-use brush, articulated tube, wall charging mount |
| Main functions | Touch screen, power adjustment (eco, medium, max, auto), battery indicator, brush blockage and obstruction indicator |
| Maintenance | Emptying the dustbin, washing filters with cold water (24h drying), cleaning brushes |
| Safety | Automatic shut-off in case of overheating, short-circuit protection, indoor use only |
| Spare parts and repairability | Original consumables available online; repairs exclusively by authorized center |
| Usage | Household, dry floors, hard surfaces and carpets |
| Warranty | See the provided warranty card |
Frequently Asked Questions - 1647FL Flama
User questions about 1647FL Flama
0 question about this device. Answer the ones you know or ask your own.
Ask a new question about this device
Download the instructions for your Vacuum Cleaner in PDF format for free! Find your manual 1647FL - Flama and take your electronic device back in hand. On this page are published all the documents necessary for the use of your device. 1647FL by Flama.
USER MANUAL 1647FL Flama
natural_image
Black vacuum cleaner with adjustable arm and handle, isolated on white background (no text or symbols visible)1647FL
PT ASPIRADOR VERTICAL SEM FIOS 1
ES ASPIRADOR VERTICAL SIN CABLE 13
EN WIRELESS VERTICAL VACCUM CLEANER 25
FR ASPIRATEUR BALAI SANS FIL 39
ASPIRADOR VERTICAL SEM FIOS
INSTRUÇÕES DE SEGURANÇA
natural_image
Four-step diagram illustrating a drilling process: tool, hand, water spray, and drill bit (no text or symbols)natural_image
Four-step diagram illustrating a drilling process: tool, hand, water spray, and drill bit (no text or symbols)natural_image
Technical line drawing showing mechanical assembly steps with no visible text or symbolsThis device may be used by individuals unfamiliar with its operation, persons with disabilities, or children aged 8 years and older, provided they do so under supervision or have been instructed on the safe use of the device and understand the associated risks.
Children must not perform cleaning or maintenance operations on the device unless supervised by an adult.
This device is not a toy. Children should be supervised to ensure they do not play with the device.
Disconnect the battery charger from the power outlet when not in use and before performing any cleaning operations.
The battery must be removed from the device before disposal.
The device must be unplugged from the mains when removing the battery.
The battery must be disposed of safely.
If the power cord is damaged, it must be replaced. Contact the customer support service listed on the warranty card. To avoid danger, do not attempt to disassemble or repair it yourself.
This device is intended for household use only, not for professional or industrial purposes.
Only connect the device to a low-voltage outlet that matches the device's specifications.
Before plugging the charger into the mains, ensure the voltage indicated on the specification label matches the mains voltage.
Connect the device to a grounded electrical outlet capable of handling 10A.
The plug of the device must match the power outlet. Never modify the plug. Do not use plug adapters.
Do not strain the power cord. Never use the power cord to lift, transport, or disconnect the battery charger.
Inspect the power cord for damage. Damaged or tangled cords
increase the risk of electric shock.
Do not touch the plug with wet hands.
Do not use the device if the power cord or plug is damaged.
If any casing of the device breaks, immediately unplug it to avoid the risk of electric shock.
Do not use the device if it has fallen and shows visible signs of damage or leakage.
Avoid contact with any liquid that may leak from the battery. In case of accidental contact with the eyes, rinse them and consult a doctor immediately. Battery fluid can cause irritation or burns.
Do not use or store the device outdoors.
Do not expose the device to rain or humid conditions. Water entering the device increases the risk of electric shock.
USAGE AND CARE
Do not use the device without the filter(s) properly installed.
Do not use the device if its accessories are not correctly assembled.
Do not use the device to collect water or any other liquid.
Do not use the device if the on/off switch does not work.
Respect the MAX level indicator on the dust container.
This device is not intended for use by individuals (including children) with reduced physical, sensory, or mental capabilities, or lack of experience and knowledge.
Do not use on surfaces containing metal objects such as staples or screws.
Never vacuum flammable or sharp objects (e.g., cigarette butts, ashes, nails).
Never open the battery under any circumstances.
When the battery is not in use, keep it away from metallic objects such as paper clips, coins, and keys, which could create a connection between the terminals.
Avoid short-circuiting the battery terminals, as this poses a risk of explosion or fire.
Do not store the device in environments where the ambient temperature exceeds 40^ C.
Use the device only for dry tasks.
Never leave the device running unattended. Doing so also saves energy and extends the device's lifespan.
Do not use the device on any part of a person's or animal's body.
Only recharge the battery with the charger provided by the manufacturer. Using an unsuitable charger may pose a risk of explosion or fire.
Use the device only with the battery designed specifically for it. Using a different battery may present a risk of explosion or fire.
This product complies with the Electromagnetic Compatibility and Low Voltage Directives, as well as directives on restrictions of hazardous substances in electrical and electronic devices and eco-design requirements for energy-related products.
This instruction manual is also available in PDF format at www.flama.pt.
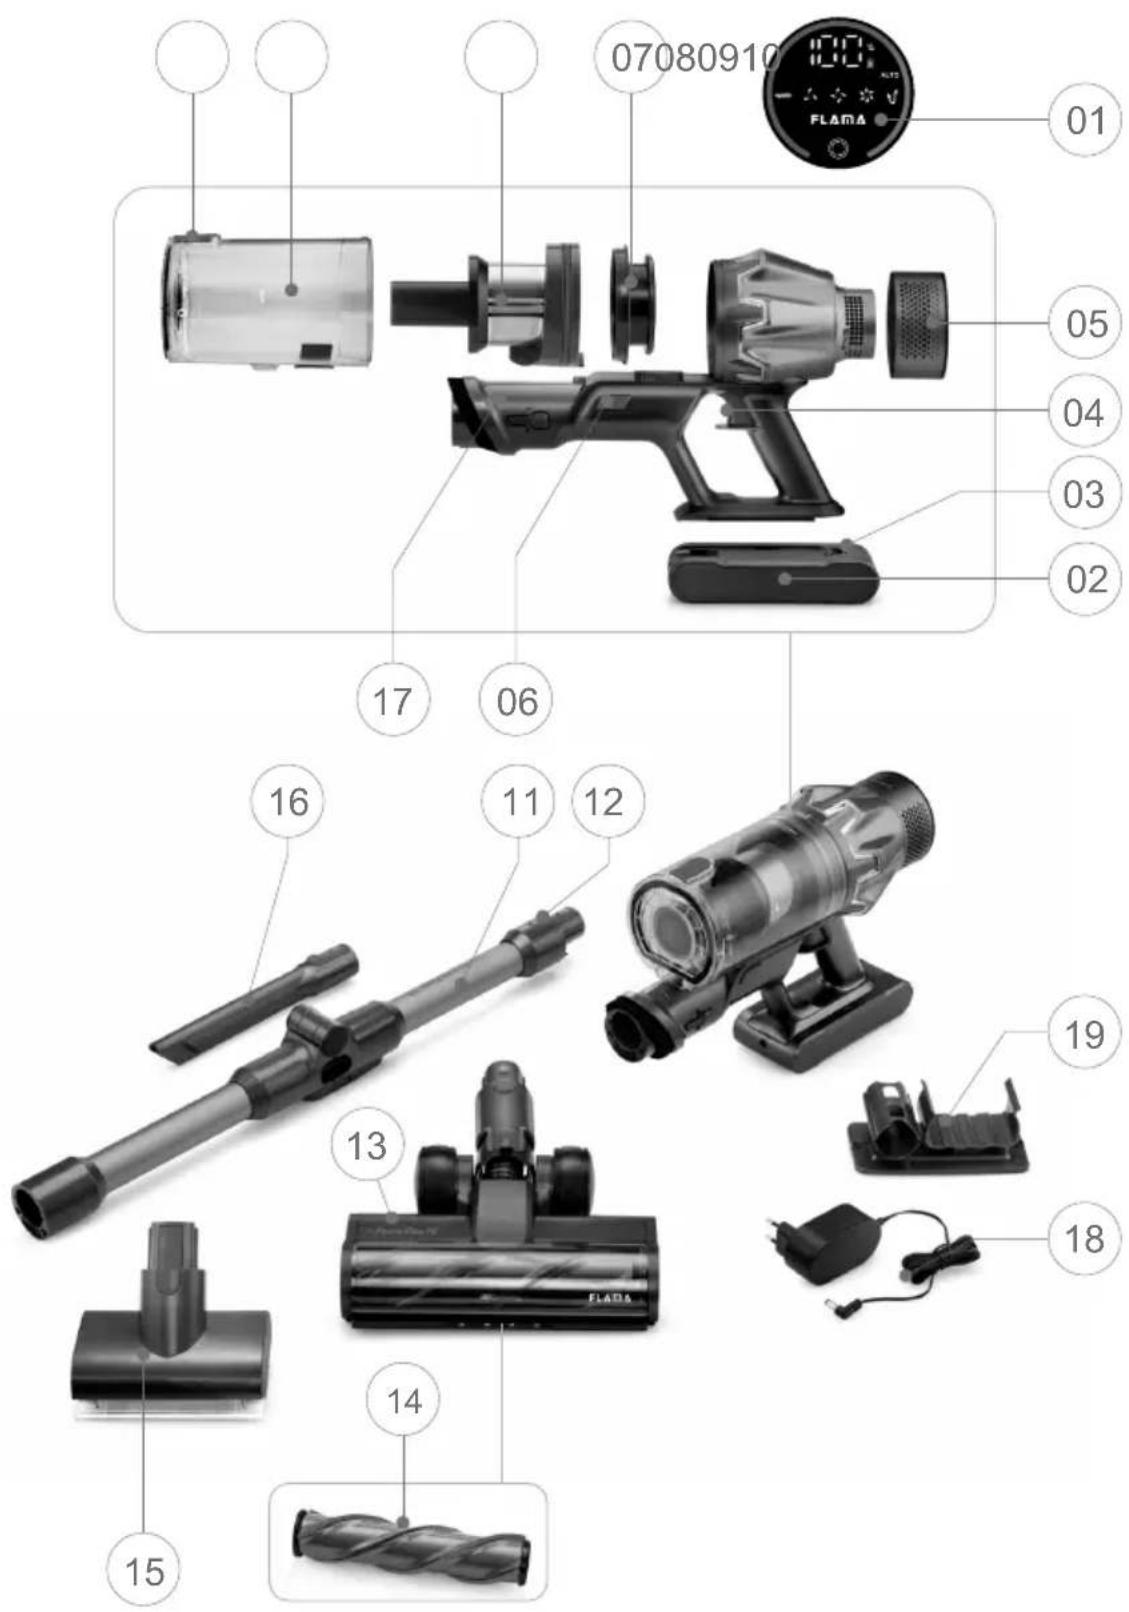
DESCRIPTION
- Touch panel
- Battery
- Battery release button
- ON/OFF button
- Rear HEPA filter
- Dustbin release button
- Intermediate HEPA filter
- Metal filter
- Dustbin
- Dustbin lid release button
- Articulated tube
- Motorized brush
- Rotating brush
- PET CARE brush
- Crevice tool
- Multifunctional accessory
- Battery charger
-
Charging dock
-
Tube/accessory release button
Touch Panel
 | Speed ControlTap the button to select the suction level and automatic mode. |
 | Suction Level Indicator |
 | Automatic mode Indicator |
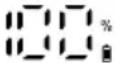 | Battery Level Indicator |
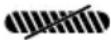 | Brush Blockage Indicator |
| [J4SB9] | Suction Blockage Indicator |
Accessories
Motorized Brush
With LED lighting, this accessory activates the automatic rotation of cleaning brushes. It should not be submerged in water or other liquids.
Rotating Brush
Ideal for carpets and rugs, its stiff bristles penetrate fibers, removing deep dirt.
PET CARE Brush
Perfect for cleaning sofas, carpets, and other upholstery. This brush is designed to effectively remove pet hair and dirt, leaving surfaces clean and sanitized. It is motorized for greater efficien-cy. It should not be submerged in water or other liquids.
Articulated tube
This accessory connects the motor unit to the brushes, making it easier to use in different situations. The articulated tube provides flexibility, adjustment, and reach, making it easier to clean difficult spaces.
OPERATION
Before using the vacuum for the first time, clean it with a soft, damp cloth and dry it well. Do not immerse the vacuum in water or any other liquids.
Battery Charging
The vacuum is powered by an integrated lithium battery. Before the first use, charge the battery for at least 5 hours.
During operation, when the power indicator shows only 10%, the number on the display will start blinking. This is a warning that the battery is low and should be charged promptly to avoid interruptions during use.
You can charge the battery in two ways – see Modes 1 and 2 below.
The vacuum cannot be used while it is charging.
The vacuum cannot be charged if the ambient temperature is below 10 °C or above 45 °C .
Charging Modes
Mode 1:
You can charge the battery with the unit on the charging dock. The touch display will show the charging process. When it reaches 100%, the battery will be fully charged.
Mode 2:
You can remove the battery and charge it separately. The battery indicator light will blink green while charging. When the battery is fully charged, the green light will stay on permanently.
Warning: Do not use any charger other than the one supplied, as using an alternative could damage the battery and the product.
Assembly of the Vacuum
Assembly of the Tube
Insert the tube into the air inlet.
To remove the tube, press the release button and detach.
Assembly of the Motorized Brush/Accessories
Attach the accessories to the tube, flexible tube, or air inlet.
To remove, press the release button and detach.
USE
Vacuum Operation
IMPORTANT - Do not use the vacuum without having all filters and the dustbin properly assembled.
Before the first use, make sure you have charged the battery for at least 5 hours.
Turn on the vacuum by pressing the ON/OFF button. Press again to turn off the vacuum.
You can select between different suction power levels by tapping the speed control button. The device starts in AUTO mode.
- Tap once for low suction level.
- Tap twice for medium suction level.
- Tap three times for high suction level.
- Tap four times to return to AUTO mode.
CARE AND MAINTENANCE
Cleaning the Dustbin
Empty the dustbin when it is full or when you notice a significant reduction in suction power.
Detach the accessories from the air inlet.
Open the dustbin lid by pressing the release button and dispose of the contents in a suitable trash container.
Removing the Dustbin and Filters
To detach the dustbin, press the dustbin release button.
Detach the intermediate HEPA filter and the metal filter from the dustbin.
Detach the rear HEPA filter by rotating as indicated.
Remove the debris by tapping the filters against a trash container.
Wash the filters only with cold water under a faucet. Repeat washing until the water runs clear. Do not submerge the filters in water.
Tap the filter to remove excess water and allow it to dry completely. Let the filters dry in a dry, well-ventilated area for at least 24 hours, away from direct sunlight and heat sources like heaters.
Ensure the filters are completely dry before reinserting them.
Follow the reverse procedure from the previous step to assemble the filters. Make sure to place the intermediate HEPA filter into the metal filter.
Reattach the dustbin to the motor unit.
Ensure the dustbin is properly attached, with the bottom of the dustbin securely fitted into the motor unit.
Reattach the rear HEPA filter.
CAUTION:
Do not wash the filters in a washing machine.
Do not use a hairdryer to dry the filters.
Never use the vacuum without the filters installed.
Cleaning the Accessories
Turn off the vacuum.
Detach the accessories from the motor unit.
IMPORTANT - Never submerge the motorized brush or PET CARE brush in water or any other liquid.
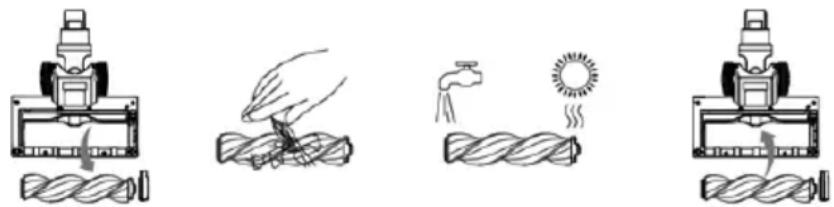
To remove the rotating brush from the motorized brush, release the side latch.
To remove the rotating brush from the PET CARE brush, unscrew the side latch with a coin or similar tool.
Clean the rotating brushes or wash them under running water, if necessary. Remove hair and other debris.
natural_image
Four-step diagram illustrating a drilling process: tool, hand, water spray, and drill bit (no text or symbols)Let the brushes dry completely before reassembling them.
Reattach the rotating brushes to the motorized brushes.
Clean the accessories with a damp cloth with a few drops of detergent and then dry them.
TROUBLESHOOTING
Switch off the appliance with the ON/OFF button and the charger from the mains socket before resolving any problems, as this may cause injury or electric shock.
| Problem Possible causes Solution | ||
| The appliance is not working. | The battery is empty. Charge the battery | |
| The filters are dirty. | Clean the filters, replace the HEPA filter if necessary | |
| The brush is blocked. | Clean the brush and remove debris such as hair and fibers if necessary. | |
| The battery does not charge | The appliance or charging station is not connected correctly. | Plug the charger into a working electrical outlet. |
| Contact with the charger has not been established. | Properly connect the battery to the charger. | |
| The suction power decreases. | A ar input is blocked Unlock the air intake. | |
| The tank is full. Empty the tank. | ||
| The filters are dirty. | Clean the filters, replace the HEPA filter if necessary. | |
| Blocked brushes. | Clean the brushes and remove debris such as hair and fibers if necessary. | |
| No suction or light suction. | The tank is full. Empty the tank. | |
| Check the filters to see if they need cleaning. | Follow the instructions to thoroughly rinse and dry the filters before reassembling. | |
| The vacuum cleaner switches off. | The battery is low. | Check the battery indicator lights and recharge if necessary. |
| Check for blockages. | Empty the dust box and clean the filters. Check the metal pipe, fittings, and openings and remove any blockages. | |
| The engine overheated. | Allow the vacuum main unit to cool down for at least 4 minutes and restart the vacuum | |
| The filter does not fit. | Poor positioning. | Check that the filter and setting are correct. |
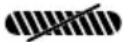 | Brush not placed correctly/ blocked or flashes red. | Check that the brush is placed correctly and remove any rope, carpet fibers, or hair that may be tangled. |
| [BATT]Battery flashes | The battery level is less than 10%. | Charge the battery as soon as possible. |
| [SAGG]Indicator BLINKS | Blocked suction. | Check the pipes, brushes or air for dirt/ blockages. |
CONSUMABLES
Consumables for this model are available online and through authorized distributors and retailers. Always use original consumables designed specifically for your model.
INSTALLATION OF THE CHARGING DOCK
Use adhesive tape or screws to install the charging stand.
When using screws, ensure there are no wires/pipes in the wall before drilling.
Make sure the height at which you place the stand aligns with the height of the device.

natural_image
Technical line drawing showing three sequential steps of a mechanical assembly with no visible text or symbolsMALFUNCTIONS AND REPAIRS
In the event of a malfunction, take the device to an authorized service center. Do not attempt to disassemble or repair the device yourself, as this could pose safety risks.
TECHNICAL DATA
| Battery | 28.8V, 3000mAh |
| Charging Time | 3h30/4h00 |
| Charger Output | 36V 800mA |
| Runtime | 23 minutes Max power40 minutos Mid power75 minutos Min power |
| Power | 450W |
| Vacuum Pressure | 33 Kpa Max power16 Kpa Mid power9 Kpa Min power |
| Airflow | 16 dm ^3 /s |
ENVIRONMENTAL PROTECTION
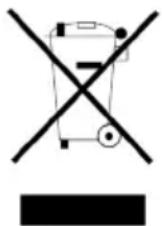
This symbol indicates separate collection of electrical and electronic equipment.
The primary goal is to reduce waste, promote recycling, and minimize negative environmental impacts.
When disposing of this device, do not discard it with regular household waste.
It is the user's responsibility to deliver the device to a designated recycling facility free of charge. Retailers may also accept used devices when purchasing equivalent new equipment.
For more information, consult your local municipality or a retailer.
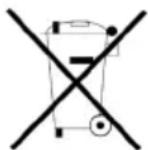
This symbol indicates the device may contain batteries that should be removed before disposal. Batteries must be deposited in designated collection containers and must never be incinerated.
ASPIRATEUR BALAI SANS FIL
INSTRUCTIONS DE SÉCURITÉ
natural_image
Four-step diagram illustrating a mechanical process: tool pressing, hand turning, water spray, and drilling (no text or symbols)This page has been left blank intentionally.
This page has been left blank intentionally.
This page has been left blank intentionally.
- ASPIRADOR VERTICAL SEM FIOS
- INSTRUÇÕES DE SEGURANÇA
- USAGE AND CARE
- DESCRIPTION
- Touch Panel
- Accessories
- Motorized Brush
- Rotating Brush
- PET CARE Brush
- Articulated tube
- OPERATION
- Charging Modes
- Mode 1:
- Mode 2:
- Assembly of the Vacuum
- Assembly of the Tube
- Assembly of the Motorized Brush/Accessories
- USE
- Vacuum Operation
- CARE AND MAINTENANCE
- Cleaning the Dustbin
- Removing the Dustbin and Filters
- CAUTION:
- Cleaning the Accessories
- IMPORTANT - Never submerge the motorized brush or PET CARE brush in water or any other liquid.
- TROUBLESHOOTING
- CONSUMABLES
- INSTALLATION OF THE CHARGING DOCK
- MALFUNCTIONS AND REPAIRS
- ENVIRONMENTAL PROTECTION
- ASPIRATEUR BALAI SANS FIL
- INSTRUCTIONS DE SÉCURITÉ
Brand : Flama
Model : 1647FL
Category : Vacuum Cleaner