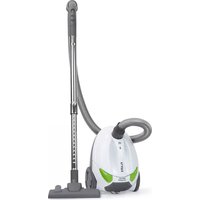
1670FL - Vacuum Cleaner Flama - Free user manual and instructions
Find the device manual for free 1670FL Flama in PDF.


| Product type | Vacuum cleaner |
| Brand | Flama |
| Model | 1670FL |
| Power supply | 220-240 V ~ 50/60 Hz |
| Power | Not specified |
| Dust bag capacity | Not specified |
| Power cord length | Not specified |
| Weight | Not specified |
| Dimensions (L x W x H) | Not specified |
| Suction type | With bag |
| Main functions | Telescopic tube, multi-surface brush, fill indicator, automatic cord rewind |
| Included accessories | Flexible hose, telescopic tube, multi-surface brush, crevice nozzle |
| Maintenance | Replace dust bag, clean filter |
| Filter | Removable motor filter |
| Safety | Grounding required, do not vacuum liquids or glowing materials |
| Warranty | 36 months |
| Reparability | Entrust to a FLAMA approved service |
| Noise level | Not specified |
Frequently Asked Questions - 1670FL Flama
User questions about 1670FL Flama
0 question about this device. Answer the ones you know or ask your own.
Ask a new question about this device
Download the instructions for your Vacuum Cleaner in PDF format for free! Find your manual 1670FL - Flama and take your electronic device back in hand. On this page are published all the documents necessary for the use of your device. 1670FL by Flama.
USER MANUAL 1670FL Flama
natural_image
White FLAMA vacuum cleaner with coiled hose and handle, mounted on a stand (no visible text or symbols)1670FL
PT ASPIRADOR COM SACO 3 ES ASPIRADORA CON BOLSA 7 EN VACUUM CLEANER WITH BAG 11 FR ASPIRATEUR AVEC SAC 15
ASPIRADOR COM SACO
INSTRUÇÕES DE SEGURANÇA
natural_image
Symbol of a trash bin with crossed lines indicating no waste or discharge, and a solid black rectangle below (no text or labels)natural_image
Symbol of a trash bin with crossed lines indicating no waste or discharge (no text or labels)Please check that the supply voltage of your electrical system corresponds to the voltage on the appliance's rating plate.
Always connect the appliance to an earthed socket.
This appliance may be used by children aged 8 and over and by persons with limited physical, sensory or mental abilities or lack of experience and knowledge, if they are supervised or have received instructions concerning the safe use of the appliance and understand the risks involved.
Children must not play with the appliance.
Cleaning and maintenance must not be carried out by unsupervised children.
Turn the vacuum cleaner off using the ON/OFF switch and unplug it before carrying out any maintenance or cleaning activity.
Do not vacuum incandescent materials. Never use the appliance on damp surfaces.
Never vacuum water or any other liquid.
Never vacuum flammable substances or hot ash.
If the suction tube becomes blocked with dirt, immediately disconnect the appliance from the power supply and unblock the tubes.
Never direct the suction tip at people or animals and especially not at the eyes and ears, nor put it in your mouth when it is connected to the vacuum cleaner and it is switched on.
It is important that the bag is placed correctly; otherwise, the appliance may be damaged.
Never use the appliance without motor protection filters, as this may damage the motor and reduce the useful life of the appliance.
Always use accessories recommended by the manufacturer.
Do not use the appliance if it is not working properly. If there are any damages, for example, in the power cord or the plug, please visit an Authorized Flama Technical Assistance Service immediately. Any intervention other than cleaning must be carried out only by authorized FLAMA agents.
If the power cord is damaged, it must be replaced by the manufacturer, its after-sales service or similarly qualified personnel in order to avoid a hazard.
This product complies with the Electromagnetic Compatibility and Low Voltage Directives.
This instruction manual is also available in PDF format at www.flama.pt.
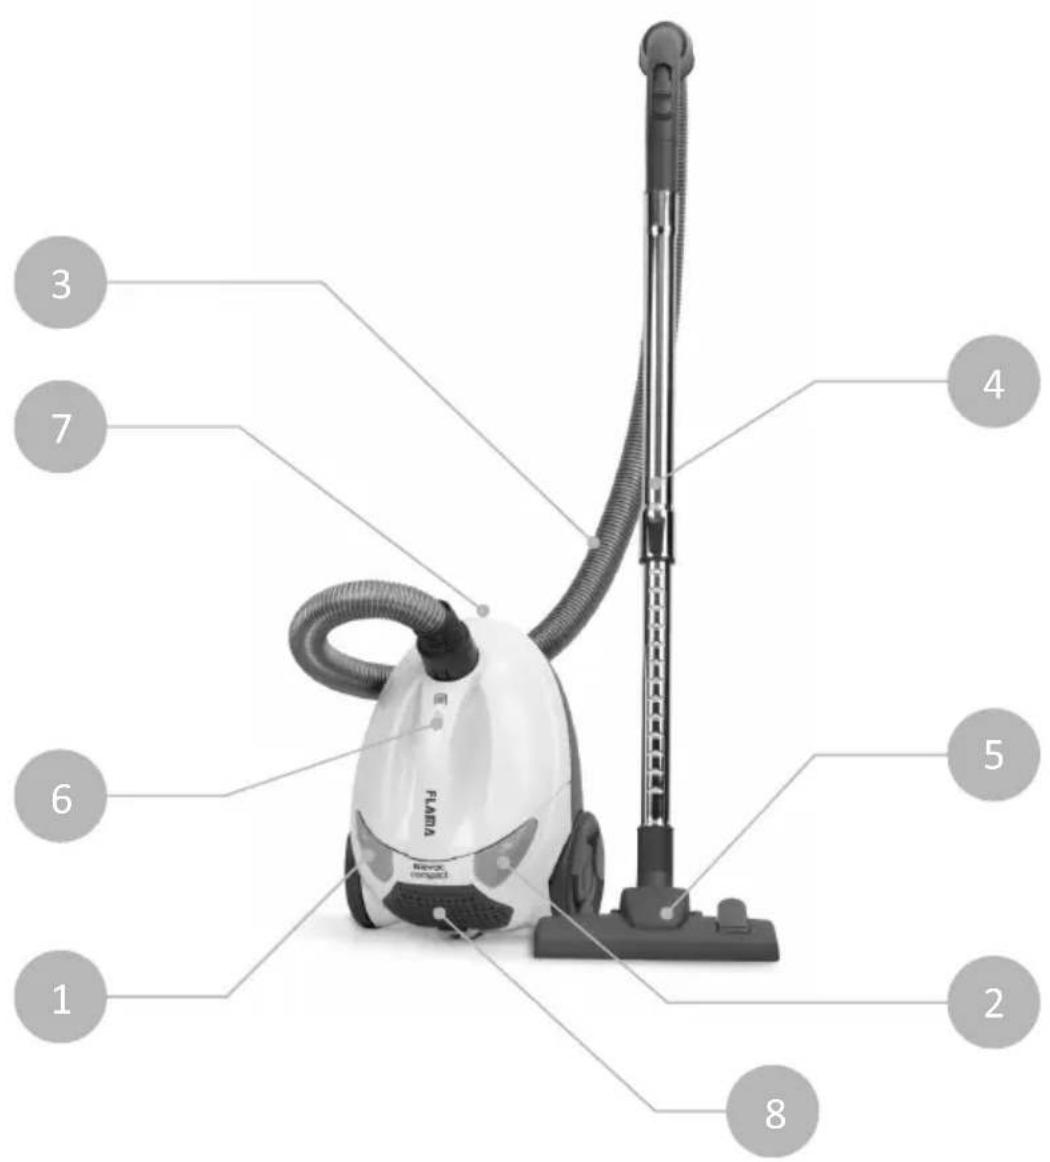
DESCRIPTION
- ON/OFF button
- Cord retraction button
- Flexible tube
- Telescoping tube
- Multi-surface brush
- Bag status indicator
- Release pedal
- filter cover
VACUUM ASSEMBLY
Remove all components from the packaging.
Attach the flexible tube to the vacuum body, making sure it is fully inserted and secure.
Fit the handle of the flexible tube into the telescoping tube.
Fit the desired accessory onto the end of the telescoping tube.
The multi-surface brush has two positions, one for soft surfaces and one for hard surfaces. The crevice brush tool is used for narrow, difficult to reach surfaces.
OPERATING INSTRUCTIONS
Before use
Make sure to only use the appliance if all the included filters and dust bag are correctly installed. An incorrectly installed or damaged dust bag or filter can damage the appliance.
Use
Extend the power cord and connect the plug to a wall outlet. Do not pull the cord beyond the red marker.
Adjust the telescoping tube to the desired length.
Select the type of flooring to vacuum using the multi-surface brush:
Hard flooring – Lower the brushes to protect the flooring.
Carpets – Raise the brushes for deep cleaning.
Turn on the vacuum by pressing the ON/OFF button.
Turn off the vacuum when done using by pressing the ON/OFF button.
Remove the plug from the wall outlet.
Press the cord retraction button to retract the cord back into the vacuum.
To move the appliance between rooms, unplug it from the wall outlet and transport it using the handle. Never pull the appliance by the power cord to move it.
CLEANING AND MAINTENANCE
The plug needs to be removed from the wall outlet before performing any maintenance or replacing any parts.
Turn off the vacuum when done using by pressing the ON/OFF button and unplug it from the wall outlet.
Clean the exterior of the vacuum with a soft, damp cloth followed by a soft, dry cloth.
Never use harsh liquids to clean the vacuum.
Replacing the dust bag
If the bag status indicator turns on, check and, if necessary, replace the dust bag.
Press on the release pedal and lift the lid of the dust bag compartment.
Remove the dust bag; discard it or empty it if it is a reusable bag. The dust bag should be disposed of conscientiously and with care.
Substitute with a new bag.
Close the lid and the dust bag lid.
Note: The bag status indicator can also flash if there is a blockage. In this case, check for the cause of the blockage.
Filter
The filter consists of a screen, which filters out the smallest particles of dust and mites.
Replacement time depends on usage.
Switch off the vacuum cleaner at the ON/OFF button and unplug the power cord from the electrical outlet.
Open the filter cover.
Remove the old filter.
Fit the new filter ensuring that it is properly positioned.
Replace the Filter Cover.
ANOMALIES AND REPAIR
In case of malfunction, please take the appliance to an authorized Technical Assistance Service. Do not attempt to disassemble or repair the appliance, as this may be dangerous.
PROTECTING THE ENVIRONMENT
natural_image
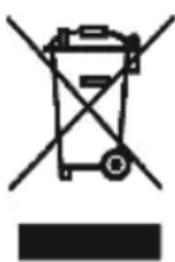
Symbol of a trash bin with crossed lines and a solid black rectangle below (no text or labels)This symbol indicates the separate collection of electrical and electronic equipment.
The main objective of the separate collection of this waste is to reduce the quantity to be disposed of, promote re-
use, recycling and other forms of recovery in order to reduce its negative effects on the environment.
When it is no longer in use, this appliance must not be disposed of together with other unsorted municipal waste.
The user is responsible for delivering it free of charge to the selective collection facilities available for that purpose.
Pieces of equipment that are no longer in use can also be taken back at points of sale, by purchasing new pieces of equipment that are equivalent and have the same functions.
For more detailed information on collection points, please contact your City Council or a point of sale for this equipment.
ASPIRATEUR AVEC SAC
CONSIGNES DE SÉCURITÉ
DYSFONCTIONNEMENTS ET RÉPARATIONS
natural_image
Symbol of a trash bin with crossed lines indicating no waste or discharge (no text or labels)This page has been deliberately left blank
- Save the proof of purchase (receipt) for this product carefully. When a repair is made under these conditions, the technician will require proof of purchase. This assistance can only be provided once you have proven, with the proof of purchase, that your appliance is within the warranty period.
- The warranty period for this appliance is 2 years from the date of purchase.
- Within the warranty period, we will repair or replace, free of charge, every parts which have deteriorated as a result of a proven material or manufacturing defect.
- Not covered by this warranty are light bulbs, delicate parts made of glass or plastic, or any other defects that do not impair its proper functioning.
5.We are not responsible for damage caused by poor or careless use of the appliance, by plugging into an electrical outlet other than that indicated on the appliance's rating label, by faulty wiring, or by weather-related, chemical, or electrochemical causes.
Other claims or demands for compensation for objects that are not an integral part of the appliance will be denied. - Providing assistance under warranty does not extend the warranty period. Warranty services are provided only within this time frame. The right to warranty is only granted to the first purchaser of the appliance and cannot be passed on to a third party.
- The warranty expires when unauthorized persons have attempted to repair, modify, or replace parts in the appliance.
- All expenses and risks of transportation to our factory or vice versa will always be borne by the buyer.
WARRANTY CONDITIONS
To benefit from the Technical Assistance service during the 24-month warranty period after the date of purchase you will need to:
Present the invoice/proof of purchase, showing the model and the manufacturing number of the product (whenever possible).
Note: Failure to present the above documents will be grounds for not providing services under warranty.
CONDITIONS DE GARANTIE
CONDITIONS DE GARANTIE
- ASPIRADOR COM SACO
- INSTRUÇÕES DE SEGURANÇA
- DESCRIPTION
- VACUUM ASSEMBLY
- OPERATING INSTRUCTIONS
- Before use
- Use
- CLEANING AND MAINTENANCE
- Replacing the dust bag
- Filter
- ANOMALIES AND REPAIR
- PROTECTING THE ENVIRONMENT
- ASPIRATEUR AVEC SAC
- CONSIGNES DE SÉCURITÉ
- DYSFONCTIONNEMENTS ET RÉPARATIONS
- WARRANTY CONDITIONS
- CONDITIONS DE GARANTIE
Brand : Flama
Model : 1670FL
Category : Vacuum Cleaner