XRF101 - Power bank Xtorm - Free user manual and instructions
Find the device manual for free XRF101 Xtorm in PDF.

| Product type | External battery with flashlight |
| Brand | Xtorm |
| Model | XRF101 |
| High brightness | 1000 lumens |
| Low brightness | 350 lumens |
| Light runtime (high mode) | 10 hours |
| Light runtime (low mode) | 25 hours |
| Charging port (input) | USB-C |
| Output ports | USB-C PD and USB-A |
| Maximum output power | 20 W |
| Recharging time | 2.5 hours |
| Battery indicator | 4 LEDs (25% each) |
| Simultaneous use | Flashlight and device charging possible at the same time (except during battery recharging) |
| Safety | Do not look directly at the light. Avoid exposure to water or high humidity. Do not disassemble. Keep out of reach of children. Do not use in the presence of flammable gas. |
| Care and cleaning | Wipe with a soft, dry cloth. Do not use chemicals. |
| Spare parts and repairability | No detachable parts. Do not open. Warranty void if opened. |
Frequently Asked Questions - XRF101 Xtorm
User questions about XRF101 Xtorm
0 question about this device. Answer the ones you know or ask your own.
Ask a new question about this device
Download the instructions for your Power bank in PDF format for free! Find your manual XRF101 - Xtorm and take your electronic device back in hand. On this page are published all the documents necessary for the use of your device. XRF101 by Xtorm.
USER MANUAL XRF101 Xtorm
50 x 175mm (compact)
Output 1: USB-C PD 20W
Output 2: USB-A QC 3.0 18W
Combined output: 15W

515 grams

Input: USB-C PD 20W

USB-C PD cable (30cm)
Manual

15W SMD
1.000 Lumen
41.000 Candela
CRI 70
natural_image
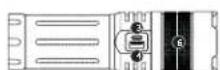
Diagram of two cylindrical batteries with a connecting cable, showing internal components (no text or symbols)Power button
LED Indicator
1
USB-C in-/output
3
USB-A output
4
Light
5
Zoom
0
Adjustable strap
7
Insulating film
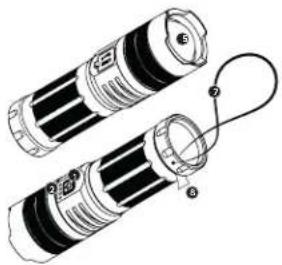
USING THE FLASHLIGHT3
3A Remove the insulating film before first use.
WARNING! INTENSE LIGHT. DO NOT STARE DIRECTLY INTO THE LIGHT.
HOW TO USE THE POWER BUTTON
| Action Function | |
| Single press (when product is turned off) | Turns on the product to check battery level only |
| Double press Turns on/off the flashlight | |
| Single press (when product is turned on) | Charges light mode (high/low/off) |
| Press and hold >2secs (when product is turned on) | Activates flashlight dimming function |
| Single press (when in same flashlight mode for >10secs) | Turns off the flashlight |
3B Create a wide or focussed beam by pulling the top part.
3C Flashlight and Power Bank can be used simultaneously.
natural_image
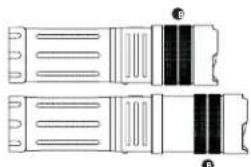
Pure electrical circuit lines without any symbolsDO NOT try to remove the lens from the light. This lens serves as a filter to provide the best quality and to protect the outside from heat.
INTENSITY AND DISTANCES
| Brightness High Low | ||
| Lumens 1.000lm 350m | ||
| Candela 750 - 41.000cd 250 - 14.000cd | ||
| Battery Life 10H 25H | ||
| Beam distance 605m 295m |
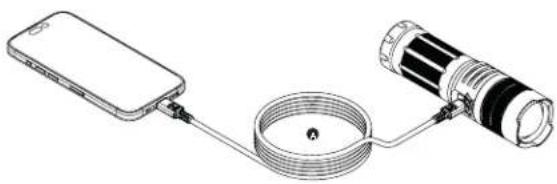
CHARGING YOUR DEVICE4
natural_image
Diagram of a smartphone connected to a cable with a flashlight, showing wiring and components (no text or symbols)4A Connect the USB-C PD (or an USB-A) cable into one of the USB ports of the Flashlight Power Bank and the other end to the input of your device. Charging will start automatically.
natural_image
Technical line drawing of a cylindrical mechanical component with internal ridges and mounting holes (no text or symbols)4B Any device up to 20W can be charged via the USB-C and USB-A ports.
4C The output power of the Flashlight Power Bank depends on the input and charging speed of your connected device.
4D The Power Bank needs an output of at least 100mAh to stay on.
4E The Power Bank will turn off automatically when disconnecting the device.
4F Flashlight and Power Bank can be used simultaneously.
4G Pass-through charging available; charge the Power Bank while simultaneously using the Power Bank to charge another device. 10W (5V/2A) will be divided over two ports.
natural_image
Technical line drawing of a USB connector with ports and connectors (no text or symbols)5A The battery indicator shows you how many power is left. There are 4 LED indicator lights right above the power button. Each light represents 25% of energy. This battery indicator indicates the energy of both the Flashlight and Power Bank.
natural_image
Technical line drawing of a device with two connectors and a power plug (no text or symbols)5B Recharge the Flashlight Power Bank with any USB-C cable in only 2.5 hours.
5C Connect the USB-C cable into the USB-C port. Recharging will start automatically.
5D When fully recharged, the Flashlight provides up to 25 hours of light.
SE Flashlight and USB-A output port cannot be used when being recharged.
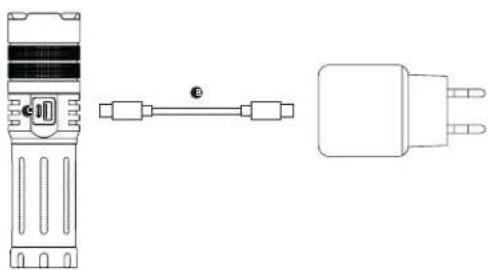
IN THE BOX6
1

元

3
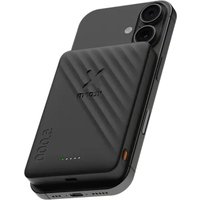
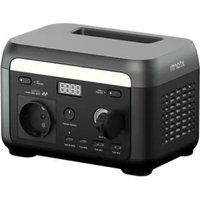
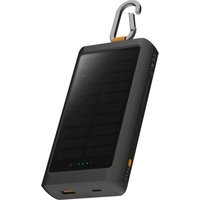
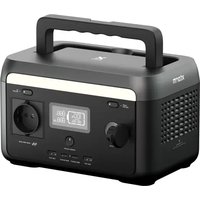
Xtorm Flashlight Power Bank
USB-C PD cable (30cm)
Manual


EN - ENGLISH
1 SPECIFICATIONS
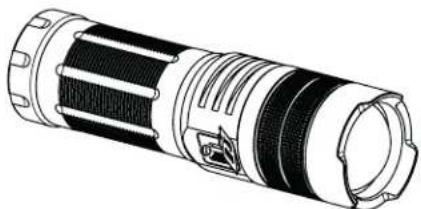
2 PRODUCT OVERVIEW
Power button
LED indicator
USB-C in-/output
USB-A output
Light
Zoom
Adjustable strap
3 USING THE FLASHLIGHT
3.A Remove the insulating film before first
use
- B Create a wide or focussed beam by pulling
the too part
3.C Flashlight and Power Bank can be used
simultaneously
WARNING! INTENSE LIGHT DO NOT STARE
DIRECTLY INTO THE LIGHT.
How to use the power button.
Single press (when product is turned off): Turns on the product to check battery level only. Double press: Turns on/off the flashlight. Single press (when product is turned on): Changes light mode (high/low/off). Press and hold >2secs (when product is turned on): Activates flashlight dimming function. Single press (when in same flashlight mode for >10secs): Turns off the flashlight.
DO NOT try to remove the lens from the light
This lens serves as a filter to provide the best quality and to protect the outside from heat.
Intensity and distances.
Brightness high: 1.000lm, 750 - 41.000cd, 10H, 605m. Brightness low: 350lm, 250 - 14.000cd, 25H, 295m.
4 CHARGING YOUR DEVICE
4.A Connect the USB-C PD (or an USB-A) cable into one of the USB ports of the Flashlight Power Bank and the other end to the Input of your device. Charging will start automatically.
4.B Any device up to 20W can be charged via the USB-C and USB-A ports.
4.C The output power of the Flashlight Power Bank depends on the input and charging speed of your connected device.
4.D The Power Bank needs an output of at least 100mAh to stay on.
4.E The Power Bank will turn off automatically when disconnecting the device.
4.F Flashlight and Power Bank can be used simultaneously.
4.G Pass-through charging available; charge the Power Bank while simultaneously using the Power Bank to charge another device. 10W (5V/2A) will be divided over two ports.
5.A The battery indicator shows you how many power is left. There are 4 LED indicator lights right above the power button. Each light represents 25% of energy. This battery indicator indicates the energy of both the Flashlight and Power Bank.
5.B Recharge the Flashlight Power Bank with any USB-C cable in only 2.5 hours.
5.C Connect the USB-C cable into the USB-C port. Recharging will start automatically.
5.D When fully recharged, the Flashlight provides up to 25 hours of light.
5.E Flashlight and USB-A output port cannot be used when being recharged.
6 IN THE BOX
NL - NEDERLANDS
1 SPECIFICATIES
2 PRODUCTOVERZICHT
Aan/ult-knop
LED-indicator
USB-C-ingang/uitgang
USB-A-uitgang
Licht
Zoom
Verstelbare riem
3 DE ZAKLAMP GEBRUIKEN
4 UW APPARAAT OPLADEN
4 INCĂRCAREA DISPOZITIVULUI
Provided with a temperature control chip that prevents overheating.

2. OVERLOAD PROTECTION
Protects both the internal battery as well as the battery of the attached device from overcharging.

3. SECURED POWER MANAGEMENT
Automatically picks the correct charging speed and efficiently devides power between attached devices.

4. SHORT CIRCUIT PROTECTION
Breaks the circuit automatically when an overcurrent is detected. This protects the Xtorm charger and your device from short circuit damage.

5. A-CLASS BATTERY CELLS
We only use the best battery cells that provide the fast charging you need and meet all safety requirements.

6. HIGH EFFICIENCY
Our power products are built to power your device as efficient as possible. This ensures the least possible loss of energy during the charging process.

WARNINGS
EN Warrinos
Don't drop, disasible or attempt to repair the charges by yourself. Avoid exposure to water or high humidity. Don't access to any heat source. Keep out of reach of children. Don't use in the presence of fluctamable gas. The warranty will lapse in the event of improper use. Telco Accessories has tested the product in a test environment. All statements/declarations made by Telco Accessories about the (paration) of the product are based on the results obtained from such tests. These results/statements/declarations cannot be guaranteed, for example in cases of depositing or involuntary use and/or use in a different environment.
NL Waarschuwingen
EU DECLARATION OF CONFORMITY


HIGHER QUALITY
= LOWER IMPACT
CUSTOMER SUPPORT
support@tag.nl
+31 (0)30 635 4800
TELCO ACCESSORIES GROUP
Hoofdveste 19, 3992DH Houten
The Netherlands
MOREENERGY
XTORM.EU