ZX6011Q - Oven Atag - Free user manual and instructions
Find the device manual for free ZX6011Q Atag in PDF.

User questions about ZX6011Q Atag
0 question about this device. Answer the ones you know or ask your own.
Ask a new question about this device
Download the instructions for your Oven in PDF format for free! Find your manual ZX6011Q - Atag and take your electronic device back in hand. On this page are published all the documents necessary for the use of your device. ZX6011Q by Atag.
USER MANUAL ZX6011Q Atag
natural_image
Exterior view of a stainless steel kitchen oven with open door and control panel (no visible text or symbols)gebruiksaanwijzing
Multifunctionele pyrolyse-oven
mode d'emploi
instructions for use
Multi-function pyrolytic oven
natural_image
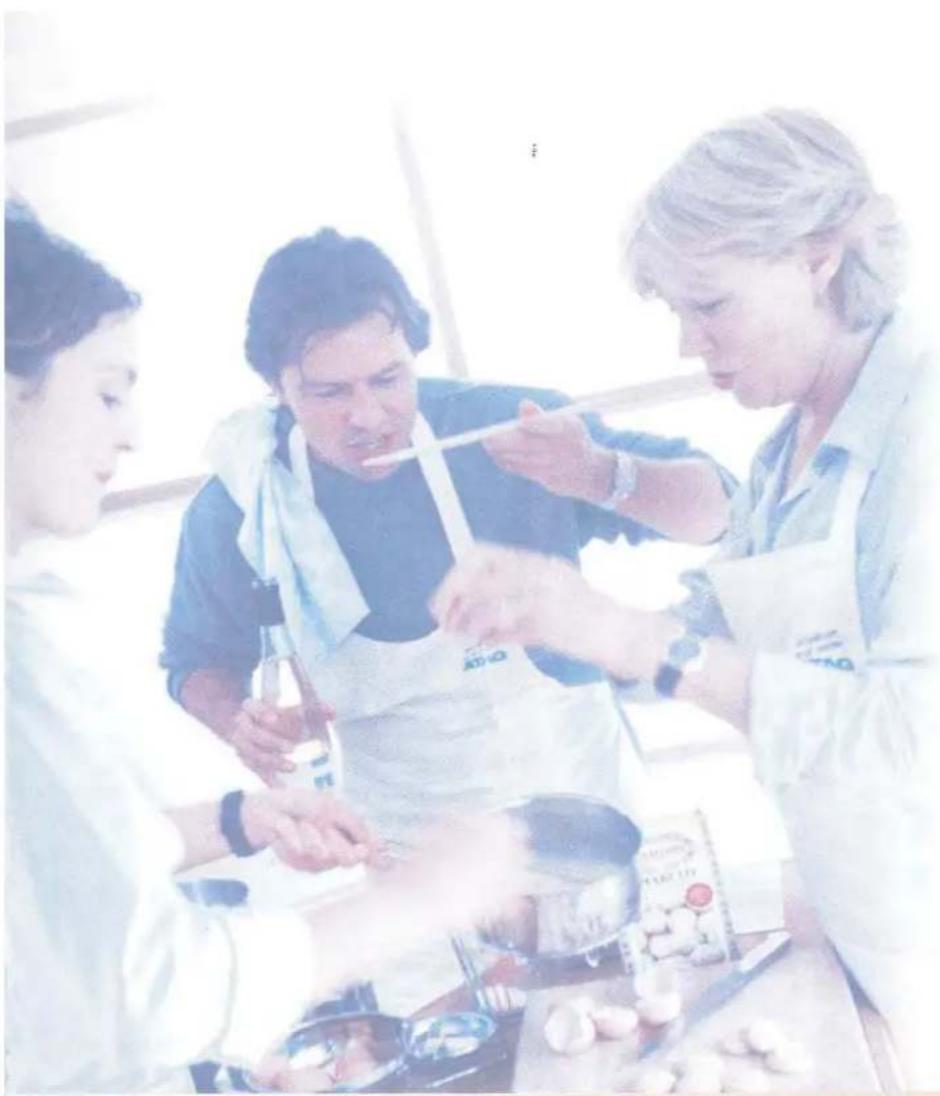
Three people preparing food together, one serving food from a bowl (no visible text or symbols)ATAG
Multifunctionele pyrolyse-oven Inleiding
Geachte Mevrouw,
Geachte Heer,
natural_image
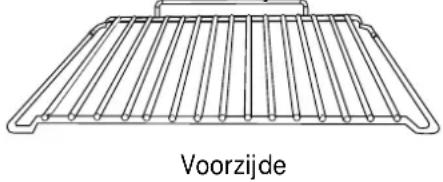
Line drawing of a perforated metal grate with no text or symbolsAchterzijde
natural_image
Line drawing of a perforated metal grate with no text or symbols
natural_image
Technical line drawing of a square frame with evenly spaced slots, no text or symbols present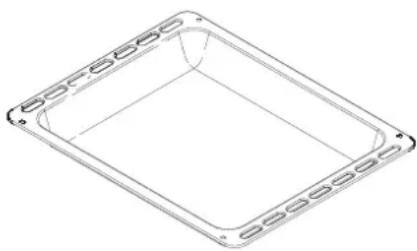
natural_image
Simple line drawing of a rectangular frame with evenly spaced slots, no text or symbols present.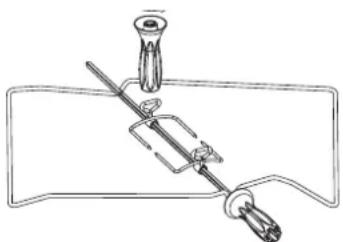
natural_image
Simple line drawing of a mechanical device with a lever and base, no text or symbols presenttext_image
Donderdag 19 September ©
text_image
Donderdag 19 September 15:30text_image
10 Kip 11 Kip aan't spit 12 Terrine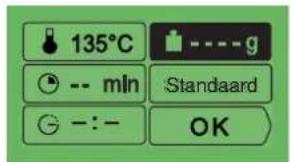
text_image
135°C -- mln Standaard - : - - OKtext_image
15:30 00:20text_image
Donderdag 19 September ©text_image
Donderdag 19 September STOPtext_image
Cropped image showing partial text 'Jeudi 19 Septembre' and a clock face with numbers 1, 2, 3, 4, 5, 6, 7, 8, 9, 10, 11, 12, 13, 14, 15, 16, 17, 18, 19, 20, 21, 22, 23, 24, 25, 26, 27, 28, 29, 30, 31, 32, 33, 34, 35, 36, 37, 38, 39, 40, 41, 42, 43, 44, 45, 46, 47, 48, 49, 50, 51, 52, 53, 54, 55, 56, 57, 58, 59, 60, 61, 62, 63, 64, 65, 66, 67, 68, 69, 70, 71, 72, 73, 74, 75, 76, 77, 78, 79, 80, 81, 82, 83, 84, 85, 86, 87, 88, 89, 90, 91, 92, 93, 94, 95, 96, 97, 98, 99, 100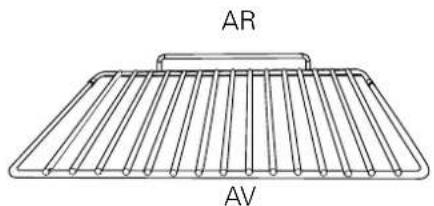
text_image
AR AV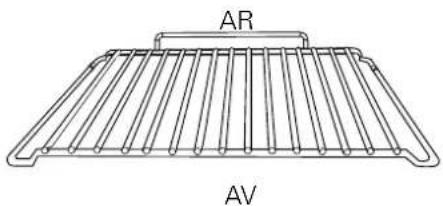
natural_image
Line drawing of a rack with labeled sections AR and AV (no text or symbols on the diagram itself)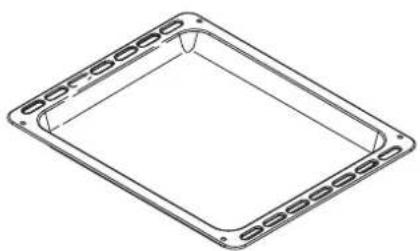
natural_image
Isometric line drawing of a square frame with evenly spaced side slots (no text or symbols)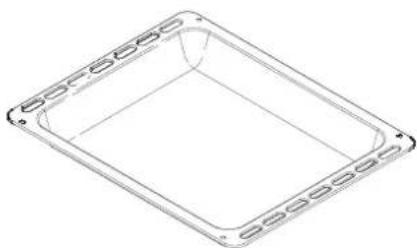
natural_image
Simple line drawing of a rectangular tray or container with side grooves (no text or symbols)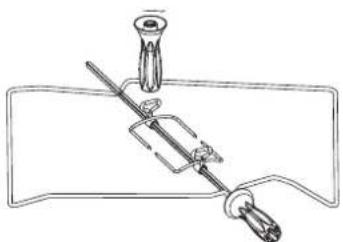
natural_image
Simple line drawing of a mechanical device with a lever and base (no text or symbols)Plat multi-usages (lèchefrite)
text_image
Mémoire 1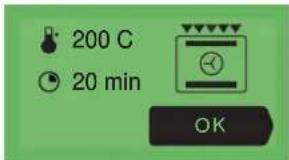
text_image
200 C 20 min OK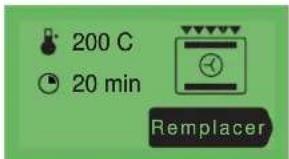
text_image
200 C 20 min Remplacer
text_image
Eolyse Active Non active OKtext_image
English Franç ais Deutschf) Atag services
text_image
ATAG Services
text_image
15:30 00:20text_image
Donnerst 19 September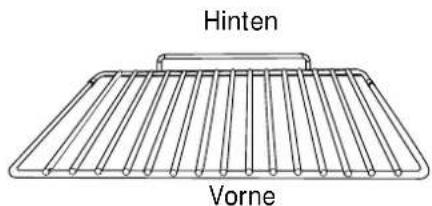
text_image
Hinten Vorne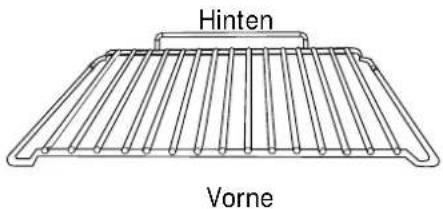
text_image
Hinten Vorne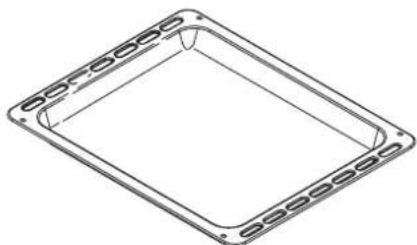
natural_image
Simple line drawing of a rectangular frame with evenly spaced square holes (no text or symbols)
natural_image
Simple line drawing of a rectangular frame with side grooves and a central hole (no text or symbols)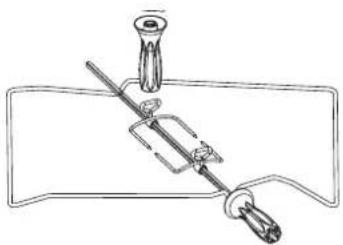
natural_image
Simple line drawing of a mechanical device with a lever and handle (no text or symbols)text_image
15:30 12 H NadeIn 12/05/01 OK (1)text_image
Donnerst 19 September ©
text_image
Donnerst 19 September 15:30text_image
Schallsignal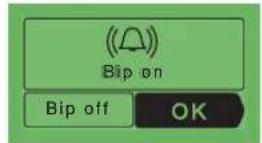
text_image
Kontrast Veille OK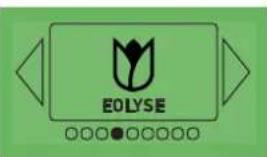
text_image
EOLYSE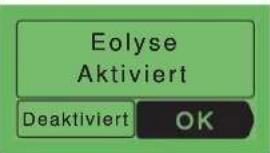
text_image
English Fran ais Deutsch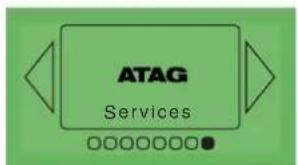
text_image
ATAG Services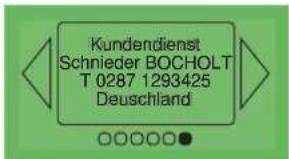
text_image
15:30 00:20text_image
Donnerst 19 September ©text_image
Donnerst 19 September STOPYour multi-function pyrolytic oven Introduction
Dear Sir / Madam
Thank you for choosing an Atag oven. You have made the right choice.
To get the most out of your new cooking aid we suggest you read and follow the advice contained in this manual.
Atag is continually improving its technology so that it can provide the best oven there is and the one you have chosen has the most innovative features. By combining the various functions and accessories you will get the greatest use out of your oven and produce the best results from your favourite recipes.
We hope you will find cooking with our oven an enjoyable experience that brings pleasure to all.
Your multi-function pyrolytic oven
recommendations
Please read these instructions before installing and using your oven.
The oven has been designed for domestic use only for cooking food. No asbestos has been used in its construction.
USING FOR THE FIRST TIME:
Before you use your oven for the first time, leave it empty and, with the door closed, turn it on to maximum temperature and let it heat up for 15 minutes. This "runs the oven in". During this time there may be some smell from the mineral wool that insulates the oven and there could be some smoke. This is perfectly normal.
NORMAL USE:
- Always close the door properly. The oven is fitted with a seal designed to work with a closed door.
- Never lean or let anyone sit on the oven door when it is open.
- The oven parts and accessories can become hot when the door is left partially open and the grill on. Always keep children at a safe distance.
- When the oven is on it will get hot. Take care not to touch the heating elements inside the oven.
- Always protect your hands with oven gloves or something similar when removing food, accessories or containers from the oven.
- Do not line your oven with kitchen foil. The metal will increase the heat produced and could ruin the food and damage the enamel.
- Before carrying out the pyro-cleaning of your oven, be sure to remove all oven accessories and wipe away major spillage.
- Do not use a steam or high-pressure cleaner.
- During the cleaning cycle accessible surfaces become much hotter than during normal cooking. Keep children at a distance.
- Always check that the oven is off before you clean the inside.
- For your safety your oven is equipped with an AUTOMATIC STOP should you inadvertently forget to turn off your oven. After 10 hours' operation, the AS (Automatic Stop) function is activated and your oven stops heating. AS is displayed in place of the time and a series of 2 successive pips is sounded for a certain time.
your oven, how it works
your oven 107
the oven programmer 108
oven accessories
accessories 109
how to use your oven
setting the date and time on the oven 110
cooking a dish 110
the "Chef" function 111
"Chef" features guide 112
using the various cooking modes 114
the "Cooking guide" function 117
the "ICS" function 121
"ICS" features guide 122
handy Hints and Tips 124
a few "ICS" recipes 125
accessing the various cooker settings 128
the automatic timer function 130
cleaning the oven cavity
the Cleaning function 131
when to clean by pyrolysis 131
carrying out the pyrolysis cleaning of your oven 132
locking the oven controls
child safety 133
troubleshooting 134
installer's information
connecting up 135
housing 136
general maintenance 137
changing the light bulb 137

text_image
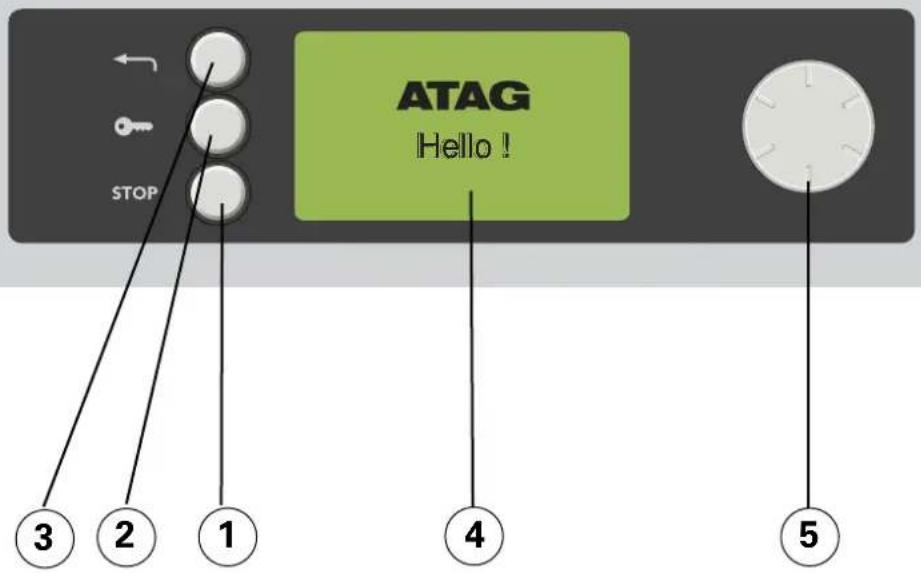
1 2 ATAG Hello 1 3 5 3 4 1 5 6OVEN FEATURES
1 Programme selector
② Control knob
③ Light
4 Rail positions
⑤ Hole for rotisserie
⑥ Door-open detector plate
text_image
STOP ATAG Hello ! 3 2 1 4 5OVEN FEATURES
① Switch off the oven or your programme
② Lock the keypad
③ Return to the previous level
④ Information display
⑤ Selector knob
List of indicators:

Key

Pyrolysis

Programming

Eolyse

Lock

text_image
Thursday 19 September — ©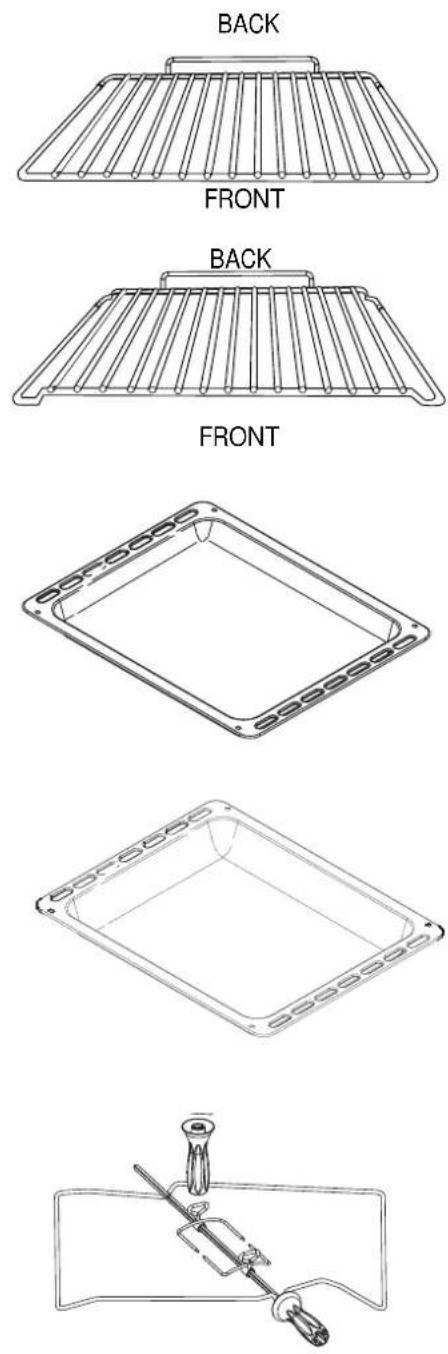
Anti-tip safety shelf
Food can either be placed on the shelf in a dish or cake tin for cooking or browning. This should be used for grilled meat (which should be placed directly on it).
The arched anti-drop safety shelf
This is used in the same way as the flat shelf. Its shape has been carefully designed to enable you to position your dish between two runner levels.
Multi-purpose baking tray (reserved for pastries)
This tray has a raised edge and can be used for baking pastries (choux buns, meringues, small cakes, flaky pasties, etc). Inserted in the runners under the shelf, it catches the cooking juices and fat from grilled meat. It can also be used half-filled with water as a double boiler.
Joints should not be cooked in this tray uncovered because fat could spit all over the oven sides.
Multi-purpose baking tray (dripping pan)
This is used to catch the cooking juices and fat from cooking carried out in the high grill or pulsed grill settings. It can also be used as a cooking dish for suitably sized joints (for example: a chicken surrounded by vegetables, at medium temperature).
Inserted under the shelf, this pan catches cooking juices and fat from grilled food. It can also be used half filled with water as a double boiler. Joints should not be cooked in this tray uncovered because fat could spit all over the oven sides.
Rotisserie
To use it
- place the multi-purpose baking tray at level no. 1 to collect the cooking juices or on the bottom of the oven if the piece of meat to be roasted is too big.
- slide one of the forks onto the spit; put the piece of meat to be roasted onto the spit; slide on the second fork; centre and tighten the two forks.
- place the spit on its cradle.
- push gently to locate the tip of the spit in the turning mechanism situated at the back of the oven.
- remove the handle by unscrewing it. After cooking, screw the handle back onto the spit to take it out without burning yourself. At the end of the handgrip, a depression enables you to unscrew the forks.
Important information:
- Never cover the inside of the oven with aluminium foil in order to cut down on cleaning. This can lead to overheating, which can damage the enamel interior of your oven.
- After cooking, do not pick up the oven accessories (shelf, spit, dripping pan, spit cradle etc.) with your bare hands.
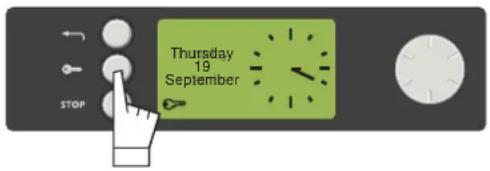
setting the date and time on the oven
a) When switching on the appliance
The oven displays the following screen. Turn the selector knob until you reach the box to be adjusted then press to enter the desired information and press again to confirm this.
text_image
15:30 12 H Analogue 12/05/01 OK (1)Date display (1).
Time display (2).
Display in 12 hour or 24 hour mode (3).
Display the time (4) as :

text_image
Thursday 19 September ©
text_image
Thursday 19 September 15:30An analogue clock or A digital clock
- Press to return to the main mode.
b) Changing the time on the clock and the date
Turn the selector knob until you reach the "Adjustment" box. Press it, and the "Time/Date" screen appears. Press again to access the time information screen then proceed as you would when switching on the appliance.
cooking a dish
The oven allows you to access three different types of programme according to your degree of knowledge concerning the cooking of your recipe:
a) For a recipe with which you are fully familiar (you choose your own cooking cycle, the temperature and cooking time): choose the "Chef" function.
b) For a recipe for which you need help from the oven (you simply choose the type of food to be cooked as well as its weight, and the oven automatically chooses the settings best suited to cooking it for you, including the temperature, the cooking time and the cooking cycle): choose the "Cooking guide" function.
c) For a recipe managed automatically by the oven: you can choose the dish you wish to cook from a list of 12 of the most popular dishes (the temperature, cooking time and cooking cycle are set automatically by the oven): choose the
"ICS" function (Intelligent Cooking System).
a) The "Chef" function
The Chef function enables you to set all of the cooking settings by yourself including temperature, cooking cycle and cooking time.
- Press on the selector knob. You then access the "Chef" screen.
- Press again to select the type of cooking from among the following list by turning the knob (for this choice, please refer to the attached cooking guide):
· Hot hair
- Combined heat
· Eco convection
· Nat. convection
· Turbo grill
· High grill
· Medium grill
- Keep warm
· Defrost
Confirm your choice by pressing again on the knob.
text_image
ChefExample
text_image
Fan cookingSymbol
Feature Description
 | Fan ovenA heater element at the back of the oven and the fan help cook the food | ▸ Oven rapidly reaches the selected temperature. Some dishes can start off in the cold oven. |
* | CombinedCooking is carried out by the lower and upper elements at the bottom of the oven, and by the air circulation device. | ▸ Three associated heat sources: lots of heat at the bottom of the oven, a small amount of circulating heat and a slight grill effect. |
* | Conventional oven ECOFood is cooked by a top and bottom element. No fan. | ▸ This is an energy-saving programme that still produces good results.▸ The ECO feature is used to label the oven. |
 | ConventionalFood is cooked by a top and bottom element. No fan. | ▸ Pre-heating needed to reach the required temperature. |
 | Turbo grillCooking is done alternately by the top element and by the fan. | ▸ This mode combines the effects of the turbine and the grill. The grill directs infrared energy at the food and the air movement created by the turbine enhances this effect. |
 | High grillThe food is cooked by the upper element. | ▸ The double grill covers the entire surface of the oven shelf. |
 | Medium grillThe food is cooked by the upper element. | ▸ When the single grill is used, this provides the same cooking performance but for smaller quantities. |
 | Warming ovenDosage de l'élément supérieur et inférieur associés au brassage d'air. | ▸ Stays warm |
 | Defrosting | ▸ You can use your oven for defrosting, with just a limited amount of heat as the fan which circulates the air around the oven accelerates the exchange of temperatures between the dish and the appliance. |
* Cooking methods referred to in the advertisement about energy labelling in accordance with European Standard EN50304 and the European Directive 2002/40/EC.
| Recommendations | C^o | Recom'd | |
| Recommended to prevent meat drying out, and for cooking vegetables and fish and food placed on up to 3 shelves. | min.35°C | recom'd180°C | max.235°C |
| Recommended for juicy quiches, pies and fruit tarts. | min.35°C | recom'd205°C | max.275°C |
| NB. All food is cooked without pre-heating the oven | min.35°C | recom'd200°C | max.275°C |
| Recommended for food requiring slow, careful cooking such as game and braising joints. Ideal for sealing red meat joints and simmering lidded casseroles whose contents have been partially cooked on the hob first. | min.35°C | recom'd225°C | max.275°C |
| Recommended for sealing red and white meat and cooking it through and through. Also for gently cooking poultry up to 2kg. | min.180°C | recom'd200°C | max.230°C |
| Recommended for grilling chops, sausages, and large prawns and for making toast. | min.1min.1 | recom'd4recom'd2 | max.4max.4 |
| Recommended for leaving breads to rise (keeping temperature below 40°C), keeping dishes warm and thawing food. | min.35°C | recom'd80°C | max.100°C |
| Recommended for defrosting fragile foodstuffs (strawberries and raspberries etc.). By slightly increasing the temperature you can defrost food-stuffs to be cooked immediately afterwards (meat, etc.). Take care that you do not "over-defrost" the food, leading to it being partially cooked. Meat should be placed on the oven shelf on the second level to avoid it coming into contact with the juices produced during defrosting (placing the dripping pan on the first level). | min.30°C | recom'd30°C | max.50°C |
When in use the oven gets hot.
Do not touch any heating element inside the oven. Young children should be kept well away.
using the various cooking modes
The oven will then ask you to enter the other cooking information.
3) The temperature.
(1)
According to the cooking cycle that you have (1) selected, the oven will recommend the ideal (2) cooking temperature. This can be modified as follows:
text_image
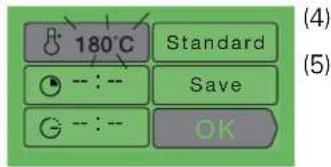
180°C Standard Save OKSelect the C° box (1) by turning the knob. Press, and the TC° box will start flashing.
Choose the desired temperature by turning the knob. Press to confirm. In the grill position (medium or high) select the "grill power" box. Set the desired grill power using the knob and confirm.
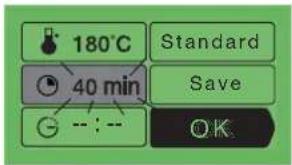
4 - 5) The cooking time and the cooking end time.
You can enter the cooking time for your dish by selecting the fox.
Turn the knob then press in order to make this box flash, then enter the cooking time by turning the knob and confirm by pressing once again. When you adjust the cooking time, the cooking end time
text_image
180°C 40 min Standard Save OK( ⊖ box)
automatically changes accordingly. You can change this cooking end time if you want it to be different.
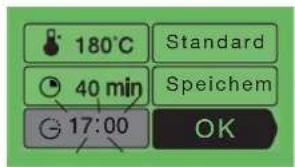
text_image
180°C Standard 40 min Speichem 17:00 OKIn this case, select the box and proceed in the same manner as for the adjustment of the cooking time. When you have chosen your cooking end time, press to confirm.
Your oven will put itself into standby mode (the symbol on the display) until the cooking starts (end time - cooking time).
NB : You can choose not to select the cooking time. In this case, leave the cooking time and cooking end time boxes empty and go directly to "OK". Confirm to start cooking. The oven can be turned off by pressing on the "STOP" button (or pressing twice on the "STOP" button) when you consider that your dish has cooked sufficiently.
6) The "Bio-grill+" option
You can access the "Bio-grill+" function by selecting the "standard" box and pressing on the button. This function enables you to complete the cooking
cycle by a browning for the last five minutes of the cooking time. This function is shown by the grill on the screen flashing as it starts up, five minutes before the end of the cooking cycle.
NB: "Bio-grill+" can be used with all cooking modes excluding the grill functions (medium grill, high grill and turbo grill) defrosting, low light warming and traditional eco.
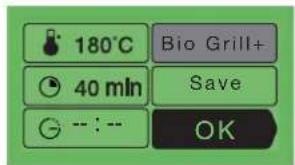
text_image
180°C 40 min -- : -- Bio Grill+ Save OKusing the various cooking modes
7) The memory function
If you would like to store the programme that you have just created into the oven memory, then access this box and press the button:
The MEMORIES function enables you to memorise three cooking modes that you have tried out using the Chef function. Using the memories, you will no longer need to always enter the same information. When cooking the same dish with the same quantity of ingredients, you will always obtain the same results.
If you would like to store the programme that you have just defined into the memory, access this box and press on the button.
The screen then proposes recording the information in an empty memory or replacing one of the other memories with the new information.
- After cooking, and before using the oven again, it is possible to enter the information from the last cooking session in the memory. Even after having tasted your dish, it still isn't too late to record the cooking mode used!
Instructions:
- Select the "Memories" function
- Press the selector button.
- Select "Last dish cooked". The screen displays the last settings used for the last dish cooked.
- Press the selector button.
- Press on OK to confirm the settings.
- Select "Memorise".
- Press the selector button.
- Access the "Memories" option.
- Press the selector button.
- Select the memory number (1, 2 or 3)
- Press the selector button.
- The screen will then show you:
either an empty memory,
or a full memory
- Confirm

text_image
Memories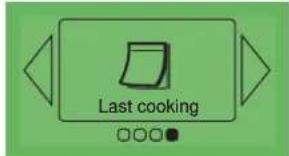
text_image
Last cooking
text_image
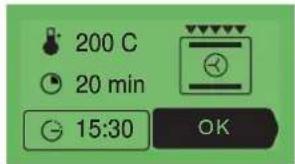
200 C 20 min 15:30 OK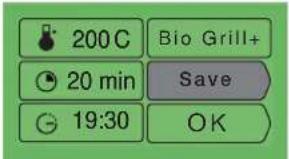
text_image
200 C Bio Grill+ 20 min Save 19:30 OK
text_image
Memory 1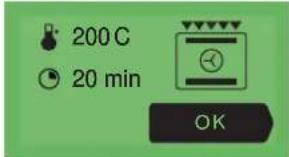
text_image
200 C 20 min OK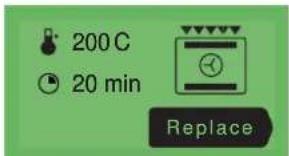
text_image
200 C 20 min Replace
text_image
Setting stored- Press on the button to display the memorised details. Confirm by pressing "OK" in order to start cooking.
text_image
200 C 20 min 15:30 OKAs soon as you have confirmed your choice by pressing "OK", your cooking programme either starts immediately or switches over to standby if you have set the cooking end time for later.

text_image
15:30 BOOSTER 120 C 230 CWhen cooking starts, the following screen is displayed and informs you that it is in booster mode. You can track the changes in oven temperature as the arrowed scale progresses. The current oven temperature is shown on the left, and the required temperature on the right.
As soon as this temperature has been reached, the oven changes over to cooking mode and the following screen is then displayed: (3)
Cooking without selecting the cooking time
(1)
1) The temperature inside the oven
2) The time
3) The cooking cycle chosen (animated).
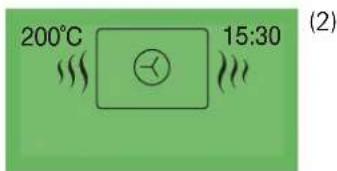
text_image
200°C 15:30 (2)Cooking with a cooking time selected
1) The temperature
2) The time
3) The cooking cycle chosen (animated).
4) The cooking time.
5) The remaining cooking time (flashing)
6) The cooking end time
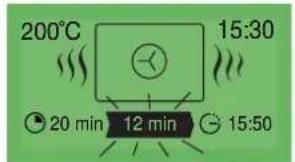
text_image
200°C 15:30 20 min 12 min 15:50(4) (5)
(6)
WHEN THE COOKING IS FINISHED :
Cooking without selecting the cooking time :
turn off the oven when the cooking is complete by pressing the "STOP" button.
Confirm that you wish to stop the cooking by pressing the button.
Cooking with a cooking time selected :
The oven automatically turns off, emits a sound for two minutes and tells you that it is ready.
Press on the selector knob to stop the beeping.

text_image
15:50 It is ready!
text_image
ATAG Bon appétit !Bon appétit!
the "Cooking guide" function
b) The "Cooking guide" function
The "Cooking guide" function selects cooking information for you based on the dish to be prepared and its weight.
- Press on the selector knob. Choose
"Cooking guide". Confirm your choice by pressing on the selector knob.
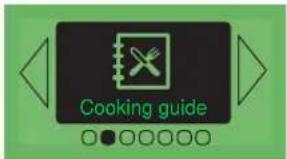
text_image
Cooking guide- The oven then proposes various types of foods. Turn the selector knob
to select among the various types proposed:
- White meat
- Red meat
· Fish
- Vegetables
· Cakes
· Tarts and quiches
text_image
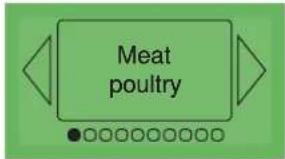
Meat poultryOnce you have made your choice, confirm this by pressing the selector knob.
- Next, you should choose the specific dish to be prepared, and confirm your choice by pressing once again.
text_image
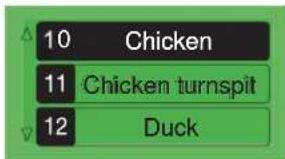
10 Chicken 11 Chicken turnspit 12 Duck- Once you have selected your dish, the oven asks you to enter its weight (the box) or the material that your dish is made out of (aluminium, porcelain, etc.) in the case of cakes, quiches, tarts and vegetables, or the size of the foodstuff (brioche).
text_image
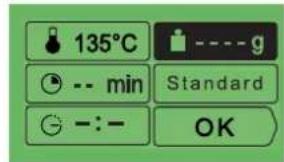
135°C -- min Standard -:-- OKEnter the weight or the material. The oven automatically makes the necessary calculations and will display the ideal cooking time. If you wish, you can modify the cooking end time by selecting the (“” box and displaying the new cooking end time.
As soon as you press on "OK" to confirm, the oven recommends the oven shelf level on which you should put your dish.

text_image
level 1 OK- Put your dish in the oven at the shelf level recommended (from 1 at the bottom to 5 at the top).

text_image
15:49 It is ready!- Confirm, by pressing on the button.
The oven starts up.
- The oven emits a sound and turns off when the cooking time is up and your screen then shows you that the dish is ready.
| List of dishes from the "Cooking Guide" | RECIPES |
| WHITE MEAT | DuckTurkey legPheasantRabbitHare / saddle of harePâtéGooseGuinea-fowlPork, loinPork, filletChicken (> 1 700 g)Chicken ROVeal, roast joint |
| VIANDES ROUGES | Lamb, shoulderLamb, saddleLamb, legRoast beef joint (medium cooked)Roast beef joint (rare) |
| FISH | Fish kebabSea breamWhitingSalmonTroutFish roastFish terrine |
| VEGETABLES | Vegetable flansgratin dauphinoislasagnesChicoryStuffed peppersStuffed tomatoes |
| CAKES | briochesFruit cakePuffsChocolate cakeYoghurt cakSponge cakeKuglofPound cakeShortbread biscuits/cookiesmeringues |
| TARTS/QUICHES | Shortcrust pastry tartFlaky pastry tarttartquicheCheese pieFruit pieMeat piesoufflé |
additional information for cooking using the "Cooking guide" function
All cooking is carried out without preheating the oven.
COOKING RED MEAT:
- Lamb - saddle
- Lamb - leg
- Roast beef (medium cooked)
- Roast beef (rare)
Cooking is carried out using the TURBO-GRIL element.
You should place the meat on the shelf part of the shelf and drip pan assembly (without using the dish). You should turn the meat when it is half cooked.
COOKING CAKES AND TARTS:
Choice of cake tin:
Aluminium: coloured non-stick tins, flexible silicone tins which are well adapted to moist dough (quiches or fruit tarts).
COOKING TERRINE
Place the terrine dish in a double boiler (a dish which is larger than the terrine dish and filled up to half its height with boiling water).
PLEASE REFER TO THE BACK OF THE "COOKING GUIDE" BOOKLET FOR ADDITIONAL INFORMATION.
c) The "ICS" function
The ICS function (Intelligent Cooking System) completely facilitates cooking for you. It automatically calculates all of the cooking details according to the dish selected (temperature, cooking time, cooking cycle) through the use of electronic sensors located in the oven which constantly measure the level of humidity and variations in temperature.
HOW THE ICS FUNCTION OPERATES:
This cooking mode cooks in two phases:
1) An "information gathering" phase when the oven starts heating in order to determine the ideal cooking time. This phase lasts between 5 and 40 minutes according to the dish.
a. Press on the selector knob and choose "ICS" then confirm.
b. The oven offers a choice of 12 dishes:
turn the knob to see each dish appear.
. Pizza
· Savoury tarts
- Roast beef
- Roast pork
- Chicken
· Lamb
· Fish
· Stuffed vegetables
· Sugared tarts
· Cakes
· Small biscuits
- Soufflés
text_image
ICSExample : Pizza
text_image
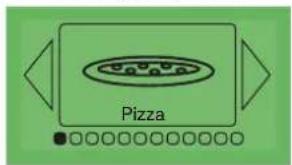
Pizza- Once the dish has been selected, confirm this by pressing the button.
- Put your dish in the oven, on the oven shelf level requested.
- Confirm by pressing the button to start cooking.
N.B.: No preheating is necessary when using the ICS function. The cooking cycle must
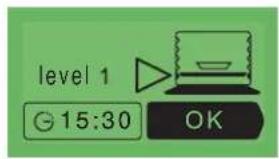
text_image
level 1 G 15:30 OKIMPERATIVELY start with a cold oven. You should wait until the oven is completely cold before cooking something else.
IMPORTANT: do not open the door during this phase as this will spoil the calculation and recording of cooking information.
This "information gathering" phase is indicated by rotating arrows.
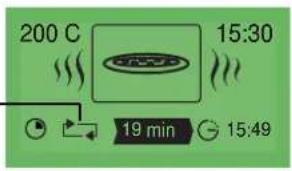
text_image
200 C 15:30 19 min 15:49- The second phase of cooking. The oven has worked out the time needed and displays this as well as the cooking end time. The remaining cooking time displayed takes account of the cooking time from the first phase. You can now open the door, for example to baste roast meat.
- The oven turns off when the cooking time is up and your screen tells you that the dish is ready.

text_image
15:49 It is ready!THE "DIFFERED START" FUNCTION:
To program a "differed start" for your cooking,
Select the clock
and change the cooking end time.
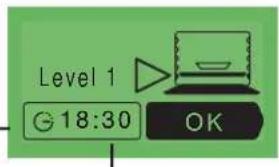
text_image
Level 1 18:30 OKNOTE : if you wish to carry out a second cooking session using ICS, you must wait until the oven has cooled completely. However, you can still use the Chef function even with a warm oven.
 | Pizza | Bought freshly made pizzaPizza base ready for useHome-made pizzaFrozen pizza |
 | Savoury tarts | Fresh quichesfrozen quichesfrozen paniers |
 | Roast Beef | Roast joints(left very pink in the middle)Place the beef joint on the shelf (in the shelf/dripping pan assembly).You can turn it over when the rotating arrows have been replaced by a time. |
 | Pork Roast | Pork roasts:- Loin- Fillet |
 | Poultry | Chicken weighing 1 to 1,700 kgDuckling, pheasant etc |
 | Lamb | Leg of lamb: 1kg to 2.5 kgPlace the lamp on the shelf (in the shelf/dripping pan assembly).You can turn it over when the rotating arrows have been replaced by a time. |
 | Fish | Whole fish(Bream, codling, trout, mackerel, etc)Fish roast |
 | Stuffed vegetables | Stuffed tomatoes, peppers, etcLasagne (fresh or frozen)Cottage pie, brandade (a cod dish) etc |
 | Sugared tarts | Fresh tartsFrozen tarts |
 | Cakes | Family cakes (sweet or savoury),Pound cakePre-packaged cake mixes |
 | Biscuits and pastry snacks | Individual biscuits and pastry snacks : cookies, almond cakes, croissants, bread rolls, packaged oven-ready currant buns, cheese on toast |
 | Soufflé | Use a tall cake tin with straight sides(diameter 21 cm) |
| • Place it on the shelf to obtain a crusty pizza base (you can place a sheet of cooking paper between the shelf and the pizza to protect the oven from splashes of cheese). • Place it on a baking tray to obtain a soft base. | |
| • Use a non-adhesive aluminium baking tin: the dough will be crusty underneath. • Remove the container from frozen quiches before placing them on the shelf. | |
| • Remove the joint from the refrigerator a minimum of one hour before you start cooking: • You will obtain a rare cooked joint. If you prefer your meat well cooked, use a traditional cooking function. • Remove as much of the bard as possible as this can cause smoking. • At the end of the cooking session, leave the joint to stand for 7 to 10 min (with the meat wrapped in a sheet of aluminium foil) before slicing it. | |
| • Remove the joint from the refrigerator a minimum of one hour before starting cooking. The colder the meat is the colder it will be after cooking. • Use an earthenware dish. Add 1 to 2 tablespoonfuls of water. • At the end of the cooking session, leave the joint to stand for 7 to 10 min (with the meat wrapped in a sheet of aluminium foil) before slicing it. The meat can be salted after cooking | |
| • Cooking on the spit: don't forget to place the dripping pan on the first level to catch all the fat. • Cooking in a dish: you should use earthenware dishes to avoid spattering. • Pierce the skin of poultry to avoid spitting. | |
| • Remove the meat from the refrigerator a minimum of one hour before cooking: • Choose a round and plump leg of lamb rather than one which is long and bony. Use an earthenware dish. • Allow the meat to stand after cooking with the leg of lamb wrapped in a sheet of aluminium paper. | |
| • This function should only be used for whole fish, cooked with herbs and white wine. (Grilled fish or fish cooked in tinfoil require the oven to be preheated). | |
| • Take care to adapt the size of your dish to the quantity to be cooked in order to avoid the juices from overflowing | |
| • Use a non-stick aluminium flan tin: the pastry: • the pastry on the bottom will be crisper. | |
| • Cakes prepared in a cake tin (round or square)... and always placed on the oven shelf. It is possible to cook two cakes in tins side-by-side. | |
| • Individual biscuits and pastry snacks on the pastry tray. Place on the oven shelf. ▲ Choux pastry should be cooked as per "Cakes" for the best results | |
| • Coat the tin with butter and do not touch the inside of the tin with your fingers or the soufflé will not rise. |
how to use your oven handy Hints and Tips
Pizza
To ovoid having cheese and tomato sauce dripping in the oven, place the pizza on a sheet of baking parchment directly on the shelf.
Flans / Quiches:
Metal trays are better than glass or porcelain, which are often too thick and food takes longer to cook. Metal also gives a crisper finish to the pastry. When cooking fruit tarts, to prevent the juice soaking into the pastry and leaving it soggy, sprinkle the base with some semolina, crushed biscuits, grounds almonds or tapioca to absorb the excess. When cooking savoury flans with vegetables containing a high-water content (leaks, spinach broccoli or tomatoes) or frozen, sprinkle with a tablespoon of cornflour.
Fish :
Check when buying that the fish has a pleasant smell and if it is a sea fish, with a faint salty tang. The fish should be firm and solid and the scales well attached to the skin. The eyes should be shiny and raised and the gills bright and moist.
Beef / Pork / Lamb
Always remove meat from the fridge well in advance of cooking. The sudden change in temperature from cold to hot can toughen meat. Ideally beef should be well browned on the outside, red in the middle but hot throughout. Do not sprinkle with salt before cooking as this draws out the blood and dries out the meat. Try to turn meat using spoons rather than a fork to keep the blood in the joint. Always leave the cooked joint for 5 to 15 minutes after cooking to recover. Wrap it in kitchen foil and leave in the open warm oven. During this time the juices, which were drawn out, can soak back into the meat.
Use earthenware dishes to roast joints; glass ones tend to make the meat spit. Do not use the enamel grill tray for roasting.
Do not pierce the leg of lamb with garlic cloves or else it will lose its blood. Instead, slide the garlic in between the flesh and the bone or cook the cloves of garlic next to the leg of lamb and crush them at the end of cooking to flavour the sauce. This should be sieved and serve hot in a sauce boat.
Pizza
(using a ready-prepared dough base for each pizza)
*Vegetable pizza: 6 tbsp. tomato sauce; 1 large courgette, diced; half a pepper diced; half a small aubergine, sliced; 2 tomatoes, sliced; 50 g grated Gruyère cheese, oregano, salt and pepper
* Roquefort cheese and smoked bacon: 6 tbs. tomato sauce, 4 rashers smoked back bacon; 100 g Roquefort, diced; 50 g walnuts; 60 g grated Gruyère.
*Sausage and cottage cheese: 200 g cottage cheese, sieved, drained and spread on the dough base; 4 sausages sliced in rounds; 150 g ham in strips; 5 olives; 50 g grated Gruyère; oregano, salt and pepper.
Quiches :
Use an aluminium flan tin 27 to 30 cm diam
Ready-made shortcrust pastry
Beat together 3 eggs and 500 ml thick cream
Salt, pepper and nutmeg.
Choice of toppings:
8 rashers bacon cooked and chopped,
or 1 kilo cooked chicory and 200 g grated Gouda or 200 g broccoli, 4 rashers bacon in bits and 50 g Stilton cheese
or 200 g salmon and 100 g spinach cooked and drained
Roast beef
Sauternes and Roquefort Sauce:
Sweat 2 tbsp finely chopped shallots in butter. Add 100 ml Sauternes and allow to reduce. Add 100 g Roquefort cheese and let it melt slowly. Add 200 ml thin cream, salt, pepper and bring to the boil.
Pork roast
Pork with prunes
Ask the butcher to cut a hole along the whole length of the joint. Insert around 20 prunes inside it. Serve cut into slices in its juice, or cold with a chicory salad.
Poultry
Stuff with a handful of fresh tarragon or coat with a mix made from 6 gloves of garlic crushed with a pinch of rock salt and several peppercorns.
Lamb
Anchovy sauce
Mix 100 g of black olives with 50 g of capers and 3 anchovies, half a clove of garlic and 10cl of olive oil. Add 10cl of fresh cream. Serve with the sliced leg of lamb.
Fish
Sea bream with dry cider: 1 sea bream weighing 1.5 kg.
500 g mushrooms.
2 cooking apples.
2 shallots.
2 tbsp thick cream.
100g butter.
500 ml cider; salt and pepper.
Gut and clean the fish and remove the scales. Chop the shallots, slice the mushrooms, place them in a dish and lay the fish on top. Pour in the cider, add salt, pepper and a few knobs of butter and place in the oven. Fry the unpee led, quarter-red apples in the remaining butter. When the fish is cooked, remove it from its dish and place on a warm plate. Sieve the liquid off, save the mushrooms and reduce the stock. Add the cream to the juices and serve with the apples and mushrooms.
Stuffed vegetables
The leftovers from stews, from a leg of lamb, from white meat roasts or roast poultry finely chopped up make excellent fillings.
Soufflés
Base for the white sauce: half a litre of milk
60 g of flour
100 g of butter
4 egg yolks + the whites beaten until stiff
Salt, pepper, nutmeg.
According to the type of soufflé you are making, you should add 150 g of grated gruyere or 1kg of ground cooked spinach or 1 kg of ground cooked cauliflower or 150 g of ground cooked fish or 150 g of chopped ham.
Flaky pastry apple praline flan:
Line a flan tin with flaky pastry and prick all over with a fork.
Bring 200 ml cream with a vanilla pod in it to the boil. Leave to cool.
Beat together 2 eggs and 30 g sugar and add the cooled cream. Dice
two eating apples and roll in 70 g praline. Spoon the cream and
apples into the flan case and cook in the oven.
Pound cake with citrus fruits
Caramel: 20 lumps of sugar (200 g)
Cake: 4 eggs
200 g of caster sugar
200 g of flour
200 g of high-quality butter
2 teaspoons of yeast.
Fruits : 1 small tin of citrus fruit in syrup.
Drain the fruit. Prepare the caramel. When it has taken on its characteristic colour, pour it in the layer cake pan. You should tilt this in order to ensure the caramel spreads evenly. Allow to cool. In the bowl on your electric mixer, mix the soft butter with the sugar. Add the whole eggs, one after the other, and then the sieved flour. Finish with the yeast. Place the quartered citrus fruit in a rosette pattern on the caramel. Pour on the dough. Place in the oven on the "CAKES". setting. Turn out on to an attractive plate and serve cold.
The fruit can be apples, pears or apricots.
Small chocolate cakes
12 individual aluminium ramekins
60 g of butter
200 g of dark chocolate (with more than 50% cocoa content)
100 g of powdered sugar
4 eggs
1 bag of baking powder
70 g of sieved flour.
Melt the chocolate with the butter on a low light. Mix the egg yolk with the sugar until this mixture becomes smooth. Add the flour, the melted chocolate with the butter and finish with the baking powder. Beat the egg whites until stiff and add these carefully to the mixture. The aluminium ramekins should be buttered and slightly sprinkled with flour. Pour the mixture into this (without pouring any on the edges). Place the ramekins on the pastry tray and select "BISCUITS". Turn out and allow to cool on a tray. Serve accompanied with vanilla custard or coconut ice cream.
accessing the various cooker settings
Press on the knob and turn this until you reach the "Adjustment" screen.
Confirm your choice by pressing once again on the knob. You can access the following settings:
- Time/date (see paragraph "setting the date and time on the oven")
Sound
Display
· Eolyse
Consumption
· Language
· Atag services
a) Adjusting the sound emitted when using the touch buttons:
If you wish, you can cancel the beeps made by the cooker whenever you confirm your choices (when you press the button).
To do this, enter this option and choose
Beep on (active) or Beep off (silent). Confirm by pressing "OK".
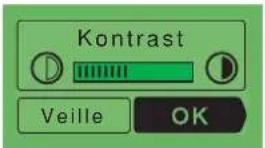
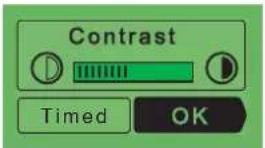
b) Adjustment of the screen contrast and standby:
Select this box to put the display on standby (saves energy) when it is not being used and to adjust the contrast of the display. Turn the knob to the right to increase the contrast or to the left to reduce it.
c) Adjusting the eolyse
You can activate or deactivate the Eolyse function (the filtering of fat and odours during cooking). (When baking cakes and pastries for example, turning off Eolyse makes it possible to allow the delicious aromas to circulate.
The symbol appears on the display to show you that the "Eolyse" function is active.
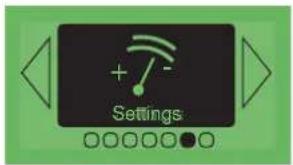
text_image
Settings
text_image
Sound

text_image
Contrast Timed OK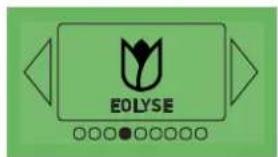
text_image
EOLYSE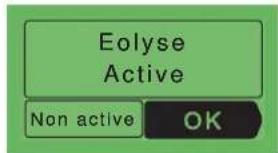
text_image
Elyse Active Non active OKaccessing the various cooker settings
d) Adjusting the electricity consumption:
By accessing this screen, you have the possibility to consult the electricity consumption for your oven since it was last reset.
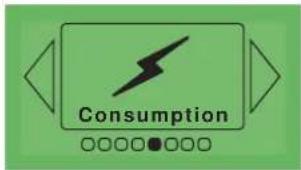
text_image
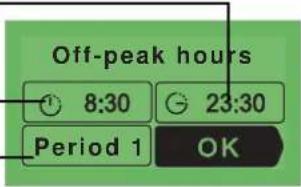
ConsumptionIf you have a contract with your electricity supplier which includes off-peak or economy hours, you can
enter the corresponding off-peak times and view details of your consumption during peak/off-peak hours.
To enter or modify data, confirm by pressing OK then enter the times for each period.
End time of "off-peak" hours.
Start of the "off-peak hours"
You can enter up to three different periods.
text_image
Off-peak hours 8:30 23:30 Period 1 OK
If you have entered periods of off-peak hours, in the pyrolysis function, the oven will automatically propose starting its cleaning cycle at the closest off-peak time.

If you would like to carry the pyrolysis cleaning of your oven immediately, you need to cancel the programming of off-peak hours.
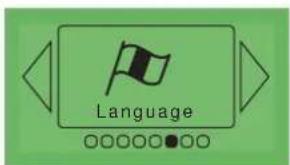
e) Adjusting the language:
By selecting this screen, you can choose the language used to communicate with your oven.
7 languages are accessible:
· French
· English
- German
· Dutch
· Danish
Spanish
- Portuguese
f) Atag services
This option enables you to obtain the contact details for the customer services and after sales services department.
text_image
Language
text_image
EnglishEnglish Fran ais Deutsch
text_image
ATAG Services
text_image
Customer Service T 01275 343 000 www.bradshaw.co.uk United Kingdomhow to use your oven
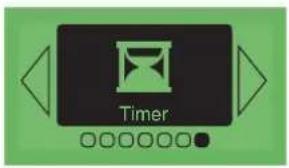
the automatic timer function
This option enables you to use the automatic timer function. This function can be accessed without needing to use the oven in either cooking or pyrolysis mode.
text_image
TimerEnter the time required.

text_image
15:30 00:20The automatic timer counts down the time after you confirm your choice by pressing on the button and rings the end of cooking.

text_image
15:30 00:00This oven is equipped with a pyrolysis cleaning function:
- Pyrolysis is a cleaning method during which the oven is heated to a high temperature to remove debris and splatter caused by spitting and dripping food. The smoke and smells that this produces are removed as the air passes through a catalyst.
- It is not necessary to run the pyrolysis feature after every use of the oven, simply when the oven is dirty. As a safety measure, once the temperature is higher
text_image
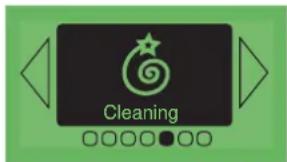
Cleaning
text_image
Thursday 19 September ©than normal use the door automatically locks. You cannot unlock it even by turning the pyrolysis feature off.
when to clean by pyrolysis
On your oven, the screen displays the symbol.
Your oven is equipped with a system that indicates when it needs cleaning, and which can be checked in the "Cleaning" option. But when the oven is dirty, a reminder is automatically displayed on the oven screen.
If your oven smokes when the pre-heat feature is on or if there is a lot of smoke during a cooking cycle run the pyrolysis cycle.
You can also use this feature if there is an unpleasant smell of cooking when the oven is cold.
| FOOD WITH LITTLE SPATTERING quickes, soufflés | Biscuits, vegetables, cakes pyrolysis feature | |
| FOOD THAT Meat, fish (in an open dish) Use the pyrolysis feature SPATTERS stuffed vegetables after 3 oven uses | ||
| FOOD THAT SPITS BADLY | Large pieces of meat on the spit | If a lot of spitting occurs, run the pyrolysis feature afterwards. |

Do not wait until the oven is coated in dirt before cleaning it.
cleaning the oven cavity
carrying out the pyrolysis cleaning of your oven
Carrying out the pyrolysis cleaning of your oven. Select "Cleaning" in the main menu. Your oven indicates the level of soiling within the oven cavity and proposes two cleaning modes:
Pyromax and Pyrocontrol.
Choose the one which you feel is best suited:
a) Pyromax
- Pyromax is a pyrolysis system with a pre-set cleaning duration. It lasts for two hours and ensures intense and thorough cleaning of the oven cavity.
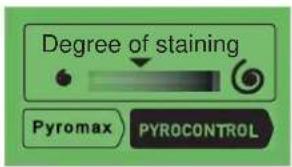
text_image
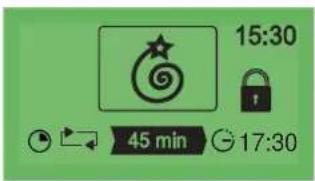
Degree of staining Pyromax PYROCONTROL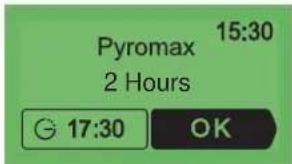
text_image
Pyromax 15:30 2 Hours 17:30 OKTo delay the start time, select the end time and modify this by entering the desired pyrolysis end time.
N.B.: if you have entered details of off-peak and peak hours, (please see the Adjustment function) your oven will recommend cleaning during off-peak hours to save energy. However, you can change this recommendation by modifying the cleaning end time and starting your pyrolysis cleaning cycle immediately if you wish.
Confirm your choice by pressing OK.
The cleaning cycle starts. Your screen shows:
- the time (1)
- the total duration (2)
- the remaining time (3)
- the pyrolysis end time (4)
- the locking status of the door (5)

text_image
16:45 (1) 2:00 45 min 17:30 (5)(2) (3) (4)
b) Pyrocontrol
· is a system which enables the oven to automatically calculate the cleaning time according to the level of soiling, making it possible to save energy with a pyrolysis cleaning time adapted to your real needs. If you would like to delay the start time, select the end time and modify this by entering the desired pyrolysis end time.
Confirm your choice by pressing OK.
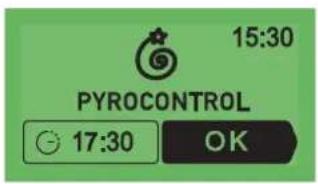
text_image
15:30 PYROCONTROL 17:30 OKAt the start of the cycle, the oven begins by calculating the length of the pyrolysis cleaning cycle according to the degree of soiling. This phase lasts for several minutes and is indicated by the rotating arrows on the screen (1).
The screen shows:
- The rotating arrows (1)
- The length of time remaining (2)
- The scheduled pyrolysis cleaning end time (3)
- The time (4)
- The door lock status (5)
text_image
15:30 45 min 17:30carrying out the pyrolysis cleaning of your oven.
c) the end of the pyrolysis cleaning cycle
Your oven tells you when the pyrolysis cleaning cycle is over.
As soon as the door unlocks, your oven indicates that the cleaning cycle is complete.

text_image
Cooling in progress...
text_image
Cleaning finished !Simply remove the burnt residue from the oven cavity using a damp sponge.
locking the oven controls
child safety
It is possible to prevent access to the oven controls by proceeding as follows: With the oven turned off, press on the Cotton for several seconds. A
"key" lights up at the bottom of the screen -> access to the oven controls is now blocked.
To unlock this, press on any button, select the "Unlock" box and confirm your choice by pressing the button.
The controls on your oven are now accessible once again.
text_image
Thursday 19 September STOP
You cannot lock the oven if you have already programmed a cooking cycle.
| IFYOU REALIZETHAT | POSSIBLE CAUSES | WHAT SHOULD YOU DO? |
| The oven isn't heating. | · The oven isn't connected to the power supply.· The fuse has blown.· The temperature selected is too low. | - Connect to power supply.- Change the fuse, checking that it is 16A.- Increase the temperature selected. |
| The lock symbol is flashing on and off. | · The door lock is faulty. | - Contact the After-Sales Service. |
| The light inside the oven isn't working. | · The lamp is unusable.· The oven isn't connected to the power supply or the fuse has blown.. | - Change the bulb.- Connect to power supply or change fuse. |
| Cleaning by pyrolysis has not occurred. | · The door is not shut properly.· The door-locking system is faulty.· The temperature sensor is faulty.· The plate that detects when the door is shut is faulty. | - Check the door is properly closed- Contact the After-Sales Service.- Contact the After-Sales Service.- Contact the After-Sales Service. |
| Your oven makes a beeping noise | · During cooking.· When cooking is complete. | - The temperature of your choice has been reached.- Your programmed cooking cycle is complete. |
| Your oven is displaying a [IMAGE] | · When you press the buttons.· The cooker controls are locked (child safety). | - Normal operation.- To stop this, press on the button and choose "Unlock". |
As a specialist, you alone are competent to install and connect up Atag appliances.
Our guarantee therefore applies only and exclusively to appliances which have been installed and connected up by you in accordance with the provisions of current regulations.
Failure to meet this requirement would incur the fitter's liability and release the Atag company from any liability.
The electrical connections are made before the oven is installed in its housing.
- The oven must be connected using an approved 3-core cable (live, neutral and earth) with 1.5mm square conductors. This should be connected via a 3-pin-socket (live, neutral, and earth to the main supply which should be should be a 220-240V, alternating single-phase current. If the oven is not connected using a plug and socket, it must be connected to a multi-pole switch with a minimum gap of 3mm between contacts. The earth wire (green and yellow) should be connected
to the terminal marked with the earth symbol ⏚ on the appliance and to the earth in the switch.
- Where the oven is connected using a separate plug and socket this must be accessible after the oven has been installed.
- The neutral wire (blue) of the oven must be connected to the neutral in the main supply.
- Tighten the clamp to hold the cable.
- Close the trapdoor using the two screws.
installer's information
connecting up
- The supply cable (H05 RR-F, H05 RN-F or H05 W-F) must be long enough to allow the oven to rest on the floor in front of its housing.
With the oven sitting on the floor and disconnected: - Open the trapdoor at the bottom right hand side at the back of the oven by removing the 2 screws and swinging the door away.
- Remove the sheath from each wire in the new cable up to 12 mm.
- Twist the ends carefully together.
- Unscrew the terminal screws and remove the wires that need changing.
- Pass the new cable through the wire clamp to the right of the terminals.
- Connect the wires up in accordance with the markings on the terminals.
- Make sure all wires are trapped under the screws.
- The brown wire (live) going to terminal marked L.

• The green and yellow wire (earth) going to the one marked
- The blue wire (neutral) going to the terminal marked N.
- Tighten the screws and check, by tugging on each wire, that they are firmly connected.
- Tighten the clamp to hold the cable.
- Close the trapdoor using the two screws.

text_image
Electricity meter (mains) (20A, single-phase 220-240 V alternating current 50 Hz) 220-240 V single phase alternating current supply Fused 16A or differential circuit breaker Socket 2 -pin with earth Connecting cable approx 1.50 m. longinstaller's information
housing
text_image
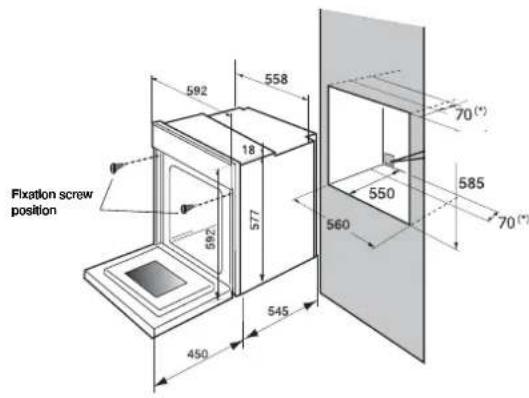
Fixation screw position 592 558 18 577 592 545 450 560 550 70(°) 585 70(°)The oven may be housed either under a work surface or built into a column that is open\* or closed with a suitable opening.
Your oven works at its best and produces excellent results when cooking and cleaning itself, if its air circulation is not compromised:
- The oven must be centred in the unit so that there is a minimum distance of 5 mm between it and the surrounding unit.
- The housing unit or its outer surface must be capable of withstanding heat.
- To ensure the oven rests firmly in the housing, screw it to the housing unit using the holes on the side uprights provided (see diagram).
To do this:
1) Remove the rubber stoppers masking the fixing holes.
2) To prevent the housing unit splintering, drill two holes 3 mm in diameter in the wall of the housing unit opposite the fixing holes.
3) Attach the oven using the two screws.
4) Conceal the hole using the rubber stoppers. (These also help to cushion the closing of the oven door).
(*) If the housing unit is open at the back, the gap must not be more than 70 mm.
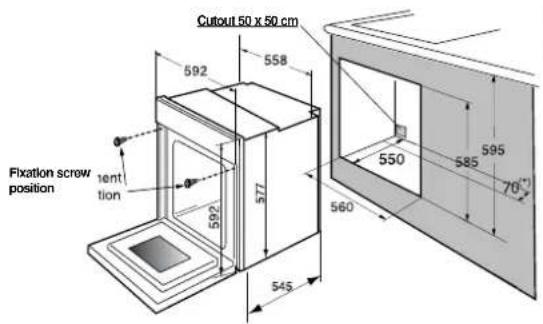
text_image
Cutout 50 x 50 cm 592 558 577 592 Fixation screw position 1ent tion 550 560° 545 585 595 70°general maintenance
Leave the oven to cool down before cleaning it manually.
In general, don't use any type of scouring powder or metal-backed sponge, or any sharp objects for cleaning.
changing the light bulb
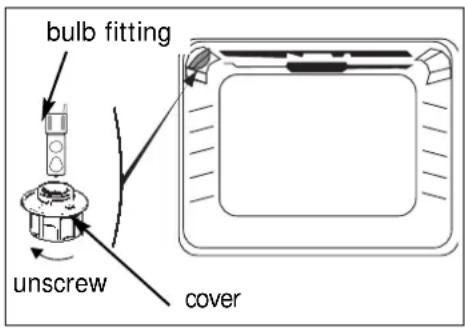
text_image
bulb fitting unscrew cover- The bulb is located in the top of the oven.
a) Unscrew the protective shade (see diagram).
b) Pull the bulb out.
The bulb used is a:
-25 W
- 220-240 V
- 300°C
c) Change the bulb, replace the shade and switch your oven back on at the mains.

Warning! Switch off the power at the main switch before attempting to change the bulb. Leave the oven to cool if necessary.